Jump to content


Photo
- - - - -

Autotest Saloon


  • Please log in to reply
73 replies to this topic

#1 GraemeC

GraemeC

    Crazy About Mini's

  • TMF+ Member
  • PipPipPipPipPipPipPipPipPipPip
  • 7,315 posts
  • Location: Carnforth

Posted 21 June 2006 - 02:43 PM

I thought it was about time I told you guys what I'm up to with my latest project as a few of you have now supplied parts in various forms! Apologies if there are a few spelling and typing mistakes in here but having snapped a tendon in a finger I'm having to wear a splint and it keeps getting in the way. :'(

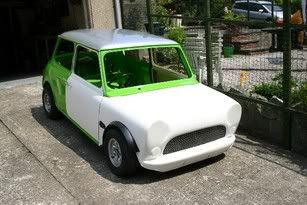
This isn't a new project so this post is a catch-up from its start on March 20th up to where I left it last night. Aim is to have it complete and ready for the local motor club's car show on 16th July (www.klmc.org.uk) - going to have to get my (knackered) finger out!

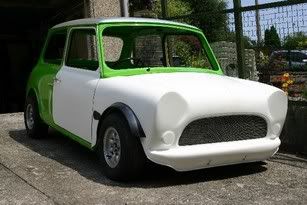
I've been autotesting for about 4 years now on and off and the old stead is getting past its best. The seat had to be mounted on bars between inner sill and exhaust tunnel as the floor wasn't stong enough, the roof gives a little more everytime you touch it and as for outer sills, boot floor, valance etc - well they say less is more?! I went to a fibreglass front as the removable steel one fell apart - although GuessWorks now has the bonnet as that was in suprisingly good nick! :D
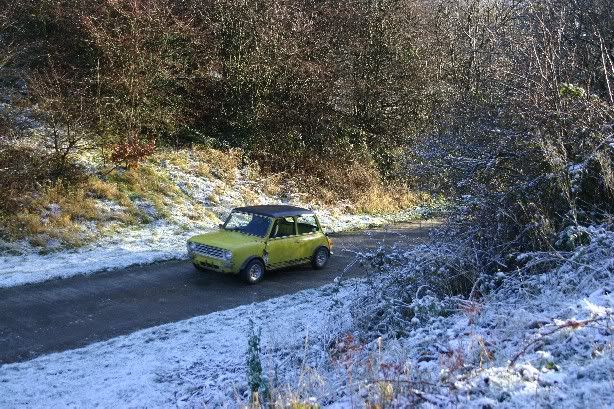
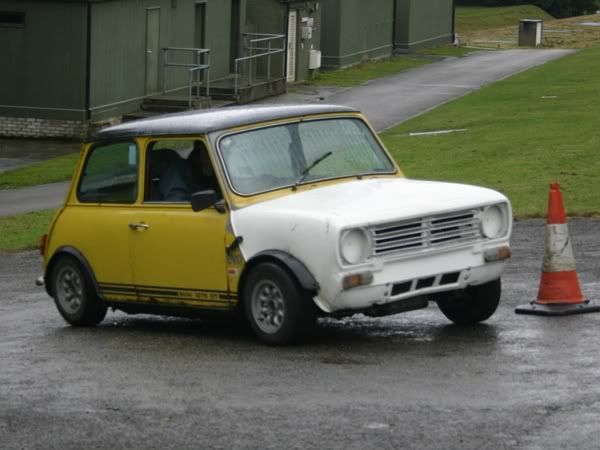
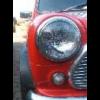
Anyway, some pics of the old GT...
Ready for the off:
Posted Image

Couple of scenic ones:
Posted Image
Posted Image

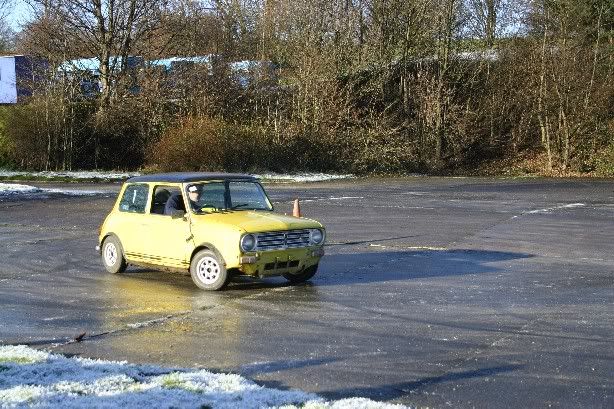
And 'in action' in 2005:
Posted Image

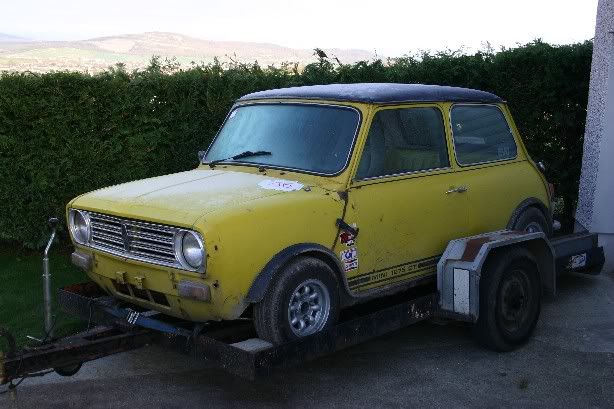
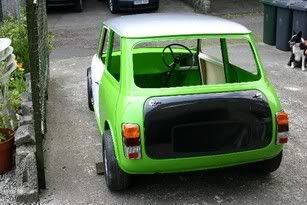
I secured a new car (well rolling shell) from WebMonkey on Minifinity for a very reasonable £150 back in August last year I decided in March that 2006 was the year I'd take the NW autotesting scene by storm - lets see them mock this one for looking like I'd just dragged it from a hedge :( (although they had a point - but mechanically it was spot on).
So pics of the starting point...
Posted ImagePosted Image

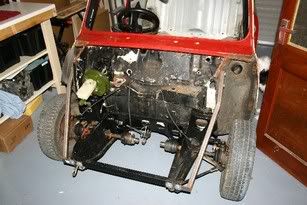
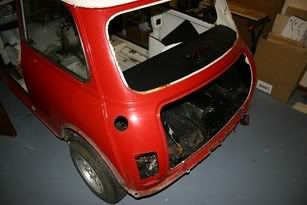
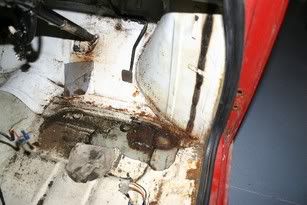
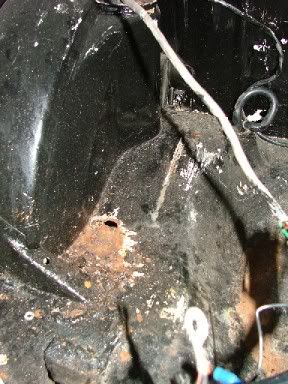
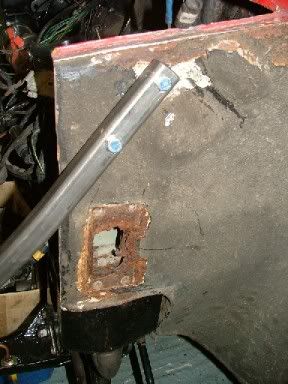
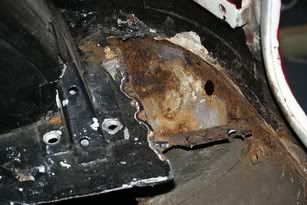
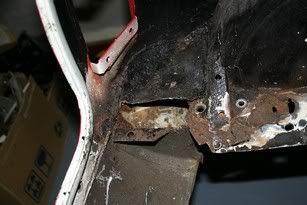
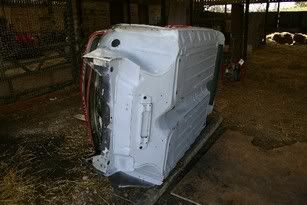
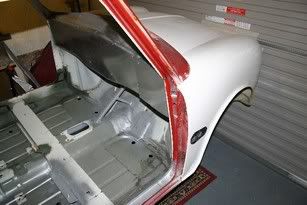
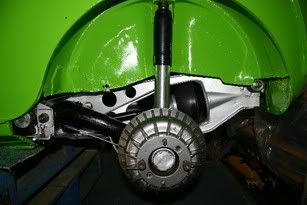
Didn't look too bad for the money (there were also two perfect doors and some adjustable suspension bits). Although on closer inspection there was a little work needed:
Posted ImagePosted Image


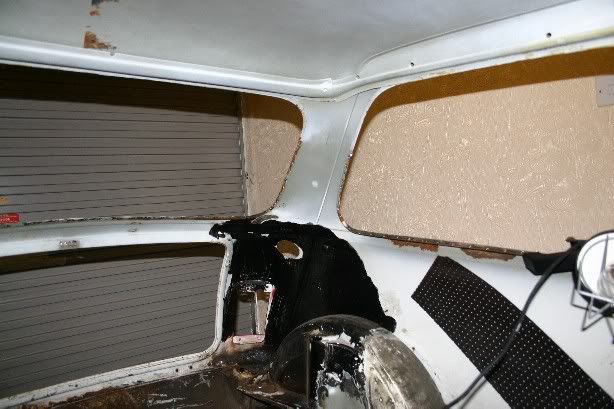
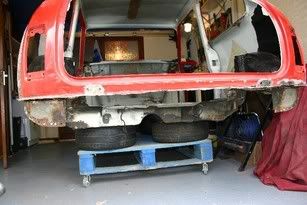
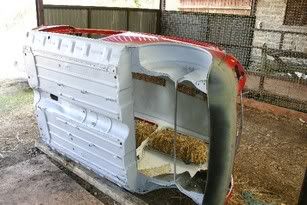
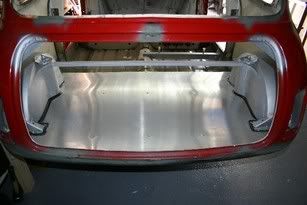
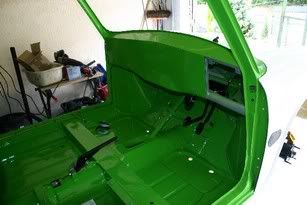
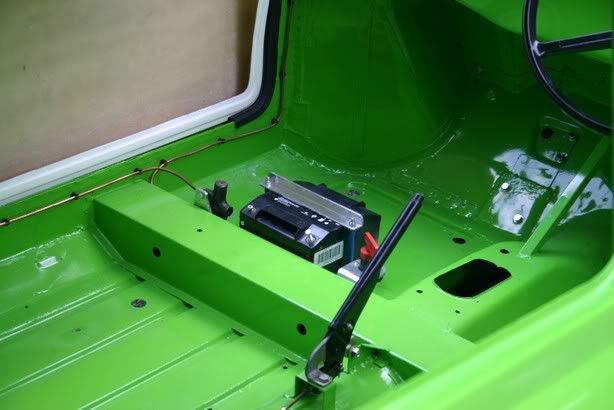
So once stripped back to a bare shell it was out with the angle grinders, spot weld drill, tin snips and anything else I could add to my arsenal. Lightwieght was the order of the day and if I didn't need something it got thrown on the scrap pile. First to go was the seat back, parcel shelf, inner C pillars and inner panels in the window apertures:
Posted Image

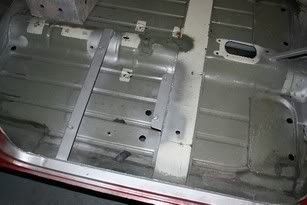
Then the sound deadening on the floor and the rear pockets got the same treatment:
Posted Image

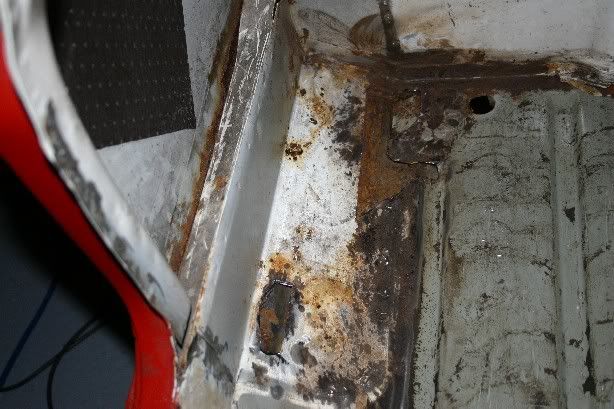
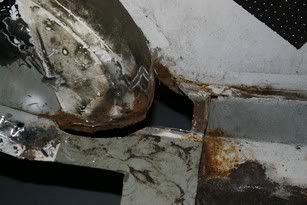
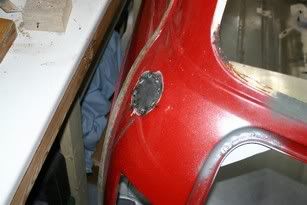
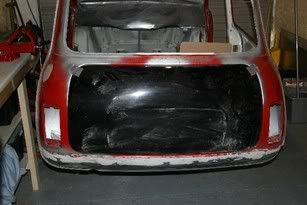
Followed by the boot floor and the crusty bits in the corners :w00t: :
Posted ImagePosted Image

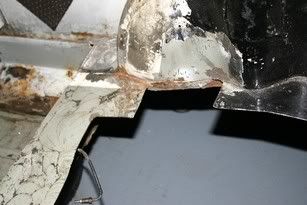
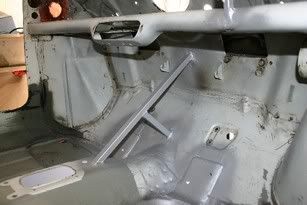
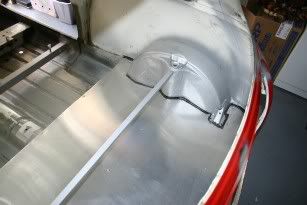
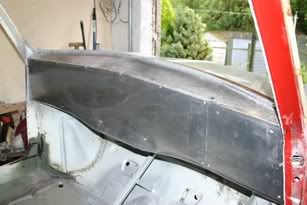
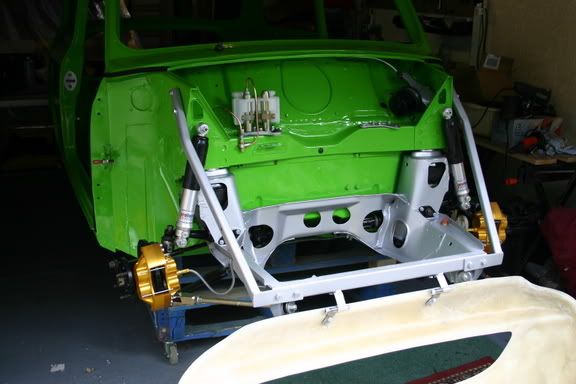
Finally the rear valance was removed - although this was to be replaced as I hate the look of minis without them, even if they do add drag:
Posted Image

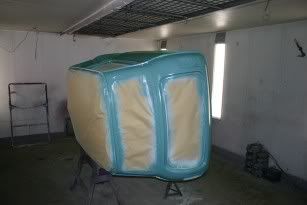
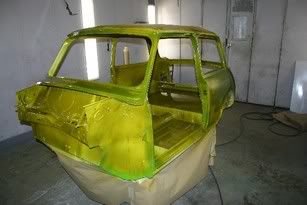
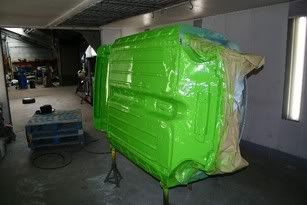
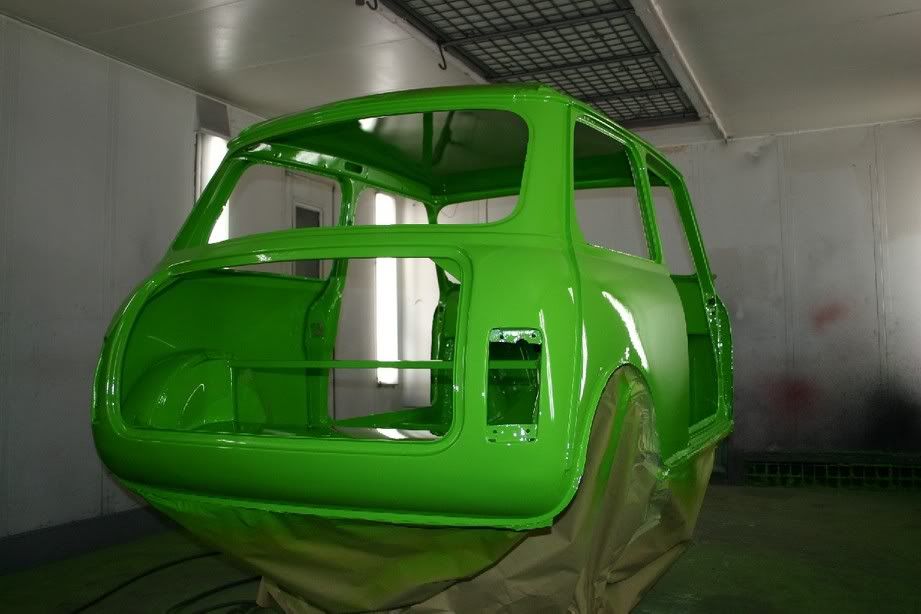
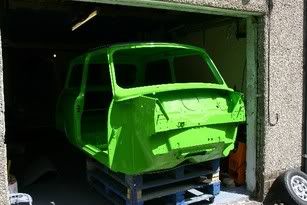
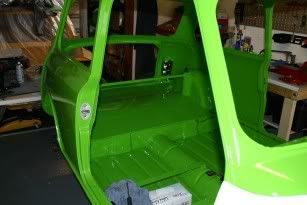
Then the whole lot was thrown on a trailer and taken into a barn for the underside to be cleaned off and coated with some primer. I didn't do this on my drive as I thought it may upset the neighbours. Plus as it was a weekend job the shell was better undercover overnight.
Posted ImagePosted Image

Edited by GraemeC, 28 July 2006 - 10:32 AM.


#2 GraemeC

GraemeC

    Crazy About Mini's

  • TMF+ Member
  • PipPipPipPipPipPipPipPipPipPip
  • 7,315 posts
  • Location: Carnforth

Posted 21 June 2006 - 03:24 PM

Once down to a bare minimum new sills and patches were put in where required. In all the box of scrap that came out of the shell weighed nearly 5 stone :w00t: Then it was time to start modifying and improving bits.

New cross bars were welded in for the seat rails, the bulkhead was braced, the toe board where the front subframe mounts was plated and re-inforced and the filler neck hole was wleded up (a 1 gallon tank will be mounted under the front wing - get that weight forward!):
Posted ImagePosted ImagePosted Image

The boot floor was replaced with a one piece light alloy panel (now that took some cutting to shape) and a strut brace added between the tops ot the arches. A light alloy dash was also fabricated and rivetted in.
Posted ImagePosted ImagePosted Image

Next up was first fit of the fibreglass front and boot skin (thanks Smudger :D ) so the mouting plates for the pins etc could be welded into place. Note the new FIA approved catches on the boot :thumbsup: :
Posted ImagePosted Image


The after a bit more preparation came the first big day - off to the body shop :thumbsup:
The shell was rubbed down, filled, primered, top coated and the roof done over a bank holiday weekend. Although the paint on the roof reacted so needs doing again :'(

First coats:
Posted Image

I told my mate spraying that I'd asked for green, not blue (although that was actually just primer) so next time he opened the booth doors I had this:
Posted Image

Funny lad! I could've shipped that off ofr Army service in Afghanistan or somewhere! When I said green though, I meant green....
Posted Image

Yep, its another bogey! Sorry Ade, but this was in my head before I saw yours - some of you may have noticed in the earlier pics I like bright colours, hence the yellow road rally car (long term project).
Posted Image

Back home :( :
Posted ImagePosted ImagePosted Image

So now the rebuild starts, along with the tasty bits! First of all the rear lights went back in, well the units did to fill the holes, they won't have bulbs and wiring - that's just extra weight! (This car won't be on the road by the way!)
[img]http://i74.photobucket.com/albums/i252/t7grc/Autotest%20Saloon/Re-build/IMG_1783.jpg[/img]

Then the brake lines (the gap is where the bias adjuster will be):
[img]http://i74.photobucket.com/albums/i252/t7grc/Autotest%20Saloon/Re-build/IMG_1785.jpg[/img[img]http://i74.photobucket.com/albums/i252/t7grc/Autotest%20Saloon/Re-build/IMG_1786.jpg[/img]

Front and rear subframe have been rebuilt and re-fitted. All bearings and bushes replaced and adjustable suspension throughout. Brakes are 7.9" solid discs with sexy KAD alloy calipers and shocks are Protech alloy ones - don't know how these peform but they are light!!
[img]http://i74.photobuck...ld/IMG_1780.jpg

I'm now working on getting the front to fit better and then its time to start on the fibreglass doors!

My finger still hurts though :crazy:

#3 CAU998

CAU998

    One Carb Or Two?

  • Members
  • PipPipPipPipPipPipPip
  • 1,202 posts
  • Local Club: TMF South Central...

Posted 21 June 2006 - 03:40 PM

Thats gorgeous, ive fell in love :( ! could you send that in the post with the vents as a freebie lol Cant wait to see this one finished!

#4 Baldspeed Racing

Baldspeed Racing

    One Carb Or Two?

  • Members
  • PipPipPipPipPipPipPip
  • 1,185 posts
  • Location: Southam

Posted 21 June 2006 - 03:41 PM

Thats well nice, very similar to what I am doing to mine at the mo. The boot is a work of art mate and I can defo see the time taken to do all of the panelling.

#5 GraemeC

GraemeC

    Crazy About Mini's

  • TMF+ Member
  • PipPipPipPipPipPipPipPipPipPip
  • 7,315 posts
  • Location: Carnforth

Posted 21 June 2006 - 03:51 PM

Thanks guys!

CAU998 - no freebies, but at least you can say your vents were once part of the project!

Mods - don't know what happened to the picture sizes and format of the first post but I can't edit it as it now tells me I have more pictures in than I am allowed (even though I was actually trying to remove two!!) -anything i can do to edit it? Sorted, just removed some of the boring pics.

#6 wobbit

wobbit

    Camshaft & Stage Two Head

  • Members
  • PipPipPipPipPipPipPipPip
  • 1,579 posts
  • Local Club: basingstoke mini club

Posted 21 June 2006 - 04:00 PM

looks great, love the colour

#7 JA1987

JA1987

    Speeding Along Now

  • Members
  • PipPipPipPipPip
  • 469 posts
  • Local Club: Redditch Mini Owners Club

Posted 21 June 2006 - 04:28 PM

What colour is the roof mate? Looks nice in the green, shouldve kept the boot floor bare though - green and shiny bits looks smart.
What size whels are you using mate?

#8 ed4ran

ed4ran

    Cadwell Event organiser

  • TMF+ Member
  • PipPipPipPipPipPipPipPipPip
  • 2,849 posts
  • Location: Stoke On Trent

Posted 21 June 2006 - 04:37 PM

Looks really good (especially the boot floor)!! I like it!! :(
What engine's going in it?

#9 GraemeC

GraemeC

    Crazy About Mini's

  • TMF+ Member
  • PipPipPipPipPipPipPipPipPipPip
  • 7,315 posts
  • Location: Carnforth

Posted 21 June 2006 - 06:54 PM

Wanted the boot floor painted as, despite the colour, subtlety is the key. There's a lot of little mods here and there that aren't noticable unless you really study it.
Plan with the boot was to make it look, at first glance, that it was made like that and I think it works - obviously hardened mini fans like you lot know different but others might not.

Roof colour is some Toyota shade. We just picked something out that was as close to the 10x5 GBs it'll be wearing as possible (I have an almost new set I didn't want to respray). Its also a good match to the silver Hammerite the subframes are done in.

Engine will be a 1380 with 256 cam and Manx Racing head running through a modified gearbox that'll only have 1st, 2nd and reverse (where 3rd is usually) and a cross pin diff. There'll also be an additional remote oil filter as autotesting is hard on gearbox internals and they can break up easily.

#10 JA1987

JA1987

    Speeding Along Now

  • Members
  • PipPipPipPipPip
  • 469 posts
  • Local Club: Redditch Mini Owners Club

Posted 21 June 2006 - 07:18 PM

Wanted the boot floor painted as, despite the colour, subtlety is the key. There's a lot of little mods here and there that aren't noticable unless you really study it.
Plan with the boot was to make it look, at first glance, that it was made like that and I think it works - obviously hardened mini fans like you lot know different but others might not.


Did removing the rear seat panel not lose some structual support in the rear end?

Roof colour is some Toyota shade. We just picked something out that was as close to the 10x5 GBs it'll be wearing as possible (I have an almost new set I didn't want to respray). Its also a good match to the silver Hammerite the subframes are done in.


Looked like a light blue in the picture, nice paint job tho

Engine will be a 1380 with 256 cam and Manx Racing head running through a modified gearbox that'll only have 1st, 2nd and reverse (where 3rd is usually) and a cross pin diff. There'll also be an additional remote oil filter as autotesting is hard on gearbox internals and they can break up easily.


Nice, you hoping for loads of torque from the 1380? Who is building the box for you are you doing it yourself?

#11 GraemeC

GraemeC

    Crazy About Mini's

  • TMF+ Member
  • PipPipPipPipPipPipPipPipPipPip
  • 7,315 posts
  • Location: Carnforth

Posted 21 June 2006 - 08:31 PM

Removing the seat back and parcel shelf does lose structural strength yes, but for the discipline this car will be used for its not too important. The arches are braced against each other which is the important part. There is a class for autoesting known as 'specials' and they have everything but the floorpan removed from the a panels backwards!

The roof does look a bit blue in the photos but its the lighting. It is definately silver in the flesh.

The engine will be very torquey at the bottom end and should rev quite well - although its peak power will probably be low down the range. Its the torque that counts here though as it is all stop go maneouverability work.

#12 GraemeC

GraemeC

    Crazy About Mini's

  • TMF+ Member
  • PipPipPipPipPipPipPipPipPipPip
  • 7,315 posts
  • Location: Carnforth

Posted 02 July 2006 - 08:43 PM

Bit more progress!

Firstly, just to wet your appetites, a couple of shots of the front and rear suspension/brakes.
Posted ImagePosted Image

The car has had wheels fitted and is back on terra firmer, the bare engine is also in but I forgot to get any pictures of that. All the fibreglass panels have been trimmed, filled, sanded, sworn at etc prior to being sent off for more green paint to be thrown about.

Just had to roll it out into todays sunshine for some pictures.....
Posted ImagePosted Image
(shame Smudger only had a black boot skin in stock!)

The battery is also in and clamped down, thanks to markrally73. I carried on the aluminium theme and made brackets for the adjustable bias valve and the battery cut-off switch.
Posted Image

Hopefully this week the fibreglass will all be sprayed and I will get the rest of the engine built up. Is it me or is it the cleaning and painting that takes all the time? I'm sure I could build this in 1/2 of the time if it was just a bolt on exercise!

#13 miniboo

miniboo

    Lord of Original Thinking

  • Members
  • PipPipPipPipPipPipPipPipPipPip
  • 9,327 posts

Posted 02 July 2006 - 08:48 PM

looking gooooooooooood

the front end looks well low how did you do that?

#14 ed4ran

ed4ran

    Cadwell Event organiser

  • TMF+ Member
  • PipPipPipPipPipPipPipPipPip
  • 2,849 posts
  • Location: Stoke On Trent

Posted 02 July 2006 - 09:09 PM

How low is that? and did you have to cut into the wings for clearence? (guessing not from the pic)

Looks good!!

#15 miniboo

miniboo

    Lord of Original Thinking

  • Members
  • PipPipPipPipPipPipPipPipPipPip
  • 9,327 posts

Posted 02 July 2006 - 09:13 PM

i believe it is actually "lower than a nat's chuff" so to speak lol and the engine aint in in those pics by the looks of it!!


0 user(s) are reading this topic

0 members, 0 guests, 0 anonymous users