Jump to content


Photo
- - - - -

1972 Road Race Build


  • Please log in to reply
11 replies to this topic

#1 gixer271

gixer271

    On The Road

  • Noobies
  • PipPip
  • 39 posts

Posted 04 September 2008 - 12:14 AM

Hi,

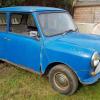
I puchased this mini back in 2005 & I have been slowly working on it as spare time allowed. I bought the car off Ebay from Derby. I had only seen the pictures on the auction & took a risk & won the auction :thumbsup: . When I arrived to pick up the car & drive it back to Doncaster I found a few extras on it that I don't even think the seller knew about. The seller had only had it for a year & had bought it from a guy in Whales that had done all the work. The seller told me that it 'Should' fly through the MOT when required a month later. I bought the car with the plan of stripping the full car to bare shell & rebuilding it, so I was expecting it requiring some work. With that we exchanged money & documents & I was on my way back home in my new project :dozing: (Which got me home no probs)

First thing I did was to book it into my local gargage for a Pre-MOT. :dozing:

It came back with 3 pages of fail items !!!!!!

Luckily for me I have worked as a a Vehicle Technician from the age of 17 & the reason for buying this car was to keep me busy playing around with cars as I am no longer in the car trade.

Whilst replacing some bottom arm bushes I noticed that there was no nut on the lower arm pin & I had driven this back from Derby !!! If the pin had fell out !!!!

There were alot of nice items on the car that the seller didnt know about which I found but didn't mention them to him.

Some of the main items included:

Metro Turbo 4 pot calipers 8.4" Vented discs
Rear Coil-Over conversion (Rear subframe removed)
Petrol tank conversion - Mini van tank taking up the boot

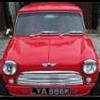
This is one of the pictures from the auction.
Posted Image

#2 gixer271

gixer271

    On The Road

  • Noobies
  • PipPip
  • 39 posts

Posted 04 September 2008 - 11:50 PM

First thing I did was to take out the engine. The last owner said the engine was re-built 6000 miles ago just before he bought it. I had to strip it down to see if that was true. I have a very good friend that has a Geabox company in Doncaster & he said I could strip the engine there on my days off :)

Posted Image


Engine was stripped right down to the bare block. I had a nice collection of Snap-on tools to hand :)

Posted Image

Pistons out. New rings, big ends, Mains, Cam bearings & thrust washers.

Posted Image

Gearbox stripped by my good friend Mr gearbox builder :) & new bearings & gaskets ordered.

Posted Image

We found a nice suprise inside. A X-pin diff (dont think the previous owner knew about this either). There was a problem though. A tooth had snapped off the crown wheel & had left metal shards all in the bottom of the gearbox. We found more of the metal inside a knackered oil pump too. 3.44 crown wheel & pinion found on Ebay & new oil pump fitted.

Posted Image

Next up was deciding on a cam. After many nights reading this forum I ordered a Swiftune SW5-07 kit with Alloy vernier duplex chain.

Posted Image

Gearbox done & fitted back on block. Just waiting for my new water pump & stage 3 head to arrive.

Posted Image

Received my new water pump & stage 3 head. Also got a new Turbo clutch & release bearing. I also did a few extra tweeks as you will see later in the pics.

With the new engine built I thought it was best to start on the car. It needed some body repairs (a dented door from a wind blast & no door strikers & a bit of rust on the scuttle panel) I called on another good friend of mine that works on car body repairs :teehee:

A long afternoon & a few welding rods later. Also got the new engine in :D

Posted Image

#3 slegersmini

slegersmini

    Speeding Along Now

  • Banned from Buying/Selling
  • PipPipPipPipPip
  • 348 posts
  • Local Club: SMAG

Posted 05 September 2008 - 12:28 PM

ooh a very nice bit of kit there... this will be soo nice once its finished :)

Keep us posted!

#4 blacktulip

blacktulip

    Crazy About Mini's

  • TMF+ Member
  • PipPipPipPipPipPipPipPipPipPip
  • 6,231 posts
  • Location: Braintree

Posted 05 September 2008 - 02:15 PM

looks mean lol :) by any chance has it been reshelled at some point? its unusual to see a top dash rail and a washer bottle mounted there on a '72 mini.

Edited by blacktulip, 05 September 2008 - 02:15 PM.


#5 gixer271

gixer271

    On The Road

  • Noobies
  • PipPip
  • 39 posts

Posted 07 September 2008 - 10:56 PM

I don't know about the shell?

Anyway.....

I decided to add a few goodies inside the cockpit. I didn't like the dash that came with it & I had spotted some nice fibreglass dashboards on this website.

Out with the old.
Posted Image


Old dash ready to sell.
Posted Image

With the old metal dash sold on Ebay for a surprising amount :D I bought a fibreglass item & started to buy new dials as I sold the old dash complete. I had in mind some nice Stack & Racetech gauges including a digital speedo.

Posted Image

Whilst I had the dash out I also modified the interior heater by cutting some metal on the dash rail to allow it to raise the heater further under the dash which gave me lots more foot space around the clutch pedal ( the heater water pipe was very close to the clutch pedal & I kept catching my foot on it).

I also won a new seat & would look at getting another to match later.
Posted Image

#6 gixer271

gixer271

    On The Road

  • Noobies
  • PipPip
  • 39 posts

Posted 08 September 2008 - 11:34 PM

After Speaking to a sales guy at Demon Tweeks with the intent to buy a matching seat to the one I already have, he talked me into a nice deal on a pair :D
Posted Image


Seat mounting points had to be welded to the floor so I could use the Recaro side mounts.
Posted Image

I also bought some 3" 6 point Saebelt harnesses but needed to add a harness bar to the roll cage to give extra support for the top holes in the seat. I had some bar left so I made up some door bars too.
Posted Image

Posted Image

I couldn't use a front cage as I didn't want to cut the dash ends, so the door bars were plated & mounted to the front inner wheel arches.

#7 blacktulip

blacktulip

    Crazy About Mini's

  • TMF+ Member
  • PipPipPipPipPipPipPipPipPipPip
  • 6,231 posts
  • Location: Braintree

Posted 09 September 2008 - 09:07 PM

good progress :thumbsup: i like the seat frames, never seen those before.

#8 mk3 Cooper S

mk3 Cooper S

    Crazy About Mini's

  • Members
  • PipPipPipPipPipPipPipPipPipPip
  • 5,569 posts

Posted 09 September 2008 - 09:15 PM

looks mean lol :thumbsup: by any chance has it been reshelled at some point? its unusual to see a top dash rail and a washer bottle mounted there on a '72 mini.

I think it is a later shell as it is rod gearchange , single handbrake cable and large bolt front sub frame.

Quality of the work looks good. I like teh extended/modified scuttle corners to help the flip front sit nicely.

#9 gixer271

gixer271

    On The Road

  • Noobies
  • PipPip
  • 39 posts

Posted 09 September 2008 - 11:29 PM

Thanks guys. Comments very welcome :thumbsup: More dash pics coming.

#10 gixer271

gixer271

    On The Road

  • Noobies
  • PipPip
  • 39 posts

Posted 10 September 2008 - 09:14 PM

Sprayed the dash Satin Black.
Posted Image

Fitted a Stack ST400 Rev counter, Racetech fuel,oil pressure & water temp guages, along with a wired up starter/ignition button.
Posted Image
Posted Image

Edited by gixer271, 10 September 2008 - 09:23 PM.


#11 mini_kel

mini_kel

    Up Into Fourth

  • Members
  • PipPipPipPipPipPipPipPipPip
  • 2,851 posts
  • Local Club: EMC/No pub mini club

Posted 10 September 2008 - 09:25 PM

Lovely project,I like the dash! Need to get some done on my own projects!

#12 Racer_Pete

Racer_Pete

    Up Into Fourth

  • TMF+ Member
  • PipPipPipPipPipPipPipPipPip
  • 2,492 posts

Posted 10 September 2008 - 09:30 PM

I like the tacho :P
Can't wait to see what it looks like finished :P


0 user(s) are reading this topic

0 members, 0 guests, 0 anonymous users