Jump to content


Photo
- - - - -

Mini Rally Car Blog


  • Please log in to reply
45 replies to this topic

#31 John Clayton

John Clayton

    Mini Mad

  • Noobies
  • PipPipPipPip
  • 110 posts
  • Local Club: Colchester Mini Club

Posted 19 March 2012 - 09:26 PM

Graham advises that:

"The Mini's tyre size is 165/60R12 we o not have that size here. The Speedflow brake line parts will cost £67.51 but that leaves enough hose for two sets (1m) and the fittings are reusable. If you are happy with that we can go ahead and order it.

i spoke to tech support on the brake lines today and she said that we should make the lines about 10mm longer than needed then all we do is cut a peice of the end and reuse the fitting. The Stainless steel braided hose is about £5.00 a metre which is reasonable we got started on the mainfold today so once we get a tyre we can drive it to get an MOT."

Edited by John Clayton, 01 March 2013 - 07:23 PM.


#32 John Clayton

John Clayton

    Mini Mad

  • Noobies
  • PipPipPipPip
  • 110 posts
  • Local Club: Colchester Mini Club

Posted 11 June 2012 - 07:33 PM

Latest update from Graham:

The Mini's main issue is doors the old doors are off and now we have to fit new doors. Unfortunately this is far from straight forward as the door skins are much thicker than steel.

The new doors are Carbon Fibre and I'm hoping to get Perspex windows put in

Edited by John Clayton, 01 March 2013 - 07:24 PM.


#33 stretters

stretters

    Stage One Kit Fitted

  • Noobies
  • PipPipPip
  • 71 posts
  • Location: Sunny Suffolk
  • Local Club: Ipswich MOC, AMC, CMC, MCR.

Posted 16 August 2012 - 09:55 PM

Hi John, nice to see that the project is still ongoing and hasn't been scrapped!

Nikolas is now looking better now the front end is in red oxide primer, it took a while to get this far but at least it's progress!

red primer!.jpg

If your interested/able to run them I have a set of four 155sr12 King Pin (Monarch) Hakka tyres that are new and un-used. I'm not going to be able to use these now on Nikolas as I've got no intention on tubbing or cutting the arches as yet. They were purchased for my old chocbox....

If they're of interest, pop me a PM and we'll go from there!

Good luck with the project,

Darryl.

#34 smudger068

smudger068

    Speeding Along Now

  • Members
  • PipPipPipPipPip
  • 344 posts
  • Location: Ipswich

Posted 17 August 2012 - 12:21 AM

Hi Lee,
Yes, I know Ted and highly recommend his firm The East Anglian Mini Centre; they have got me out of a fix on several occasions!

I used to have a Sierra at Havering College as a project car but the students let me down so I had to move it over to CEME to these guys http://classracing.org.uk/ who are a lot better.

I found the oil cooler now, so Class Racing are just trying to work out if they can mount it without a sandwich plate -anyone got any tips?

One of the carbon door's skin has split so they are going to try a repair with resin adhesive. We are also considering getting some thicker perspex and cutting it with a suitable bandsaw for the windows. The guys are hoping to respray the car in due course.


Sorry i didnt relise you had replied
haha, i know what one you mean, i saw that there just as i started and when i did start it had gone
Hope your project is coming on :proud:

#35 John Clayton

John Clayton

    Mini Mad

  • Noobies
  • PipPipPipPip
  • 110 posts
  • Local Club: Colchester Mini Club

Posted 19 January 2013 - 09:25 PM

Hi Graham,

Hopefully you will receive today the gasket detailed in the attached doc. When the manifold is off, please could you measure and advise the dimensions of the inlet/exhaust ports on the head itself? It may be that the diagram in the attached doc would be useful to record the head ports' dimension (if the doc is emailed back to me with an updated filename). Are we still on for collecting Mini & talking Franchising etc. on Thurs?

Regards,
John Clayton

Edited by John Clayton, 01 March 2013 - 07:24 PM.


#36 John Clayton

John Clayton

    Mini Mad

  • Noobies
  • PipPipPipPip
  • 110 posts
  • Local Club: Colchester Mini Club

Posted 28 January 2013 - 12:02 PM

I pleaded with Graham to do an MoT (or failing that just a quick test drive of the car -even just up/down the street) before I picked it up from Class Racing http://classracing.org.uk/ last Thurs (after it had been with them for 15 months off the road while work was done). He didn't get the above done, but assured me that the car would be fine.

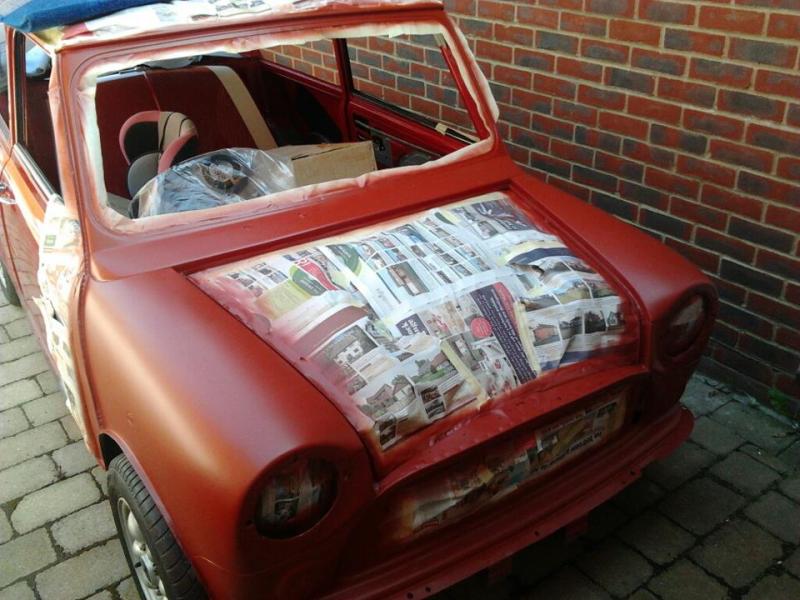
When I picked it up, it was idling at 2500rpm, the doors/bodywork hadn't been painted, the gear lever could be pulled up out of its socket, iit had no bolt holding the K&N air filter in, it was missing a floor bolt for one of the harness straps (which was therefore not attached to the car), had a soft rear tyre, and the car only had 3rd, 4th and reverse gears! However, they HAD achieved a lot of positive progress with the car for which I'm very grateful (I will post a full resume below in due course).

I took it away and found the next day that the gear lever wasn't bolted in, and the linkage appears to have been connected 180 degrees out. You CAN select 1st & 2nd if you lift the lever (but there is no detente on Reverse).

I did guest rides all day (despite some crunching gears from the above) for the service crew of the http://www.armedforcesrallyteam.com/ at Aldershot.

We couldn't get the car started at first so there must be a current drain on the battery overnight (it was fine the day before) -must remember to throw the Battery Master switch when parking it up. Endless messing about with jump leads etc. but eventually got it jumped off the van battery.

The stage was part tarmac and part off-road track (the latter was way too deeply potholed/rough for the Mini so I stuck to the Tarmac). It was covered in frozen slush/snow and it was like 'Strictly Come Dancing on Ice'. Handbrake turning round every corner, with way more power than grip; pendulum it in (or left foot brake or handbrake) to induce a slide and then hold the slide with counter-steer & power to drift all the way round.

I hit about 50-60mph on the main straight on the first lap and the car was snatching and weaving a bit as 1 driven wheel would find some grip on bare tarmac, and the other wheel still on the snow. We then went into a royal tank-slapper; I was working the wheel like an Octopus playing the piano as we fishtailed from one side to the other (with a windscreen full of the trees adjacent the road 50% of the time -thinking "this is about to be one BIG prang if we go off on THAT side"). After several oscillations, we speared off -thankfully to the other side (across the grass) -demolishing a FINISH sign in the process. I had a team sponsor onboard at the time (and cut my finger cut badly -possibly on something sharp on the steering wheel), so we came in after that, changed passengers and kept going much of the day with a different person each time.

Every time I looked across at the passenger, they had a big beam on their face. Someone said that he felt a lot safer in the Mini than in the Land Rovers (because of how they roll alarmingly going round the bends). Another said that there's something about a Mini that is just a lot more fun than other cars. Everyone enjoyed the experience.

The only glitches with the car for the rest of the day were:
a) Oil pressure became low at idle mid afternoon. I let it cool down and topped up the oil and it was fine after that -it was idling at about 30-50psi and up to about 70 on the stage
b) The cable handbrake wasnt' great (and probably became worse during the course of the day)
c) Most of the rivets holding the driver's new plastic window in place popped out
d) The passenger seat rocks on its mountings (due to the floor flexing)
e) Slight weep of oil on the top of the oil cooler
f) Need to check the sump pan for oil
g) Some worrying corrosion which needs treating e.g. passenger sill & footwells
h) The battery needs stronger strapping down
i) Also need to tackle the residual issues present when I picked the car up

The car needs a good wash now (inside and out)

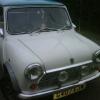
There are some pics of the Mini on pages 1-3 inclusive of this album:
http://www.photobox....m_id=1739783187

Edited by John Clayton, 28 January 2013 - 12:03 PM.


#37 John Clayton

John Clayton

    Mini Mad

  • Noobies
  • PipPipPipPip
  • 110 posts
  • Local Club: Colchester Mini Club

Posted 03 February 2013 - 08:17 PM

Yani washed the Mini today (still on the trailer) dried it out inside (it leaks like a sieve!) and removed the 2 front foot chequer plates (that concealed a mass of wet dirt/rust and lots of disturbing footwell corrosion that needs tackling!)

The Stormforce cover is shredded (torn by wind apparently) so that's pretty disappointing for a barely used £140 cover.

#38 John Clayton

John Clayton

    Mini Mad

  • Noobies
  • PipPipPipPip
  • 110 posts
  • Local Club: Colchester Mini Club

Posted 01 March 2013 - 06:46 PM

Car's now in covered storage awaiting bodywork welding attention when I have time

#39 AndrewMini

AndrewMini

    Mini Mad

  • Noobies
  • PipPipPipPip
  • 154 posts
  • Location: Launceston, Cornwall

Posted 02 March 2013 - 10:59 AM

nice car, would love a car built to that sort of spec

#40 John Clayton

John Clayton

    Mini Mad

  • Noobies
  • PipPipPipPip
  • 110 posts
  • Local Club: Colchester Mini Club

Posted 01 August 2013 - 07:25 PM

+++++++++++++++++++++++Work done to date+++++++++++++++++++++++ 

-removed the 2 front foot chequer plates (that concealed a mass of wet dirt/rust and lots of disturbing footwell corrosion that needs tackling!)

-'Four wheel alignment' set up for a £100 (local garage did it using an impressive infra-red sensors/computer set up)

-The LCB of the exhaust manifold had a crack in it

-Changed Antifreeze to Red OAT stuff

-Took the fan out to clean up the grille in the wing (getting rusty). Also removed the shocks, Nitro Morsd & angle-grinded 2 of the 4 arches. Removed the Alu false floor in the boot and found loads of rust in the steel floor so got to cut that out and weld in a plate now. The passengers sill is v rotten so cut the top off along the whole length of the passengers door -got to weld it up. Put an Endoscope camera down the sill where it goes aft behind the passenger's door sill and it looked OK so will spray it with Rust Treatment then Waxoyl. 

-Fitted an OIL FILLER CAP GENUINE VENTED & a HOSE SILICONE KIT  

-Put in MILLERS CTV 20/50 SEMI SYNTHETIC OIL 
-Fitted AVO competition coilovers at rear

-Fitted a Dowty Autofan

-my colleagues at lorne road are adding so new parts to the rear end which should be much stronger. They are also working all the electrics and the ignition "on" problem. The new parts at the rear are inner brackets that are made from box tube with a radius and we are adding gussetts to make them stronger. We will make some spares too

-Over last summer we did the following on it:

-Removed the exhaust manifold, rusttreated it and then painted it with several coats of aersol SPEREX red exhaust (gives a powdery matt finish). It looked great, but I've been a bit disappointed by how quickly the paint finish degraded
-Tom made a better bracket for the bottom of the manifold, welded up the crack in it and then we fibre-glass lagged the whole manifold (to reduce underbonnet temperatures).
-Removed the head after the hd gasked failed due to just following the instructions on Holts Radflush (it states to flush the engine when it's hot; guess what happens when you put cold water through a hot engine -I now know!)
-Sorted a problem in the gear lever ball swivel mech (and also a loose bracket for the gear selector rod).
-I stripped the paint on the head and rocker cover, rust treated them and then painted them with Tetrosyl Blue Engine lacquer (looks fantastic)
-Removed the front calipers (they were pulling to one side on the track). One was seized due to corrosion. I got them shot blasted, but I couldn't believe how quickly they began to rust again (within hours!). I had to put 'rust converter' on them. Tom battled away to change the seals and install new Stainless pistons. It was a pig of a job and took ages -never again -I'll buy recon calipers next time! We reassembled the brakes with decent race pads, but failed to bleed them up properly (despite trying every trick in the book including clamping off the other wheels' hoses in every conceivable combo (e.g. front to back split system or diagonally split) for every age of Mini. Nothing worked. We missed 2 Rally Sprints due to the brakes not being fixed in time; most depressed and frustrated. In desperation I took the Mini up to this place http://www.eastangli...nicentre.co.uk/ and Ted Sparrow took one look at it and told me 'your calipers are on upside down'! I was gutted. In 2 mins he had solved a problem that had thwarted us for many, many hours of pointless work. Ted also fixed a dodgy lead on the electric fuel pump, changed the oil to competition stuff and I'm really grateful to him for staying late on a Saturday afternoon to get us back on track for the following day's event -top bloke.
-We reinstalled the head (with competition head studs and one of the best gaskets for motorsport -the BK450 from the MG Metro Turbo) after we (and also Andy Bridewell of Merlin Engine Services) checked that the head wasn't warped with an 'Engineer's straight edge' -it was absolutely fine. The engine was remarkably clean and sootless inside -only the most minor clean with emery paper was necessary. There was slight damage to the edge of one of the pistons -it looked like some tiny foreign object had come down the inlet manifold at some point on (IIRC) the cylinder on the extreme right (from the driver's perspective), and this debris had been melted/ground up into a silver burr standing proud of the piston top. It was easily sanded off and the bore was undamaged, thankfully.
-Proper brass manifold nuts were fitted to the inlet/exhaust manifold.
-The Engine steady bars (ESB) had their bushes changed where necessary (perished rubber for decent poly bushes). The ESB at the clutch end had its bracket bent to make it align properly. The ESB at the thermostat end had a slot cut in it to make it simpler to remove. 
-I confirmed that a thermostat blanking plate was fitted.
-We removed the radiator and I got it 'flow tested' by the local Rad Rebuild firm. It was deemed to flow less well than a new rad, but it's a 4core (rather than a normal Mini rad which is 2) so it was deemed by the guy to still be plenty (even for a rally car) as the rad is 'a monster'!
-FAN: a rally car will always be revving hard (normally 3500 to 6000rpm) so a normal fan is probably blowing too hard much of the time (and therefore sapping engine power). I did consider an electric fan but I consulted the following and heard:

http://www.billrichardsracing.com/ "This was tried on Paddy Hopkirk's works Monte Carlo rally mini in in the 90s and it overheated in traffic"
Pitstop Racing of Brize Norton (Ralph Saunders): "the engine power saved will barely show up on a dyno"
Therefore, I abandoned the elec fan idea and fitted a DOWTY AUTOFAN (the blades automatically feather a bit when the engine is at higher rpm -they are spring loaded and the air pressure twists the blade a few degrees to reduce the fans output). Does it work? If you get the light on it at the right angle you can see as you blip the revs that the 'shimmer' moves so it does appear to work. However, the car was getting VERY hot (even just doing short 4 min 2nd gear stages every 25mins) when competing on a hot summer's day. I ran it with the bonnet off, although it didn't actually boil, so maybe it was just 'nicely hot (3/4 up the temp gauge) rather than (too hot). 
-I want to fit an oil cooler but somewhere along the line the pipes were lost for the first one (at Skidz Banbury), and the 2nd oil cooler is also now lost (possibly in my garage or possibly at CEME).
-While the radiator was out I paint-stripped, applied rust converter then 2-pack primer and then Black stone chip to the vented wing (where the fan blows through. I also did the same (after angle-grinding the rust off as much as poss) to all 4 arches on the car (and also put 2 layers of black Waxoyl Underbody seal all over them. Tom welded up inside the front N/S arch where possible, but it was a pain to get to (even after Daz had removed the rollcage) so I had to fill the holes with ISOPON body filler. I don't think the arches will EVER rust again after this complete overkill. I'm working on the basis of 'doing it right once', because the preparation takes SUCH a long time that you don't want to be doing it all again in 5 years time if the rust is creeping back. Lying on your back staring up at the bright sky, it was very difficult to see inside the dark front wheel arches. If I did it again I would put a blanket over the front of the car and down the side of the wheel arch, and then use a head torch. I got Nitro Mors dripping on my face at times which is not good -it stings like mad. I got paint dripping in my hair repeatedly (wear an old hat or -as I found -you will end up having to cut chunks out of your hair before you are presentable to go back to work the next day!). It was a punishing job that I would not be too keen to do again in a hurry! 
-Tom replaced the gaiter on the front N/S driveshaft.
-We removed the alloy plate false floor in the boot (that made it a nightmare to mount exhaust brackets under the car, bolt the tank down etc. Tom then did a great job cutting out the rusty spare wheel well and expertly welding in a new panel. 
-I paint stripped, rust-convertered, seam sealed, then grey 'high build primered' the whole boot. I was going to leave it 'as is' but after phoning the manufacturer I learned that the paint is porous (due to all the talc it contains to make it 'high build') so it will absorb moisture. As a result, I sprayed several coats of Hammerite black stonechip paint over the whole boot. It took ages. I primered and seam sealed the underside of the boot (but it still needs a top coat and waxoyl when I do the whole underbody.
-Tom made a bracket to refit the battery, and did a makeshift routing of the wires and pipes for the fuel pump/tank. 

-The latest update from CLASS RACING is that they have sorted the rear trailing arm brackets alignment issue (washers on the brackets allowed them to be re-aligned as required), and they are now cutting out some rusty floor in the front footwells. It also needs some Waxoyling underneath, and they are planning to hang the carbon fibre doors on it soon, and hopefully do a partial respray in due course (all as practice for their pupils)

-I found the oil cooler now, so Class Racing are just trying to work out if they can mount it without a sandwich plate -anyone got any tips?

-One of the carbon door's skin has split so they are going to try a repair with resin adhesive. We are also considering getting some thicker perspex and cutting it with a suitable bandsaw for the windows.

-The Mini's main issue is doors the old doors are off and now we have to fit new doors. Unfortunately this is far from straight forward as the door skins are much thicker than steel.


++++++++++AUSTIN MINI RALLY CAR


+++++++++++++++++++++++Jobs still to do++++++++++++++++++++
 
+++++++TOP PRIORITY (ESSENTIAL WORK BEFORE NEXT EVENT)

-Couldn't get it to start in Dec 13 (car was last driven in Jan 13)

-the gear lever could be pulled up out of its socket,

-I took it away and found the next day that the gear lever wasn't bolted in, and the linkage appears to have been connected 180 degrees out. You CAN select 1st & 2nd if you lift the lever (but there is no detente on Reverse).

-it has no bolt holding the K&N air filter in

-it is missing a floor bolt for one of the harness straps (which was therefore not attached to the car)

-it has a soft rear tyre (slow puncture)

-The cable handbrake wasnt' great (and probably became worse during the course of the day)

-Most of the rivets holding the driver's new plastic window in place popped out
-The passenger seat rocks on its mountings (due to the floor flexing)
-Slight weep of oil on the top of the oil cooler
-Need to check the sump guard for oil
-Some worrying corrosion which needs treating e.g. passenger sill & footwells
-The battery needs stronger strapping down


++++++MEDIUM PRIORITY

-Front footwell corrosion

-MOT


++++++LOWER PRIORITY
-Check for a current drain on the battery overnight

Edited by John Clayton, 07 May 2014 - 10:18 AM.


#41 GraemeC

GraemeC

    Crazy About Mini's

  • TMF+ Member
  • PipPipPipPipPipPipPipPipPipPip
  • 7,315 posts
  • Location: Carnforth

Posted 02 August 2013 - 11:30 AM

You shouldn't really run OAT antifreeze in a cast iron block, glycol stuff is better for corrosion protection etc.  OAT is generally for alloy engines.


Your gearstick problem - is it the linkage that's 180 degrees out or the bottom plate of the selector housing (much easier fix!)?


#42 John Clayton

John Clayton

    Mini Mad

  • Noobies
  • PipPipPipPip
  • 110 posts
  • Local Club: Colchester Mini Club

Posted 28 April 2015 - 04:58 PM

On 7 May 2014 I heard the following from www.2fast2soon.info - a youth outreach project from Lincolnshire Road Safety Partnership  www.roadlincs.com :


The work on the mini  looks ok for us to do. My intension will be to initial store the car in our garage at Lincoln and then run a project again as we did before but with a new set of students.  We would look to start this project during the winter months. But it will get done! We will then move the mini  up to our driver TRG centre where it will be housed in our new garage/workshop. The mini will then be used for our pre-driver training courses and for our changing attitudes and behaviours courses that we do  with high risk youngsters . If you are ok with the time scales then I will complete the forms and collect the car?


If you would like to look at a YouTube video of our previous project we did with the 205 gti then follow this link:  


++++++++++++++++++[Mini was collected from Colchester by LRSP on Wed 21 May 14]


6 Jun 14: I did find time to take the mini to scampton for a test. It is running now engine seems fine now gear box issue I think could be the selector box not the actual gear box. Will learn more when I get chance to get it on a ramp


+++++++++++++++++++

12 Dec 14: fitted new  gear selector, battery mounting and new battery, sorted seats out now securely fitted, fitted new clutch slave cylinder but it does also need a new clutch fitting, next job!


+++++++++++++++++

4 Mar 15: Please see attached a couple of photos that I took at the college of the mini. The students are really enjoying working on the car!

The box of spares hasn’t been required as yet and is still banded up in a storage box.

 As you can see from the photos once the mini was stripped back then it revealed a lot of rust and rot. There is no  sub frame  either, I can only assume this was taken off to fit on the suspension but it should have been replaced with a custom one to give the body some strength back. A custom built one will be built and fitted.  I have spent £1000 on replacement panels so far. The tutor at the college who is leading the project is an expert at restoring classic minis his work is second to none. So once complete I would expect it to be pretty amazing. 


+++++++++++++++++++

5 Mar 15:  This is the mini centre who fixed the clutch:    http://www.tyreandtech.co.uk/  


Tyre & Tech LTD

16 Crofton Road,Allenby Industrial Estate,Lincoln,LN3 4NL


Edited by John Clayton, 29 April 2015 - 02:29 PM.


#43 John Clayton

John Clayton

    Mini Mad

  • Noobies
  • PipPipPipPip
  • 110 posts
  • Local Club: Colchester Mini Club

Posted 28 April 2015 - 05:04 PM

Further updates (and lots of photos) are on this page:


Lincolnshire Road Safety Partnership Mini Project

https://www.facebook...2997367?sk=info

Here are the updates from the above page (as of 28 Apr 15):


20150331: Still more rot to cut out (Why do people weld plates on top of plates? Some areas have 7 plates on top of each other) If you look carefully you can see that we are now fitting some new panels. O/S inner and outer sill, door step and door all have had their first fit and screwed in place. 
A BIG Thank you to Netty at 
Midnight Classic Minis for supplying the panel work!! //(*-*)\\


20150417: Another step forward, Boot floor repair panel, boot and boot hinge panel now aligned and temporary fixed into place


Edited by John Clayton, 28 April 2015 - 05:05 PM.


#44 John Clayton

John Clayton

    Mini Mad

  • Noobies
  • PipPipPipPip
  • 110 posts
  • Local Club: Colchester Mini Club

Posted 09 June 2015 - 09:11 AM

I wasn't aware of 'Midnight Classic Minis' until now when the college announced their involvement with the Mini restoration, but they have been great for classic Mini parts: http://www.midnightclassicminis.co.uk/ 


Edited by John Clayton, 09 June 2015 - 09:11 AM.


#45 John Clayton

John Clayton

    Mini Mad

  • Noobies
  • PipPipPipPip
  • 110 posts
  • Local Club: Colchester Mini Club

Posted 19 August 2015 - 10:56 AM

I could do with speaking to the car's previous owner to ask about the following:

history, who made the beam frame, cyl hd gasket type, what head work has it had done, are the valves standard (or even modified for Unleaded), is it an A+ engine, is the Manifold matched to the block, any overheating problems, where did the modified rad come from etc.


0 user(s) are reading this topic

0 members, 0 guests, 0 anonymous users