Jump to content


Photo
- - - - -

Ken -The 1275 High Compression Engine Micra Mini (Running Project)


  • Please log in to reply
749 replies to this topic

#526 lawrence

lawrence

    One Carb Or Two?

  • Members
  • PipPipPipPipPipPipPip
  • 1,330 posts

Posted 10 February 2017 - 11:44 PM

All in good time :) I'm on limited funds as well a time here haha :)
Coolent system is basically done just need to order some piping and do a couple of other little bits.

I've made a start on the inlet manifold and have got an update for that but was hanging back with it until the coolent system was done and dusted.
Plus it keeps raining here as you can see in any of the engine bay photos meaning I'm getting soaked walking back and forth :(

Tommorow in the morning im popping into the garage, I'll only have an hour or so and will do a few bits then make a list of jobs that need sorting and pop it up here
Lawrence

#527 lawrence

lawrence

    One Carb Or Two?

  • Members
  • PipPipPipPipPipPipPip
  • 1,330 posts

Posted 13 February 2017 - 06:19 PM

So we all like a bit more info on the coolent system ;)
Bracket that I made fitted to the bulkhead
20170211_105600.jpg
Plumbing done.
20170211_120159.jpg

I'll order the last hoses sometime, I'll finish modifying the heater first tho

20170211_163038.jpg
Also worked out where I'll pop the tank. Going to put it here. I've bent up the bracket slightly but I'm planning to put a steel rod back along it once I've sorted the tank mounting all out so it will be strong again

20170211_163244.jpg

Lastly I'm going to mount the coil pack under the throttle bodies.
20170211_163244.jpg
Out of the way I know but I case anyone has noticed I've got a full wire tuck and tidy on the engine bay here :) need to Order some new HT cables to make them up, thinking copper cored

That's the little bit I got done Saturday
Lawrence

#528 lawrence

lawrence

    One Carb Or Two?

  • Members
  • PipPipPipPipPipPipPip
  • 1,330 posts

Posted 15 February 2017 - 06:29 PM

Good afternoon.

So ive finished faffing around with the coolent system (for now at least)

Time to play with the inlet manifold


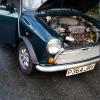
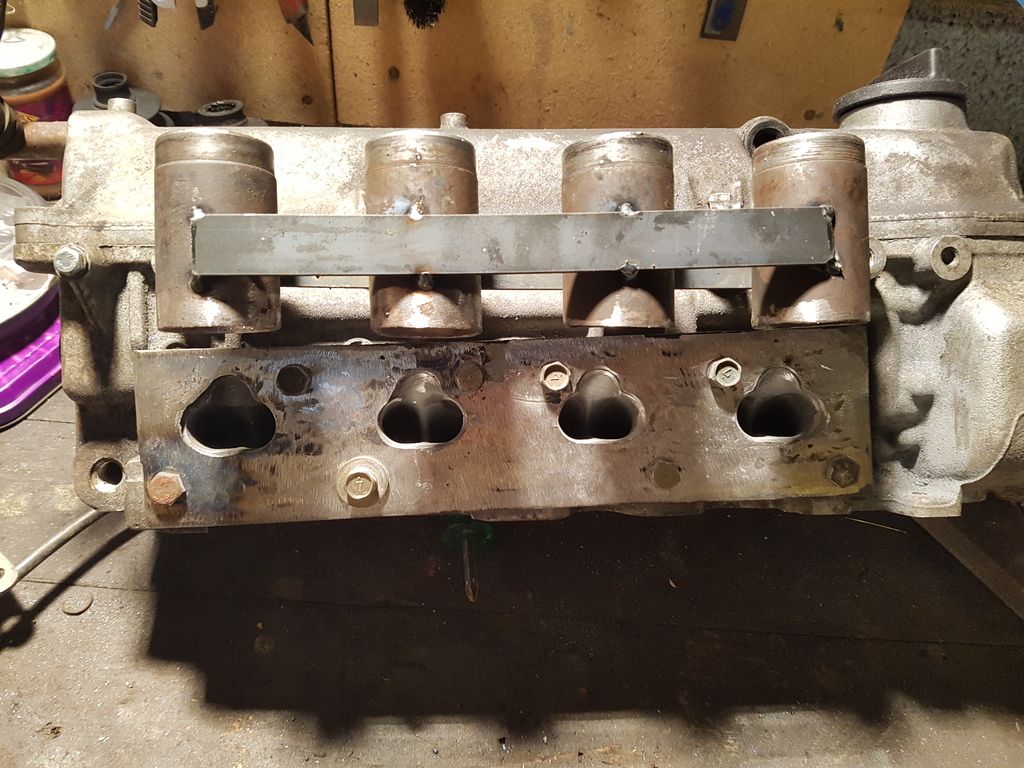
Last time I talked about it I had given up with making a new backplate and had ground off the old one.

20170128_125823.jpg

as you can see.


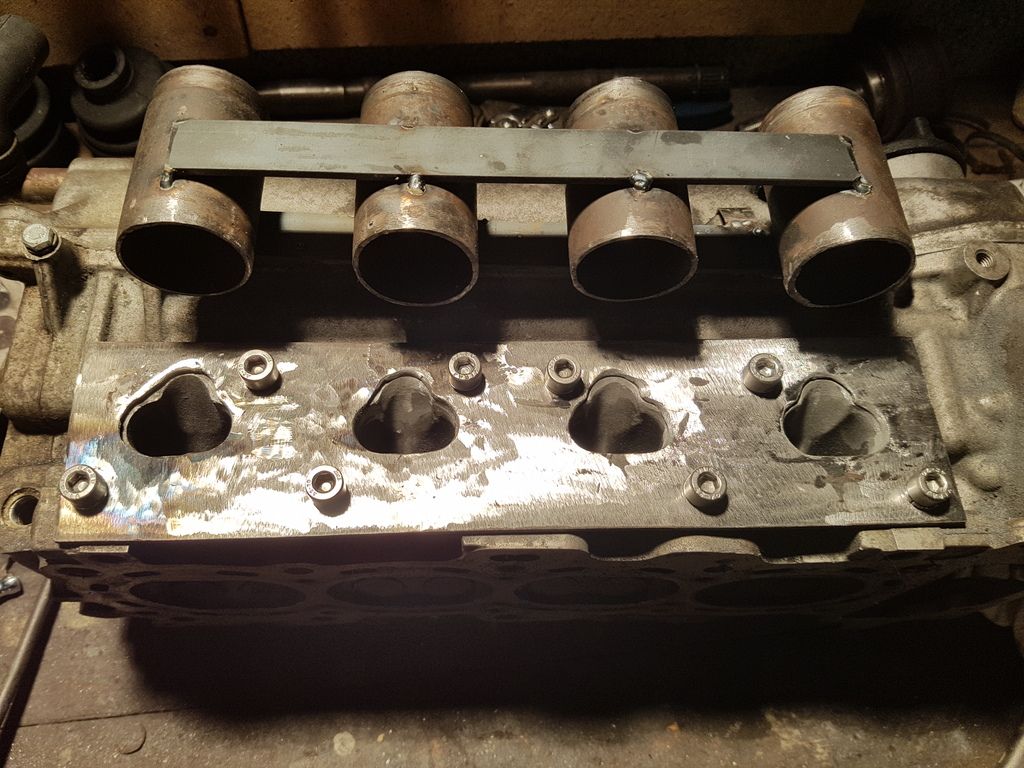
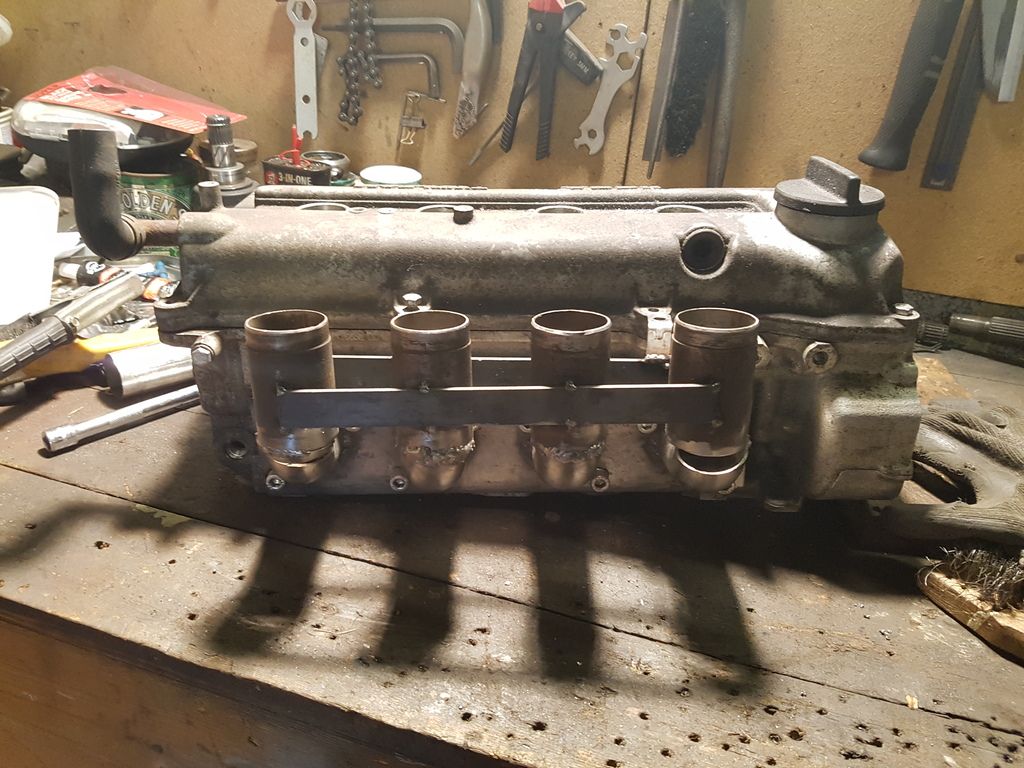
So bolted that up to my spare head.


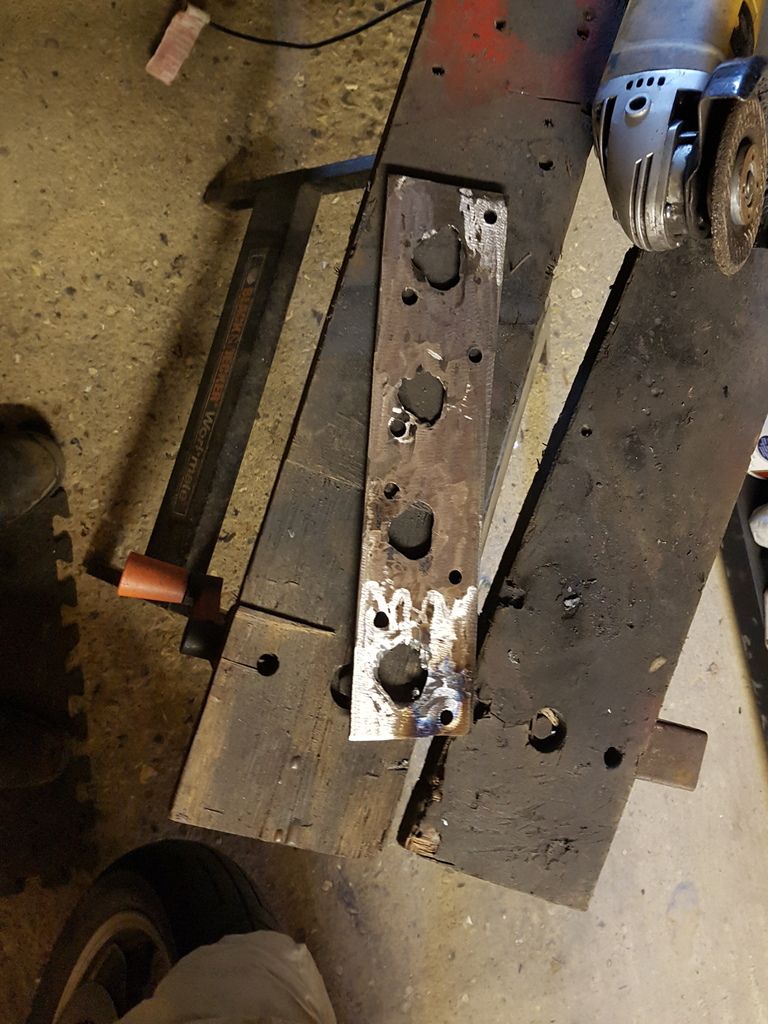
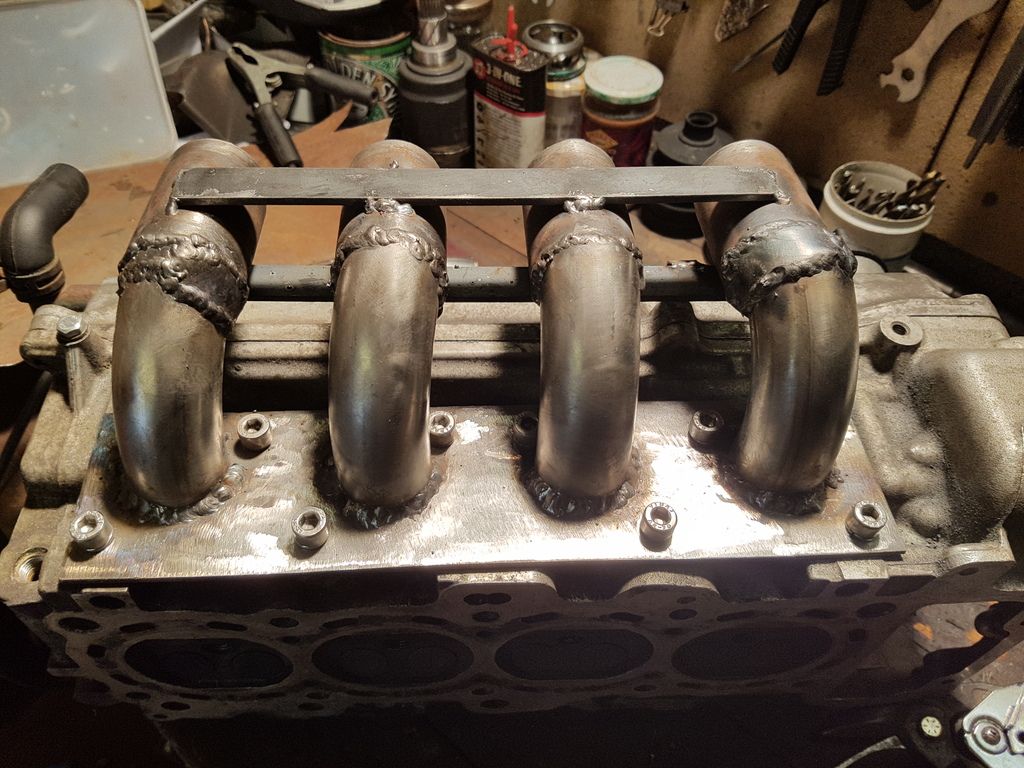
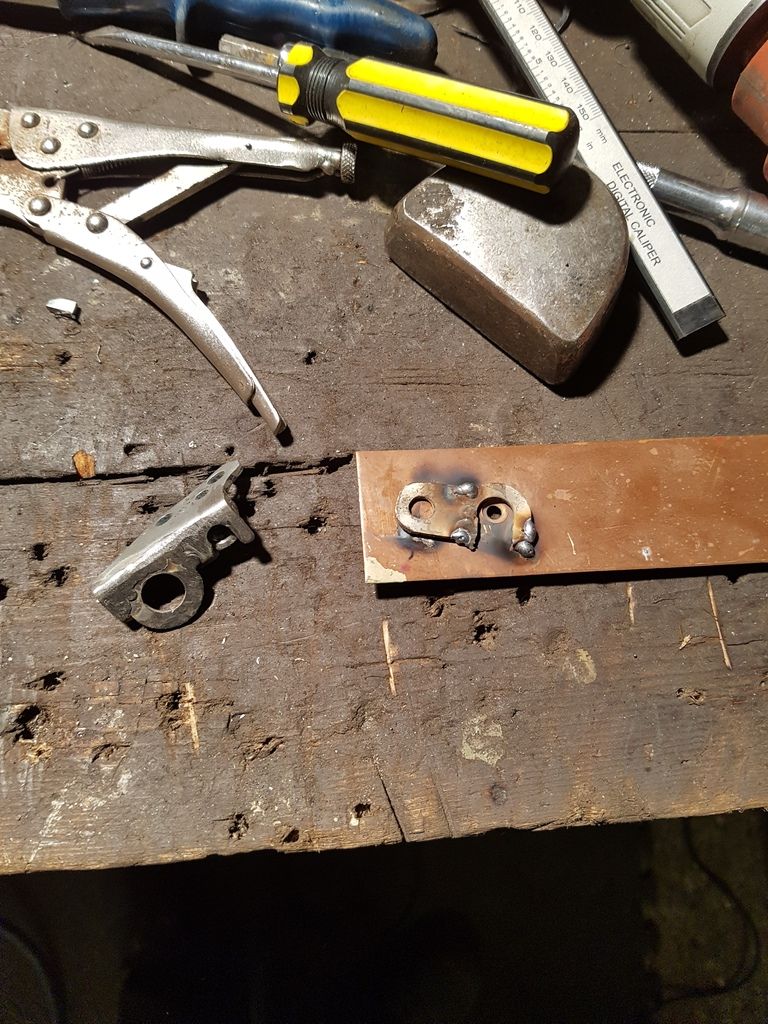
I wasn’t having the runner going off all wonky on me this time so tacked some reinforcing bits to them to keep them aligned

20170131_121851.jpg


bracket welded to them and then attached to head.

20170131_125501.jpg


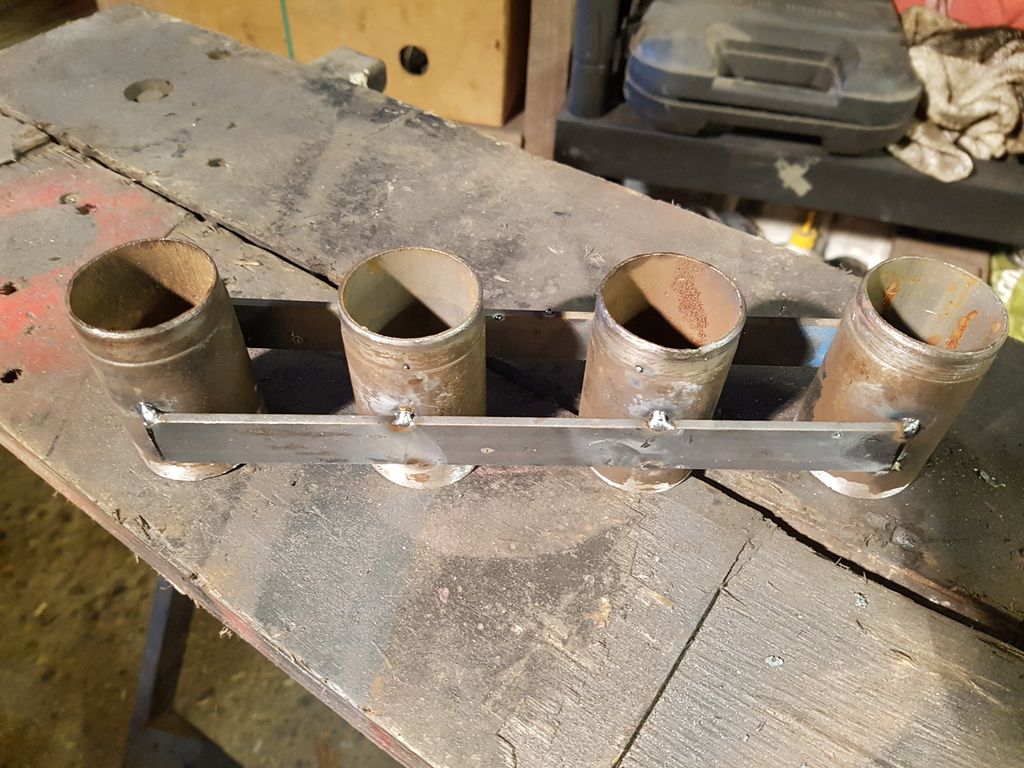
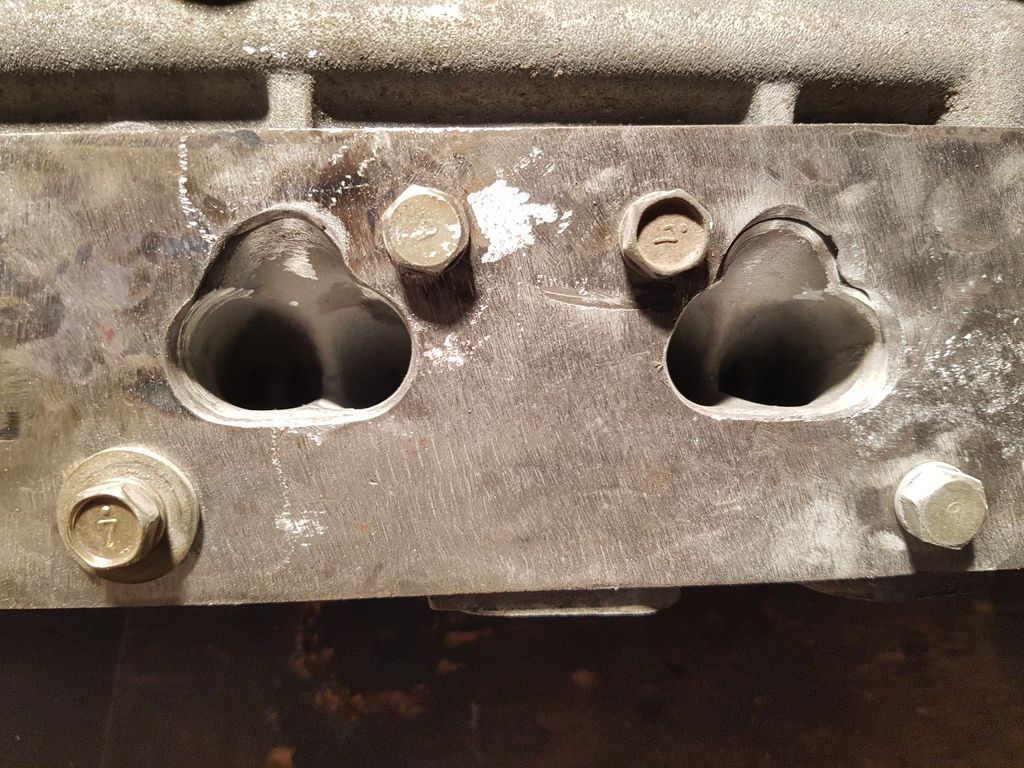
you can see in this one that the holes were drilled a little off and that the mounting plate is slightly wonky!

20170131_125454.jpg


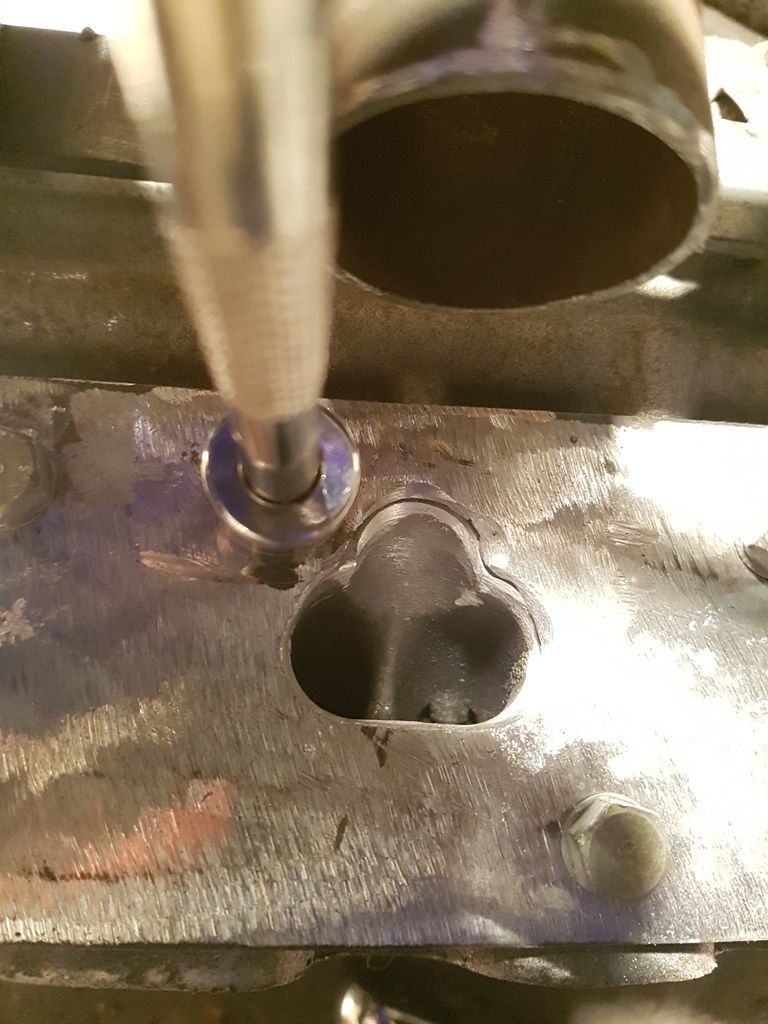
ive matched the plate to the ports, not that itll make a huge difference as im welding round pipes on!

20170131_120103.jpg


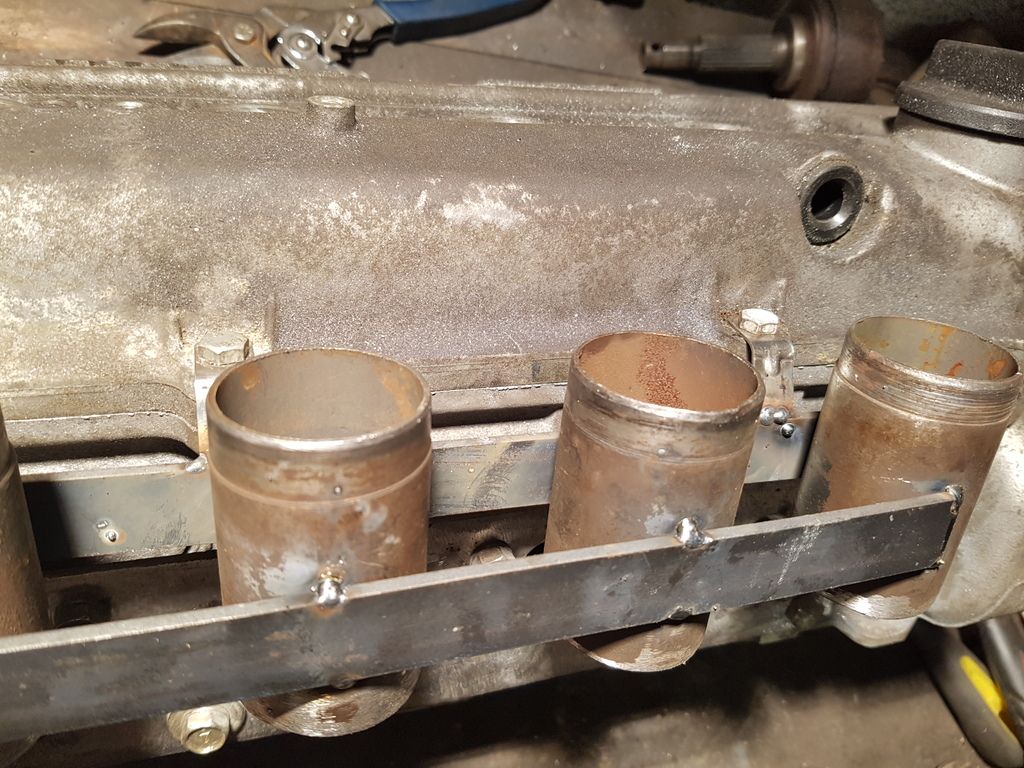
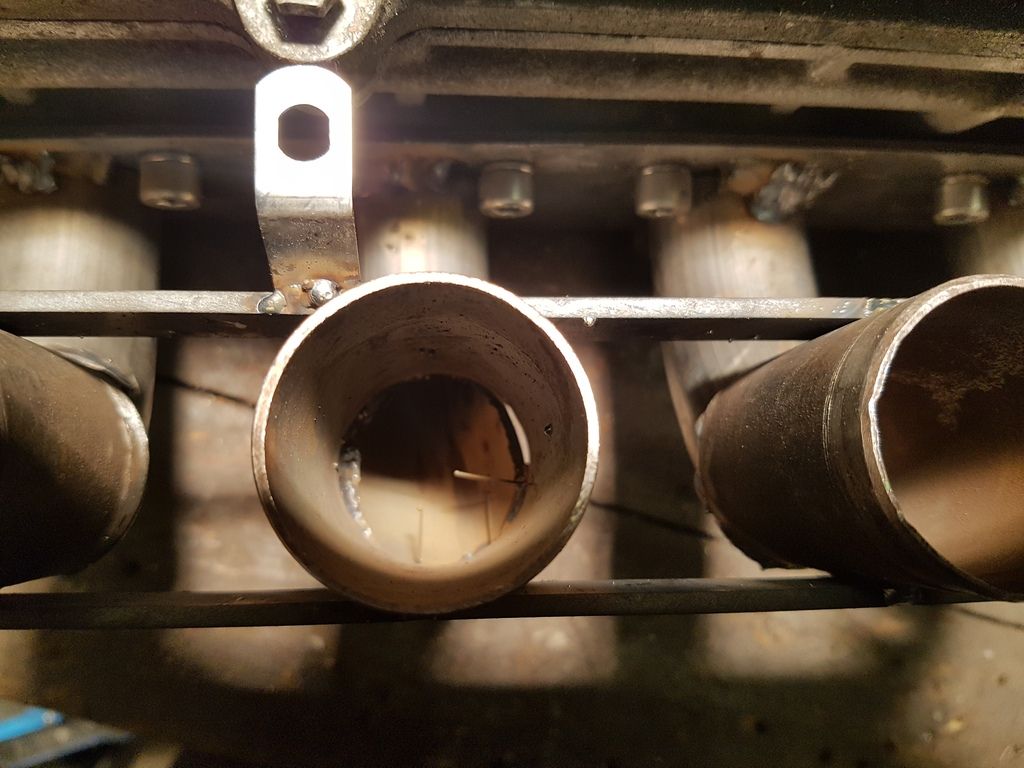
So this is where I paused the other week. As you can see in the photo its tight to the bolt which makes it difficult to get weld and the socket to undo the bolt in the same place!

Also the little brackets I welded on wouldn’t work. When I did a mock fit the throttle body hit the rocker cover and the bends on the pipe were too small.
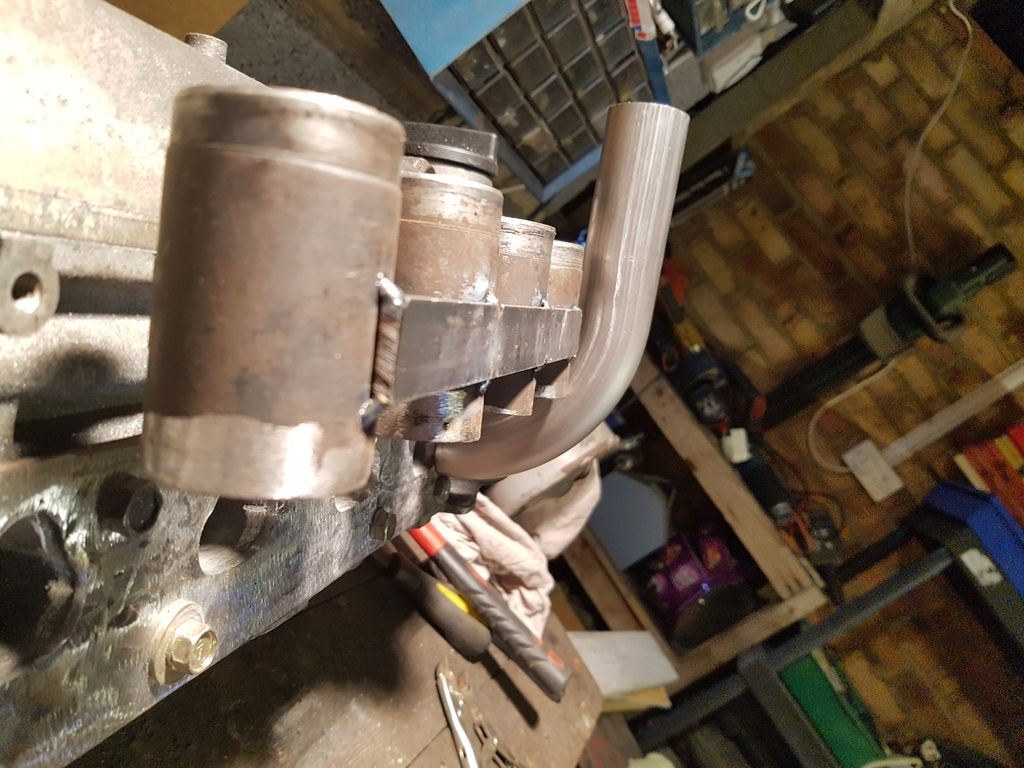
20170131_125727.jpg


see what I mean?


So I had a pause and a think.

This was the issue. Too tight

20170204_102128.jpg

20170204_102200.jpg

clearance using studs and nuts or bolts

20170204_102220.jpg


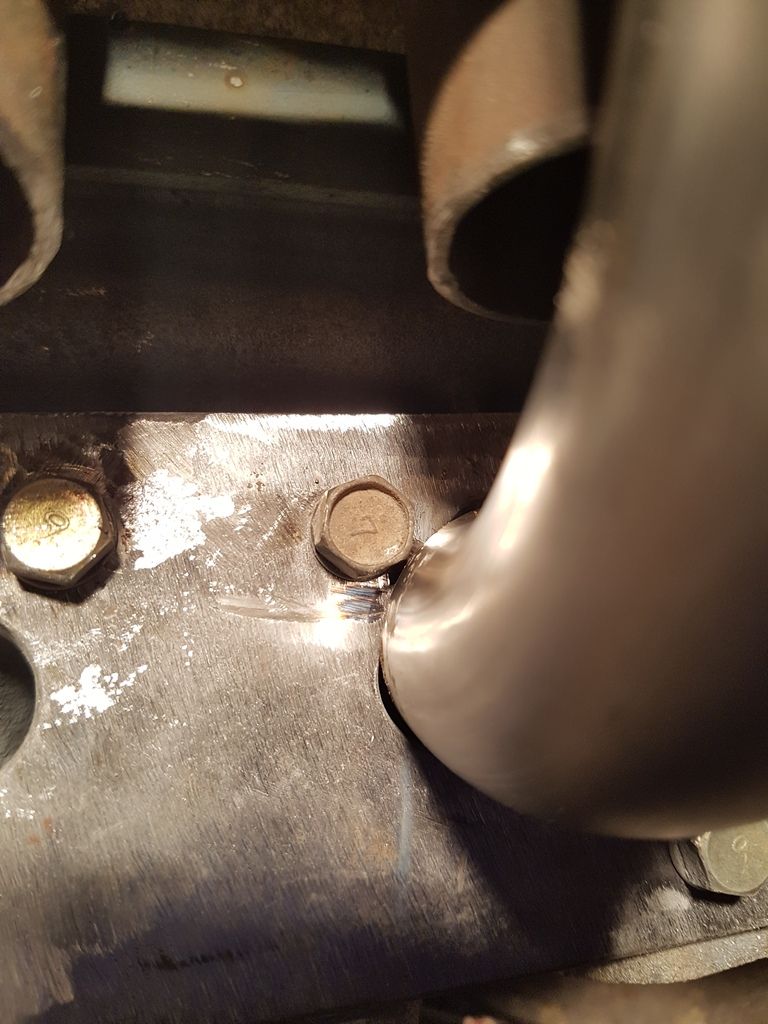
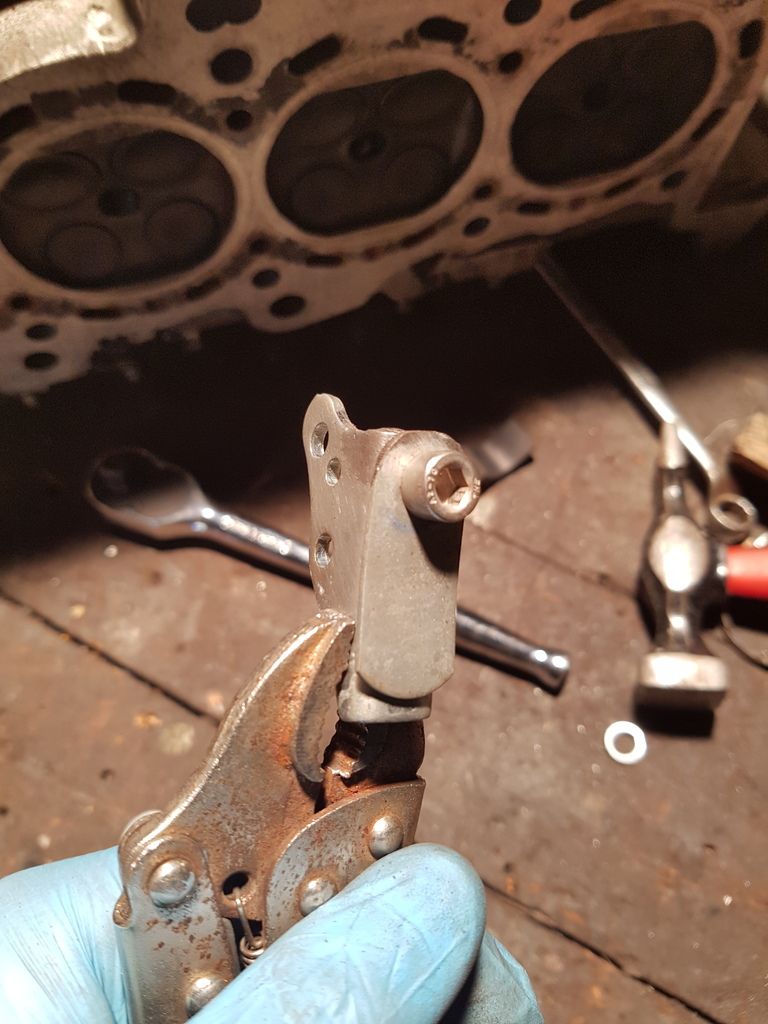
so I had a think and came up with the solution of getting some stainless cap head bolts.

20170204_102634.jpg

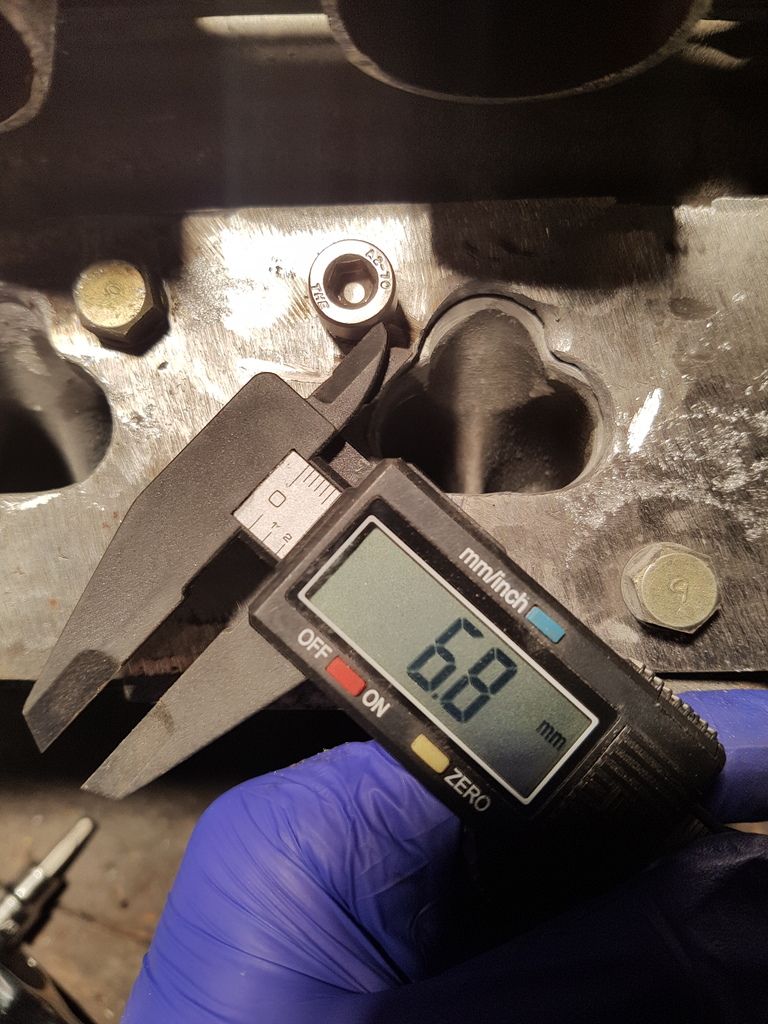
now got a lot more clearance for the welds


All bolts replaced on the plate

20170204_105142.jpg


Its not a bad solution to the problem however I need to be extra carefull not to thread any of the bolt holes in the head as obviously ali is weaker than stainless and I don’t fancy retapping a head on the car! The mockup head im using this has already happened to on two of the holes therefore im keen to avoid this issue!


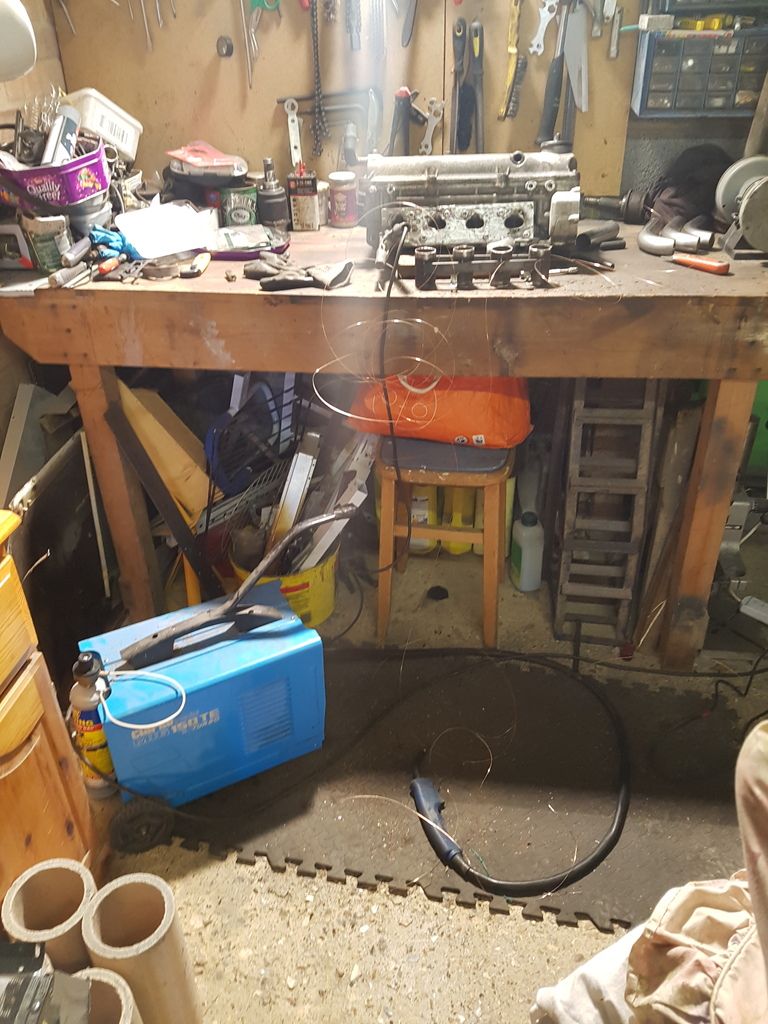
So today. Was planning to weld up the manifold.

Got attacked by the welding wire first
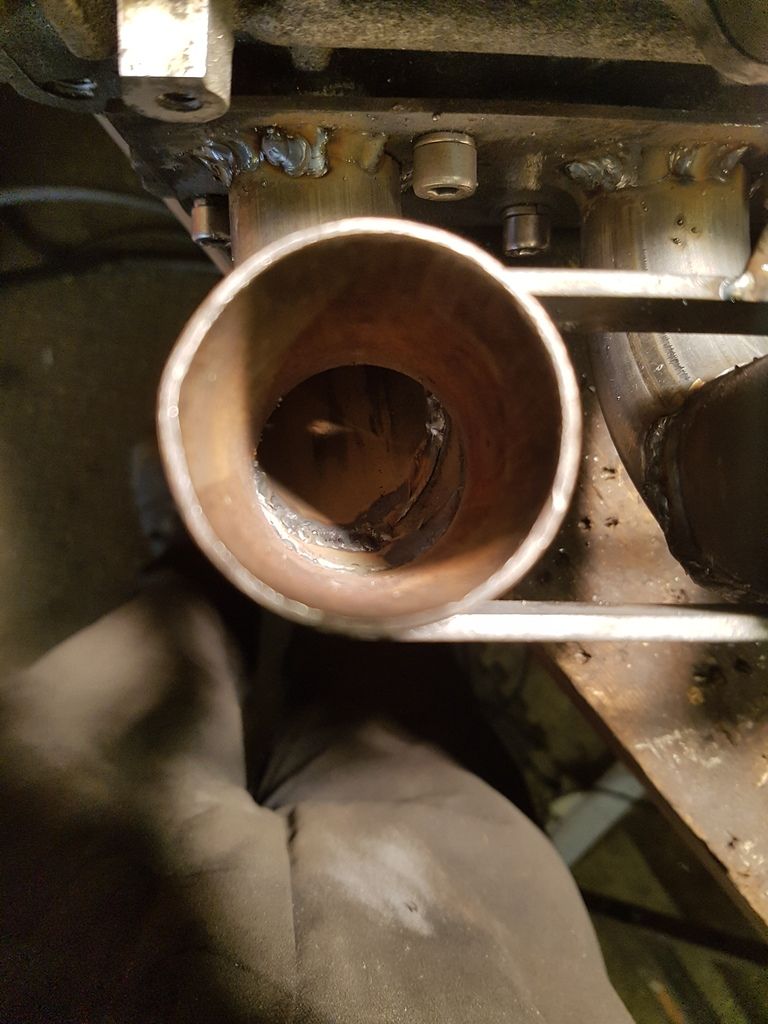
20170215_120146.jpg


partly welded

20170215_131412.jpg

close up

20170215_131416.jpg

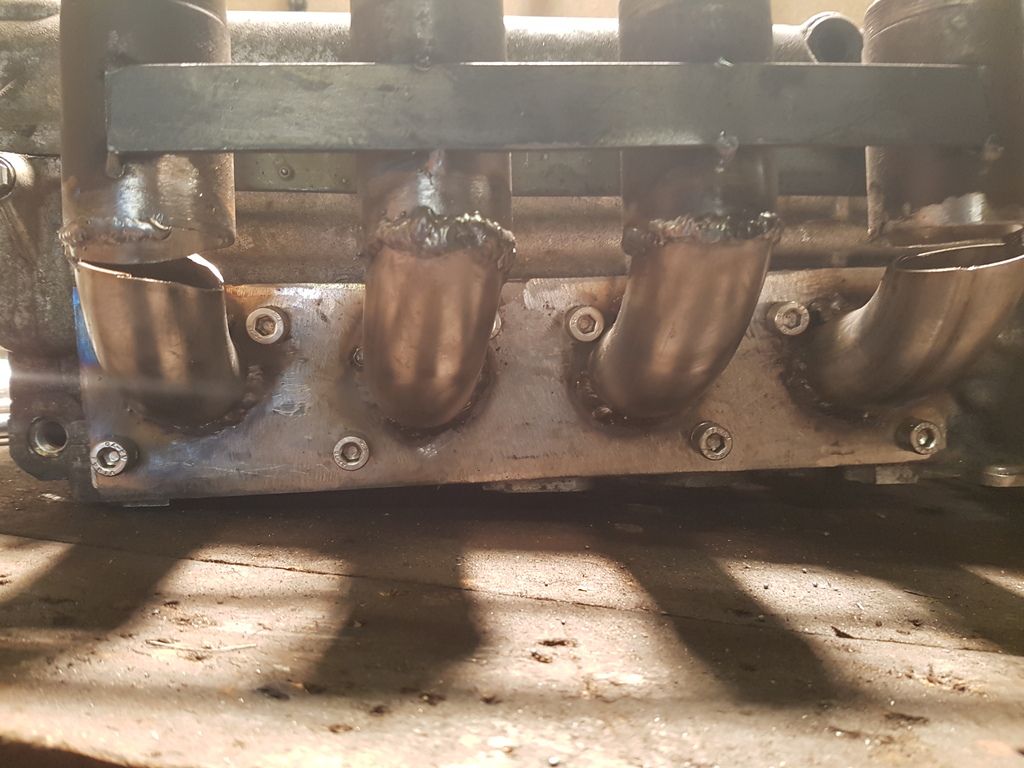
nice and smooth flow

20170215_131426.jpg


you can see I cut the two outer ones a bit too much also


mockup,

20170215_131746.jpg

nothing hits the rocker cover anymore and I know there loads of space on the car at the back so not worrying about the brake master cylinder either


and mostly welded. Have to do a few bits but I wanted it to cool completely before I took it off the spare head

20170215_133954.jpg


20170215_134036.jpg

the flow is fine where I had to add metal back, just needs some cleaning up on the inside


and fitted to the car

20170215_145355.jpg

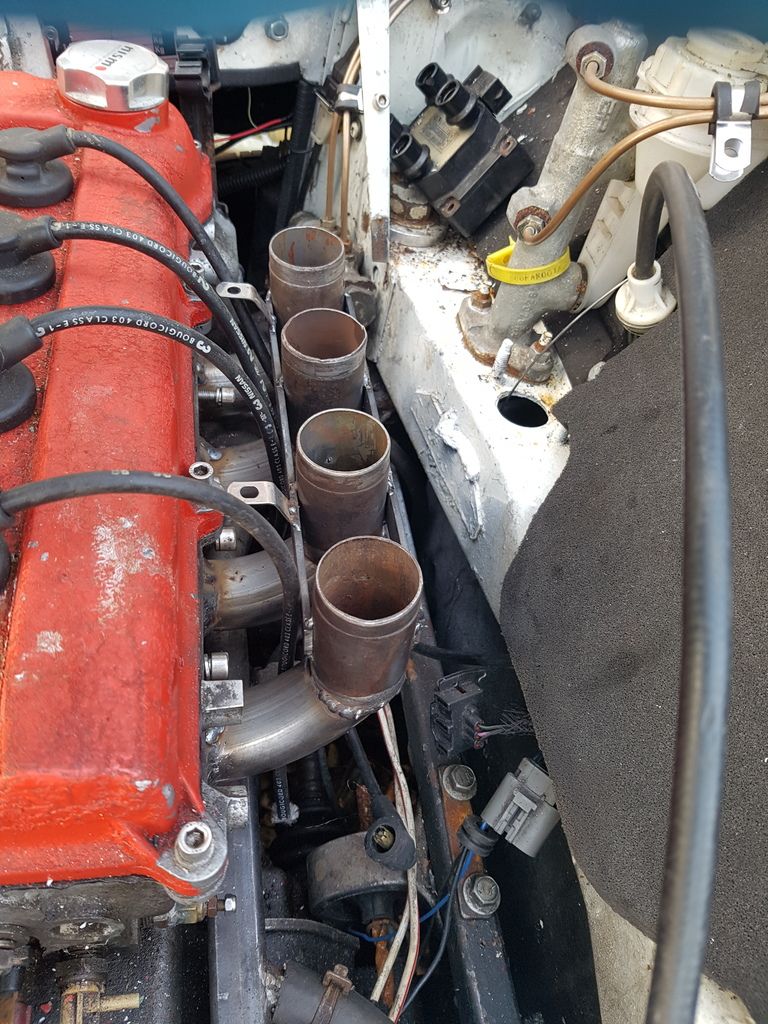
still got some welding left to do but I was getting a bit bored of it to be honest


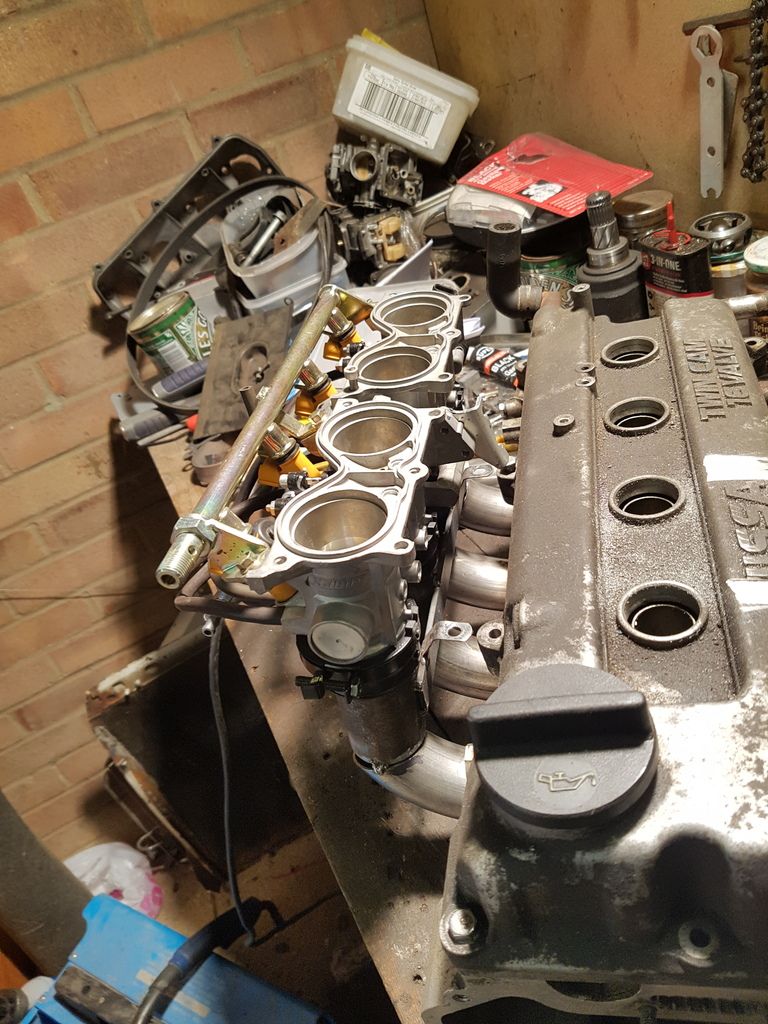
and throttle bodies fitted to the manifold

20170215_145448.jpg


20170215_145634.jpg

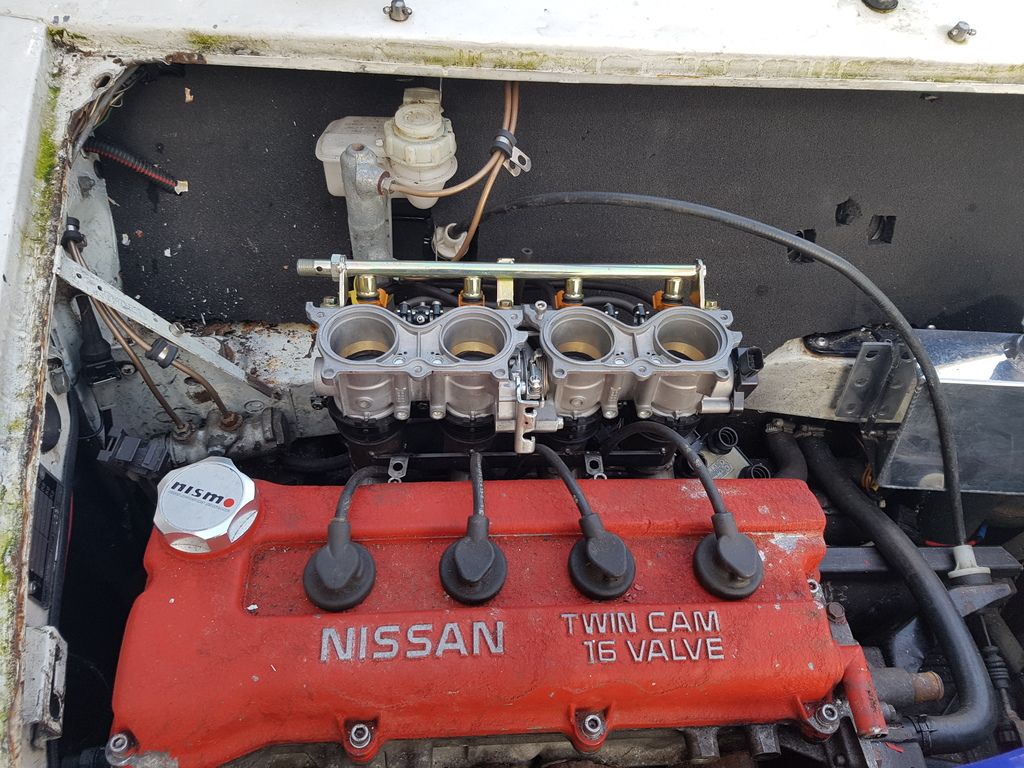
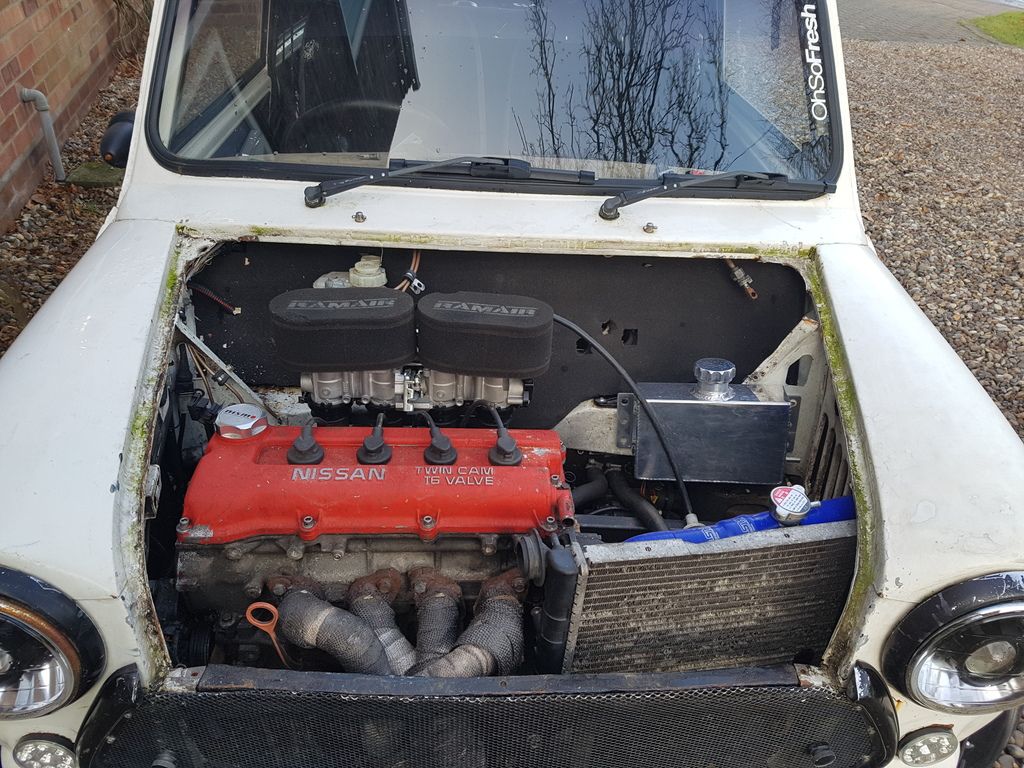
airfilters placed on top. Will be snug with the bonnet! But hopefully the long inlet manifold runner will be torquey


On a side not this is almost as busy as the engine bay will be,

Im planning to replace the sound deadening with one new piece that runs the length of the bulkhead. I also need to refit the wiper motor in the usual position and have asked for the Retrosport cover for my birthday to add some flair. Lastly im going to get some brushed stainless to cover the exhaust manifold up, this I will bend round to protect the radiator from heat also. Its weird seeing the bay so empty!


Next up a bit of fabrication
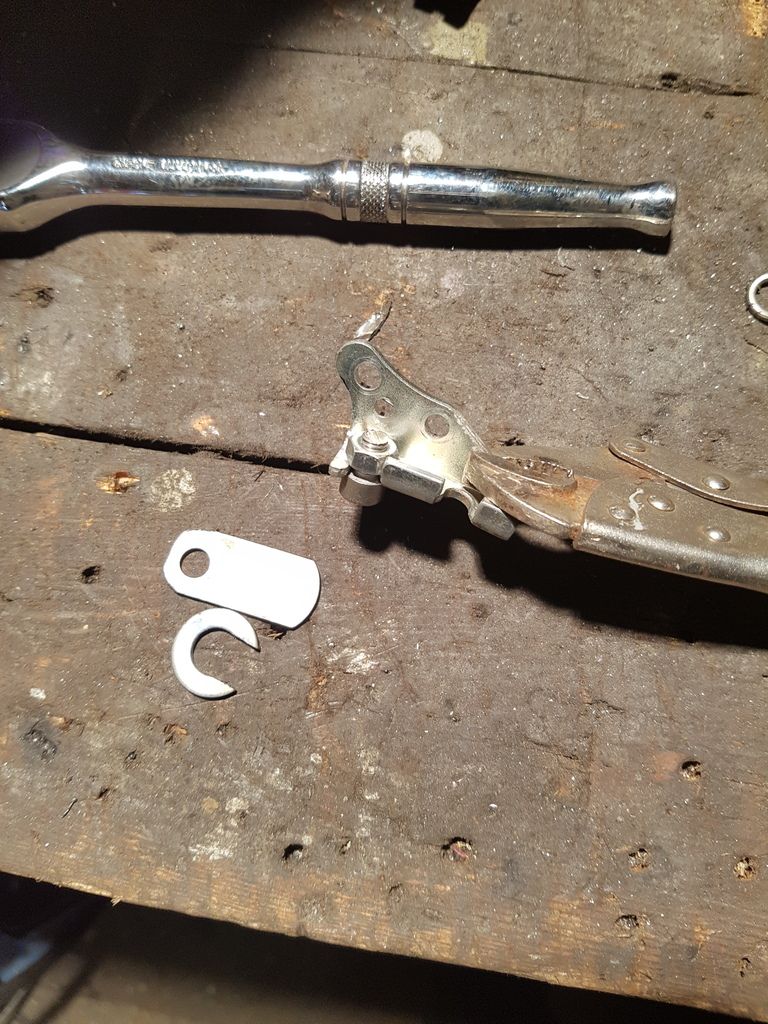
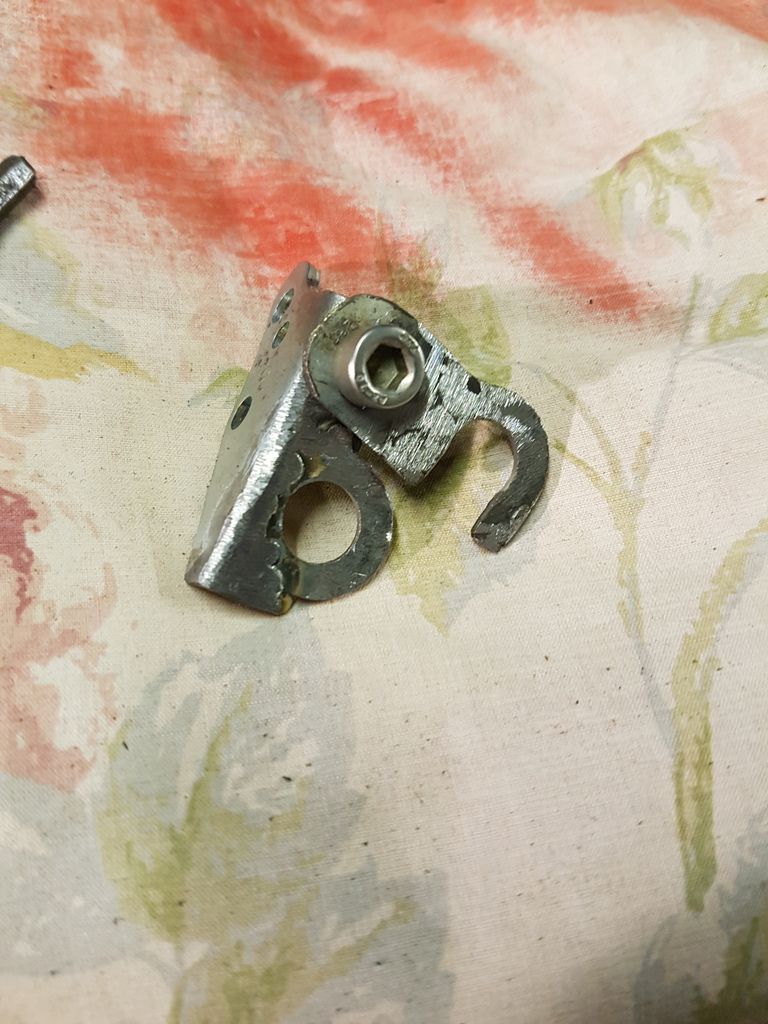
20170215_153616.jpg

20170215_153923.jpg

20170215_160407.jpg

20170215_160905.jpg


and fitted

20170215_161514.jpg


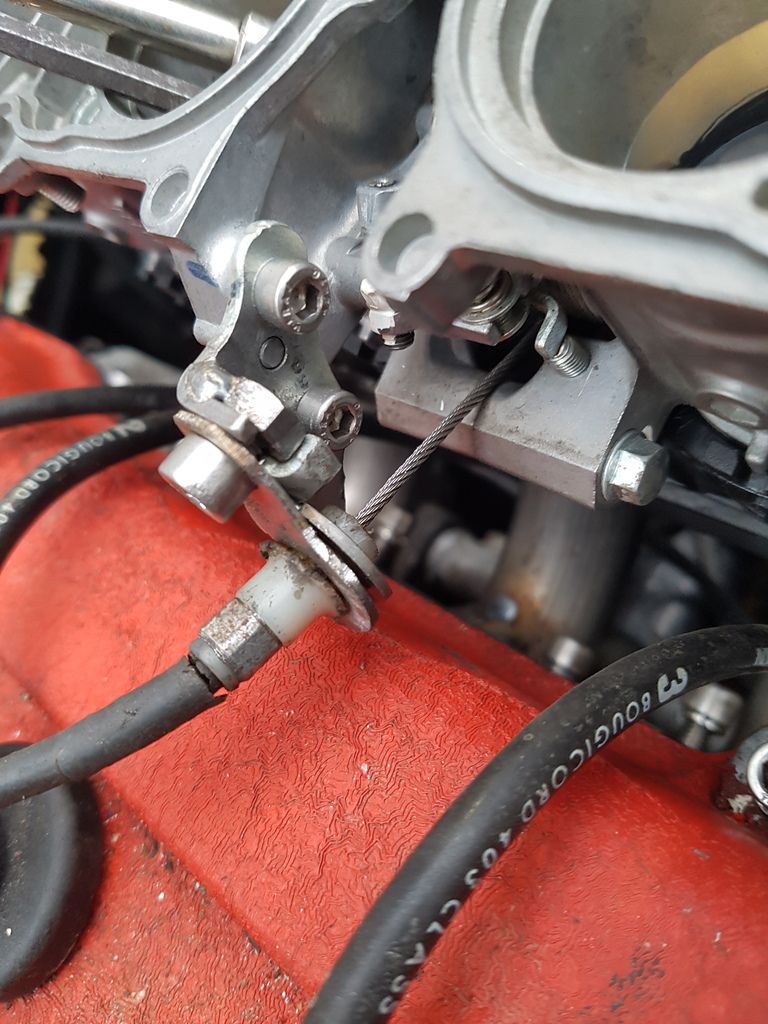
It needs a bit of paint but it does the job of holding the throttle cable in place excellently, there is no movement at all and no chance of it falling out due to how ive overengineered it! Just need to adjust it at the pedal end and that’s the throttle sorted!


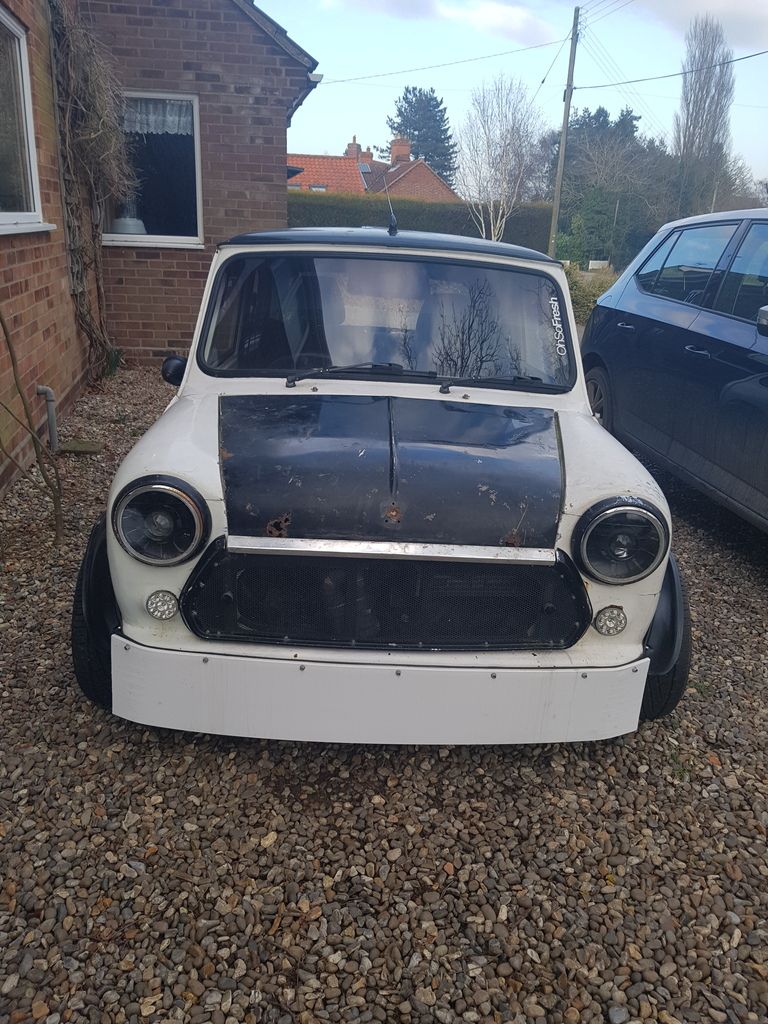
Oh and got a metal bonnet the other day, still undecided with it tho

20170214_150859.jpg


So that’s all for now folks.


I start placement at university in hospital theatres next week. That means im working a 37 ½ hour week as well as a 12 ½ hour day at work on Sundays when possible. Ive also got a 3000 word essay to do as well as a 7000 word dissertation.


I cant see myself doing much work on mini as uni work has to take priority. Im Also over mini budget this month by about 50pounds :(


So keep an eye out for updates people but there may not be many for the next 3 months or so


Lawrence


#529 benm

benm

    Mini Mad

  • Noobies
  • PipPipPipPip
  • 111 posts
  • Location: S.Wales

Posted 16 February 2017 - 07:36 AM

Making some good progress there!

#530 lawrence

lawrence

    One Carb Or Two?

  • Members
  • PipPipPipPipPipPipPip
  • 1,330 posts

Posted 20 February 2017 - 06:01 PM

Time for another update :)


Got some bearing on the whole situation


20170218_091319.jpg


but you will have to bear with me regarding what they are for (somuchpun)


done a bit of painting of the bracket I made

20170218_104440.jpg

I never took one of it painted unfortunately


Finished welding up the manifold

20170218_104437.jpg


and remounted it

20170218_114448_001.jpg

I bought some smaller bolts, makes a tidier job of it compared to cutting down the other ones and means less chance of damage to the threads too.


Time to get my head around the different pipes for the throttle body.

20170218_125103.jpg


So these long squiggly ones got to 4 little brass outlets on the TBs. The outlets come out engine side of the throttle body so it saves me tapping into the inlet manifold. But as you can see they are small

20170218_125108.jpg


cue drilling time

20170218_125502.jpg


So now the holes are bigger they flow a lot better. Now all 4 are drilled it will mean I can attach the other end to the emmisions PCV valve. This will prevent the crankcase from overpressurising and blowing gaskets etc which as my readers may have noticed has happened before!

Attaches here

20170218_132020.jpg


Time for some more bracket fabrication

20170218_133408.jpg

So this mechanism is attached to the throttle bodies however it’s a bit bulky but needed in order to fit the idle screw wossit I need to make another bracket.


Dug through my metal bits. Ooh a handy bracket

20170218_133546.jpg


lets weld a bolt in the middle

20170218_134208.jpg


bit of filing

20170218_145441.jpg


and some paint. Ta da.

20170218_151329_001.jpg


Ive kept the valve, its vacuum activated. Now I can refit it if I need to if I can work out how to plumb it. Going to look into it. But I would rather have an electrical way of controlling the idle so bare with :)


Now to modify the throttle cable, course I can buy one but where the fun in that. Probably would have been easier but ahh well.


Eww crusty

20170218_151746.jpg


bit of modifying

20170218_155417.jpg


All ready to fit. It part honda cbf125 speedo cable now! I like recycling

20170218_164955.jpg


and fitted, you can see the little painted bracket that hold the cable securely all painted there too

20170218_171050.jpg


Also dug out another Nissan bracket so this part looks nice and tidy! And the cable runs smooth which will give me a nice progressive throttle just like we all want! Just got to find/make another bracket to keep the cable from rubbing on the valve cover by the filler cap but that’s easy peasy.


So whats up next. Not sure. Keep an eye out people

Lawrence


#531 lawrence

lawrence

    One Carb Or Two?

  • Members
  • PipPipPipPipPipPipPip
  • 1,330 posts

Posted 09 March 2017 - 10:13 AM

Thankyou for bearing with me :)

20170218_091319.jpg


hehe,


So not sure who reads pollyp’s threads on micra sport but he does a replacement of the plastic bush for bearings, the bearing he used were a different type however mine will cope with better loads side to side. The result will be an extremely slick gear change with no notchyness or play. I’m also intending to remove the shifter assembly from the car so I can dismantle it and attempt to remove more play that end.


So shifter rod removed, as you can see there is a threaded section on it already, this allows me tweak the placement slightly to get a position I was comfortable with.

20170228_123538.jpg


grinding off the rivet

20170228_123540.jpg


20170228_131326.jpg


20170228_132635.jpg


20170228_135352.jpg


20170228_143953.jpg


20170228_144353.jpg


So as you can see the plastic has now been replaced by the bearings. the joint now moves freely and has zero pay. Essentially all I did was cut down the plastic part on the original joint and then leave clearance for the bearings, fairly simple.


Any questions ask.


So other bits, im planning to tweak the spare sump that I have, this will be to give clearance around the tie rod that is currently hammered in and to raise part of the sump up that is going to give me grief when the car is lowered.


Still need to paint the inlet manifold but I haven’t got time unfortunately.


New update sometime next week maybe


lawrence


Edited by lawrence, 09 March 2017 - 10:16 AM.


#532 lawrence

lawrence

    One Carb Or Two?

  • Members
  • PipPipPipPipPipPipPip
  • 1,330 posts

Posted 13 March 2017 - 12:05 AM

Painty painty
20170311_142832.jpg

Ooh shiny.
20170312_153510.jpg

I'll make a gasket tommorow for it tommorow as I am tight and use gasket paper, no way will I spend £9 on gaskets!
Then I can properly fit the throttle body's!

Also
Cruise control!
20170312_132322.jpg

How it woks when it's all free
http://rs1111.pbsrc....&h=160&fit=clip
And when electronically locked/unlocked
http://rs1111.pbsrc....&h=160&fit=clip

The cruise cruise control is very rudimentary, it's a electro magnetic lock essentially. It needs a live current to lock the throttle or it will be free. Plan is to use the brake switch to deactivate it and probably a latching relay. Then should the brake switch fail it will prevent the cruise control from being applied. It will not be adaptive, just a simple throttle holder.

That's it guys, I'm busy with dissertation atm so sneaking little bits of mini in as a treat for words written!

#533 thelegg

thelegg

    Super Mini Mad

  • Members
  • PipPipPipPipPipPip
  • 601 posts
  • Location: Forton

Posted 14 March 2017 - 10:48 AM

Cruise control such luxury!

#534 benm

benm

    Mini Mad

  • Noobies
  • PipPipPipPip
  • 111 posts
  • Location: S.Wales

Posted 15 March 2017 - 06:48 PM

i got cruise control in my mini, its my right foot  :proud:


#535 lawrence

lawrence

    One Carb Or Two?

  • Members
  • PipPipPipPipPipPipPip
  • 1,330 posts

Posted 20 March 2017 - 07:28 PM

It should be fun when it works, I doubt I'll use it much but it's nice to say mini old mini has cruise control haha.

Tiny update,
I should be doing dissertation however snuck out to the garage for a bit today.
I have given up finding the specific connector for the tps, spent a good few hours trying to find one and avoid buying an entire loom!

Soldered some wires and heat shrank them.
20170320_110117.jpg
And heat shrank over the top to make everything waterresistant
20170320_110853.jpg

Also working out my coil mounting bracket
20170320_122320.jpg

Trying to make it simple, almost welded bars to the frame until I realised that would make getting the engine out very difficult!

That's all for now, may finish off the coil parts when I find a gap between uni work!
Lawrence

#536 lawrence

lawrence

    One Carb Or Two?

  • Members
  • PipPipPipPipPipPipPip
  • 1,330 posts

Posted 24 March 2017 - 02:42 PM

Bit more sneaking to the garage this morning. 

20170324_120215.jpg

Bracket now made to mount the coils too, its very simple however will work a treat. I will add a photo of it fitted tomorrow so it makes sense where it goes.


20170324_112713.jpg

Funds are tight. I've soldered the injectors to the loom for the time being, nothing I can't go back on later however will allow me to get the car running. It does look nice and tidy however. 


Also cleaned up the wiper motor for painting but forgot to take a photo unfortunately. 


Currently on the lookout for a injection fuel pump for a very cheap price. I want an external inline tank pump however am reluctant to buy a cheap one from eBay and would rather buy a second hand good quality one. I also need to look at the fuel pressure regulator part of the fuel system as I am not sure if my throttle bodies are a non return system or not. Plus not sure if I should go for AN fittings or not ?


Keep and eye out for updates, only small ones currently tho.

Lawrence


#537 lawrence

lawrence

    One Carb Or Two?

  • Members
  • PipPipPipPipPipPipPip
  • 1,330 posts

Posted 24 March 2017 - 10:43 PM

Right, I got paid a little money which is nice :) 
 
so I've bought
>Injection fuel pump 
>Fuel pump bracket
>Fuel filter (30micron and washable)
>5m of 8mm fuel hose 
 
I've also had a think about the rest of the fuel system. Plan is to weld the Micra parts to the Honda fuel rail using the micra fuel pressure regulator. That means I can cut costs and not buy a stand alone fuel pressure regulator. I also took a while to look into the standard fuel pump from the cbr600rr engine, it comes with an integral FPR however ill have to somehow include it into the tank which really isn't designed for an internal tank pump. 
 
So now I've got an external fuel pump and ill run the lines under the car with the P clips that Ive had for ages. Plan is to use the standard mini lines as the return as they are already there. Ohh maybe the new pipe will run along where the old starter motor cable? hmm, brainstorming here. 
 
Anyhow thats all for now. Oh and the new pump etc are shiny! woo! updates when they arrive.
 
Lawrence 

Edited by lawrence, 28 March 2017 - 02:21 PM.


#538 lawrence

lawrence

    One Carb Or Two?

  • Members
  • PipPipPipPipPipPipPip
  • 1,330 posts

Posted 28 March 2017 - 07:15 PM

I have been doing a few bits when I can squeeze time in,


Sunday morning few hours


Fuel tank removed, as you can see I have a water leak in the boot a little

20170326_113300.jpg

So cleaned it all up, wire brushed the surface rust and gave a coat of rustoleum

20170326_120044.jpg


Nice and tidy to receive the tank back in, new seals on my shopping list for minispares. I may also make some new rubber seals for the lights as not sure where the water is getting in, likely the boot seal however.


So Fuel system :0

20170326_121901.jpg

the top pipe is micra, the lower honda. The Fuel pressure regulator is micra and I need to graft that to the honda!


So drill a hole progressively bigger

20170326_122750.jpg


And would you look at that, the FPR stub I cut off fits like a glove!

20170326_122741.jpg


but, in the engine bay it pokes out and looks untidy in my tidy engine bay, therefore a 90deg bend is needed (bit of waterpipe) in addition to this the regulator is on the fuel outlet part so needs to point roughly down towards my fuel return line


how I left it the other day

20170326_132436.jpg


The top pipe is the fuel inlet bit on the micra, im not sure where my fuel pipework is running yet so nothing is finalised yet.


And now on to todays work (28th)

I got up early today. Was out in the garage by 8am as I wanted to have after 12 doing uni work


So what’s been going on?

20170328_092258.jpg

FPR fully welded on now and ground back. I need to pressure test the welding but in all honesty I wont be able to until the system is made up, fingers crossed the micra FPR works (I have a spare also which is handy)


Bracket made for the coil pack finished, had to cut it about a little but its sorted now

Painted

20170328_102445.jpg

covered in heatshrink

20170328_103303.jpg


and fitted with the coil pack attached.

20170328_115008.jpg


ive covered it in heatshrink because if not its going to be metal on metal the way ive made the mount and where it goes, I don’t want it reverberating or rubbing the paint off.


Where the ht leads are routed through

20170328_124125.jpg

even made a nice little clip to hold them in pairs.  You can also see the second support bracket for the accelerator cable fitted there too.


Stripped the bulkhead wiring and taken the edis unit off, its moving inside the bulkhead this time.

20170328_111838.jpg


look how tidy the bulkhead is now

20170328_124115.jpg


refitted the wiper motor also

20170328_124141.jpg

also fitted the dsn plate I got for my birthday


meanwhile the fuel pump arrived

20170328_105206.jpg

need to order some smaller outlets for it


So that’s the engine stuff pretty much done. Obviously I need to wire everthing up and buy some more plumbing parts for the cooling system but the majority of the thinking is completed. Need to look into how im going to mount the airfilters also.


I fancied a little painting today as the sun was out

20170328_135448.jpg

20170328_145339.jpg

had to weld up the inner rings where I had cut them to fit the golf lights.


Garden sculpture

20170328_154531.jpg


Refitted

20170328_162943.jpg


So next update will be tomorrow afternoon, its going to be lots of little bits and pieces like welding a captive bolt for the expansion tank and making a shopping list of the small bits to buy. I also may adjust the clutch cable again and potentially remake the bracket so it clears the expansion tank. Preferably I would have it arch over the expansion tank however I am contemplating making a bracket that just stops in from rubbing.


Watch this space people! And feel free to comment

Hmm red rocker cover again?

Lawrence 


#539 thelegg

thelegg

    Super Mini Mad

  • Members
  • PipPipPipPipPipPip
  • 601 posts
  • Location: Forton

Posted 29 March 2017 - 12:09 PM

Fine work so far :) yeah definitely paint the rocker cover as it's letting the car down lol

#540 lawrence

lawrence

    One Carb Or Two?

  • Members
  • PipPipPipPipPipPipPip
  • 1,330 posts

Posted 29 March 2017 - 01:23 PM

Thankyou for the comment. I’m trying to do her better justice such as proper fabricated rad mounts not a bit of bar like before. Hopefully a better quality less rushed install will give better results at the end regarding reliability!


Regarding the rocker cover, plan is to paint it the wrinkle paint red again, I may smooth it off like before but will leave the PCV valve on this time!


So today, little bits and pieces and then looking at the alternator mount.


Welded on a nut for the expansion tank and painted the area

20170329_102808.jpg


Trimmed back the inner wing cleaner and fitted seals round the edge where the rad goes

20170329_102817.jpg


re welded on the rad captive nut

20170329_103613.jpg


swapped all the exhaust nuts for the stainless cap head nuts, also made some decisions about the alternator

20170329_111627.jpg


As you can see it’s a horrible mess currently

20170329_111631.jpg


marked out some steel

20170329_112449.jpg


cut off and rounded edges

20170329_113422.jpg


drilling the mounting holes

20170329_114520.jpg


Its hard to explain my plan for the mounts verbally so I will just make it up, basically im keeping the alternator in exactly the same position as it works well where it is. However its going to be hanging on a bolt that is attached to a flat plate that goes across the current timing chain cover, hopefully that will prevent oil leaks…. Watch this space


Oh and the fuel filter arrived. This will be the secondary one in the engine bay, the primary one is going to be a disposable cheaper type. Likely to be the micra one I took off the other day.


20170329_135128.jpg


That’s all for now. Maybe some work tomorrow, not sure yet

Lawrence 


1 user(s) are reading this topic

0 members, 1 guests, 0 anonymous users