I hadn't realised you could do that but then again once I had moved bits of engine out of the way I may as well remove the whole thing! Plus I changed the rubbers on one part (using reclaimed parts from an old radius arm, I'm not changing these again any time soon!)
Well currently the front feels quite solid when I push down on it. But then again I'm not sure what the shocks are set to. I'm planning to fit the new shocks I bought on known settings. Fingers crossed it'll work well!


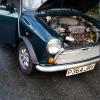
Ken -The 1275 High Compression Engine Micra Mini (Running Project)
Started by
lawrence
, Sep 19 2009 12:30 PM
749 replies to this topic
#557
: post #557")
lawrence
-
- Members
-

- 1,330 posts
One Carb Or Two?
Posted 27 April 2017 - 07:52 AM
Few bits and bobs done last night. I was bored so went in the garage after work.
Pulley cut down
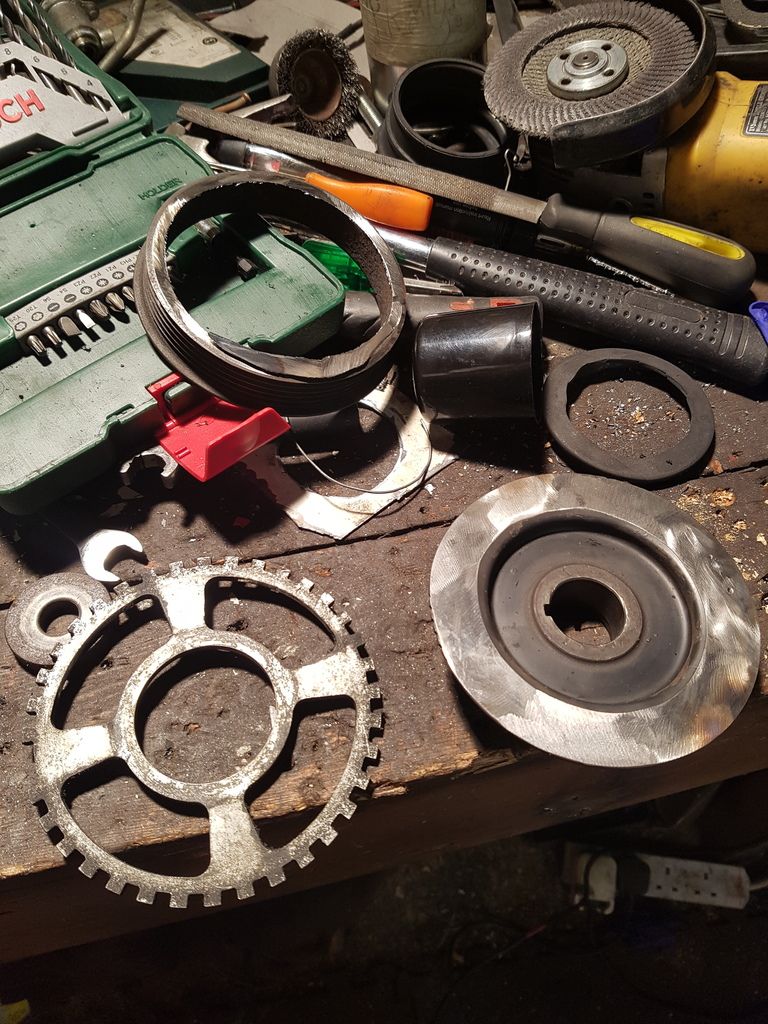
And welded on the trigger wheel
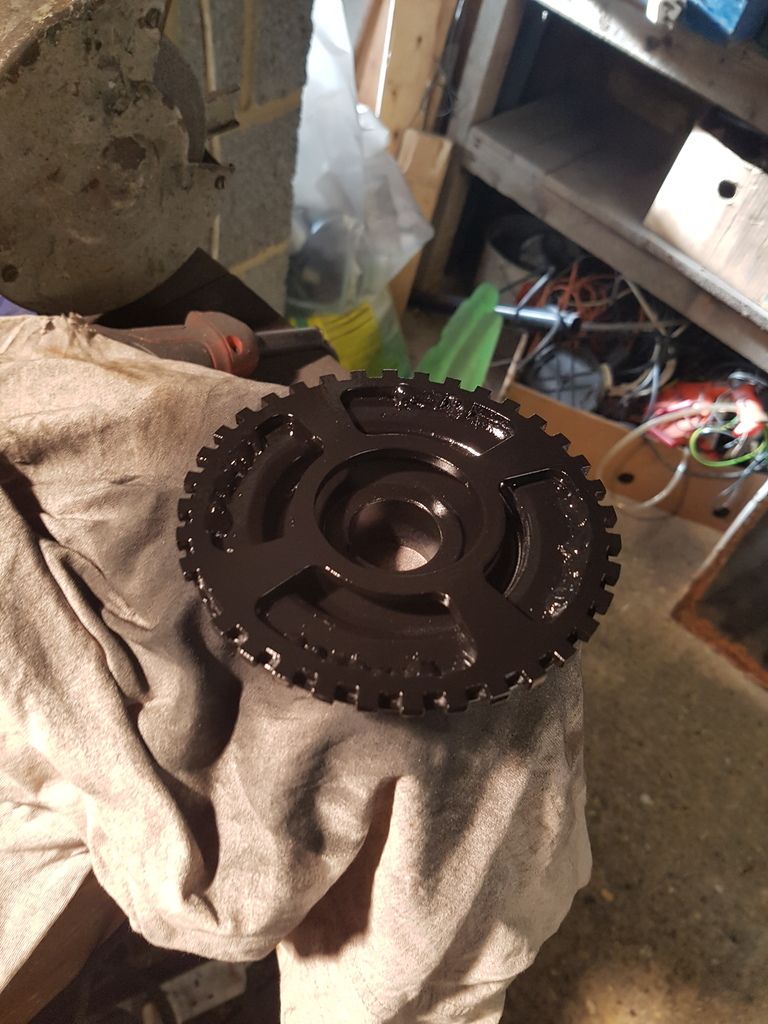
It's taken down the rotating mass slightly as well as moved the trigger wheel inboard the wheel arch. I will need to make a new bracket for the hall sensor but that's not difficult as I wanted a fully adjustable one to dial down the degrees.
Next I took the pulley and alternator steady off the engine in the car. Tried to get my head around fitting the spring loaded adjustor one however in the end I decided it was too complicated with not enough space
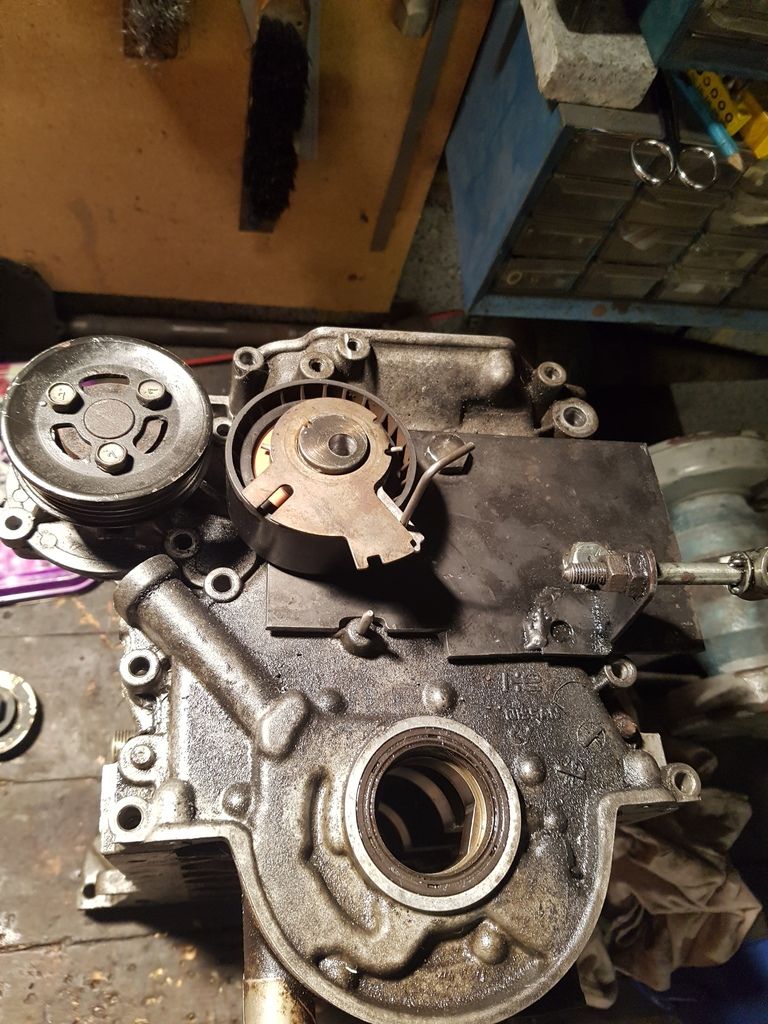
So in the end I've decided to go for a fixed pulley type as I know that is a working design.
I also need to redesign the adjustment part for the alternator and measure a new belt to correct size therefore I'll pop an engine roughly together again like before as it makes the measuring so much easier. It also lets me look at what lengths of belt are easily available incase I finish all the design off and find there's no belts that fit!
That's all folks
Lawrence
Pulley cut down

And welded on the trigger wheel

It's taken down the rotating mass slightly as well as moved the trigger wheel inboard the wheel arch. I will need to make a new bracket for the hall sensor but that's not difficult as I wanted a fully adjustable one to dial down the degrees.
Next I took the pulley and alternator steady off the engine in the car. Tried to get my head around fitting the spring loaded adjustor one however in the end I decided it was too complicated with not enough space

So in the end I've decided to go for a fixed pulley type as I know that is a working design.

I also need to redesign the adjustment part for the alternator and measure a new belt to correct size therefore I'll pop an engine roughly together again like before as it makes the measuring so much easier. It also lets me look at what lengths of belt are easily available incase I finish all the design off and find there's no belts that fit!
That's all folks
Lawrence
#558
lawrence
-
- Members
-
- 1,330 posts
One Carb Or Two?
Posted 29 April 2017 - 07:40 PM
Soooo. I had a night shift last night but somehow still awake today enough to function which is nice
Pulley bracket nicely trimmed down and also smoothed off the edges so itll hold its paint better

alternator bracket removed and primed

painted

timing cover ready to fit

painted alternator bracket and refitted

also cleaned up all the oily mess left from the leaky timing cover

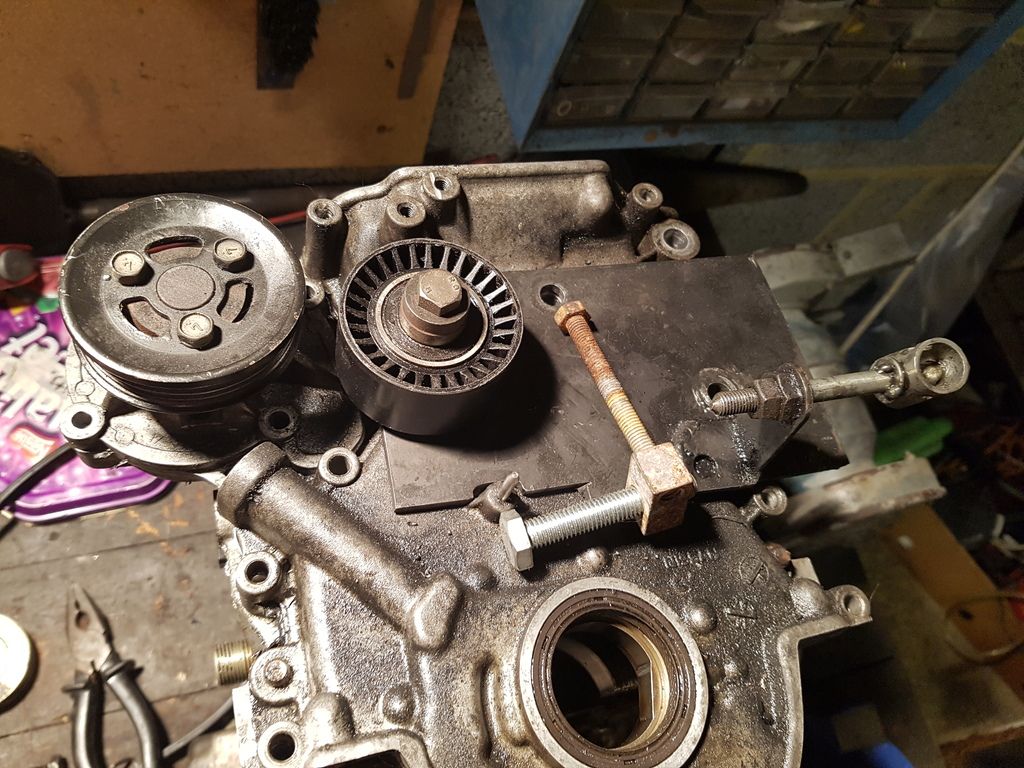
I had to make clearance for the bolt.

but as you can see its now very tight around the adjuster mount part.

plan tomorrow is to remove and reweld the bracket, that will give the clearance that I want
plently of clearance the pully end compared to before I trimmed the bracket

another one showing the deflection on the belt, got to fix this

That’s today, didn’t plan to work on her but felt surprisingly awake enough to work which was nice
Plan tomorrow will be to finish off the adjustment bracket and paint it. That will mean the alternator and all that jazz will be sorted
Lawrence
#559
lawrence
-
- Members
-
- 1,330 posts
One Carb Or Two?
Posted 30 April 2017 - 11:06 PM
Good morning people,
So the plan today was to get the alternator and all the stuff sorted and that’s been completed, took a while as you can see its all very over engineered however should add to the longevity of the build. However it does look good very now its all done!
Finishing the adjuster part

painty painty


All back together (also painted the frame rail)

Easy to adjust you just take the grill off and insert a spanner (oh and loosen the pivot bolt that’s locktited as well as loosening the nylock for the tensioner but putting your hand under the wing and don’t forget the 12mm the 14mm and the 17mm spanners!)

Still it does look good!
Next up.
Redid the front brake pipe protector

need to drill and weld some captive nuts for p clips however its too windy today for that
nice shiny shocks


Also attempted to modify the front arches. Drilled a hole that now needs welding up. Oops

Now at least I know they look best where the are now!
To do list:
NS front-
>New tie rod gaiter (need new ball joint splitter as current one has failed and bent sad days)
>New rebound buffer and bolt (lost them)
>torque up suspension correctly
>New drive flange bolts needed
>New brake pads
>Brake lines need new protectors fitted and P clipping securely
>Grease nipples
OS front
>Hall sensor mount needs fabricating
>Brake line P clips need welding
>New rebound buffer and bolt
>New brake pads
>Weld hole in wing
>Grease nipples
OS Rear
>Check bushes and knuckle joints
>Potentially replace donut
>Inspect and repaint Gaz shock (I hope is ok)
>Remove crappy camber bracket
>Put brakes back together correctly (See I told my girlfriend I can remember stuff sometimes!)
>Grease Nipples
NS
Ive been playing here today! I knew the radius arm is bad. Its been an MOT advisory on and off since ive owned her (8years!!)
Eww you dirty girl

bit better

Ive put it together and regreased it. The play has almost gone now they are greased but that’s not going to last, it needs replacing. Also the outer rubber had gone so its been open to the elements for a while

bit worse for wear that!

And these are whats going on, radius arm from spare subframe bought for the restoration that I cleaned up a while back all ready to fit. Also reclaimed knuckle joint from the same frame that I cleaned up and will now refit. Lastly ive got a newish donut cone wossit to go on that I bought from a member on here a few months ago that’s going on too.

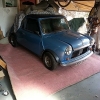
lastly my choice of shocks

The adjusters work on both the spax and Gaz, the blue one works but is non adjustable. Gaz one needs new rubber bushes and a paint. My hope is the OS shock is in working condition. If so ill repaint the both, fit new rubbers and refit them saving myself some money. Failing that ill fit the spax as I know they work. Or ill buy new rear gaz to match the fronts! Chices choices!
Lastly are these lowered shocks? I think they are


That’s all for now folks.
Im not planning on doing any mini bits next week as im back on placement at uni. Got 2 weeks left so have to churn out four 700 word essays so depending how that goes I may be in the garage!
Feel free to comment even if it’s a criticism!
Lawrence
#560
Ben_O
-

- Paint Doctor
-
- 9,781 posts
Mill Road Garage
- Location: Isle of Wight
Posted 04 May 2017 - 05:42 PM
what was for lunch?
#561
McMini 22
-
- Members
-
- 289 posts
Mini Mad
- Location: East lothian
Posted 04 May 2017 - 06:20 PM
what was for lunch?
Whatever it was it definitely needs bacon. Everything is better with bacon!
#562
lawrence
-
- Members
-
- 1,330 posts
One Carb Or Two?
Posted 04 May 2017 - 06:23 PM
Took me a moment to realise what you were referring too! I didn't know I had included that photo!
It was avacardo on toast with a drizzle of olive oil :) very tasty yet rather middle class!
It was avacardo on toast with a drizzle of olive oil :) very tasty yet rather middle class!
#563
lawrence
-
- Members
-
- 1,330 posts
One Carb Or Two?
Posted 09 May 2017 - 06:57 PM
Good evening people
Ive been doing some exhausting work today (so much pun)
So in order to remove the radius arm I had to take the zaust off
Then I decided why not do a bit of modding, ive got a whole selection of silencers and id like to do something more subtle with the exhaust bypass valve
All layed out on the drive

As you can see the cutout is fairly obvious, not only do I want it a little more subtle I would also like it to exit the back of the car to the valance. Plus I fancy a twin exhaust!

Not going centre as its too pimp my ride for me and doesn’t suit the car. Also don’t want the twin dtm bellowing out my presence unless I want it to
Cut up


and how it will look once its all welded back together

Hopefully that photo makes sense, basically the standard day to day exhaust will be the exit on the left. That will be with the perforated tube which I may offset to make it even quieter. Then when I want to make noise I activate the cutout and it goes straight through no silencing out of the right exit. But from the back it will look neat and tidy and apart from the strange looking silencer no one will be any the wiser!
So picking up gas tomorrow and lets see what I can create!
Onward to the radius arm

removed

swapping over the quadrant

And all back together

New knuckle joint (dab of grease inside cup), new suspension cone, cleaned up shock and stole the lower bush from the spax. All torqued up and greased also. No more play in the pin. That’s the NS rear sorted.
I will have a look as the OS rear tomorrow. Plan is to clean it up and inspect rubbers etc and fit the standard radius arm brakets also.
In case anyone is wondering I haven’t done anything brake wise but have bought some new parts.
Got some NOS front brake pads and NOS disks
Bear with for more updates. Also got the blue lupo im planning to mot and the sell (in any other projects section), that will hopefully make me a little profit and that along with being able to work Sundays again I should be able to make a good sized order from minispares. Its only for little things but itll help get more bits finished off
That’s all for now. Im looking forward to this new exhaust, should be fairly awesome!
Lawrence
#564
l_jonez
-
- Members
-
- 1,453 posts
One Carb Or Two?
- Local Club: south wales mini club
Posted 10 May 2017 - 07:37 PM
I like the concept of the exhaust, I'd be making the silencer like some bike exhausts and have the ability to dismantle it to get to the valve etc, assuming that it will all be within the silincer?
#565
lawrence
-
- Members
-
- 1,330 posts
One Carb Or Two?
Posted 10 May 2017 - 10:05 PM
Everything will be hidden inside the silencer. The cutout will be bolted to the back of it. I've got another idea to be able to adjust the standard exhaust flow but still thinking it through. I'd like the perforate tubes to be offset however want them adjustable. Just got to think up how now!
#566
benm
-
- Noobies
-
- 111 posts
Mini Mad
- Location: S.Wales
Posted 11 May 2017 - 07:13 PM
love the exhaust idea!
#567
lawrence
-
- Members
-
- 1,330 posts
One Carb Or Two?
Posted 17 May 2017 - 09:59 PM
Kinda wish I hadn’t started with this exhaust now! Taking me a lot longer than I would have thought and its still not done yet. It better look and sound bloody awesome if not ill be grumpy

so that’s the bypasslink pipe welded in.

welding back on the bits I cut off

slot cut

plate made

where it goes

as I left it Tuesday.

So bit of explanation, I am by no means an expert in exhaust systems and don’t pretend to be, I simply looked online at cut open silencers and made my own up!
The system has three options,
Standard silenced straight through perforated pipe

Perforated bypass pipe making the gasses go around the blockage

And on the left side of the silencer the straight through loud resonating pipe of over the top noise

So hopefully the new silencer will be a bit quieter than the old on, firstly its got packing that the one before didn’t, secondly the one before had its perforated section half blocked off by the 90deg bend and lastly I have the options to force the gas to take a detour around.
There we are. Flipping loads of welding but it should look alright in the end. Going to paint the backbox satin black as ive welded the stainless with mild wire.
Just got to sort the end where the valve attaches now, some days I wish I owned a plasma cutter for awkward shapes, would be so much easier than a grinder!
Update next Tuesday most likely, im helping my dad with his bikes tomorrow so may pop a few photos of them up. One of them has been a project almost as long as I am old!
Lawrence
#568
lawrence
-
- Members
-
- 1,330 posts
One Carb Or Two?
Posted 22 May 2017 - 02:38 PM
Time for an update,
Did a bit of work on my dads bike and made a shopping list for it also


carbs are gummed up to hell, even the sliders are sticking

when I took them apart the pilot jets were all completely blocked, explain why it didn’t start! And all the pistons were gummed shut.
Cleaned up and it ran sweet. However ive got an issue with the float needles weeping allowing excessing fuel throught and the engine overrevving up to 3k.
All apart again now and stripped down. Planning to pop them in the dishwasher to clean them up. More on bike next week perhaps.
Back to mini
New front disks fitted

may go back to the old ones, depends if I send them for a skim or not.
Adjustable radius brackets made

holes widened and ill weld on a thick washer when I get the camber etc measured accurately.
Onto the OS rear suspension
Dirty

not sure if the seals were broken

Knuckle rubber not doing its job

cleaned up


all back together

then it rained loads

so I stopped playing a did some shopping.
New brakes sorted. Wait and see for them
Oh and the OS rear GAZ shock works fine and the adjusters work too. Plus the rear cone looks alright too.
Plan tomorrow is sort out the front brake piperwork and weld some pclips on too. Bit of uni work in the afternoon too.
Lawrence
#569
lawrence
-
- Members
-
- 1,330 posts
One Carb Or Two?
Posted 23 May 2017 - 10:32 PM
Well time for todays bits of work. I didn’t get around to doing the front brake pipework, maybe ill do that tomorrow once ive done my uni work in the morning.
Decided to do bits on the front indicator mod.
Second unit made

ready to start measuring

holes prepped and surface rust removed

welded in


Yes they are simply tacked on in multiple area but they arnt going anywhere and im planning to seam seal the backs properly when I tackle the front end painting again.
Skim of filler


and refitted


So there we are, something a little different and a little more modern, ill take some photos of them lit up when I play around with front end wiring again.
That’s all for now. Need to sell blupo to raise some funds! Contemplating buying a microsquirt unit also as megasquirt is very complicated. Cant make my mind up yet.
Brakes tomorrow then, feel free to comment
Lawrence
#570
lawrence
-
- Members
-
- 1,330 posts
One Carb Or Two?
Posted 24 May 2017 - 06:52 PM
Hello again peoples.
So as I said today I will crack on with the brakes. Luckily the wind has dies down also allowing me to weld bits outside again!
This is the main reason im doing the brake lines again on the front,

the lines are close to the exhaust, sure its wrapped but I want them to be extra safe.
So found where I dumped them the other day

Redone the covering. Im out of 8mm old fuel hose so used some spare vacuum line this time. Its then covered by polyester braiding and then all secured with sections of heat shrink to look tidy.
Rubber lined Stainless P clips to hold the pipe nice and safely. Nuts welded to the subframe


Brake lines now suspended off the subframe, secured and wrapped to prevent damage

During this playing the new brake calipers arrived

looks like they both have machined stainless steel pistons so should last a while!
Degreased for paint

painting


Assistant helping me

So that’s the brakes pretty much done.
Waiting on the callipers to dry fully, tomorrow I may do another layer of paint on them and clean them up where paint got on the pistons and seals. Then I can fit them to the car to be bled sometime in the future. I have plenty of brake fluid in stock but Ill wait for the calipers to dry fully so it doesn’t ruin my hard work today.
So, onwards from brakes.
Radiator-
Needed a top bracket to hold the rad. Its got plenty of support from the bottom two mounts it sits in but it needs a top one just to steady it and make clearance for piperwork/clamps.
Cad template

cut out

welding up


trial fit before paint

nice bit of clearance


Holds the top of the radiator very firmly in place.
Primed

painted

Its refitted but I forgot to take a photo.
So that’s bit of cooling stuff done today. Bracket took a while as lots of measurements and tweaking needed.
Onward to fueling. Im on a roll here. Plus the welders out and ive got gas.
Those whom are keeping an eye know I had a few fuel leaks from my welded rail. Now I was planning on replacing it however I am now giving welding it another chance.
So rewelded with lots of power, going for function over form here as a last attempt


then primered up to show leaks/weeps


As you can see the inlet pipe is leaking around the join where the pipe goes on. I May need to extend the pipe down and see if it seals better.
On the outlet side there is weeping under where it previously had before. However I had to run the pump for a good 30second or so to get his moisture.
So removed again to add more slugs of weld. Also ran some more around a weeping area on the back that the photos don’t show.

This meant im getting there with the fueling. Im getting weeps and not sprays of fuel. Also the micra fuel pressure regulator is working fine.
Im planning to remount the fuel tank soon to properly plumb everything in, this will mean I can run the fuel pump for longer letting me look for fuel leaks.
So that’s today. Updates next week
Lawrence


1 user(s) are reading this topic
0 members, 1 guests, 0 anonymous users


