Jump to content


Photo

Started My Pro-mo Build


  • Please log in to reply
477 replies to this topic

#46 racerlike

racerlike

    Speeding Along Now

  • Members
  • PipPipPipPipPip
  • 417 posts

Posted 23 September 2010 - 09:16 PM

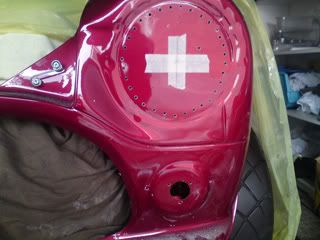
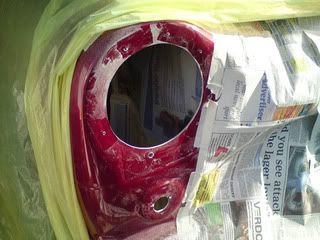
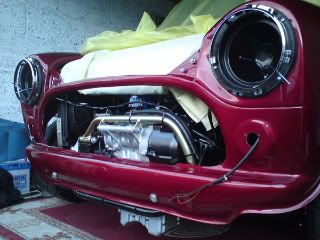
Started cutting up the front end to make way for the headlights and indicators. Took quite a while cutting and then slowly sanding it down with a Dremel but got there in the end. Now my skin should have chance to recover from the itchy carbon fibre dust rash. Didnt realise just how much dust there was going to be and it got everywhere despite the newspaper and blankets.
Posted ImagePosted ImagePosted Image

#47 Squares

Squares

    Passed Test

  • Noobies
  • PipPip
  • 34 posts

Posted 29 September 2010 - 04:22 PM

Hi, just to say its looking fantastic and I look forward to the progress reports.

>_< :lol:

Edited by Squares, 29 September 2010 - 04:23 PM.


#48 JamesGodfrey1992

JamesGodfrey1992

    Speeding Along Now

  • Members
  • PipPipPipPipPip
  • 422 posts
  • Location: West Lothian

Posted 07 October 2010 - 06:59 PM

looks absolutely amazing. :P

#49 racerlike

racerlike

    Speeding Along Now

  • Members
  • PipPipPipPipPip
  • 417 posts

Posted 12 October 2010 - 06:21 PM

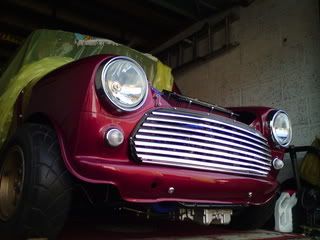
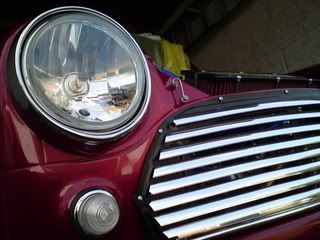
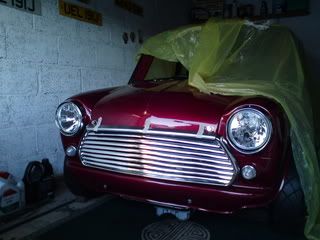
Headlights and indicators done which near enough finishes the wiring apart for a couple of bits. My idea of using some different headlight rims gave me a lot more work than expected. I wanted them mounted upside down - but that meant leaving the bowls the right way up for the locating screw - this in turn meant the retaining rims didnt locate on the back of the headlights so i had to make some little aluminium brackets to hold them in place.
Posted ImagePosted ImagePosted Image

#50 racerlike

racerlike

    Speeding Along Now

  • Members
  • PipPipPipPipPip
  • 417 posts

Posted 20 October 2010 - 06:11 AM

Wiring is coming along a treat now. Headlights, sidelights, tail-lights, brake lights, LED number plate lights and LED indicators all working fine. Horn and washer pump have been fitted and are also working.
Started wiring up my dash now using the 03 R6 clocks. Couldnt find the R1 clocks anywhere and i had been looking for ages but the two are near identical bar the tacho face.
Last item is the fuel pump and then I should be ready to see if she starts.
Getting interesting now

#51 racerlike

racerlike

    Speeding Along Now

  • Members
  • PipPipPipPipPip
  • 417 posts

Posted 24 April 2011 - 08:55 PM

some 6 months have passed since my last post so thought it was time for an update...

well its not finished - far from it in fact. A new job and moving to London with the mini left back home at my parents has pretty much knocked the project on the head since October. I need to plan my visits back home in advance so i dont waste valuable time on the project.

i was struggling to get the clocks wired so decided to put that to once side and concentrate on making my own dashboard instead which I have pretty much finished this weekend. Hours and hours spent cutting and measuring and then sanding and sanding some more. Then the same thing with the brackets to hold it all in place. Wouldn't do it again but I'm glad I've done it now that its finished!
Photo doesn't do it justice but im pretty pleased with the results.
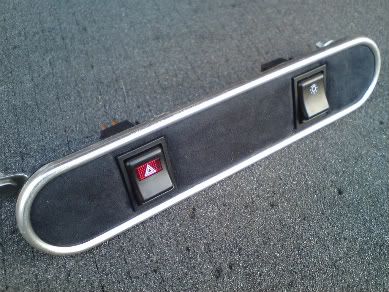
Liked the idea of black suede so thats the theme for the interior. Dash, parcel shelf and switch panel done.
Next on the list it to cover whats left of the rear seat area and then to make my own headlining
Posted ImagePosted Image

#52 Scholes2012

Scholes2012

    Mini Mad

  • Members
  • PipPipPipPip
  • 239 posts
  • Local Club: NONE

Posted 24 April 2011 - 09:27 PM

I know what it's like to make time for a project, it will be worth it in the end, would love to have a project like this, but money is tight everywhere these days.

#53 racerlike

racerlike

    Speeding Along Now

  • Members
  • PipPipPipPipPip
  • 417 posts

Posted 01 May 2011 - 05:24 PM

Spent the weekend cutting templates for covering the rear seat area and headlining.
Ordered my poly windows and a few other bits and pieces.
Wired up the fuel pump and turned the starter motor over a few times to check that side of things is working.

But I cannot get the Yamaha clocks to work. I'm using the Promotive loom mated to a custom mini loom. I think its either an earth or live feed issue as I've had the neutral light come on once and then the right indicator despite it not being connected to anything. I've got plenty of wiring diagrams and have followed them to the best of my ability (maybe I've misinterpreted them) and thought i was getting somewhere but now I just keep hitting a brick wall and not totally sure where I'm going wrong. Probably something simple... I hope

So if anyone has successfully wired in the 03 Yamaha clocks to a 5pw then please help!!!

#54 akaflash

akaflash

    Stage One Kit Fitted

  • Noobies
  • PipPipPip
  • 96 posts

Posted 01 May 2011 - 06:17 PM

do you not have the bike clock loom that just plugs into engine loom and clocks?

#55 SukiDawg

SukiDawg

    Speeding Along Now

  • Members
  • PipPipPipPipPip
  • 304 posts

Posted 02 May 2011 - 11:04 PM

Can't help you with the rev counter, but looking good there none the less..... :proud:

#56 racerlike

racerlike

    Speeding Along Now

  • Members
  • PipPipPipPipPip
  • 417 posts

Posted 06 May 2011 - 09:55 PM

all i have is the block connector that plugs into the clocks but only a short length of the accompanying wires from where they were chopped. whats making it hard is that all the wires are black! iguess i really need to get hold of the complete section of loom to the clocks and work back from there

#57 analogue_radio

analogue_radio

    Up Into Fourth

  • TMF+ Member
  • PipPipPipPipPipPipPipPipPip
  • 4,897 posts
  • Location: Melton Mowbray, UK.

Posted 08 May 2011 - 11:13 AM

Is the black suede actually black? Photos might have lightened the colour a bit, also, where is it from?

#58 racerlike

racerlike

    Speeding Along Now

  • Members
  • PipPipPipPipPip
  • 417 posts

Posted 08 May 2011 - 01:17 PM

yeh it is black though not true suede. i bought a load of it from ebay. pretty good quality and has a backing to it which stops the glue coming through.

#59 analogue_radio

analogue_radio

    Up Into Fourth

  • TMF+ Member
  • PipPipPipPipPipPipPipPipPip
  • 4,897 posts
  • Location: Melton Mowbray, UK.

Posted 09 May 2011 - 10:52 AM

Mind sending me a link to the Ebay shop? quite a fair few suedes for sale.

#60 racerlike

racerlike

    Speeding Along Now

  • Members
  • PipPipPipPipPip
  • 417 posts

Posted 15 May 2011 - 07:15 AM

Heres an ebay item listing for the stuff that I bought. I thought it was quite good for the price.
130484268390


0 user(s) are reading this topic

0 members, 0 guests, 0 anonymous users