


Mini Virgin Rebuild Of 83 Mayfair.
Started by
grahama
, May 22 2010 05:09 PM
1006 replies to this topic
#31

TopGearRules
-

- Members
-

- 421 posts
Speeding Along Now
Posted 06 June 2010 - 04:36 PM
Brilliant thread, ive enjoyed reading the progress being made! At this rate, you'll have a fantastic mint Mini in no time! Good luck
#32
grahama
-
- Members
-
- 2,442 posts
Up Into Fourth
- Location: Warrington
- Local Club: None in my area !!
Posted 14 June 2010 - 12:19 PM
Hi all,
bit of progress over the last few days. Wifey is complaining already that I have become obsessed with it and need to stop thinking about minis for a while and watch tv with her, errrr no, not when big brother is on anyway !!!
Anyway, have been cleaning up some bits and pieces whilst the rain stopped me going outside but when I did get out I undid the subframe mounts front and rear and tried to lift the shell off. I have daftly parked the mini in 6" of gravel for the duration and it has settled somewhat making getting underneath difficult so battery cable snipped off and steering rack bolts hammered through the bulkhead.
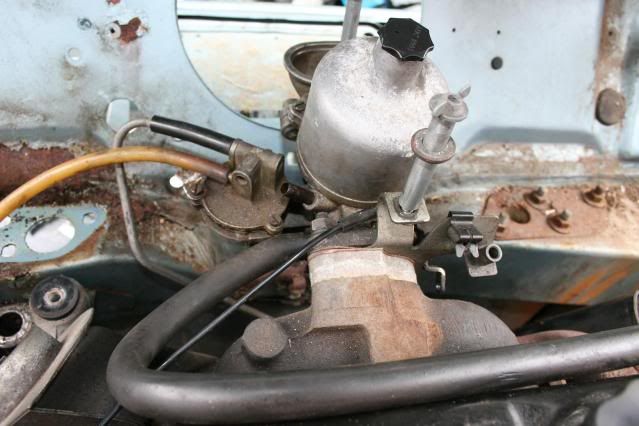
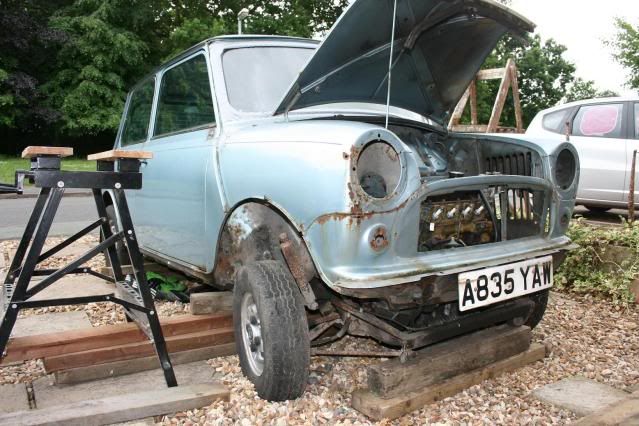
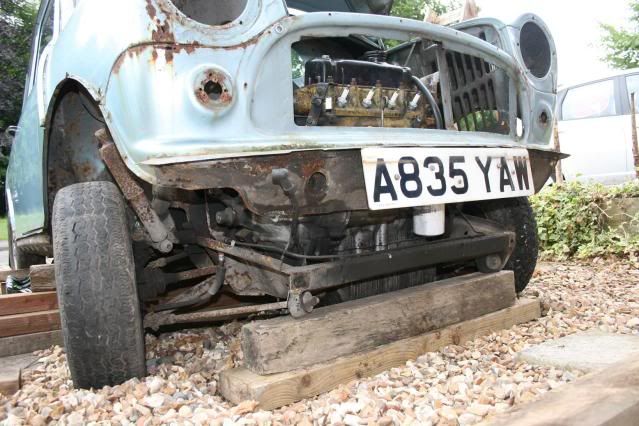
The carb was fouling the shell for the lift so it came off first, needs a good clean like most things but forgot about the dizzy cap and broke it off. A spring came off the body and I hope I don't have to buy a complete dizzy to replace now A quick lift at the front and up the shell came, blocked with wood and went for more.
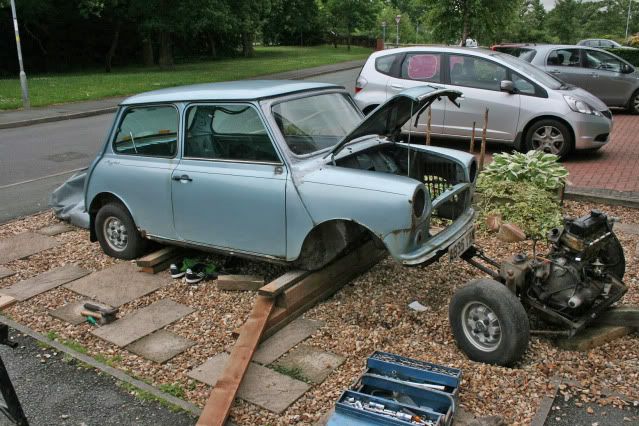
As you can see there is a workbench and a ladder the otherside of the car. If you work in H&S turn off now. I lifted the shell up at the front while my Matt slid a plank of wood under to hold it up, then he left for more revision. I pulled the subframe and engine out complete and lowered the shell back down onto some wood for now. Spit coming soon.
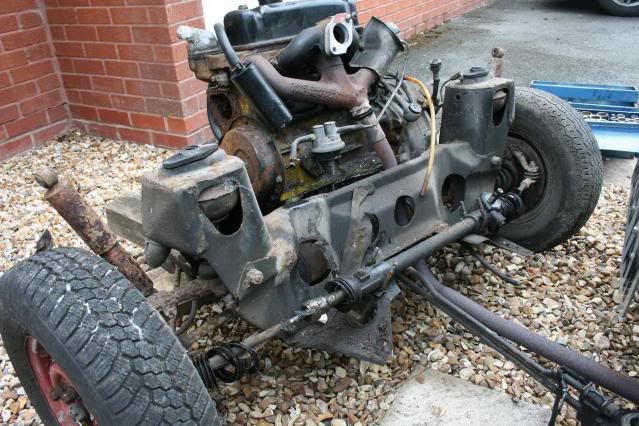

On first inspection the subframe looks in good condition and the engine dirty and a bit oily so hope no major problems there. The gear linkage is still attached and that's the next job, taking it off. The good condition stopped at the steering rack boots which were pretty shot and I hope the joints are ok, will clean up and inspect.
Thats all for now, got a welder from fleabay today for half price so pleased with that and then the bodywork should start soon. Will seperate the engine and subframe first though and store ready for repainting.
Hope you enjoy as much as I did.
Graham
bit of progress over the last few days. Wifey is complaining already that I have become obsessed with it and need to stop thinking about minis for a while and watch tv with her, errrr no, not when big brother is on anyway !!!
Anyway, have been cleaning up some bits and pieces whilst the rain stopped me going outside but when I did get out I undid the subframe mounts front and rear and tried to lift the shell off. I have daftly parked the mini in 6" of gravel for the duration and it has settled somewhat making getting underneath difficult so battery cable snipped off and steering rack bolts hammered through the bulkhead.
The carb was fouling the shell for the lift so it came off first, needs a good clean like most things but forgot about the dizzy cap and broke it off. A spring came off the body and I hope I don't have to buy a complete dizzy to replace now
A quick lift at the front and up the shell came, blocked with wood and went for more.As you can see there is a workbench and a ladder the otherside of the car. If you work in H&S turn off now. I lifted the shell up at the front while my Matt slid a plank of wood under to hold it up, then he left for more revision. I pulled the subframe and engine out complete and lowered the shell back down onto some wood for now. Spit coming soon.
On first inspection the subframe looks in good condition and the engine dirty and a bit oily so hope no major problems there. The gear linkage is still attached and that's the next job, taking it off. The good condition stopped at the steering rack boots which were pretty shot and I hope the joints are ok, will clean up and inspect.
Thats all for now, got a welder from fleabay today for half price so pleased with that and then the bodywork should start soon. Will seperate the engine and subframe first though and store ready for repainting.
Hope you enjoy as much as I did.
Graham
Edited by grahama, 14 August 2012 - 07:26 AM.
#33
MiniAlex
-

- Members
-
- 734 posts
One Carb Or Two?
- Location: Staffordshire
- Local Club: Mini's N Oatcakes
Posted 27 June 2010 - 05:19 PM
Any progress!??
#34
grahama
-
- Members
-
- 2,442 posts
Up Into Fourth
- Location: Warrington
- Local Club: None in my area !!
Posted 27 June 2010 - 09:43 PM
Hi,
update on progress, sorry been a while.
OK, I have been fixing the fleabay welder for starters !!! Half price but it needed a new liner, tip and regulator to get it going, but going it is. I have been doing some practicing on scrap before I dive onto the car and blow holes in it, (or should that be more holes !!!). The lad has done precious little with me but exams are at an end an he WILL start to get his xbox fingers dirty once again !!
The next job was to seperate the engine and subby for cleaning and inspection. A task made more difficult with the engine ballancing on planks of wood and I thought the sub would just slip over the engine, wrong !!

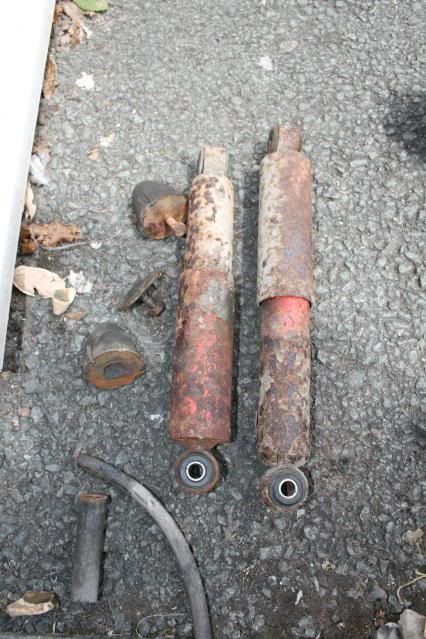
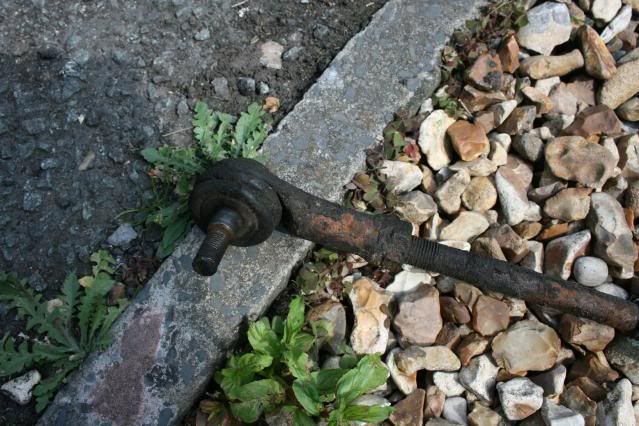
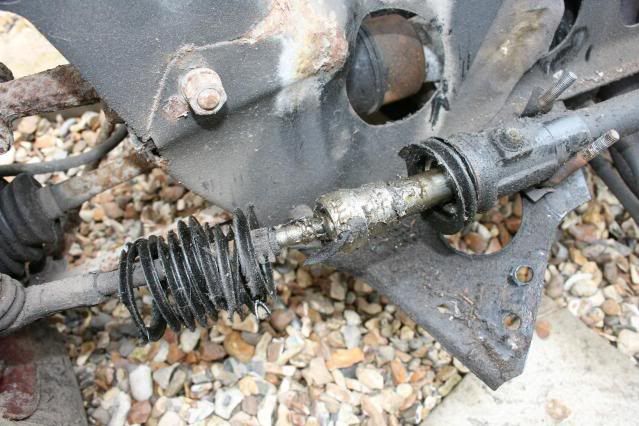
I started to strip the bits from the subframe and engine to make the exercise easier and founs some things shot like the dampers and track rod ends, and others perfectly fine and just needing a clean. Good advice from the members about taking some things off again.

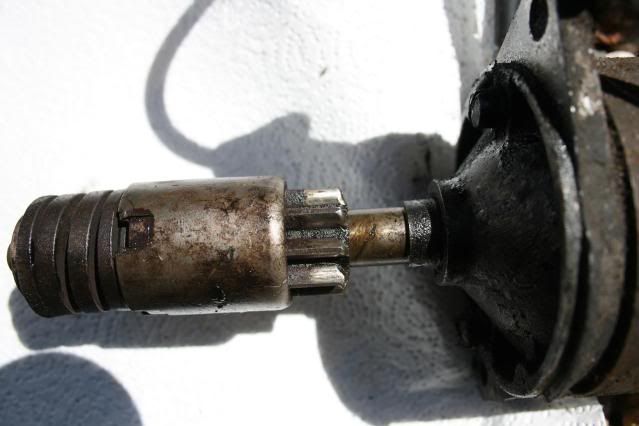
Old drum brakes off and once the steering parts were off the drive shafts just pulled out.
I didn't know the trumpets and cones seperated so I spent 20 mins fiddling, pushing, pulling and hammering, and then it seperated and out they popped. Will probably be replacing with hi los but cleaned them up just in case.
Anyway with the bits off, the front subby still wouldn't come off so next was the clutch and flywheel. Starter off, worn teeth, bell housing off to reveal the original 1983 clutch and flywheel, worn teeth !!
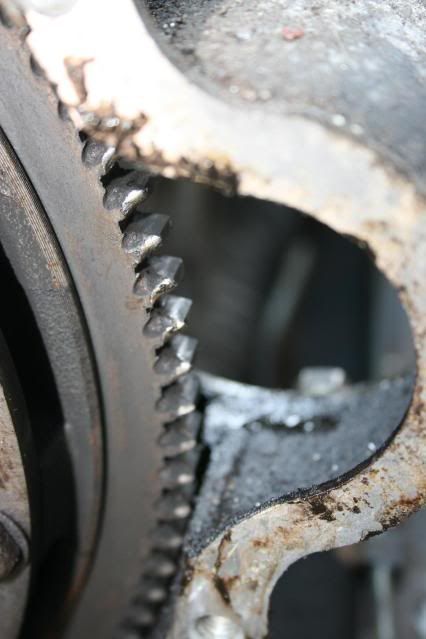
Found out the starter and flywheel dont match but thats a factory thing so deciding what to do about it when the refit comes around next year. I did some research and aparantly getting the flywheel off is sometimes a 2 day afair due to siezing on so with puller set up off I went turning the bolt.
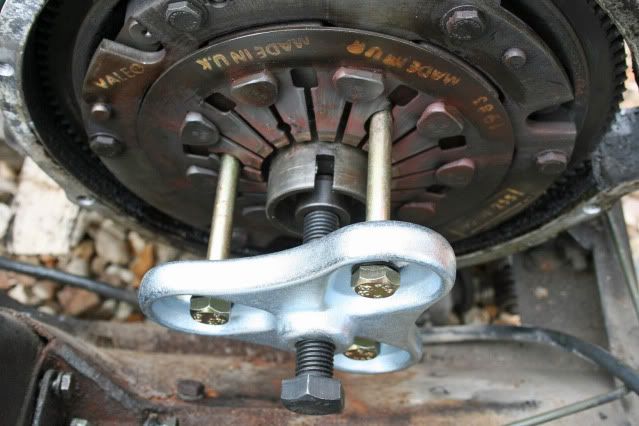
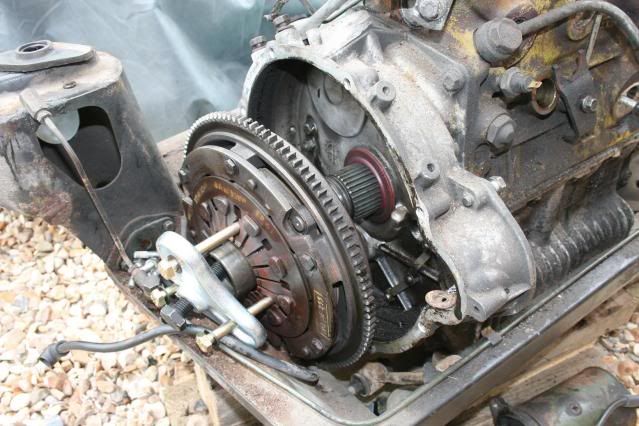
The puller was set parallel to the flywheel and surprisingly in 2 minutes it was off with a clunk no problems. The flywheel casing off next and I thought that would be it, subby off, wrong, the crank bolt still sticks out too far. The washers are my flywheel locking device, very low tech but does the job nicely.
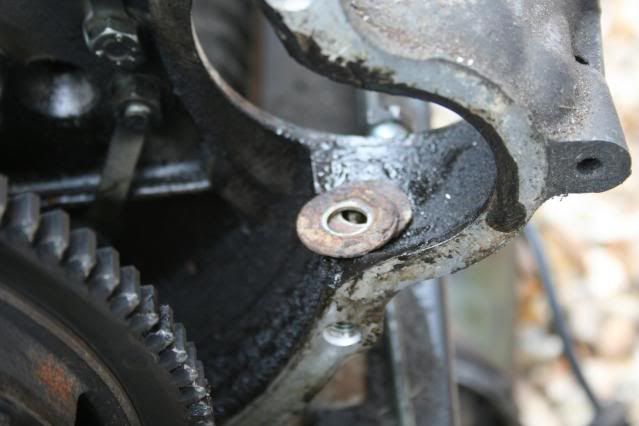
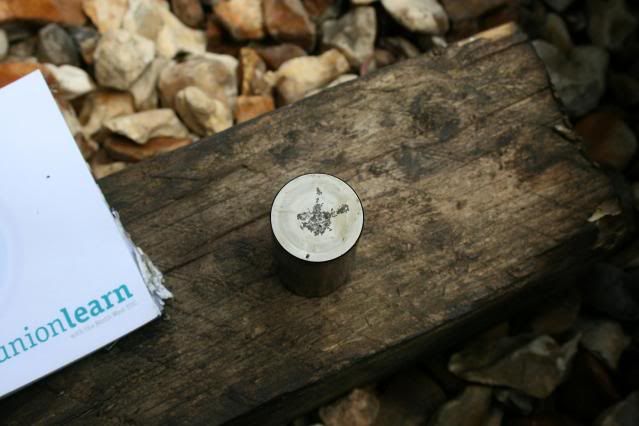
The exhaust manifold off then the inspection plate with the cylinder thing on, (don't know what that does by the way), thermostat housing off and then I wiggled it free. by the way, when removing the flywheel casing from the block make sure you have drained the oil first will need some new gravel as now swimming in engine oil !!
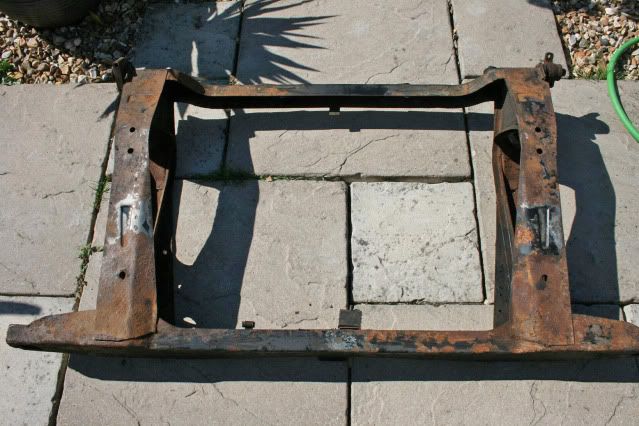
Engine free and cleaned up the front subby.
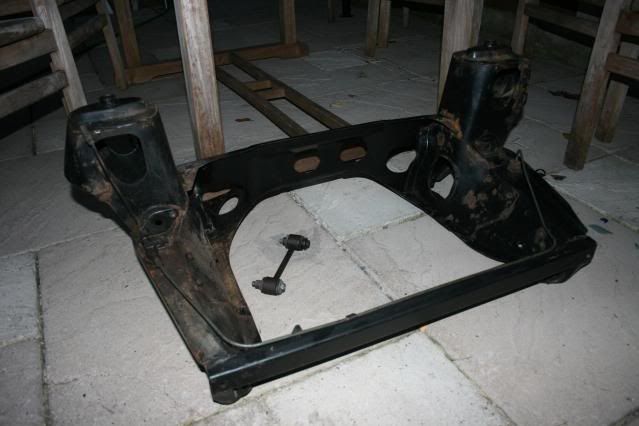
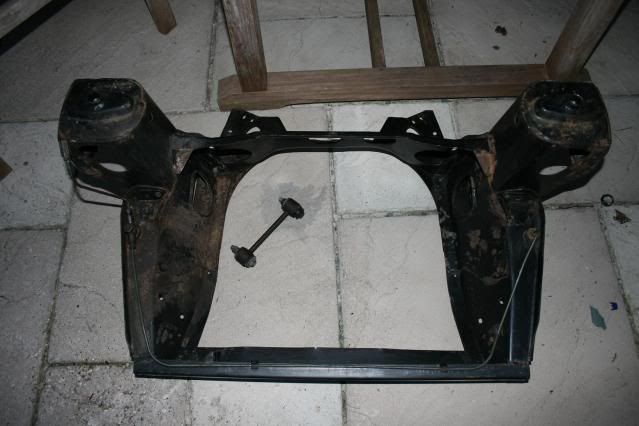
Came up very nicely after an initial clean and only some light surface rust so no problems there. It was covered in a bituman like substance which I think may have been Waxoil but not sure. Did a good job protecting it though and will be doing something similar on refit. Just wondering what colout to paint it now, probably white to contrast the royal blue the car will be.
Rear subby out tomorrow and then hopefully my spit is coming later in the week that my welder friend is knocking up for me. Hope you enjoyed,
Graham
update on progress, sorry been a while.
OK, I have been fixing the fleabay welder for starters !!! Half price but it needed a new liner, tip and regulator to get it going, but going it is. I have been doing some practicing on scrap before I dive onto the car and blow holes in it, (or should that be more holes !!!). The lad has done precious little with me but exams are at an end an he WILL start to get his xbox fingers dirty once again !!
The next job was to seperate the engine and subby for cleaning and inspection. A task made more difficult with the engine ballancing on planks of wood and I thought the sub would just slip over the engine, wrong !!
I started to strip the bits from the subframe and engine to make the exercise easier and founs some things shot like the dampers and track rod ends, and others perfectly fine and just needing a clean. Good advice from the members about taking some things off again.
Old drum brakes off and once the steering parts were off the drive shafts just pulled out.
I didn't know the trumpets and cones seperated so I spent 20 mins fiddling, pushing, pulling and hammering, and then it seperated and out they popped. Will probably be replacing with hi los but cleaned them up just in case.
Anyway with the bits off, the front subby still wouldn't come off so next was the clutch and flywheel. Starter off, worn teeth, bell housing off to reveal the original 1983 clutch and flywheel, worn teeth !!
Found out the starter and flywheel dont match but thats a factory thing so deciding what to do about it when the refit comes around next year. I did some research and aparantly getting the flywheel off is sometimes a 2 day afair due to siezing on so with puller set up off I went turning the bolt.
The puller was set parallel to the flywheel and surprisingly in 2 minutes it was off with a clunk no problems. The flywheel casing off next and I thought that would be it, subby off, wrong, the crank bolt still sticks out too far. The washers are my flywheel locking device, very low tech but does the job nicely.
The exhaust manifold off then the inspection plate with the cylinder thing on, (don't know what that does by the way), thermostat housing off and then I wiggled it free. by the way, when removing the flywheel casing from the block make sure you have drained the oil first
will need some new gravel as now swimming in engine oil !!Engine free and cleaned up the front subby.
Came up very nicely after an initial clean and only some light surface rust so no problems there. It was covered in a bituman like substance which I think may have been Waxoil but not sure. Did a good job protecting it though and will be doing something similar on refit. Just wondering what colout to paint it now, probably white to contrast the royal blue the car will be.
Rear subby out tomorrow and then hopefully my spit is coming later in the week that my welder friend is knocking up for me. Hope you enjoyed,
Graham
#35
JonnyBMX
-

- Members
-
- 865 posts
One Carb Or Two?
- Location: Bedfordshire
- Local Club: Rebels
Posted 01 July 2010 - 11:58 PM
looks really good man, good luck with it all hope it comes good in the end, shall keep an eye out 
#36
grahama
-
- Members
-
- 2,442 posts
Up Into Fourth
- Location: Warrington
- Local Club: None in my area !!
Posted 06 July 2010 - 07:36 PM
Hi all,
Update of progress, nearly up to the scary bodywork stage.
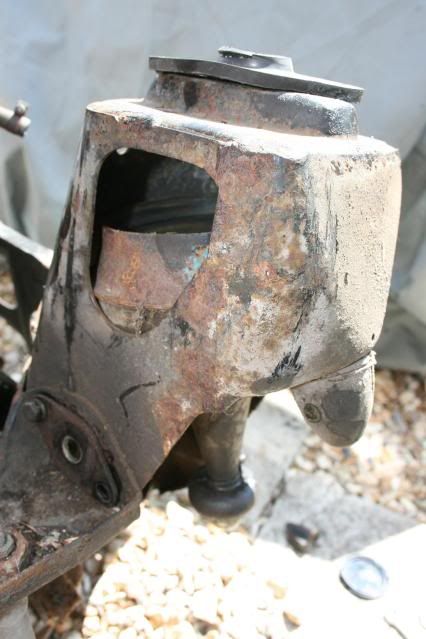
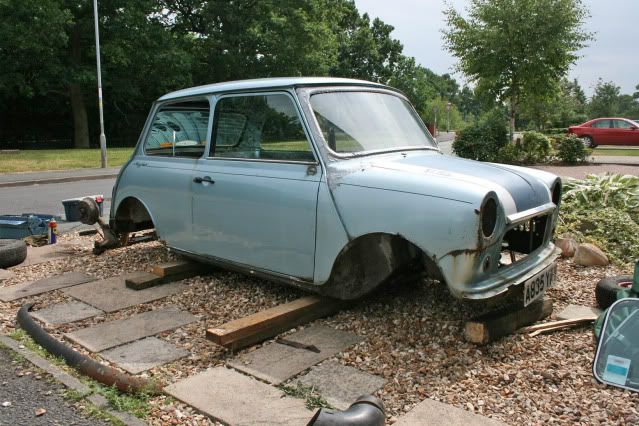
Rear subframe came out easily as I had got the bolt nasties out of the way a week or so ago so I simply lifted up the back end whilst Matt slid wood under to support the mini. Slid it out and on first inspection not too bad.

The mini ended up like this after and stayed for a week like this
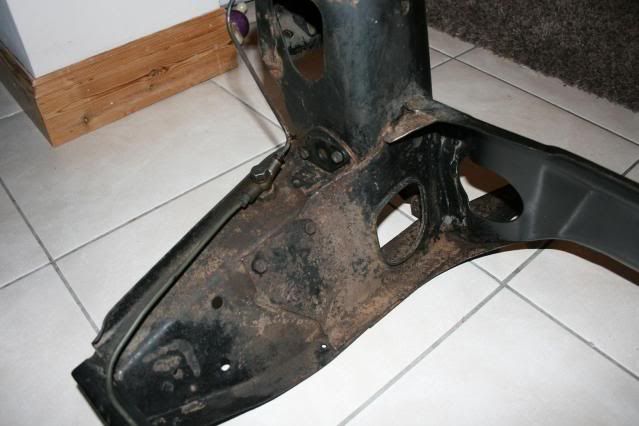
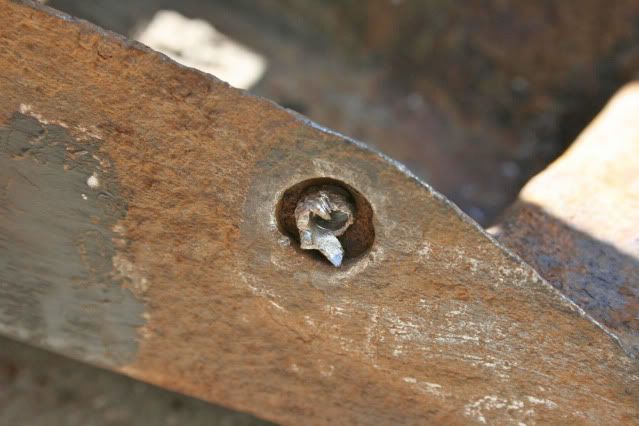
Stripping the subframe also had it’s problems with seized bolts and the radius arms certainly put up a fight and one needed grinding off unfortunately.
I cleaned the subframe up with white spirit and brake cleaner and found a little patch of thinning metal which will need a new section on before the refit.

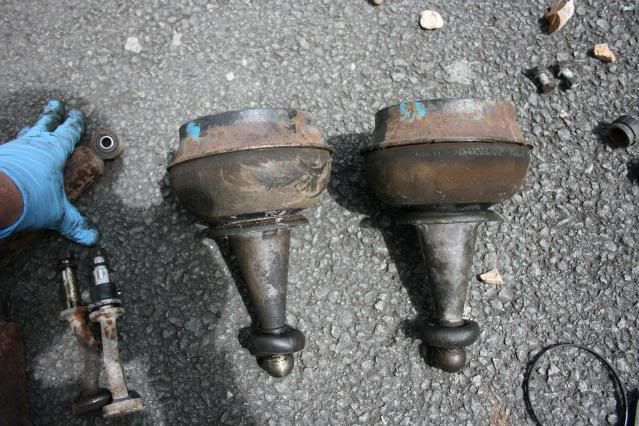
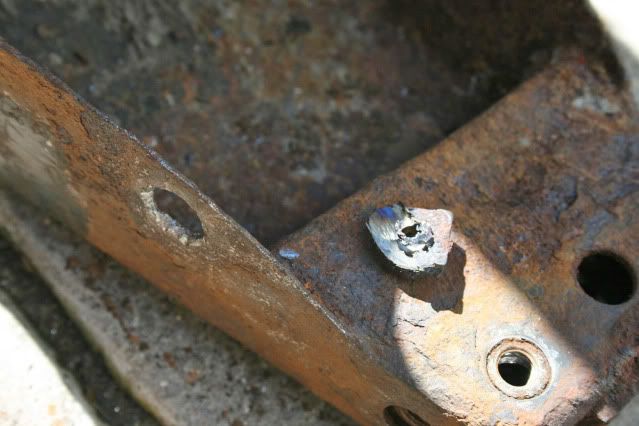
Once off the radius arms looked in good condition. The bearing and brass bush looked fine, no notchy turning and a slight drag as required. The knuckle on one cone needs replacing and so do the rubber cones, but the trumpets will be replaced with HiLos so Fleabay for the cones.
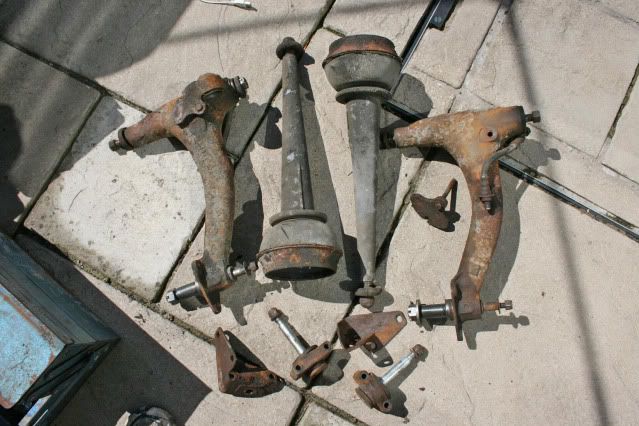
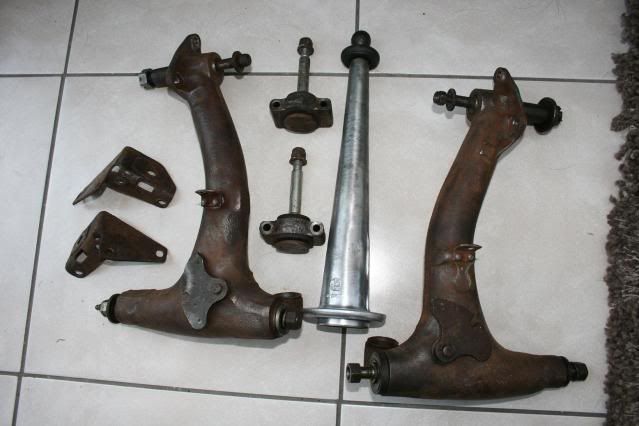
Before and after. Only one trumpet as one cone is putting up resistance and welded itself to the trumpet so ongoing in that respect.
OK, onto the dreaded bodywork, and as a beginner welder, quite frightening. I have spent a fair bit already on the car with purchase and bits for the refit and need it to work or my wife will leave me. Lol.
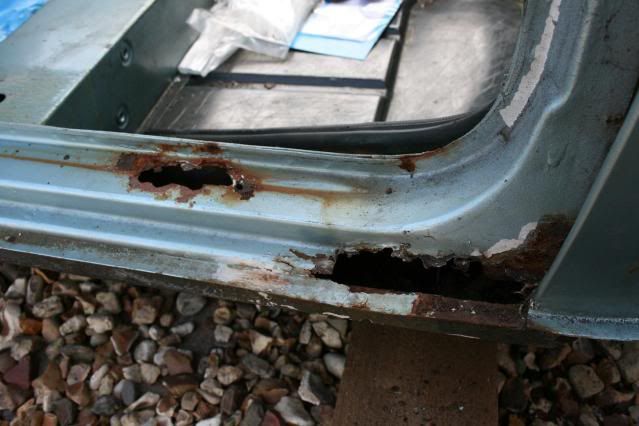
I hacked away at the OS doorstep and it has had it, and from the look inside so have the inner and outer sills. I already knew the wings had had it and the front panel ends and the end scuttles, but then I did some digging in the rear.
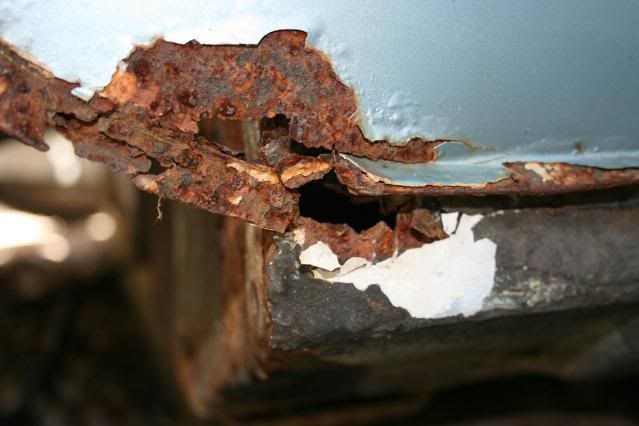
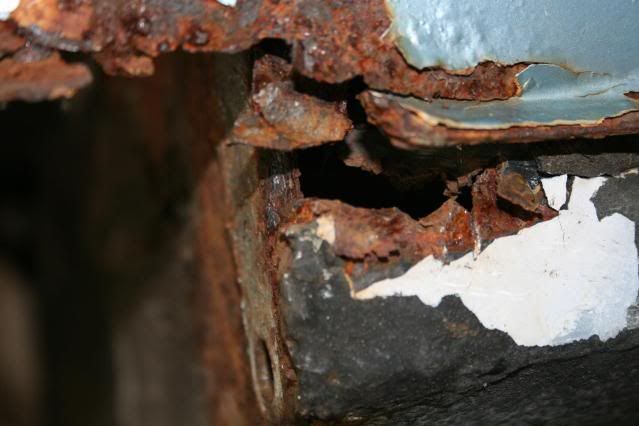
This is worrying me a bit as the rot here has gone near the rear subframe mount and I don’t want to mess things up if there is no good metal to weld to.
On a brighter note Matt was out again giving me a lift with the doors
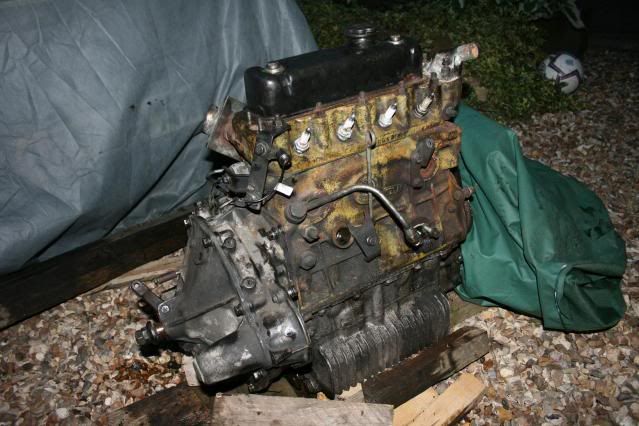
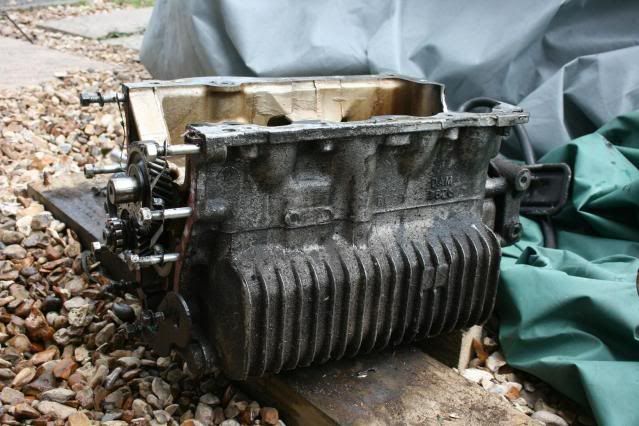
All stripped ready for the welding and grinding. I set about moving the engine too to take it down into head, block and transmission for storage.

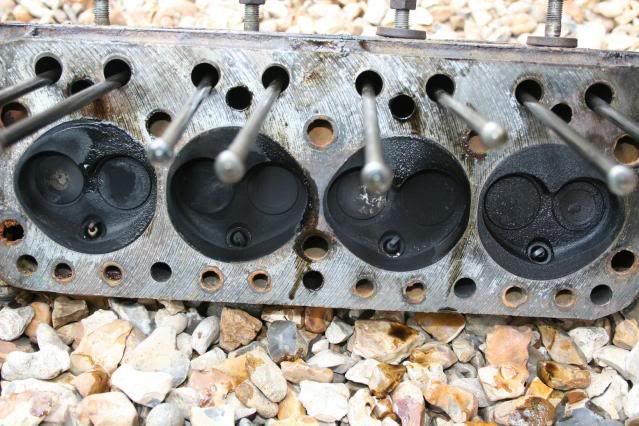
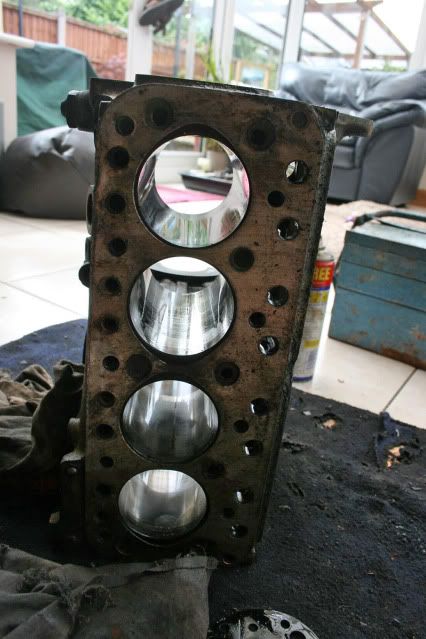
All going well and the head was a little sooty but ok, the valves will need a clean but all worked before the strip so hopefully still will.
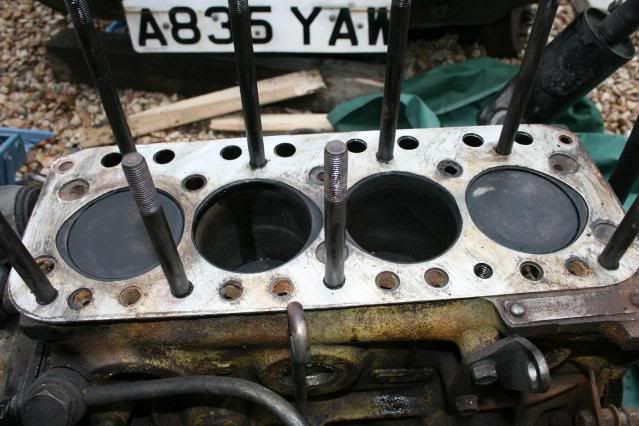
Top of pistons look fine too from my beginner point of view but I will be asking questions to make sure. The problem I have is separating the block from the transmission which is stuck fast.
Oh well tomorrow is another day....
Graham and Matt, (this time) !!
Update of progress, nearly up to the scary bodywork stage.
Rear subframe came out easily as I had got the bolt nasties out of the way a week or so ago so I simply lifted up the back end whilst Matt slid wood under to support the mini. Slid it out and on first inspection not too bad.
The mini ended up like this after and stayed for a week like this
Stripping the subframe also had it’s problems with seized bolts and the radius arms certainly put up a fight and one needed grinding off unfortunately.
I cleaned the subframe up with white spirit and brake cleaner and found a little patch of thinning metal which will need a new section on before the refit.
Once off the radius arms looked in good condition. The bearing and brass bush looked fine, no notchy turning and a slight drag as required. The knuckle on one cone needs replacing and so do the rubber cones, but the trumpets will be replaced with HiLos so Fleabay for the cones.
Before and after. Only one trumpet as one cone is putting up resistance and welded itself to the trumpet so ongoing in that respect.
OK, onto the dreaded bodywork, and as a beginner welder, quite frightening. I have spent a fair bit already on the car with purchase and bits for the refit and need it to work or my wife will leave me. Lol.
I hacked away at the OS doorstep and it has had it, and from the look inside so have the inner and outer sills. I already knew the wings had had it and the front panel ends and the end scuttles, but then I did some digging in the rear.
This is worrying me a bit as the rot here has gone near the rear subframe mount and I don’t want to mess things up if there is no good metal to weld to.
On a brighter note Matt was out again giving me a lift with the doors
All stripped ready for the welding and grinding. I set about moving the engine too to take it down into head, block and transmission for storage.
All going well and the head was a little sooty but ok, the valves will need a clean but all worked before the strip so hopefully still will.
Top of pistons look fine too from my beginner point of view but I will be asking questions to make sure. The problem I have is separating the block from the transmission which is stuck fast.
Oh well tomorrow is another day....
Graham and Matt, (this time) !!
#37
minimissions
-

- Members
-
- 3,427 posts
Up Into Fourth
- Location: North West
- Local Club: M.M.O.C
Posted 07 July 2010 - 01:06 PM
Good you have a really good shell/basis for a good project. Do you have any plans for what it might look like at the end original or modded? info?
#38
grahama
-
- Members
-
- 2,442 posts
Up Into Fourth
- Location: Warrington
- Local Club: None in my area !!
Posted 07 July 2010 - 05:22 PM
Hi,
A good shell, mostly, but the rear rot on the last post is not what I expected but have already thought of a way to keep all lined up when replacing this section of the heelboard.
As for the finished article it will stay blue, but royal blue and a white roof and engine. The usual minilights but the engine will have to remain standard at the moment as it's for my lad's 17th present !! As long as it's safe and rust free and goes he can mod it when he gets older and earns some money
Anyway the finish seems a long way off at the mo so some recent progress engine wise.
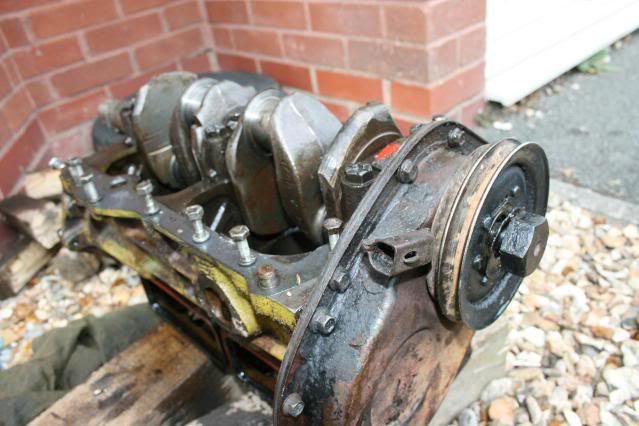
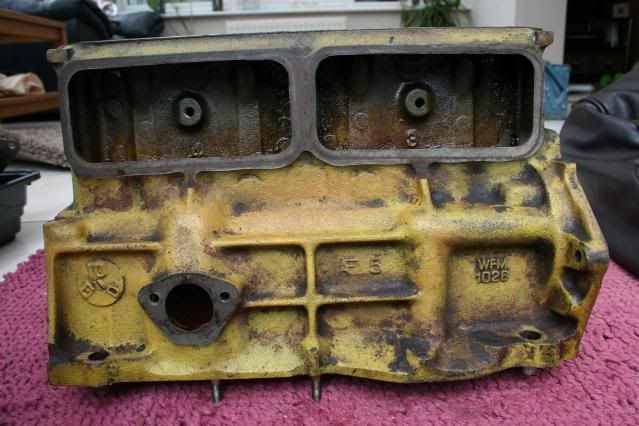
Now splitting these took a while. All bolts undone etc but I had to resort to a block of wood and a hammer which I knocked liberally around the block to try and free up the two halve. No joy so left it and read posts to try to see how to do it. Some suggested hanging the block and using the weight of the gearbox to aid splitting. I made a jig out of wood to hang the block from and as I picked up the tapered end of the crank off it came, only an hour wasted !!!
Less in here than I expected which is a good job really as I found some extra metal bits inside so a stripdown will have to be done, may aswell seeing as though it's accessable.

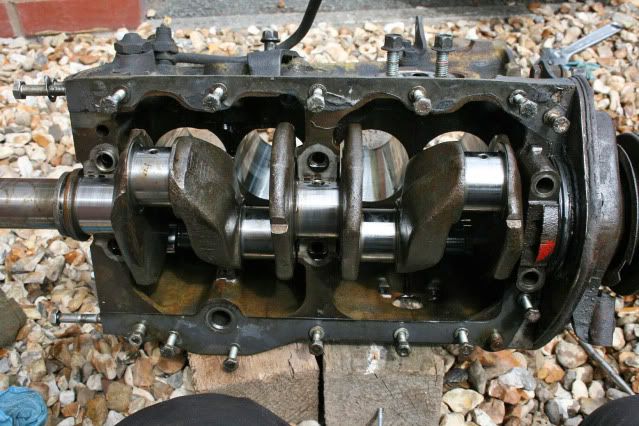
The flanges on the crank have some surface rust as the car was sat for a while but the journals are shiny and mark free so a light wet n dry should sort it all out.
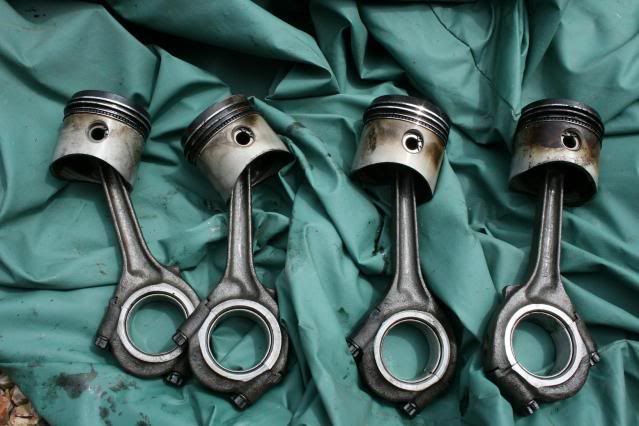
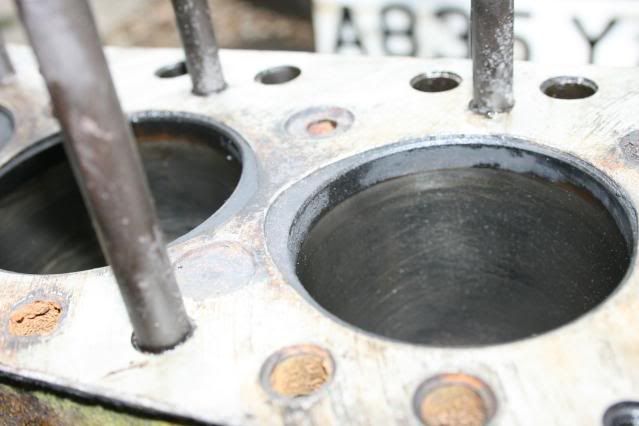
The bores are smooth with a small lip at the top and the pistons soty like the head but they will clean up when I get round to it. A hone and polish will sort the bores out and some new rings for the pistons once cleaned, although they look reasonable as do the big end shell bearings.
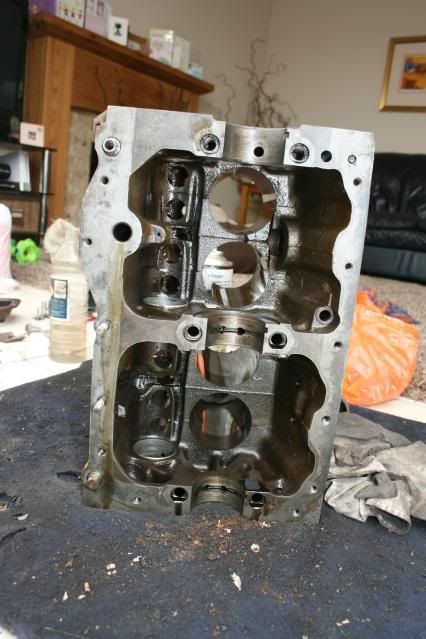
All stripped except two stuborn bolts and two plug things from the gearbox mating side but looks good. Cleaned it up in the living room as it was raining outside to the absolute delight of my good lady wife who came in at the oil on the floor stage !!! We have tiles so not as bad as it sounds but still got an ear bending lol.
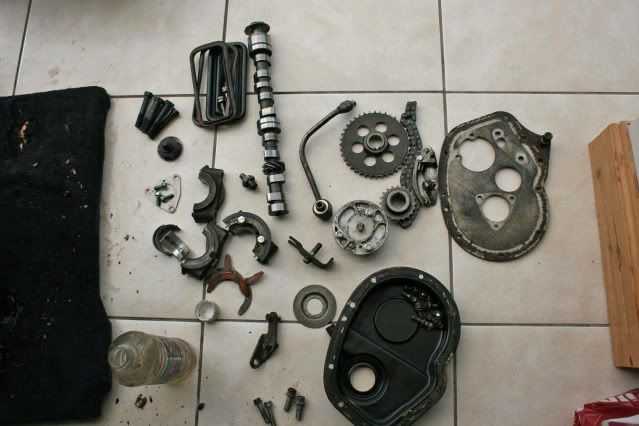
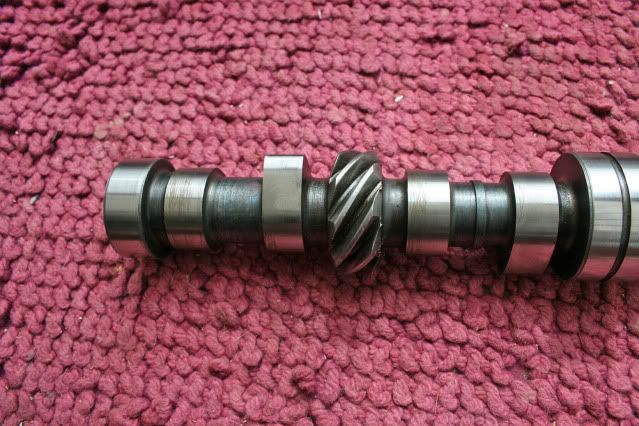
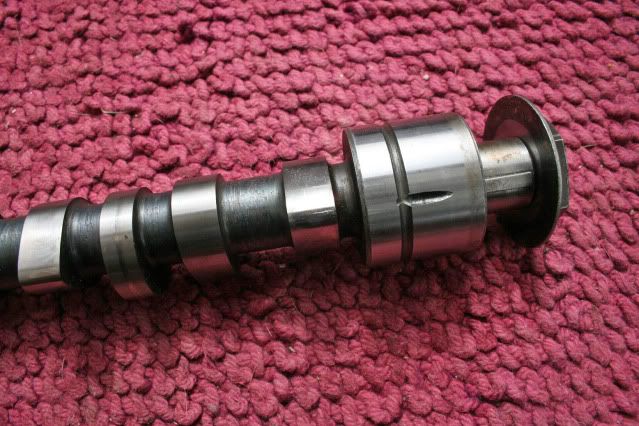
The bits cleaned up fine as you can see but the cam has some marks on the lobes at the oil pump end and pitting on the timing end lobe. This is from the pitted cam follower I took out so a regrind of the cam will be needed and some new followers.

All done and floor cleaned up, gearbox tomorrow hopefully.
Blimey I sounded like I knew what I was talking about for a minute there, but all I have is shiny bits to go back in and a few pictures !! Learning all the time though.
Graham
A good shell, mostly, but the rear rot on the last post is not what I expected but have already thought of a way to keep all lined up when replacing this section of the heelboard.
As for the finished article it will stay blue, but royal blue and a white roof and engine. The usual minilights but the engine will have to remain standard at the moment as it's for my lad's 17th present !! As long as it's safe and rust free and goes he can mod it when he gets older and earns some money
Anyway the finish seems a long way off at the mo so some recent progress engine wise.
Now splitting these took a while. All bolts undone etc but I had to resort to a block of wood and a hammer which I knocked liberally around the block to try and free up the two halve. No joy so left it and read posts to try to see how to do it. Some suggested hanging the block and using the weight of the gearbox to aid splitting. I made a jig out of wood to hang the block from and as I picked up the tapered end of the crank off it came, only an hour wasted !!!
Less in here than I expected which is a good job really as I found some extra metal bits inside so a stripdown will have to be done, may aswell seeing as though it's accessable.
The flanges on the crank have some surface rust as the car was sat for a while but the journals are shiny and mark free so a light wet n dry should sort it all out.
The bores are smooth with a small lip at the top and the pistons soty like the head but they will clean up when I get round to it. A hone and polish will sort the bores out and some new rings for the pistons once cleaned, although they look reasonable as do the big end shell bearings.
All stripped except two stuborn bolts and two plug things from the gearbox mating side but looks good. Cleaned it up in the living room as it was raining outside to the absolute delight of my good lady wife who came in at the oil on the floor stage !!! We have tiles so not as bad as it sounds but still got an ear bending lol.
The bits cleaned up fine as you can see but the cam has some marks on the lobes at the oil pump end and pitting on the timing end lobe. This is from the pitted cam follower I took out so a regrind of the cam will be needed and some new followers.
All done and floor cleaned up, gearbox tomorrow hopefully.
Blimey I sounded like I knew what I was talking about for a minute there, but all I have is shiny bits to go back in and a few pictures !! Learning all the time though.
Graham
#39
Junior Mini
-
- Members
-
- 313 posts
Speeding Along Now
Posted 07 July 2010 - 10:33 PM
How did you get away with that! 
If I cleaned a block within 10 paces of the house i'd be sleeping in the Mini!
If I cleaned a block within 10 paces of the house i'd be sleeping in the Mini!
#40
grahama
-
- Members
-
- 2,442 posts
Up Into Fourth
- Location: Warrington
- Local Club: None in my area !!
Posted 08 July 2010 - 08:07 AM
I sneak the bits in when she is out at work and because I converted the garage to an office for her then I sort of get away with it !! However, when she came home and saw the oil smudges on the tiles and me up to my elbows covered in it she did give me an ear bending.
Today is another day and when she goes out the gearbox will be sneaked in and cleaned up. She'll love it when it's all done and leaking oil on the drive not the lounge floor !!!
Graham
Today is another day and when she goes out the gearbox will be sneaked in and cleaned up. She'll love it when it's all done and leaking oil on the drive not the lounge floor !!!
Graham
#41
Timty
-
- Members
-
- 848 posts
One Carb Or Two?
- Location: Up North
- Local Club: S.U.N.M.C.
Posted 08 July 2010 - 08:30 AM
I'm really enjoying watching you learning as you go along (gives me a bit of confidence) keep up the good work!
Tim
Tim
#42
grahama
-
- Members
-
- 2,442 posts
Up Into Fourth
- Location: Warrington
- Local Club: None in my area !!
Posted 08 July 2010 - 09:05 AM
Hi,
Big learning curve for me but the best thing I have done in ages. I have a friend who can show me how to put the engine back together if i get mixed up but the gearbox and bodywork are all mine. Never welded before, (except for a few weeks in an apprenticeship), and to be honest it is worrying me a little, but onward and upward, I'll get there with some practice.
Glad you are enjoying the thread and ask away with any questions as long as I have got to that stage !!! How along the mini route are you??
Graham
#43
mk3cortina
-

- Members
-
- 677 posts
Super Mini Mad
Posted 08 July 2010 - 10:02 AM
this is what i like to see, getting really stuck into it. just be careful that no dodgy scrap guys/pikeys dont see it and just lift the shell away off your drive!
#44
matt2871
-

- Noobies
-
- 1 posts
Starting My Mini Up
Posted 09 July 2010 - 02:19 PM
Hi There,
Just got myself a 1985 ritz in a little bit worse condition than yours, but reading through your thread cant wait to get in amoungst it!!
started off a little overwelmed by it all, but decided to break it up into sections like you and go from there....
great thread, and look forward to the next update..
#45
mk1john
-

- Noobies
-
- 55 posts
Stage One Kit Fitted
Posted 09 July 2010 - 08:52 PM
Hi mate
just finished reading your topic great work, it should be a nice car when its done, interior looks really nice.
In answer to your question on crank regrind
price for crank regrind, new shells, all new gaskets and s/h rod was £192.83.
Gearbox was just cleaned and checked, looked to be in good shape, so just pressed it back into service. Just hope it lasts for a while as i will be rebuilding it at a later date when funds allow as third is a bit iffy.
keep up the great work


0 user(s) are reading this topic
0 members, 0 guests, 0 anonymous users


