Jump to content


Photo
- - - - -

Mini Virgin Rebuild Of 83 Mayfair.


  • Please log in to reply
1006 replies to this topic

#976 grahama

grahama

    Up Into Fourth

  • Members
  • PipPipPipPipPipPipPipPipPip
  • 2,442 posts
  • Location: Warrington
  • Local Club: None in my area !!

Posted 09 May 2016 - 07:00 PM

Hi all,


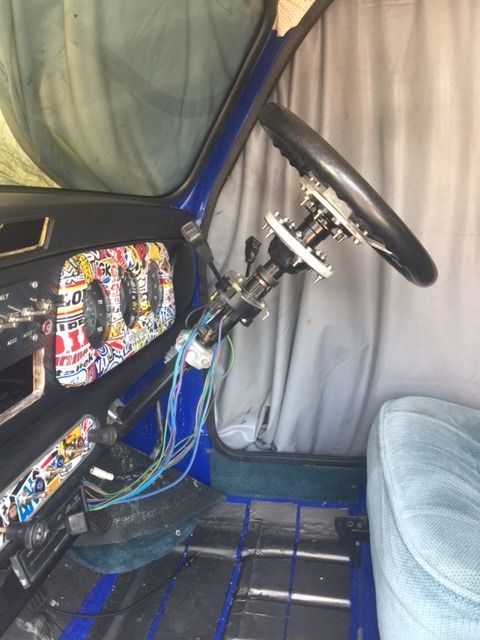
Since last time I have moved the wires for the fuse box inside after stripping the mid section of the loom.  It looks messy but I know what everything is, honest !


2016-05-05%2017.41.51.jpg?raw=1


Had a nice delivery the other day,  switches, lamps, wire all for the dash build.  So off I went organising the dash to accept the new switches and lamps.  Much time, swearing and rebating later I had this.


2016-05-05%2017.38.46.jpg?raw=1


2016-05-05%2017.39.49.jpg?raw=1


2016-05-05%2017.40.20.jpg?raw=1


2016-05-05%2017.40.38.jpg?raw=1


Very pleased with myself I popped out to the mini to see it in place. Didn't fit !!  My dash rail gap is 10mm narrower one side and also the switches and lamps were too close to the edge anyway for it to slot in,  ahhhhhhhhhh !!  This resulted in


2016-05-06%2013.37.10.jpg?raw=1


2016-05-06%2013.40.09.jpg?raw=1


2016-05-06%2013.41.46.jpg?raw=1


But at least I know it fits ok now lol. I filled in the holes and rebated areas on the reverse with car body filler ready for the next go !!  And this was it


2016-05-07%2009.46.03.jpg?raw=1


Should have done this in the first place but I still need to put a couple of switches in the wooden area although the pic below hasn't got the switches moved yet.


2016-05-07%2009.45.47.jpg?raw=1


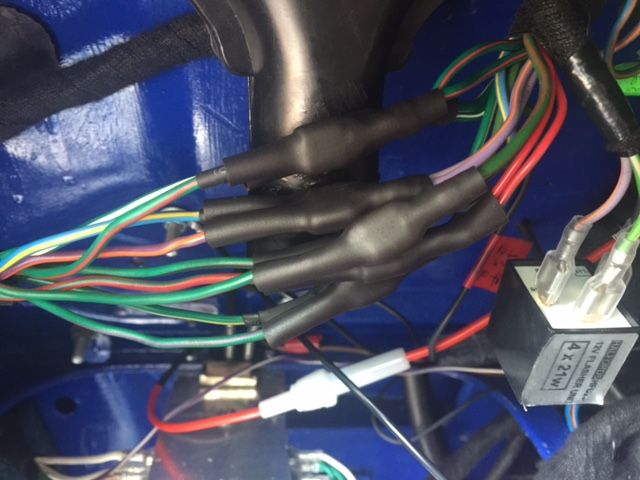
I made up a new loom with the delivery and a few relays for the new toggles, a days work but quite pleased with it.


2016-05-07%2009.47.56.jpg?raw=1


2016-05-07%2009.48.32.jpg?raw=1


2016-05-07%2009.48.59.jpg?raw=1


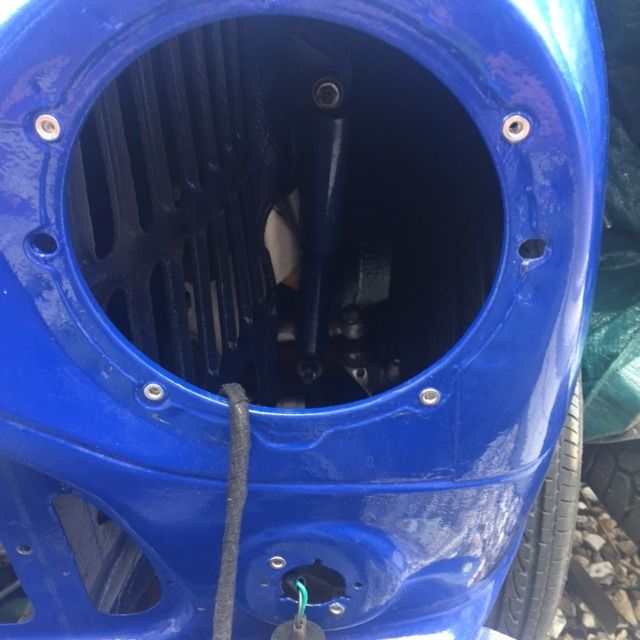
Went to see it all in place in the mini and decided to start it as I hadn't had it running for months.  I had no fuse box connected so smart alec here just connected the permanent live to switched live so I could power the engine bay.  Started pretty much eighth time and joy turned to panic when a few whiffs of smoke came out of the inside. 


2016-05-09%2017.29.23.jpg?raw=1


2016-05-09%2017.29.32.jpg?raw=1


2016-05-09%2017.30.27.jpg?raw=1


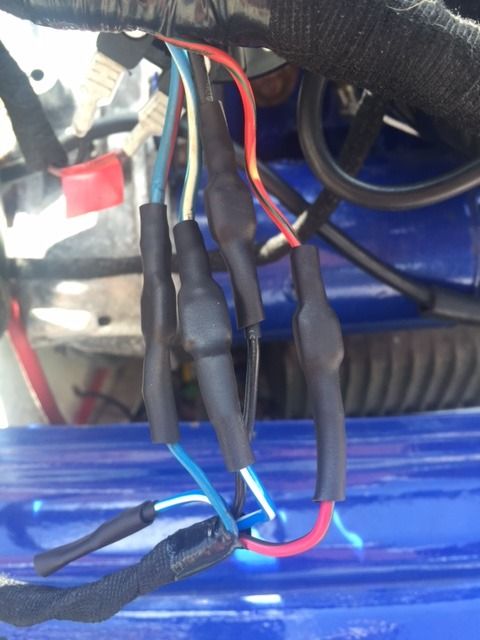
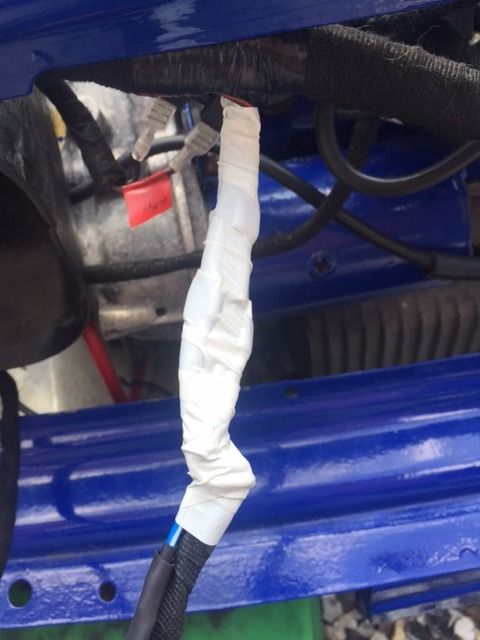
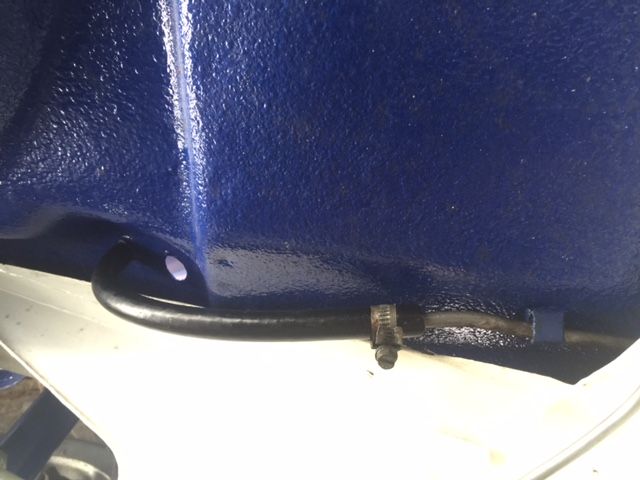
I forgot that the headlight circuit had a permanent live feed and a sidelight connector shorted to earth on the engine side of things where the lights connect into the loom.  Boom, crispy wires,  but limited to the sidelights fortunately.  I have some marked wires where the wires stuck together but no more burnt ones.  These I will heat shrink to protect to be double sure,  the red ones I am thinking of replacing lol.


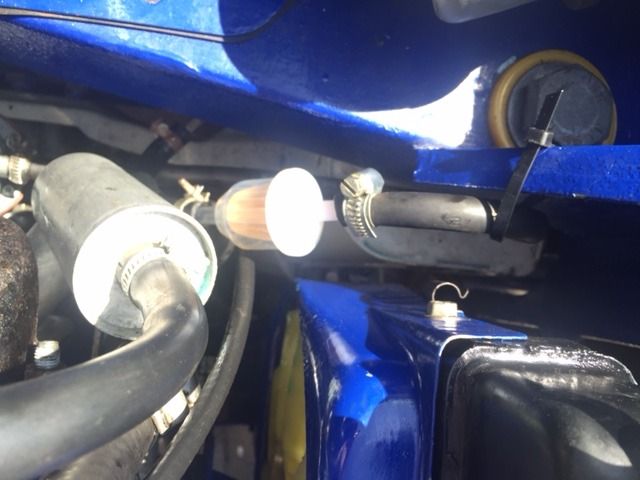
On a positive note, the engine was running nicely with the exhaust connected up and pasted in and the KnN style air filter in place resulting in a nice sound which cheered me up a touch. Red/green wires on order and an hours work ahead but could have been much worse !!


Plodding on anyway,


Graham


#977 Steve8274

Steve8274

    Super Mini Mad

  • Members
  • PipPipPipPipPipPip
  • 580 posts
  • Location: Wigan (north west)

Posted 10 May 2016 - 05:56 PM

Looking good. Shouldn't be long now

#978 grahama

grahama

    Up Into Fourth

  • Members
  • PipPipPipPipPipPipPipPipPip
  • 2,442 posts
  • Location: Warrington
  • Local Club: None in my area !!

Posted 23 May 2016 - 05:01 PM

Hi all,


Sorry for some of the pics being sideways or upside down, cant get a decent photo sharing program since Flickr stopped letting me copy and paste,  so annoying !!


I have been busy repairing the damage on the loom and making new looms for the centre starting button and fog light loom.  All inside the car now apart from the engine and light essentials, should hopefully make it less likely to corrode.


2016-05-12%2013.23.52.jpg?raw=1


2016-05-12%2013.40.37.jpg?raw=1


2016-05-15%2011.53.22.jpg?raw=1


New route of fuse box cables.  I have added a couple of switched and permanent feeds for the toggle switch loom.  It looks messy but this is how the toggle loom connects in, loom tape required lol)


2016-05-15%2012.22.38.jpg?raw=1


I have tested and retested the loom following the burnt wire and it has taken an age to sort because of ordering parts and waiting then realising you forgot something and reordering lol,  bit of a test


2016-05-16%2013.39.17.jpg?raw=1


2016-05-16%2018.09.52.jpg?raw=1


going for a little sticker bombing and carbon fibre vinyl wrap.


To be honest there isn't much left of the dash I started with, filled, sanded and re holed for stuff left this


2016-05-16%2018.11.16.jpg?raw=1


but will look something like this when done


2016-05-18%2016.19.42.jpg?raw=1


2016-05-20%2013.44.13.jpg?raw=1


2016-05-20%2013.44.22.jpg?raw=1


I had to make the brackets to hold the dash on but my first attempt with 1mm steel just bent and didn't hold properly.  I made some long washers sort of to stiffen them up and all came good


2016-05-20%2013.44.53.jpg?raw=1


All wrapped up and clipped in place the looms look a little tidier.  The toggle loom was taped to keep the pins in the old connectors as when the mini gets going they could rattle loose.  I coiled up the wires into a soft loop so as not to stress the old wires in their new position.


2016-05-23%2015.32.36.jpg?raw=1


2016-05-23%2015.31.15.jpg?raw=1


I made a new loom for the new starter circuit and front spots when I get them.  The spot side of the loom is just tucked out of the way for now but will operate on the stalk flasher and main beam setting so all front lights will flash or be on, legality not my strong suit lol


2016-05-23%2015.49.47.jpg?raw=1


2016-05-23%2015.50.12.jpg?raw=1


The starter part of the loom completely replaces the old white/red wire from position 3 on the ignition column but I have retained the wires intact if I want to go back, you can just see the old white/red wire taped out of the way on the left.


That's about it for now, looms in and tested, dash done and going in tomorrow, starts first time, coolant tomorrow and then its a waiting game for fasteners !!!


Regards,


Graham


Edited by grahama, 23 May 2016 - 05:44 PM.


#979 slidehammer

slidehammer

    One Carb Or Two?

  • Members
  • PipPipPipPipPipPipPip
  • 1,081 posts
  • Location: Surrey
  • Local Club: LSMOC

Posted 23 May 2016 - 08:04 PM

Nice to see you making progress Graham, keep up the good work and another Mini will be back on the road where it belongs.


#980 Cookiez

Cookiez

    Mini Mad

  • Members
  • PipPipPipPip
  • 205 posts
  • Location: Glasgow

Posted 24 May 2016 - 08:00 AM

Well done on the loom Graham, Bet your glad thats ones ticked off the list.


#981 grahama

grahama

    Up Into Fourth

  • Members
  • PipPipPipPipPipPipPipPipPip
  • 2,442 posts
  • Location: Warrington
  • Local Club: None in my area !!

Posted 24 May 2016 - 12:51 PM

Thanks guys for the comments.

Very glad it's out of the way lol, just some insulating to go on connectors but all working, starting first time and running at a normal temperature.

Put the coolant in and dash complete so nearly there. I just can't get rid of an air lock in the heater return hose. Have asked in tech section for help.

It is a bit sooty at the back end, probably a touch rich but I can sort that after the long list of things are sorted. The list really needs writing first though so I can tick jobs off lol


The handbrake middle section under the car was hitting the exhaust middle box when I pulled the handbrake, and that can't be good so I knocked up a little bracket to drop it down 10mm to clear it.


IMG_1416_zpswwmopyee.jpg


FullSizeRender.jpg?raw=1


Will keep going,

Graham


Edited by grahama, 24 May 2016 - 05:00 PM.


#982 Cookiez

Cookiez

    Mini Mad

  • Members
  • PipPipPipPip
  • 205 posts
  • Location: Glasgow

Posted 24 May 2016 - 01:07 PM

I had airlock problems with Ruby

I drilled a hole in the thermostat and it cured it


#983 Ben_O

Ben_O

    Mill Road Garage

  • Paint Doctor
  • PipPipPipPipPipPipPipPipPipPip
  • 9,781 posts
  • Location: Isle of Wight

Posted 25 May 2016 - 07:16 AM

Great work on the wiring and dashboard Graham.


Both look great.


The end is in sight!


#984 grahama

grahama

    Up Into Fourth

  • Members
  • PipPipPipPipPipPipPipPipPip
  • 2,442 posts
  • Location: Warrington
  • Local Club: None in my area !!

Posted 04 June 2016 - 02:16 PM

Hi all,


plodding along in the sun recently, burnt back of neck for my troubles.


I have finished changing the crimped connectors to solder and insuklated them all, especially the ones like the front lights


IMG_1453_zpsdsllv92f.jpg


IMG_1454_zpsuboij9hi.jpg


Some black loom tape and all will look fine.  Hopefully keep the elements out.  I have carried on inside and at the rear like this so hopefully no shorting out.


IMG_1452_zpsezrtjsyq.jpg


I fixed my steering wheel in place with the detachable boss but think it will need a drop bracket to make it comfortable to use, or a shorter steering column as it sits 3" further back than a standard steering wheel.  I do however have to extend the seats back yet so that should make a difference.


IMG_1456_zpswubm8mb0.jpg


Fuel lines connected but as I know I have fines in the tank I cant get out I have fitted an in line plastic fuel filter.  Thought about putting it under after the fuel tank here


IMG_1491_zps0omc7le9.jpg


but thought when I replace it with the glass one I have it might just smash with stones etc so put it in the engine bay tie wrapped out of the way from the manifold


IMG_1480_zpsnw64gviu.jpg


I will when the fines have passed through the filter replace this with the glass one but I am also going to put a metal one straight after the fuel tank to pre filter the filter, overkill probably but hey ho!!


I next had to fix the lights and indicators and the rivinut tool finally arrived.  Not a bad tool but I went a touch gung ho and nearly ruined the 4mm mandrill putting the first few in.  I was putting too much force into it and pulling the rivinut in too much, the last ones I did were perfect.  A great way to fix stuff so they are removable and not riveted in permanent.


IMG_1520_zpsmlsmbwea.jpg


And all fixed in place ready to align the light beam


IMG_1521_zpsme7cpsft.jpg


Ticking things off the list now, wheel rims are in lacquer ready for tyres, battery next week, nearly there !!


Graham


#985 ckneller321

ckneller321

    Mini Mad

  • Members
  • PipPipPipPip
  • 224 posts
  • Location: Northampton

Posted 10 June 2016 - 09:21 PM

I'm off work at the moment recovering from surgery after breaking my collar bone so I've read this on and off over the last week. Top work mate and keep plugging away; you're almost there! You'll be so proud of this project once it's on the road.


#986 g111mds

g111mds

    Speeding Along Now

  • Members
  • PipPipPipPipPip
  • 432 posts
  • Location: Edinburgh

Posted 30 December 2016 - 11:09 PM

Any more progress on this? Fantastic effort, especially given the driveway build. Always liked the early mayfairs.

#987 Shukran

Shukran

    Mini Mad

  • Noobies
  • PipPipPipPip
  • 129 posts
  • Location: In Abu Dhabi, missing Jo'burg

Posted 07 February 2017 - 08:05 AM

Any news grahama? (I always read this as "grandma") :mrcool: sorry


Edited by Shukran, 07 February 2017 - 08:06 AM.


#988 lawrence

lawrence

    One Carb Or Two?

  • Members
  • PipPipPipPipPipPipPip
  • 1,330 posts

Posted 07 February 2017 - 08:57 AM

Graham I'm disappointed with that cable tie in the engine bay there!
It's crying out for a riv nut with a lovely rubber lined p clip for a top quality install (like the rest of your work has been of course)

Of course I'd it's a mocking up cable tie then I will give allowance :)
I'm looking forward to a new update

Lawrence

#989 superzorg1000

superzorg1000

    Just On Tickover

  • Noobies
  • Pip
  • 5 posts
  • Location: Fareham

Posted 22 August 2017 - 08:32 PM

Just read the whole thing over the past three evenings. Fantastic work, can't wait to see the finished product!


Matt


#990 grahama

grahama

    Up Into Fourth

  • Members
  • PipPipPipPipPipPipPipPipPip
  • 2,442 posts
  • Location: Warrington
  • Local Club: None in my area !!

Posted 24 May 2018 - 09:32 AM

Hi all, after a long break again,


Had a very tricky set of front hubs annoying me last year, got so fed up with it all I put it to bed and ignored it.  Anyway this year I found a mini restoration garage near me and they sorted the play I couldn't figure out.  It turns out that it was ball joint adjustment and a very slightly worn CV joint.  Changed the bearings to be safe too.  Back on and fine.


Hand brake adjusted and onto the MOT list now.  Fuel tank is full of vinegar as it has got a little rusty over the years but its doing the trick.  


Feeling motivated again so onwards.  Will post some pics soon.


Regards,


Graham


0 user(s) are reading this topic

0 members, 0 guests, 0 anonymous users