Jump to content


Photo
- - - - -

My Mk1 Mini Rebuild


  • Please log in to reply
202 replies to this topic

#31 minimikej

minimikej

    Speeding Along Now

  • Members
  • PipPipPipPipPip
  • 346 posts
  • Location: Derbyshire

Posted 03 June 2011 - 09:42 AM

Yep been in that situation...my whole shell was like that! Lol

I would fit the rear bulkhead back in position as the dimensions of that aren't critical, but it will only really fit in one position, and that will help with the rigidity ALOT!

You can't fit the rear quarters until the floor is in because you need to fit the stiffener panles where the rear bins are and wheel arch closing panels before the quarter goes on.

I wouldn't worry too much about the door step panel, as that can be fited after the floor.

Have a look at my build thread to see what order I did mine. Doing the floor first worked well, as it acted like a good datum point. if you've got a good straight rear subby you could use that to help position the floor, along with the front subframe mount holes.

http://mk1-forum.net...c.php?f=6&t=659


Matty, thanks for that. So floor first it has to be then. The rear subframe is new pattern from M-Machine, hoping I can trust that to be sort of square.
Regarding the rear bulkhead, wouldn't I need to have the boot floor welded in place too? Or do you mean just spot the bulkhead to the parcel shelf and tack to the window channel? I've trial fitted the boot floor ok but got as far as clamping on the inner wheelarches before things started to get a bit tough with positioning stuff.

Will digest your thread.

Cheers

#32 dougie1142

dougie1142

    Super Mini Mad

  • Members
  • PipPipPipPipPipPip
  • 500 posts
  • Location: Inverness/Elgin
  • Local Club: I.M.O.G

Posted 03 June 2011 - 12:57 PM

Hmmmmm another mk1 project... how i want one of these :)

Good luck!

#33 matty...

matty...

    Super Mini Mad

  • Traders
  • PipPipPipPipPipPip
  • 605 posts
  • Location: Oxfordshire
  • Local Club: Turbominis

Posted 03 June 2011 - 05:50 PM

You can use the 3 holes on the bumper lip to align the boot floor, I used a large metal bar through each of them to keep them in the right place.

If your old subframe is still in one piece (all the mounts still where they were), I would bolt that up to the heel board and see how it lines up with the rear subframe holes in the boot floor. If they line up well I would put a few spots of weld along the rear seem to hold the boot floor in place.

You can then weld the bulkhead back in place (to the parcel shelf, and parcel shelf to rear panel). The edge of the of bulkhead should line up with the edges of the boot floor, where they would join to the wheel arches. I would then put a couple of tacks on the rear bulkhead where it meets the boot floor.

You should now have enough strength in the rear of the car to remove the floor. Before you do that, make up some brackets that bolt the the heel board, at the subframe mounts. When you fit the new floor you can use these to line it up, and hold it in place whilst you sort the front section out.

You will need to brace the shell between the A and B posts and between the two B posts as a minimum.

As I was replacing the rear quarters on mine, I just sliced straight along above the seams to save the hassle of cleaning the edges up.

Hope this helps! Once the floor, and boot floor is in you'll find it easier to work on, as you have some good datum points to work from!

Edited by matty..., 03 June 2011 - 05:52 PM.


#34 minimikej

minimikej

    Speeding Along Now

  • Members
  • PipPipPipPipPip
  • 346 posts
  • Location: Derbyshire

Posted 04 June 2011 - 08:04 AM

You can use the 3 holes on the bumper lip to align the boot floor, I used a large metal bar through each of them to keep them in the right place.

If your old subframe is still in one piece (all the mounts still where they were), I would bolt that up to the heel board and see how it lines up with the rear subframe holes in the boot floor. If they line up well I would put a few spots of weld along the rear seem to hold the boot floor in place.

You can then weld the bulkhead back in place (to the parcel shelf, and parcel shelf to rear panel). The edge of the of bulkhead should line up with the edges of the boot floor, where they would join to the wheel arches. I would then put a couple of tacks on the rear bulkhead where it meets the boot floor.

You should now have enough strength in the rear of the car to remove the floor. Before you do that, make up some brackets that bolt the the heel board, at the subframe mounts. When you fit the new floor you can use these to line it up, and hold it in place whilst you sort the front section out.

You will need to brace the shell between the A and B posts and between the two B posts as a minimum.

As I was replacing the rear quarters on mine, I just sliced straight along above the seams to save the hassle of cleaning the edges up.

Hope this helps! Once the floor, and boot floor is in you'll find it easier to work on, as you have some good datum points to work from!


Matty, yes I'm with you here. Spent a couple of hours last night cleaning up the spot welds on the parcel shelf and cleaning up the top flange of the old heelboard.
Thing with the old subframe is that it has a massive kink in the rear crossmember where I guess someone tried to jack the car up but I'll give that a go.

I lined up the bumper holes bang-on using my socket extension which is the exact diameter of the pressing holes, but then the curves of the boot hinge panel and boot don't match. I can pull the hinge panel to line up with the boot floor but then the central bumper hole is about a centimeter out! Should I trust the holes or match the curves? See pics...

The good news is that with the subframe mounts tightened up everything lines up apparently ok. The rear bulkhead fits like a glove along the seat base but not the sides (see crap pic), and the drivers side inner wheelarch fits pretty much bang-on for a pattern panel. Nearside is still a farmer's yard off, but then again the rear quarter has been hacked about so that won't help.

An hours work dismantling it all again and cleaning up the flanges for spot welding should see things progressing at last...

Cheers
M

Attached Files


#35 matty...

matty...

    Super Mini Mad

  • Traders
  • PipPipPipPipPipPip
  • 605 posts
  • Location: Oxfordshire
  • Local Club: Turbominis

Posted 04 June 2011 - 07:55 PM

I wouldn't worry too much about the overhang at the back, they had that from the factory. Heritage don't seem to be the greatest at trimming the panels very well, as you have probably already found out! Im sure I had to trim mine.

If the subby lines up with the boot floor and the inner arch fits well on the drivers side, its got to be good. Is the overhang of the bulkhead the same on both sides? If it is then you know its central.

#36 hughJ

hughJ

    Soldiering Along

  • Members
  • PipPipPipPipPipPipPip
  • 727 posts
  • Location: Highlands, Scotland

Posted 04 June 2011 - 09:06 PM

Super work - what a brave restoration! Keep us informed.

Hugh

#37 minimikej

minimikej

    Speeding Along Now

  • Members
  • PipPipPipPipPip
  • 346 posts
  • Location: Derbyshire

Posted 10 June 2011 - 09:11 AM

Morning, had an hour on Weds to go clean up the various seams ready for spot welding. Will have some time next week to get things moving I think; the plan is to get the boot floor and bulkhead/parcel shelf all spotted together, hopefully with my 'new' spot welder.

Every time I look at the car now I'm more and more convinced that I'm doing the right thing by stripping everything right back.

Here's a couple of pics showing some crap repairs done in the previous 'resto'. Crap, but MOT standard apparently. The mini never failed an MOT on any body work...

Attached Files


#38 Duggy

Duggy

    On The Road

  • Noobies
  • PipPip
  • 39 posts

Posted 10 June 2011 - 10:51 AM

You're doing sterling work with this. At the factory, the principal for spot welding body panels was that they should not be more than 1 1/2" apart if I remember correctly.

;D

#39 mk1leg

mk1leg

    Crazy About Mini's

  • Members
  • PipPipPipPipPipPipPipPipPipPip
  • 9,341 posts
  • Location: Jersey
  • Local Club: Mini Club Jersey, MCR

Posted 10 June 2011 - 08:21 PM

thats a great mk1 project..........keep up the good work................. :)

#40 Swainy

Swainy

    Speeding Along Now

  • Members
  • PipPipPipPipPip
  • 319 posts
  • Location: Derbyshire
  • Local Club: Sexy People Only Mini Club

Posted 12 June 2011 - 03:52 PM

Looking forward to seeing this finished!

Keep it up!

#41 minimikej

minimikej

    Speeding Along Now

  • Members
  • PipPipPipPipPip
  • 346 posts
  • Location: Derbyshire

Posted 12 June 2011 - 05:25 PM

Jeez. Will it ever stop effing raining?

Can't do much in weather like this as all my work is dependent on the genny... :)/

#42 matty...

matty...

    Super Mini Mad

  • Traders
  • PipPipPipPipPipPip
  • 605 posts
  • Location: Oxfordshire
  • Local Club: Turbominis

Posted 15 June 2011 - 04:00 PM

Haha love those 'quality repairs', maybe they were done by the same guy that did mine!

You are definitely making the right decision, its very satifiying seeing the bodges disapear, and replaced with properly fitting panels.

#43 minimikej

minimikej

    Speeding Along Now

  • Members
  • PipPipPipPipPip
  • 346 posts
  • Location: Derbyshire

Posted 10 June 2012 - 08:22 PM

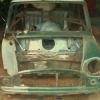
Well, that was some break, being busy being a dad. Following some unplanned unemployment I've spent some time with the mini hacking the floor pan out. Took a lot longer than I'd thought, mostly due to the layers and layers of patches. Stripped the drivers side toe board down properly for linishing but the passenger side is still fighting. Painful, noisy work.

Some pics:

Posted Image

Posted Image

Posted Image

Posted Image

Posted Image

#44 jagman.2003

jagman.2003

    One Carb Or Two?

  • Members
  • PipPipPipPipPipPipPip
  • 1,307 posts
  • Location: In the shed.
  • Local Club: Owner of my own club of Minis

Posted 13 June 2012 - 12:05 PM

That's a great way of doing it, nice clean, no messing, whole new floor. Looking good.

#45 IwanDavies95

IwanDavies95

    Stage One Kit Fitted

  • Noobies
  • PipPipPip
  • 78 posts
  • Location: Ammanford

Posted 13 June 2012 - 03:19 PM

i agree with Jagman, no messing bout there!!

looking good, keep it up :)

iwan


0 user(s) are reading this topic

0 members, 0 guests, 0 anonymous users