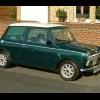
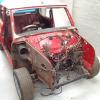
Orville The '86 City E
#16

Posted 21 April 2011 - 10:44 AM
#17

Posted 21 April 2011 - 11:51 AM
#18

Posted 22 April 2011 - 07:17 PM
#19

Posted 22 April 2011 - 07:26 PM
#20

Posted 22 April 2011 - 07:31 PM
#21

Posted 23 April 2011 - 08:24 PM


#22

Posted 27 April 2011 - 06:46 PM
#23

Posted 09 June 2011 - 10:29 AM
First came tackling the headlining, not looking forward to it as I've heard everyone say what a pig it can be! All pegged up:

All fitted up, seals in place - MPI headliningl, was difficult in places as it is second hand and hadn't been taken out the old car very carefully, reckon thats a good enough job though! (spray glue EVERYWHERE mind you)


Rear windscreen in after a lot of arguements (and dirty side windows) - bolted the rear lights on too so it looks like i'm getting somewhere:

Front indicators and headlamp bowls - fitted the steering rack loosly, then realised i should probably fit some brake and fuel lines underneath...

Headlights in just for a look

Front windscreen is next, attempted it the other day...managed to drop it as take a chip of paint out of the o/s wing and scratch the scuttle....fantastic - think this thread sums it up Windscreen Emotions!
Thats all for now, jsut been and got tool to insert the locking strip in the windscreens - mine is in the garage somewhere but i cant find it.
Thanks for looking.
#24

Posted 09 June 2011 - 10:46 AM
Long time no update...car had a few iffy bits of work done so I sent it back to the bodyshop to be sorted - all done and back home now, trying to crack on with stuff.
First came tackling the headlining, not looking forward to it as I've heard everyone say what a pig it can be! All pegged up:
All fitted up, seals in place - MPI headliningl, was difficult in places as it is second hand and hadn't been taken out the old car very carefully, reckon thats a good enough job though! (spray glue EVERYWHERE mind you)
Rear windscreen in after a lot of arguements (and dirty side windows) - bolted the rear lights on too so it looks like i'm getting somewhere:
Front indicators and headlamp bowls - fitted the steering rack loosly, then realised i should probably fit some brake and fuel lines underneath...
Headlights in just for a look
Front windscreen is next, attempted it the other day...managed to drop it as take a chip of paint out of the o/s wing and scratch the scuttle....fantastic - think this thread sums it up Windscreen Emotions!
Thats all for now, jsut been and got tool to insert the locking strip in the windscreens - mine is in the garage somewhere but i cant find it.
Thanks for looking.
Glad you appreciated my "windscreen emotions" post!
#25

Posted 09 June 2011 - 11:13 AM
#26

Posted 10 June 2011 - 06:10 PM
First up, rear screen insert, went in suprisingly well - should I have left a gap between the 2 ends to allow for any expansion though or is it fine to fit it nice and tight?

Brake and fuel line in underneath the car, went better than I thought it might, look fairly neat so I'm happy.


Rear subframe, bit tight fitting, but went in ok.

Front subframe, complete pig to get in! Bodyshop welded the front on without lining it up on the subframe to the front panel isnt perfect but we go it in and bolted up the tower and rear mounts.

Left with this gap at the front which I doubt i'm going to get a full mount into, any ideas? (sorry not a very clear picture)

And the front panel seems to sit a little low (I'm assuming the subframe sits ok as the tower mounts and rear brackets are all lined up nicely) Again any ideas are welcome to finding a way to make this work.

Oh and the brake master cylinder ready to start getting plumbed in

Thanks for reading,
Matt
#27

Posted 05 September 2011 - 04:38 PM
Progress is pretty slow what with work, but got quite a bit done now, wiring loom is in progress, have got the front and rear subframes fitted, it has been on its wheels at times! Subframes were both a pain in the ass to get in and aligned, but should all be ok for now. Rear arches are on, as is the bumper rear only needs a fog lamp and bootlid and its pretty much there. Also started on some soundproofing to the floor and inside of the panels. Doors and windows all on so the car is watertight (ish) now, even got my door locks and central locking motors installed!
Few pictures, not much room on the drive to get any good ones, oooh and I bought my wheels!


Yummy

#28

Posted 05 September 2011 - 07:35 PM
#29

Posted 05 September 2011 - 08:06 PM
This is the next stage I can't wait to get to, putting stuff back on the shell!
I think you should also give the plastic on the brake master cylinder a proper good scrub, looks dirty compared to the rest!
#30

Posted 05 September 2011 - 10:15 PM
0 user(s) are reading this topic
0 members, 0 guests, 0 anonymous users


