For plug welds, I generally consider it good penetration when you have a small bump on the bottom. if there is no bump the bottom piece generally didn't really melt to fuse. I have used a few number of size hole, there is the ones my blair spot weld cutter makes, 1/4 inch like I drilled to spotweld my boot floor in, and a bit bigger then 3/8 I had to drill in the floor to weld the thick subframe brace plate on as the small hole would fill before the thick plate heated up enough for penetration.
Chris

 2 votes
My Poor Wee Mini Sky
Started by
hughJ
, Nov 13 2010 05:12 PM
1146 replies to this topic
#32

new_zealand _minis
-
- Members
-

- 654 posts
Super Mini Mad
- Local Club: wellington new zealand
Posted 18 December 2010 - 09:39 AM
im a certified welder . best hole to use for plug is 8mm start in the middle of the hole get nice and hot then move round the edge . turn the welder up because you want it hot and to penetrat not to just sit on the top of it . do that and you shuld be good 
#33
hughJ
-
- Members
-
- 727 posts
Soldiering Along
- Location: Highlands, Scotland
Posted 18 December 2010 - 02:25 PM
Thanks Chris and new_zealand _minis. Welding the seams on a Mini, the plugweld must take most of the seam width, then.
Well despite being -4 outside I tried to put my first patch on the driver's side front inner wing at the lower front. I thought that nobody sees it and it is of little structural importance.

It took two hours to make this tiny patch! I hope I can get faster. If not, I'll not finish till 2020. Tacked it in.

I stupidly cut too far into the inner wing with the cutting disc and then had to blob this in with weld. You'll notice I didn't say weld over it!
And the back - it's a good thing the photo is blurred.
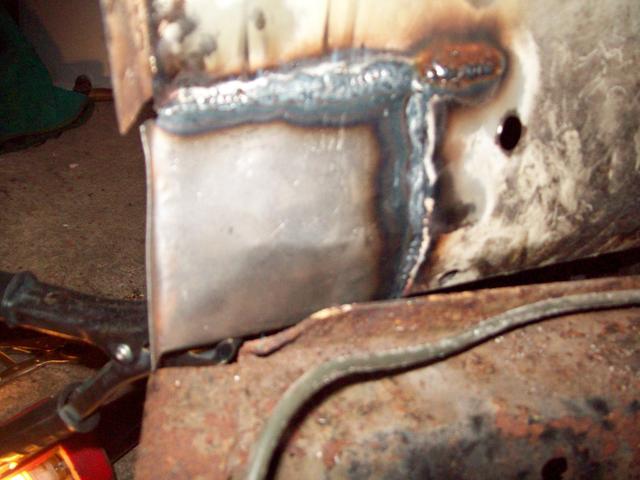
Then ground it down.

I've very mixed feelings. Still hate welding. I could have done it worse - two weeks ago I could have burned holes the whole way along. But I could have done it better - it is ugly and the penetration is not nearly as good as I would have liked. It is so much more difficult welding down on the ground instead of at workbench level.
But I've done my first tiny repair. I should go back outside but its so cold and it goes for my old bladder.
Hugh
Well despite being -4 outside I tried to put my first patch on the driver's side front inner wing at the lower front. I thought that nobody sees it and it is of little structural importance.
It took two hours to make this tiny patch! I hope I can get faster. If not, I'll not finish till 2020. Tacked it in.
I stupidly cut too far into the inner wing with the cutting disc and then had to blob this in with weld. You'll notice I didn't say weld over it!
And the back - it's a good thing the photo is blurred.
Then ground it down.
I've very mixed feelings. Still hate welding. I could have done it worse - two weeks ago I could have burned holes the whole way along. But I could have done it better - it is ugly and the penetration is not nearly as good as I would have liked. It is so much more difficult welding down on the ground instead of at workbench level.
But I've done my first tiny repair. I should go back outside but its so cold and it goes for my old bladder.
Hugh
#34
grahama
-

- Members
-
- 2,442 posts
Up Into Fourth
- Location: Warrington
- Local Club: None in my area !!
Posted 18 December 2010 - 07:44 PM
Well done for working in this, I am chickening out at the moment due to mini covered in ice. I know how you feel with the speed thing and I assure you it does get easier the more you do, (not that I am a veteran !!). However keep going and lots of pics.
Graham
Graham
#35
myredmini
-

- TMF+ Member
-
- 3,211 posts
My Mummy Says It's OK
- Name: Dan
- Location: Teesside
- Local Club: BOG MOG
Posted 18 December 2010 - 08:14 PM
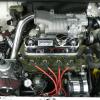
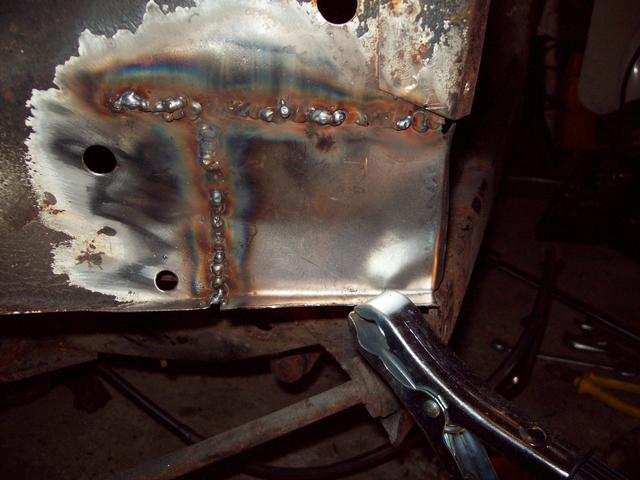
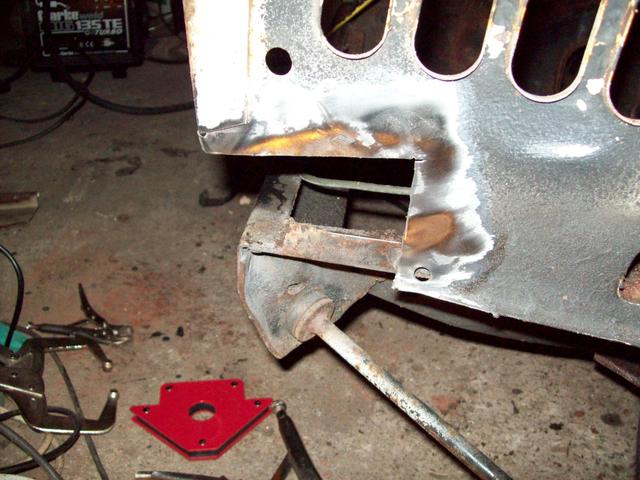
Hi, been watching this from the beginning. You have made brilliant progress on your welding skills stick at it and you will soon pick it up. Im now 17. I began learning to weld at 16 and started with gasless, i have now moved onto using argoshield light from BOC and my welding was 10000000% better. here are soe piccys of my repairs to the same area you done...
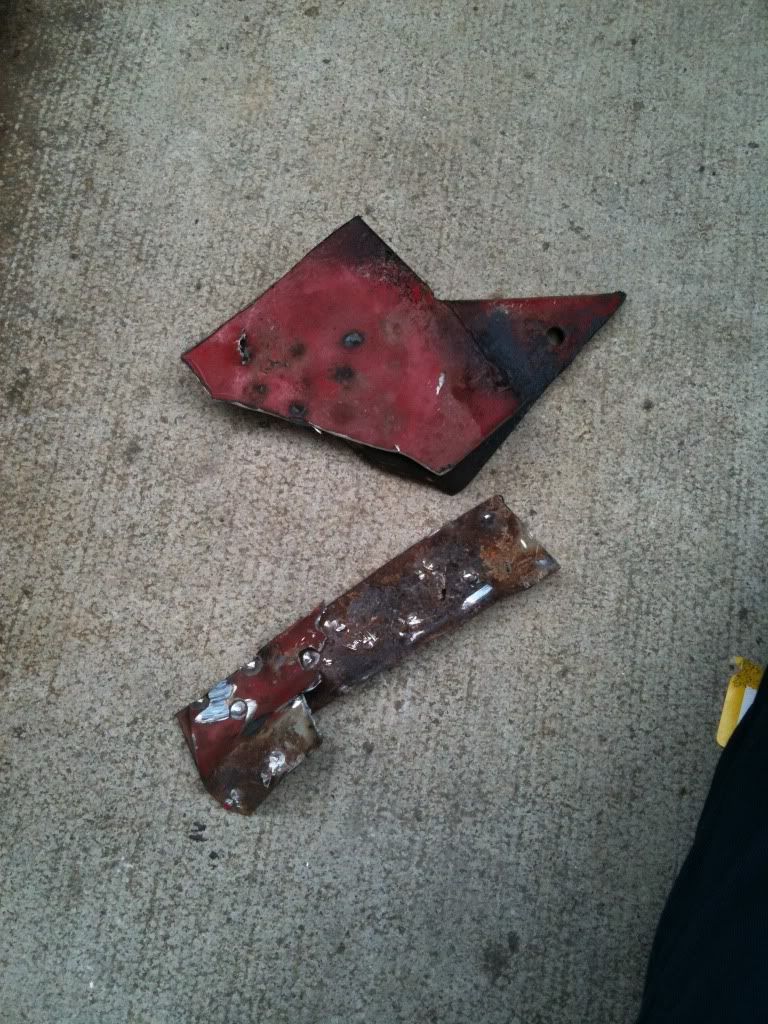
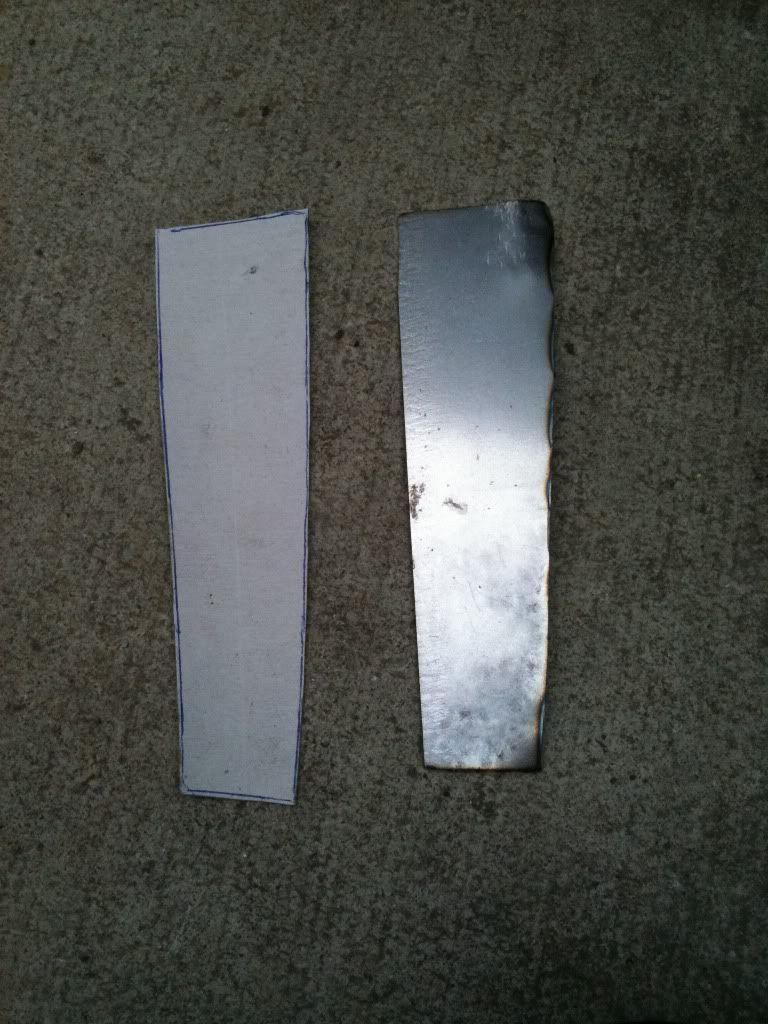
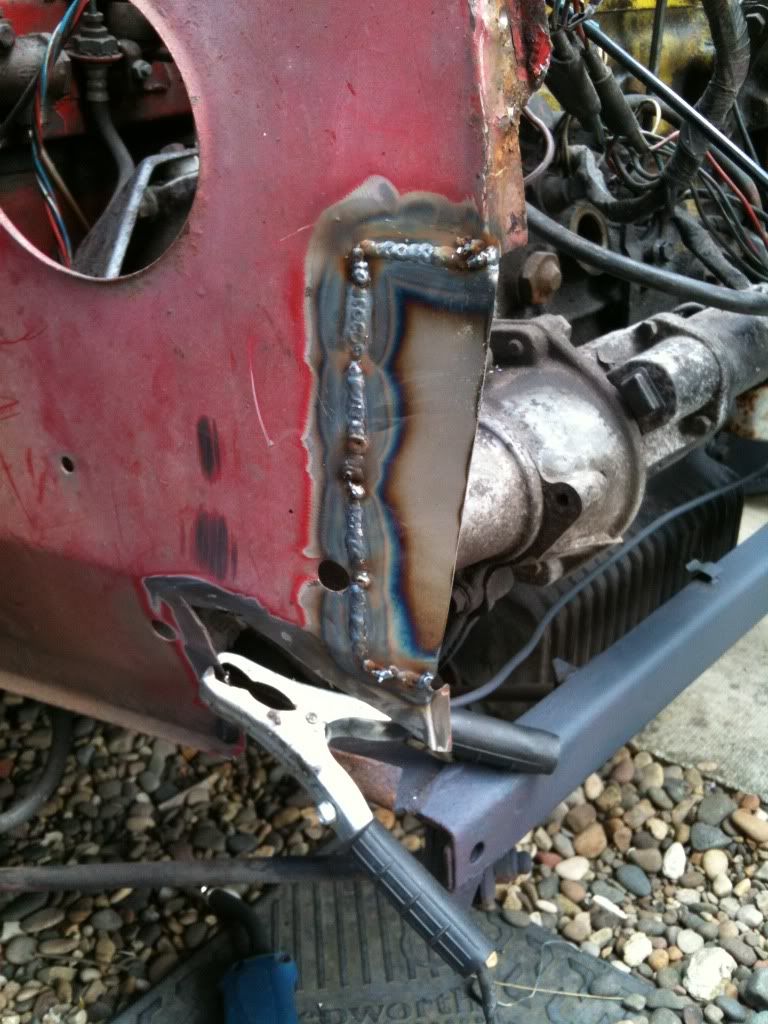
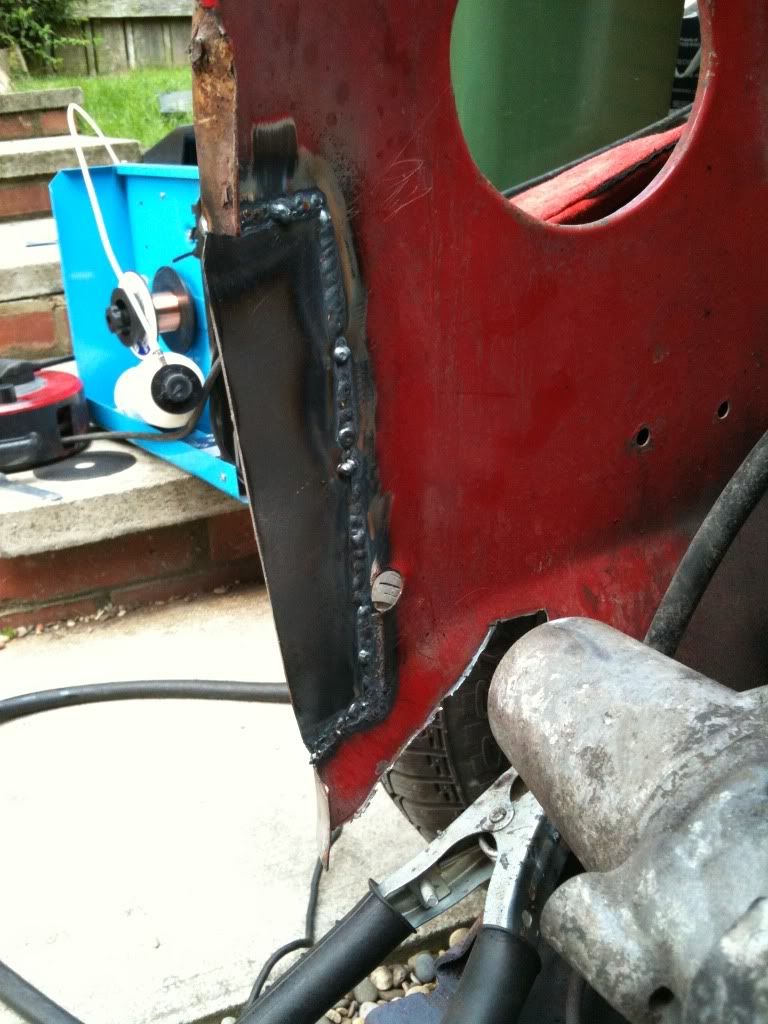
I only welded one side the penetration was brilliant and is now a loverly invisable repair.
Dan.
I only welded one side the penetration was brilliant and is now a loverly invisable repair.
Dan.
#36
charie t
-

- Members
-
- 3,153 posts
Up Into Fourth
- Location: South Leicestershire sticks
- Local Club: wreake mini wanderers
Posted 18 December 2010 - 08:34 PM
You could have done that in one panel and keep the lip there, welding looks good though Dan, well done
Dan.
#37
hughJ
-
- Members
-
- 727 posts
Soldiering Along
- Location: Highlands, Scotland
Posted 18 December 2010 - 10:03 PM
Thanks Graham.
Thanks Dan. I hang my head in shame. Your repair is beautiful.
Hugh
Thanks Dan. I hang my head in shame. Your repair is beautiful.
Hugh
#38
CLM
-

- Members
-
- 817 posts
One Carb Or Two?
Posted 19 December 2010 - 01:50 AM
Excellent first repair Hugh!
About what mine started out like, Just keep at it you will get it, building skills you can use later!
Chris
About what mine started out like, Just keep at it you will get it, building skills you can use later!
Chris
#39
hughJ
-
- Members
-
- 727 posts
Soldiering Along
- Location: Highlands, Scotland
Posted 27 December 2010 - 01:45 PM
Thanks Chris.
A good Christmas to you all - notice the wee bit of holly edited into the first picture!
The temperature is above 0 today, just, so I went out to the garage. Stripped out the dash. It seems to be made from cardboard, bits of polystyrene and bits of foam. It really is a bit nasty. The lower dash-rail cover is broken as explained earlier the top one seems fine.

And the rust is really starting to show.
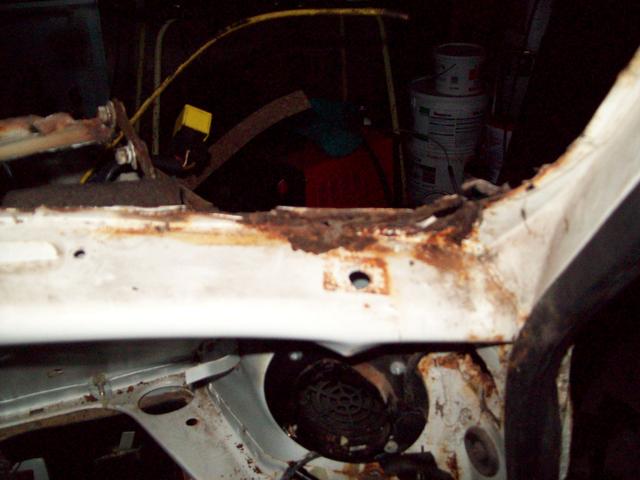


The area round the windscreen is going to take some work.
Hugh
A good Christmas to you all - notice the wee bit of holly edited into the first picture!
The temperature is above 0 today, just, so I went out to the garage. Stripped out the dash. It seems to be made from cardboard, bits of polystyrene and bits of foam. It really is a bit nasty. The lower dash-rail cover is broken as explained earlier the top one seems fine.
And the rust is really starting to show.
The area round the windscreen is going to take some work.
Hugh
#40
CLM
-
- Members
-
- 817 posts
One Carb Or Two?
Posted 28 December 2010 - 04:08 PM
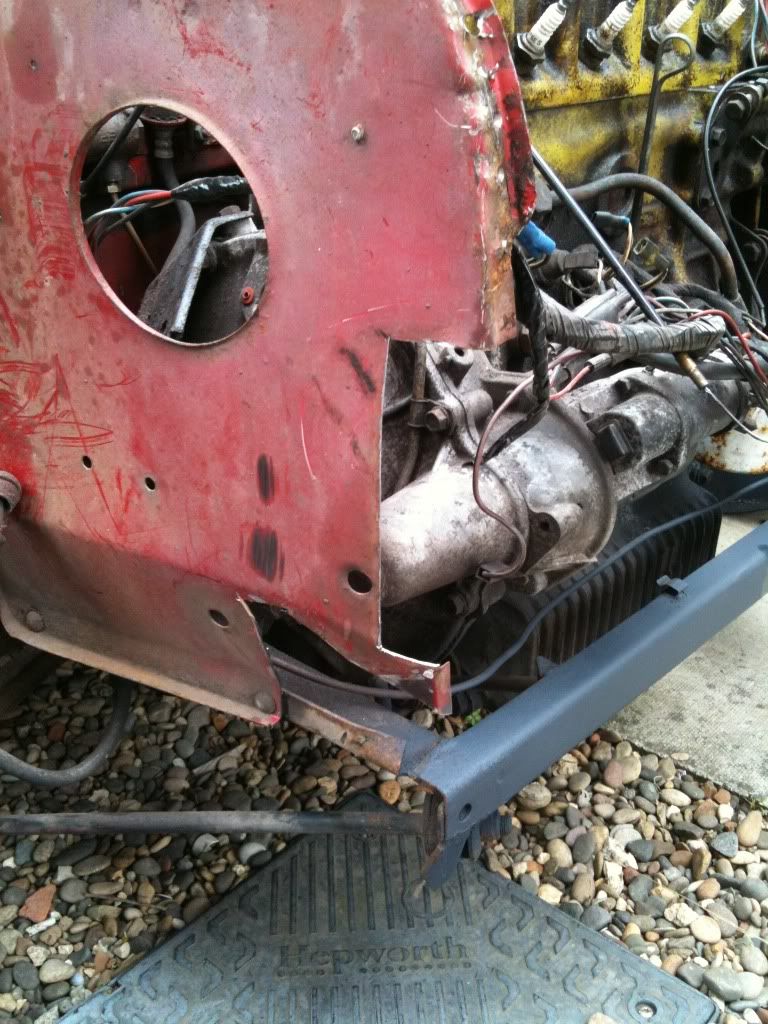
Fun bit of fabrication work ahead of you It likely looks identical to what my van will look like when I get there!
I'm guessing you may be buying a whole new upper dash piece? I noticed the edges adjacent to the top dash padding was pulled out likely for access to the padded dash bolts. The rust doesn't appear too extensive which is good as you should still have a fairly decent basis for patterning the replacements.
Chris
It likely looks identical to what my van will look like when I get there!I'm guessing you may be buying a whole new upper dash piece? I noticed the edges adjacent to the top dash padding was pulled out likely for access to the padded dash bolts. The rust doesn't appear too extensive which is good as you should still have a fairly decent basis for patterning the replacements.
Chris
#41
malcs_miniturbo
-

- Members
-
- 602 posts
Super Mini Mad
- Location: swindon
Posted 28 December 2010 - 05:18 PM
looks like you got your worked cut out mate be good to see more
#42
hughJ
-
- Members
-
- 727 posts
Soldiering Along
- Location: Highlands, Scotland
Posted 28 December 2010 - 05:23 PM
Thanks again Chris. I don't know whether to make small patches or replace the whole dash rail. We will see.
I had a most discouraging day.
I thought I would patch the bottom of the passenger side inner wing at the front. I thought it would be easier having done the drivers side. No it wasn't. It took two goes - 5 hours work!
I meant to record this so diligently for the Mini Forum.
So cut out the rot.
Made a nice wee patch
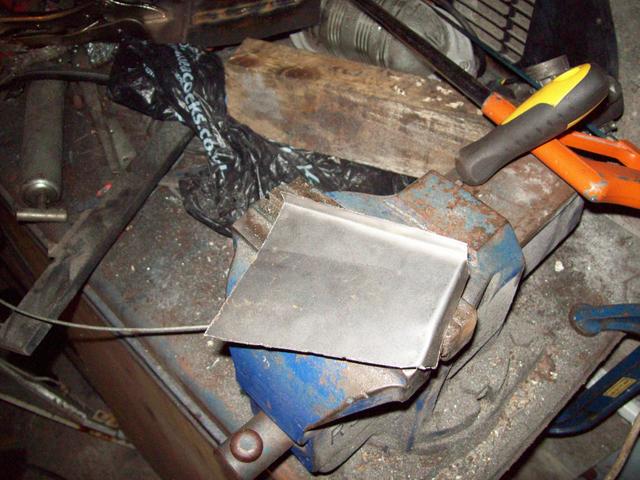
Tacked it in place

And then did some awful welding.

When I ground it back there were holes which I then tried to fill with weld. That was a disaster. I had ground too far and was trying to weld steel foil! I gave up with the camera. In fact I wanted to give up altogether. But, bravely, I cut more out and welded in a bigger patch. The patch wasn't nearly as nice as the one above.
I then practiced vertical and horizontal welding on some scrap pieces. I needed to up the wire speed. So tried welding in again.

It doesn't look good but it did penetrate a bit better.
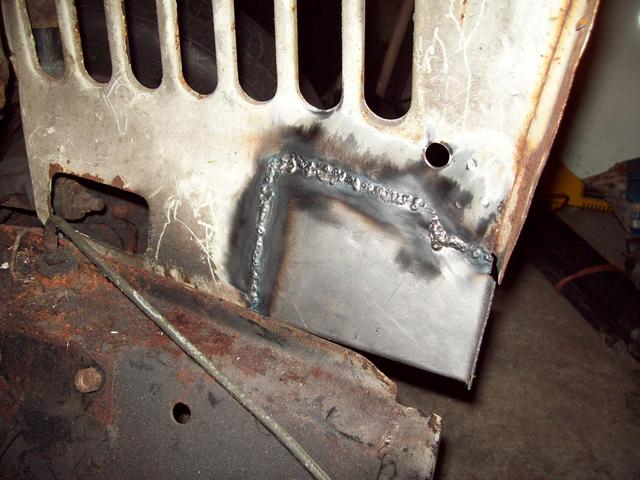
Its kind of gloopy in places as my patch didn't fit so well. I had to build up the weld to fill the gaps. After a bit of grinding -

A bit of a waste of a day really. I had meant to get started removing the sound deadening from the floor.
Hugh
I had a most discouraging day.
I thought I would patch the bottom of the passenger side inner wing at the front. I thought it would be easier having done the drivers side. No it wasn't. It took two goes - 5 hours work!
I meant to record this so diligently for the Mini Forum.
So cut out the rot.
Made a nice wee patch
Tacked it in place
And then did some awful welding.
When I ground it back there were holes which I then tried to fill with weld. That was a disaster. I had ground too far and was trying to weld steel foil! I gave up with the camera. In fact I wanted to give up altogether. But, bravely, I cut more out and welded in a bigger patch. The patch wasn't nearly as nice as the one above.
I then practiced vertical and horizontal welding on some scrap pieces. I needed to up the wire speed. So tried welding in again.
It doesn't look good but it did penetrate a bit better.
Its kind of gloopy in places as my patch didn't fit so well. I had to build up the weld to fill the gaps. After a bit of grinding -
A bit of a waste of a day really. I had meant to get started removing the sound deadening from the floor.
Hugh
Edited by hughJ, 28 December 2010 - 05:27 PM.
#43
megamini_jb
-

- Members
-
- 5,491 posts
Crazy About Mini's
- Name: Jamie
- Location: -
Posted 28 December 2010 - 05:32 PM
my favourite mini. i love mini sky  hehe ^^ great project. i will definitely be watching
hehe ^^ great project. i will definitely be watching
#44
Shifty
-

- Admin
-
- 13,128 posts
Sponsored by Fosters (tm)
- Name: Sean
- Location: Shropshire(sunny)
- Local Club: TMF
Posted 28 December 2010 - 05:34 PM
Good progresss with the welding, I may be able to help you though..
When doing stuff like that I 'pulse' weld, ie not try and do a long run. Weld 5-10mm and then stop, wait till the glow just disappears from the bit you've just welded and then start up again.
Its basically like doing a series of long tacks, stops the panel from warping and also stops you 'blowing' through with the welder.
Long uninterupted runs of weld look good on American hot-chopper but aren't really suitable for the kind of rusty crap you find on a mini.
The welds are flatter, you can hold the torch in one position longer and get more penetration.
#45
hughJ
-
- Members
-
- 727 posts
Soldiering Along
- Location: Highlands, Scotland
Posted 28 December 2010 - 07:19 PM
Thank you Shifty - advice from you is worth having. I am really just doing lots of tacks waiting till the red dies down in the previous one - are you suggesting I go a wee bit longer before stopping? That would sure scare me. I feel I have just reached the stage of getting the weld down without blasting through. I would say that welding is the hardest thing I have had to learn in life. It doesn't help that I am not really that good with my hands - I can do curves with a ruler!
Thanks for the kind words malcs_miniturbo and megamini_jb.
Hugh
Thanks for the kind words malcs_miniturbo and megamini_jb.
Hugh


0 user(s) are reading this topic
0 members, 0 guests, 0 anonymous users


