 This topic is locked
i will keep my eyes on this


My Mini ;) The Third Chapter. 998 Fast road.
Started by
analogue_radio
, Dec 11 2010 03:27 PM
842 replies to this topic
#31
 The Third Chapter. 998 Fast road.: post #31")
malcs_miniturbo
-

- Members
-

- 602 posts
Super Mini Mad
- Location: swindon
Posted 19 December 2010 - 08:13 PM
#32
analogue_radio
-
- TMF+ Member
-
- 4,897 posts
Up Into Fourth
- Location: Melton Mowbray, UK.
Posted 19 December 2010 - 08:15 PM
Looks like I just need some elbow grease then!
I'll give the pedal box another bash when I'm next out, there is a lip that prevents me from getting a spanner on properly, not enough room for a ratchet either. Probably just going at it the wrong way.
Shifty what were the brackets for that are half silicone puttied and riveted to the floor, I'm assuming a set of seats at one point?
Dedicating tomorrow to Uni work, boooo.
#33
Shifty
-

- Admin
-
- 13,128 posts
Sponsored by Fosters (tm)
- Name: Sean
- Location: Shropshire(sunny)
- Local Club: TMF
Posted 19 December 2010 - 08:17 PM
Nope they were for a gash underseat speaker board!!
#34
analogue_radio
-
- TMF+ Member
-
- 4,897 posts
Up Into Fourth
- Location: Melton Mowbray, UK.
Posted 19 December 2010 - 08:24 PM
Ewww rank! I thought someone had secured seats down with putty and rivets 
#35
Mini Mad Drakeley
-

- Members
-
- 1,172 posts
One Carb Or Two?
- Location: bangor
- Local Club: south down mini owners club
Posted 23 December 2010 - 11:10 PM
i had just finished reading the project2 thread but i found this one early so i can keep up  and it looks a good shell now and i wouldnt have put it past some1 to secure a seat with sealant and rivets, earlier i found a 'repair' and some1 had just stuck a piece of metal over he rust with seam sealer and put filler around it so it wasnt noticeble and i think your like me, got next few weeks off so working non stop on the car, do your neighbours think your completely nuts aswell?
but good luck with it and hopefully you'l be able to finish this one
and it looks a good shell now and i wouldnt have put it past some1 to secure a seat with sealant and rivets, earlier i found a 'repair' and some1 had just stuck a piece of metal over he rust with seam sealer and put filler around it so it wasnt noticeble and i think your like me, got next few weeks off so working non stop on the car, do your neighbours think your completely nuts aswell?but good luck with it and hopefully you'l be able to finish this one
#36
analogue_radio
-
- TMF+ Member
-
- 4,897 posts
Up Into Fourth
- Location: Melton Mowbray, UK.
Posted 24 December 2010 - 07:43 PM
Thanks mate  Haha yeah I guess so! They can't see into the garage so for all they know I could be creating some sort of Transformer or a new version of the Batmobile
Christmas eve efforts -
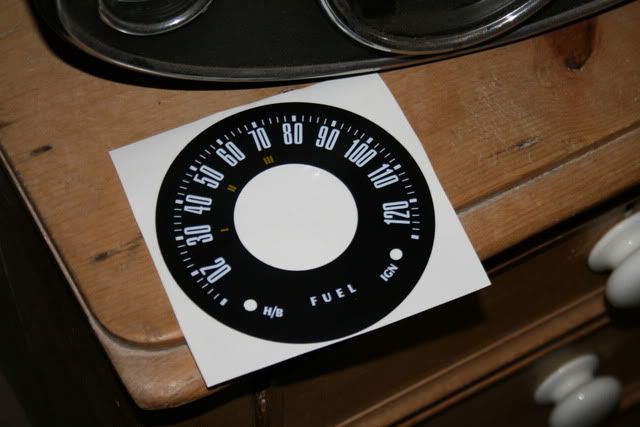
A sticker for the speedo, converts it into a 120mph. It will need re-calibrating though.
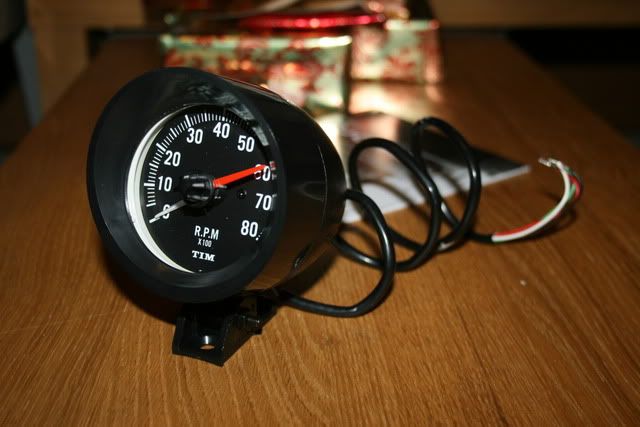
Pod mounted rev counter, the most in keeping style I could find. This will be mounted behind the steering wheel on the steering column.
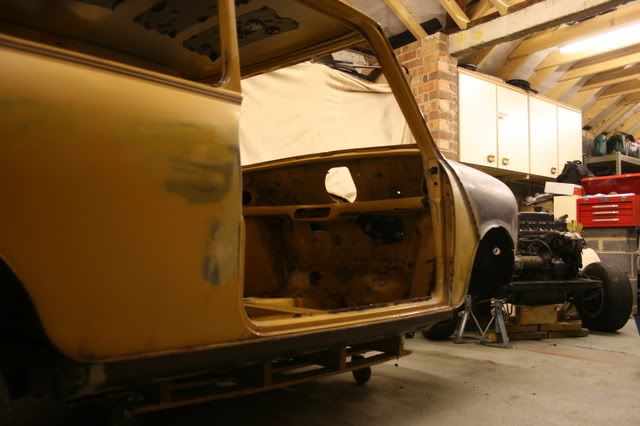
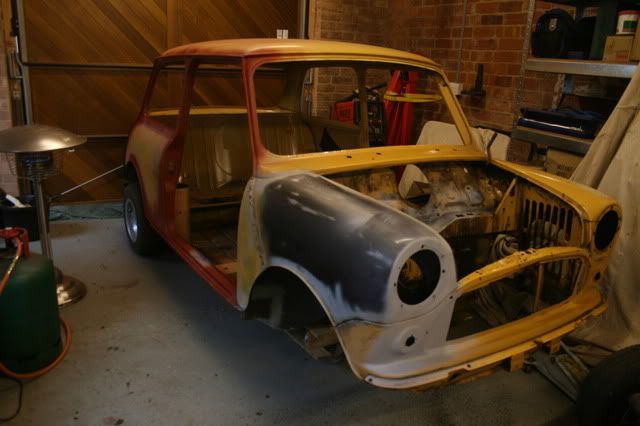
And the shell, apart from the rear subframe & that damn pedal box, is stripped. Rear subframe left on for ease at the moment.
Next time I will get the pedal box off and start the repairs on the upper half, whilst tidying up some current welds, ku-rusting a few bare metal areas that have become exposed and just general TLC before completely stripping and rolling her upside down onto a mattress to sort the underside.
Happy Christmas you lot
Haha yeah I guess so! They can't see into the garage so for all they know I could be creating some sort of Transformer or a new version of the Batmobile Christmas eve efforts -
A sticker for the speedo, converts it into a 120mph. It will need re-calibrating though.
Pod mounted rev counter, the most in keeping style I could find. This will be mounted behind the steering wheel on the steering column.
And the shell, apart from the rear subframe & that damn pedal box, is stripped. Rear subframe left on for ease at the moment.
Next time I will get the pedal box off and start the repairs on the upper half, whilst tidying up some current welds, ku-rusting a few bare metal areas that have become exposed and just general TLC before completely stripping and rolling her upside down onto a mattress to sort the underside.
Happy Christmas you lot
#37
Shifty
-
- Admin
-
- 13,128 posts
Sponsored by Fosters (tm)
- Name: Sean
- Location: Shropshire(sunny)
- Local Club: TMF
Posted 24 December 2010 - 07:55 PM
Still looks good!!
Have you damaged the front panel lifting it up? It doesn't seem to sit right?
Have you damaged the front panel lifting it up? It doesn't seem to sit right?
#38
analogue_radio
-
- TMF+ Member
-
- 4,897 posts
Up Into Fourth
- Location: Melton Mowbray, UK.
Posted 24 December 2010 - 09:02 PM
The slam panel? Just underneath the bonnet latch?
#39
Shifty
-
- Admin
-
- 13,128 posts
Sponsored by Fosters (tm)
- Name: Sean
- Location: Shropshire(sunny)
- Local Club: TMF
Posted 24 December 2010 - 09:03 PM
Yup, it looks twisted??
May be camera angle?
May be camera angle?
#40
analogue_radio
-
- TMF+ Member
-
- 4,897 posts
Up Into Fourth
- Location: Melton Mowbray, UK.
Posted 24 December 2010 - 09:07 PM
Yeah I see what you mean! Might just be the camera angle or a shadow.
#41
malcs_miniturbo
-
- Members
-
- 602 posts
Super Mini Mad
- Location: swindon
Posted 25 December 2010 - 10:00 AM
yea dose look like it also
#42
analogue_radio
-
- TMF+ Member
-
- 4,897 posts
Up Into Fourth
- Location: Melton Mowbray, UK.
Posted 27 December 2010 - 03:12 PM
Why not mate? They should be nice and easy to get toIt's the two bolts that are attached to the lower dash rail.. Just can't get to them.
This information is wrong, considering the nuts are welded to the black bracket. The way to remove the pedal box is to cut slits into both bolts and use a screwdriver as they are the 'snap-off' type.
http://www.minispare...ty=pb&pid=33222
As seen there, when they are fitted and torqued correctly the bolt will sheer off leaving a smooth rounded head.
Removed two pedal boxes now and they've been a pain in the arse both times

#43
charie t
-

- Members
-
- 3,153 posts
Up Into Fourth
- Location: South Leicestershire sticks
- Local Club: wreake mini wanderers
Posted 27 December 2010 - 04:10 PM
Oh wrong bolts, i thought you were refering to the bolts at the bottom of the dash/bulkhead.Why not mate? They should be nice and easy to get toIt's the two bolts that are attached to the lower dash rail.. Just can't get to them.
This information is wrong, considering the nuts are welded to the black bracket. The way to remove the pedal box is to cut slits into both bolts and use a screwdriver as they are the 'snap-off' type.
http://www.minispare...ty=pb&pid=33222
As seen there, when they are fitted and torqued correctly the bolt will sheer off leaving a smooth rounded head.
Removed two pedal boxes now and they've been a pain in the arse both times
Still bit of a bull in a china shop approach mate

Edited by charie t, 27 December 2010 - 04:11 PM.
#44
analogue_radio
-
- TMF+ Member
-
- 4,897 posts
Up Into Fourth
- Location: Melton Mowbray, UK.
Posted 27 December 2010 - 07:31 PM
After some research it's the easiest way, they are tamper free so are damn tricky to get out. It's either cut a slit, which I did using a 1mm cutting disc, or if you've got skinny enough mole grips, try that.
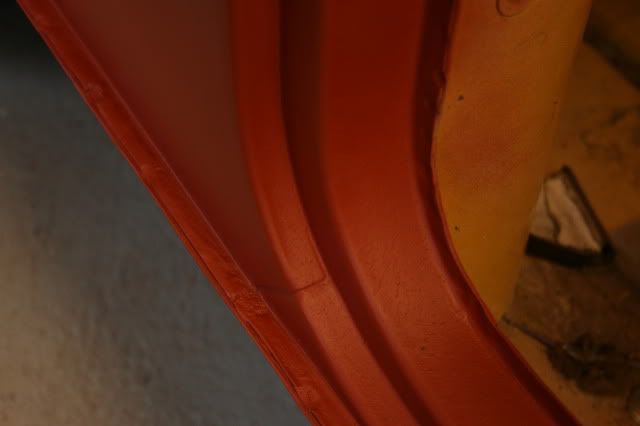
Anyway, today I was just prepping and cleaning some of the exposed repairs or bits that were covered like the seam strips for example. A knotted wire brush wheel on an angle grinder is fantastic by the way. So I bare metal'd what I needed to, Ku-rusted it and left it to dry. Then I applied a dusting of etch primer and a coat of red oxide. I'll follow the guide in the latest Mini Magazine which is handy. I want to do as much as the prep work as possible to save costs in the bodyshop.
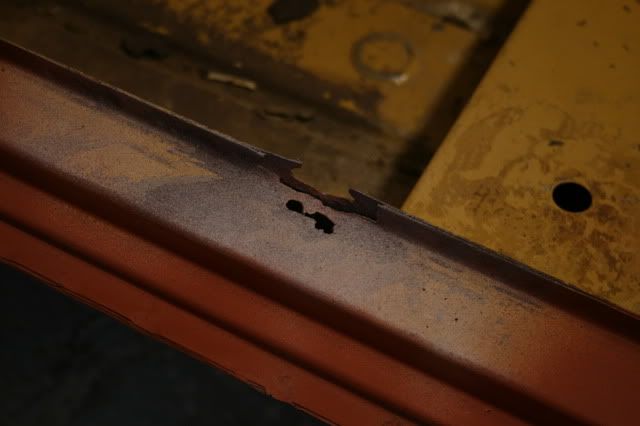
And I found hopefully what will be the last rusty spot.
Anyway, today I was just prepping and cleaning some of the exposed repairs or bits that were covered like the seam strips for example. A knotted wire brush wheel on an angle grinder is fantastic by the way. So I bare metal'd what I needed to, Ku-rusted it and left it to dry. Then I applied a dusting of etch primer and a coat of red oxide. I'll follow the guide in the latest Mini Magazine which is handy. I want to do as much as the prep work as possible to save costs in the bodyshop.
And I found hopefully what will be the last rusty spot.
#45
LouisT
-

- Members
-
- 197 posts
Mini Mad
- Location: Manchester
Posted 27 December 2010 - 08:11 PM
all 3 of your project threads are a great inspiration for mine,
love how much attention to detail you give to them,
i should be starting mine soon, and ill be filing through your projects for help no doubt,
keep it up,
Louis
love how much attention to detail you give to them,
i should be starting mine soon, and ill be filing through your projects for help no doubt,
keep it up,
Louis


0 user(s) are reading this topic
0 members, 0 guests, 0 anonymous users


