Jump to content


Photo
- - - - -

My Fixerupper


  • Please log in to reply
200 replies to this topic

#31 minilester

minilester

    One Carb Or Two?

  • Noobies
  • PipPipPipPipPipPipPip
  • 770 posts

Posted 22 July 2011 - 06:53 PM

it is quite alot to do with the lighting on these compact cameras if you can drag your work out in to the day light the shots would look 50 times better and if it uses auto focus give it time to focus b4 you push the button all the way in to take the shot :thumbsup:


..just a few things iv learned is all :) :D

#32 skoughi

skoughi

    One Carb Or Two?

  • Members
  • PipPipPipPipPipPipPip
  • 1,199 posts
  • Location: Lerwick
  • Local Club: Shetland classic car club

Posted 22 July 2011 - 09:44 PM

It's a Fuji finepix s1000 10megapix. It should be a very good cam but even waiting for it to focus and trying the macro mode i can't seem to get clear shots. Sometimes having the flash on helps but it has some sort of fault that means it won't record the shot. Think i'll look for something new!

#33 skoughi

skoughi

    One Carb Or Two?

  • Members
  • PipPipPipPipPipPipPip
  • 1,199 posts
  • Location: Lerwick
  • Local Club: Shetland classic car club

Posted 13 August 2011 - 09:57 AM
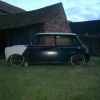
Managed to get the passenger side rear seam repaired. This involved starting at the top and cutting out sections of the old deseaming that had been done. I cut out bits about 200mm long by 20-30mm wide then seam welded in new metal. Managed to get a good penetrating weld that left a good bead on the inside which bar a little tidying up has been left. This meant i could grind the outside smooth and shrink, streach and batter into a more smoother and rounded shape. It will still need a little filler but should just be a skim instead of a thick layer that was there before. At the bottom i've taken off the flange off the valance and shaped it too fit the bottom of the quarter/rear panel so once thats seam welded then a skim of filler should be all thats required. I ground off the filler off the drivers side last night and found a strip thats been laid out over the original seam the buried under a lot of filler! So it's now a case of doing the same as before starting at the top and finishing below the light opening. Then once thats done i can replace the bit below the boot opening and shape the valance to leave a smooth rounded butt!!

Attached Files


Edited by skoughi, 13 August 2011 - 10:05 AM.


#34 skoughi

skoughi

    One Carb Or Two?

  • Members
  • PipPipPipPipPipPipPip
  • 1,199 posts
  • Location: Lerwick
  • Local Club: Shetland classic car club

Posted 15 September 2011 - 08:42 PM

Finally managed to get both rearr seams finished and the valance fixed on as well. I did both seams by cutting out the work that had been done before and welding in 20-30 odd mm strips. I butt welded in the strips, lap welding would have been easier but wasn't wanting the risk of rust in the lap joint bubbling out at a later date. I welded from the outside and managed to get a good bead on the inside which meant i could grind the outside smooth and just grind off enough on the inside to make it look reasonable! I had to do a lot of shrinking and beating though to get it to a passable state so there isn't too much filling to be done. The section from below the boot lid/edge of the boot floor and valance was a frap! I used the shape of the valance as a rough guide for making it up which was a mistake as it was a cheap pattern and was a crap shape! I should've made enough to get the boot lid bolted back on then used that to get the shape. When i bolted it back the lower edge of the apature was too high and was touching the boot lid! I had to run a cutting disc between both hinges to get the lower edge down and open up the panel gap then seam weld it back up. The valance ended up having so much cutting, reshaping and welding that it's a completly different shape from what it started out as!

Attached Files

  • Attached File  002.JPG   145.32K   30 downloads
  • Attached File  001.JPG   153.95K   35 downloads
  • Attached File  004.JPG   158.08K   17 downloads
  • Attached File  006 (2).JPG   150.87K   44 downloads


#35 Bristol Mini

Bristol Mini

    Mini Mad

  • Noobies
  • PipPipPipPip
  • 162 posts
  • Location: Take a guess.

Posted 15 September 2011 - 08:44 PM

Looks lush mate

#36 skoughi

skoughi

    One Carb Or Two?

  • Members
  • PipPipPipPipPipPipPip
  • 1,199 posts
  • Location: Lerwick
  • Local Club: Shetland classic car club

Posted 15 September 2011 - 09:02 PM

Cheers, i like the deseamed look but sometimes wish it hadn't been done before i got my hands on her as it's been a lot of work to repair whats been done before! I think if she'd still had the seams on then i would've welded from the inside then cut off the seam after. What ruined it was some of the seam had a plate welded over the seam and some was just tacked here and there then everything buried in filler! There will still be filler but at least it's welded from top to bottom with no lap joints.

#37 skoughi

skoughi

    One Carb Or Two?

  • Members
  • PipPipPipPipPipPipPip
  • 1,199 posts
  • Location: Lerwick
  • Local Club: Shetland classic car club

Posted 24 September 2011 - 08:27 PM

Managed to get back into the garage today and tackled the rotten battery box. I had a length of stainless flashing from work which had a 90* bend on it so thought it would do the job, at least it wouldn't rust in front of my eyes! Whipped out the old one, took a few sizes, marked up the stainless and went for it with the cutting disc. At this point i had that reoccuring thought, "why didn't i buy a sheet metal bender!" Struggled on with my two bits of aluminium angle in the vice and various clamps and got something close to a box. Then balanced the box on a trolley jack in the hole in the boot and jacked it up to the right height and marked the boot floor around the box. Marked a 20mm lip above this mark and got the cutting disc out again. Then i had to bend it with a hammer and dolly, didn't look all that great but still has to get welded and ground so not too worried. So there it is ready for welding to the boot floor, just needs a couple of drain holes and i've some rubber matt that i'll cut to size and glue down to the bottom of the box for a slight cushion for the battery. Job done, one more thing off the list!!

Attached Files

  • Attached File  011.JPG   77.69K   22 downloads
  • Attached File  010.JPG   62.57K   15 downloads
  • Attached File  013.JPG   66.73K   22 downloads
  • Attached File  030.JPG   171.91K   33 downloads
  • Attached File  031.JPG   172.11K   16 downloads
  • Attached File  029.JPG   188.15K   25 downloads


#38 skoughi

skoughi

    One Carb Or Two?

  • Members
  • PipPipPipPipPipPipPip
  • 1,199 posts
  • Location: Lerwick
  • Local Club: Shetland classic car club

Posted 02 October 2011 - 06:19 PM

Finally got the boot area to the priming stage today. I've got all the welding repairs done apart from a little bit underneath the boot at the valance closing sections, which will get done when i get her on a spit. There was quite a few layers of unknown types of paint in most areas so i decided to get the paintstripper out and get it completly off. Didn't take too long and a least i didn't grind any more metal off doing it. Then i gave all the exposed metal a good rub with jenolite. This will keep any surface rust at bay until i get a chance to get some hamerite primer on. One job still to do though is to shrink the metal in the wheel tub. Its been streached over the years and now the wheel well sits on the subframe at the rear. So a couple of hours with the shrinking disc in the grinder and i should get some tension put back into it, the primer then i can finally get the seat back and rear shelf put back in! :D

Attached Files

  • Attached File  018.JPG   236.43K   38 downloads
  • Attached File  020.JPG   231.61K   46 downloads


#39 skoughi

skoughi

    One Carb Or Two?

  • Members
  • PipPipPipPipPipPipPip
  • 1,199 posts
  • Location: Lerwick
  • Local Club: Shetland classic car club

Posted 17 October 2011 - 09:08 PM

Well thats me finally got the boot primed and welded in the rear seat panel. I've primed the boot even though there will still be some welding to be done, it kinda makes me think i'm getting somewhere! Plus it may keep some of the everpresent rust from getting any worse. I was then able at long last to dig out the salvaged rear seat bulkhead and prep it then get it welded in place. I've simply used the spot welds that i drilled out for new welds, with a few extra here and there. Very chuffed with it and the shell is starting to look like a shell again, plus i now have rear seat belt mounts for the little ones. I'm not sure how this will check out with the MOT testers when it finally comes to that, i'm confident that my welding is good but it may be wise to leave them out when i get her tested, anyone have any thoughts on this? Next job is to get my other salvaged panels, rear bins, sorted and fitted. I stupidly cut about 40mm of the bottom of one when i was removing it so i've sorted that tonight by welding in a strip and will do a little fetteling and fit them, i'll get some pics up once i finish them to explain better. Talking of pics i've nearly used up my quota, how can i get more quota?

Attached Files

  • Attached File  023.JPG   203.82K   30 downloads
  • Attached File  020 (2).JPG   217.32K   51 downloads
  • Attached File  022.JPG   190.79K   33 downloads
  • Attached File  025.JPG   226.54K   41 downloads


#40 skoughi

skoughi

    One Carb Or Two?

  • Members
  • PipPipPipPipPipPipPip
  • 1,199 posts
  • Location: Lerwick
  • Local Club: Shetland classic car club

Posted 05 November 2011 - 08:50 PM

Finally got to the stage of getting a spit made! As you can see it's been put together with what ever i could scran! The scaffold clamps on the main pipe seem to be holding fine but i may end up doing something a bit more solid. The body has ended up a lot easier to turn than i expected, it is a completly stripped shell so it's easy to lift anyway. It may not look the prettiest but it's doing the job and i'm reasonably chuffed with it, and all for the cost of £18!

Attached Files

  • Attached File  016.JPG   207.8K   58 downloads
  • Attached File  017.JPG   204.17K   37 downloads
  • Attached File  021.JPG   208.39K   36 downloads
  • Attached File  025.JPG   206.98K   25 downloads
  • Attached File  027.JPG   251.17K   42 downloads
  • Attached File  028.JPG   237.78K   39 downloads


#41 skoughi

skoughi

    One Carb Or Two?

  • Members
  • PipPipPipPipPipPipPip
  • 1,199 posts
  • Location: Lerwick
  • Local Club: Shetland classic car club

Posted 06 November 2011 - 07:46 PM

Whey hey! I got me some seats t'day! Maybe not the most stylish but they're comfy, they've come out of a saxo about mid ninties vintage! Anyone got any tips on dying seat covers?! I think i'm going to use the seat runners that comes with them so i can get the seat backs to tilt forward. This means making up some brackets to get them fixed to the floor though i'm not that keen on this as i've replaced the floor and crossmember, but there's no way around it so thats whats going to happen. Has anyone fitted these seats or type of seats before and how did you get around it? Also i've noticed when i had a trial fit with the steering column in place that my wheel is completly off center. I have a drop bracket but dont't think this makes any difference. Does any one have any solutions for this problem or to at least make it slightly better? I've got both seats very close together but i think they're probably rather wide for a mini, if i had a pair of classic cobra buckets then this problem might not be so bad as i would think the cobras will be narrower therefore i could get them closer together, any thoughts on this? I got most of the underseal off the boot floor today so a bit of weld snotters to clean up and more welding that i couldn't do from above, plus lots of lovely rust to sort as well!

Attached Files

  • Attached File  003.JPG   239.68K   12 downloads
  • Attached File  004.JPG   229.37K   29 downloads
  • Attached File  006.JPG   233.58K   20 downloads
  • Attached File  009.JPG   239.43K   33 downloads


#42 skoughi

skoughi

    One Carb Or Two?

  • Members
  • PipPipPipPipPipPipPip
  • 1,199 posts
  • Location: Lerwick
  • Local Club: Shetland classic car club

Posted 13 November 2011 - 07:16 PM

I made a start at cleaning the rust off the underside of the boot floor, well i actually started last weekend, then left it and by the time i got back to it this morning it was in a worse state! The first pic is as it was when i turned her over, then the next is after i'd cleaned of most of the gunk and given it a run over with the wire cup in the grinder. This leaves as much metal as possible still on the car. I then took some patio cleaner, which is a mild hydrochloric acid, brushed on small amounts and gave it a good rub with some wire wool. On the really bad bits i used a small wire cup in the drill. I would add at this point that it's a good idea to use full PPE!! I did this quite a few times and after each time wiped off all the rusty mess. This left quite a nice shiny surface, but it can't be left as it will rust up straight away. Went for it after that with jenolite, but did it about 3 or 4 times, rubbing with wire wool. This seems to leave a good surface which stays as it is for a while. I checked it again tonight and stiil seems fine. Think i'l clean the whole floor like this then go over it again with jenolite then a coat of zinc primer. At least doing it this way i can leave as much metal on the car as i can instead of sweeping it up

Attached Files


#43 cityspeed

cityspeed

    Mini Mad

  • Noobies
  • PipPipPipPip
  • 193 posts
  • Location: Essex

Posted 13 November 2011 - 07:43 PM

keep up the good work
Good chemicals! I think I will have to purchase some of these to speed things up! Fed up of bloody undersill!

#44 DAVEY_C

DAVEY_C

    Super Mini Mad

  • Members
  • PipPipPipPipPipPip
  • 555 posts
  • Location: kildare, ireland
  • Local Club: irish minis owner club

Posted 13 November 2011 - 08:18 PM

fantastic job mate, it pays to have the skills :proud:

#45 skoughi

skoughi

    One Carb Or Two?

  • Members
  • PipPipPipPipPipPipPip
  • 1,199 posts
  • Location: Lerwick
  • Local Club: Shetland classic car club

Posted 13 November 2011 - 08:21 PM

Go for the patio cleaner, it fairly cleans things up, but please wear the right gear! You're supposed to neutralise but it's not that strong. I left a scrap bit of metal in it overnight and it just took of the surface crap. It will rust straight away if you don't use something else after you've used it, thats why i use the jenolite. Seems to work fine and as i said its better than grinding everything away to nothing! Go on "metal meet forums" there's a few threads on there on removing rust with chemicals, interesting stuff.http://www.metalmeet...read.php?t=7132


0 user(s) are reading this topic

0 members, 0 guests, 0 anonymous users