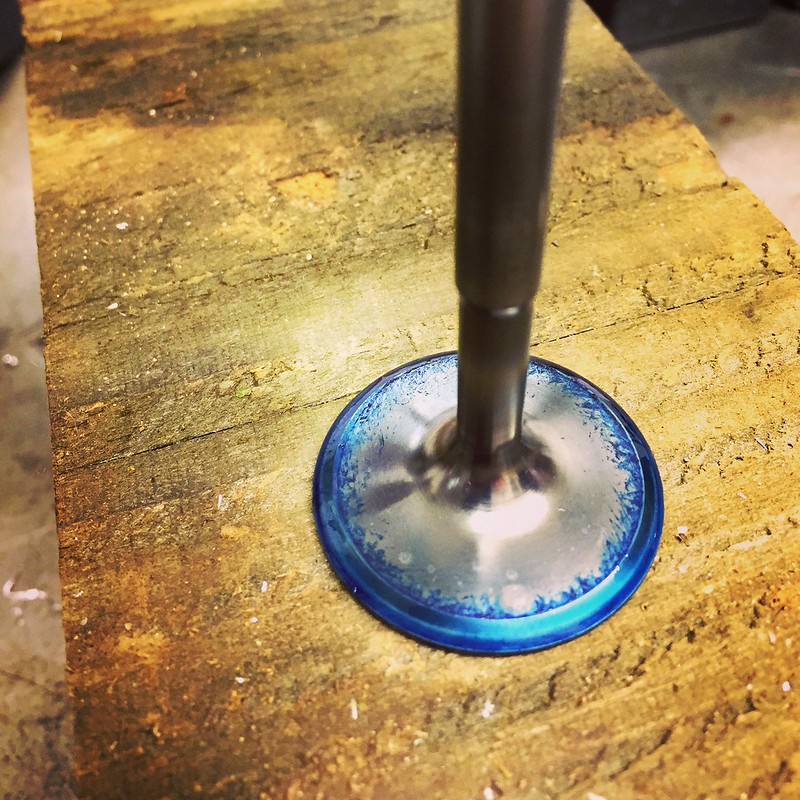
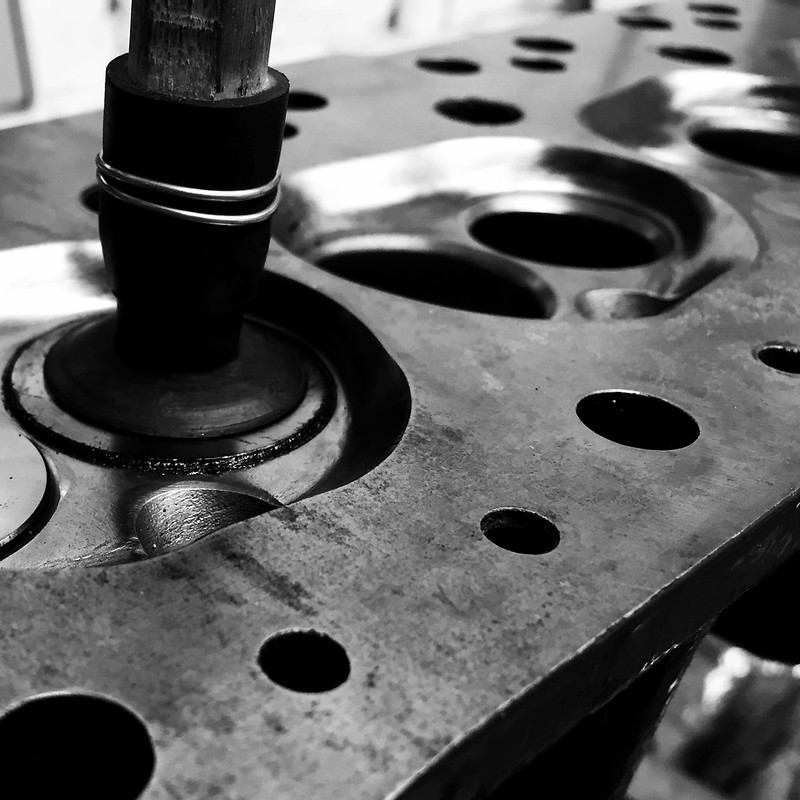
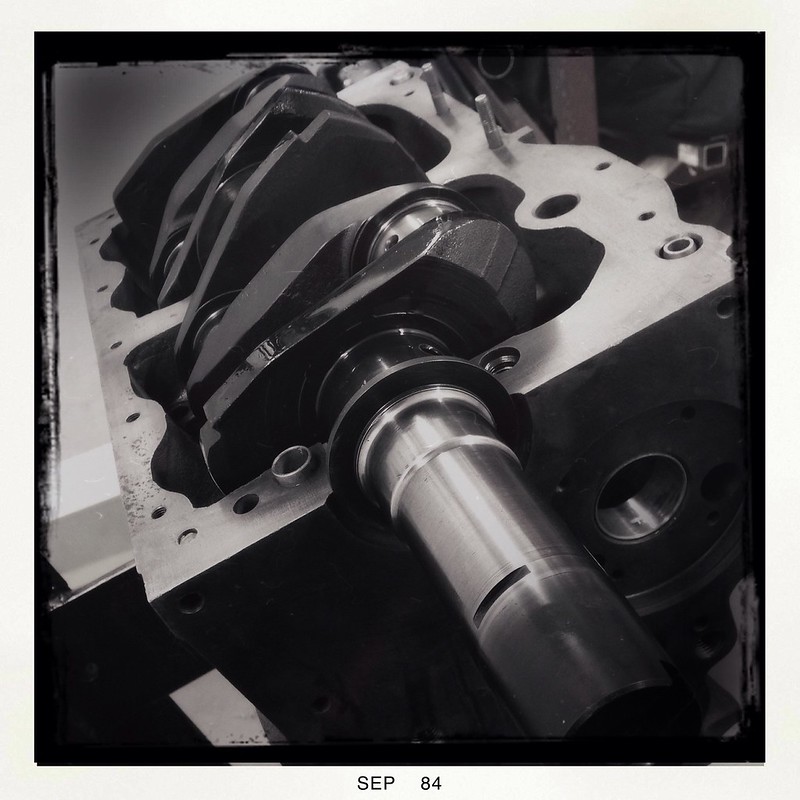
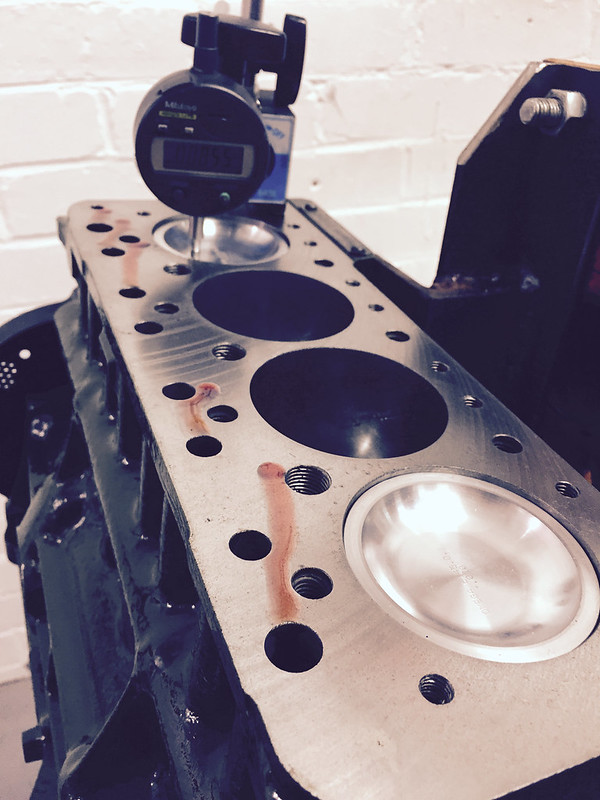
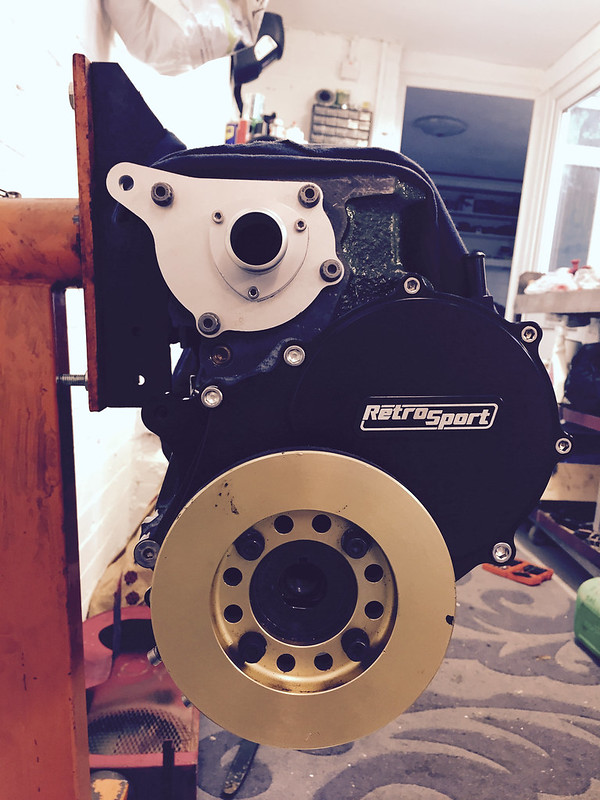
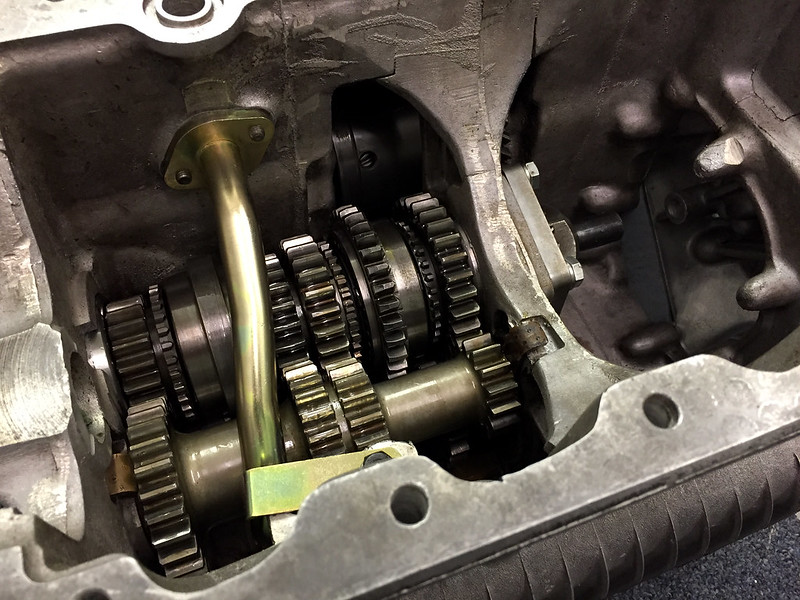
Jump to content


Photo
- - - - -

Lil Grey


  • Please log in to reply
66 replies to this topic

#31 t@z

t@z

    Camshaft & Stage Two Head

  • TMF+ Member
  • PipPipPipPipPipPipPipPip
  • 1,712 posts
  • Local Club: www.turbominis.co.uk

Posted 08 January 2012 - 07:24 PM

today has been a mammoth mini weekend. yesterday i helped lee with his mini and doing a few bits on that and today was a busy day on mine!

i just want to say thanks to lee as without him i would have given up about 1130 this morning.

basically mechanically it ran it needed a few things sorted for MOT etc.

so today we.....

- headlights (this was a pain as it kept shorting, blowing fuses and we never knew why. turned out it was a lose bulb holder on the back of the center clock making a connection; massive ball ache. also had to clean the connector)

- side lights & indicators

- rewire incl inline switch for aux fan

- windscreen wipers and washer jets

- horn

- bonnet strap(s)

- exhaust wrap screamer pipe & re cut end to tidy it up.

- had a few other niggly delays like dash light's not working and gernally checking everything for an MOT etc

so anyway i need to hover it and tidy the dash up again; i sure there is probably something else but at the moment i cant really think. been a busy weekend!!!!

Posted Image
mini lights by lilpinkiy, on Flickr

#32 t@z

t@z

    Camshaft & Stage Two Head

  • TMF+ Member
  • PipPipPipPipPipPipPipPip
  • 1,712 posts
  • Local Club: www.turbominis.co.uk

Posted 21 January 2012 - 12:05 AM

had a few issues with it anyway got it sorted. came home tonight to try and run some tests. supermottolee decided to join me and help which i was very grateful for :) i always get more done with him about cracking the whip lol

anyway.....without being a complete dick we checked a few things and worked out it was the fuelling. we couldnt work out if there was any in the tank so we went and got some more petrol.

when we got back we let the pump drain it and what came out was just shy of a ltr of non flammable ******* that looked like someone had pissed down into my tank. i guess the dude who i got this tank off had petrol in there for a while :S

put new fuel in and hey presto fired......******* thing!

we then plugged in the computer and tried to get it idling better and tried to look at the various maps i had to see if we could tweak any. once we were happy with that i we then mocked up the force racing steady and fitted that to the lower front subframe. required some drilling and grinding of the bracket but the engine is now properly secure and not just on the clutch to bulk head box.

soooooo, i think its ready for an mot......

Posted Image
good job! by lilpinkiy, on Flickr

video
http://www.flickr.com/photos/lilpinkiy/6728004995/in/photostream/

#33 t@z

t@z

    Camshaft & Stage Two Head

  • TMF+ Member
  • PipPipPipPipPipPipPipPip
  • 1,712 posts
  • Local Club: www.turbominis.co.uk

Posted 01 March 2016 - 02:49 PM

so this will be a bit of a spam update i'll try keep it to the point but if you want to see more if i have missed anything check link in sig


01.07.14


i have been busy collecting parts for the rebuild and coming to terms with parting with my cash, be worth it in the end i keep telling myself.
 
As some of you may remember i had a wanted add for a new block around Jan time.  Mostly the reason what because i was building a new engine with new parts it was outside the tolerances that we wanted to build with.  Had it been my current pistons etc i would have just reused it but alas i wasn't so thankfully eden come to my rescue.  The block had already been dry decked and it was the correct bore size so that saved him some time.
 
my donor from eden and secret sock object with chesman engineering
10326438_652582874796772_1684661936_n.jp
 
I don't have any pictures to hand of the block now but its been away to be chemically cleaned, re bored, top slighted decked to make sure its flat and supply and fit new cam bearings.  The engine itself looks new and hardly any water penetration after the clean and next to no paint so really happy with all the work that has been done to that.  Had a slight emergency in that the dummy cam i gave them was proving troublesome in the new bearings so i just decided to buy the cam the other week.  Wasn't expecting to pay for that now but alas it's bought.  Thanks to Benross for coming up trumps on that and sending it to them.
 
let me start with the story of what i have purchased.
 
some shiney things.... told i need these for my engine to work properly.
 
nice light exhaust acquired, the head also makes an ace rubber hammer holder.
10013298_517807394994245_1886346976_n.jp
 
took the time to go see MED as well while i was around the area dropping off the engine.
10311323_645775415494825_223013790_n.jpg
 
new springs also arrived from Tial Merica.
1527504_461777843967461_1682261705_n.jpg
 
Thats pretty much it.  Im going to be building the engine with Lee over the next few months so hopefully there will be more updates as we get it together and what we do.
 
T


#34 t@z

t@z

    Camshaft & Stage Two Head

  • TMF+ Member
  • PipPipPipPipPipPipPipPip
  • 1,712 posts
  • Local Club: www.turbominis.co.uk

Posted 01 March 2016 - 02:50 PM

19.01.15


Slight update.  
 
The engine has all been measured by lee so we could get the required compression, or least around what i wanted.  As a result it had to be sent back to Chesmans for some additional work to get that fixed.  Got that back last week so will be dry building with lee and painted etc hopefully get an actual built block over the coming month or so.
 
Had some slight trouble with the head.  Nothing major just the collets and caps i had for the valves were pretty *******.  wasnt happy with the standard caps from MiniSpares personally so ended up buying new valves with the single collet, mine had 3 before.
 
Lee helped measure my spring poundage and make some shims so they are equal.  when its built i think the head will be done other than needing to get some roller rockers.
10890969_709043272527990_660652615_n.jpg
 
Gearbox donor is being sent this week with a S/C gearset i have from an unused engine.  Swifty will be getting a call next to put in an order for a quaffle diff.
 
Cinq rad has been purchased and next month will also get waterpump & controller.
 
Matty has also sent me a downpipe so fingers crossed that should be less hassle. 
 
Feels like its taking an age but i'm not rushing it as it'll just end up being wrong and breaking :)
 
As work starts to pick up i'll try do more updates.


#35 t@z

t@z

    Camshaft & Stage Two Head

  • TMF+ Member
  • PipPipPipPipPipPipPipPip
  • 1,712 posts
  • Local Club: www.turbominis.co.uk

Posted 01 March 2016 - 02:50 PM

30.01.15


piss poor update incoming!
 
- engine and head being painted, think will need a few more coats mind!
 
10919456_1529639020630585_1522104600_n.j


#36 t@z

t@z

    Camshaft & Stage Two Head

  • TMF+ Member
  • PipPipPipPipPipPipPipPip
  • 1,712 posts
  • Local Club: www.turbominis.co.uk

Posted 01 March 2016 - 02:52 PM

14.05.15


as per normal i won't do much off the talking but mostly let the pictures do it.  slowly getting there thanks to lee.
 
hoping to see the light!
 
HEAD
17631685632_921ee320f3_c.jpg
17012126424_456b271040_c.jpg
17011547374_00a72e8641_c.jpg
17632251322_5cabc741a1_c.jpg
17012170124_f1b9c21ea6_c.jpg
17447718519_bd553cd760_c.jpg


BLOCK
17448357829_d41041581f_c.jpg
17013707113_1347f331fe_c.jpg
17631660042_94890e50f1_c.jpg
17448336579_10874df2f4_c.jpg
17447087890_66d20866d0_c.jpg
17013689093_830278c6ba_c.jpg
17011508454_c0a517c171_c.jpg
 
 
GEARBOX
17447736459_81b5722a7a_c.jpg


#37 t@z

t@z

    Camshaft & Stage Two Head

  • TMF+ Member
  • PipPipPipPipPipPipPipPip
  • 1,712 posts
  • Local Club: www.turbominis.co.uk

Posted 01 March 2016 - 02:52 PM

16.07.15


work has happened, getting there.  
 
thanks to lee mostly for it getting this far.  We've had a few disastrous failings the last few weeks.  block needing tapping more for head studs, not enough bolts or lacking tools and one random head gasket later so had to order another.   Needless to say it has taken a bit longer than one might expect.
 
However it's getting there, soon will be time to bring it home, or to its temp home while the engine goes in.
 
19116437654_d75a82cd8f_c.jpg
 
19550975280_a4e19b2e46_c.jpg
 
19712804676_5960705525_c.jpg
 
19550974650_9ff4e4d82e_b.jpg


#38 t@z

t@z

    Camshaft & Stage Two Head

  • TMF+ Member
  • PipPipPipPipPipPipPipPip
  • 1,712 posts
  • Local Club: www.turbominis.co.uk

Posted 01 March 2016 - 02:53 PM

06.01.16


s i said i would update i've just realised that while i have been doing bits its probably not much to write home about.... :D
 
So the ermmm where to start.  I had a lot of holidays in Aug and Oct so not much got done there, traveled some with work in between so that took some hit on progress as well next think you know bam here we are.
 
I spent a lot of time faffing about on ebay with adapters and arguing with myself how i will route the water cooling for the turbo and also get the right angle for the oil return.  As i never ran a speedo anyway i attacked the speedo drive casing for an easier return with and got an aeroquip welded on the outside to screw hose too.  just to help flow etc etc.
 
24128051071_b5fff4593d_c.jpg[/url]
 
i then bought a new toy :)
23915061900_f789aa9ea7_c.jpg[/url]
 
Lee and i then spent some night at this local establishment.
23582431424_c7fe0173d9_c.jpg
 
The end result and after some wallet rapeage from MED and MS and some spice girls magic... 2 finally become 1 with some new spacers (thanks lee)
23915062140_709e339501_c.jpg
 
Currently the assembly is with MiniSpeed to be balanced and i hope to get this all collected Saturday.
 
I've also ordered all the wiring for the Nodiz, finally see how this thing works soon and if it was a bit of a bad buy.  Time will tell.  Also ordered the EWP80 and controller as some people do on here.  Messing around with fans as well took some time and by god what a pain.  Anyway hopefully that is all resolved but wont know till it comes to fitting.
 
Last bit managed to faff around with a friends help to get the wheels straight as its being moved to a dry place to work in a few week.  Mega happy about that as the engine and car will come together and i can start (he says) making some progress getting it back together.
 
24210641545_fe6d7c3623_c.jpg
 
I'll update as and when stuff happens, thanks for reading :)


#39 t@z

t@z

    Camshaft & Stage Two Head

  • TMF+ Member
  • PipPipPipPipPipPipPipPip
  • 1,712 posts
  • Local Club: www.turbominis.co.uk

Posted 01 March 2016 - 02:54 PM

29.01.16


quick update.
 
engine is ready to come home from its place of temporary residence while building for the last few years
 
still have work to do as you can see i am missing bits but most off these are either at home or i'll order.
 
12568807_146224149091110_1908731228_n.jp
 
fingers crossed this page should become a bit more active.


#40 t@z

t@z

    Camshaft & Stage Two Head

  • TMF+ Member
  • PipPipPipPipPipPipPipPip
  • 1,712 posts
  • Local Club: www.turbominis.co.uk

Posted 01 March 2016 - 02:55 PM

01.02.16


so phase 2 of the 2016 operation is also now complete!!  
 
early morning start for collection
12568206_167435520294668_614064540_n.jpg
 
Sitting happy where i can sort the brake lines in and everything perfect in the dry!
12531130_216712678674102_1372914464_n.jp
 
also sorted out transportation to get the engine back so that will happen in the next 2 weeks.


#41 t@z

t@z

    Camshaft & Stage Two Head

  • TMF+ Member
  • PipPipPipPipPipPipPipPip
  • 1,712 posts
  • Local Club: www.turbominis.co.uk

Posted 01 March 2016 - 02:56 PM

29.02.16


Been busy with lots off faffing!  
 
There isnt much in the way off pictures but so to speak but i have been busy when i have been able to be.
 
Think Automotive has become my new home most fridays @4pm.  
 
So far i have run all new front lines, measured and then cut and crimped.  Because i am running a bias that is located inside mounted to the bulkhead box I was toying with the idea off trying to use the existing lines in the car for the rears but the other weekend things just werent working out.  Basically my bias is to low and the original rear line in the engine bay was to high.  Dremel time and laziness to feed it behind the front & rear subby it was removed.  I now after getting some bits spare from Think friday i ended up getting the rears measured (off to think tonight or tomorrow).  Also resulted in me having to probably get the rear left & right lines re made as well thanks to ******* threads.
 
Something from test fitting the above also meant that some of the sound deadening has cracked off so i will be hitting that as well ASAP although a task i had been avoiding due to people saying its a **** job.  However it is cold so maybe that will work in my favour.
 
I spent sometime fighting with the wiper motor so at the moment it is mounted inside, not sure if it works at all but it i havent changed anything so fingers crossed it works! :/
 
mocked everything up and realised the turbo rubs on the block... again as my old T2 did again.  must be a thing with this v1 matty manifold but its not the end off the world just all takes time on off on off do up studs.  In conjunction i also did the return messing around with different return adapters i have, boy do i hate push on hoses!!
 
24745476583_7eaf0d7263_b.jpg
 
so planning in my attempt to use the water cooling on the turbo and erm failing.  well not to the point of giving up but still it needs a rethink.  so im thinking off changing the adapter sticking out to a bango to give me more clearance as it rubs currently on exhaust = /fail! 
 
25346024036_5586f4b723_b.jpg
 
still to do is:
 
- wire in nodiz
- remove sound deadening
- fit engine
- bleed brakes
- make exhaust
- make passenger side engine steady
- fit seat rails
- fit seat
- get seat re stuffed (i have an old seat that looks cool just no padding)
- sort out dash
- wire in water pump & controller
 
So as you can see loads to do and im sure i have forgotten some bits off it.
 
regards
 
 
That is it for now people i'll try keep this more updated as i update my project page on the other site.


#42 t@z

t@z

    Camshaft & Stage Two Head

  • TMF+ Member
  • PipPipPipPipPipPipPipPip
  • 1,712 posts
  • Local Club: www.turbominis.co.uk

Posted 05 March 2016 - 06:35 PM

after seeing e5tus attack his car i thought why the hell not.  now i know this is going to be obvious to you all but fak me this crap weights a lot!!  after amazon priming some stanley chisels and them turning up being tiny i was dreading it but the 16mm (largest one) was amazing, and the smaller ones for helping to get going.

 
only done the rear at the moment, will do the fronts one eve.  need to get the crappy lil bits off as well was just going to use a wire brush or is there a better way?
 
Before
25532165665_022e25876d_b.jpg
 
After
25506026596_a7f65a604f_b.jpg
 
Managed to do my water feed and return.  It is a bit awkward and well I'm hoping there will be enough pressure in the system to push the water round but time will see.  Its really tight after trying to do it cheap it ended out being that there was only 1 way to and had to bite the bulltet.  The hose is high temp, super flexible stuff i got from think automotive, costs £35+vat a meter.  The unions don't get me started /cry. this is it below
 
Feed
this is super tight here mostly because there isn't much room on the bingo head for the exhaust downpipe.
25532174785_43e9c24c89_b.jpg
25532165515_c9a76ea1af_b.jpg
 
Return
25532172075_c7b120cc8d_b.jpg
 
Thats all for the moment, until tomorrow if i can be bothered to work on it :)
 
T


#43 James_eaton_thewholething

James_eaton_thewholething

    One Carb Or Two?

  • Members
  • PipPipPipPipPipPipPip
  • 1,063 posts
  • Location: Manchester

Posted 05 March 2016 - 10:36 PM

With the floor just keep scraping, I don't think there is really a quick way. I've found when you hear it up with any power tools it just wants to spread out instead of be removed

#44 t@z

t@z

    Camshaft & Stage Two Head

  • TMF+ Member
  • PipPipPipPipPipPipPipPip
  • 1,712 posts
  • Local Club: www.turbominis.co.uk

Posted 02 September 2016 - 06:14 PM

adding more from my build thread


pathetic update....

 
after doing the engine hokey cokey yesterday finally got it in.  few problems.  my rev 1 matty manifold and rev x GT17 downpipe meant that the downpipe fowled on the subframe.  originally tried just squishing the downpipe a lil but ended up needing to trim the subframe lip on the back as well after the 2nd trial fit.... so third time lucky. also while getting an engine in isnt hard it was a bit of a ******* messing with the thing tilting as i dropped it in with the turbo on, and a bugger to align with the holes. a lot cursing of cursing was involved!
 
also thanks for eagle eye for the washer.  that is now fixed :)
 
27461190883_4bc35f9471_c.jpg
 
27461194203_fb10332edf_c.jpg


#45 t@z

t@z

    Camshaft & Stage Two Head

  • TMF+ Member
  • PipPipPipPipPipPipPipPip
  • 1,712 posts
  • Local Club: www.turbominis.co.uk

Posted 02 September 2016 - 06:15 PM

adding more...


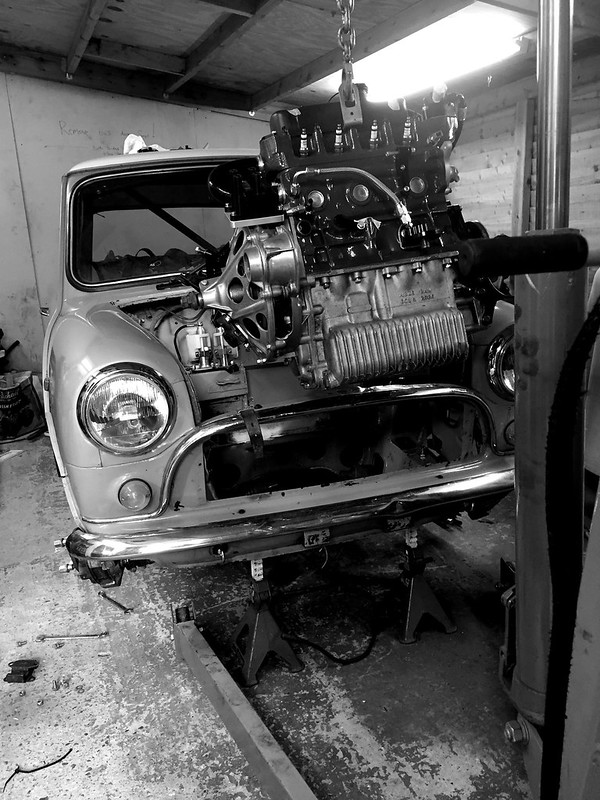
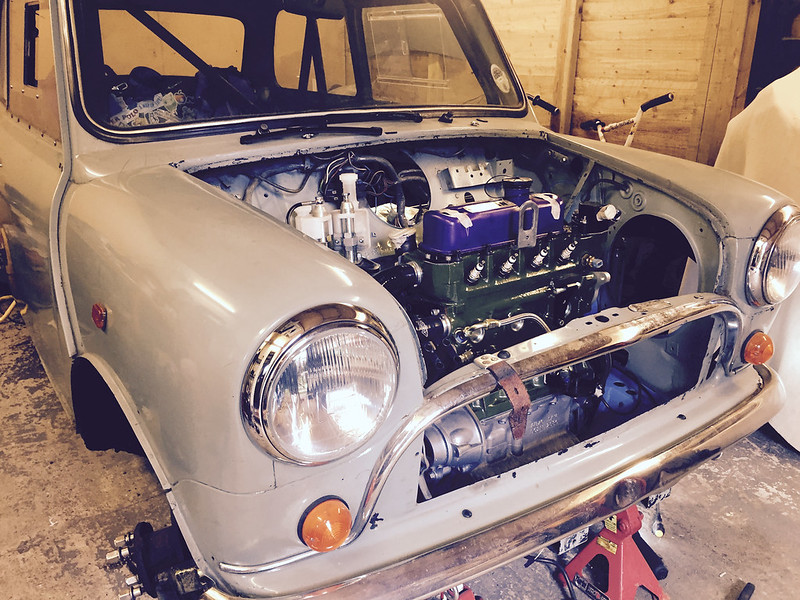
So after getting the engine in and sizing up the radiator.... realising how little space there was and some angle grinding.  Out the engine come again.

 
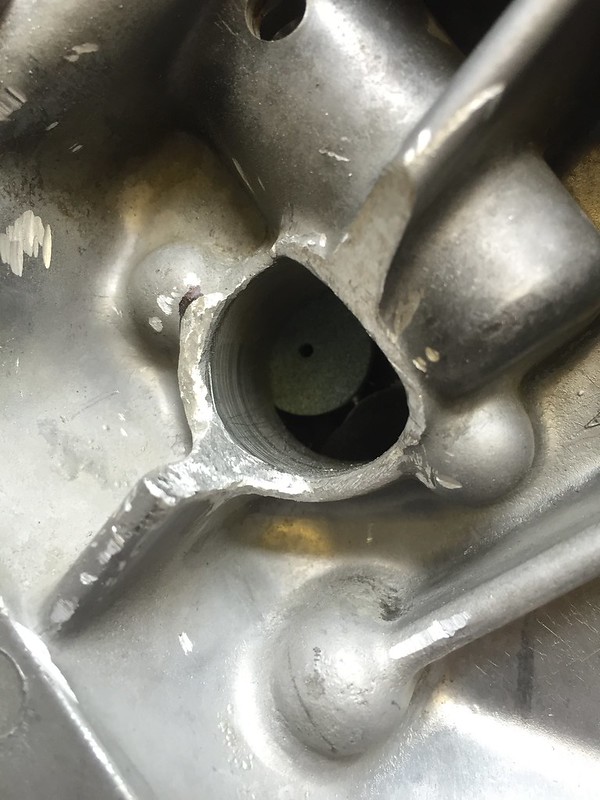
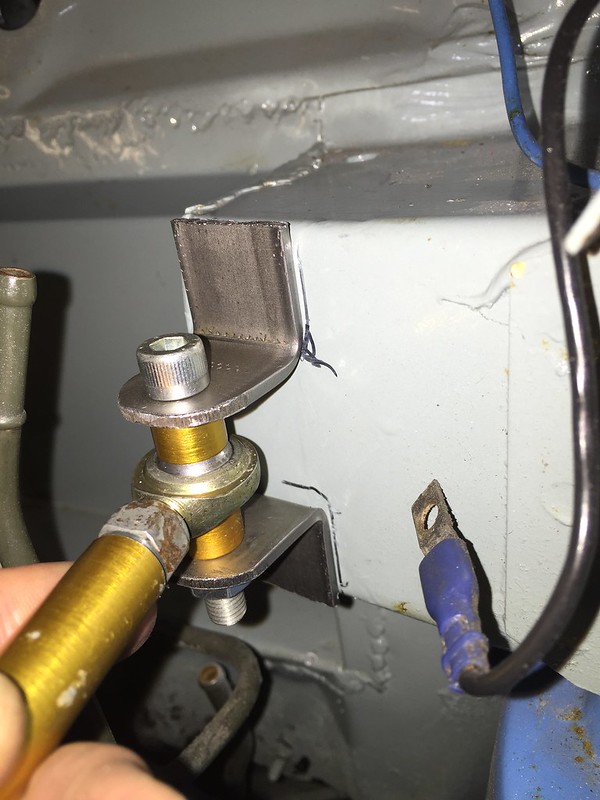
The reason why the engine come out was mostly due to the fact that i needed to weld on a new steady bracket.
 
So this...
29400895085_c0acdc5904_c.jpg
 
To this... (no laughing at my welding.... i am an excel warrior not really skilled in this melting stuff magic)
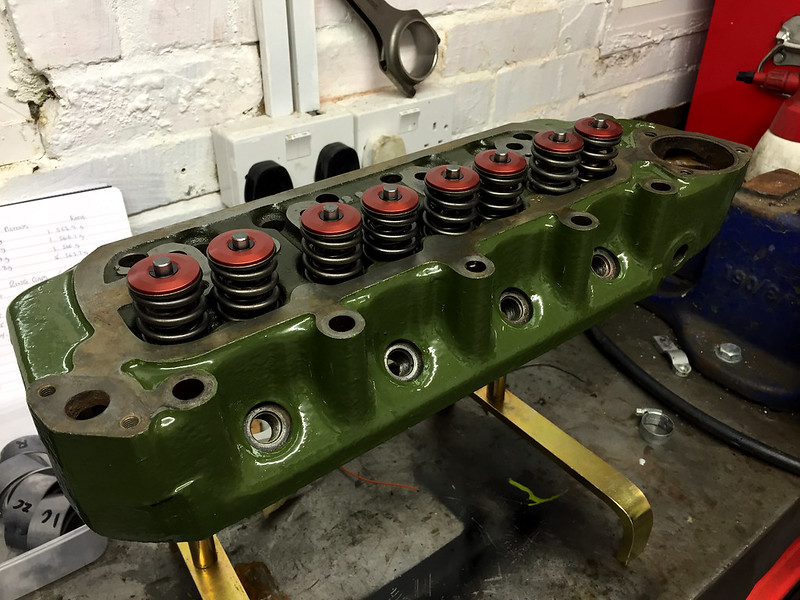
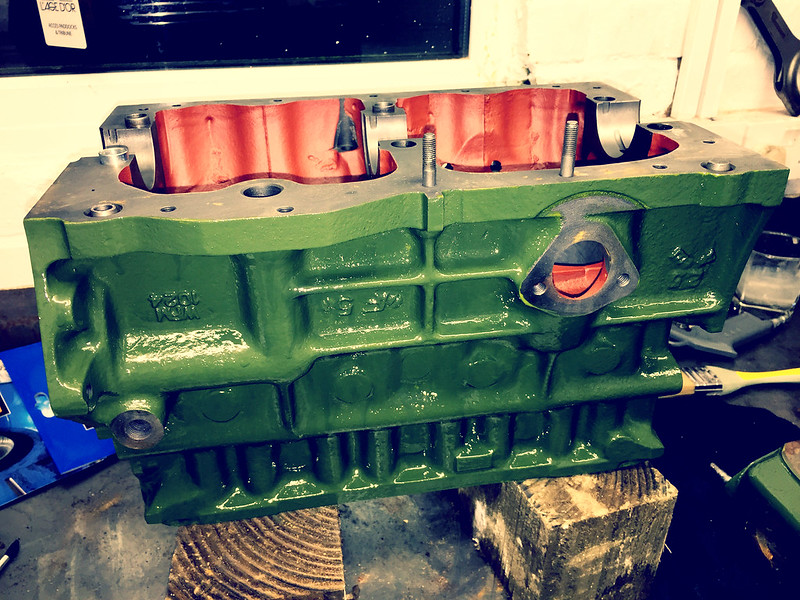
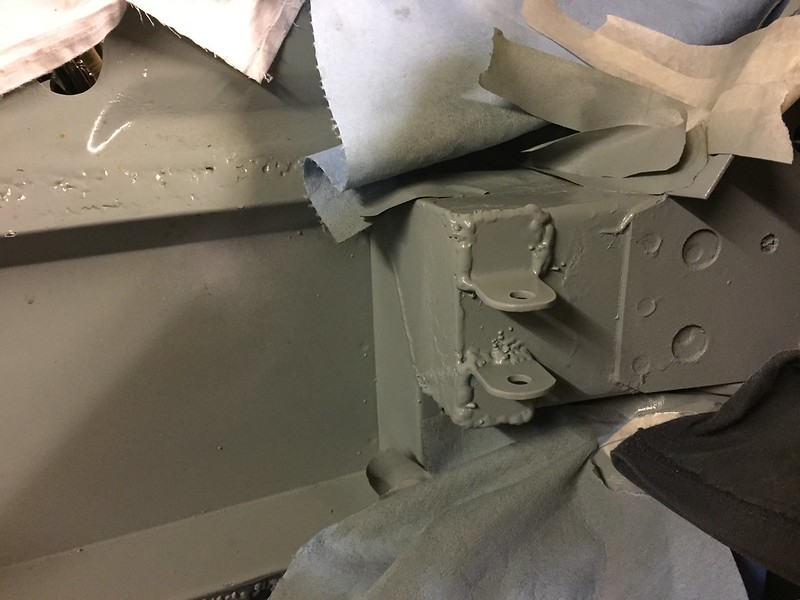
29321326321_1b007c21aa_c.jpg
 
Then painted...
29366449506_8d2b1f5b02_c.jpg
 
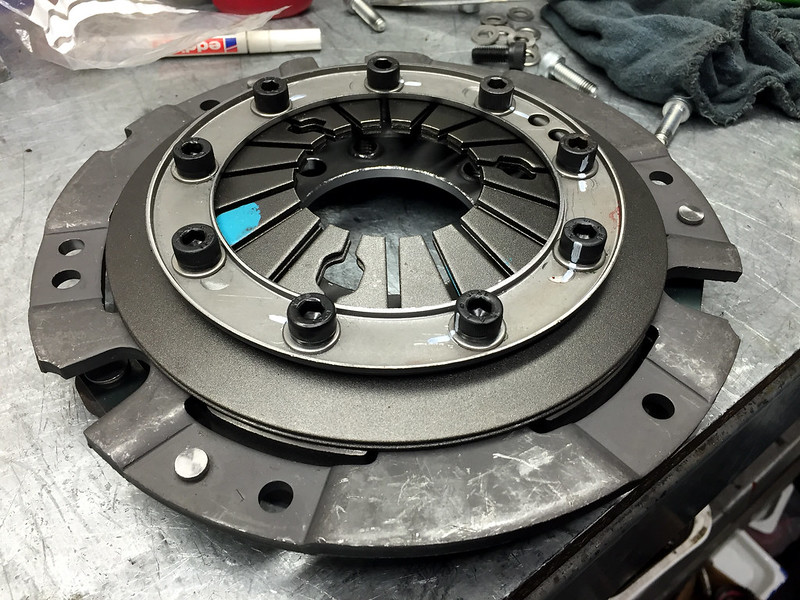
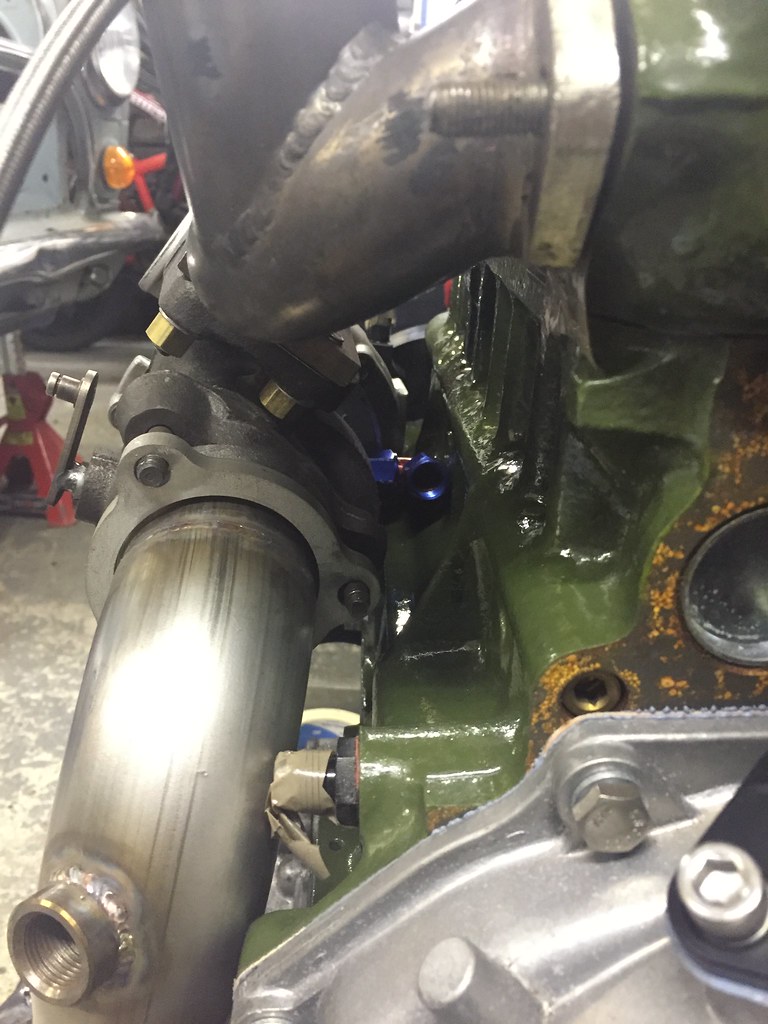
Not sure if i have put the somewhere in this thread but i got some off these made to go on the side off the water pump plate.
29321584071_eeb8723144_c.jpg
 
Will need a bit off tweaking but nothing some heat and a hammer wont fix :D  Fingers crossed should hold!
28776755714_ab3f35bc2b_c.jpg
 
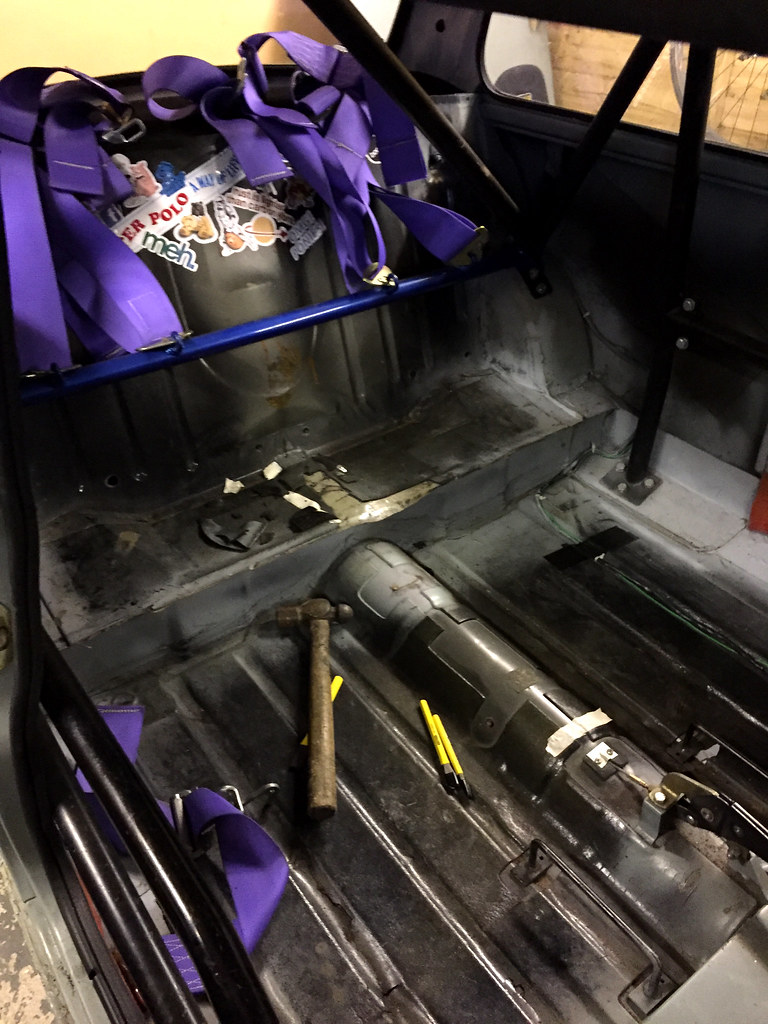
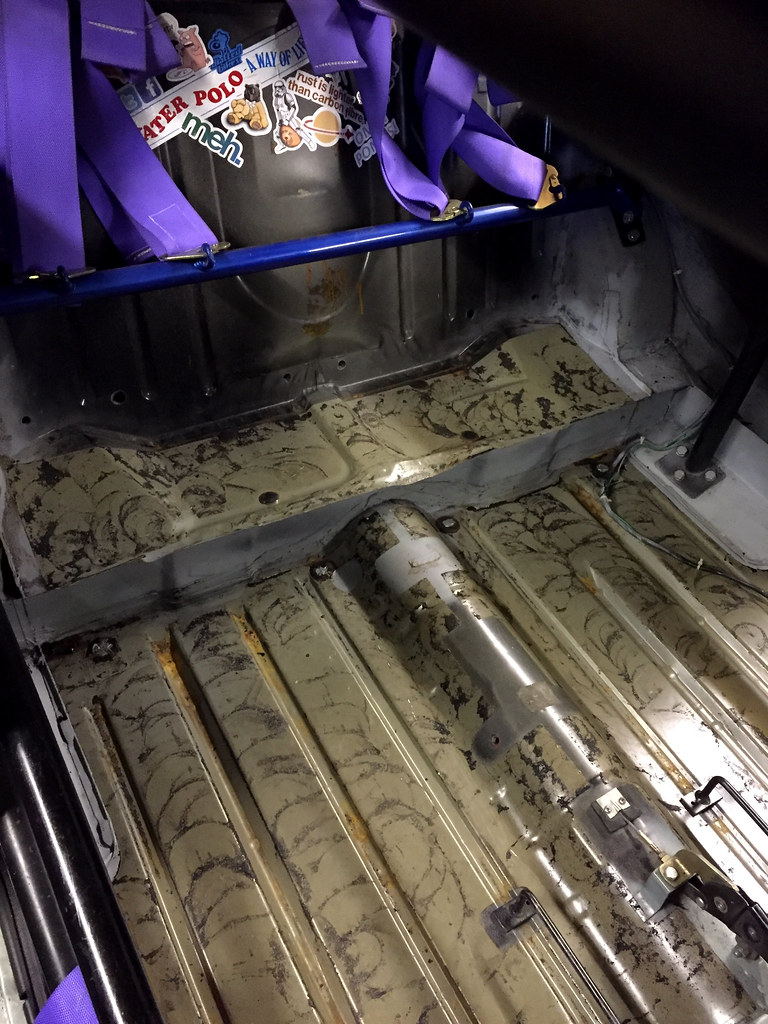
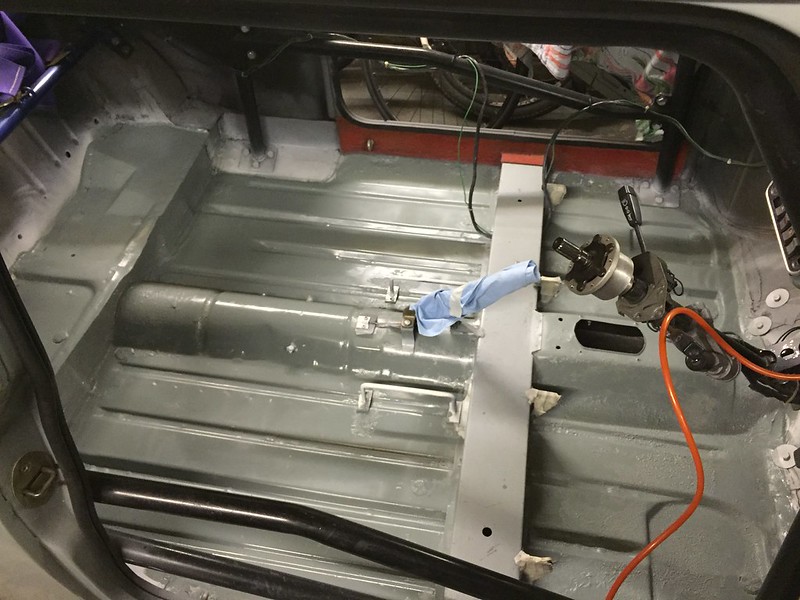
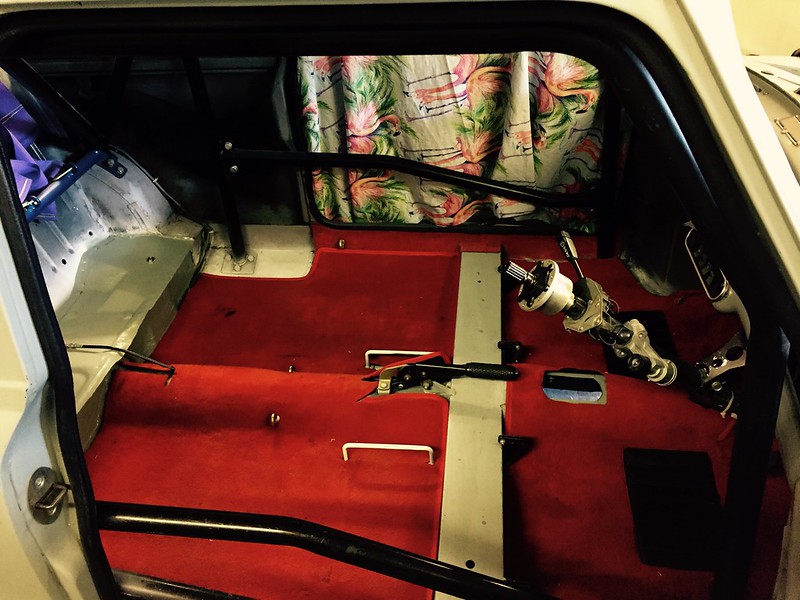
I then painted the inside.  The paint went a bit weird but its not to bad once dried, my excuse to in short say its ok.  Also ran the rear brake line from the bias under the dash through the rear seat and got all the rears connected finally.  Just need some help bleeding when the time comes.
 
Really is surprising how well the carpet makes it look more finished lol
 
28776574554_08f09b7fac_c.jpg
29112580780_a850c3c357_c.jpg
 
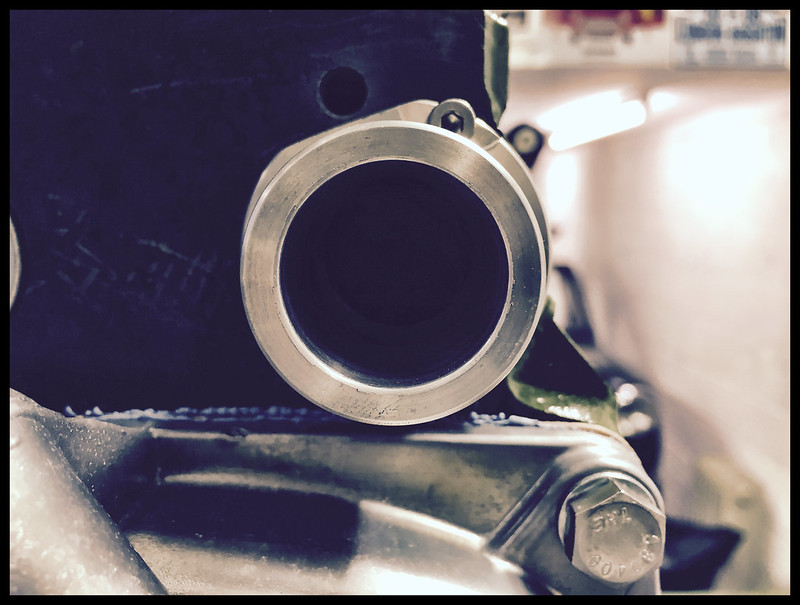
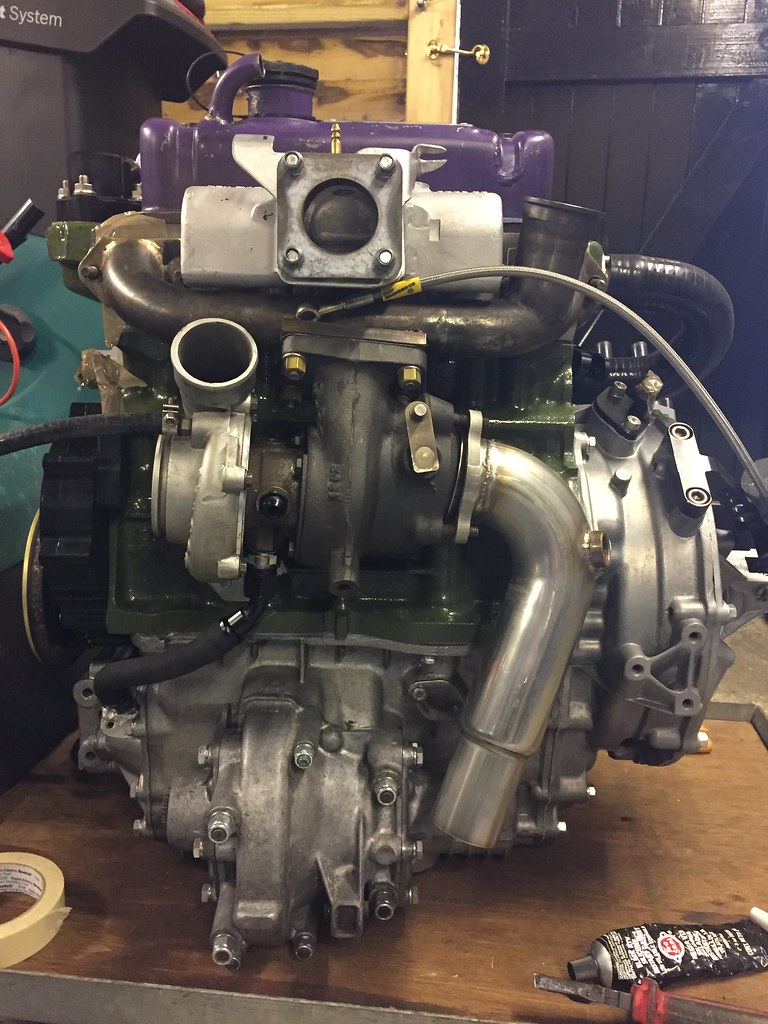
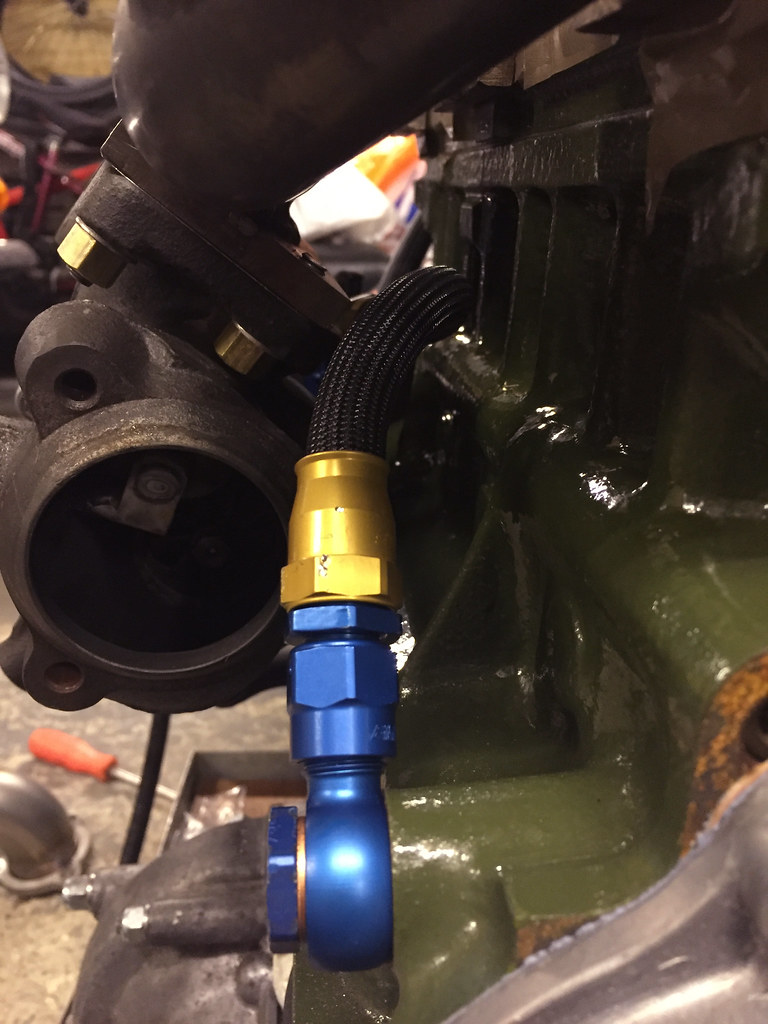
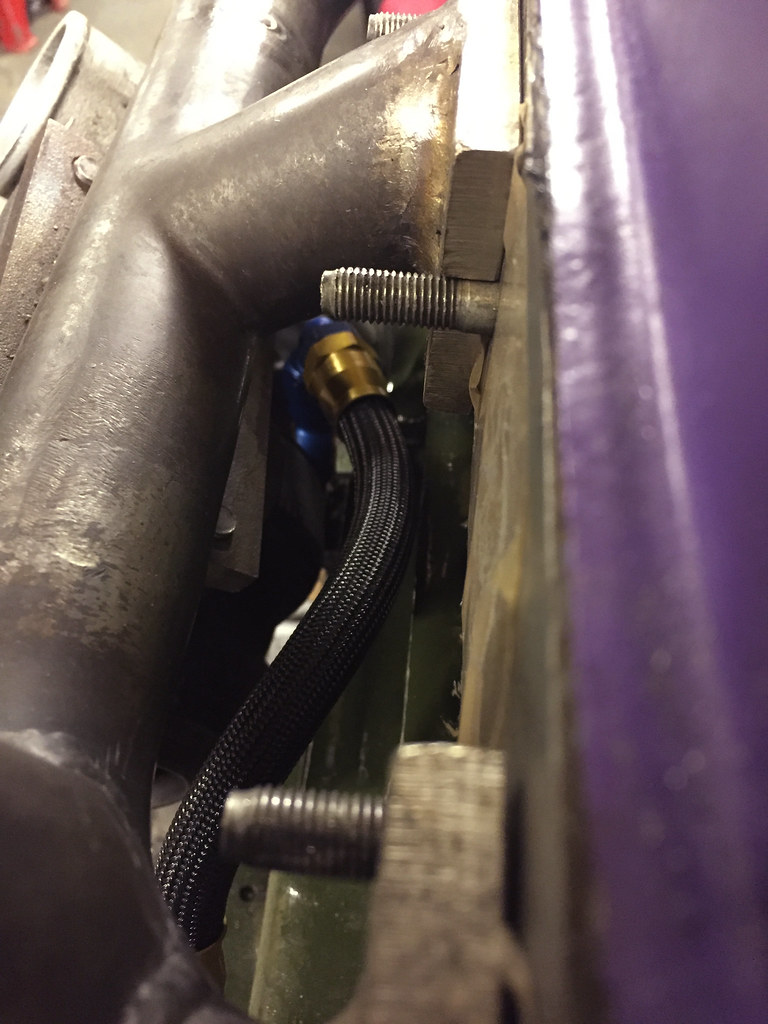
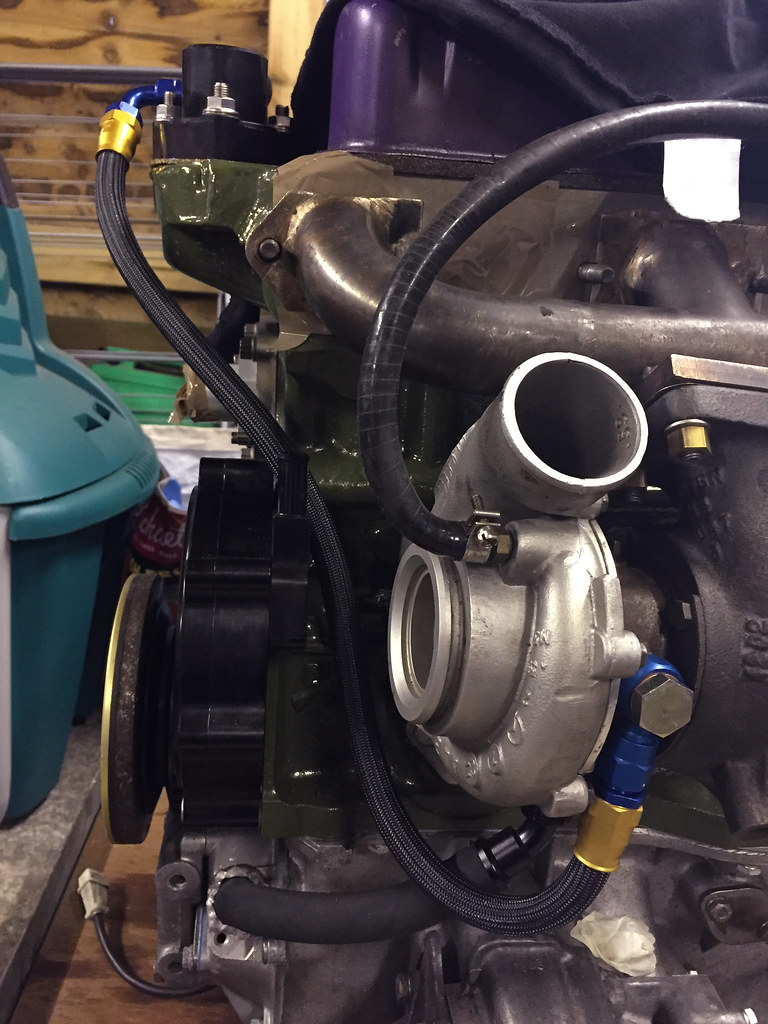
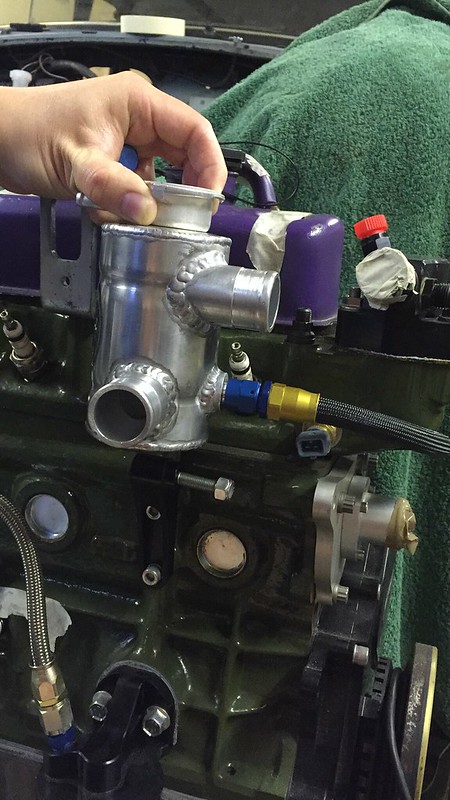
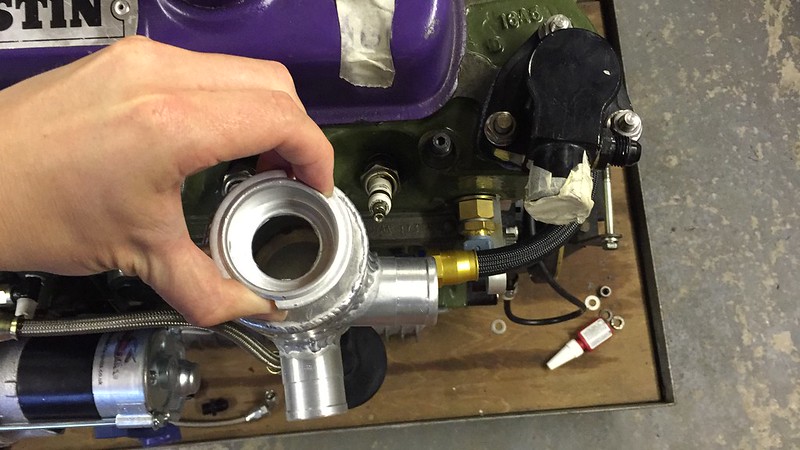
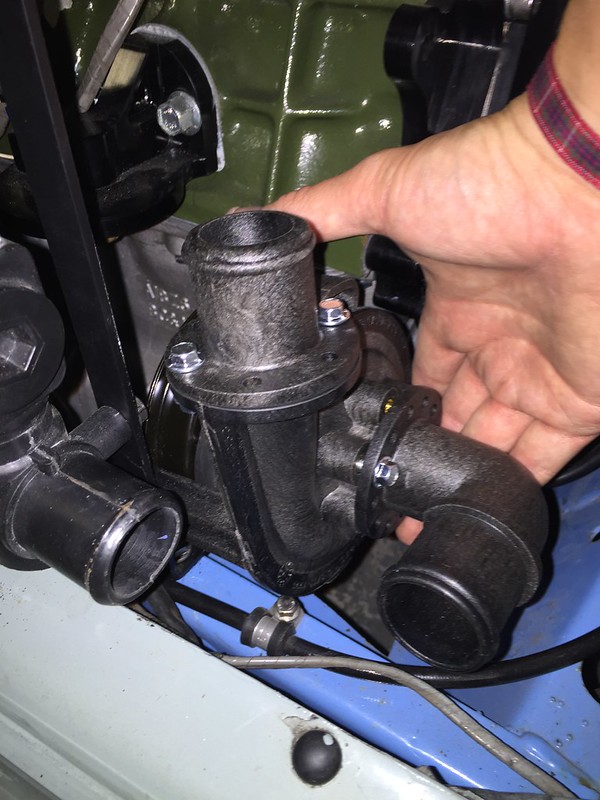
Next job was to try and figure out the issues that i had with regard to the last comment on the pump/turbo return from the water.  Went back to the drawing board and realised that if i swap the hose to the other direction it clears the turbo housing with the 90 deg and also the straight will reach to something similar to simons set up. Roll on 2 weeks and this rocked up.  thanks matty for this, super happy with it.
 
29292559182_275cc4a036_c.jpg
29400853605_087ac9bc87_c.jpg
 
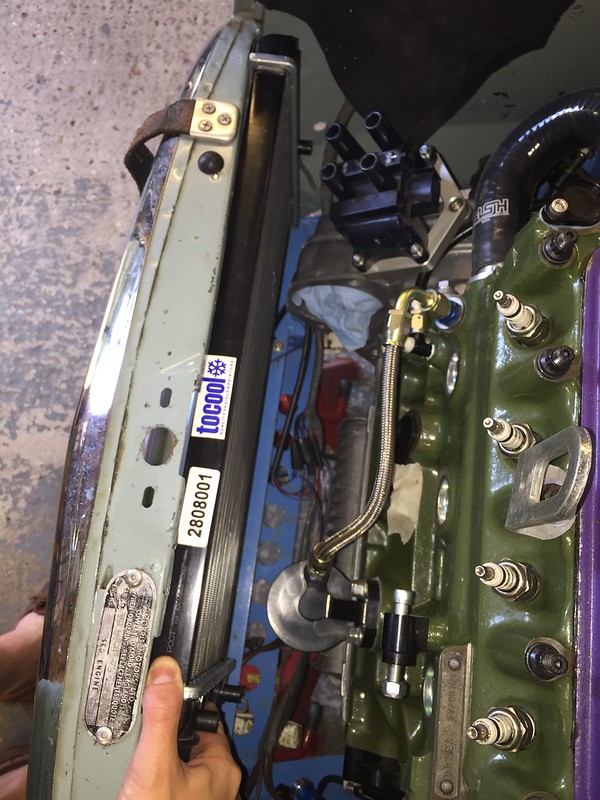
Then on to the radiator....
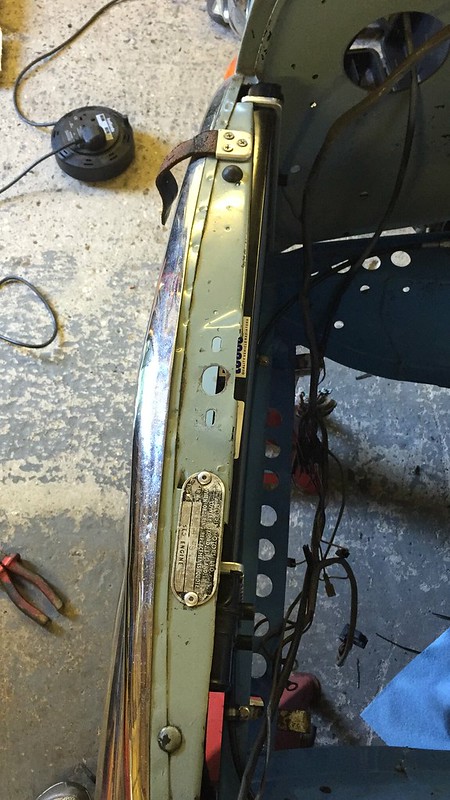
This thing was a royal pain in the arse.  Mostly because i really wanted to minimise the amount i actually cut away from the car to fit it so it was a lot of tedious  remove a bit and offer it up, cut more and repeat.
 
What started off like this
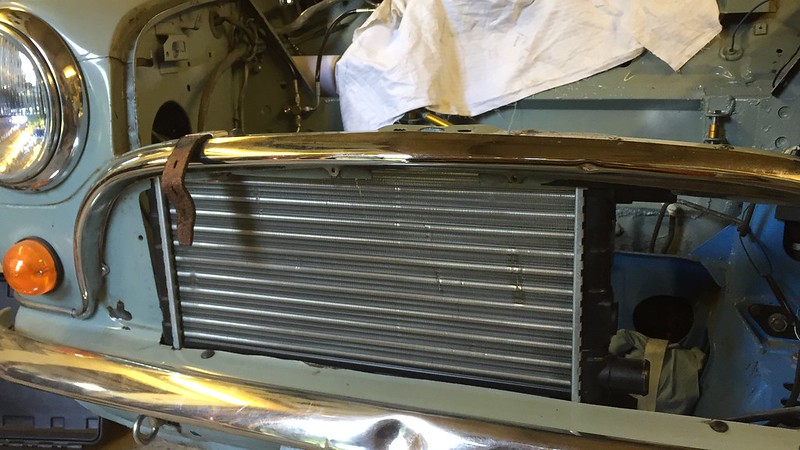
28776560594_c090503696_c.jpg
 
ended up like this
28776999314_121ed91373_c.jpg
29112943380_bb7e742c66_c.jpg
 
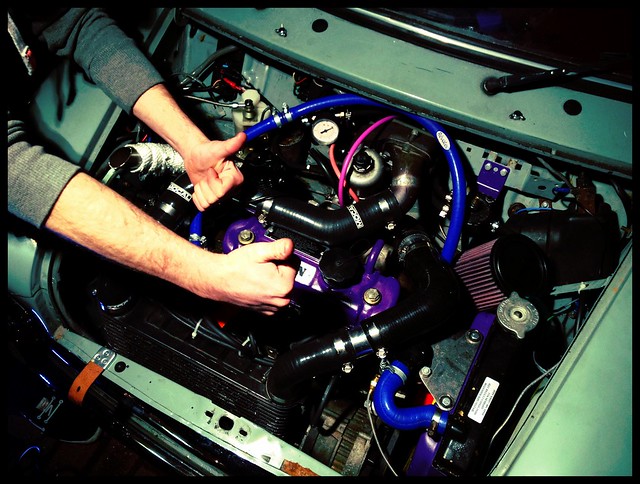
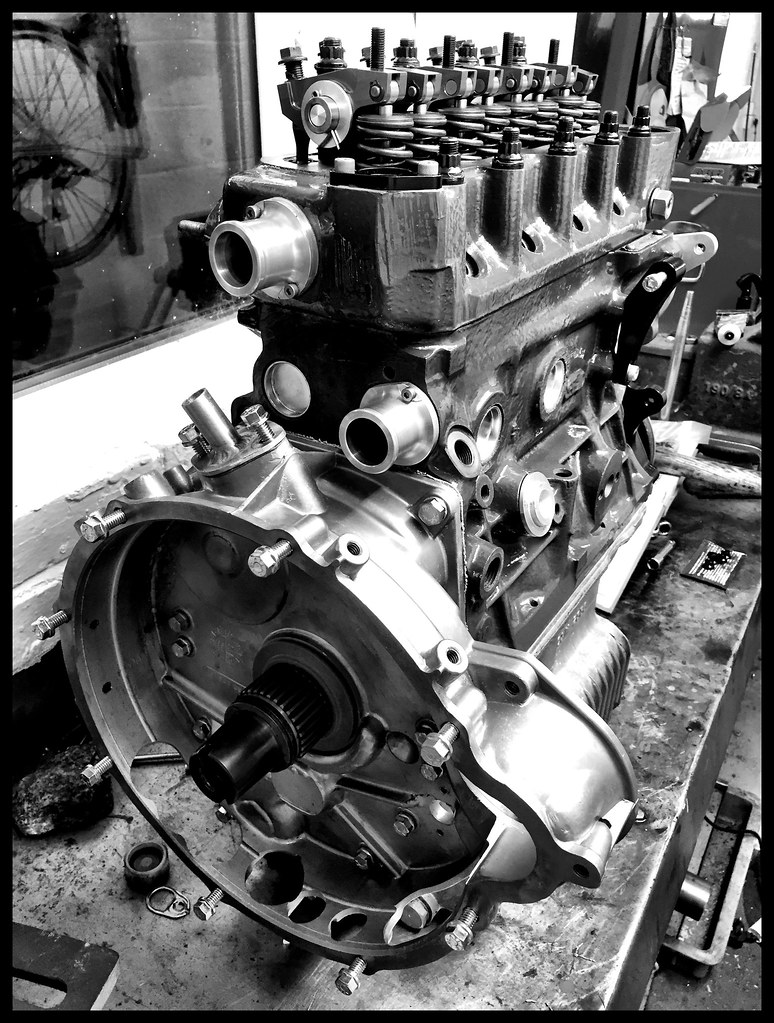
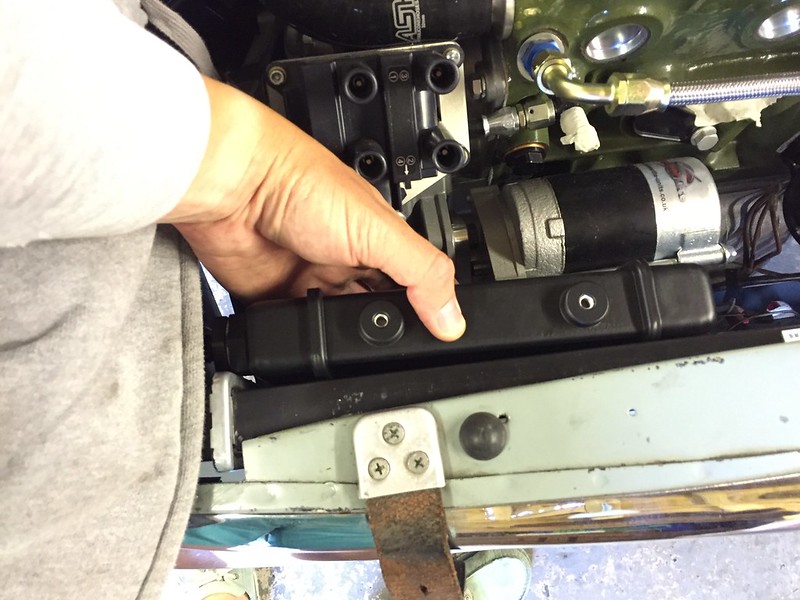
Engine back in and i turned the coil pack around on the bracket means i have enough room to mount the oil cooler as well.  I've ordered some ali sheet to make a bracket that will sit on the slam panel.  If anyone is wondering the fan sits just in front off the oil filter hosing.  Its a 9" (i think) Revotec puller fan, fits perfectly and all will be surprisingly tidy behind the radiator.
29366378916_beef2a84f1_c.jpg
 
Last night i was looking at where to put the EWP80.  Think i will have it here but i need to make sure that i have enough room once i have the engine in place properly with downpipe etc.  I read that they are light enough to "float" and where possible should not be mounted but just use the hose to hold.  But we will see, it seems perfect mind from the picture.
29400874645_c0a58d8fcc_c.jpg
 
 
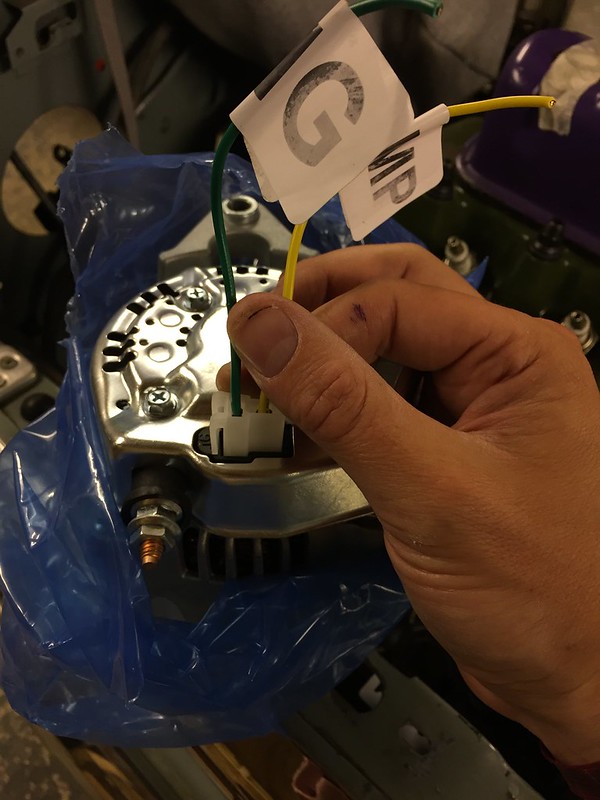
This weekend i'm going to try and figure out the wiring off the alternator and starter that i purchased from MED.  Im shockingly **** at wiring so any help will be gratefully appreciated.
 
Below are the alternator wires i am working with...
28776566404_0396aec35d_c.jpg
29292556902_e2692b5aac_c.jpg
 
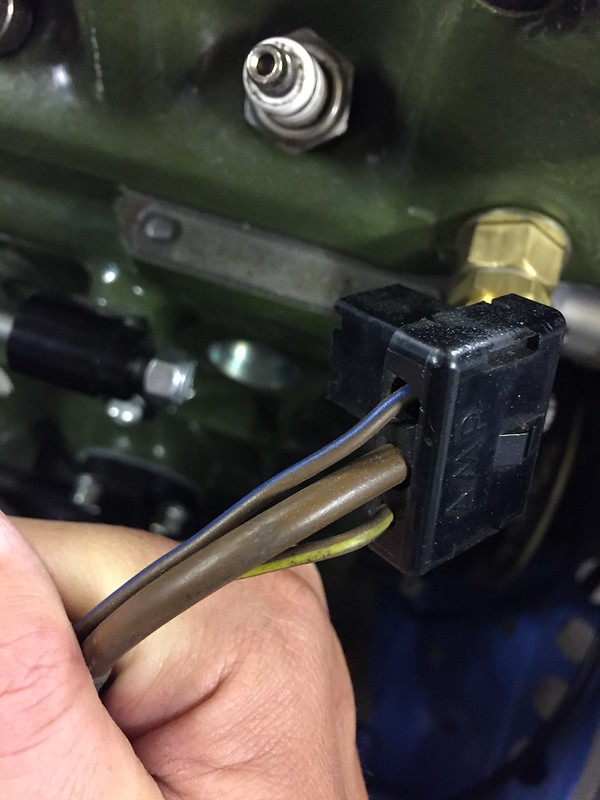
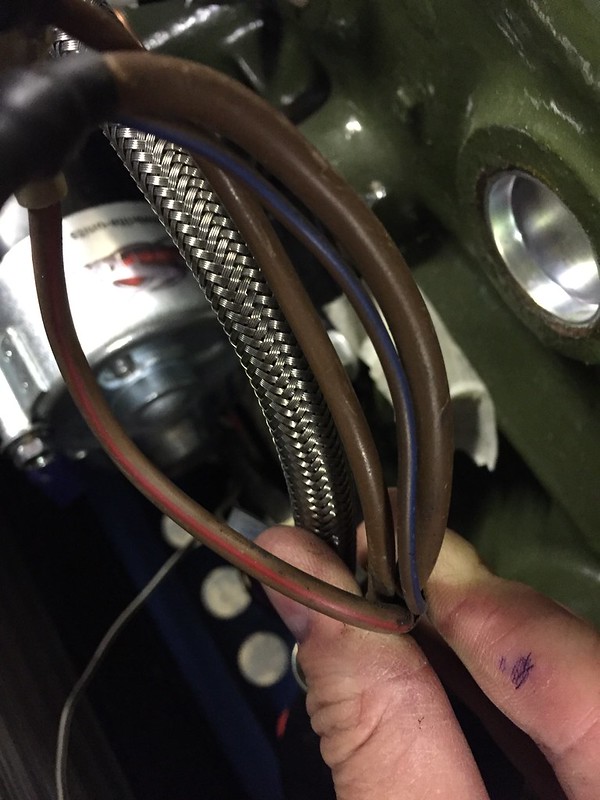
Starter wires that need connecting to it somehow, fingers crossed i took a picture off my old one!
29400882575_e74f8eac61_c.jpg
 
Anyway i think that is all, if i have missed anything it probably wasn't that important or just to painful to remember.


0 user(s) are reading this topic

0 members, 0 guests, 0 anonymous users