Jump to content


Photo
- - - - -

1982 Austin Mini - Project Who?


  • Please log in to reply
848 replies to this topic

#46 JonnyAlpha

JonnyAlpha

    Up Into Fourth

  • Members
  • PipPipPipPipPipPipPipPipPip
  • 2,744 posts
  • Location: North Devon
  • Local Club: Exmoor Minis

Posted 25 May 2014 - 06:39 PM

Today I started to cut away the LH rear corner of the floor and the rear subframe front mounting as well as the rest of the inner sill.


IMAG5279_zps16efc85e.jpg


Thought i'd be able to save the Rear Subframe mount that is welded to the inner sill but its too far gone, the slinging shoe bracket has also rotted out as well as the rear portion of the bracket that joins the inner sill to to rear subframe mount closing panel.


IMAG5277_zps695123d5.jpg


Once I had cut out the LH rear corner of the floor I measured up and made a template in order to fabricate a repair panel.


IMAG5283_zps967481ec.jpg

Next I transferred the measurements to a piece of sheet steel:

IMAG5284_zps82586aaf.jpg 

And started to make the folds:


IMAG5285_zpsaa0a61ea.jpg


I test fitted the floor repair with the Heelboard Repair Panel in place:


IMAG5287_zps591204fe.jpg


I then removed the sound proofing from the rear left floor, to reveal lots of surface rust :-(


IMAG5289_zpsb309968b.jpg


Here's the rear of the floor repair profiled to match the heel board using my newly acquired metal fabricating skills!!


IMAG5290_zpsfb4817d6.jpg


I then refitted and plug welded in the area of the Heelboard that I had lifed to check for rust and clean, before I welded it I sprayed in some Zinc Weld Through Primer.


IMAG5292_zps2f1294bf.jpg


And then another test fit of the floor repair:


IMAG5294_zpsdd477bb1.jpg


 IMAG5293_zps1d264d87.jpg


Still need to do the flutes, may only do one as the other has been cut away throughout the rear.


#47 JonnyAlpha

JonnyAlpha

    Up Into Fourth

  • Members
  • PipPipPipPipPipPipPipPipPip
  • 2,744 posts
  • Location: North Devon
  • Local Club: Exmoor Minis

Posted 25 May 2014 - 08:24 PM

Marked out the location of the flute and then beat it into the floor repair:


IMAG5300_zps3b5fab18.jpg


IMAG5301_zpsf3661f02.jpg


All I need to do now is confirm the fold lines along the outer edge of the inner sill and its ready to be welded in. Before I weld it though I need to make a small repair piece for the bottom of the side of the companion bin where it meets the floor as this is rusted. It will be easier to make it and fit it without the inner sill in place.


Also doing a few repairs to the Rear Subframe, just been taking off the bottom plates and will be making new ones to fit. To get them off you have to locate all the spot welds and drill them out and then gently prise up the plate using a screwdriver or chisel.


IMAG5302_zpsd1db08eb.jpg


IMAG5304_zps36835722.jpg


To get the front and rear edges of the plate off where it is seam welded I found it easiest to cut into the plate inside the weld line and then once the plate was off I simply ground down the weld and remainder of the plate.


#48 JonnyAlpha

JonnyAlpha

    Up Into Fourth

  • Members
  • PipPipPipPipPipPipPipPipPip
  • 2,744 posts
  • Location: North Devon
  • Local Club: Exmoor Minis

Posted 12 June 2014 - 09:02 PM

Decided it was time to attack the Radius Arms and Hubs, there is a picture of them at post 41 but here's another of what they looked like today before I started:


IMAG5468_zps5e01877e.jpg


IMAG5467_zps094531b9.jpg


The Flexi Hoses looked well rusted but I managed to get them off without resorting to a hack saw but one the rear copper pipe on one the pipe must have been fused to the union and as it would not turn when undoing the nuts it could only be removed by breaking it.


IMAG5479_zps559b2174.jpg


This was a shame as I am trying to re-use as many original parts as possible to keep the cost down :-( still a replacement set is only £7.00 or £9.50 for Cupronickel Ones.


The backplate looked very rusty but after a couple of hours of picking, scraping tapping and a light going over with a twisted knot they came up pretty good:


IMAG5495_zps656f5395.jpg


That oranging on the left one is some surface oxidisation as they where drying following a wash in some soapy water.


Along the way one of the split pins refused to come out of the pin that holds on the handbrake quadrants:


IMAG5481_zpsa7964dcc.jpg


So i cut the split pin off and the pin came out, just need to tap out the split pin with something the same size or buy some new pins?


I am contemplating stripping the radius arms further as there are a couple of areas that I cannot get to, otherwise i'll paint them as is but I hate painting over crap that should be removed, false economy.


The insides are not that bad but one of the brake cylinders looks older than the other?? but they work (I think).


The brake adjusters might be seized so they may need changing as well?


Anyway for now I am going to paint on some Rust Converter onto the rusted areas to prevent any further rusting.


More later.


#49 JonnyAlpha

JonnyAlpha

    Up Into Fourth

  • Members
  • PipPipPipPipPipPipPipPipPip
  • 2,744 posts
  • Location: North Devon
  • Local Club: Exmoor Minis

Posted 13 June 2014 - 08:20 AM

Time to tackle the Rear Trumpets and get the Rear Rubber Doughnuts off, considering what they were like to get out of the subby, I just knew these were gonna be a pig!!!


Here they are before:


IMAG5465_zps7e9ad1a5.jpg


Try as I may I just could not get them to shift manually and I did not want to resort to too much force in fear of snapping the trumpet.

So out came the Stanley Knife, damm that Rubber is hard!!!


IMAG5466_zps99aaa943.jpg


Just like the opposite end of the Doughnut the metal cup is a friction fit and as such it was seized solid, even though I have had these soaking in Oil and Petrol they too would not budge time for some mechanics.


IMAG5472_zps6e06b9f3.jpg


I thought about cutting them off but again did not want to damage the Trumpet, luckily there was a slight gap at the top of one of the cups just enough to get a small blade in so I set about with various screwdrivers gentle tapping and turning as I went.


IMAG5474_zps94288d1c.jpg


On the second cup the gap was too small so I used an old Lock Knife:


IMAG5475_zpsf33b1e31.jpg


And Ta Da.......... off came the cups:


IMAG5476_zps3fdce82c.jpg


Got some surface corrosion to clean off but they should come up nice, i'll probably change the Knuckles, I think these are a Friction Fit as well so fingers crossed they come out otherwise this will all have been in vain :-( Any tips welcome (heat etc?). 


#50 JonnyAlpha

JonnyAlpha

    Up Into Fourth

  • Members
  • PipPipPipPipPipPipPipPipPip
  • 2,744 posts
  • Location: North Devon
  • Local Club: Exmoor Minis

Posted 14 June 2014 - 07:56 PM

Not got a lot done today, started making some Cleko Pins to help fitting the floor panels as I want to mainly Butt Weld. I got some Stainless Steel for the plates on the pins but welding Stainless causes Chromium Vapour which is Carcinogenic, so I ended up wasting 2 hours trying to find out if my Respirator (3M 7500) filters were up to the job!!!


I then spent another hour or so test fitting and adjusting the Rear Floor panel that I made earlier in this thread. It now fits pretty good here is a picture of it before I made the last few adjustements.


IMAG5499_zpsb3133efa.jpg


Fathers Day tomorrow so going out for Breakfast and family time so back at it Monday :-)

Only three weeks left to get it MOT'd!!!!! 


#51 JonnyAlpha

JonnyAlpha

    Up Into Fourth

  • Members
  • PipPipPipPipPipPipPipPipPip
  • 2,744 posts
  • Location: North Devon
  • Local Club: Exmoor Minis

Posted 14 June 2014 - 08:16 PM

Sorry missed some work I did the other day, after stripping and cleaning up the Radius Arms I treated them with Rust Converter, now they look as good as new?!?!?!?


IMAG5498_zps1336d5ec.jpg


They will painted, either with Chassis Black or Epoxy Primer and Stone Chip and a Gloss Top Coat?


#52 JonnyAlpha

JonnyAlpha

    Up Into Fourth

  • Members
  • PipPipPipPipPipPipPipPipPip
  • 2,744 posts
  • Location: North Devon
  • Local Club: Exmoor Minis

Posted 16 June 2014 - 08:25 PM

Trying to multi task at present to try and keep ahead, cleaned up and sprayed weld through primer on the bottom of my Subframe Plates before I weld them in:


IMAG5512_zps795124fd.jpg


Then back onto the Mini LH Side, before I weld in the Floor Repair panel that I made earlier I had to repair the bottom of the Companion Bin, it would be easier to do this with the floor off.


First I cut off the bottom of edge that needed repairing and set about fabricating a repair panel out of 1mm steel:


Here's the piece partially finished:


IMAG5513_zpsc25e254b.jpg


Here it is after I welded up and dressed down all the cuts made to fabricate the curved folds:


IMAG5520_zps3c1662c4.jpg


And here it is clamped in place:

IMAG5521_zps10da795f.jpg


In the picture is a home made Cleko Pin, didn't turn out as good as i'd like but it works :-)


#53 JonnyAlpha

JonnyAlpha

    Up Into Fourth

  • Members
  • PipPipPipPipPipPipPipPipPip
  • 2,744 posts
  • Location: North Devon
  • Local Club: Exmoor Minis

Posted 16 June 2014 - 08:29 PM

And here it is after a few welds:


IMAG5525_zps5b01405d.jpg


Finally after what seems an eternity (since the boot repairs), I am starting to weld things on instead of cutting things off. Tomorrow I'll hopefully have the rear floor corner in, then I can finish off the Heelboard. 


Couple of annoying casualties over the past few days, first my inspection light packed up, then my LED hand held lamp is playing up, intermittent, then my halogen work lamp bulb went and I cant find my spare and tonight my SIFLITE Auto Darkening Helmet stopped auto darkening, its done it before but now it does not want to play :-(


I'll be welding my candle light with my eyes closed at this rate - joking of course :-)


I just can't afford these problems in more ways than one :-(


Edited by JonnyAlpha, 18 June 2014 - 07:47 PM.


#54 JonnyAlpha

JonnyAlpha

    Up Into Fourth

  • Members
  • PipPipPipPipPipPipPipPipPip
  • 2,744 posts
  • Location: North Devon
  • Local Club: Exmoor Minis

Posted 17 June 2014 - 07:02 PM

More done today.


Here's the Companion Bin Repair fully tacked in place:


IMAG5529_zps3461fcf2.jpg


Finished welding it in and then started on the Rear Floor Corner piece, here's a view from the outside:


IMAG5538_zpsd3d71a62.jpg


My best butt welding to date, only a couple of blow throughs which I easily welded up.


And here is the floor from the inside:


IMAG5536_zps323e399c.jpg


And a better look at the butt welding:


IMAG5537_zps9b80b426.jpg


I was going to crack on with the middle floor repair up to and including the Cross Member however it would mean disturbing my bracing so I decided to do the front, that way once the Front Floor Pan was done and the rear the middle should not need as much bracing?


First I chalked out the Rot and all the previous bad repairs:


IMAG5539_zpsd4fe8910.jpg


Then started cutting out at least two previous repairs :-)


First out was the Toe Board Corner:


IMAG5540_zps27bcc888.jpg


And then it was 6PM time for Tea :-)


Back at it tomorrow, hopefully i'll get the front cut out and at least one repair piece made, starting with the Toe Board. Once the Toe Board is done I may fit the Floor Pan and build up around it using the Floor Pan as a Guide?? 


Edited by JonnyAlpha, 19 June 2014 - 06:57 PM.


#55 JonnyAlpha

JonnyAlpha

    Up Into Fourth

  • Members
  • PipPipPipPipPipPipPipPipPip
  • 2,744 posts
  • Location: North Devon
  • Local Club: Exmoor Minis

Posted 18 June 2014 - 07:42 PM

Had a few errands to run today so only had a few hours, managed to get the Toe Board Repair piece made and trimmed out a bit more of the Front Floor area.


First up I made a template of the Toe Board piece using cardboard, and then cut out the repair piece and made the folds:


IMAG5542_zps8afa4a0f.jpg


When I went to fit it didn't look right and not in line with the lower part of the (imaginery) Flitch Panel. I decided that I needed to use the Floor Pan Repair in place to act as a guide to get the correct shape, the reason for this was because the piece that I had cut out was badly rotted and had already been badly repaired.


So after trimming out more of the Floor and cutting out a badly repaired front piece of the Cross Member I was able to get the Floor Pan in place enough to adjust the Toe Board End Piece. 


Here it is slightly modified:


IMAG5543_zps85ff2b48.jpg


You can see the LH Top edge is now straighter whereas before the curve continued.


Here's the best pic I could get of the Floor Repair Panel dry fitted:


IMAG5547_zps24c21e15.jpg


I'll be chopping approximately 2/3 of the edge that sits up against the Gear Stick Centre Beam and about 1/2 of the front folded edge to just above the lower Subframe Bolt.


The problem I will have with this panel is that it is a Floor Repair Panel designed to fit on top of the original floor, most of my floor is gone and Butt Welding it is probably out of the question as it will be an absolute knightmare trying to match up all the edges so it will probably be a mix of Lap Welding / Plug Welding.


I may also modify the panel as currently it sits on top of the Cross Member bottom flange as opposed to under it where the original floor went. What I may consider is flattening out the back edge of the Repair Panel and Plug Welding it to the underside of the Cross Member?


You can also just about see in the pic above where I have cut away the remains of several old repairs to the Lower Flitch, my plan is to weld in the Toe Board repair piece I made, the the floor pan and then the make a repair panel for the Flitch and weld it in from the outside but also Plug Weld the Floor to it from the inside, that's the plan.


#56 JonnyAlpha

JonnyAlpha

    Up Into Fourth

  • Members
  • PipPipPipPipPipPipPipPipPip
  • 2,744 posts
  • Location: North Devon
  • Local Club: Exmoor Minis

Posted 19 June 2014 - 07:29 PM

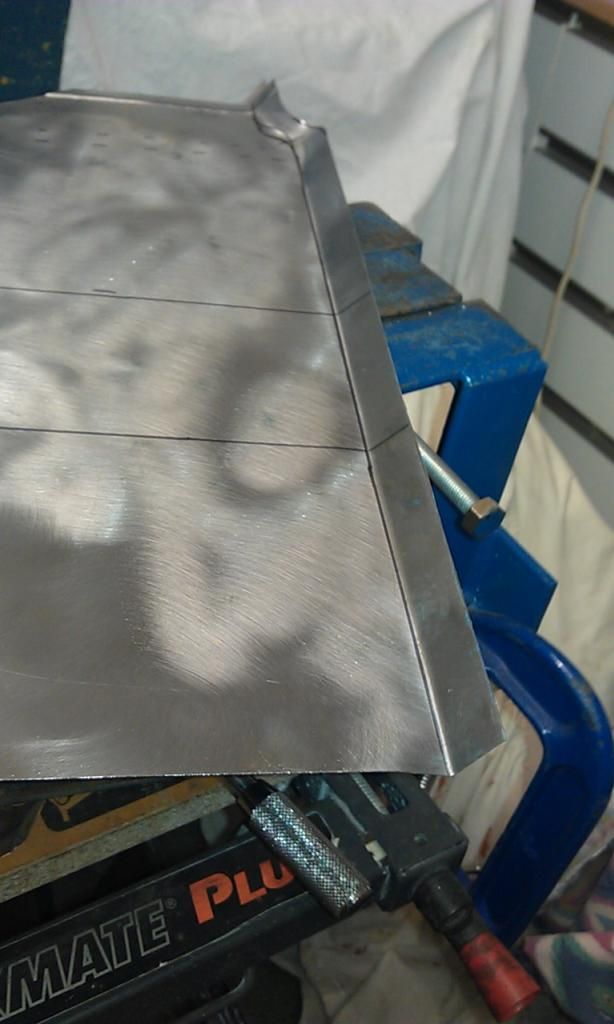
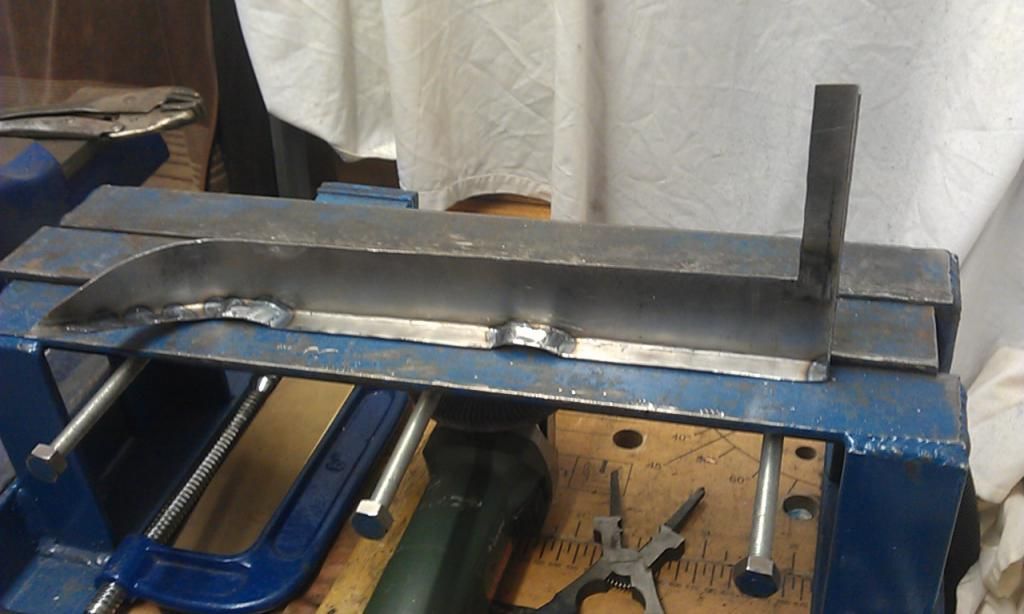
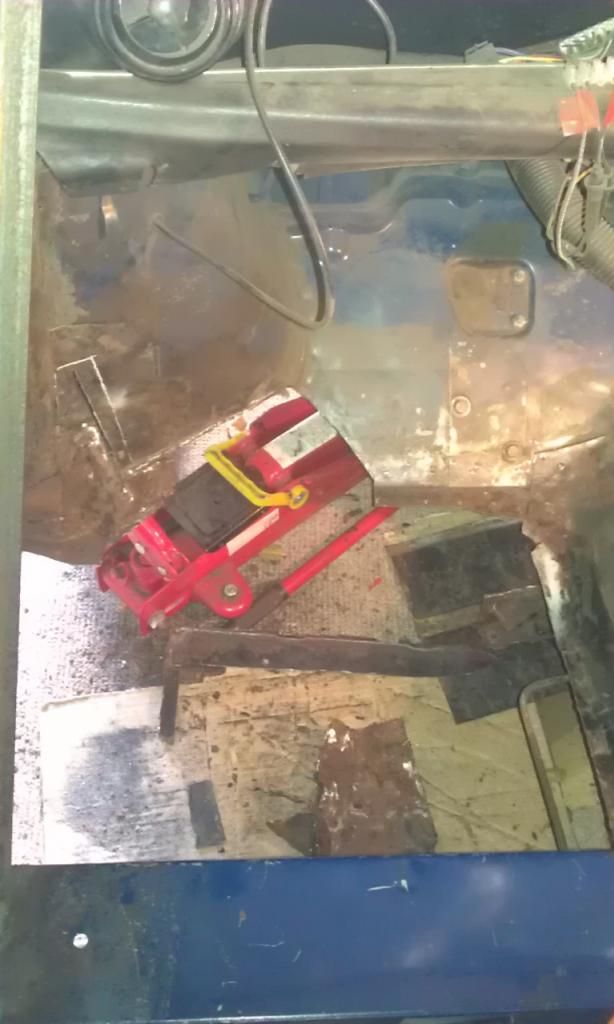
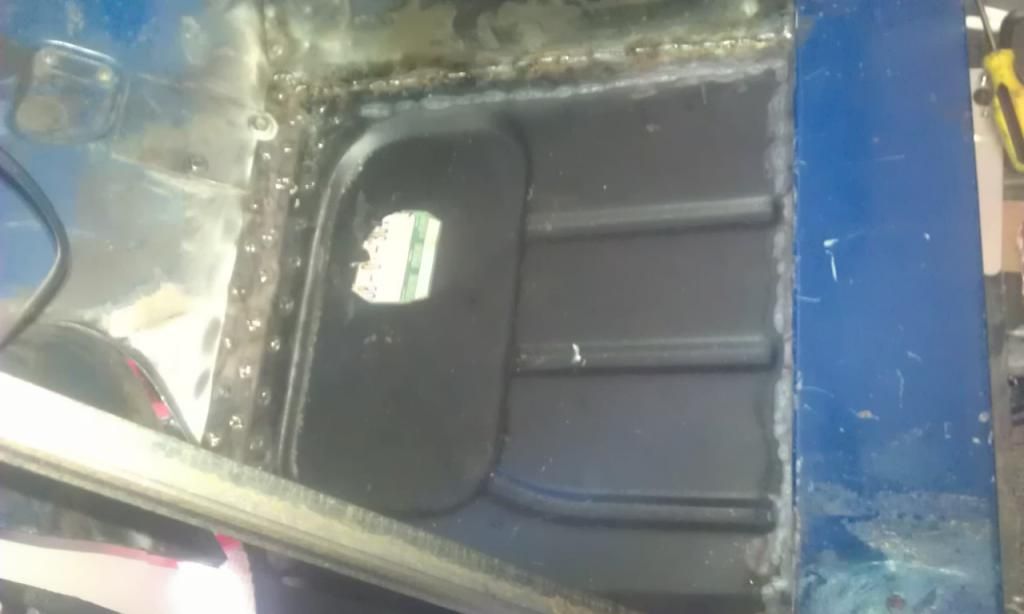
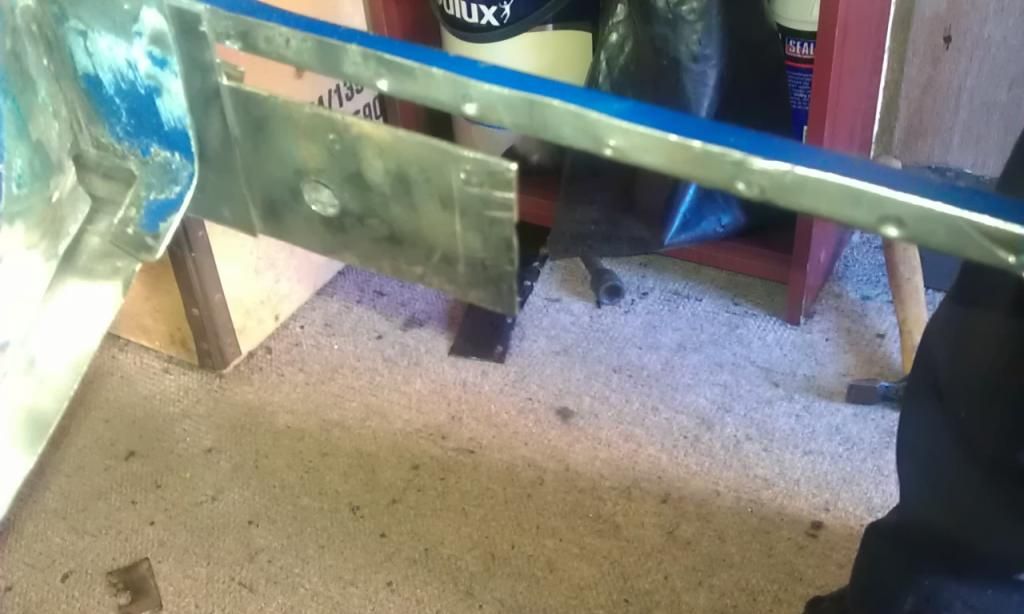
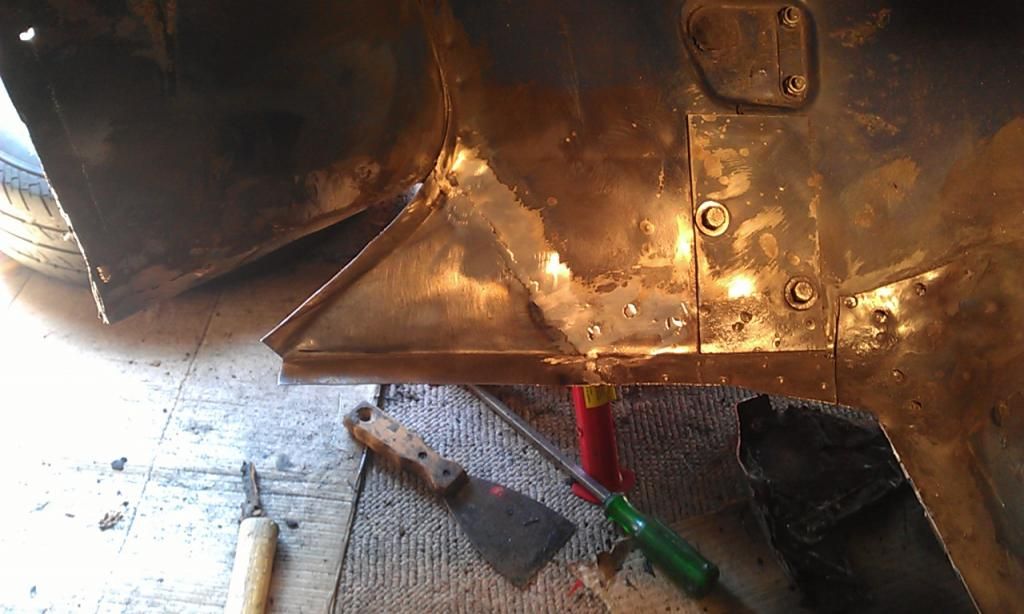
OK made a little progress today, first off I managed to get the Toe Board Repair Piece that I made welded in place. Here it is clamped in:

IMAG5555_zps87a7bdfc.jpg


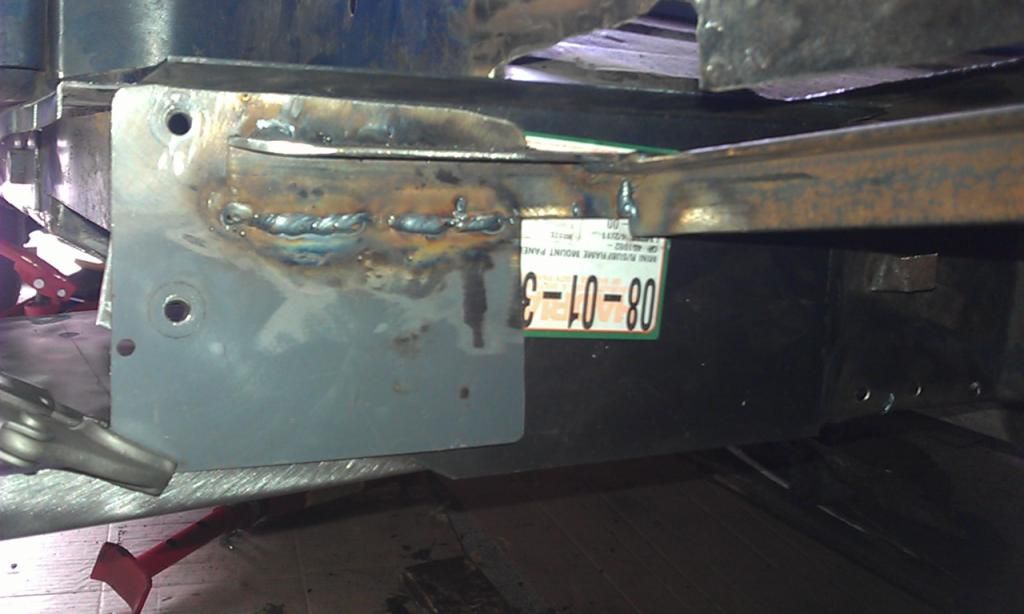
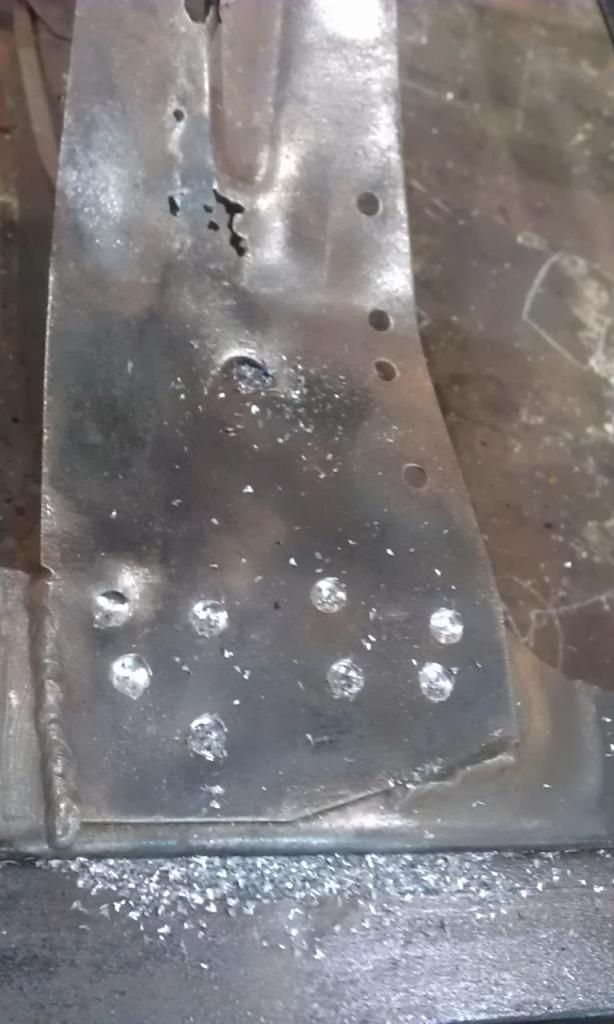
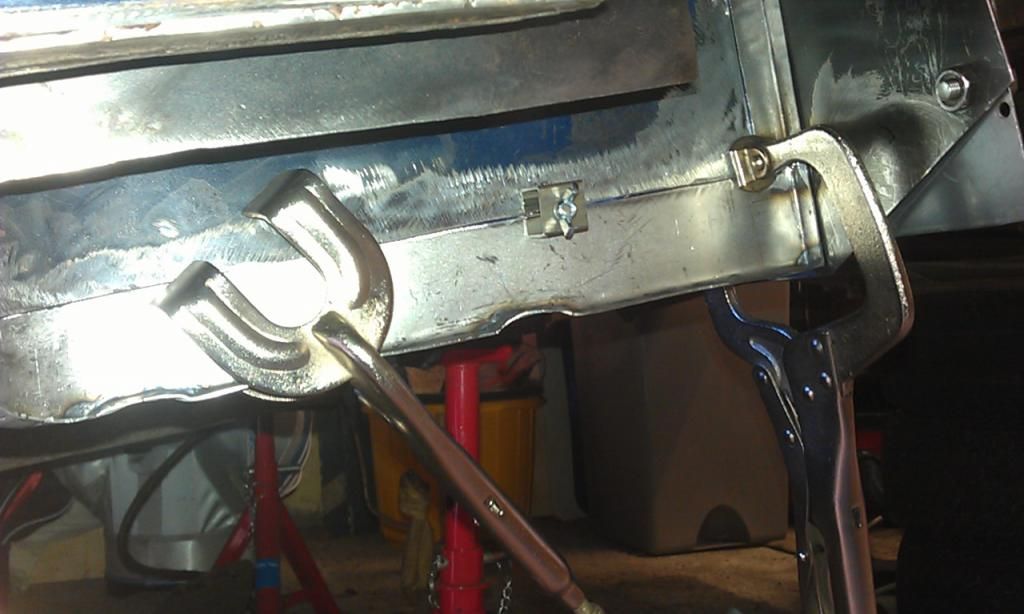
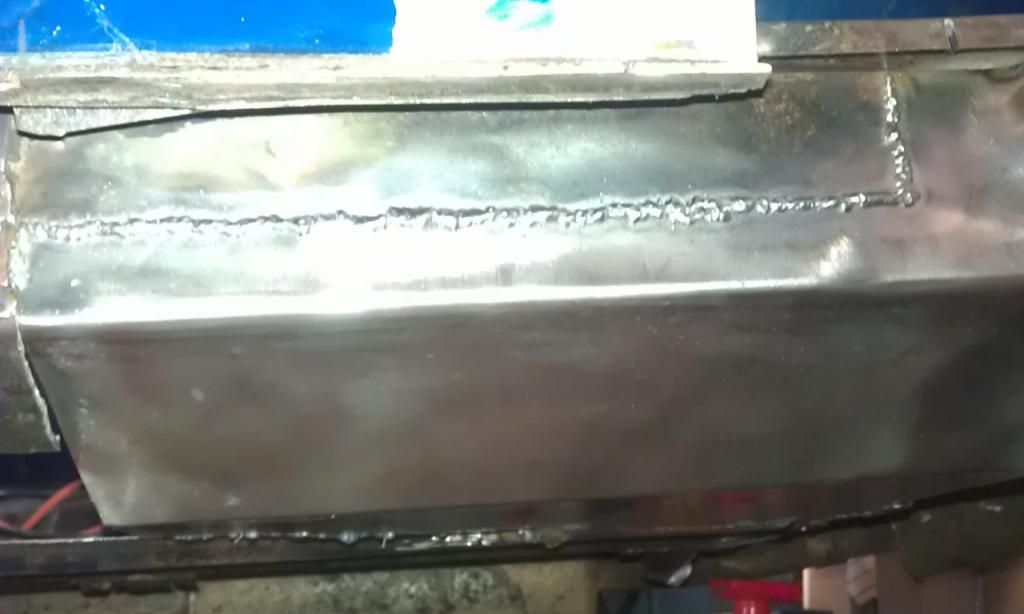
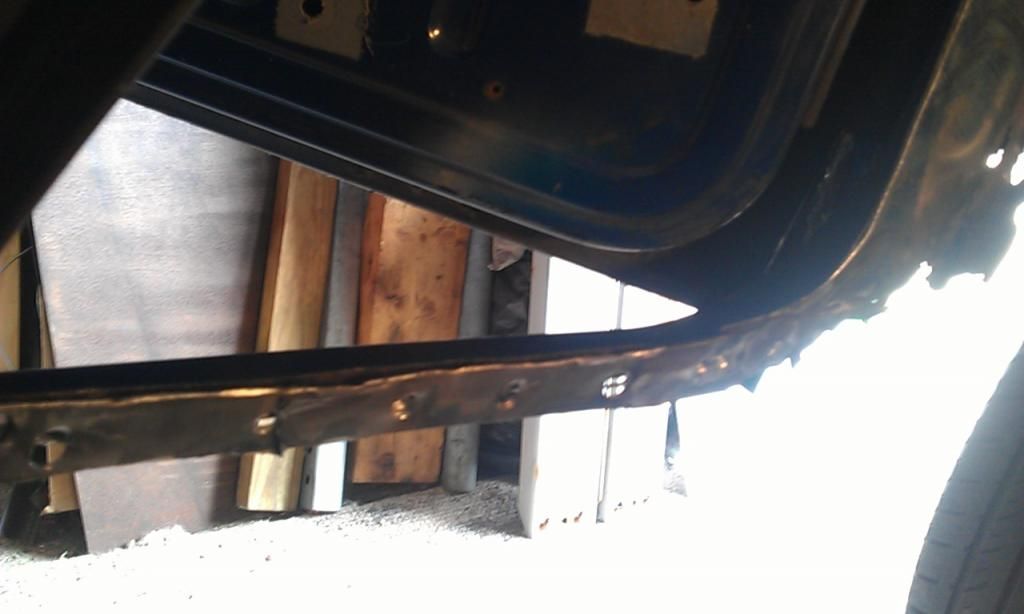
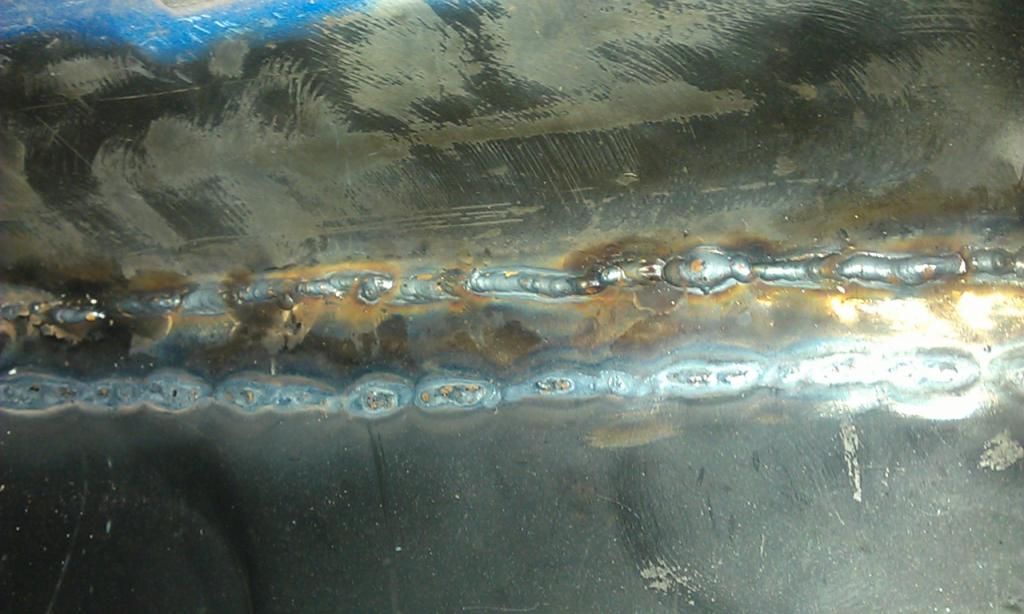
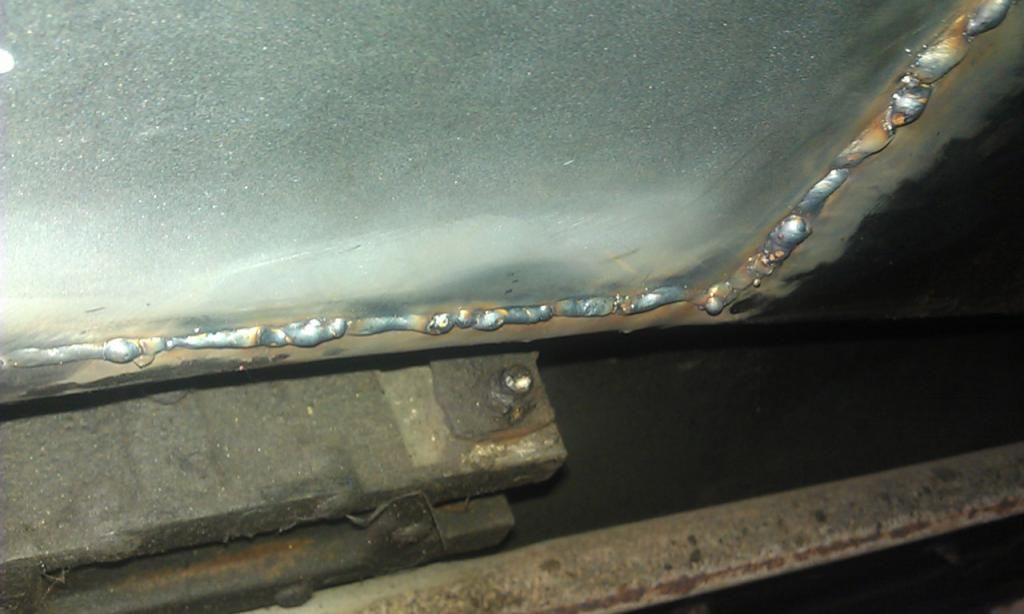
And here it is welded in and dressed down:


IMAG5556_zpsefcdc4cc.jpg


And a close up:

IMAG5557_zpsac1468cc.jpg


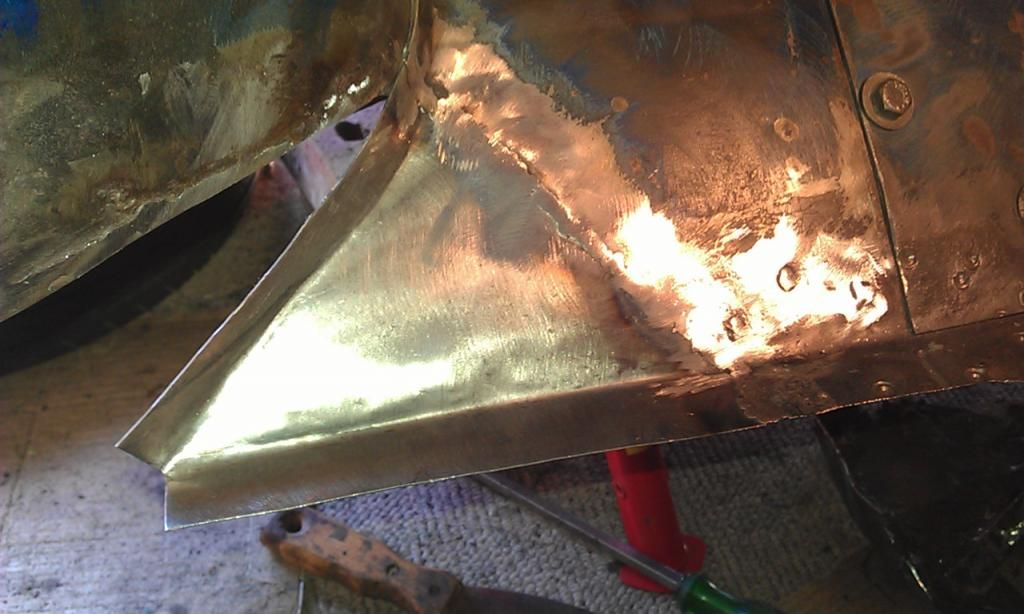
Wasn't going to dress it down that far as it will be under the carpet but hey ho did it carefully and no thinning, will look great painted.


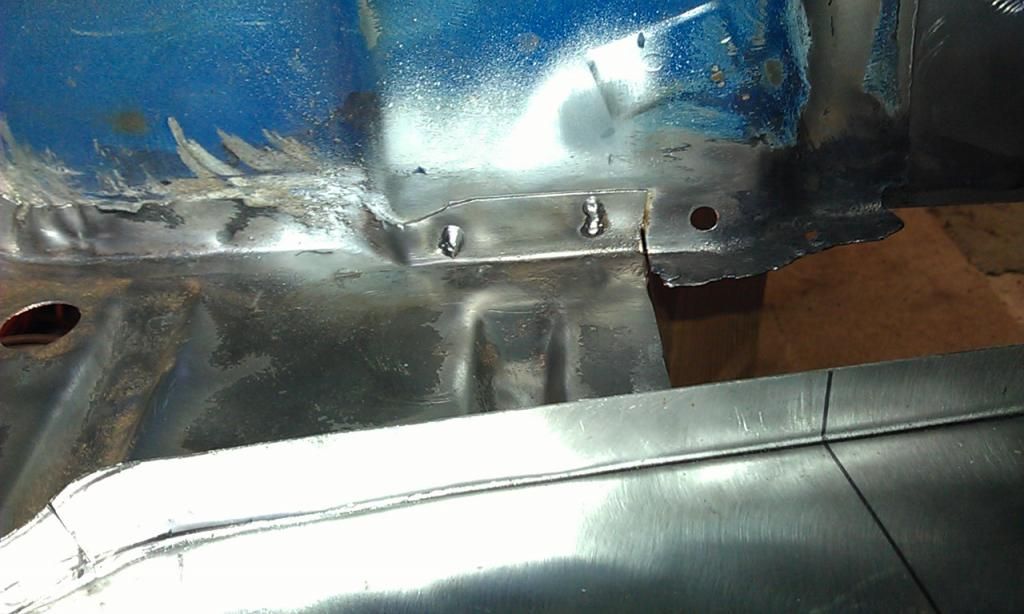
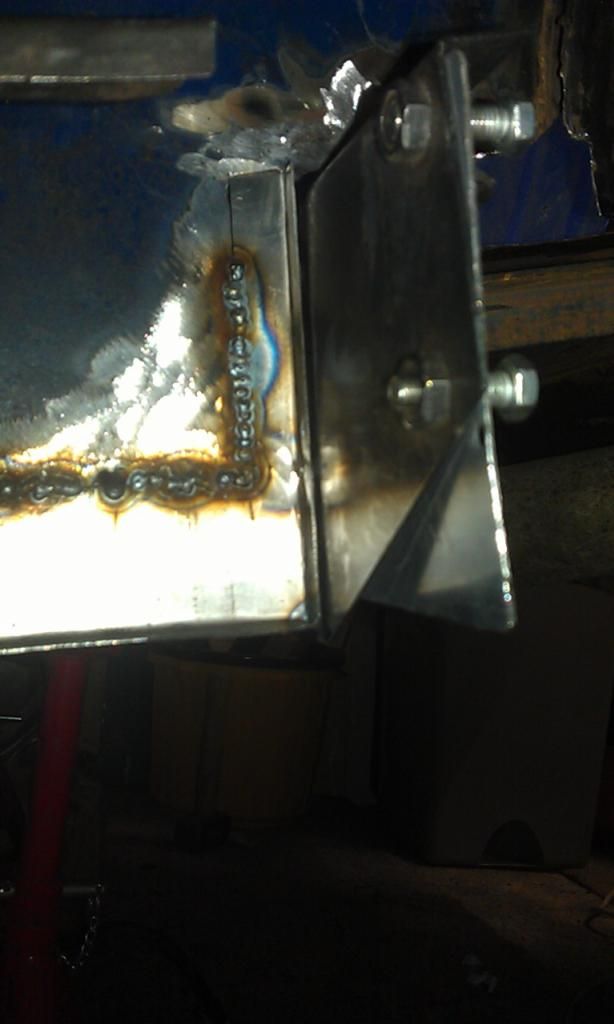
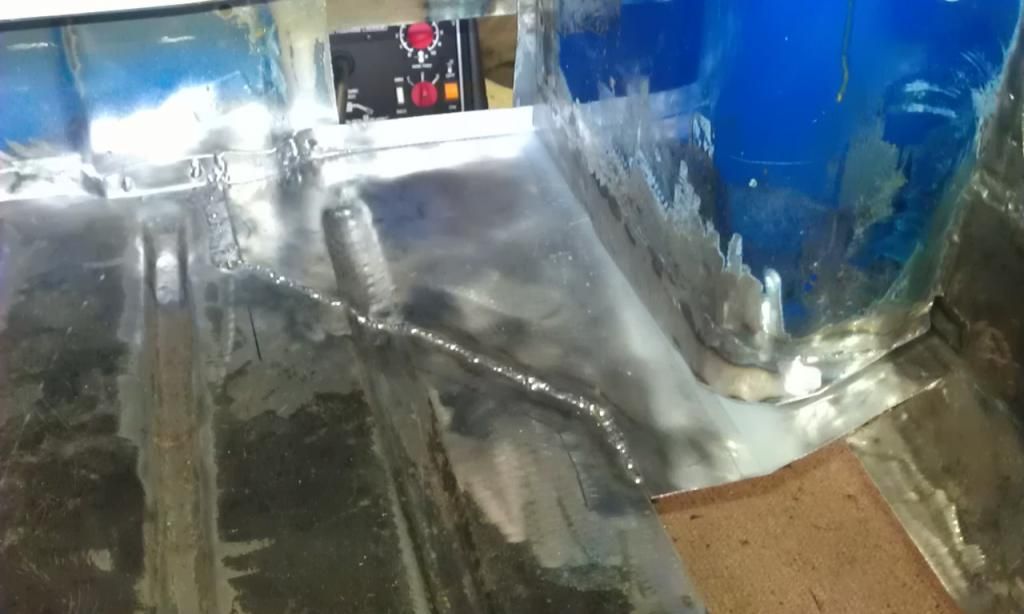
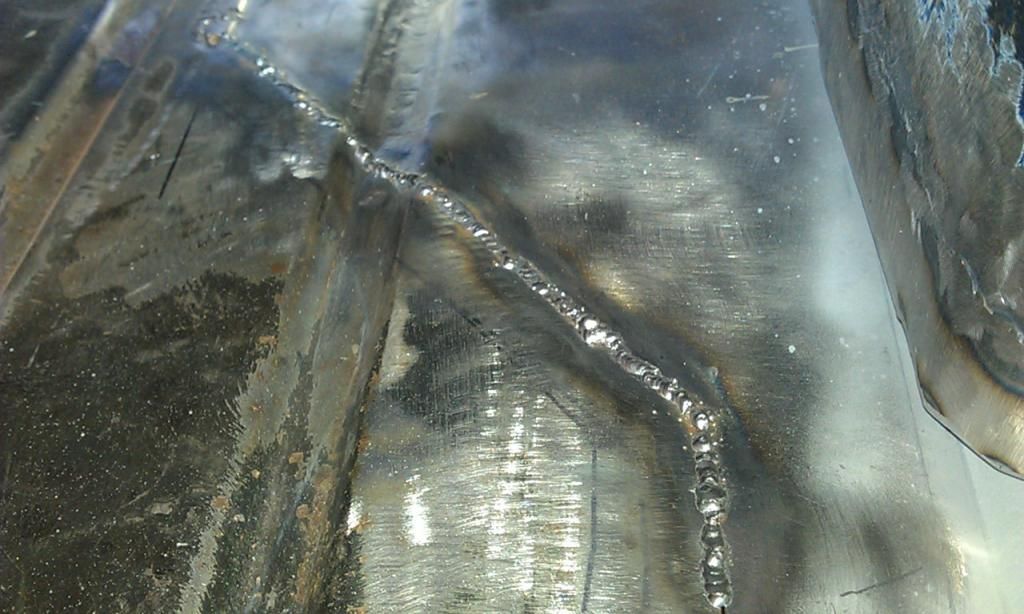
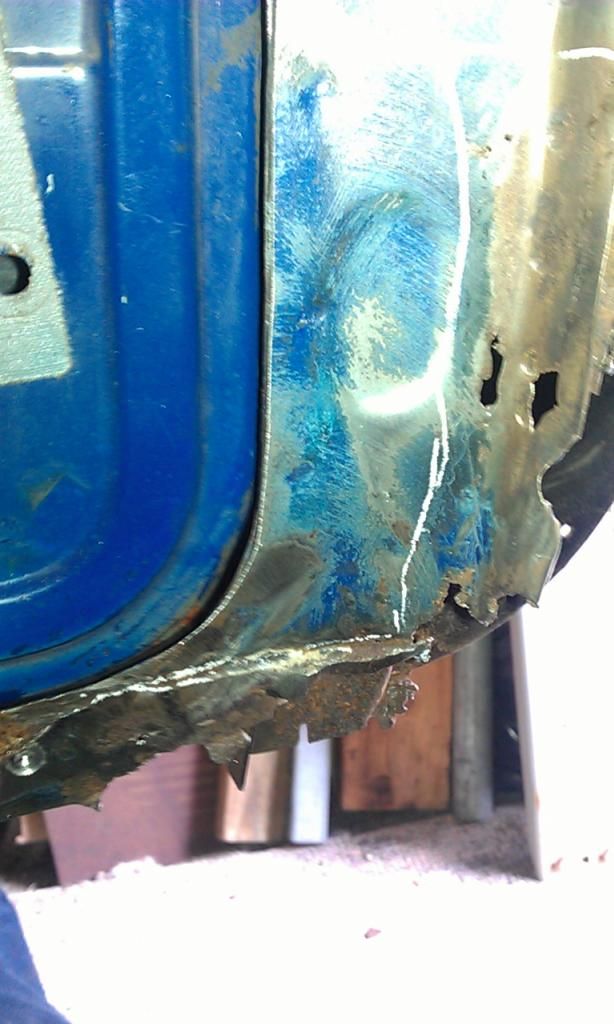
Oh another close up:


IMAG5558_zps85f3aad6.jpg


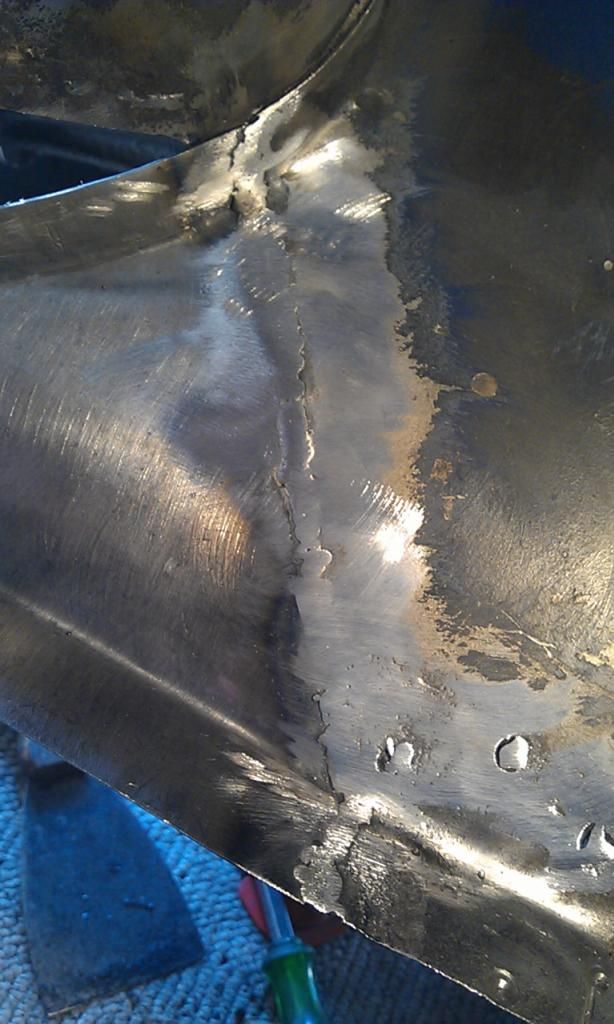
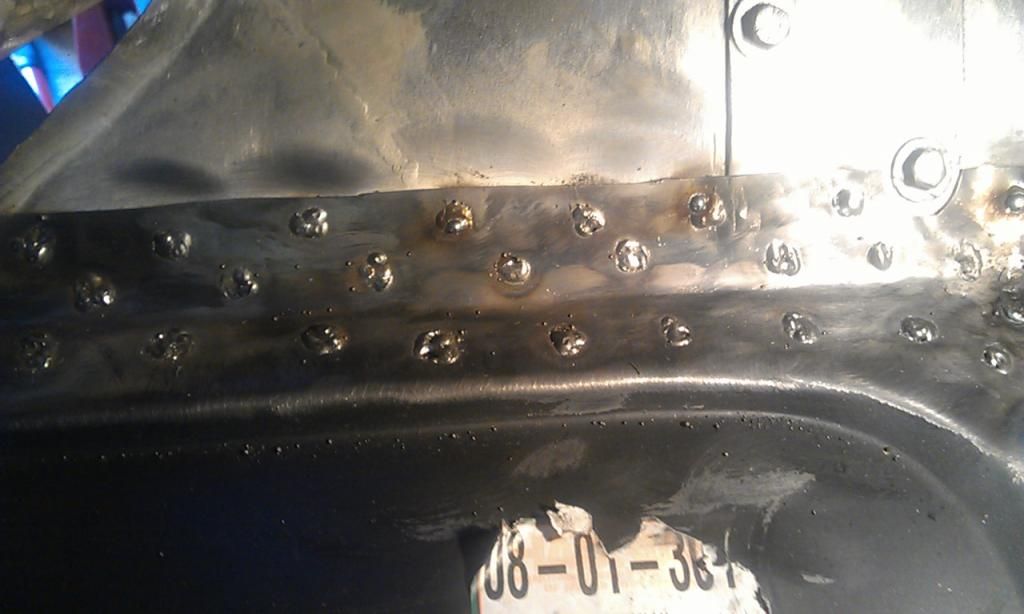
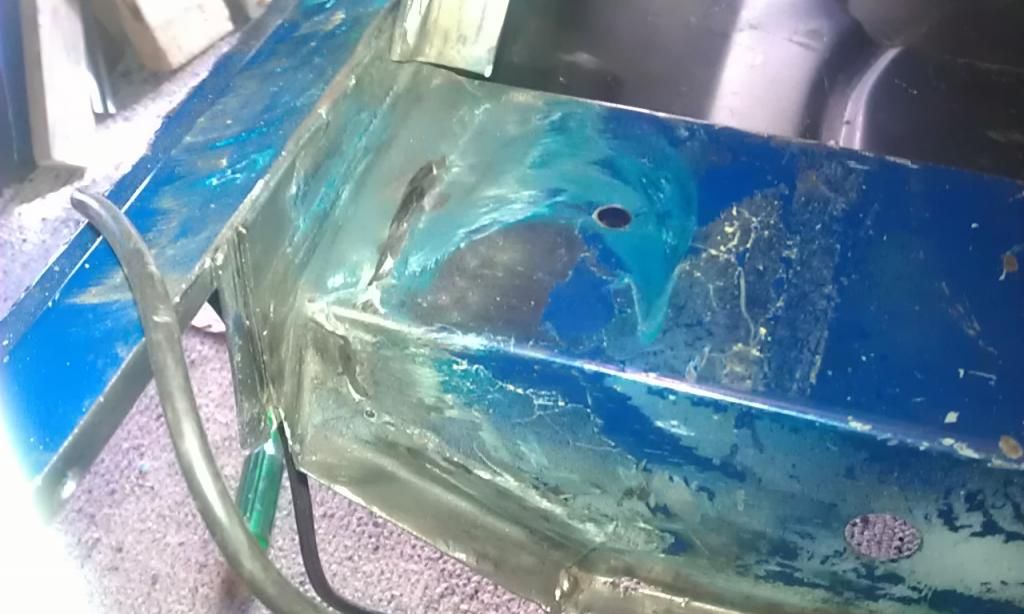
The welded round spots to the right are where I went a bit over zealous drilling out spot welds, didn't notice at first but when I was checking the Toe Board weld for holes with a torch i noticed it shining through a couple of these so I plugged them with weld and ground them down.


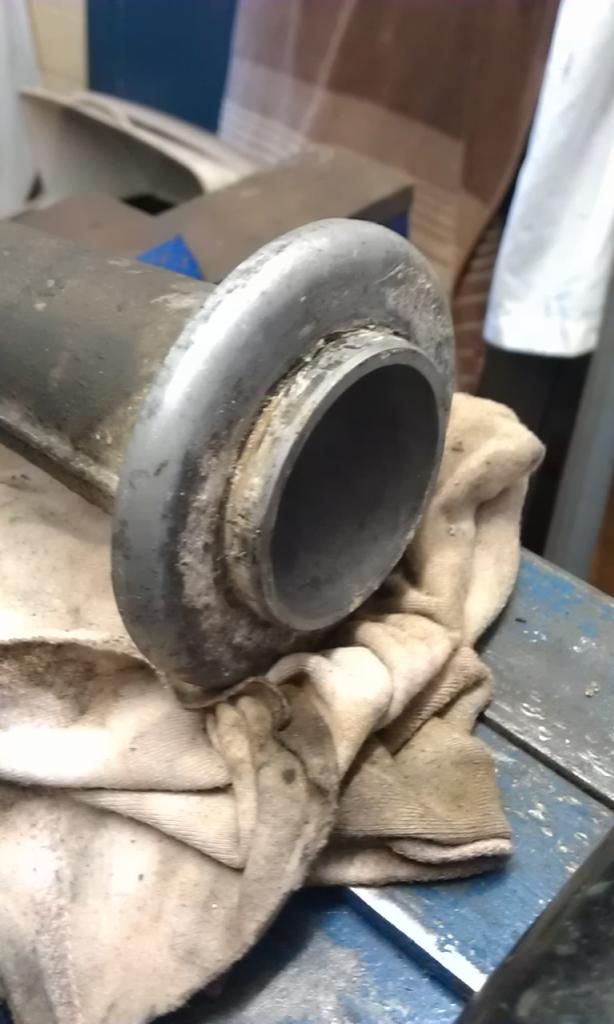
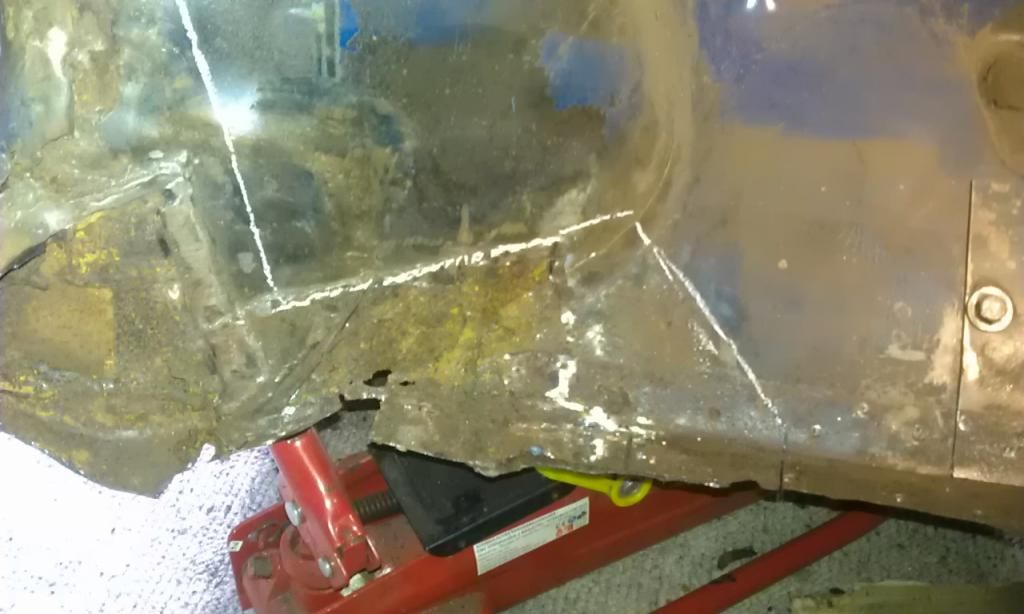
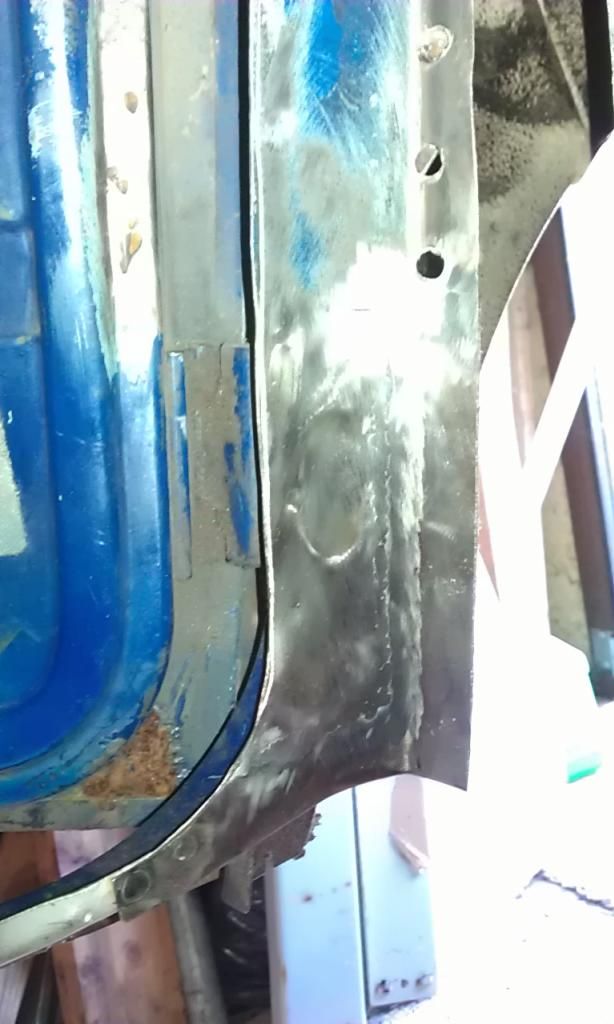
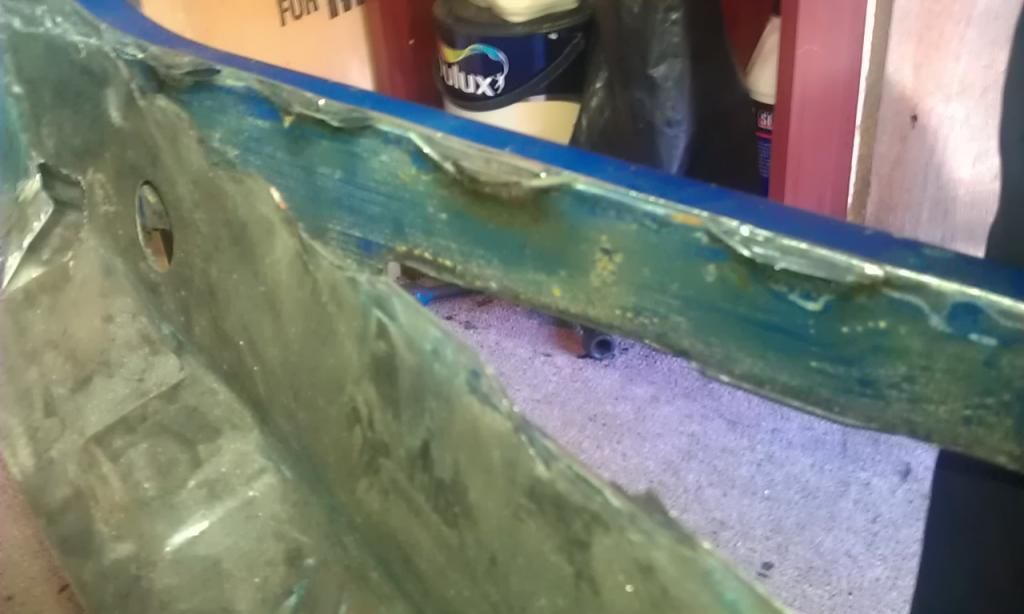
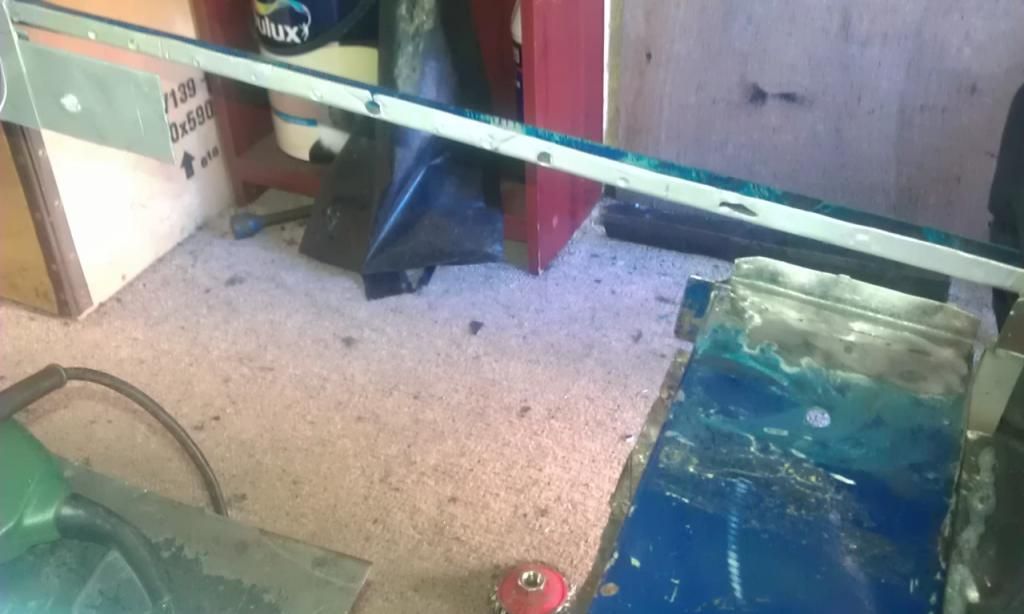
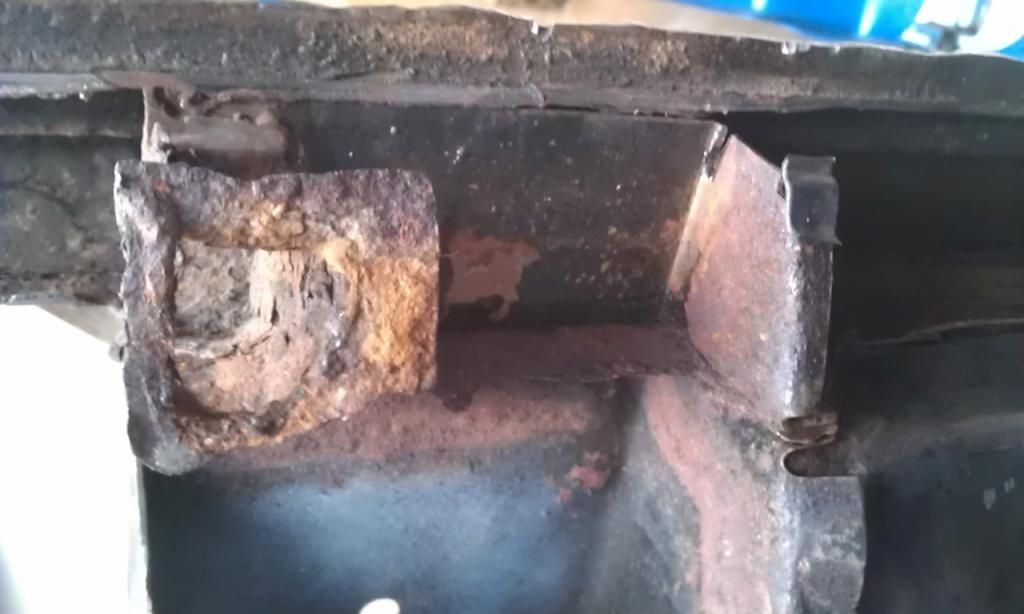
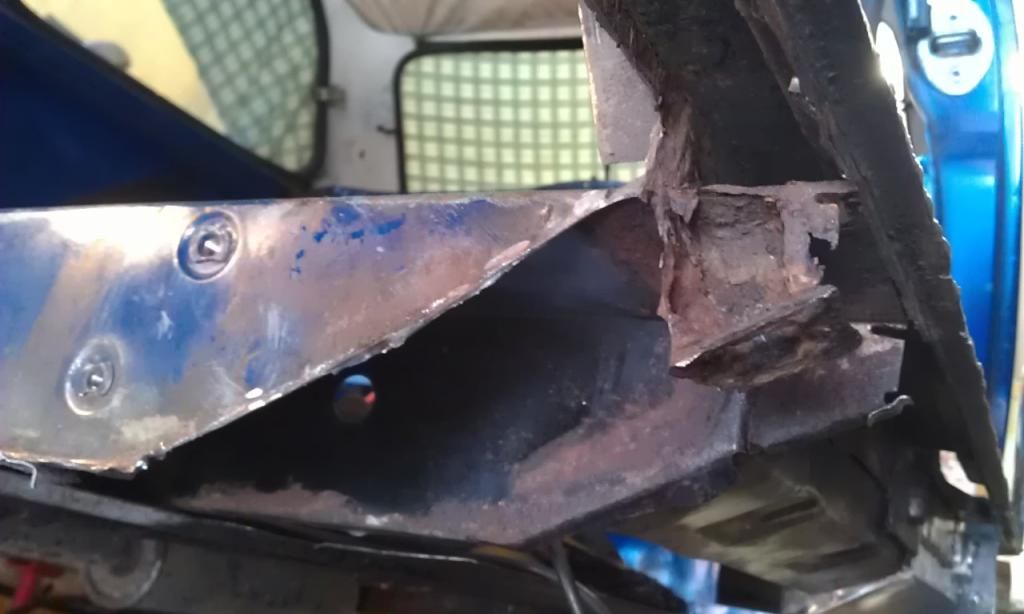
Next I went to tackle the front edge of the LH Cross Member, it has rusted and has been badly repaired in the past (a lot of that on this car).


First I had to get rid of the rotted Jacking Point without removing the door step, I know this seems a bit of an odd way of doing things but I have no choice as I can't afford to cut the hole thing to bits and don't have the space :-(
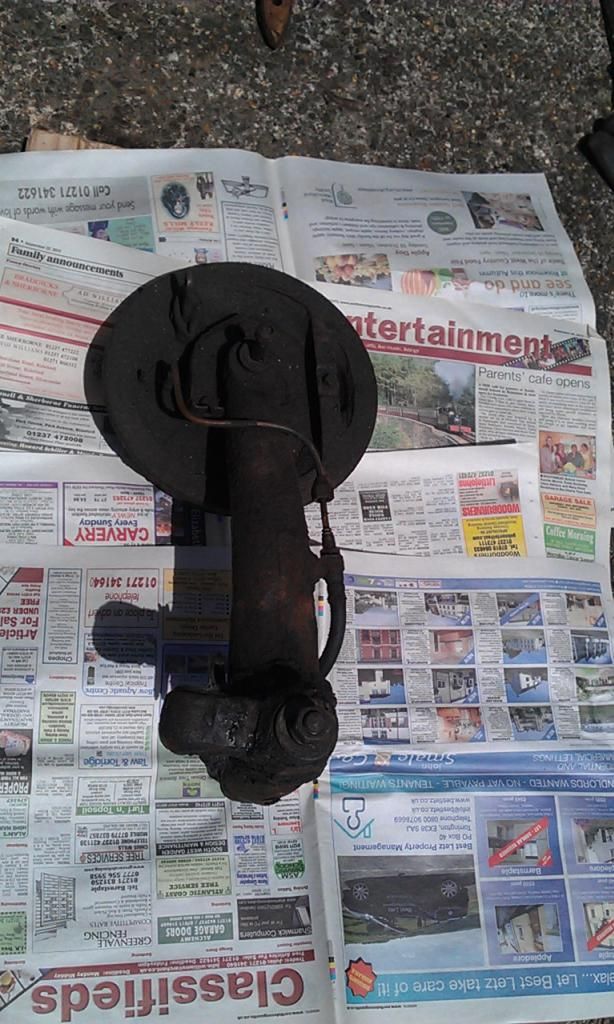
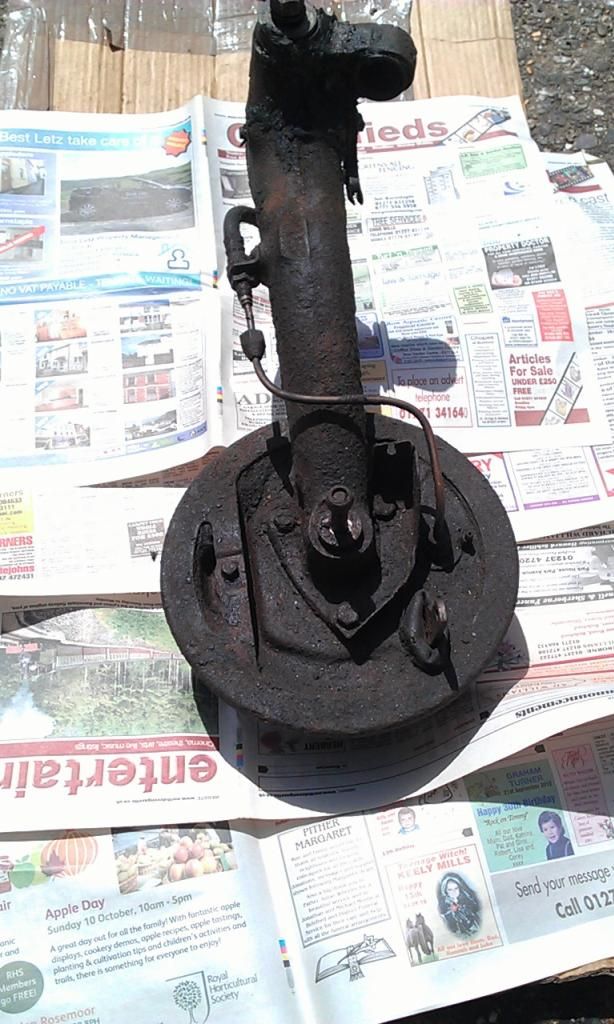
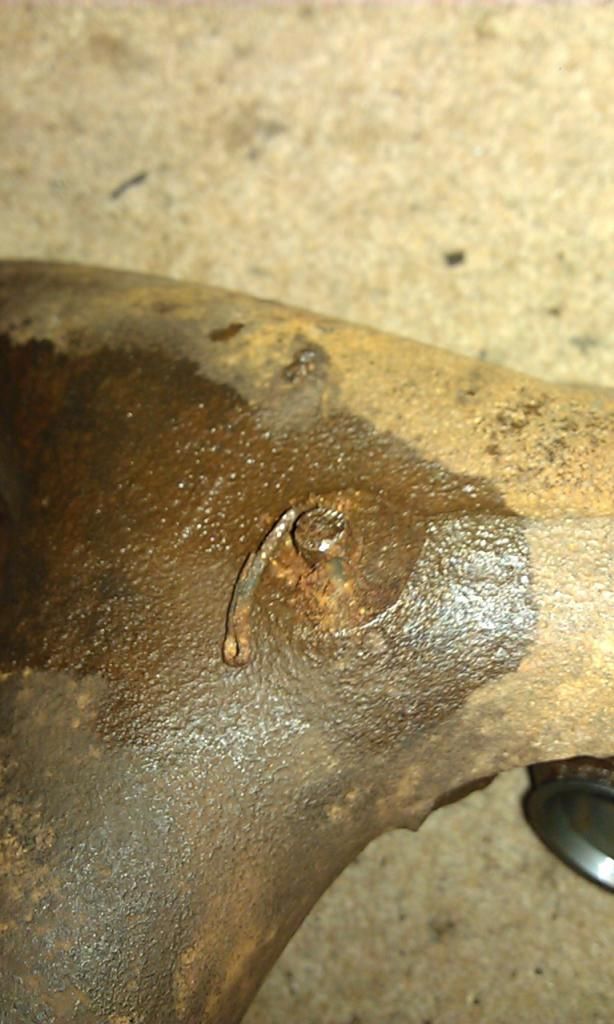
 

Here's the culprit:


IMAG5559_zpse9b9b08f.jpg


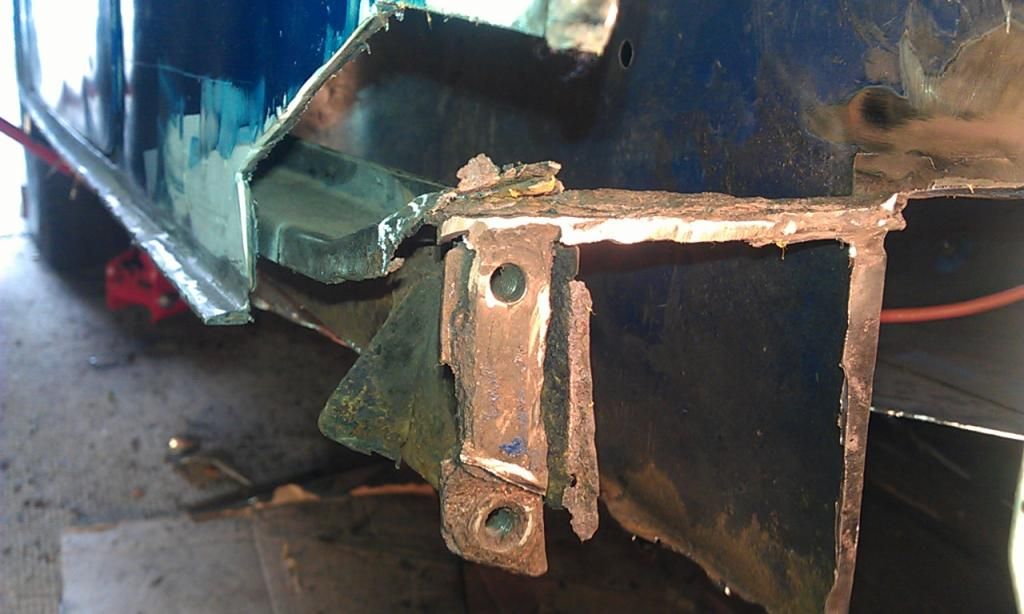
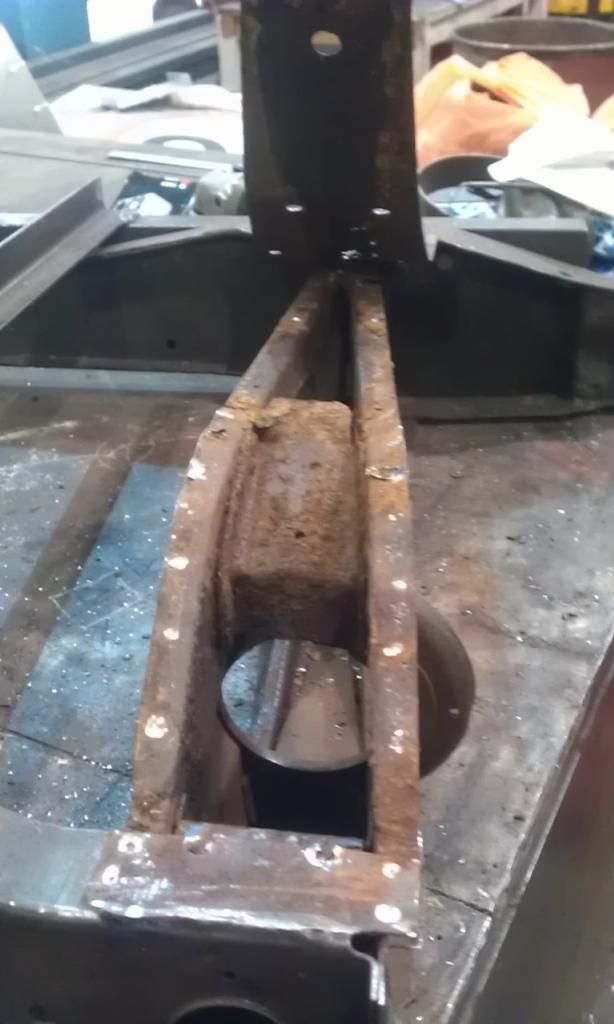
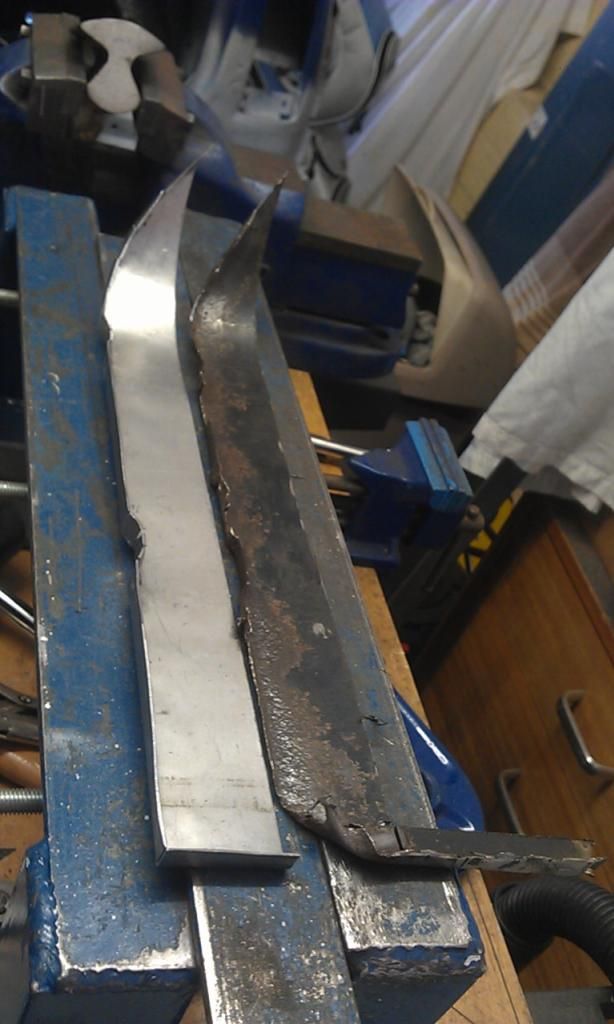
And here is the Cross Member with the bad area removed:


IMAG5560_zps2fad6e72.jpg


As if by magic - Ta Da:


IMAG5561_zps96ab3fc8.jpg


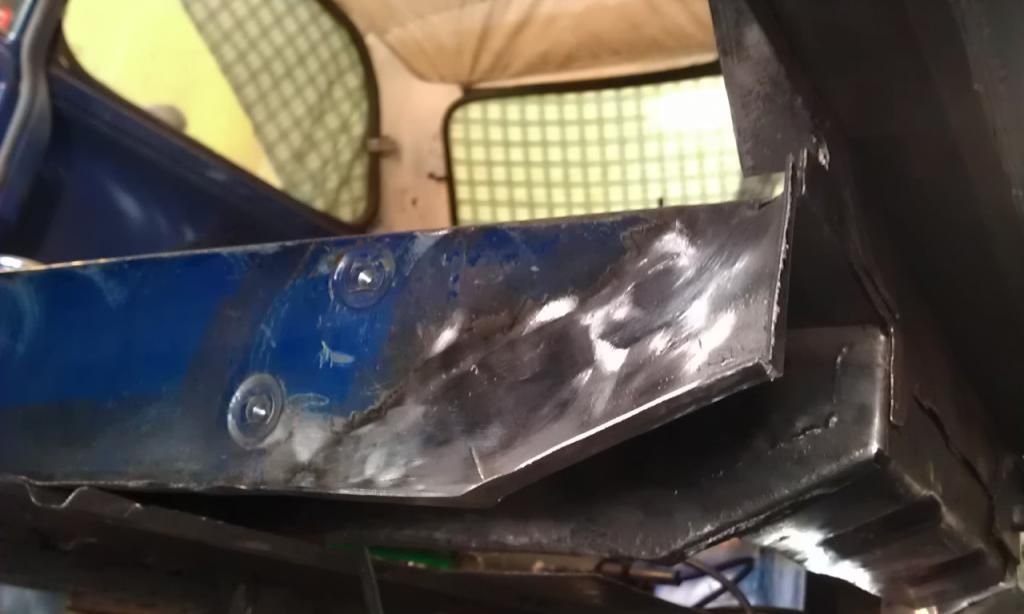
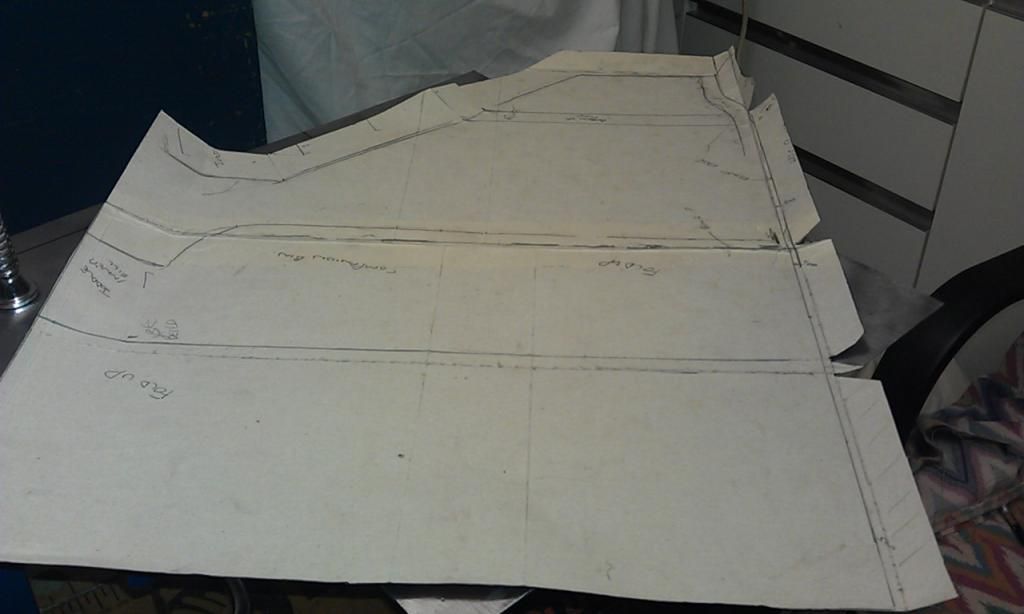
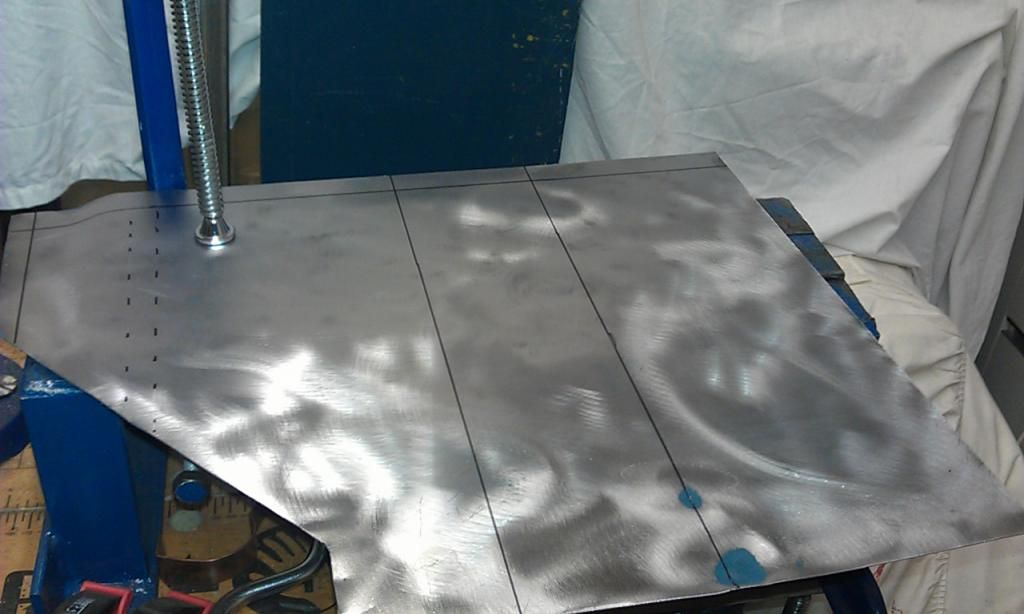
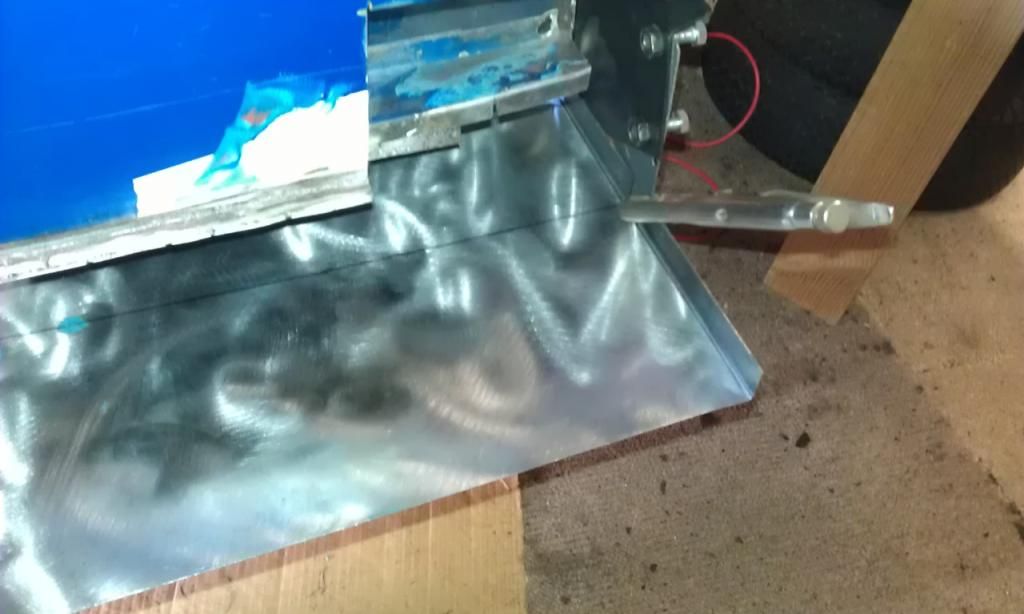
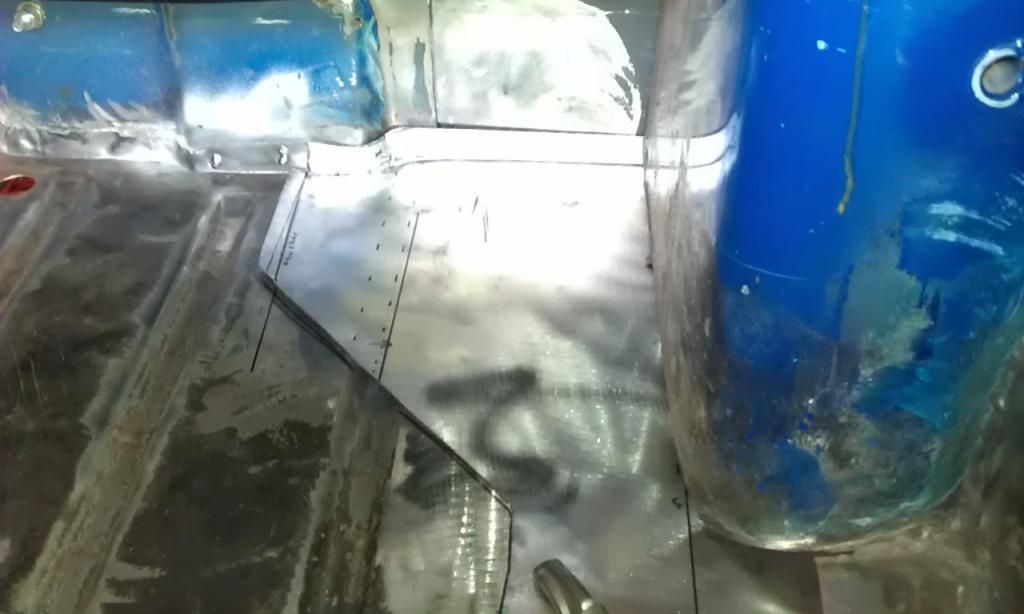
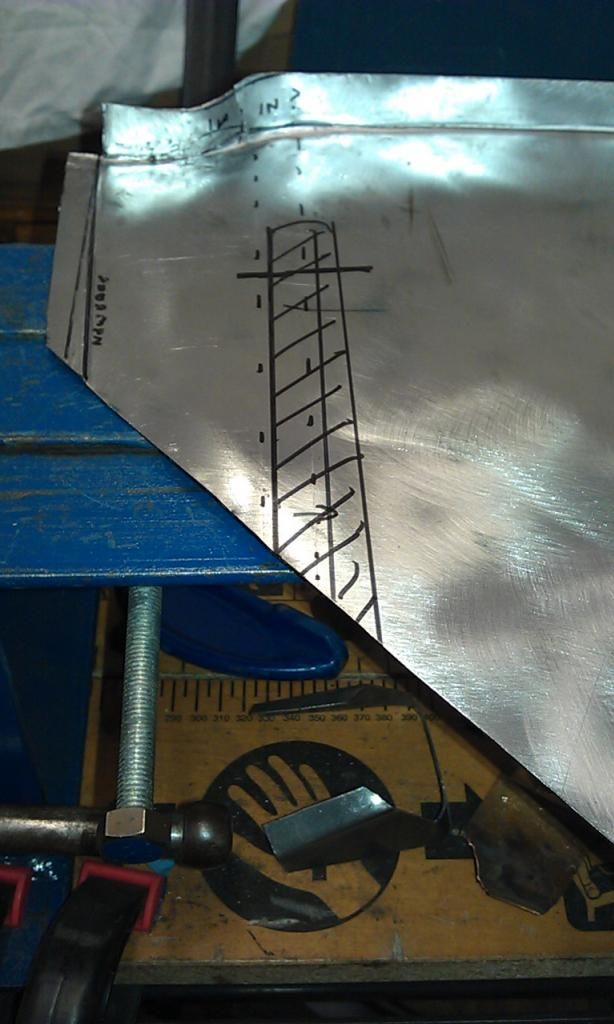
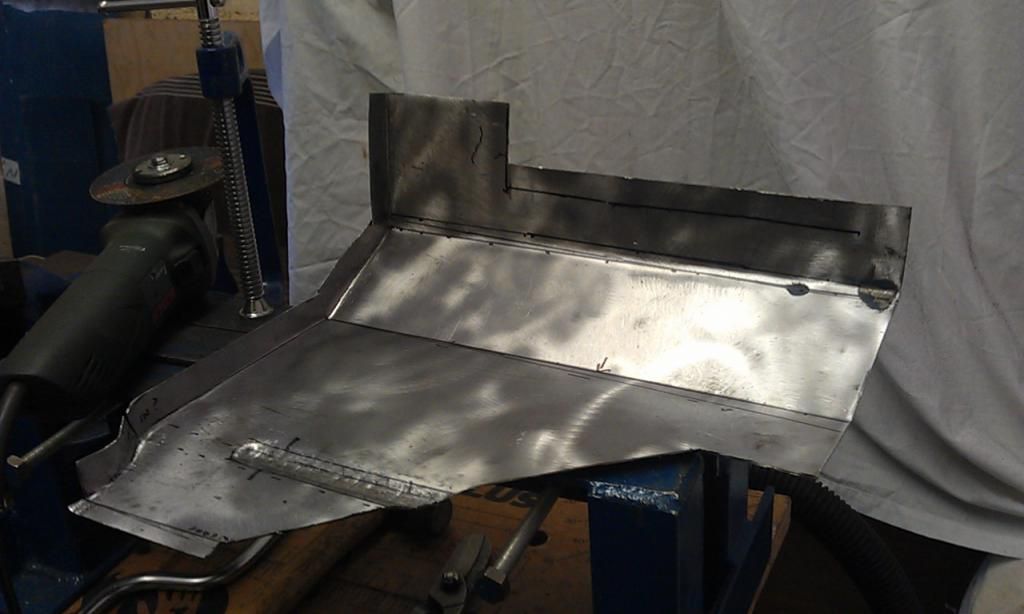
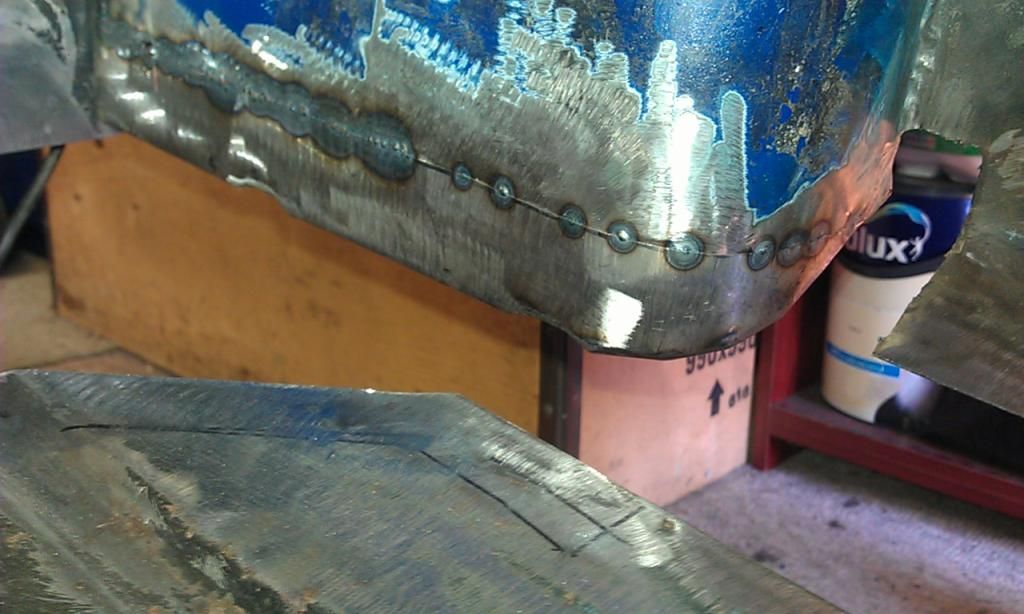
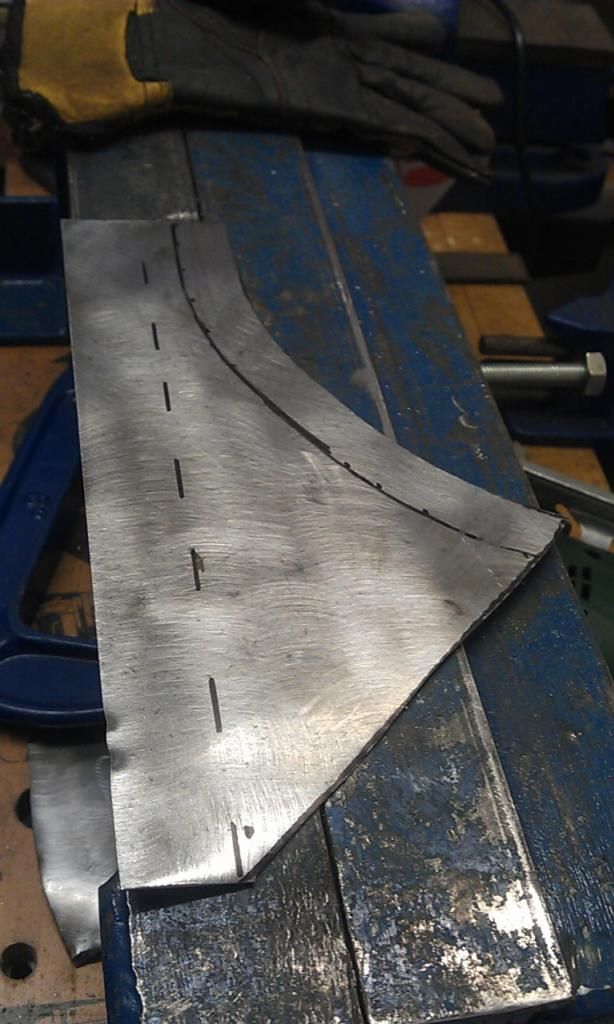
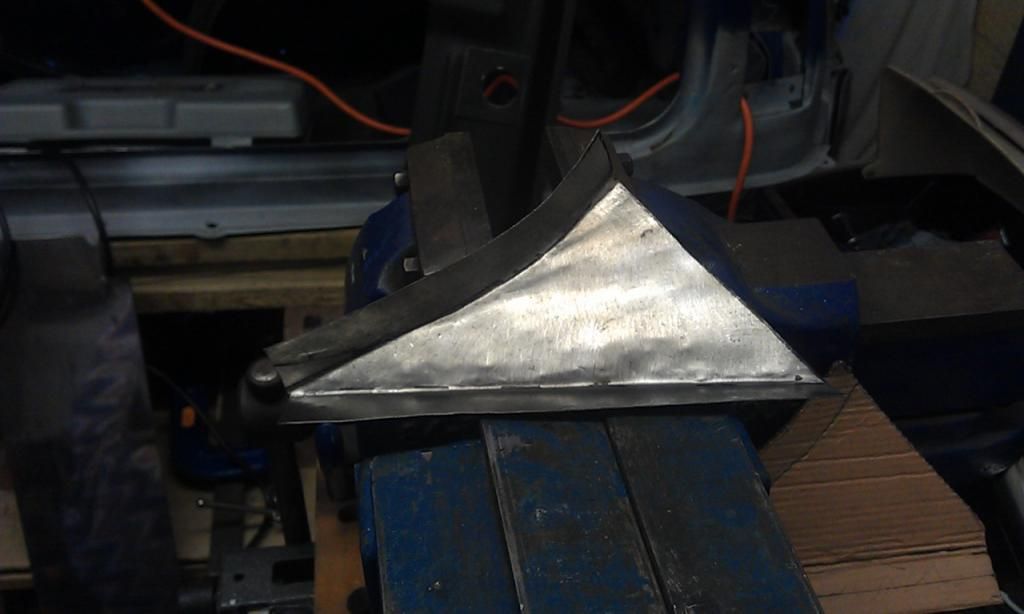
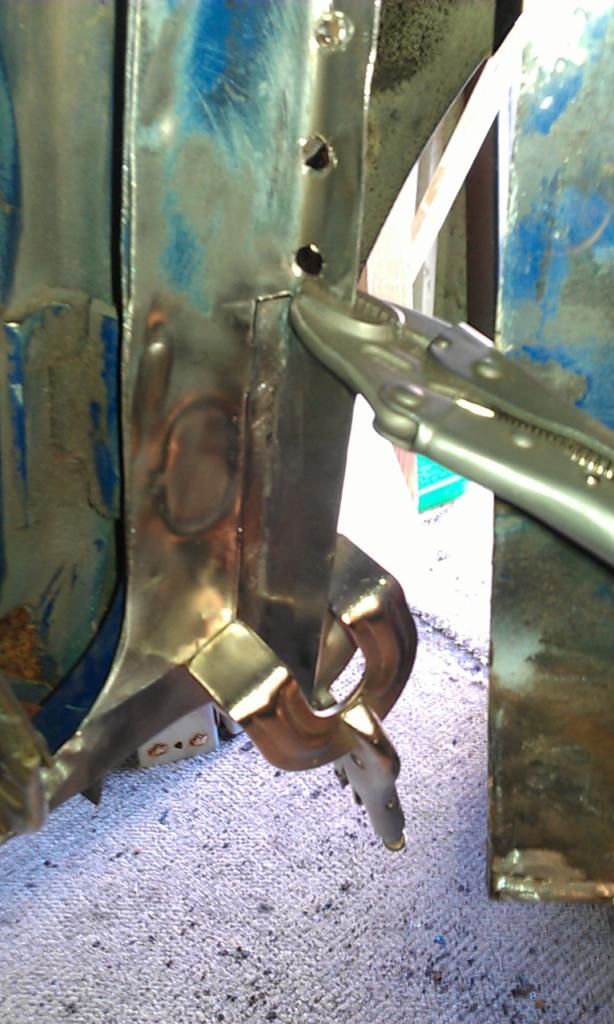
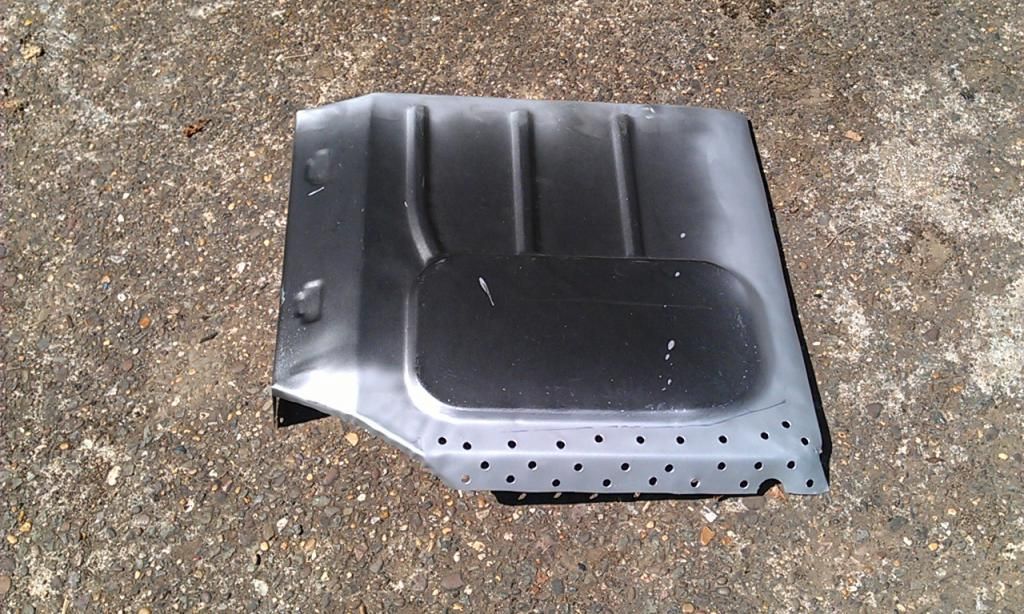
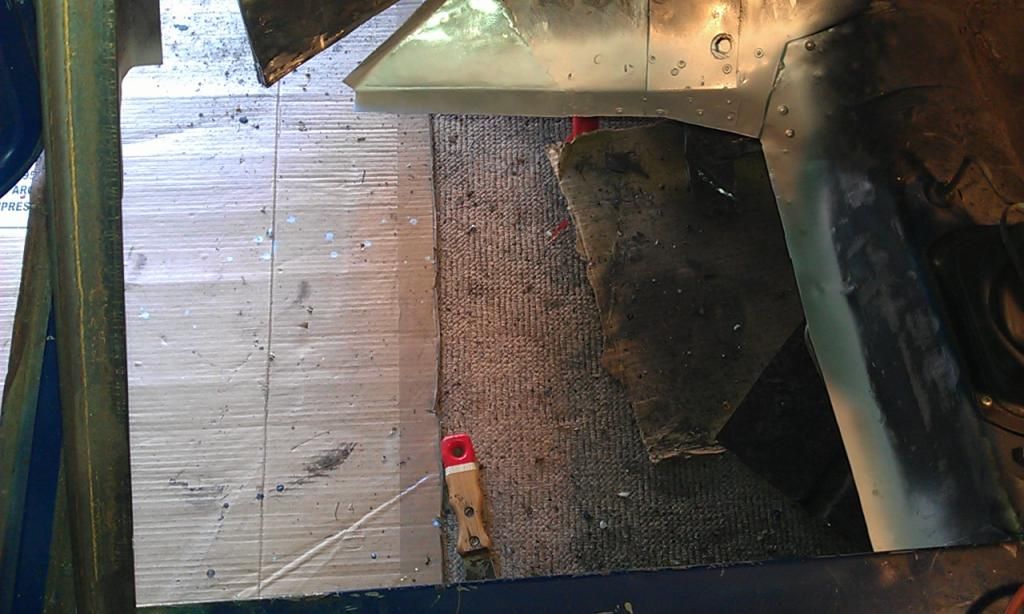
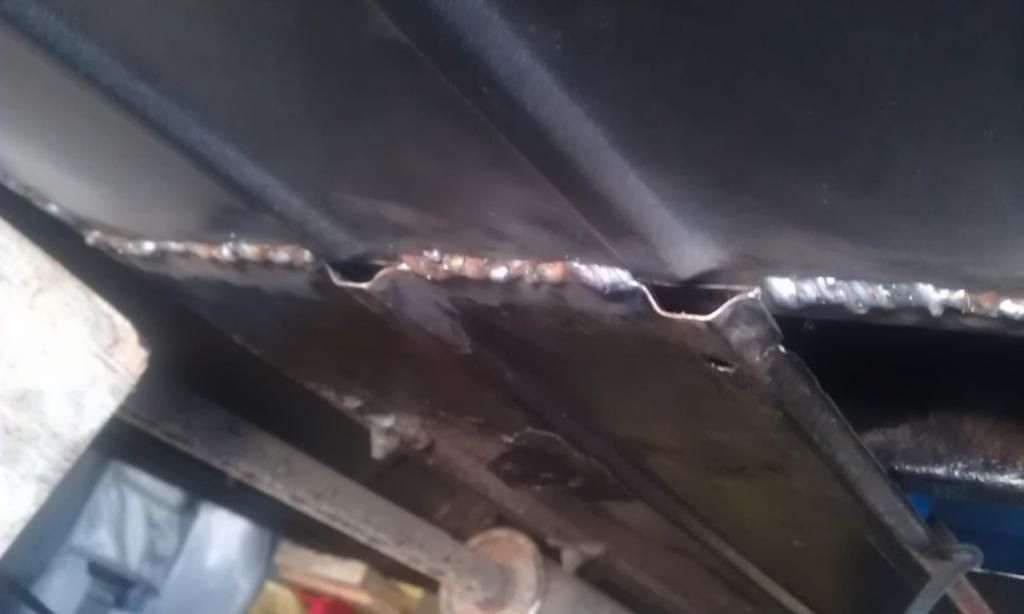
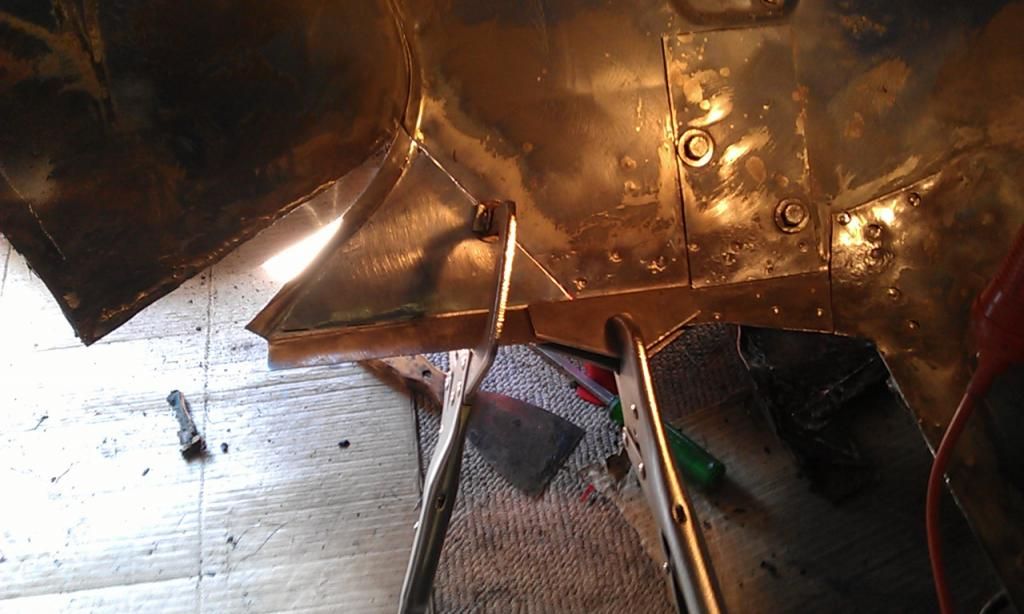
Made a cardboard template marked up some 1.2mm sheet metal, cut it out with a Jigsaw, folded it in my Home Made Bender, test fit, few adjustments after measuring it against the good side and along the remnants of the Inner Sill. Welded it and dress down the weld penetration. I welded it from the inside and will leave the welds as they are for strength.


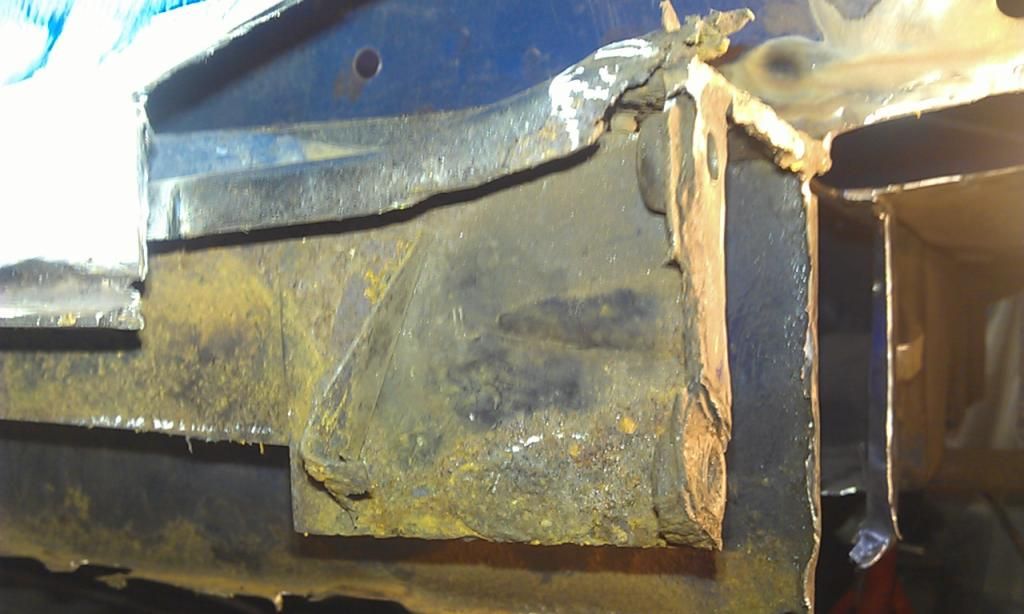
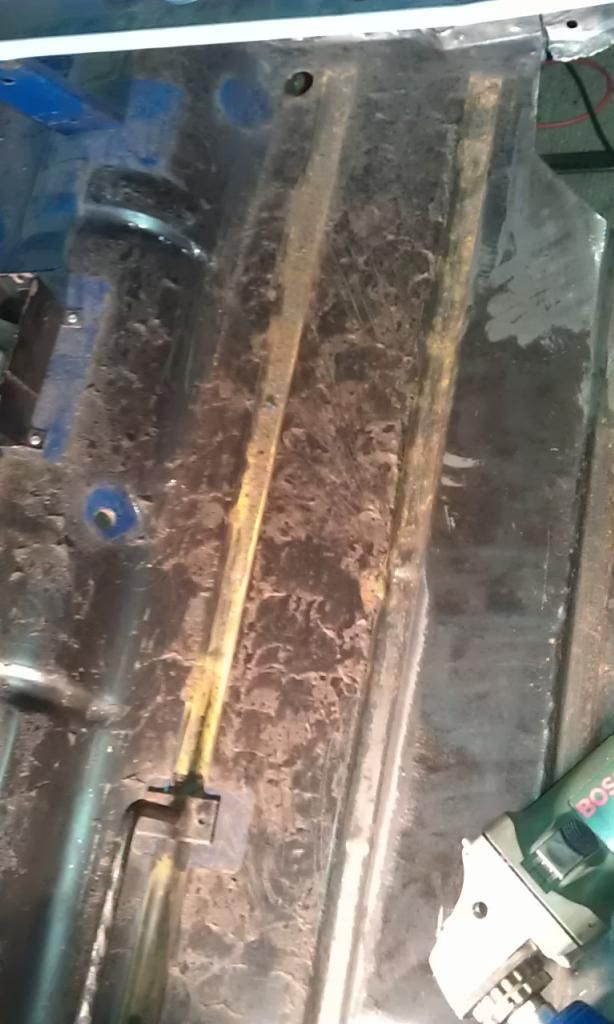
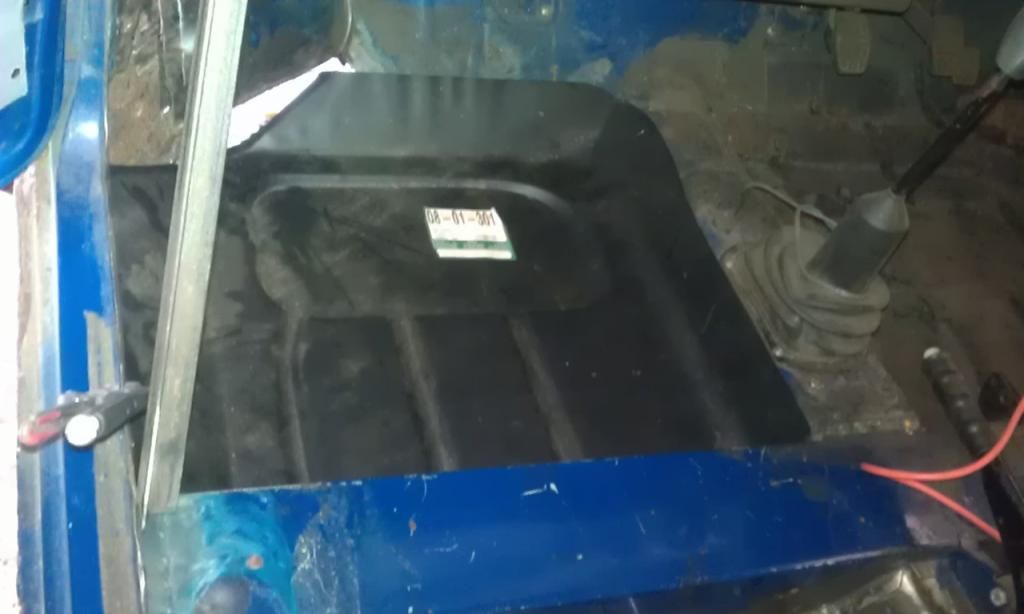
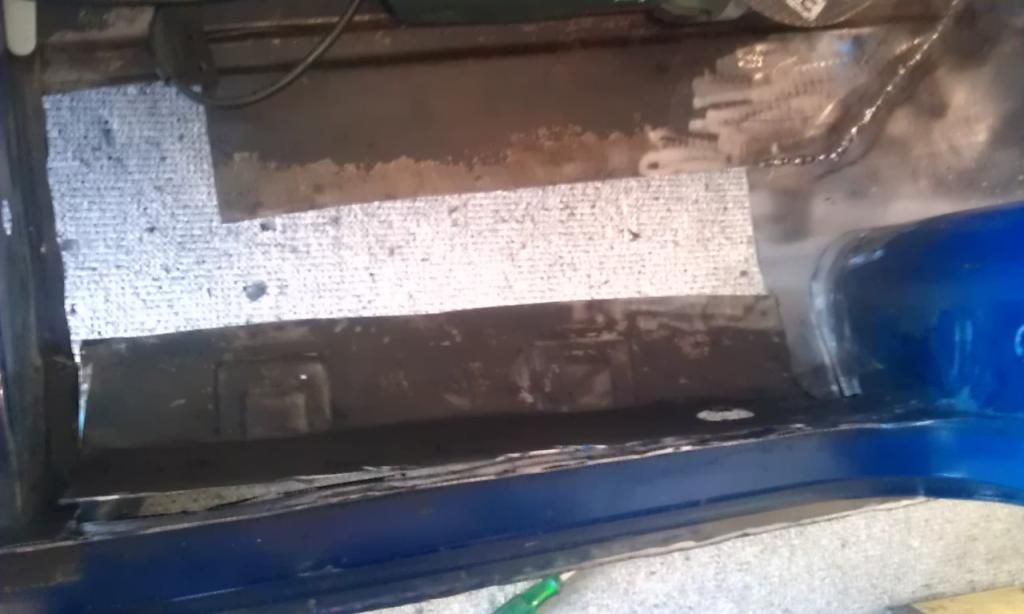
And here is another view of it with the internal area cleaned up a tad:


IMAG5562_zpsc91ae9fd.jpg


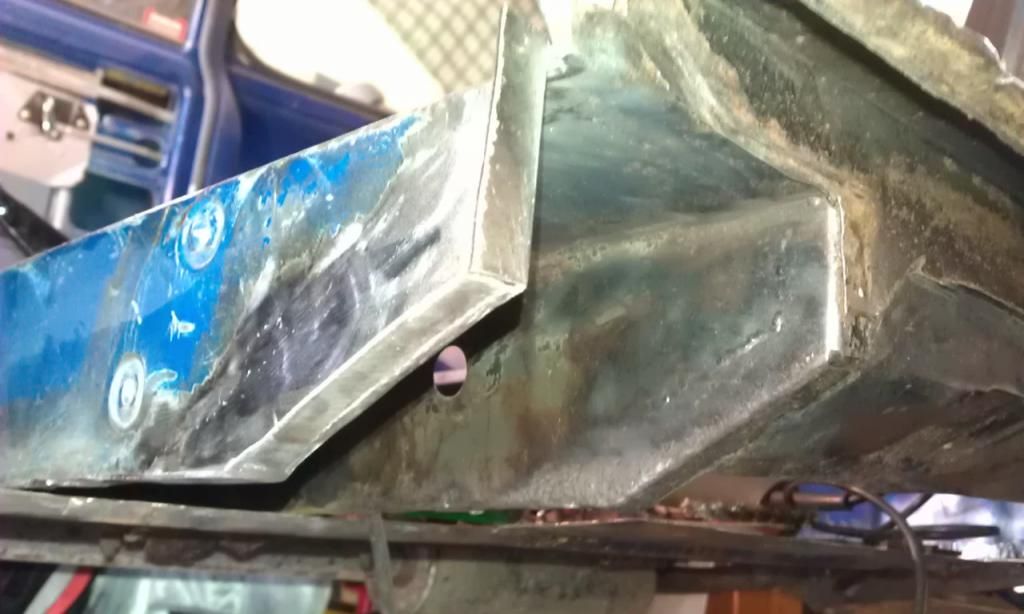
Can't get in too far and its pretty gungy and orange on the floor so I leant in with a hand driven wire brush and hoover and will splash in some rust converter.


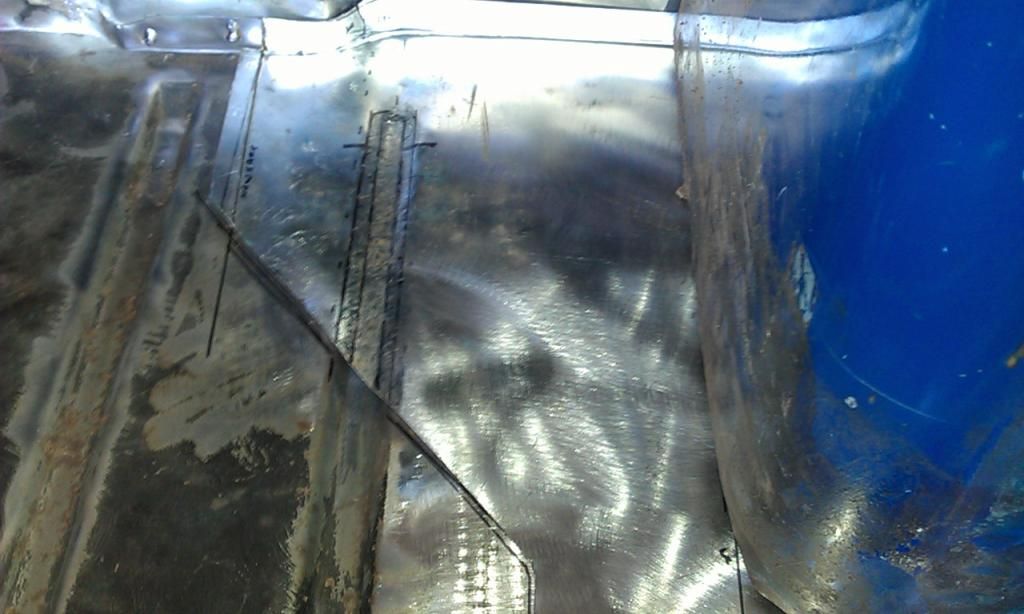
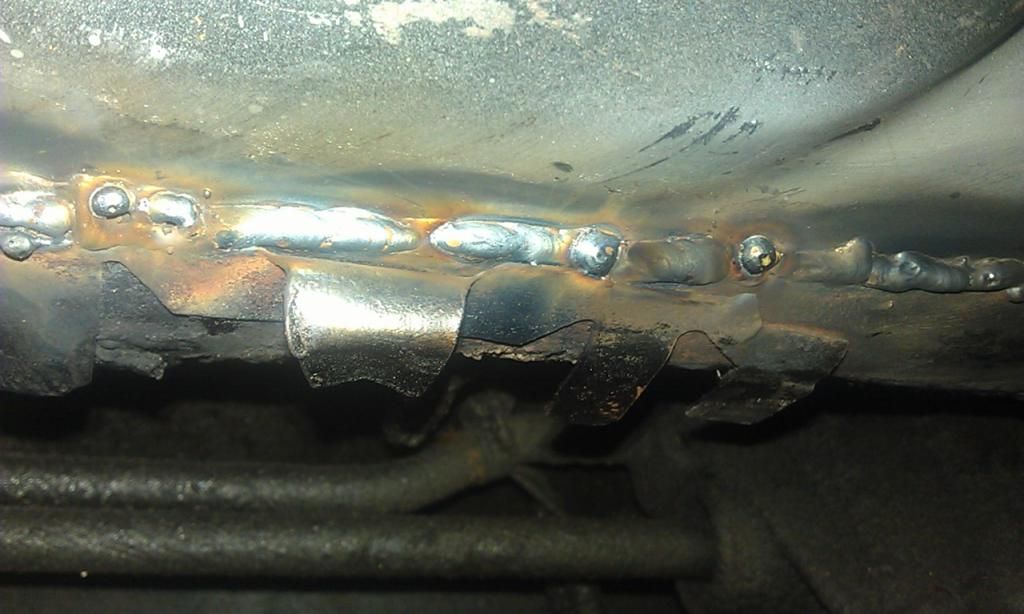
In the pic above on the left you can see the remnants of the Inner Sill and part of an Inner Sill Repair Panel that a previous owner had welded in over the top of the old Inner Sill added to this was the oversills and all the rotten bits where just left sandwiched in between!!!


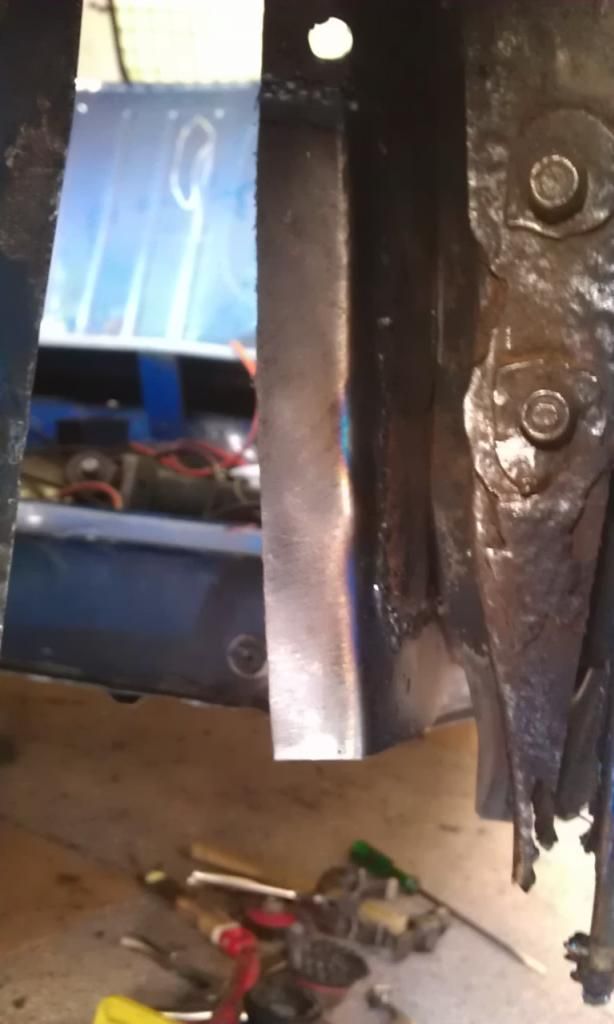
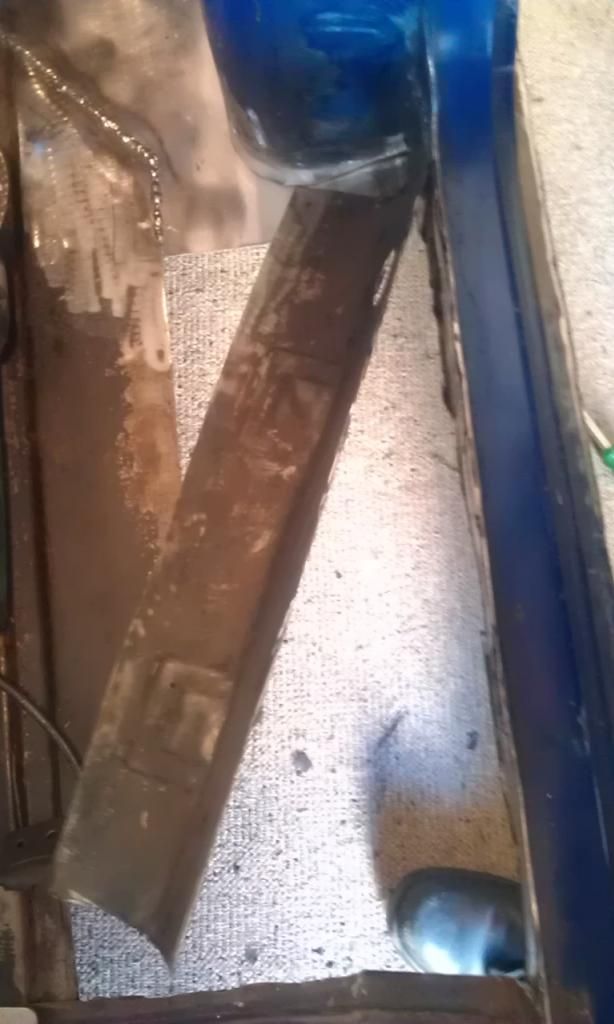
At the rear end ,Companion Bin area, I kept the top edge of the original Inner Sill and Butt Welded to it, but behind the Cross Member the Inner Sill repair and the Original Inner Sill will both be removed and replaced. However the piece of the Inner Sill that sits between the Cross Member and the Door Step is rusted and will be a problem, the Jacking Point also needs replacing and this cannot be done until I get the old one completely out. You cannot see it in this pic but the top flange of the Jacking Point is still in place.`


The problem I have is my current bracing is two pieces of Angle Iron going from the A Post and B Post to the Inner Sill above the Cross Member and I daren't remove them until I have at least the Front Floor In. 


My plan (at the moment) is to Complete the Front Floor to give back some strength and poss also do the floor from the rear under the Cross Member and the cut a section out of the middle of the Door Step to complete the Inner Sill Repair and re-fit the Jacking Point.


Or do the Front Floor and fit a new Brace on top of the Cross Member welded to the A Post and B Post but leaving enough room to work on the Inner Sill?


Edited by JonnyAlpha, 19 June 2014 - 07:30 PM.


#57 JonnyAlpha

JonnyAlpha

    Up Into Fourth

  • Members
  • PipPipPipPipPipPipPipPipPip
  • 2,744 posts
  • Location: North Devon
  • Local Club: Exmoor Minis

Posted 20 June 2014 - 07:37 PM

Only managed half a day today and in order to do things properly I didn't achieve as much as I wanted to.


In order to get the LH Front Floor Pan in I needed to clean up the inside of the door step and repair the Boxing Plate (The bit that joins the A Post to the inside of the Flitch Panel).


Here's a pic of the showing the remnants of the Inner Sill still attached to the Door Step and the rotten Boxing Plate.


IMAG5563_zpsea8fd1ec.jpg


The rear part of the boxing plate is sandwiched between the Door Step and the Inner Sill so once the Inner Sill was carefuly removed by drilling out the spot welds I cut a line where I wanted to removed the damaged area of the Boxing Plate using a 1mm Cutting Disc and care not to cut into the Door Step.


You can just see the Boxing Plate in this pic, the original one on this was not a good fit:


IMAG5564_zps888784ae.jpg

First I chalked up the area to be cut out:


IMAG5566_zps4adcca0a.jpg


Then using a cardboard template I made the repair piece trimmed it and clamped it into place, before clamping it though I spent some time cleaning up the other side ready to treat it and paint it. Here is the piece clamped in place:


IMAG5568_zpsef53b533.jpg


Here's a view from the front once it had been welded in:


IMAG5569_zps25bf95e7.jpg


And here it is from inside dressed down ready for filling and painting:


IMAG5572_zps256abc32.jpg


And here is a pic of it in place and the Door Step cleaned up ready to start fitting the Floor Pan.


#58 JonnyAlpha

JonnyAlpha

    Up Into Fourth

  • Members
  • PipPipPipPipPipPipPipPipPip
  • 2,744 posts
  • Location: North Devon
  • Local Club: Exmoor Minis

Posted 21 June 2014 - 07:18 PM

Cracked a full day, apart from some Geezer asking me to sort his bumper out on his van. He saw me working away and assumed I was a Mechanic :-) I helped him out.


A full day like I said but all I managed was to get the Front LH Floor Pan in, not fully welded but in none the less :-) Nice to see it coming together.


First after lots of test fitting measuring and cutting, I got the Floor Pan down to the size I wanted, cleaned off the black paint, sanded, drilled and weld through primed any areas that would overlap. Did the same to the floor recess but also applied some Rust Convertor in few places. I also decided to clean out and de-rust the area inside the Cross Member, it was orange and rusty. Once it was cleaned and treated it looked a lot better.


Here's the Floor Pan:


IMAG5577_zps7375e1cb.jpg


Here's the recess:


IMAG5580_zpsc571a639.jpg


And here's the Floor Pan part welded:


IMAG5582_zps0ec927c9.jpg


Job done, hot and sweaty day though :-)


Edited by JonnyAlpha, 22 June 2014 - 09:35 PM.


#59 JonnyAlpha

JonnyAlpha

    Up Into Fourth

  • Members
  • PipPipPipPipPipPipPipPipPip
  • 2,744 posts
  • Location: North Devon
  • Local Club: Exmoor Minis

Posted 24 June 2014 - 02:11 PM

Been away in Londinium for a couple of days but got back at it this Morning. Needed to finish welding in the Front LH Floor Pan which I completed just as my Gas Bottle ran out :-(


Here's the finished job:


IMAG5641_zpsf232379a.jpg


Here's a close up of the RH side nearest the centre console, this area was overlapped and Lap Welded the line underneath is the penetration from below:


IMAG5642_zps2564f621.jpg


This is the front section Plug Welded to the Toe Board:


IMAG5643_zpsf638e5be.jpg


And this is the underside up against the Cross Member and part of the Rear Floor:


IMAG5645_zps48ab6260.jpg


I decided in the end to weld it up against the Cross Member and the Rear Floor, I then plan to make a couple of bridge pieces to join the Flutes on the new Floor Pan and the old Floor.


And here's a couple of pics of the welding on the underside centre:


IMAG5648_zps6e0b48bb.jpg


IMAG5649_zps31316a5a.jpg


Like I said the gas ran out so this will prevent me from doing any more welding until I get a re-fill, currently with Adams Gas but may try and switch to BOC? Until I get a re-fill I'll start making some more repair panels for the middle floor section or start cutting of the RH Side Rear Corner / Heelboard and Sill. (loads to keep me going).


#60 JonnyAlpha

JonnyAlpha

    Up Into Fourth

  • Members
  • PipPipPipPipPipPipPipPipPip
  • 2,744 posts
  • Location: North Devon
  • Local Club: Exmoor Minis

Posted 24 June 2014 - 07:50 PM

All I managed this afternoon was to cut out the rest of the Old Inner and prep the door step and Cross Member area ready to make and fit the middle floor repair piece. I need a piece 14 Inches Wide for the floor which I don't have so I'll have to go looking.


First up I cut down either side and cut out some of the welds holding on the Inner Sill repair which had been welded from the inside over the top of the old Inner Sill (shocking way to do a repair). This is a view with my head through the door looking towards the floor:


IMAG5651_zps0e3f9918.jpg


It came off without too much hassle:


IMAG5652_zps349edbac.jpg


Here's another shot showing the original Inner Sill still in place:


IMAG5653_zpsa581d072.jpg


Then I spent a long while gently removing the original Inner Sill from the Seat Belt mounting point:


IMAG5654_zps6ed5f5e3.jpg

It is still attached to part of the inner Sill on the left side, this has been left and the repair piece I will make will be butt welded to the original inner Sill and Lap and Plug Welded to the seat belt Mount.


IMAG5656_zps07f9651f.jpg


Next I had to remove the Inner sill repair piece and the remnants of the original inner Sill from the Cross Member which had been sandwiched between the two.


IMAG5656_zps07f9651f.jpg

Here it is all removed, the RH side of the Cross Member (when viewed from outside the Mini) will also need repairing (its a weakened with rust). I did the LH side already.


IMAG5657_zpsceb93db2.jpg


Last job was to clean everything up and spray Weld Through Primer on the inner side of the Door Step (Need to repair a few holes in the Door Step).


Tomorrow I'm on a mission to find some sheet metal wide enough to make my next Floor Piece :-)


0 user(s) are reading this topic

0 members, 0 guests, 0 anonymous users