Jump to content


Photo
- - - - -

1982 Austin Mini - Project Who?


  • Please log in to reply
848 replies to this topic

#61 JonnyAlpha

JonnyAlpha

    Up Into Fourth

  • Members
  • PipPipPipPipPipPipPipPipPip
  • 2,744 posts
  • Location: North Devon
  • Local Club: Exmoor Minis

Posted 28 June 2014 - 08:26 PM

Well Gas has run out and so has my project money pot so anything that needs cash is on hold at the moment :-(

Had family visiting since Thu so did't get anything done but managed a couple of hours pottering today :-)


Thought I'd pay the Engine Bay some attention, I keep lifting the bonnet and thinking yuuuckkk I just gotta sort that out before the MOT. I wont be able to give it a full makeover just yet so at first it will just get a tidy up and any rusty parts will get cleaned, treated and temp painted.


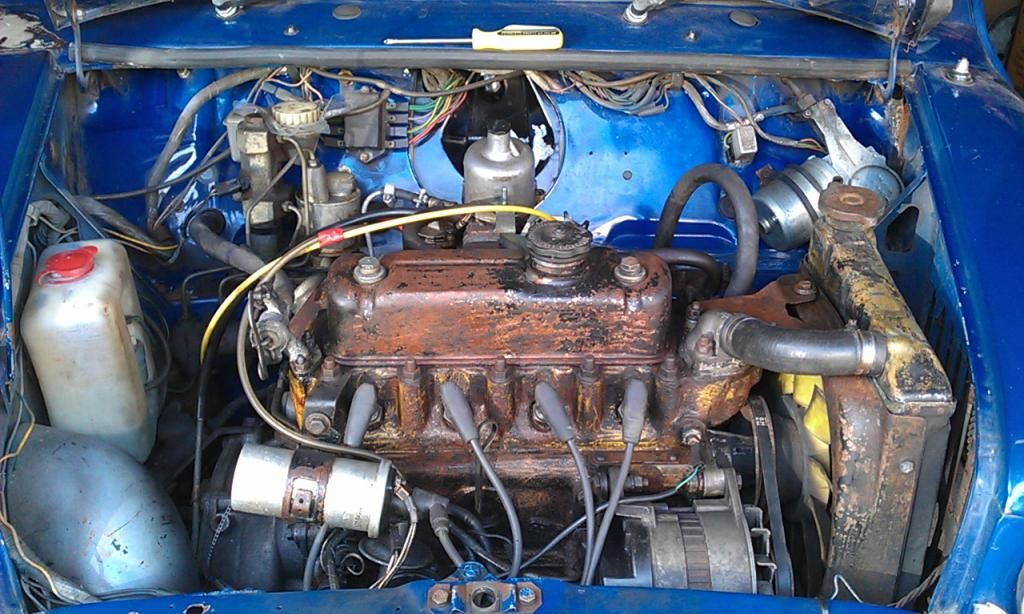
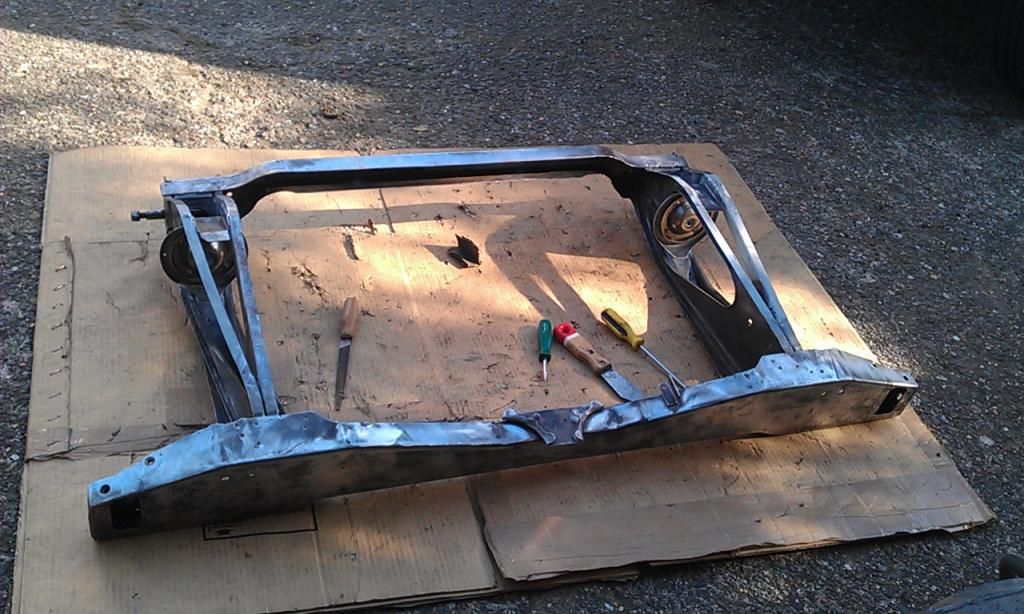
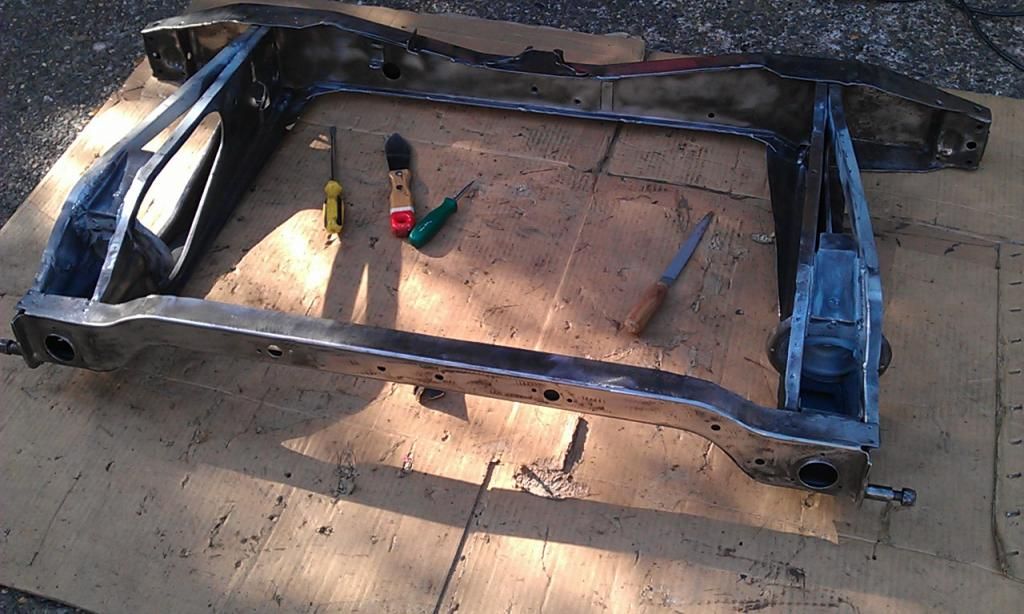
Here is a pic of what it looked like when I started:


IMAG5705_zps8bfb62aa.jpg


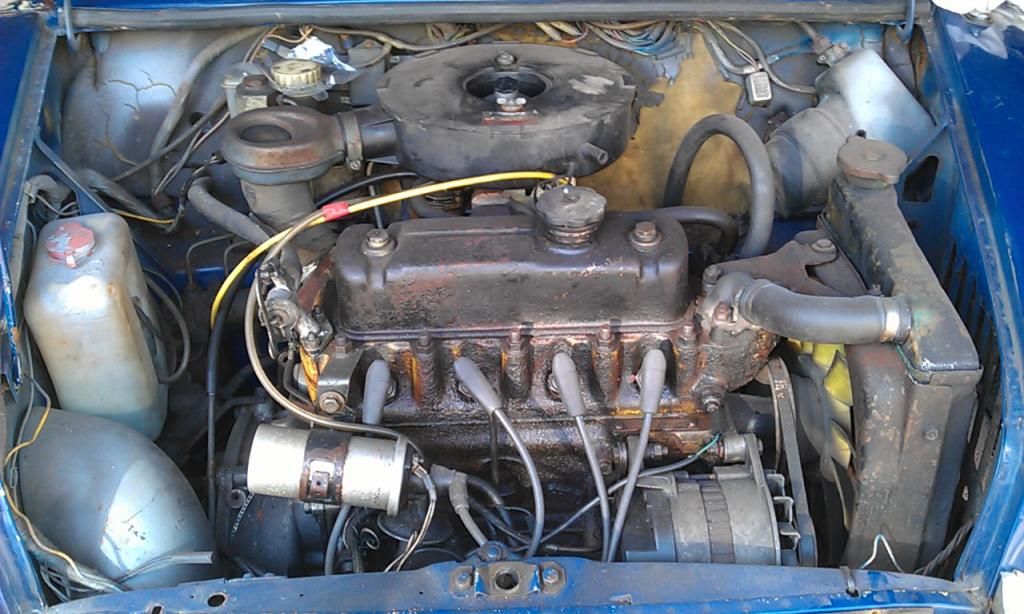
The photo actually make its look a lot better than it actually is.


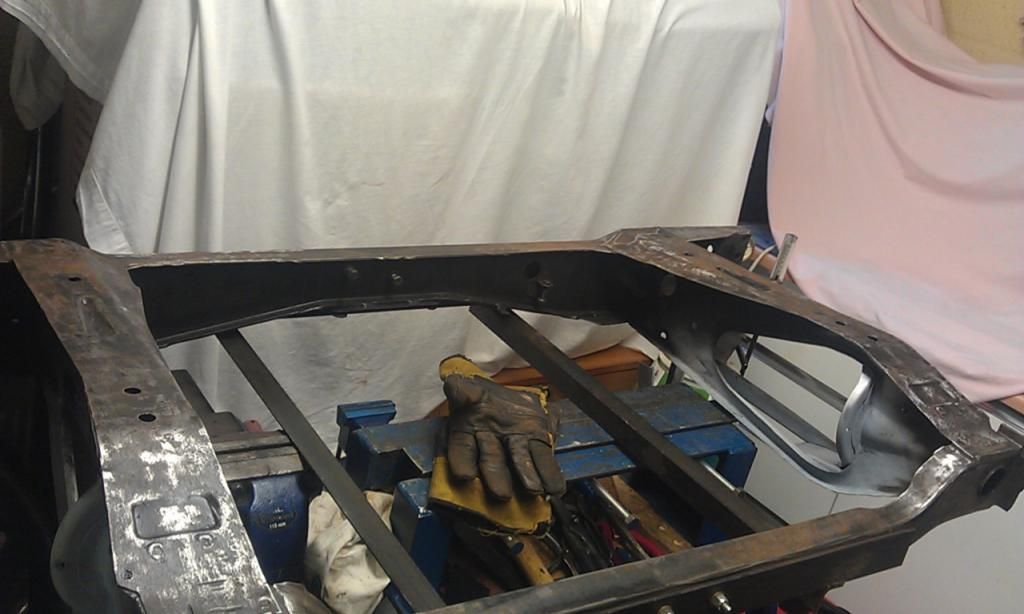
First thing I did, as recommended in the Engine Styling section was to remove the ugly sound proofing, the Bulkhead behind was in very good condition.

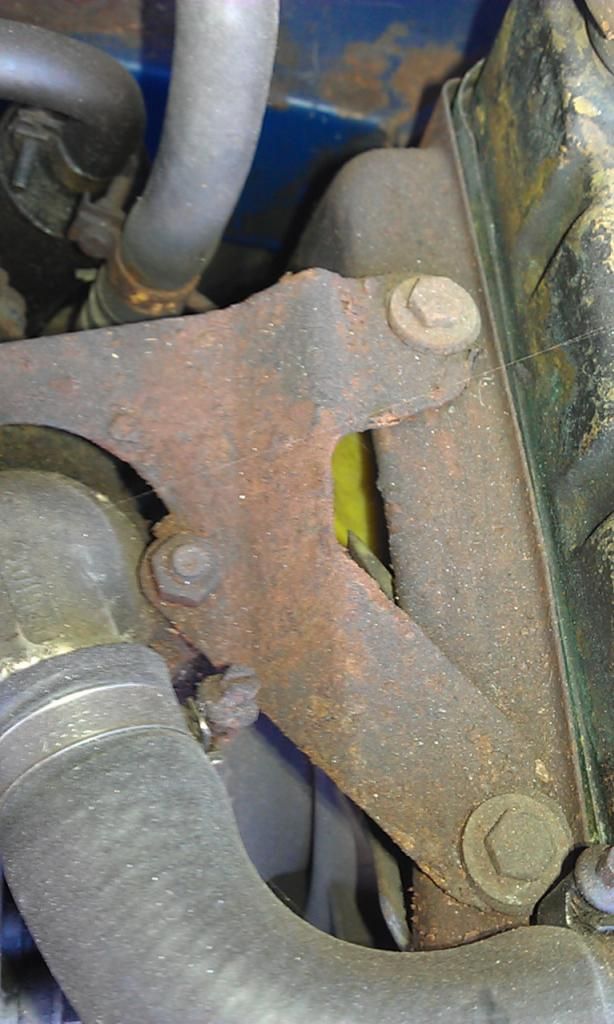
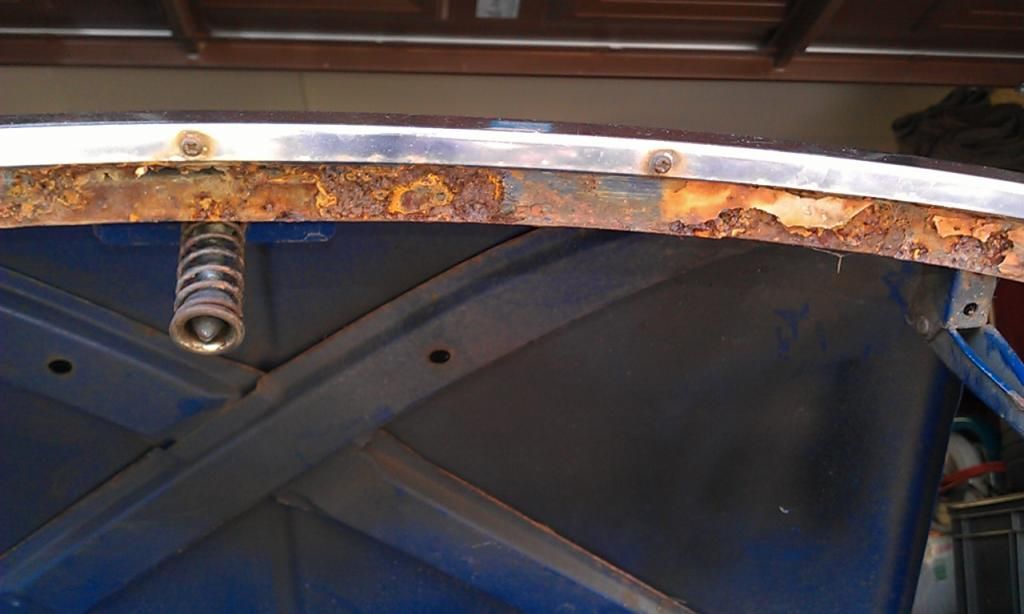
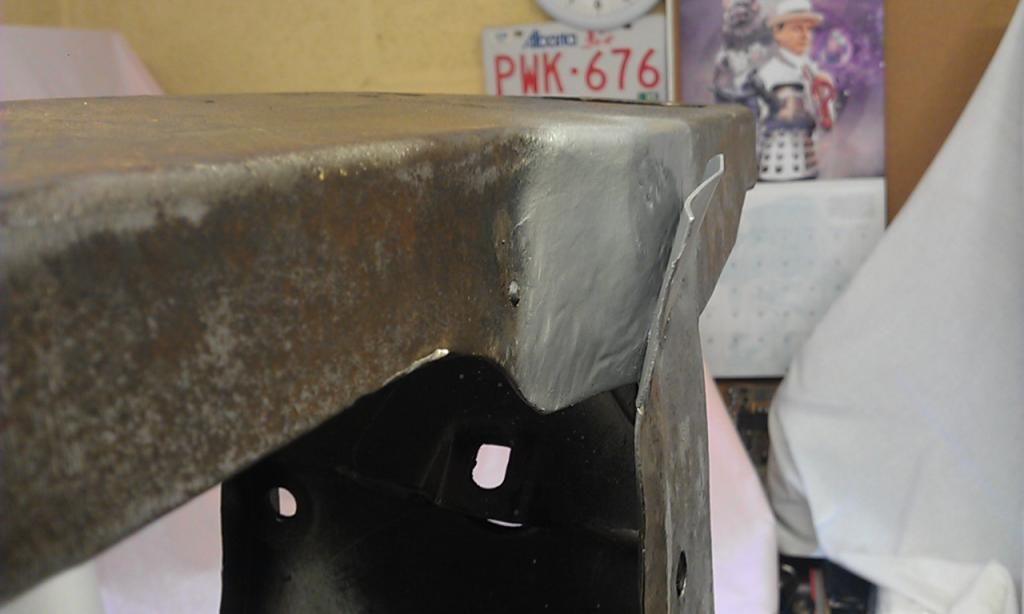
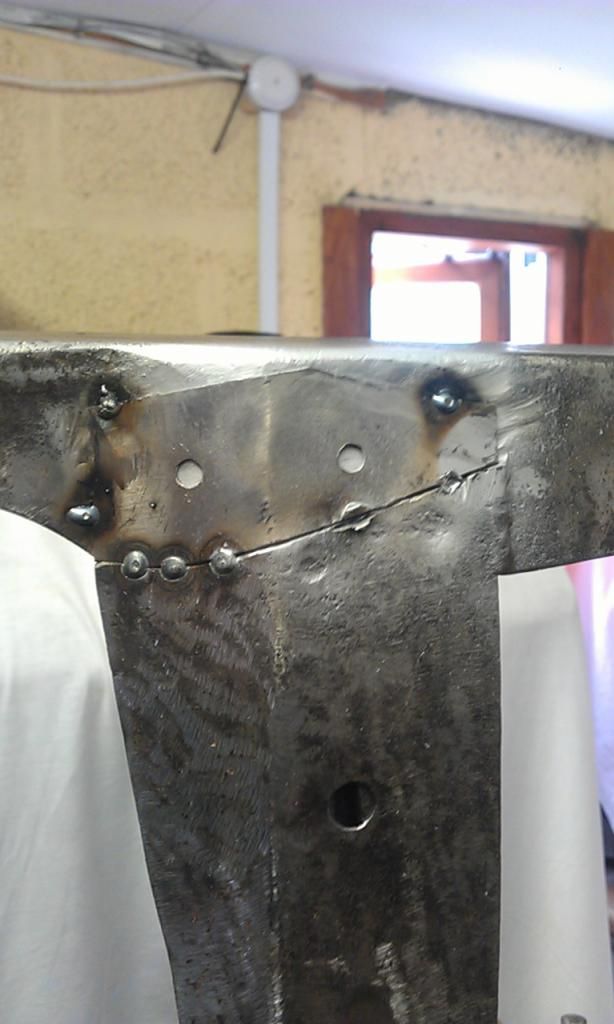
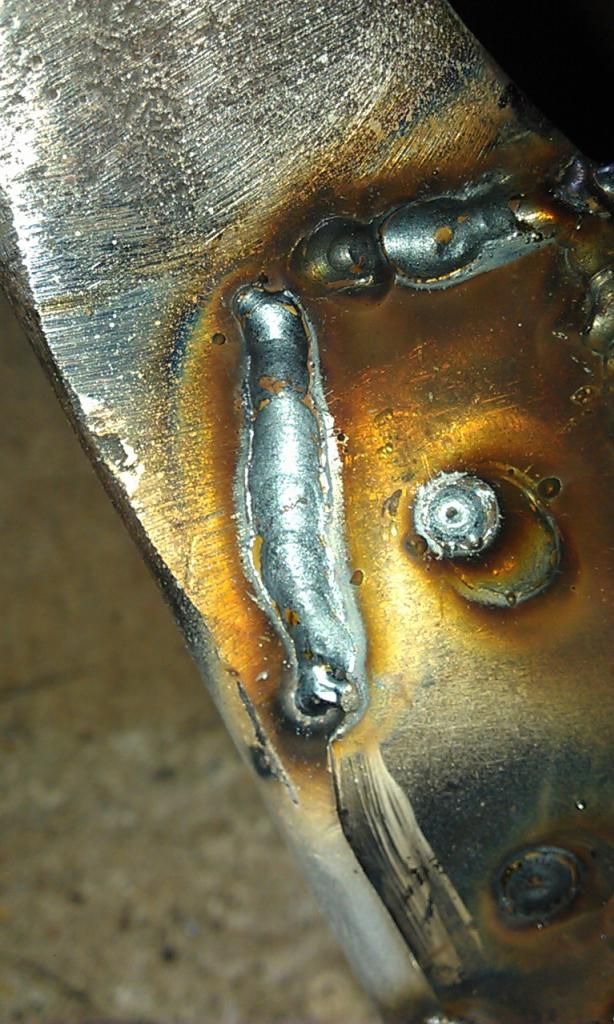
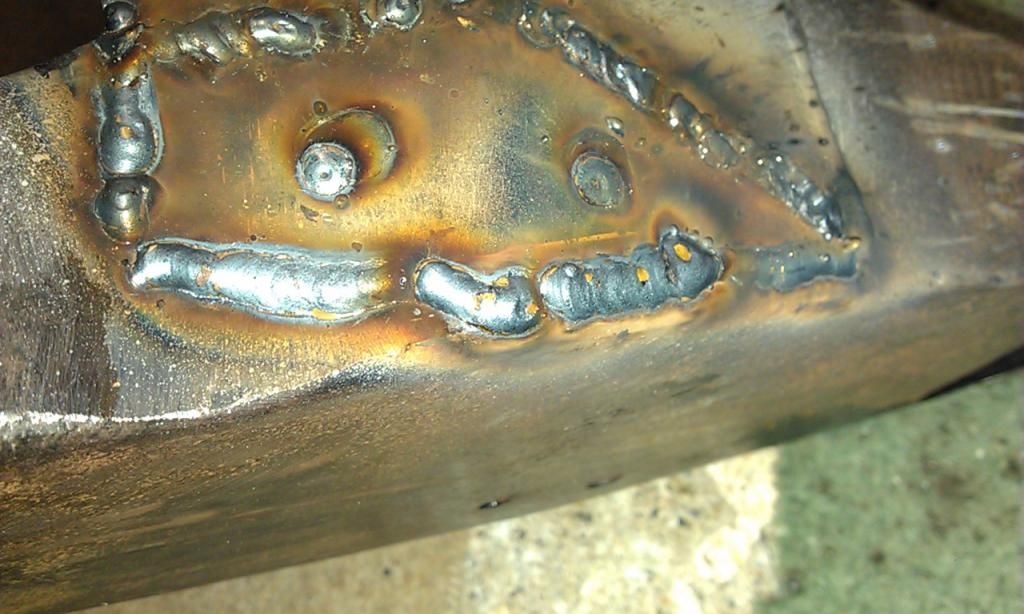
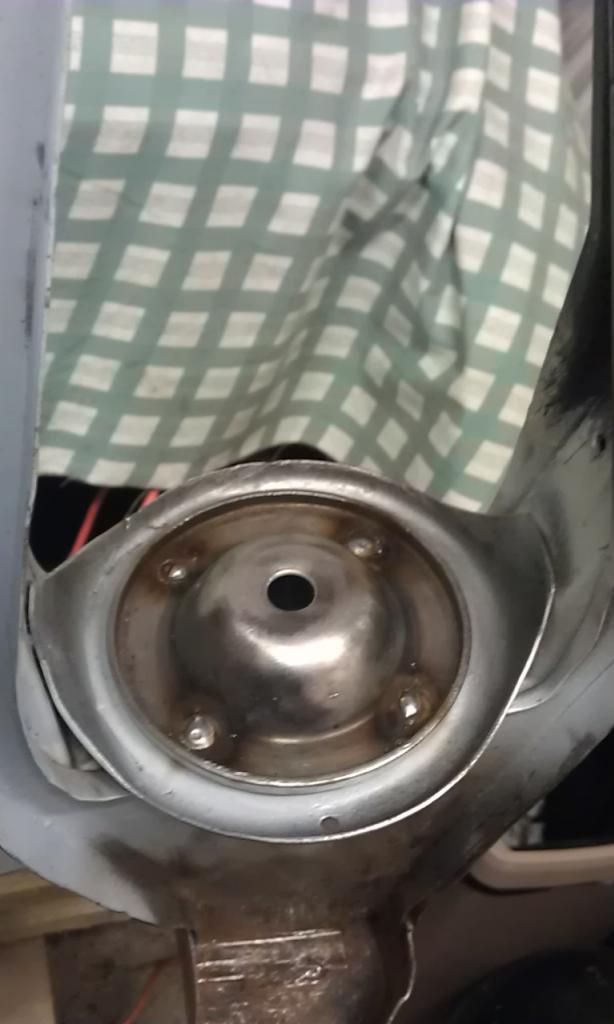
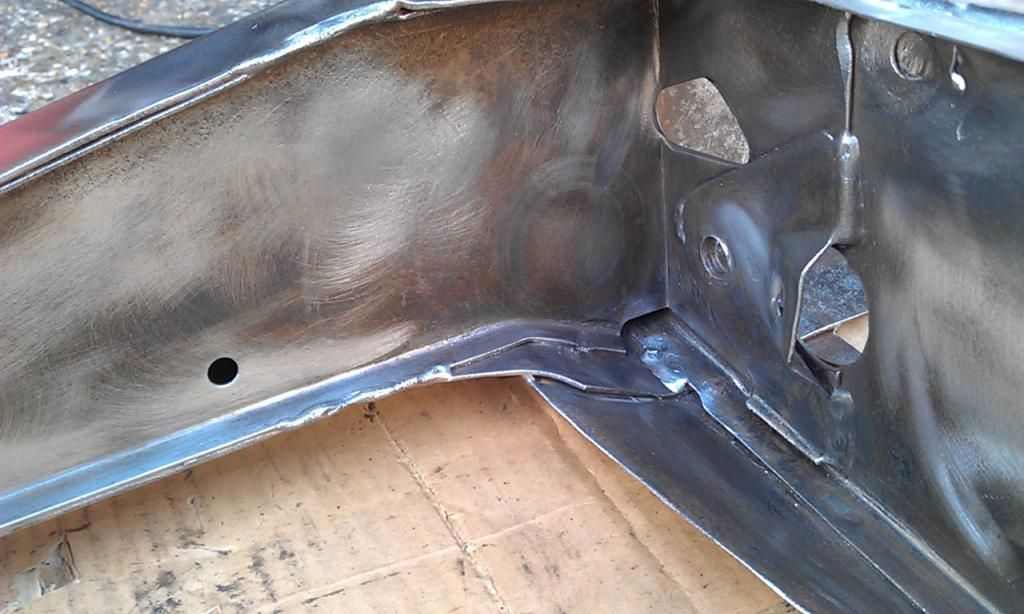
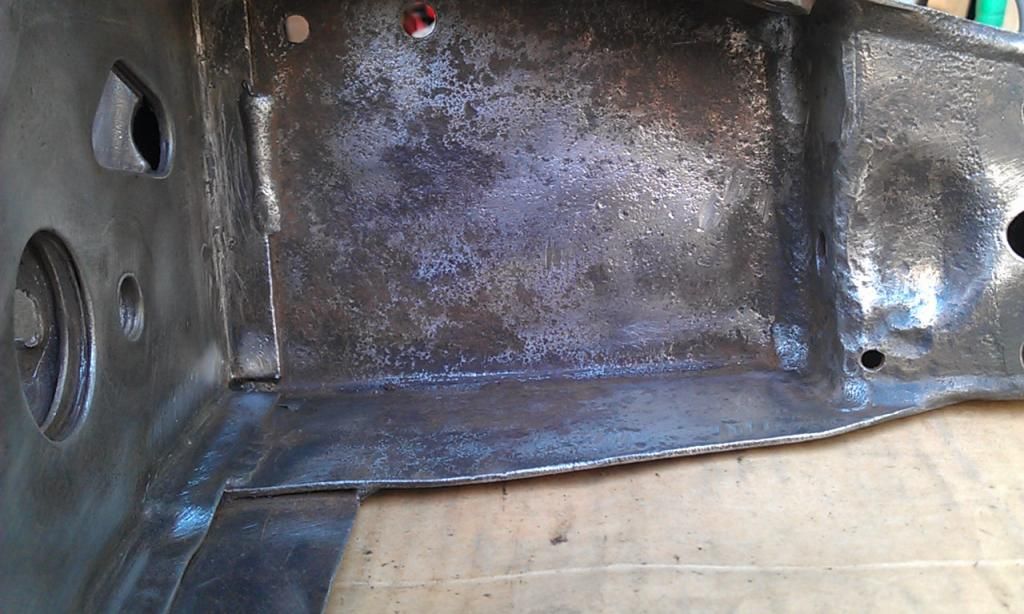
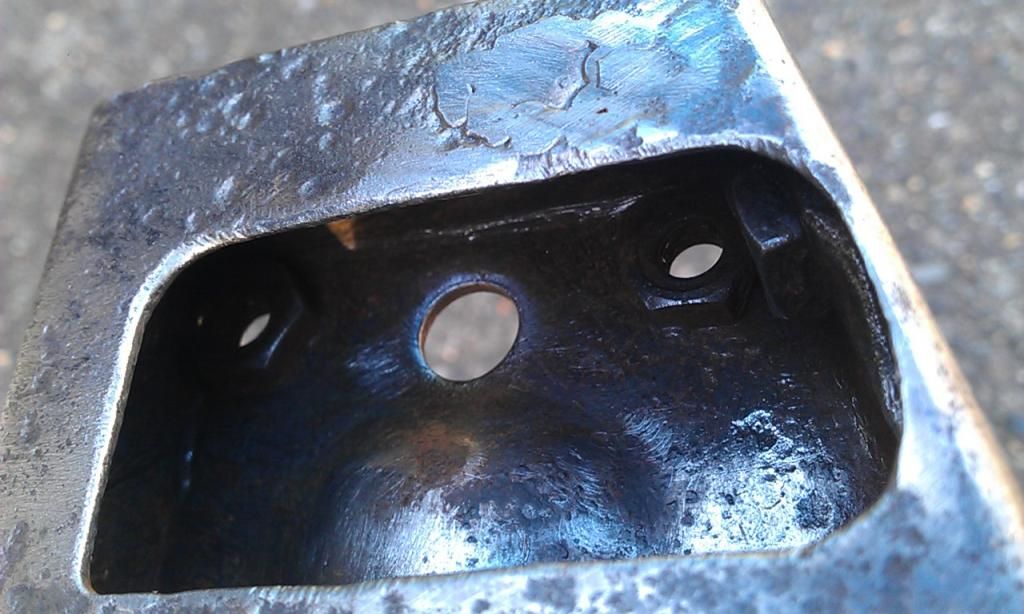
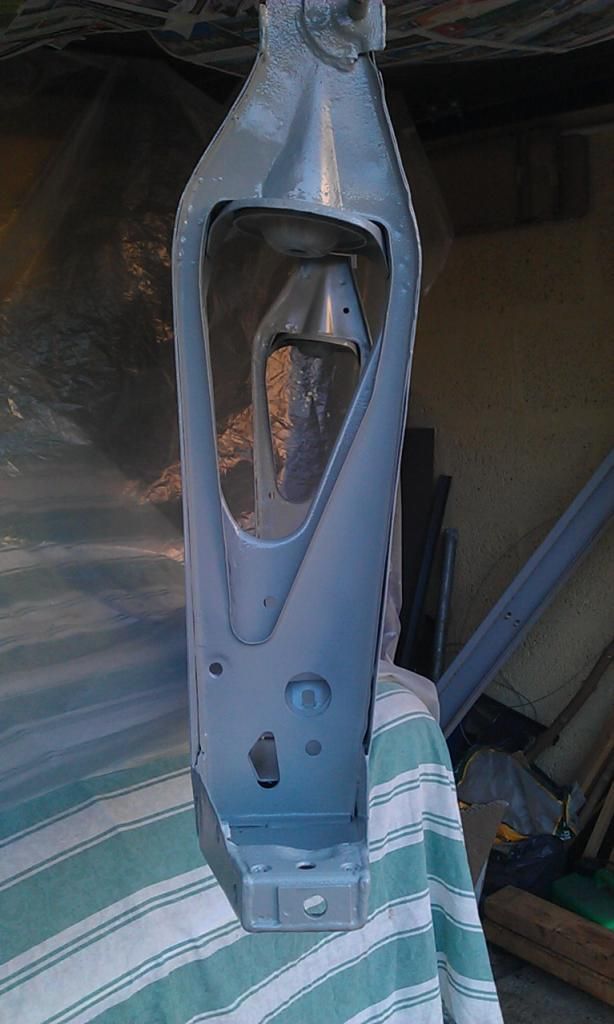
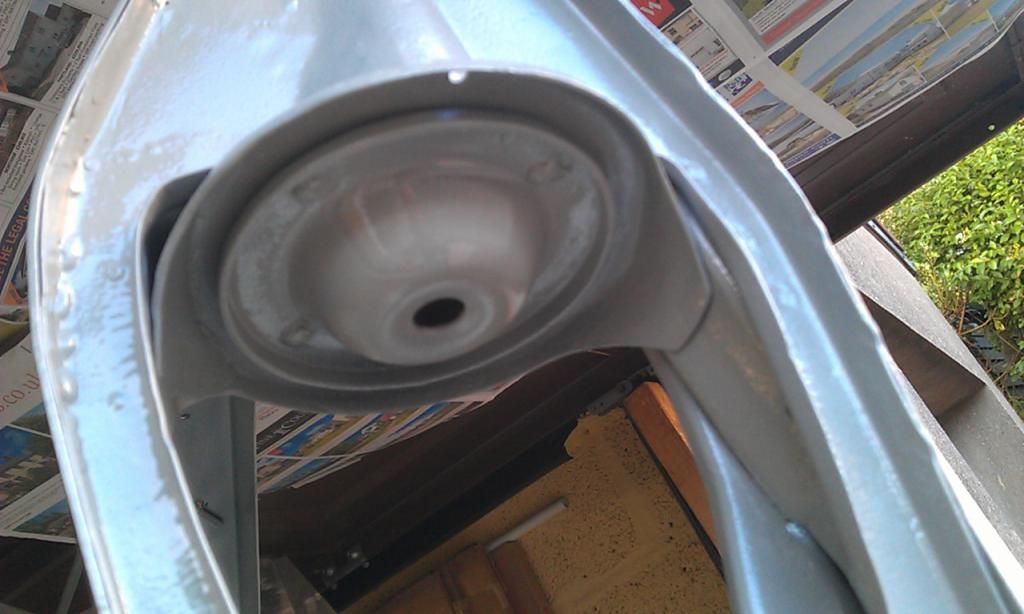
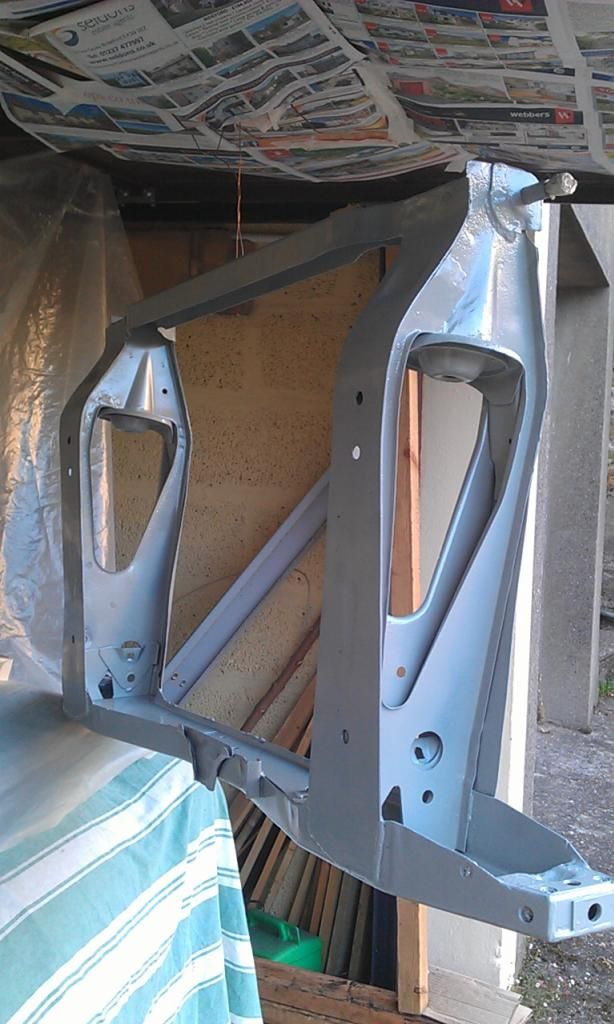
I have found some surface rust around the RH Upper Subframe Mount which will need some attention and more worryingly or annoyingly the Inner Wing has gone through to the RH side of the Bonnet Hinge, the Scuttle Closing Plate has probably gone as well. The only real way to repair this is to remove the A Panel and poss the RH Wing, not a job I was planning on. I may be able to patch it up for the MOT and do a proper job on it next winter?


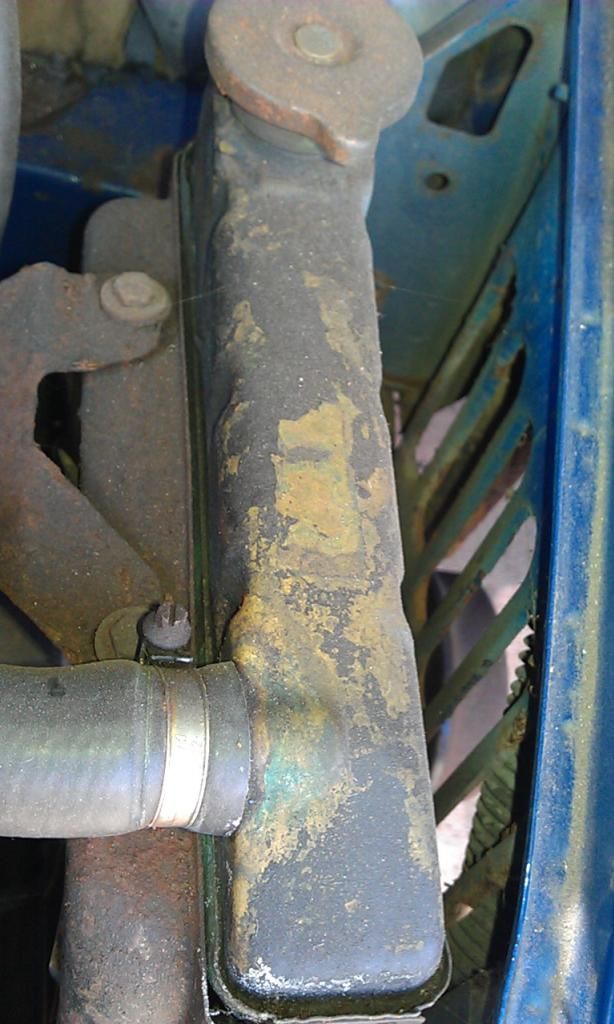
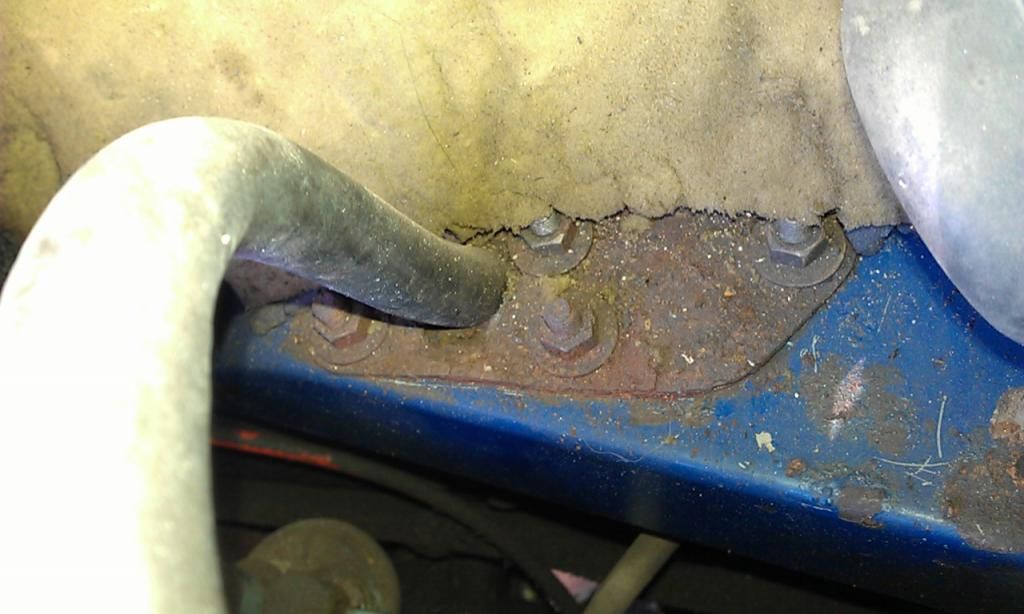
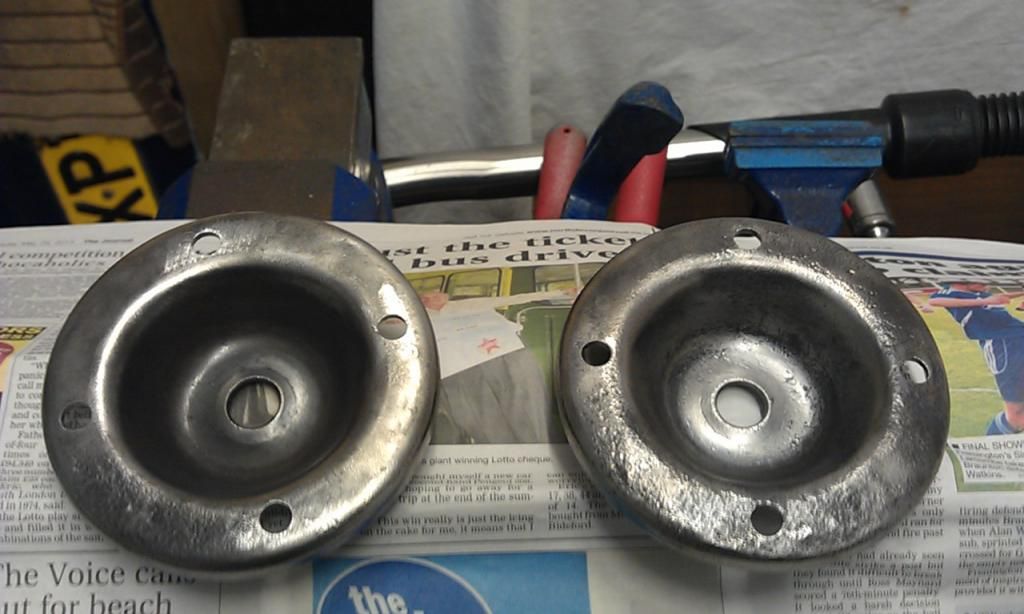
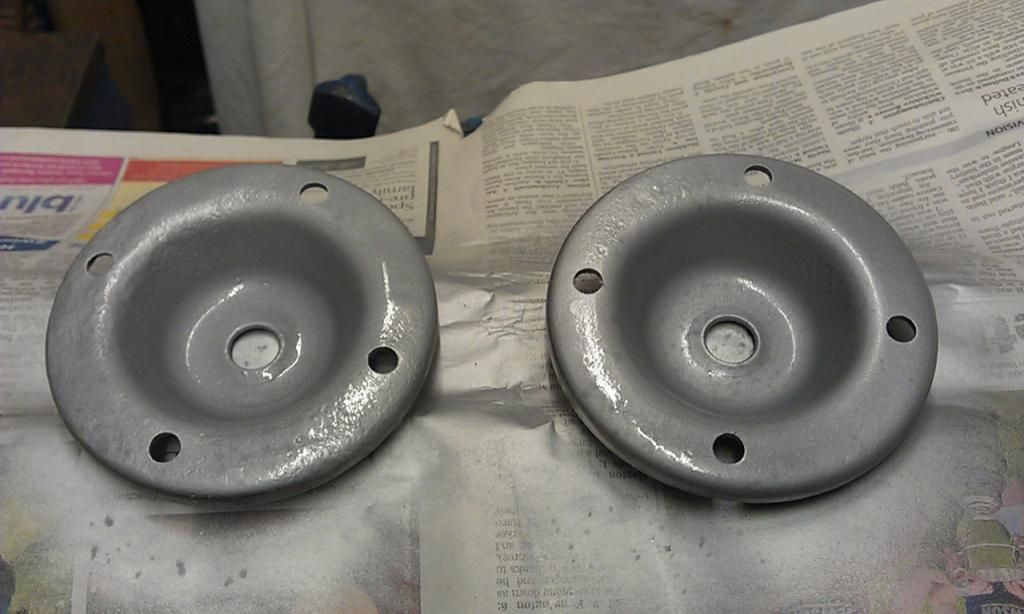
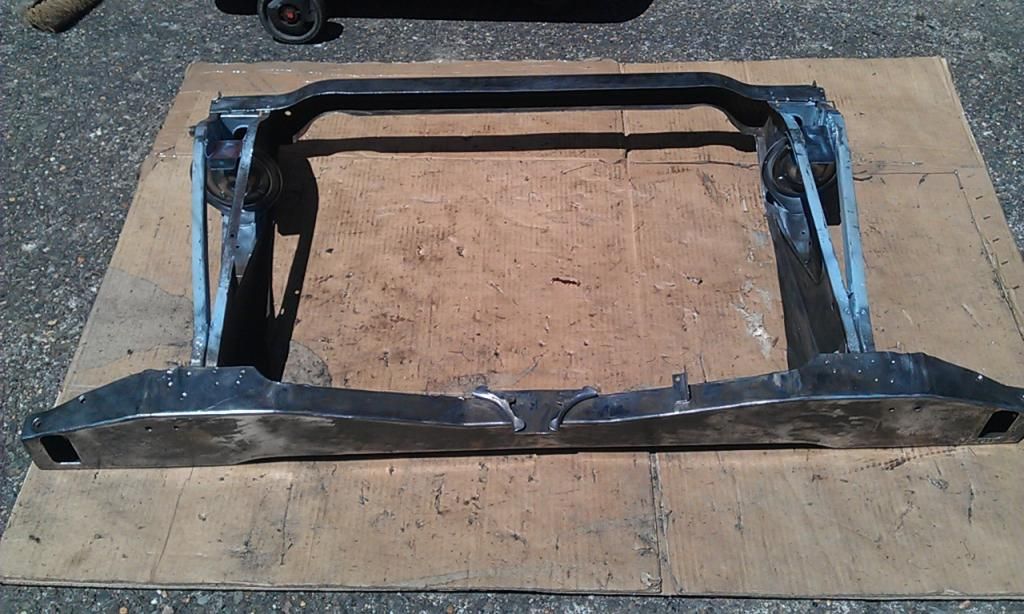
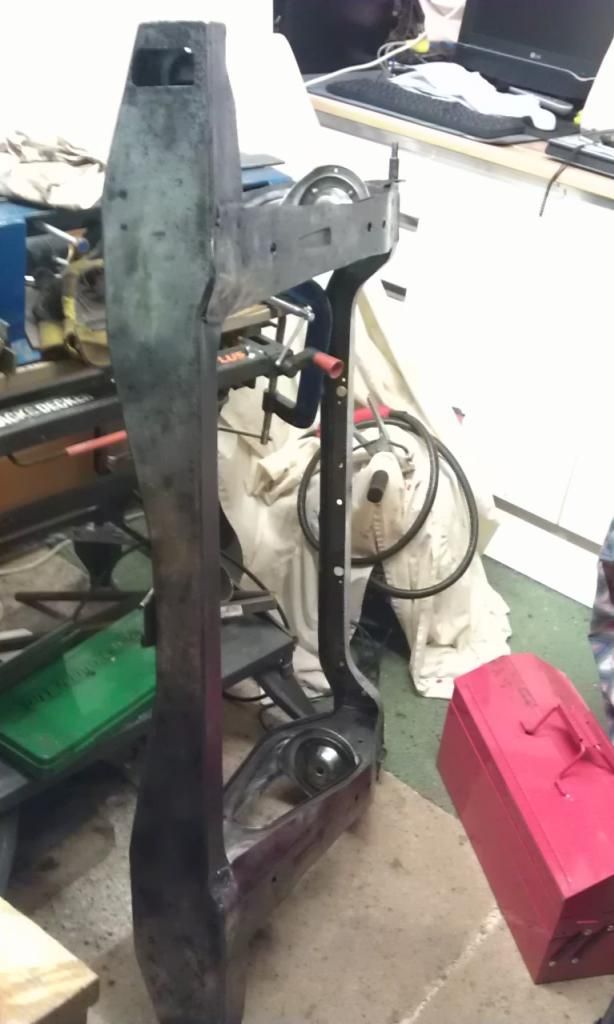
The other areas that need attention are the Upper Radiator Mounting Plate, the Radiator, the Plate that the Brake Cylinder sits on and the plate that surrounds the area where the heater hose enters the cockpit, this is badly rusted.


Here are some pics:


IMAG5706_zps3d1cd736.jpg


IMAG5707_zps7072c64f.jpg 


IMAG5714_zps7ef73625.jpg


The front lip of the bonnet will also need some TLC:


IMAG5717_zps7070f166.jpg


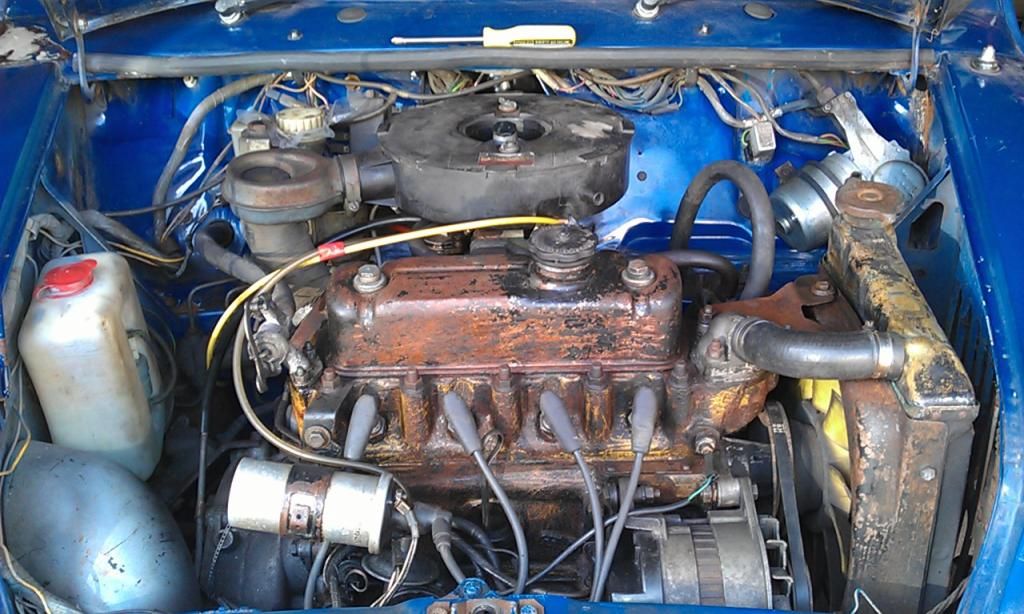
Even after a little scraping hoovering and wiping it looked 100% better:


IMAG5718_zpsc1dc3f1b.jpg


It looks like someone has painted the Rocker Cover and Cylinder Head with rubbish black paint which has blistered all over the place, underneath it looks like the cylinder head may have been yellow?


Here's a pic with the Air Filter back on:


IMAG5719_zpsc2dd5611.jpg


That was all for today :-(


#62 Ben_O

Ben_O

    Mill Road Garage

  • Paint Doctor
  • PipPipPipPipPipPipPipPipPipPip
  • 9,781 posts
  • Location: Isle of Wight

Posted 28 June 2014 - 10:13 PM

quite an improvement mate.


The engine would have all been yellow. I believe all 998 A+ engines were painted yellow.


Do it yellow again!


#63 JonnyAlpha

JonnyAlpha

    Up Into Fourth

  • Members
  • PipPipPipPipPipPipPipPipPip
  • 2,744 posts
  • Location: North Devon
  • Local Club: Exmoor Minis

Posted 29 June 2014 - 08:32 AM

quite an improvement mate.


The engine would have all been yellow. I believe all 998 A+ engines were painted yellow.


Do it yellow again!

Thanks - thought no one was looking at all my hard work :-)


Mmm yellow - the Mini will probably be re-done Green - yellow engine block in a green bay - might work. Think i'd do the Cylinder Head Yellow and poss the main block, but the Rocker Cover would need to be Silver (but looks cheap unless its actually chrome or Ali) or Matt Black?


#64 Ben_O

Ben_O

    Mill Road Garage

  • Paint Doctor
  • PipPipPipPipPipPipPipPipPipPip
  • 9,781 posts
  • Location: Isle of Wight

Posted 29 June 2014 - 09:39 AM

I have been following your project all along mate!


Sometimes it is hard to think what to put into a reply without keep repeating the same things like 'looks good' or nice progress'


I often think nobody reads mine but then one day ill update and get a few responses.


You are doing well mate. Can't remember the last time i worked on mine. Shocking really!


#65 JonnyAlpha

JonnyAlpha

    Up Into Fourth

  • Members
  • PipPipPipPipPipPipPipPipPip
  • 2,744 posts
  • Location: North Devon
  • Local Club: Exmoor Minis

Posted 29 June 2014 - 11:00 AM

I have been following your project all along mate!


Sometimes it is hard to think what to put into a reply without keep repeating the same things like 'looks good' or nice progress'


I often think nobody reads mine but then one day ill update and get a few responses.


You are doing well mate. Can't remember the last time i worked on mine. Shocking really!

Thanks Ben - been watching yours too, I get what you mean about replying without filling up a thread with gunk. 


I was about to suggest asking for a way of showing the number of people have read a post but DOH its already available against each thread as well as a number of replies it shows how many views the thread has had. All I need to do is check the number of views after I have done an update and then check periodically to see if anyone has viewed it. That way I'll get inspiration knowing that taking the time to report on what you have done is at least getting looked at :-)


#66 JonnyAlpha

JonnyAlpha

    Up Into Fourth

  • Members
  • PipPipPipPipPipPipPipPipPip
  • 2,744 posts
  • Location: North Devon
  • Local Club: Exmoor Minis

Posted 10 July 2014 - 05:53 PM

Well familiy holiday, cash flow and illness (Nothing serious just Summer Flu) have all contributed to a slow down in progress, not to mention I need to re-fit my bathroom and secure a place on a teaching degree for September.


MITP is looming and that was / is my target - not looking hopeful.  


Did a Car Boot Sale last weekend and made a small amount of cash, enough for Gas and Paint and may have enough coming in to finish the project (well get it on the road and drivable at least), also cleared a load of stuff from my already cluttered garage!!


This is one of those 'pocket money' only projects but it's a long time since I got pocket money so getting anything past Her Indoors has been difficult but I think we have reached and agreement - think she was sick of me moping around huffing and sighing :-)


I'm sure she'll love it when its finished and she has a drive :-)


Just ordered some paint for my Rear Subframe from a local (really helpful) supplier. I have decided to go off the wall and will be painting the Rear Subframe Old English White, with Matt Black Radius Arms and Hubs.

The paint (from a choice of three as suggested by my helpful paint supplier) is Fast Engine Paint, its a fast drying hard wearing coating somewhere between Chassis Paint and Poly Eurothane 1K. They are all good so I opted for the middle one.


I was going to paint my Subby with Celly over Epoxy Primer as I thought the only choice of Chassis Paint would be black / Grey but when my supplier suggested that they can mix any colour I opted for OEW. So it will be Epoxy Primer followed by Fast Engine Paint.


I think (hope) an white subframe will contrast nicely from under an Almond Green Wheel Arch? And the Matt Black Radius Arms / Hubs will finish it off nicely (again I hope).


Reason for Matt Black is I think Gloss Black has been done so many times before and looks old?


Just seen this whilst looking for choices - mmm may do the Radius Arms OEW too, problem is I have not separated the BackPlates yet and was not going to?      


#67 JonnyAlpha

JonnyAlpha

    Up Into Fourth

  • Members
  • PipPipPipPipPipPipPipPipPip
  • 2,744 posts
  • Location: North Devon
  • Local Club: Exmoor Minis

Posted 13 July 2014 - 07:32 PM

Well I picked up the paint for my Subframe, Old English White Cellulose, and some standard Celly Thinners, Panel Wipe and Tack Rags. I also set up an account with BOC and got a bottle of Gas on their Volkszone Deal, worked out about £40 rental and £34 for the gas, the difference is the Admas Gas I was using was 9L Bottle filled to 137 Bar and the BOC is a 20L Bottle filled to 230 Bar around three times more gas!!!


So armed with paint and Gas (and a small stash of cash, prob just enough to finish barring any unforeseen emergencies) I am now back in business!!


Did some work on the Subby today, dressed down some awkward welds, posted here


Just need to finish cleaning it up, patch repair the front of the Top Skid Plates and weld on the bottom skid plates, treat any iffy areas with rust converter, prime and paint.


Here's a pic of it after cleaning up the Top Skid Plates:


IMAG5921_zpsa35f3c3c.jpg


Hopefully i'll crack the welding and cleaning tomorrow as I want to get it finished and out of the way. 


#68 JonnyAlpha

JonnyAlpha

    Up Into Fourth

  • Members
  • PipPipPipPipPipPipPipPipPip
  • 2,744 posts
  • Location: North Devon
  • Local Club: Exmoor Minis

Posted 14 July 2014 - 05:51 PM

More work on the Subframe today, removed it from its Jig, cleaned it up a little more, made some repair pieces for the rotten Top Front Plates and welded them in and welded in the Rear Dougnut Support Cups, looking solid!!


Here's a few pics of the progress:


Top Right Rot Removed:


IMAG5938_zps5d9e9dc9.jpg


Top Left Removed:


IMAG5937_zpsf545db87.jpg


Templates transferred to sheet metal:


IMAG5939_zps2b292d0d.jpg


Clamped:


IMAG5942_zpseb6f559d.jpg


Tacked in place:


IMAG5943_zps713ff1f5.jpg


Made two mistakes:

1. Did not put any copper behind my first weld on (where I was able) to stop penetration too far.

2. Forgot to spray the internal areas with Weld Through Primer.


Start again!!!


Weld Through Primer squirted in place


IMAG5947_zpsfe40399b.jpg


That's better:


IMAG5948_zpsbeb4bbe3.jpg


Some of the welding:


IMAG5951_zpsf4d5dac9.jpg


IMAG5952_zps6a1f7558.jpg


Next up I cleaned up the rear cups and drilled four Plug Weld holes:


IMAG5954_zpsf7332292.jpg


Sprayed with Weld Through Primer - remembered this time!!


IMAG5955_zpsbeb3ae83.jpg


Welded in place:


IMAG5957_zps5325ffc9.jpg


Starting to look like a Subframe again:


IMAG5958_zps5a313193.jpg


Tea time :-)


Tomorrow's target:

Finish Cleaning.

Prime and paint inside rear ends.

Weld on Bottom Skid Plates.

Prime and Paint whole Sub Frame :-)


#69 JonnyAlpha

JonnyAlpha

    Up Into Fourth

  • Members
  • PipPipPipPipPipPipPipPipPip
  • 2,744 posts
  • Location: North Devon
  • Local Club: Exmoor Minis

Posted 15 July 2014 - 09:05 PM

Scratch, pick, scrape, sand:


IMAG5959_zps5ad603b5.jpg


Then out came the Fleece Disc and a bit more scarping and picking:


IMAG5960_zpsc3f31cd9.jpg


IMAG5961_zps59d3fc69.jpg


IMAG5962_zpscd65f118.jpg


Areas like these where a Bit**:

IMAG5963_zps79b8723c.jpg


Still a few areas that will need rust treating:


IMAG5964_zps548ce5ea.jpg


And impossible to get into:


IMAG5965_zpsf272c53c.jpg


And at 9pm I had finished:


IMAG5967_zps7c04b177.jpg


All shiny and ready to paint.


#70 Ben_O

Ben_O

    Mill Road Garage

  • Paint Doctor
  • PipPipPipPipPipPipPipPipPipPip
  • 9,781 posts
  • Location: Isle of Wight

Posted 15 July 2014 - 09:09 PM

You have done a cracking job of that subframe.


well done!


Ben


#71 JonnyAlpha

JonnyAlpha

    Up Into Fourth

  • Members
  • PipPipPipPipPipPipPipPipPip
  • 2,744 posts
  • Location: North Devon
  • Local Club: Exmoor Minis

Posted 15 July 2014 - 09:19 PM

You have done a cracking job of that subframe.


well done!


Ben


Thanks Ben, wish I had shot blasted it but I need every penny :-)


#72 Ben_O

Ben_O

    Mill Road Garage

  • Paint Doctor
  • PipPipPipPipPipPipPipPipPipPip
  • 9,781 posts
  • Location: Isle of Wight

Posted 15 July 2014 - 09:32 PM

I know that feeling well


#73 JonnyAlpha

JonnyAlpha

    Up Into Fourth

  • Members
  • PipPipPipPipPipPipPipPipPip
  • 2,744 posts
  • Location: North Devon
  • Local Club: Exmoor Minis

Posted 19 July 2014 - 09:07 PM

Been getting on with the Subframe - boy this is taking some time :-) its really held me back but it needed to be done.


Setup an outdoor spray bay to paint the inside cavities before I welded on the bottom plates:


IMAG5970_zps06644cdd.jpg


IMAG5971_zps280cbf93.jpg


I had already given the inside a brush coating of Epoxy Primer, and this is Old English White Fast Engine Paint, a kind of rubber finish. Recommended by my paint supplier as slightly better than Chassis Paint and not quite as good as Full Blown Polyurethane). I also painted the underside of the bottom skid plates with Epoxy and Top Coat but the top coat was a mistake as it burnt quite a bit during the welding.


The Suction Spray Gun in the top pic was borrowed from a mate, it was awful to use as it doesn't like small amounts of paint. So fed up with settling for second best (and as it is in the budget) I ordered myself a new Spray Gun (My first ever). I have been looking for a while and researching what to get and what I can afford and after a second burst of researching (Thread Here) I bought this Fast Mover Gun:


IMAG5982_zps43aba42a.jpg


I was a little hasty as the day after I ordered it (it arrived next day at no cost for postage) I found the same Gun with Green Bling on Amazon sold by the same company for about £10 cheaper Grrr, still I am very happy with the gun, never used one before but I love it so far.


Once the Bottom Skid Plates were dry I welded them on, shi@ loads of plug welds and a bit of seam welding, I am getting better with practice and can control the welds pretty nicely now and I now know when to adjust the power / wire speed.


Here's the finished product:


IMAG5995_zps16dff55e.jpg


I then spent another hour or so dressing down the weld and cleaning up the surface rust AGAIN!!! and prepped the Wheelie Bin spray bay and equipment but just as I finished setting up, the heavens opened!!! AGGGHHH!!


IMAG5997_zps11aea02f.jpg


After a lot of thinking I relocated to the front of the garage under the open garage door, just as I finished the sun came out so I cracked on. Set up the Airlines and Spray Equipment, checked the pressure (Had to Youtube that bit) and sprayed the first coat, gobbled down my Dinner (Spag Bog) then cracked the next coat before the pot went off (Hour shelf life).


Here's the finished product (well primed anyway) seems OK.


IMAG5999_zps72ada99a.jpg


A view from further back, just before I started spraying I realised that I needed to mask off the underside of the garage door. But to be honest the spray patter on these LVLP Guns is pretty narrow with virtually no overspray.


IMAG6000_zps13d6e5a5.jpg


IMAG6003_zps1afd8ab8.jpg


IMAG6004_zps0a73c45b.jpg


IMAG6005_zps7172c0c2.jpg


Sorry about all the pics of the Subframe but I am so impressed with it :-)

It looks good in grey seems a shame to paint it OEW ?


What to do next?


Might seam seal the Subframe and give it another two coats of primer? Or Seam seal and straight on with the Top Coat (might start a separate thread to ask the question). 


#74 Ben_O

Ben_O

    Mill Road Garage

  • Paint Doctor
  • PipPipPipPipPipPipPipPipPipPip
  • 9,781 posts
  • Location: Isle of Wight

Posted 19 July 2014 - 11:13 PM

Those subframes are going to be a bugger to keep clean once painted OEW!


Looking good though


Ben


#75 JonnyAlpha

JonnyAlpha

    Up Into Fourth

  • Members
  • PipPipPipPipPipPipPipPipPip
  • 2,744 posts
  • Location: North Devon
  • Local Club: Exmoor Minis

Posted 20 July 2014 - 09:46 AM

Those subframes are going to be a bugger to keep clean once painted OEW!


Looking good though


Ben

Good job I haven't got OCD then - oh I have!!

Still I thought gloss black is boring, matt black may have worked, but the shell will be Almond Green and it seems the inside of the arches are normally the same as the body colour. I wanted the Subframe to contrast so as I am doing the Roof OEW I thought OEW would be a nice contrast to make the Subby stand out? I was going to do it Gloss Grey like the one in my Subframe Refurb Thread Here I may?? still go down that route but I have already bought the OEW Fast Engine Paint?


Edited by JonnyAlpha, 20 July 2014 - 10:03 AM.


0 user(s) are reading this topic

0 members, 0 guests, 0 anonymous users