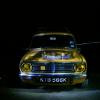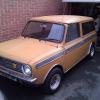
1971 Clubman Estate....now Turbo
#31

Posted 18 September 2011 - 07:25 PM
#32

Posted 18 September 2011 - 07:31 PM
This is on my 71' clubman estate, and takes the padded dash rail with four studs, if that helps?

Liam
#33

Posted 18 September 2011 - 07:44 PM
cars looks awesome! keep going
Ben
#34

Posted 19 September 2011 - 09:13 PM
Also I have been meaning to ask for some time if there is meant to be bump on the underside of the top dash rail? There are two of these lumps at the same place at each end of the top dash rail.
This is on my 71' clubman estate, and takes the padded dash rail with four studs, if that helps?
Liam
mine was also like that, and i'm pretty sure no aftermarket dash was ever installed in it. possibly bent to be able to use a tool to screw the padded top part...
good luck with the build, its looking great so far (and was looking great before the crash).
i think mine was originally the same colour as yours. you should paint the trim pieces that surrounds the fake wood black, or get them anodized black, i believe they're aluminum...
cheers
#35

Posted 20 September 2011 - 09:58 PM
mine was also like that, and i'm pretty sure no aftermarket dash was ever installed in it. possibly bent to be able to use a tool to screw the padded top part...
good luck with the build, its looking great so far (and was looking great before the crash).
i think mine was originally the same colour as yours. you should paint the trim pieces that surrounds the fake wood black, or get them anodized black, i believe they're aluminum...
cheers
Thanks for that, you have given me peace of mind. I was very unsure about it because I haven't seen any other mini with it but they do look like they are meant to be there.
I'm in two minds about the colour at the moment. Think it would be good to keep it in its original, Harvest Gold and personally I think it suits the car but I also like the sound of a sandy beige with a cream/ white roof. Like:
http://www.flickr.com/photos/happy-accidents-productions/4087039806/
As for the chrome trim, good idea but a little bold for my liking. I have been following your build for awhile now, love what you did to your fake trim on yours and Yukon grey is a great colour which also suits the car well. I think it's so much hard to find a colour to suit the clubman estate than it is any other mini.
Update
I managed to get out into the garage for a few hours after work today and continued constantly fitting and removing panels to make them fit right, still some areas to work on but getting there. My main focus was the o/s, also trial fitted the bonnet which I was pleasantly surprised about.


Not to sure what I'm going to do here just yet. The two panels are not that far from lining up at the bottom and top but are miles out around the hole for the indicator.

Something else I started was to weld up the holes on the bulkhead where the dial brackets bolt through on left hand drive cars. I plan to make it look tidy under the bonnet, before it was a mess with wires and pipes everywhere.

Cut a little bit of metal to weld in:

Welded in, ground back, and primed:

I also ordered a few parts from m-machine I need before I can start attaching any of the panels. Hopefully they shouldn't take too long to arrive.
Liam
#36

Posted 20 September 2011 - 10:03 PM
#37

Posted 20 September 2011 - 10:26 PM
You've got a lot of money in panel s sat there, I commend you for doing it properly and not sticking a flip front on it.
I thought about it for a second because it was the cheap option but then realised I hate the bleedin' things. Don't think I have seen a single one that fits right. So it was a no brainer really I thought financially crippling myself with heritage panels was the better option.
Your doing a sterling job on your project, really quite some interesting stuff going on.
#38

Posted 26 September 2011 - 11:34 AM


Liam
#39

Posted 08 October 2011 - 09:48 PM
#40

Posted 09 October 2011 - 04:50 PM
I have a New Old Stock clubman front panel if your interested...........Thanks for the kind comments guys.
Not to sure what I'm going to do here just yet. The two panels are not that far from lining up at the bottom and top but are miles out around the hole for the indicator.
Liam
#41

Posted 10 October 2011 - 01:50 PM
#42

Posted 10 October 2011 - 02:21 PM
#43

Posted 25 October 2011 - 07:38 PM
This is what I have been doing today:


Made up the repair sections


Door frame braced before the old section was cut out and new welded in

Coated in a zinc primer

Liam
#44

Posted 25 October 2011 - 07:52 PM
Edited by alex-95, 25 October 2011 - 07:53 PM.
#45

Posted 26 October 2011 - 06:52 PM
Looking good, I'm liking this rebuild.
Thanks.
I have been continuing with what I was doing yesterday.
Welded in my repair section,

Then dressed and coated with a zinc primer,

I then attached the new A post stiffener plate, which use to look like this,

Plug welded in,

Dressed and primed

Liam
0 user(s) are reading this topic
0 members, 0 guests, 0 anonymous users


