Jump to content


Photo

Clubby Estate Project


  • Please log in to reply
61 replies to this topic

#1 chrisn89

chrisn89

    Mini Mad

  • Noobies
  • PipPipPipPip
  • 113 posts
  • Local Club: BOGMOG

Posted 08 October 2011 - 02:57 PM

Hi Guys,

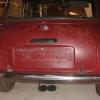
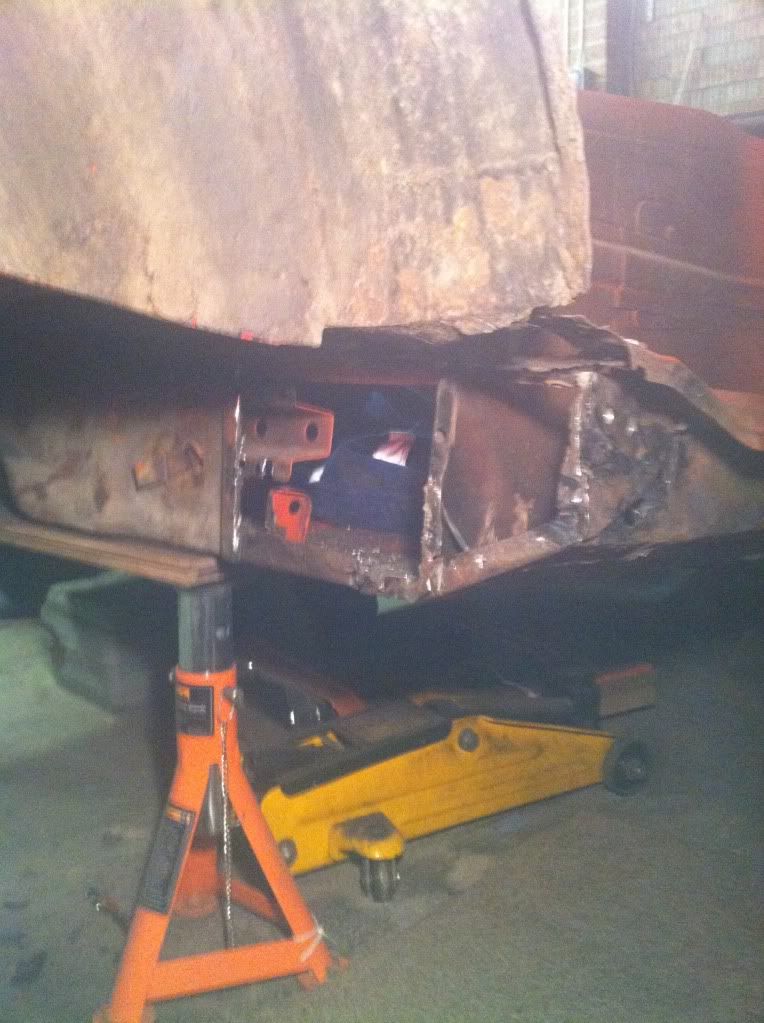
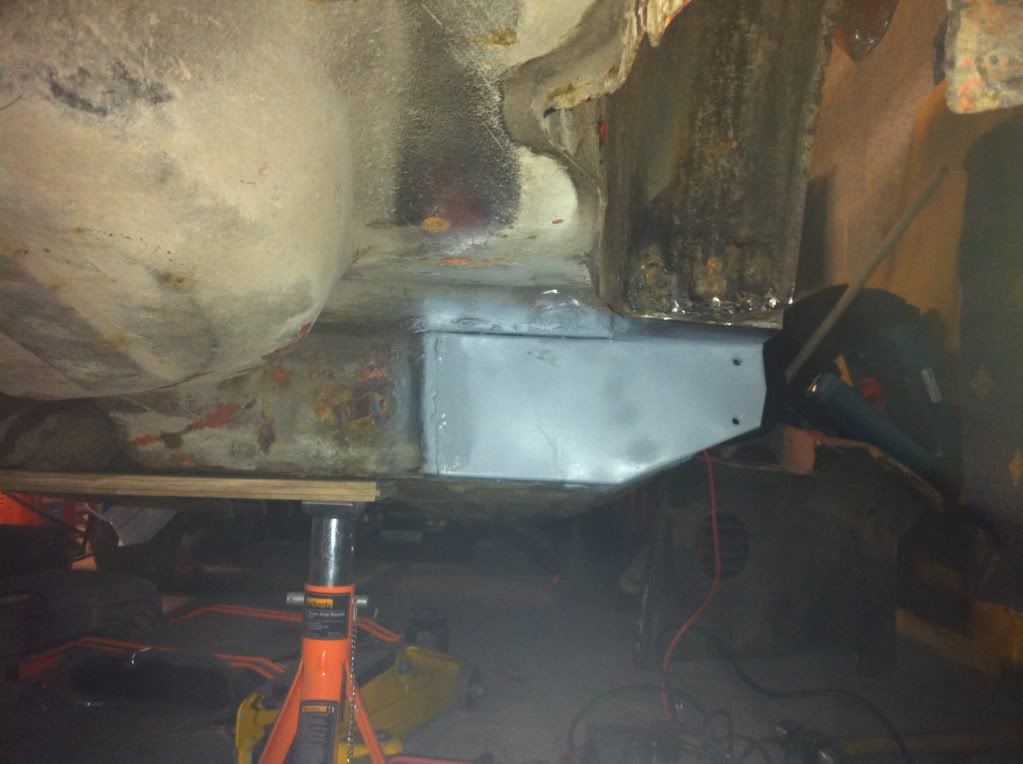
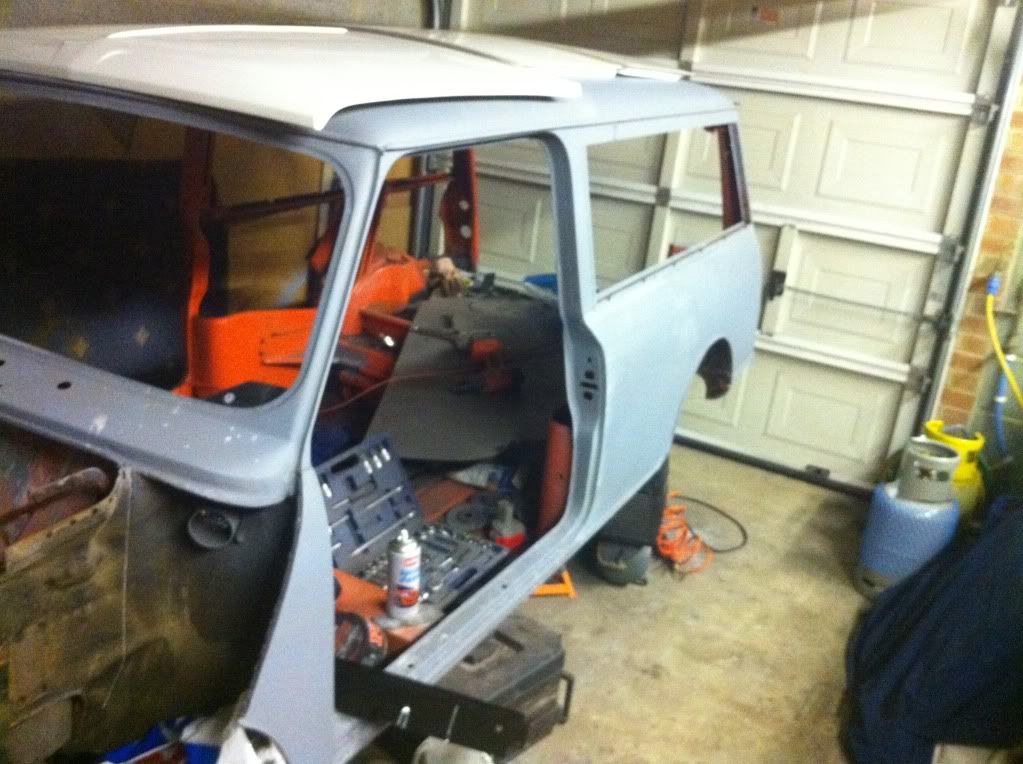
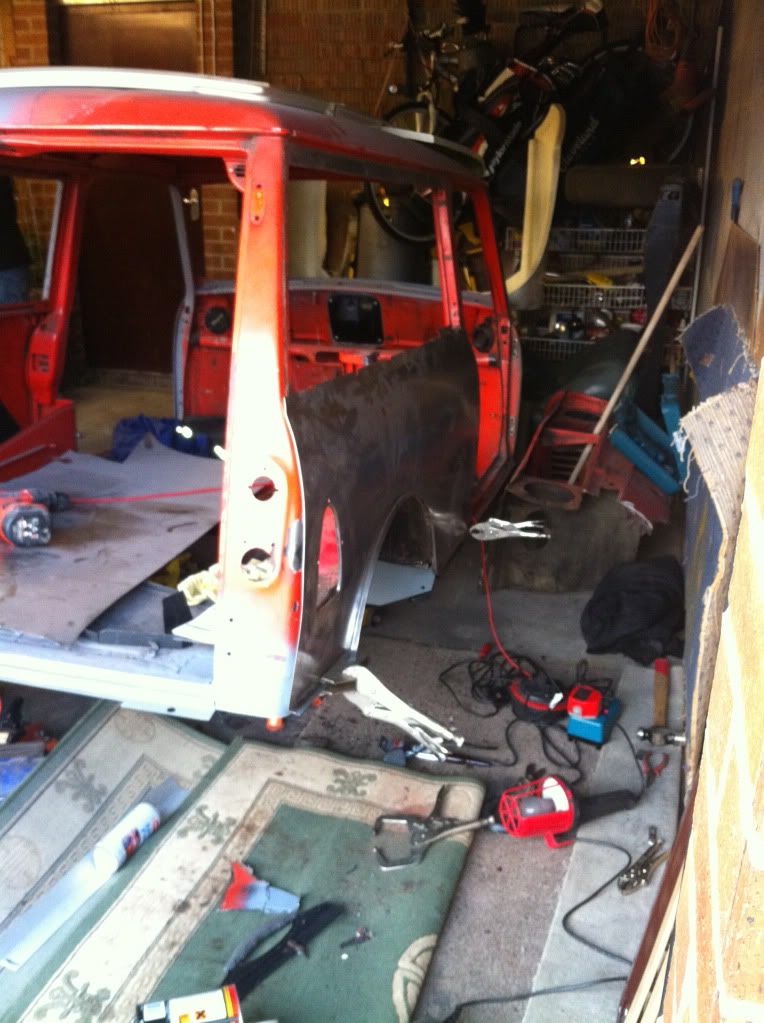
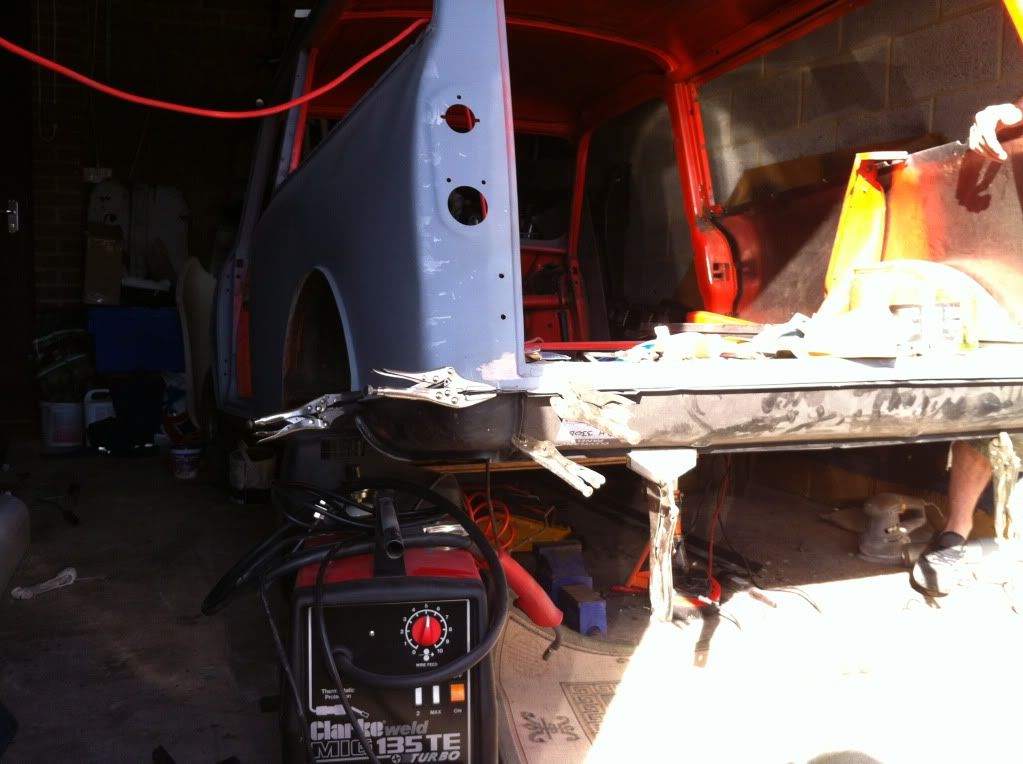
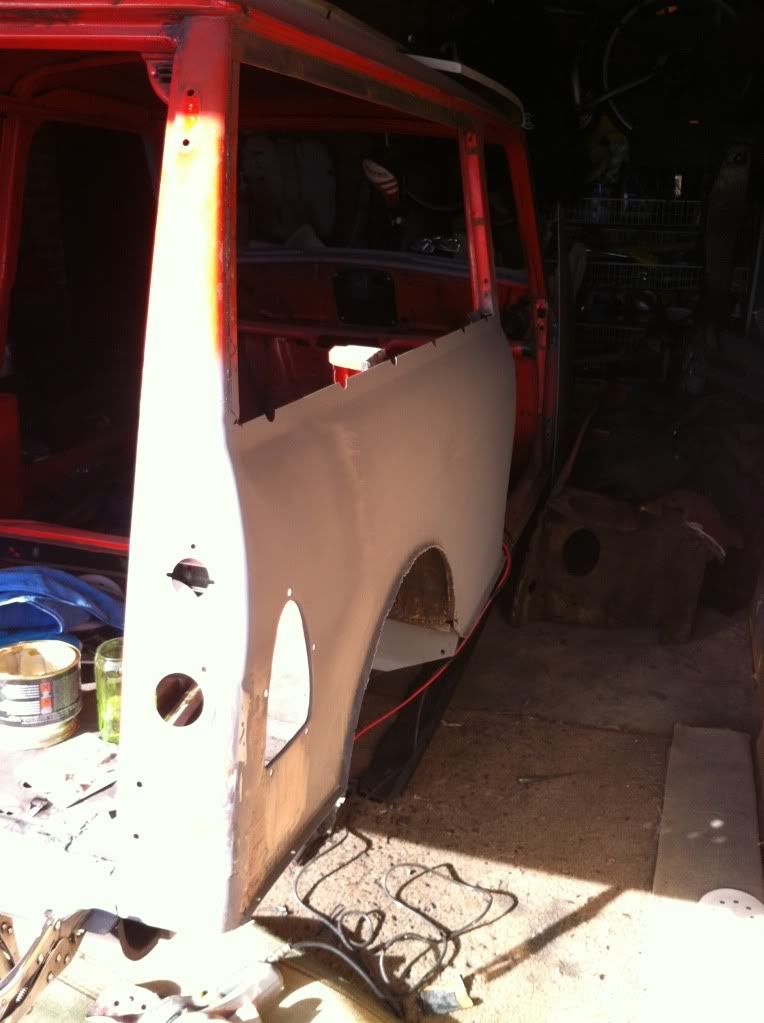
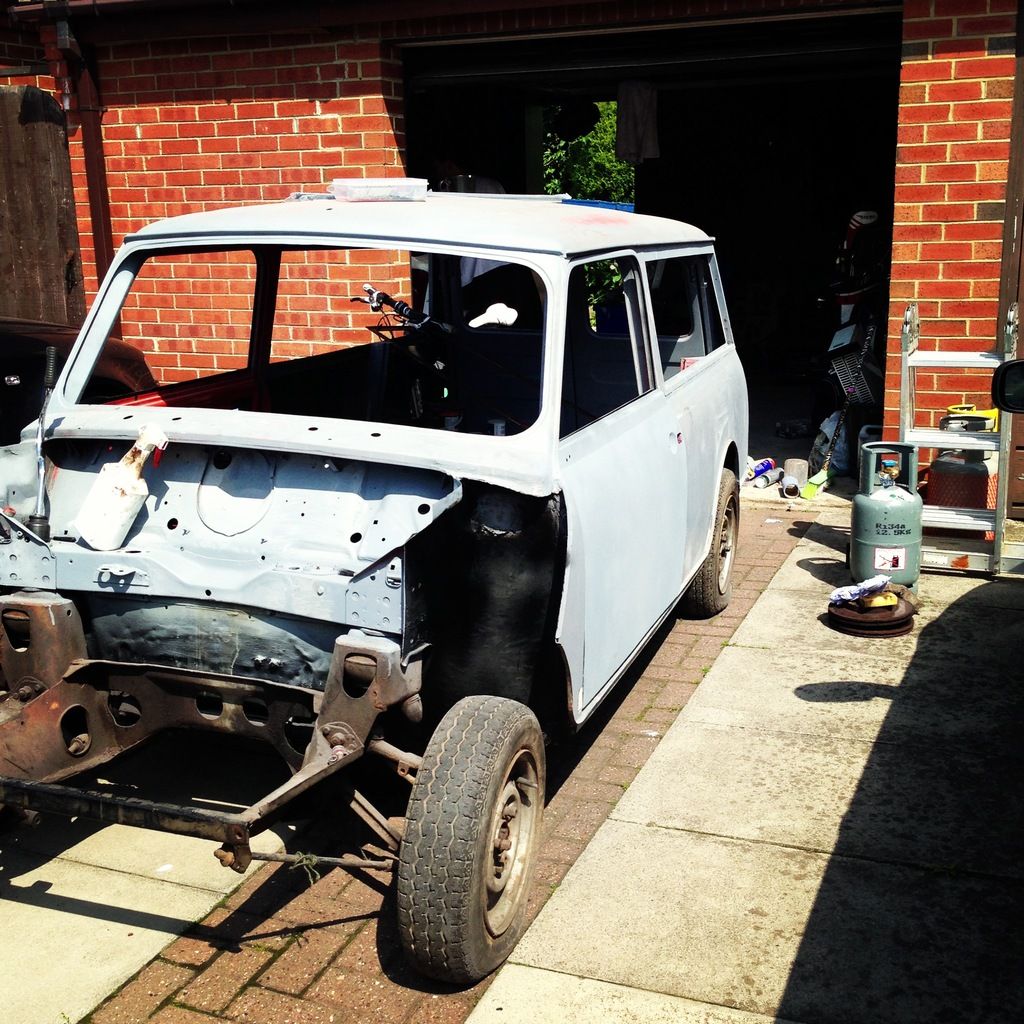
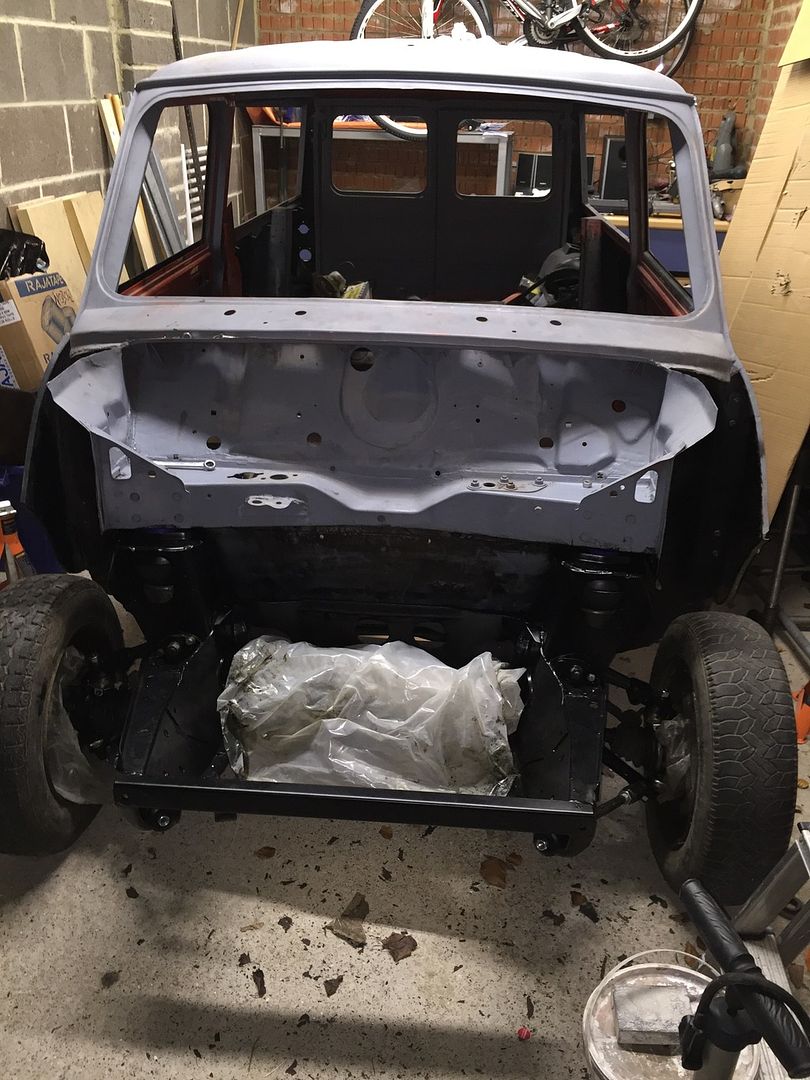
got myself a mini again finally and starting from scratch.
70/80s clubby estate. May have jumped in the deep end a bit so advice would be a massive help.

Got some pics i'll put up now, any idea where the best place for clubby estate panels is?
ill keep pics coming as i go

cheers
chris

Attached File  IMG_0490.JPG   1.98MB   8 downloadsAttached File  IMG_0498.JPG   1.56MB   8 downloadsAttached File  IMG_0499.JPG   1.84MB   8 downloadsAttached File  IMG_0500.JPG   1.86MB   12 downloadsAttached File  IMG_0501.JPG   1.39MB   3 downloads

#2 strettman

strettman

    Mini Mad

  • Members
  • PipPipPipPip
  • 241 posts
  • Location: York

Posted 08 October 2011 - 03:30 PM

hi mate, nice project. i have just got myself a clubby estate too but i have to finish my first project before i start the clubby :(

m-machine seam to be good for panels but they don't have all of them for estates. it's best to download their catalogue than browse online i think because i hate their website, haha.

what's the plans for this clubman estate then? keeping her standard or doing her up? i have a small collection of pictures of tarted up clubman estates (to give you some ideas), if you want me too send you them PM me your email address ;)

thanks

#3 chrisn89

chrisn89

    Mini Mad

  • Noobies
  • PipPipPipPip
  • 113 posts
  • Local Club: BOGMOG

Posted 08 October 2011 - 04:17 PM

Hi man,

not too sure where i'm going with it for the time being i'm just going to concentrate on the body for the time being. It won't be going completely original though i can almost garuntee that.

My last one i modified and done too much at once, think that was one of the main reasons i got shot of it along with other things which cropped up

m machine are pretty local so that'd be ideal and totally agree with you about the website that's why i didn't have much of a look but i'll give them a ring.

and definitely! That'd be a great help, e-mail is [email protected]

cheers

#4 chrisn89

chrisn89

    Mini Mad

  • Noobies
  • PipPipPipPip
  • 113 posts
  • Local Club: BOGMOG

Posted 25 October 2011 - 07:45 PM

Okay, bought the panels to start work on the back, basic plan just to start at the back and work my way to the front :D i'll stick some pics up over the weekend with how it goes.

Chris

#5 chrisn89

chrisn89

    Mini Mad

  • Noobies
  • PipPipPipPip
  • 113 posts
  • Local Club: BOGMOG

Posted 20 November 2011 - 03:29 PM

Hi guys, currently struggling with panels... any idea where i can find the point where the rear doors shut? attached some pics

m machine have a lead they're going to look up for me but if thats not the right panel i'm stuck.. any ideas? I don't want to repair this one i'd rather replace because its a bit shot where the boot corners go.

cheers
chris
http://s1118.photobu...nt=IMG_0554.jpg
http://s1118.photobu...nt=IMG_0555.jpg

#6 chrisn89

chrisn89

    Mini Mad

  • Noobies
  • PipPipPipPip
  • 113 posts
  • Local Club: BOGMOG

Posted 29 December 2011 - 06:13 PM

starting to feel like im talking to myself but i've got the boot floor replacement in and bought a shed load of panels. Also replaced the corner on the back right and now have an offside valance to fit, gona be winging it but ill stick some pics up with how it goes

cheers
http://s1118.photobu...nt=IMG_0588.jpg

#7 minifcd

minifcd

    Mini Mad

  • Members
  • PipPipPipPip
  • 246 posts
  • Location: Stamford

Posted 29 December 2011 - 08:52 PM

Hi Chris. Great project. Did M machine come through on that panel you were after? I'm not familiar with estates as currently I have only restored saloons, but I take it your after the panel that is in your second and third pictures you posted and goes across inside the rear doors on the floor? The pictures aren't that clear but could you make one by folding from sheet steel? Its a big bit to make though. Have you any clearer pictures of it?
Just a pointer, when posting pictures from photobucket if you click to copy the "IMG Code" and paste into your thread, the pictures will appear in the thread without a link to click on. Just makes it quicker and easier for people to read.
I'll try and keep an eye on your progress as I may also have an estate coming my way as a future project.

#8 chrisn89

chrisn89

    Mini Mad

  • Noobies
  • PipPipPipPip
  • 113 posts
  • Local Club: BOGMOG

Posted 30 December 2011 - 12:39 PM

Hi,
M machine came through with the panel still with Austin stickers on it!

I'll have a go with the IMg code again next time but I had a bit of trouble with it.
Looking at getting the quarter done sometime this week if I get a chance!

#9 minifcd

minifcd

    Mini Mad

  • Members
  • PipPipPipPip
  • 246 posts
  • Location: Stamford

Posted 30 December 2011 - 07:02 PM

Good to hear Chris. Original Austin, you can't complain at that! I've used M machine a few times and their always helpful. Yes when you hover over the image in photobucket, the IMG code is the bottom of the four and when you select it, it should say "copied". Then just past into thread on a new line. I did have a problem with one of the Adobe Flash updates that displayed the boxes black with black writing at one point though!! Good luck.

#10 chrisn89

chrisn89

    Mini Mad

  • Noobies
  • PipPipPipPip
  • 113 posts
  • Local Club: BOGMOG

Posted 29 January 2012 - 08:12 PM

Hi guys,

few updates.. dug the rear quarter out apart from a few bits to hold everything together.. and while i had access thought id get the kick plate repair panel out of the way... anyway here's how it looks.. feedback would be great because i've never attempted any of these panels before. didnt realise how many bits are fixed to it!!
Posted Image

Posted ImagePosted Image


anyone go to stafford today? got some fibreglass rear doors for it there too! :D

Edited by chrisn89, 29 January 2012 - 08:15 PM.


#11 vtec_miniestate

vtec_miniestate

    Speeding Along Now

  • Members
  • PipPipPipPipPip
  • 356 posts
  • Local Club: Torbay Mini Club

Posted 29 January 2012 - 11:22 PM

Looking good :)

#12 chrisn89

chrisn89

    Mini Mad

  • Noobies
  • PipPipPipPip
  • 113 posts
  • Local Club: BOGMOG

Posted 05 February 2012 - 04:29 PM

Rear quarter now offered up. Requires cutting to size and sorting now
Posted Image

Edited by chrisn89, 05 February 2012 - 04:30 PM.


#13 chrisn89

chrisn89

    Mini Mad

  • Noobies
  • PipPipPipPip
  • 113 posts
  • Local Club: BOGMOG

Posted 11 March 2012 - 03:08 PM

Hi Again,

rear quarter on, just a bit of tidying up to do round the edges, valences offered up too.. getting somewhere with the back end of it now!! :D
Posted Image
Posted Image

Edited by chrisn89, 11 March 2012 - 03:09 PM.


#14 chrisn89

chrisn89

    Mini Mad

  • Noobies
  • PipPipPipPip
  • 113 posts
  • Local Club: BOGMOG

Posted 18 August 2012 - 04:06 PM

Fibreglass rear doors fitted from arc angels. Bit of filing but they're really good compared to 400 for new doors. and no rot!Attached File  IMG_712.JPG   28.28K   6 downloads

#15 chrisn89

chrisn89

    Mini Mad

  • Noobies
  • PipPipPipPip
  • 113 posts
  • Local Club: BOGMOG

Posted 26 April 2016 - 10:13 AM

Scary to think the last time i updated this was 2011.....

anyway in moving house and whatnot it sort of got put on hold. 


The bodywork was completed with new door skins and bottoms etc. and i got it moved to my place from my parents about 2yr ago and it all started again. 

As it stands the front subby is done (just about) and the engine has been built and stuck in. Im just trying to collect all the bits to try and get it on the road now but its proving expensive! Next summer is the aim i think.


But just to catch up for those interested:

IMG_1913.jpg

Bodywork just about done, before moving and it all stopped

IMG_4951.jpg

Removed, powdercoated & rebuilt subframe, nigh on all new components as it all stripped on reassembly after cleaning, painting etc..


1 user(s) are reading this topic

0 members, 1 guests, 0 anonymous users