Jump to content


Photo

Mini Pickup Restoration Project No.2! Finally Underway!


  • Please log in to reply
126 replies to this topic

#1 pickupmad87

pickupmad87

    Previously adampadmore

  • Members
  • PipPipPipPip
  • 273 posts
  • Location: woking

Posted 05 February 2012 - 06:37 PM

**upadte** still have the pickup hasn't progressed much in 5 yes or so but is on the list to be finished soon I hope!

Right i have finally got the time and some panels to make a start on my pickup No.2!

heres a few pics of what she looks like.

Untitled-1-2.jpg

2011-10-02_15-06-54_76.jpg

2011-10-02_15-06-32_13.jpg

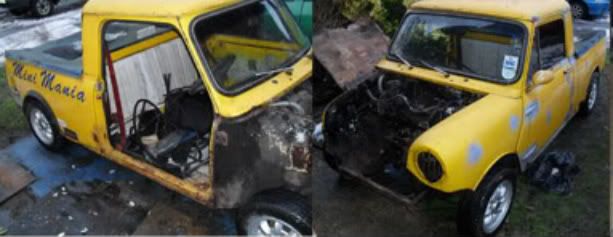
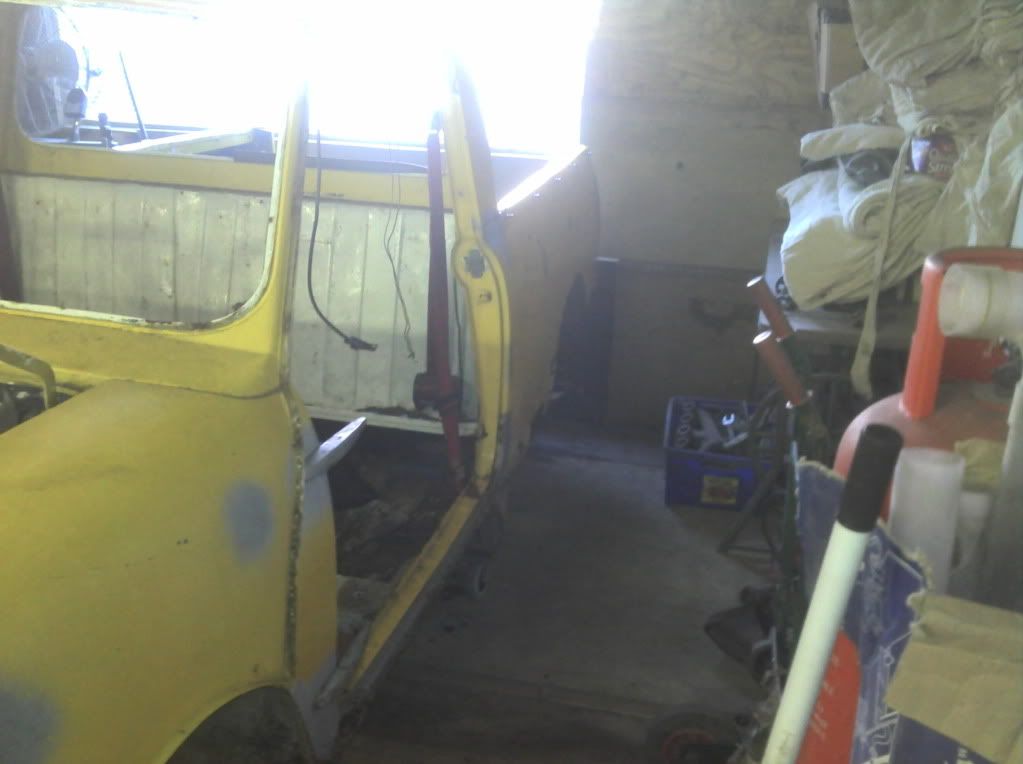
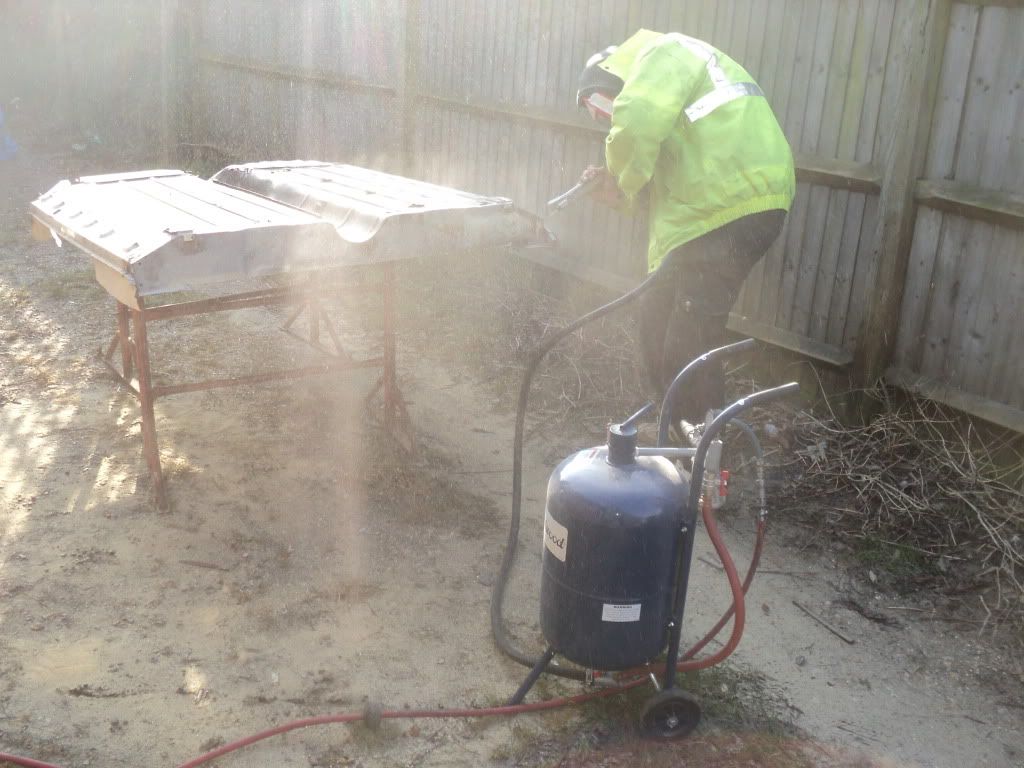
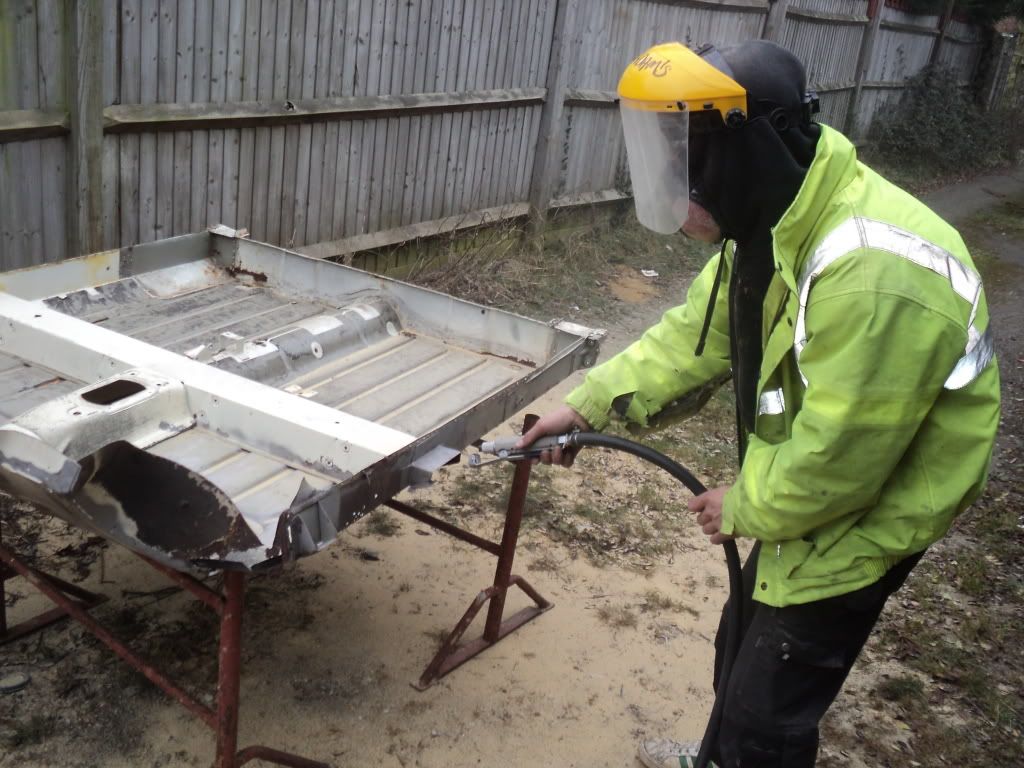
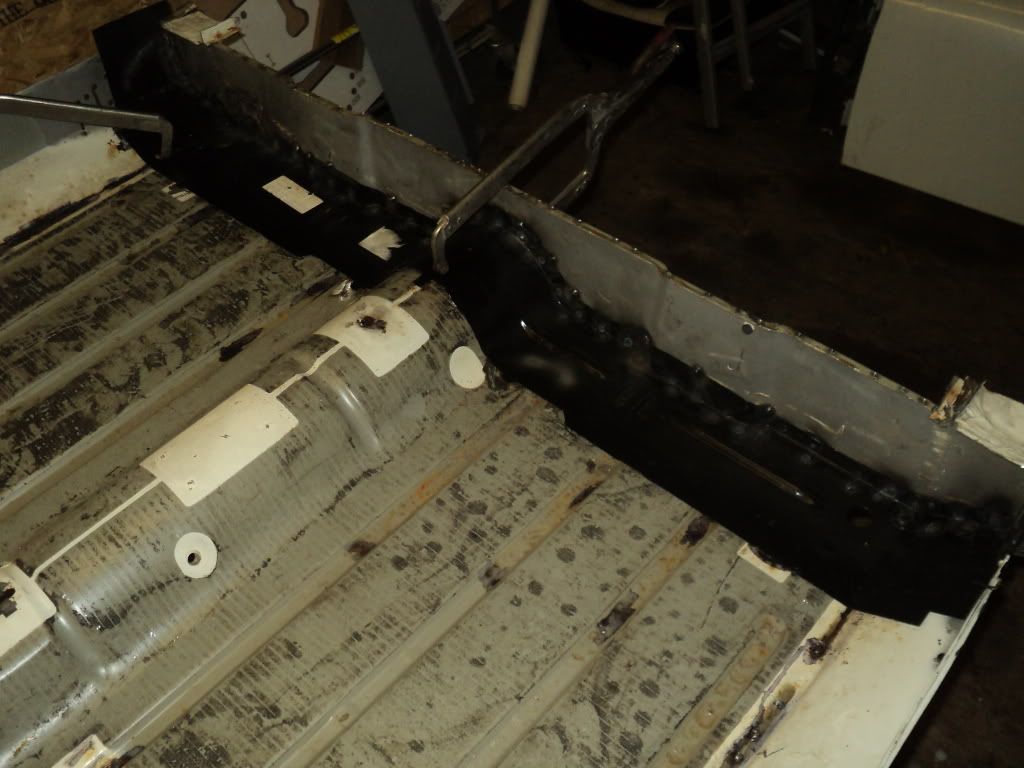
this pickup is needing much of the same sort of work that my dads pickup went through! there isnt a lot of the front floor pan left and what is needing repairs! the rear load bed is pretty rotten as are the rear quaters and bottoms of the wings!

so ideally i could do with another mini van base that we managed to acquire for my dads pickup resto!
Hmmm i think that was a once in a lifetime find!!

heres a link to our previous restoration project. http://www.theminifo...__fromsearch__1

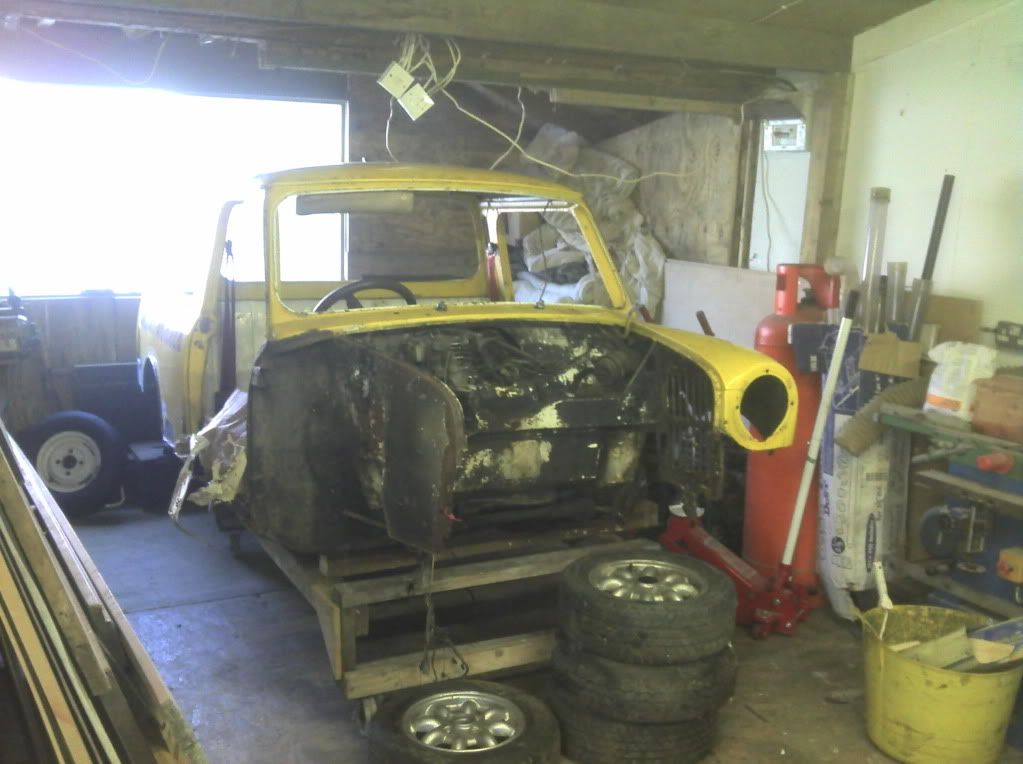
so over the last year ive been looking for a rotten saloon mini that has got a fairly rot free floor pan! not easy to come by, but have managed to get one!

before you ask, i know the pickup is at least 6 inches longer than a saloon mini, but when the made the pickup they didnt make a longer floor pan they just made an extension panel which is available from the likes of Moss and Sommerford.

right after digging the floorpan out from the depths of our workshop we investigated it and came up with a plan of what to do and where to start first.

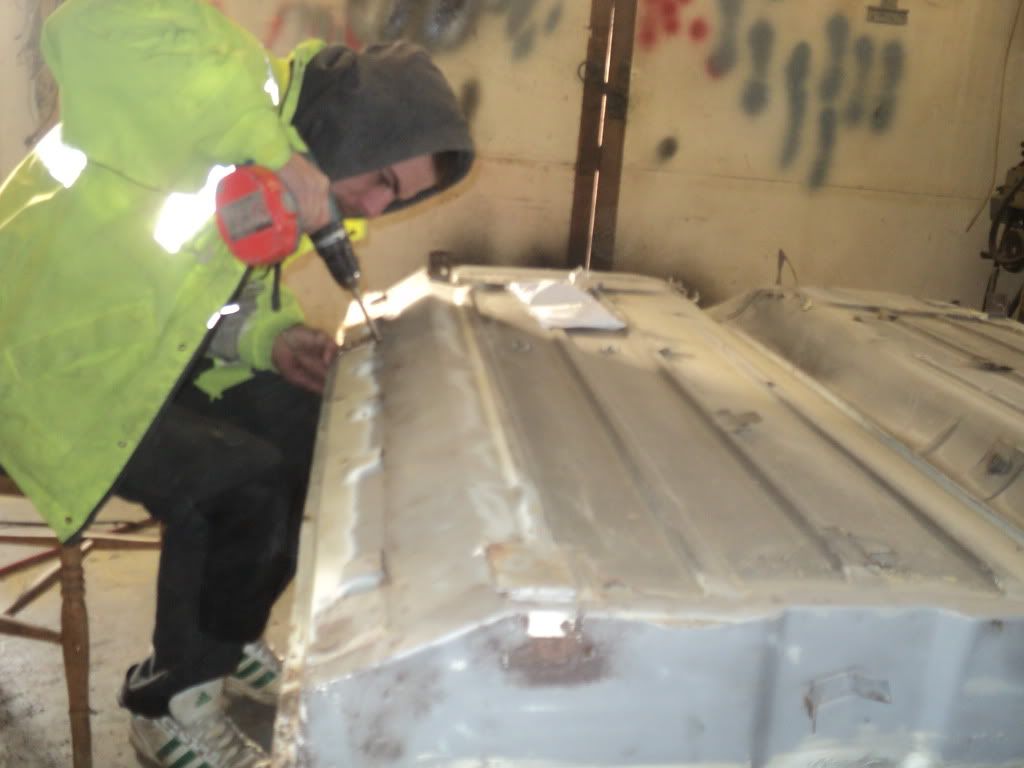
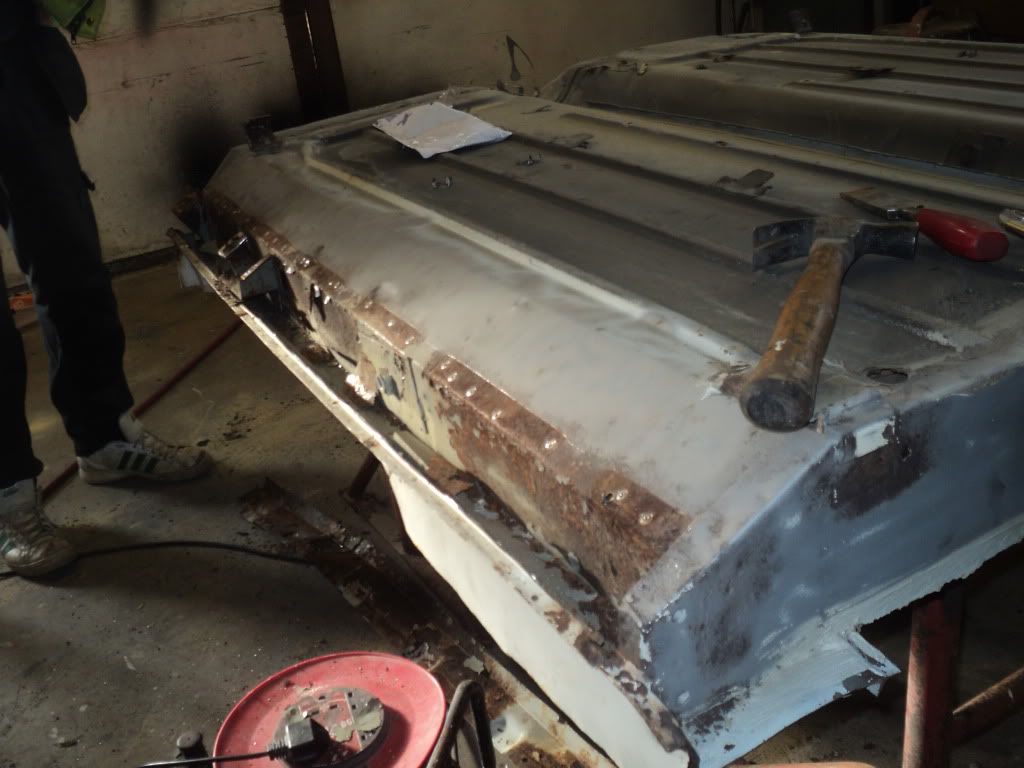
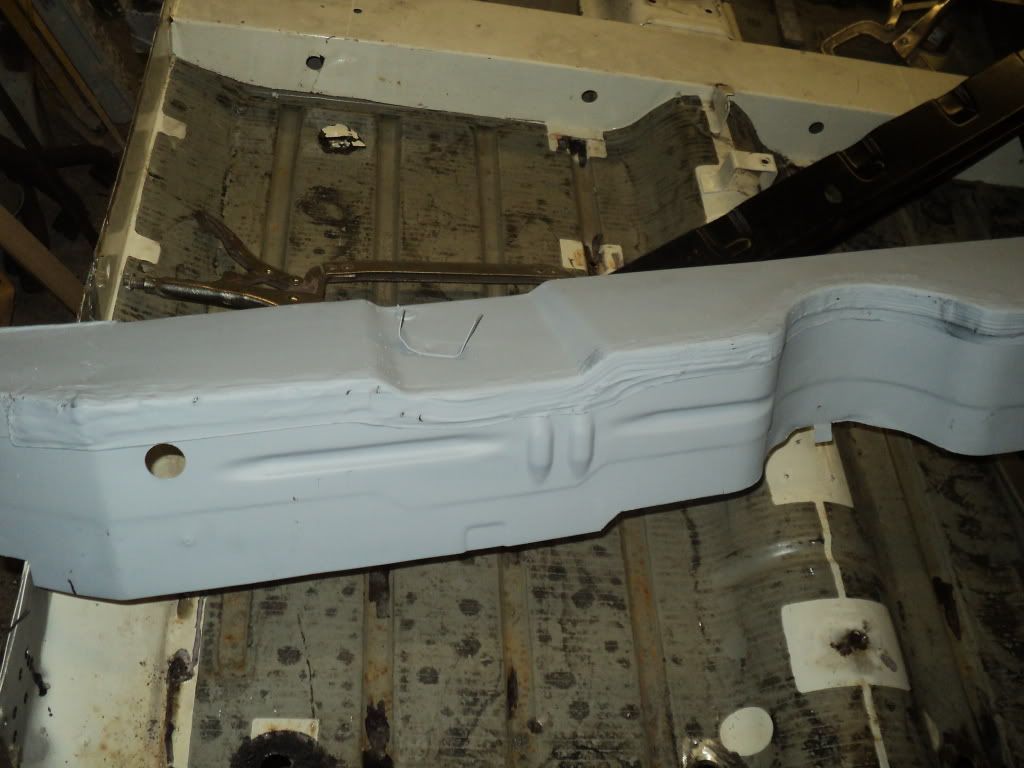
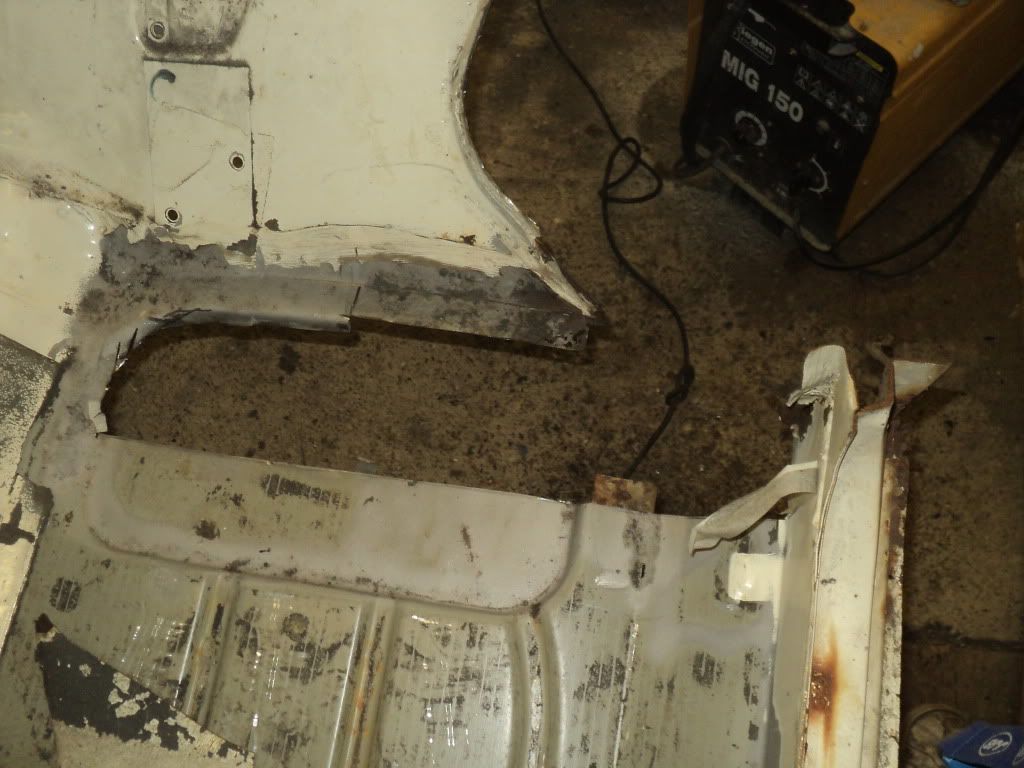
after looking at it it was apparent that the front footwells need some work on them, they arent totally gone but need some metal cutting out and replacing. because im a bit tight on money at the moment i cant afford to buy the floorpan replacement panels so ive had a go at cutting repairs out of a left over van floor panel from my dads mates body shop.

DSC00639.jpg

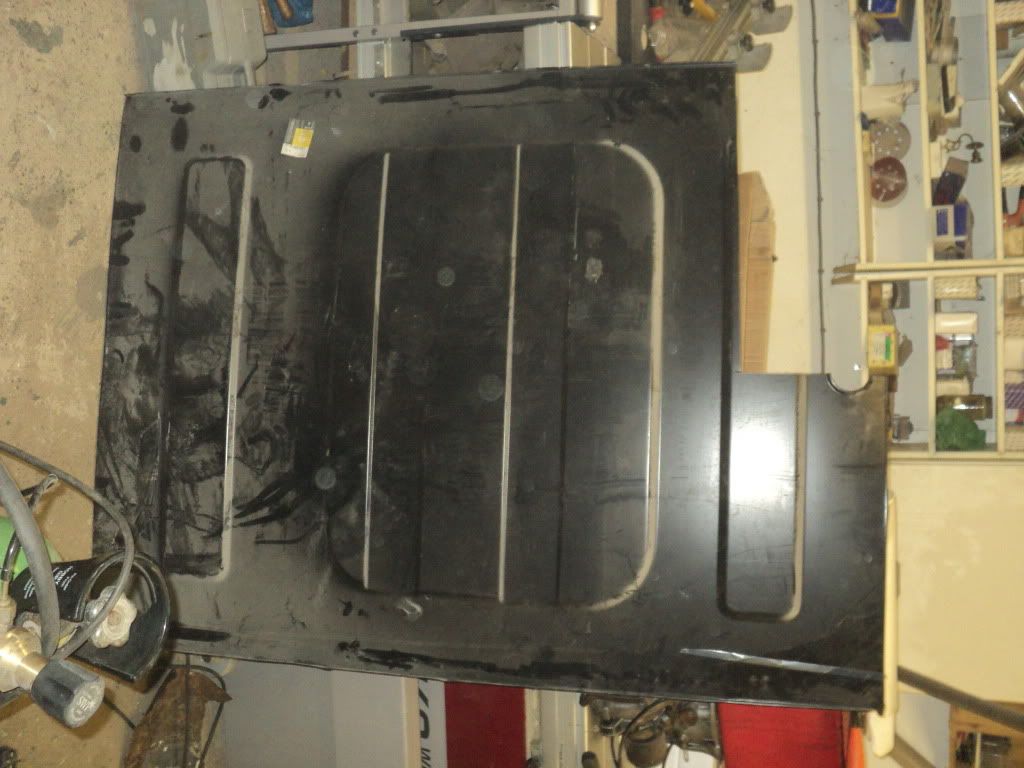
i templated the panel for the floor pan with some strong card then cut it out of the left over panel.

DSC00638.jpg

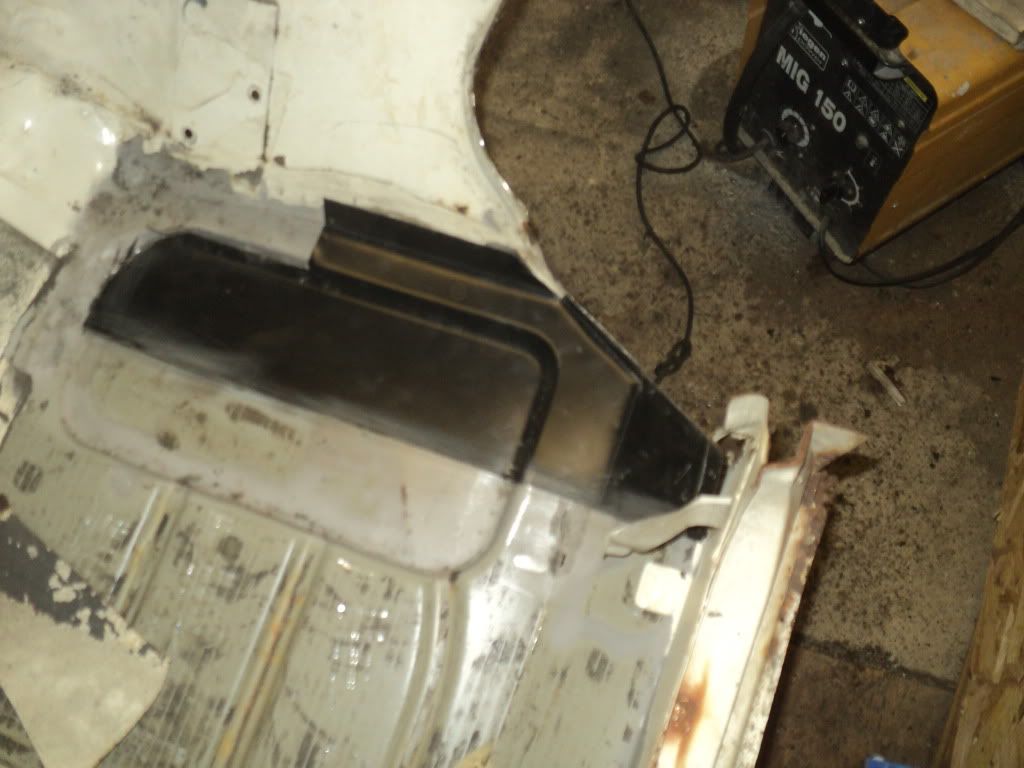
once i was happy that the panel was bent in the right places and fitted properly i scribed round it with a knife and cut out the rusty metal underneath.

DSC00636.jpg

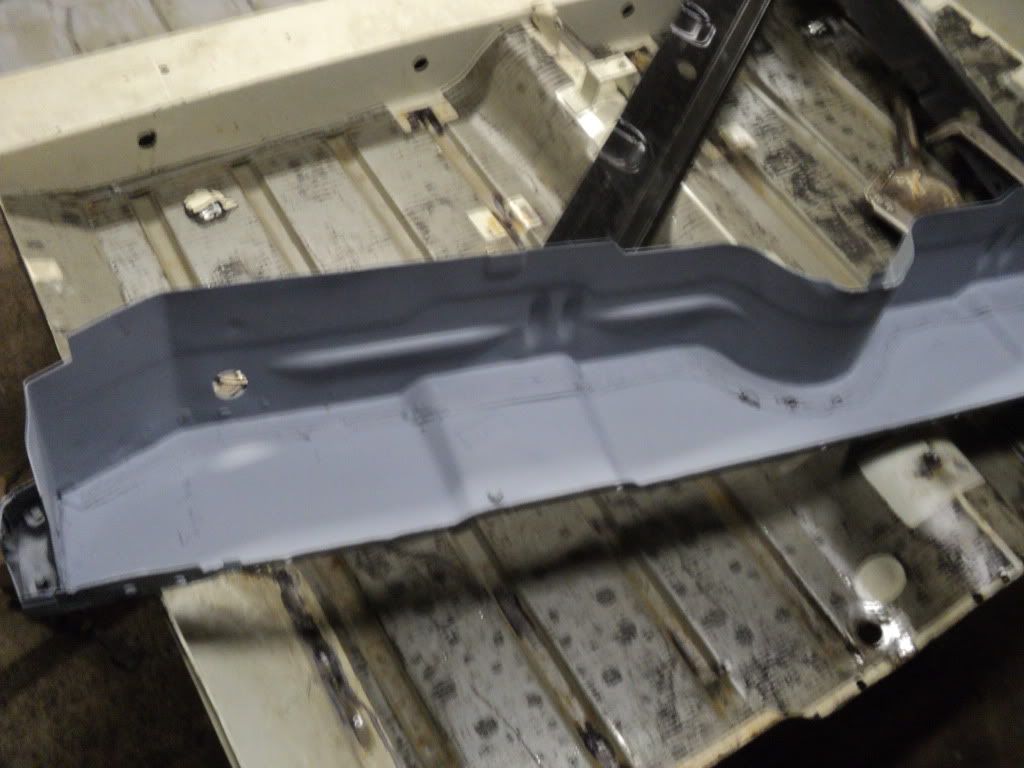
i procceded to tack the panel in place making sure i moved around the panel to minimise the distortion.

DSC00642.jpg

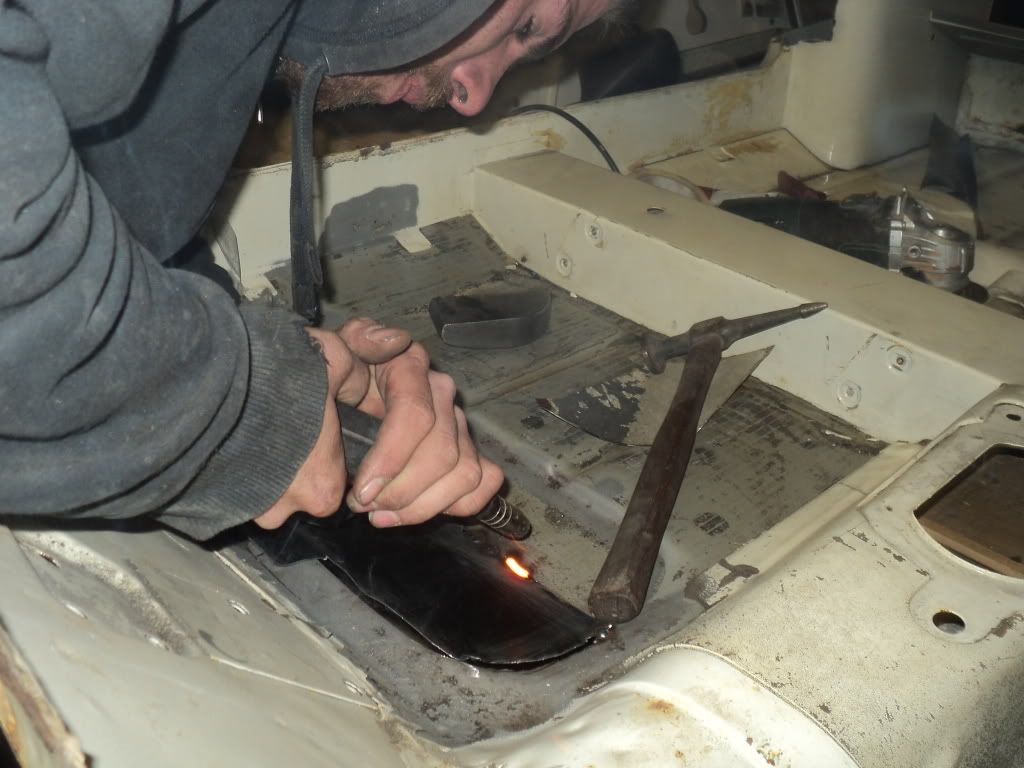
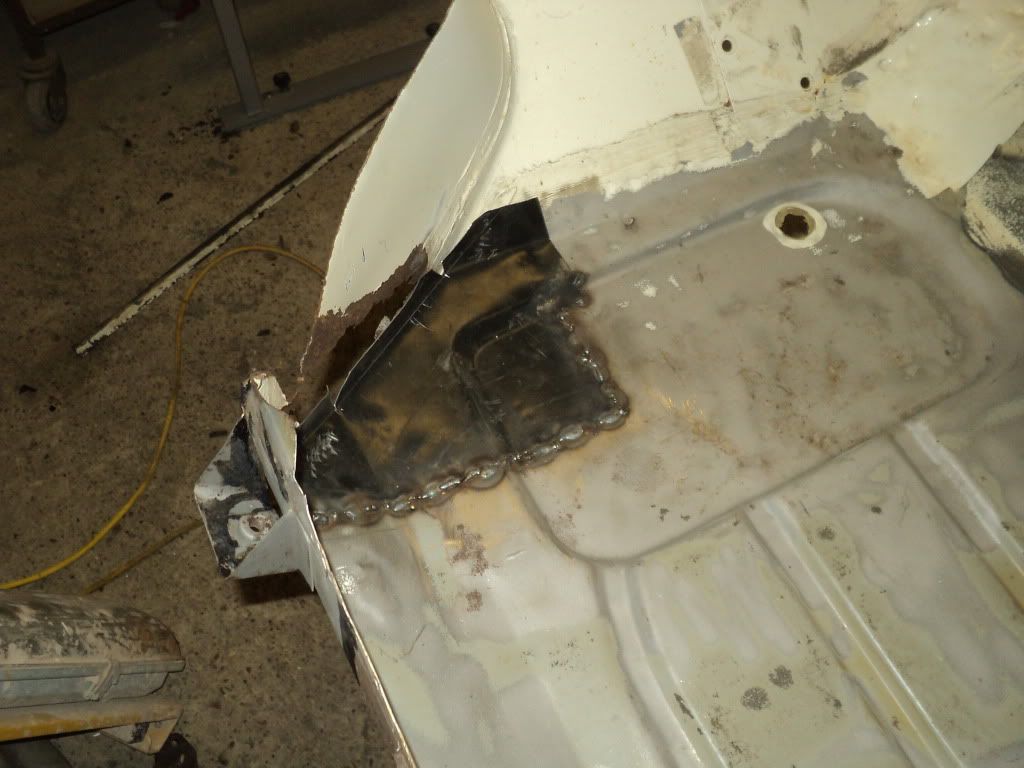
once this was done i turned the floor pan over and seam welded all around the panel.

with that done i turned my attention to the other floor pan which didnt need so much cutting out!

DSC00675.jpg

Edited by pickupmad87, 08 May 2020 - 06:58 PM.


#2 jamesy

jamesy

    Mini Mad

  • Members
  • PipPipPipPip
  • 210 posts
  • Location: scotland

Posted 05 February 2012 - 06:52 PM

looks good, great lookin project.

just wondering how youve got your welder set up, i have an identical one and have never seen another, your welding looks miles better than mine, wire speed 5-6 if i can see right? power at 1? what gas you using? any other tips you could offer?

#3 pickupmad87

pickupmad87

    Previously adampadmore

  • Members
  • PipPipPipPip
  • 273 posts
  • Location: woking

Posted 05 February 2012 - 06:57 PM

next i turned my attention to stripping off the old outer sills, so the floor pan was taken outside and sandblasted along where the spotwelds are so i could see them to drill them out. using our new toy we bought the other week!!

Posted Image

with the spotwelds revealed, i drilled them all out then removed the outer sills.

Posted Image

Posted Image

with both sides removed, the floor pan was taken back out side and sandblasted all the rust off from the inner sills.

Posted Image

after i had sandblasted the rest of the pan i noticed that the heel board was in pretty good condition so i decided to carfully drill out the spot welds and pick it off. i can now take the new one ive got back and get some different panels with the balance!

Posted Image

having picked the old heel board off succesfully, i started to weld it to the floor extension piece. i used an old rear subframe bolted to the heel board and some 10mm packings to keep the heel board nice and flat when i welded it to the extension piece.

Posted Image

once i had plug welded the heel board to the extension piece i un bolted the subframe and started to grind the plug welds down.

Posted Image

Posted Image

i got bored of grinding down the welds so i thought i would position the heel board and extension piece on the floor pan!

Posted Image

if i dont bother going to work tomorrow ill do some more work to it. ( lets hope the roads are too icy to travel on!!!) if not it will probally have to wait till next weekend!

#4 pickupmad87

pickupmad87

    Previously adampadmore

  • Members
  • PipPipPipPip
  • 273 posts
  • Location: woking

Posted 05 February 2012 - 07:03 PM

looks good, great lookin project.

just wondering how youve got your welder set up, i have an identical one and have never seen another, your welding looks miles better than mine, wire speed 5-6 if i can see right? power at 1? what gas you using? any other tips you could offer?


ive got the power set to two and the wire speed to 6 and the gas is a co2 argon mix, every welder is different just make sure when your welding that you hold the tip no more than 10mm away. im still learning myself!! but i have got a dad whos an expert welder tutoring me!!

#5 jamesy

jamesy

    Mini Mad

  • Members
  • PipPipPipPip
  • 210 posts
  • Location: scotland

Posted 05 February 2012 - 10:38 PM

might need to try your settings, is it .6 or .8 wire your using? its argoshield universal i have, so should be o.k. (my dad could just about stick two bits of metal together with the old ww2 arc welder, so am on my own!)

#6 pickupmad87

pickupmad87

    Previously adampadmore

  • Members
  • PipPipPipPip
  • 273 posts
  • Location: woking

Posted 06 February 2012 - 01:23 PM

i think were using .8 wire ill check when i get home.

#7 pickupmad87

pickupmad87

    Previously adampadmore

  • Members
  • PipPipPipPip
  • 273 posts
  • Location: woking

Posted 07 February 2012 - 09:18 PM

managed to get a bit done this evening i cracked on and ground all the welds on the heel board, seam sealed it nicely and sprayed it with a nice coat of etch primer.
Posted Image

Posted Image

Posted Image

#8 mike_c

mike_c

    Learner Driver

  • Noobies
  • PipPip
  • 11 posts

Posted 09 February 2012 - 06:40 PM

looks good need to make a proper start on my pickup.

#9 spike 25

spike 25

    Speeding Along Now

  • Members
  • PipPipPipPipPip
  • 322 posts
  • Location: KENT
  • Local Club: Kentish Mini Club

Posted 09 February 2012 - 08:04 PM

OMG how you gonna get the car trued.......have you got a jig?

#10 GreaseMonkey

GreaseMonkey

    Has Ratchet, Will Make Noises

  • Members
  • PipPipPipPipPipPipPipPipPip
  • 3,663 posts

Posted 03 March 2012 - 06:38 PM

Did you buy this off a guy near Heathrow by any chance?

#11 rich2

rich2

    Speeding Along Now

  • Members
  • PipPipPipPipPip
  • 351 posts

Posted 03 March 2012 - 08:56 PM

Posted Image


Dude, please tell me you aren't mig welding without eye protection! Hate to be a patronising git but if you happen to smell toast while you're welding, that's the backs of your eyeballs burning!

#12 johnsn

johnsn

    Stage One Kit Fitted

  • TMF+ Member
  • PipPipPip
  • 69 posts
  • Local Club: OMS

Posted 04 March 2012 - 06:32 PM


Posted Image


Dude, please tell me you aren't mig welding without eye protection! Hate to be a patronising git but if you happen to smell toast while you're welding, that's the backs of your eyeballs burning!


I'd assume he is doing the close your eyes pull the trigger tack welding technique. It works well, you just have to be sure to do it in the correct order. I'm dislexic so I mess up the order too much. O_O So I only do it for one or two tacks.
Also the welding helmit does keep the weld splatter out of your face. >_< :ohno:
But as your dad's a welder, he'll keep you in line. :P
My dad worked in a ship yard in ww2, I was amazed at what he could do with a stick welder.
Keep up the goodwork. I like your creativity.
john :D :D

#13 jagman.2003

jagman.2003

    One Carb Or Two?

  • Members
  • PipPipPipPipPipPipPip
  • 1,307 posts
  • Location: In the shed.
  • Local Club: Owner of my own club of Minis

Posted 09 March 2012 - 07:16 PM

great looking project. great start.

#14 pickupmad87

pickupmad87

    Previously adampadmore

  • Members
  • PipPipPipPip
  • 273 posts
  • Location: woking

Posted 28 March 2012 - 08:16 PM

Did you buy this off a guy near Heathrow by any chance?

hownslow area guy called derek used to run mini mania

#15 flatline

flatline

    Mini Mad

  • Members
  • PipPipPipPip
  • 247 posts
  • Location: Lytham St Annes

Posted 28 March 2012 - 09:59 PM

Nice project,what compressor are you using with your blaster?


0 user(s) are reading this topic

0 members, 0 guests, 0 anonymous users