Jump to content


Photo
- - - - -

The Wifes Worst Nightmare 83 Full Resto


  • Please log in to reply
920 replies to this topic

#16 Minidarren83

Minidarren83

    One Carb Or Two?

  • Members
  • PipPipPipPipPipPipPip
  • 1,207 posts
  • Location: Stanford Le hope

Posted 21 July 2012 - 08:25 PM

cheers guys thanks for the comments and encouragements. so far i am realy enjoying it i dont follow sports or anything like that i never have done and this is what i enjoy doing ive always messed with my cars and bikes and scratch built a couple of streetfighter style bikes. having said that i am sure that when i mess things up as i normaly do i will wish i never started it lol

anyway enough of that got in the garage last after work for half an hour before the wife got home and cut and tacked in one of the patches needed before fitting the toe board

started with cutting a cardboard template
Posted Image
then transfered to steel from an old roof panel it will be cleaned off properly before full welding lol
Posted Image
then using my hitech clamping device following on from grahama i set it in place i must get some of them magnet things lol
Posted Image
then plenty of tacks and this is as far as i got
Posted Image
Posted Image

i must admit that my panel cutting skills are something to be desired but nothing that cant be tidied up with a bit of weld and a flap disc lol hopefully should get it fully seamed in tomorrow

#17 Minidarren83

Minidarren83

    One Carb Or Two?

  • Members
  • PipPipPipPipPipPipPip
  • 1,207 posts
  • Location: Stanford Le hope

Posted 24 July 2012 - 07:13 PM

well got a bit more done on this today after work got the patch fully welded in and cut and welded in the bottom patch. im not even going to show you the pics of it before dressing the welds it was probably some of my worst welding so far
Posted Image
Posted Image
and the inside of those patches to check the penetration haha i said penetration im such a child
Posted Image
Posted Image
ive not dressed the inside yet as ill do that when the shell is upright and i can get in a bit easier

then i trial fitted the new heel board it was a pretty good fit but needed some small adjustments with the hammer to meet the floor lip but i expect that seeing as 95% of my panels are non gen, makes the build a bit more interesting i think lol. i used plenty of self tappers and only need some more on the seat base then it can be welded in ive drilled loads of holes for the plugs but still need lots more drilling i made myself like a milling bit out of a normal drill bit works really well
Posted Image
Posted Image

I need a bit of advice on one of my first panels fitted when i fitted the flitch panel the a panel lip didnt follow the door hinge panel at the top and the bottom and im worried the a panel will sit proud of the door skin
this is at the bottom
Posted Image
and this at the top
Posted Image
what is my best course of action? should i wait untill i get my a panels and see what the fit is like then deal with it?
cheers darren

#18 Carlos W

Carlos W

    Mine is purple, but I have been told that's normal

  • TMF+ Member
  • PipPipPipPipPipPipPipPipPipPipPip
  • 10,110 posts
  • Location: Sittingbourne, Kent

Posted 24 July 2012 - 07:16 PM

I'd wait until you've got your A-panels!

I'll have a look at mine and see how good a fit it is, but from memory I think it's the same!

You're certainly making progress!

#19 Minidarren83

Minidarren83

    One Carb Or Two?

  • Members
  • PipPipPipPipPipPipPip
  • 1,207 posts
  • Location: Stanford Le hope

Posted 24 July 2012 - 08:59 PM

Cheers i like to get bits done when i can, i get time on it most days from early starts and early finnishes at work so plenty more to do. Yeah I was thinking the same with the door fitted with no seal it sits level and follows the door curve so hopefully the seal will account for the a panel thickness talking of doors the door in question is a little strange I wiill drop it in the hole tomorrow take some pics and see what you all think

Edited by Minidarren83, 25 July 2012 - 04:46 AM.


#20 MrBounce

MrBounce

    Up Into Fourth

  • TMF+ Member
  • PipPipPipPipPipPipPipPipPip
  • 2,563 posts
  • Location: The Manroom in Ipswich

Posted 24 July 2012 - 09:29 PM

Gives me yet more inspiration to get on with mine! Keep at it! :gimme:

#21 grahama

grahama

    Up Into Fourth

  • Members
  • PipPipPipPipPipPipPipPipPip
  • 2,442 posts
  • Location: Warrington
  • Local Club: None in my area !!

Posted 25 July 2012 - 07:28 PM

Nice fit on the heel board, how I wish I had done a full piece there now as the ends were a right pain. On the small patch you showed the inside for the penetration, personally I would seam the inside too as there seems to be some parts that have not penetrated too well and better safe than sorry. I have double seamed all my patches and ground then back to about your level as I am too scared to grind them back all the way incase I weaken the welds. But nice work all in all.

Graham

#22 Minidarren83

Minidarren83

    One Carb Or Two?

  • Members
  • PipPipPipPipPipPipPip
  • 1,207 posts
  • Location: Stanford Le hope

Posted 27 July 2012 - 07:19 PM

cheers for the advice grahama looking back it will need going over in the inside ill just have to wait until i get the welder inside the shell and i know what you mean about gringing, im not too bothered about the strength of the weld but i am just not that great at grinding i seem to just make the surrounding metal too thin so think as it wont be seen its not that important for a flush finish

update time!!!
got back in the garege and done the final fitting of the heel board its not a bad fit considering its a pattern part so once i was happy i plugged it many many times but only half way as the drivers side floor needs replacing yet and i hope to get the seat base welds all done over the weekend. all welds ground down and a sploosh of primer in it

Posted Image

Posted Image

Posted Image
next for this side is to make the inner sill stiffner and then the outer sill. i know the view of the oversills and would never consider putting them on but i have a pair of them and was wondering is it ok to cut them down to standard size?

now on to my odd door gaps, i will post in technical but would appreciate your help and advice all coments are welcome as i am stuck
when i fitted the new door step i took measurements from the pasangers side and they are still the same but the door does not sit strait at all

Posted Image

but from the inside of the door it is dead level with the door frame all the way along

Posted Image

which leads me to believe the step lip is twisted or not sitting right plus i need to drill the hinges out a touch and it also looks to me as thought the doors bottom lip has at some point been worked on and is smaller at the front than the rear. my question is could all of these factors make a gap this drastic and how would i go about fixing this?

Posted Image
Posted Image
Posted Image

hopefully i can get this sorted cheers darren

#23 malcs_miniturbo

malcs_miniturbo

    Super Mini Mad

  • Members
  • PipPipPipPipPipPip
  • 602 posts
  • Location: swindon

Posted 28 July 2012 - 03:42 PM

some good progress there mate

#24 Minidarren83

Minidarren83

    One Carb Or Two?

  • Members
  • PipPipPipPipPipPipPip
  • 1,207 posts
  • Location: Stanford Le hope

Posted 03 August 2012 - 01:19 PM

Update time!!!

Well not an up date more of a back up after getting the shell upright refitting the door it was clear I had made an error. The shell is level and all the major points are still strait but it would seem that measuring from the other side has meant that I have fitted my new doorstep about 1cm too low in the front. I feel so stupid to make such a school boy error and am really peed off that I somehow have to undo some of my hard work and redo it luckily the front of the inner sill is not yet welded to the step flange and will accept a bit of movement the rear where it starts to wander off will confirm with a large adjustment tool and block of wood but still really hacked of with myself as I was almost ready for the outer sill on this side.

On a brighter note I've made and fitted the inner sill stiffener so that end is ready for the sill at least I'll get a pic up later of how I made it and it fitted

This mini will not beat me 😡

#25 sonikk4

sonikk4

    Twisted Paint Polisher!!!

  • Admin
  • PipPipPipPipPipPipPipPipPipPipPip
  • 15,897 posts
  • Name: Neil
  • Location: Oxfordshire

Posted 03 August 2012 - 01:25 PM

The flitch to A panel i would wait until you have the a panel and wing. You can easily section the flitch to sort out any issues. The flitch i was going to fit to Project Paddy did not fit very well so i ended up repairing individual sections to ensure the contour was correct.

#26 Minidarren83

Minidarren83

    One Carb Or Two?

  • Members
  • PipPipPipPipPipPipPip
  • 1,207 posts
  • Location: Stanford Le hope

Posted 03 August 2012 - 02:57 PM

Wow sonikk4 you are quick lol. That is what I was thinking and after fitting the door back on its not that bad I wish I could fit complete inner wings but £130 each I just can't justify it and then to chop the fronts off as my front end will be a steel flip up front so repair it is and you are right wherever the panels come from unless heritage they are not great

#27 Minidarren83

Minidarren83

    One Carb Or Two?

  • Members
  • PipPipPipPipPipPipPip
  • 1,207 posts
  • Location: Stanford Le hope

Posted 06 August 2012 - 08:09 PM

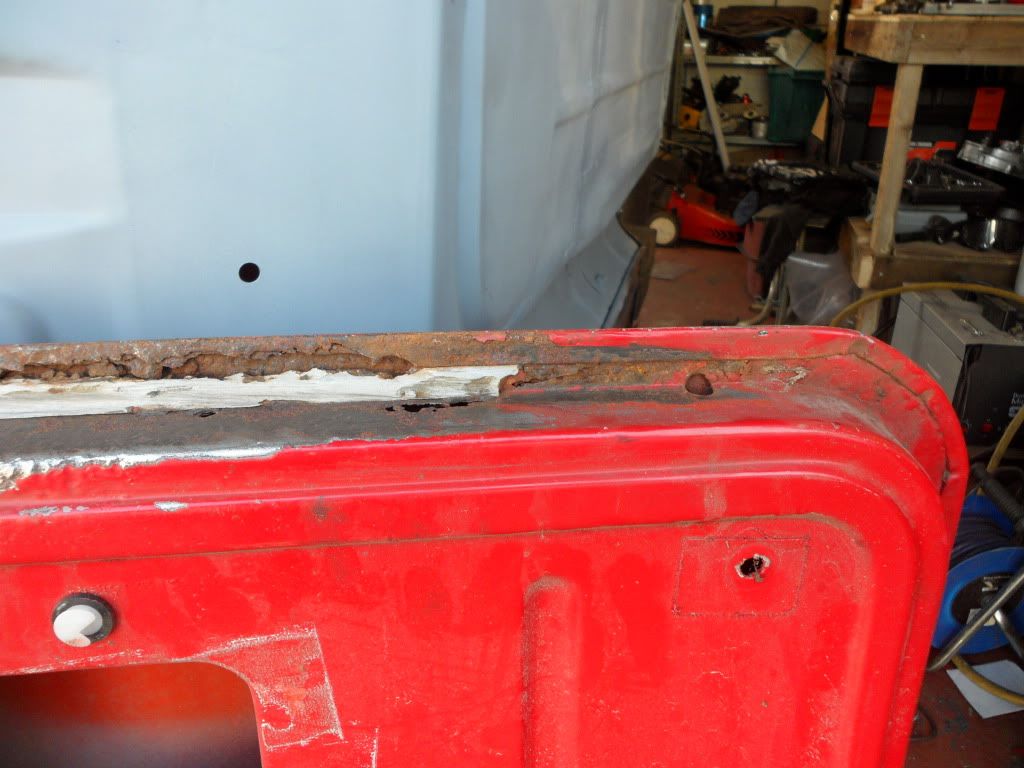
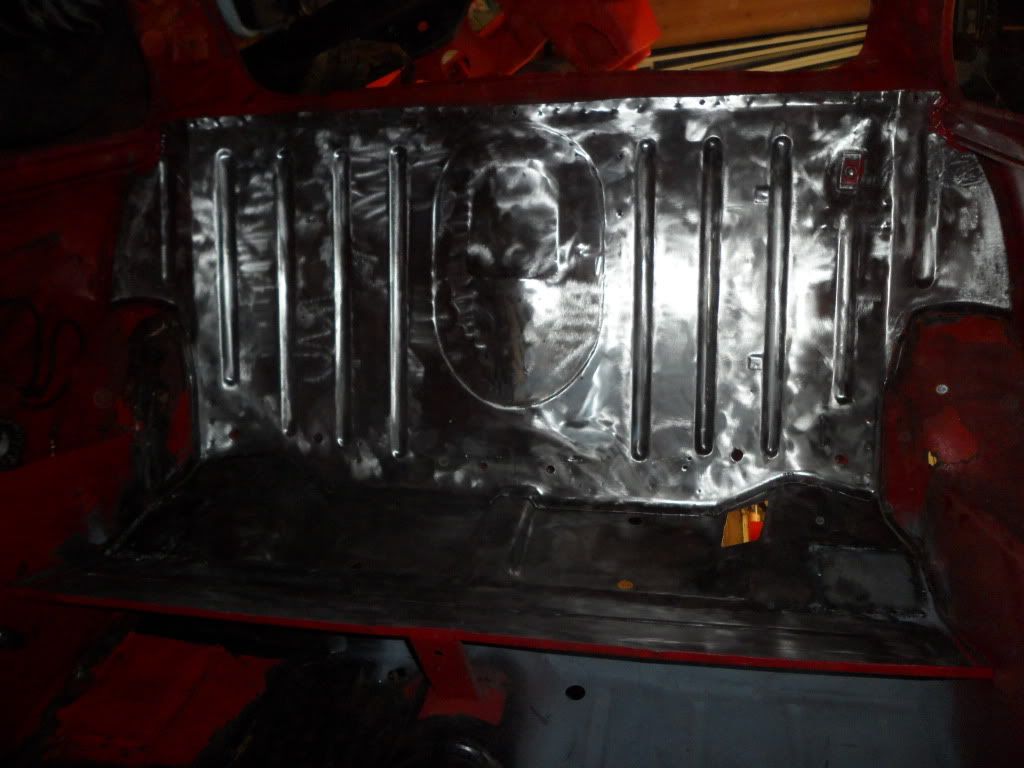
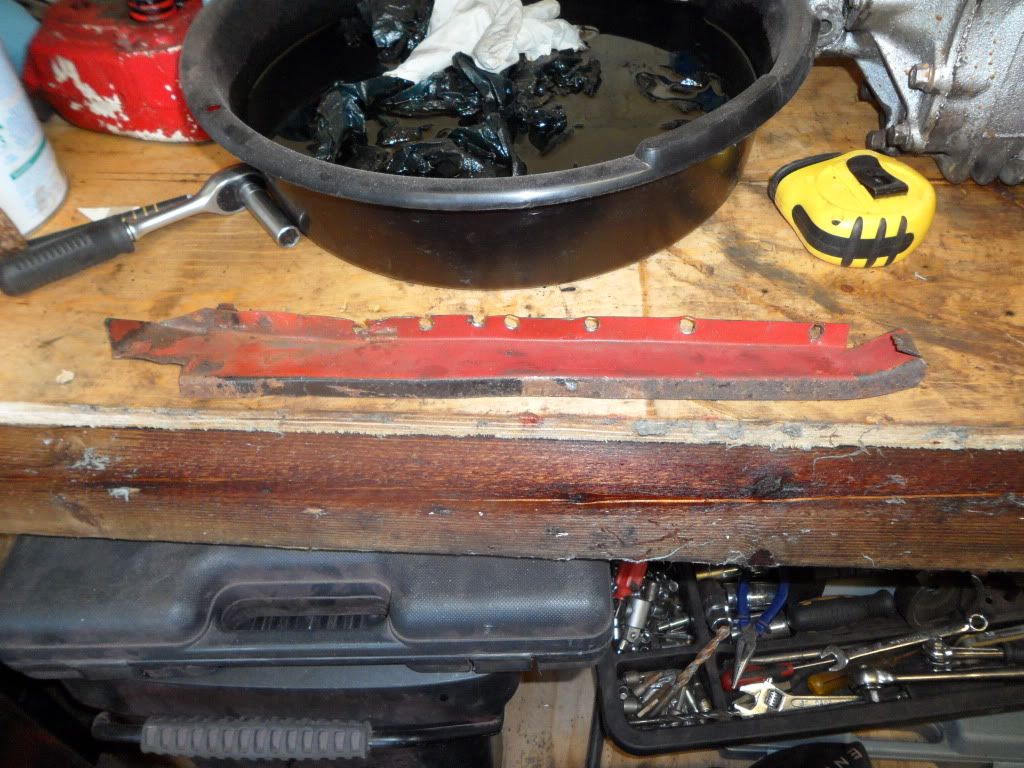
so a little later than promised but here are the pics of the inner sill stiffner

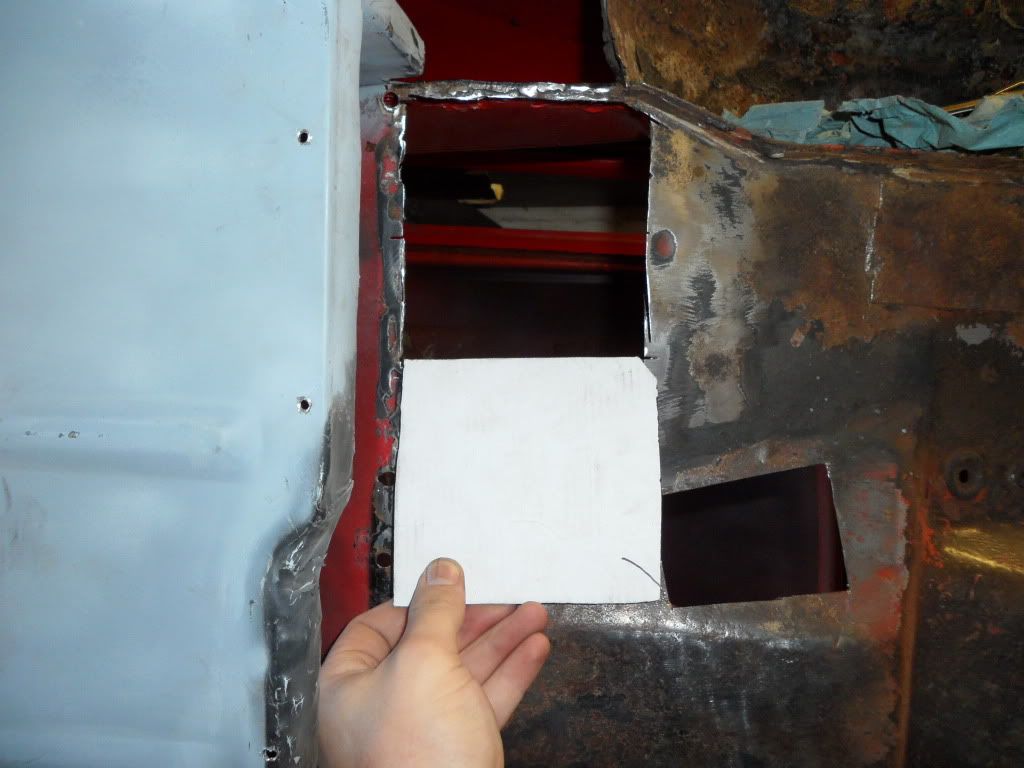
started with what was left of what came off

Posted Image

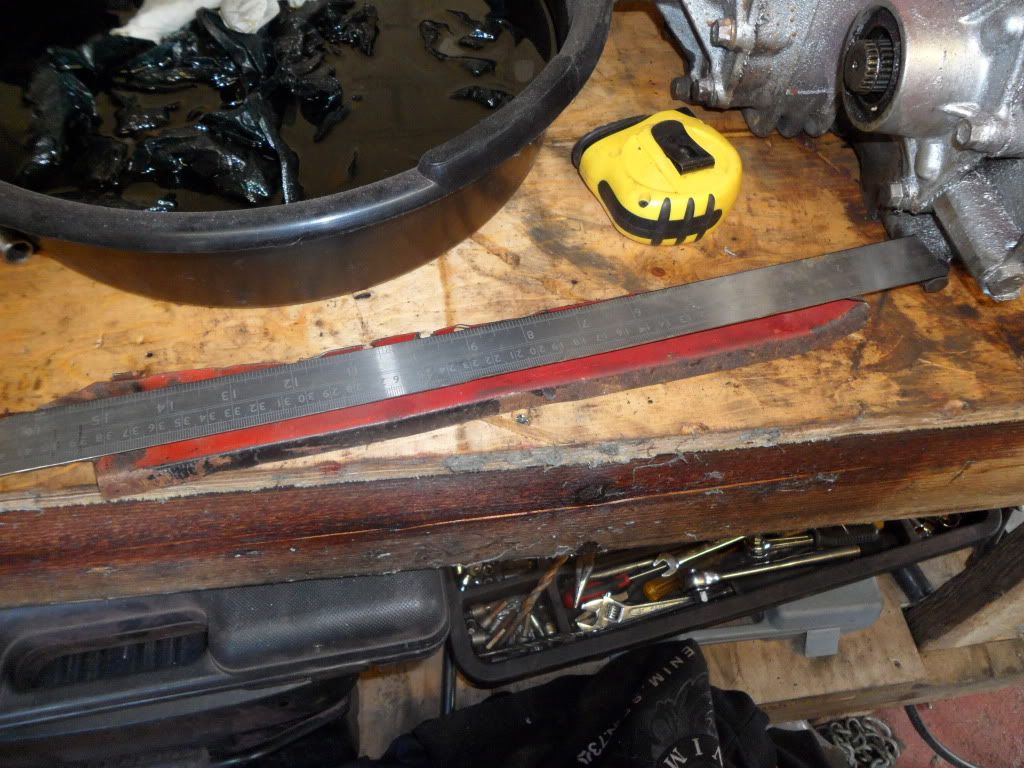
took some dimensions of the piece and it turns out that it gets wider towards the front of the car being 1,1/4 at the heel board and 1,1/2 at the doorstep end, only one pic we all know how to measure
Posted Image

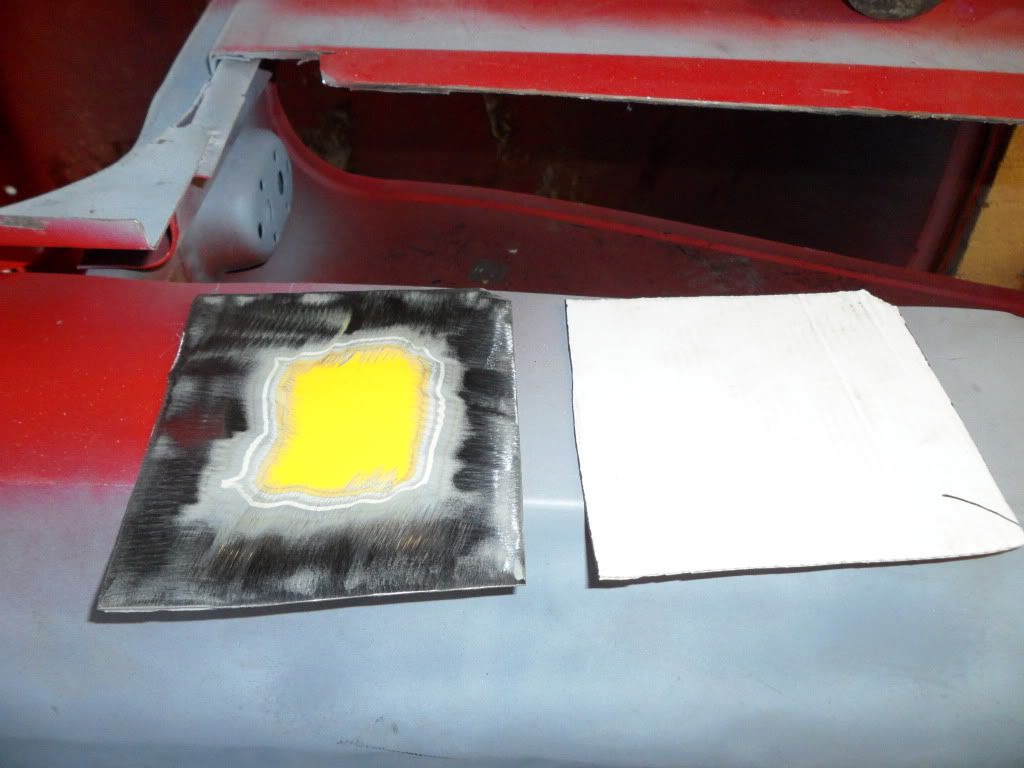
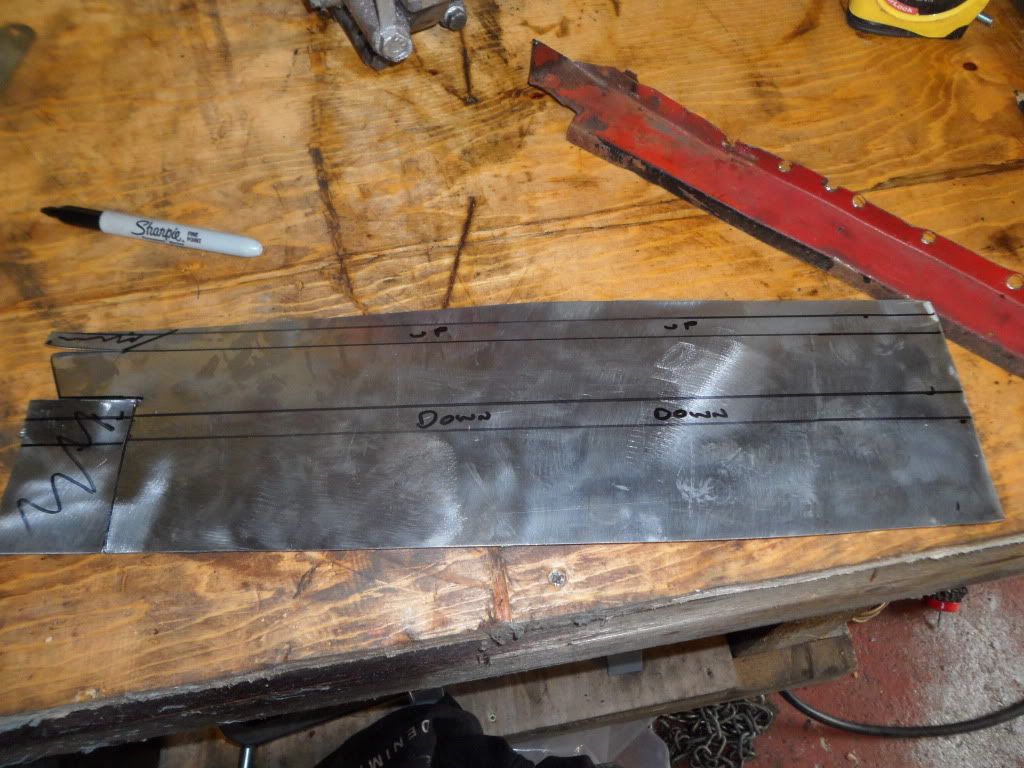
then transfered all the dimensions onto steel with all the fold lines and areas to be trimmed marked out

Posted Image

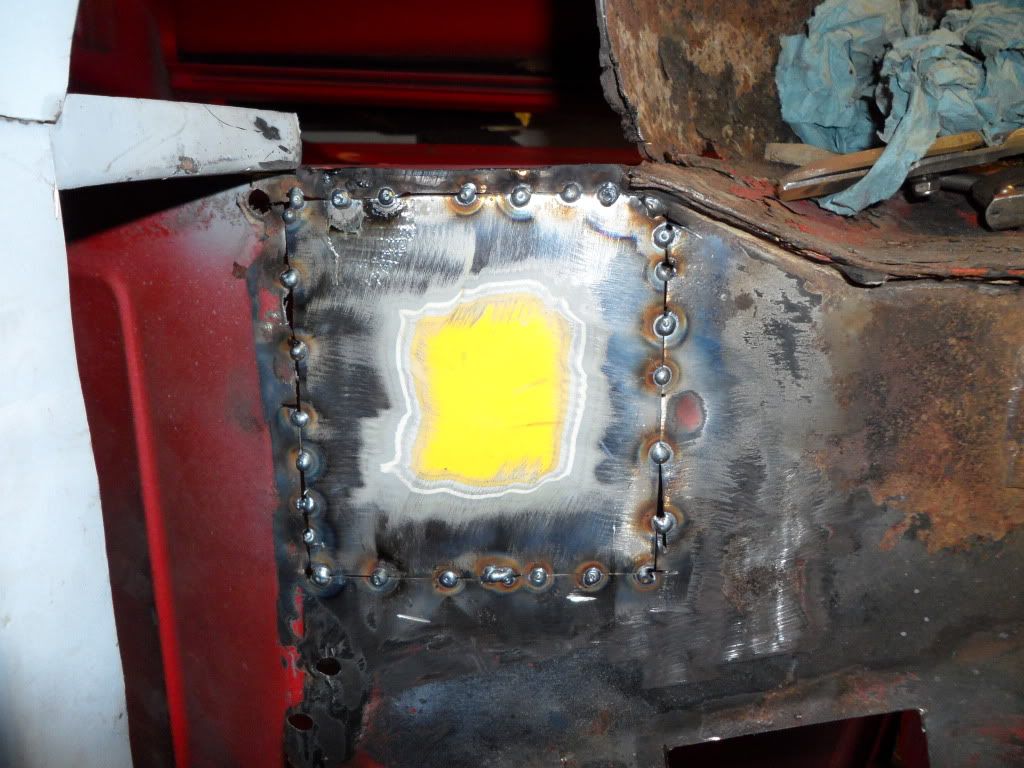
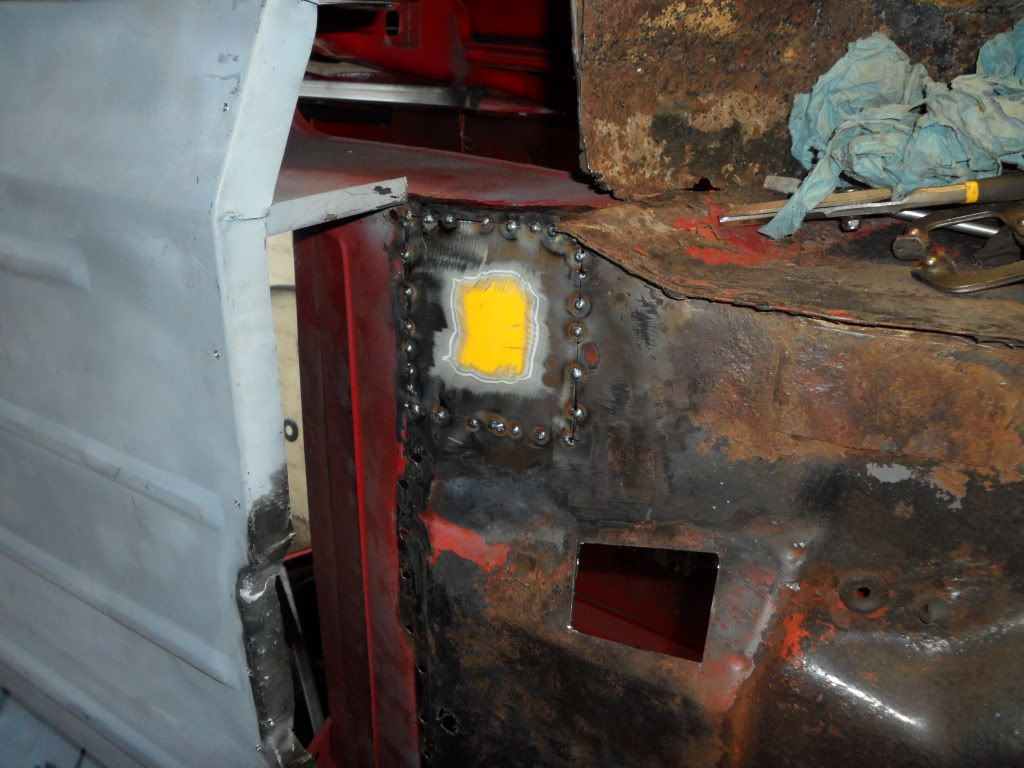
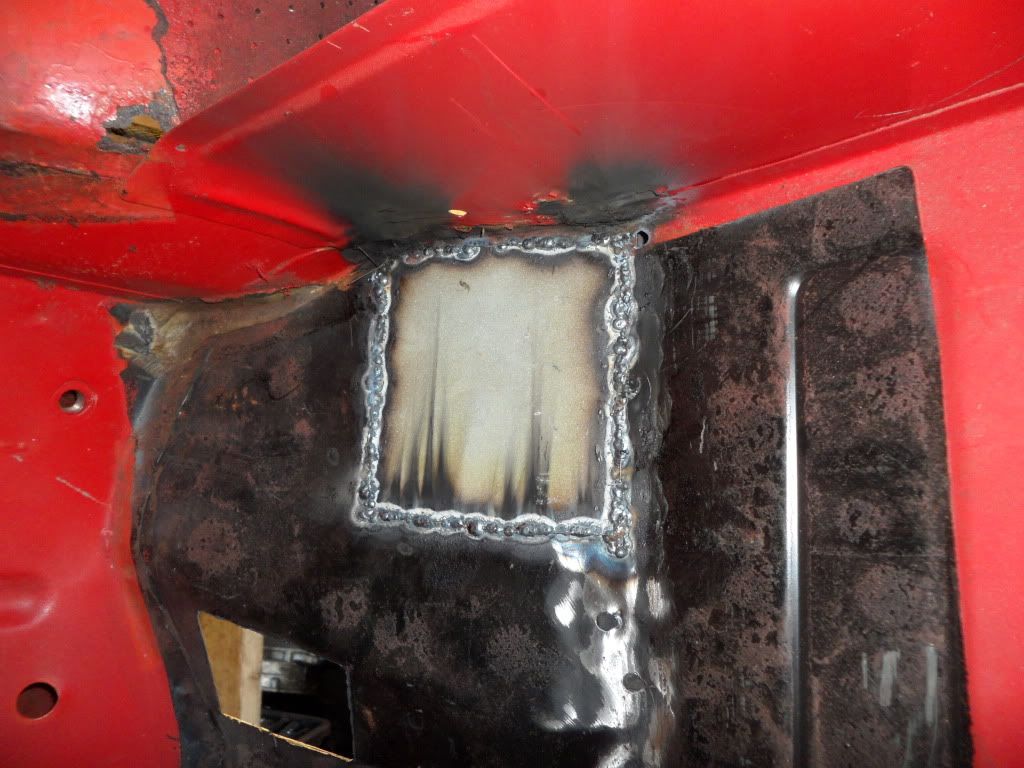
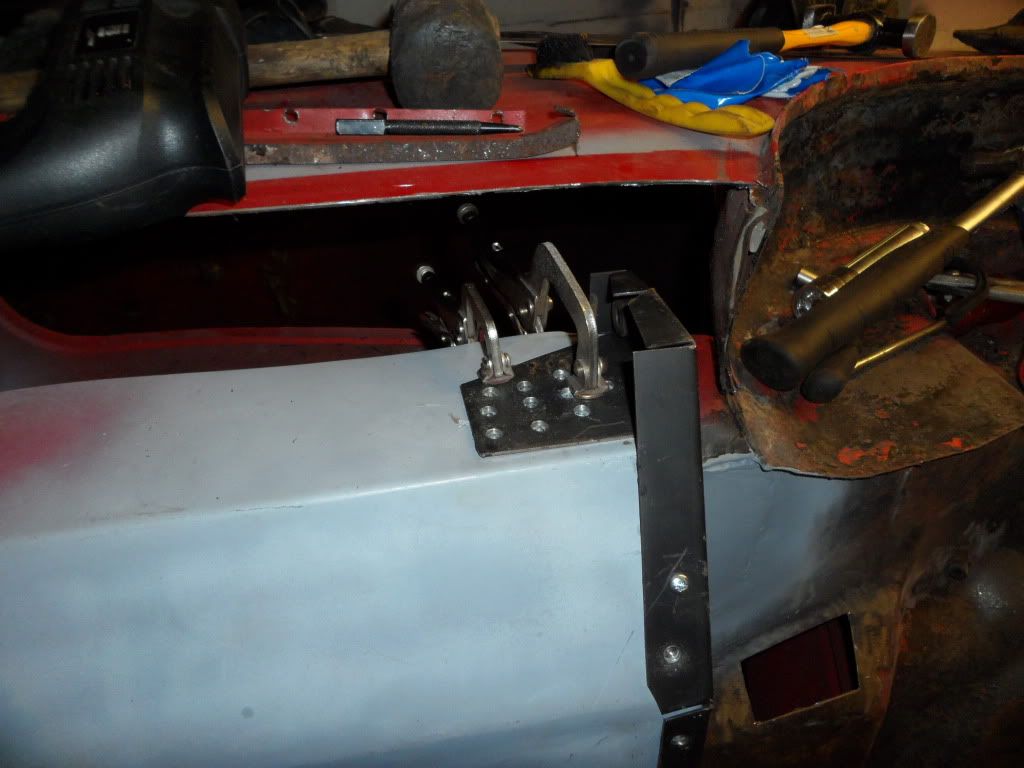
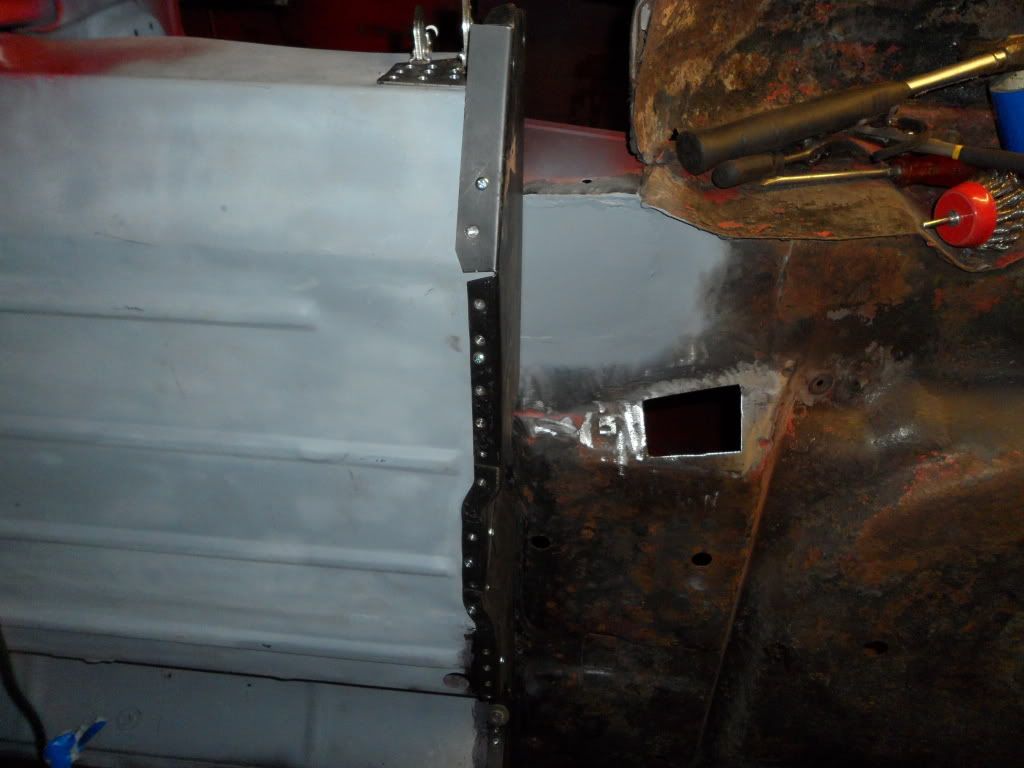
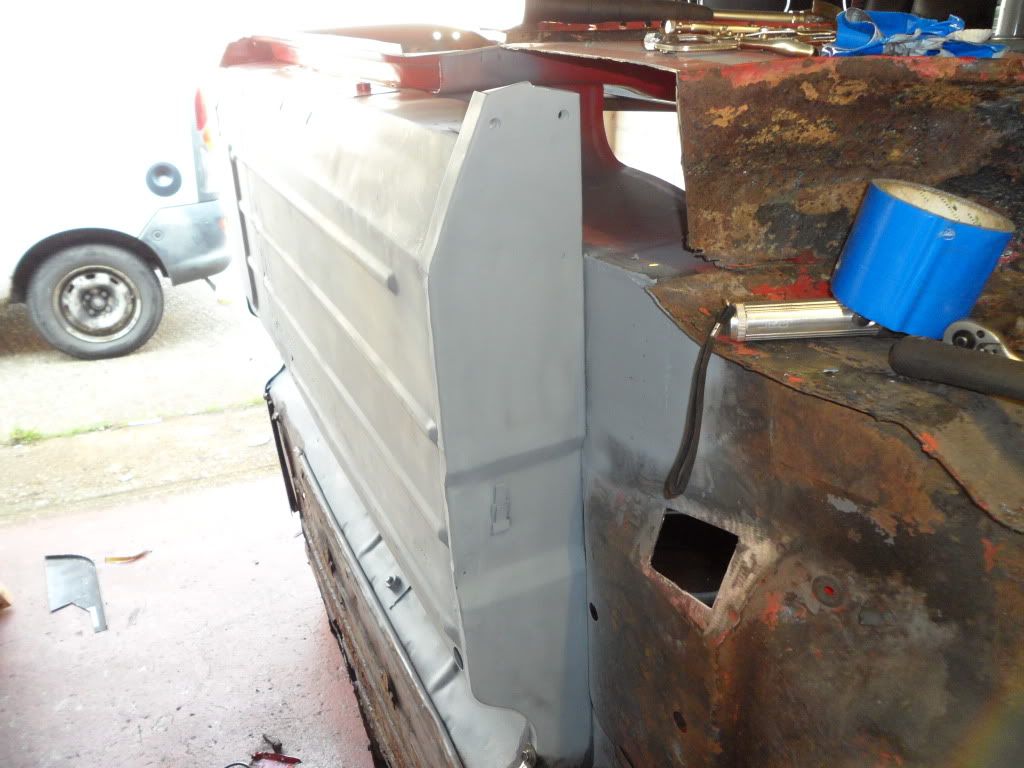
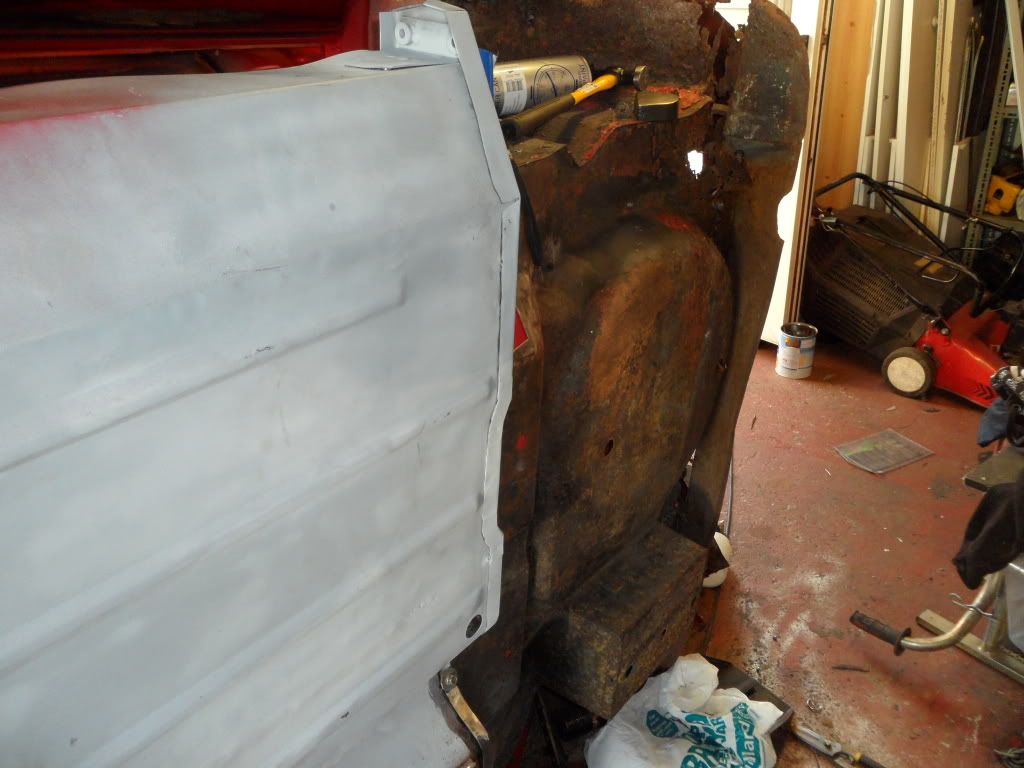
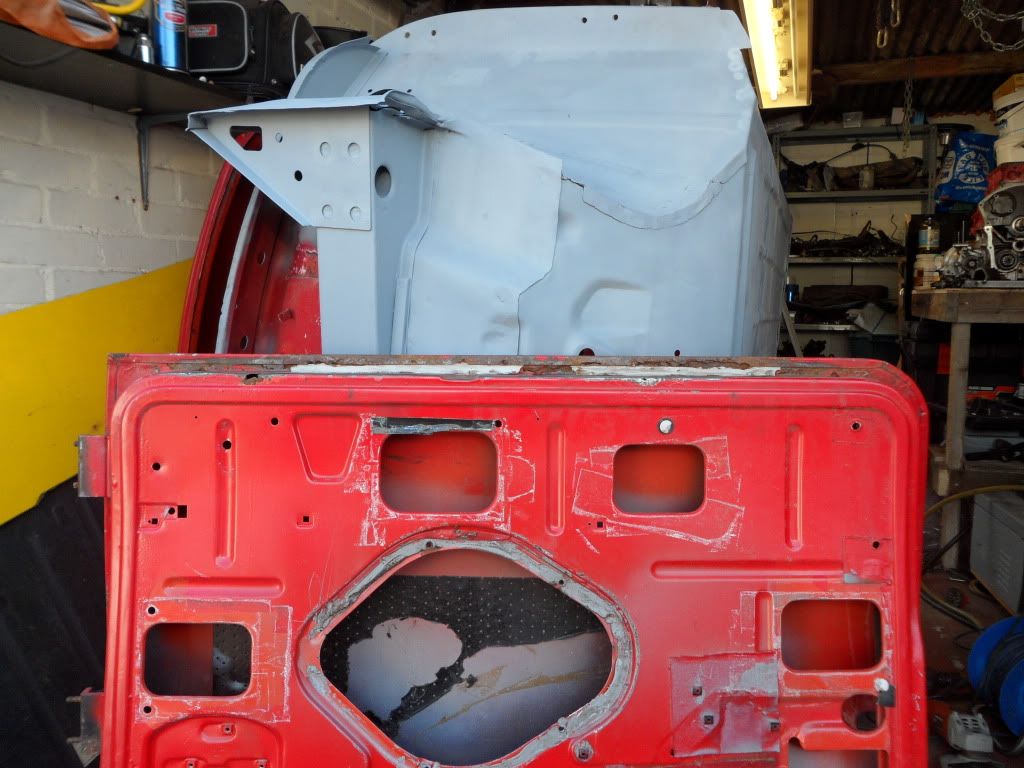
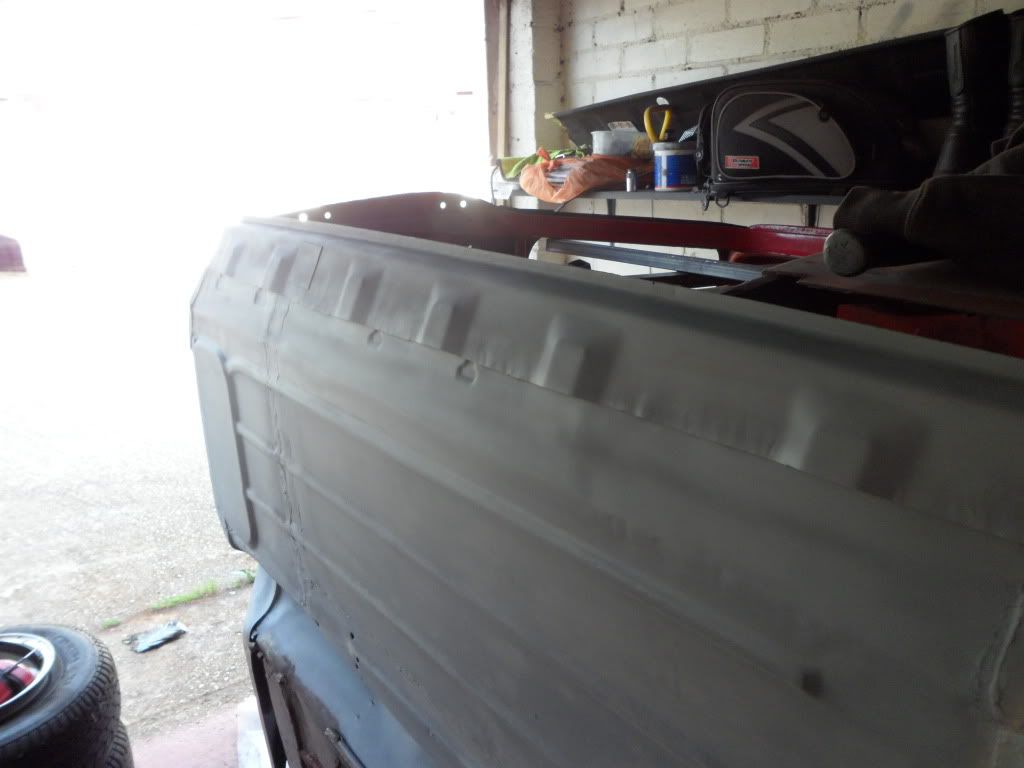
then folded trimmed and cut to shape i forgot to take picks of it before fitting but here it is all plug welded to the inner sill i have not tacked it to the heel board as yet so i can still get the arch close out panel under the tang

Posted Image

Posted Image

Posted Image

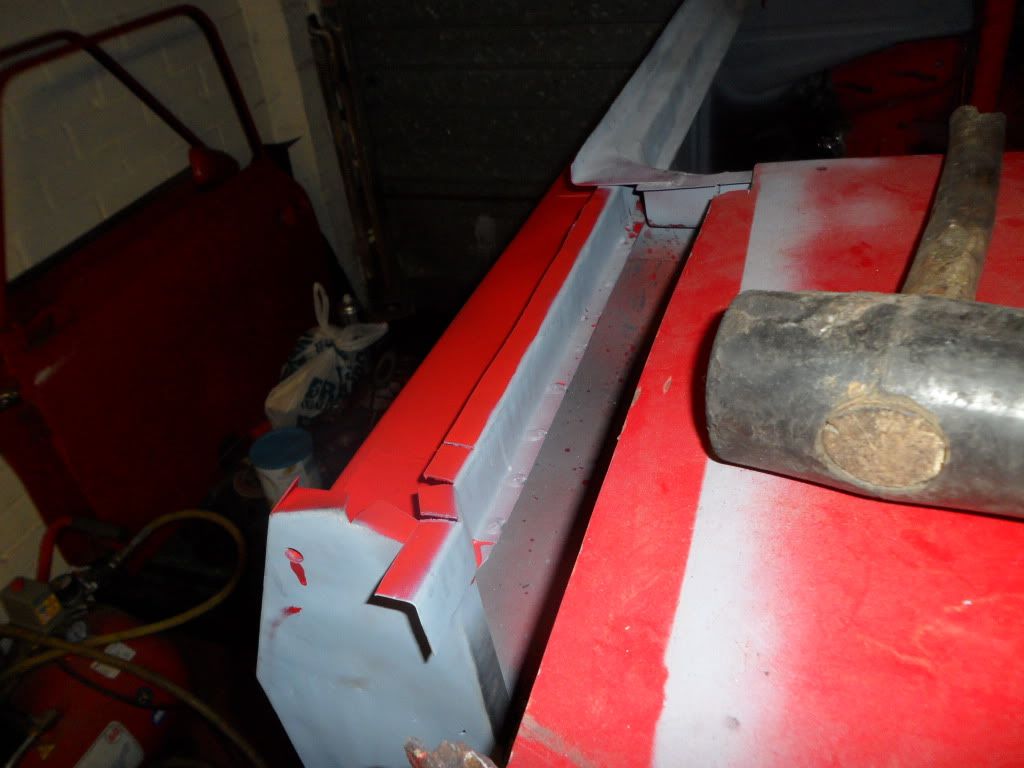
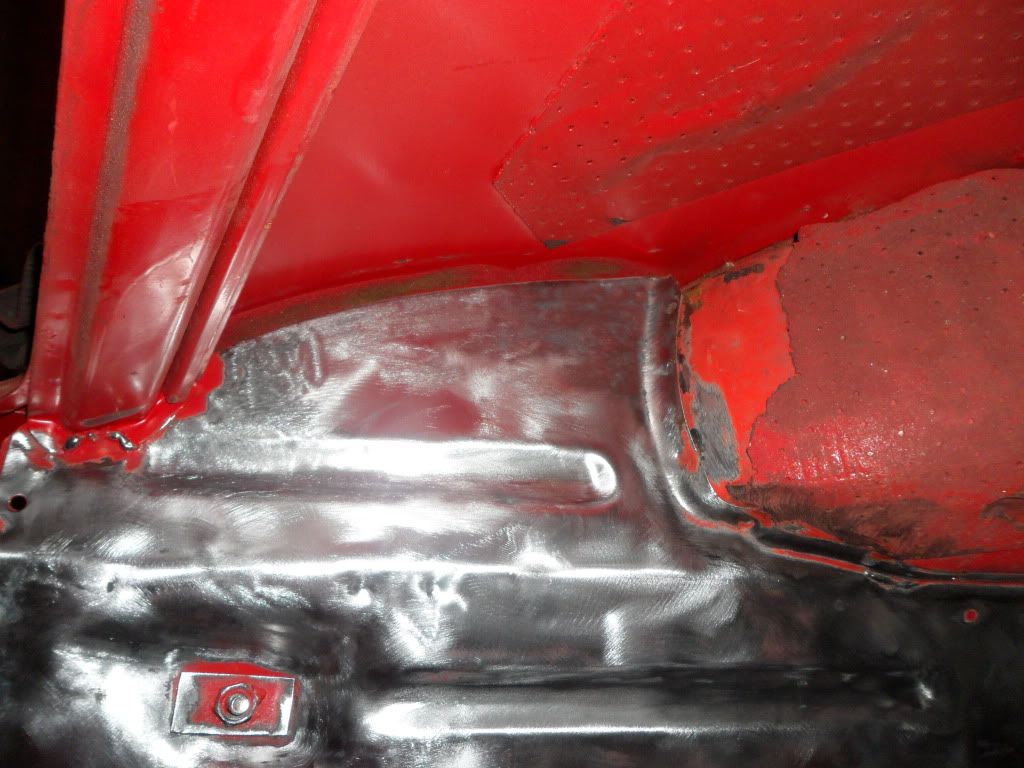
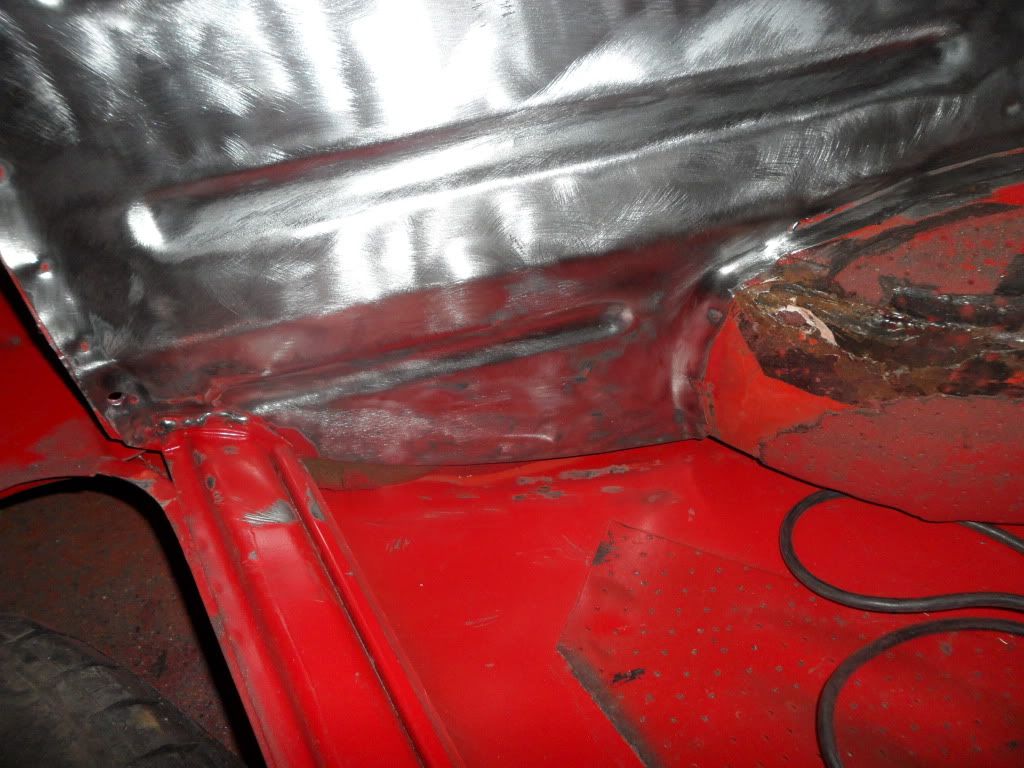
not sur if its right or not but my origional item had a little tang that sat under the doorstep but was not welded to the step so thats how i left it.

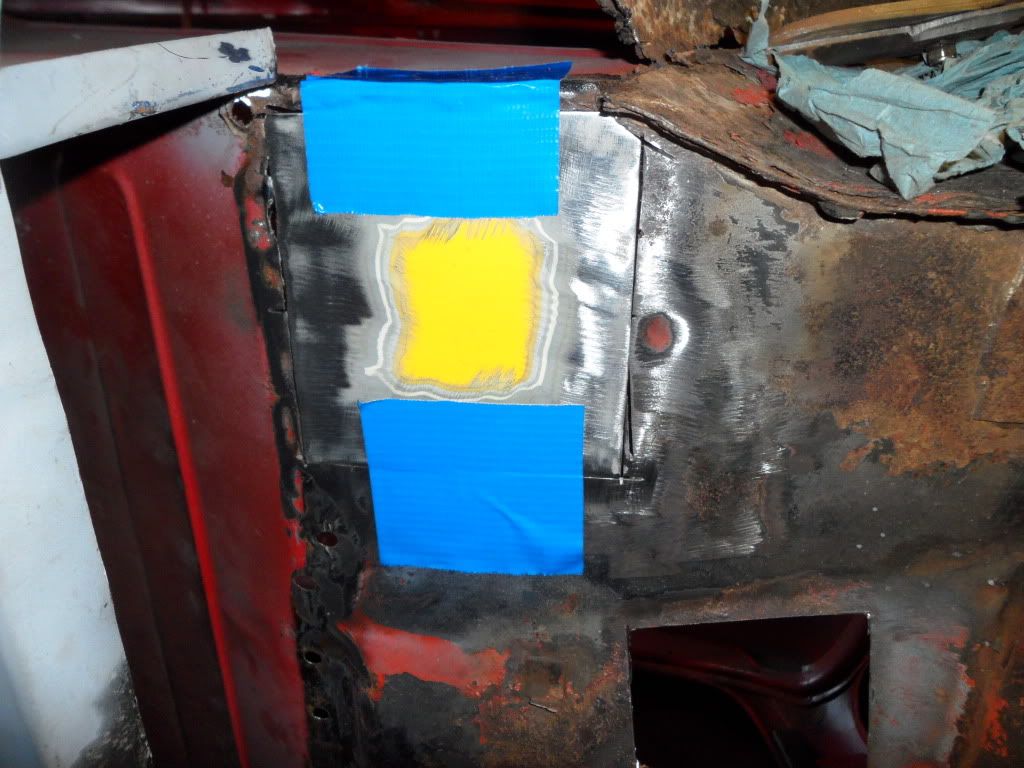
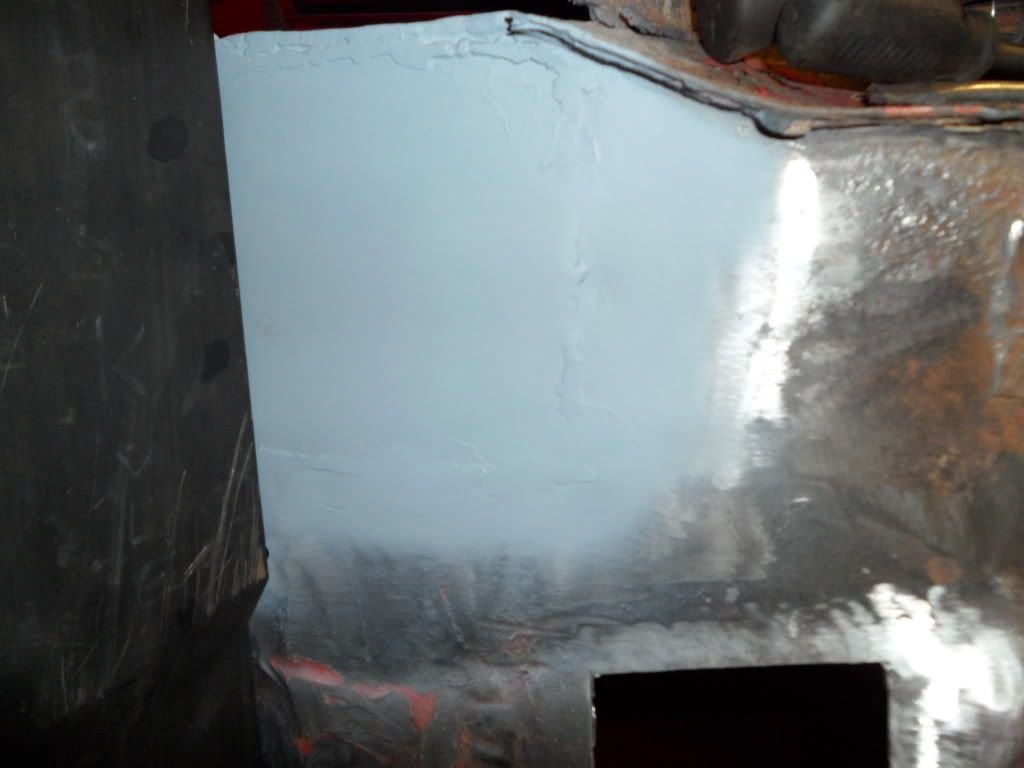
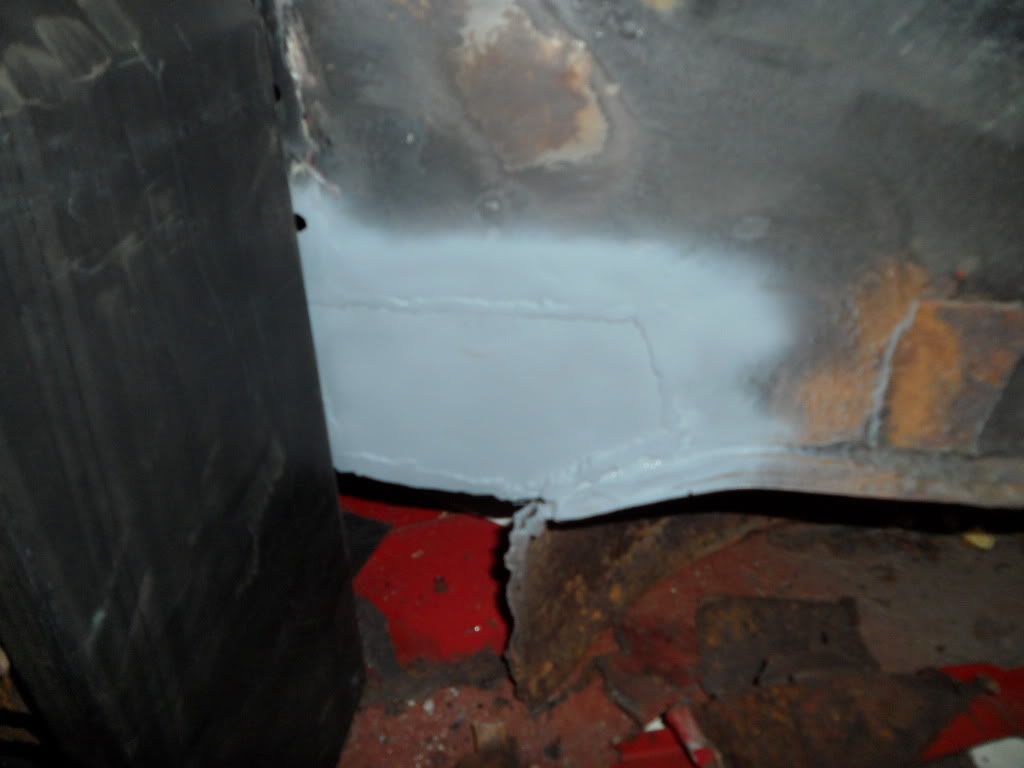
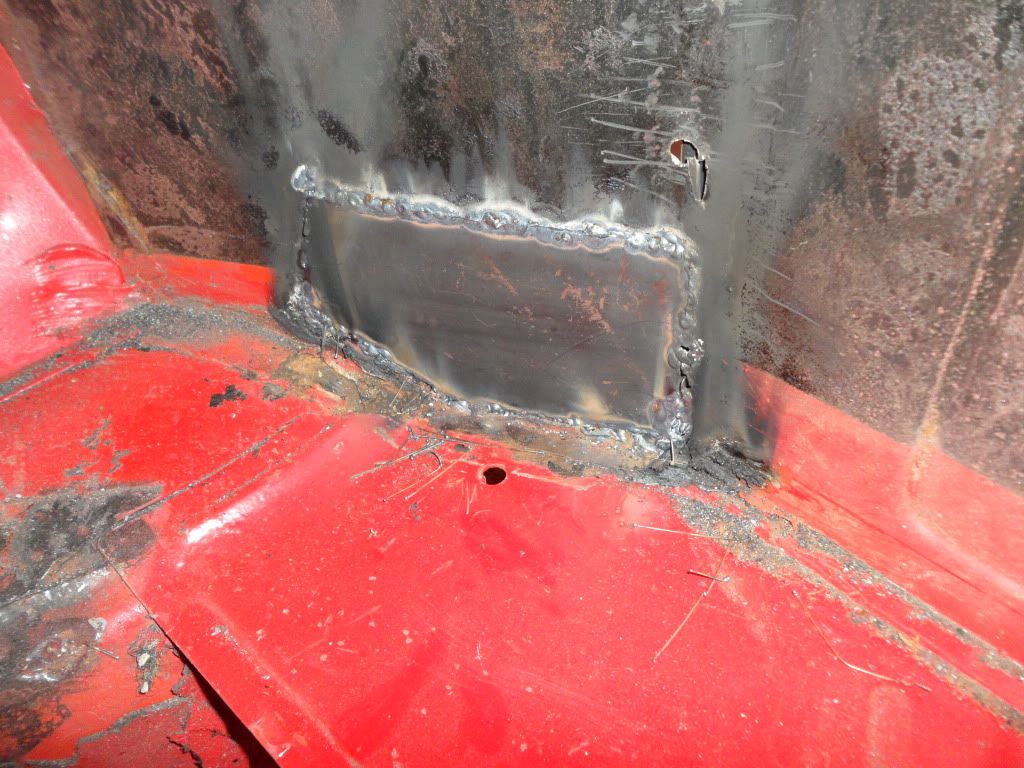
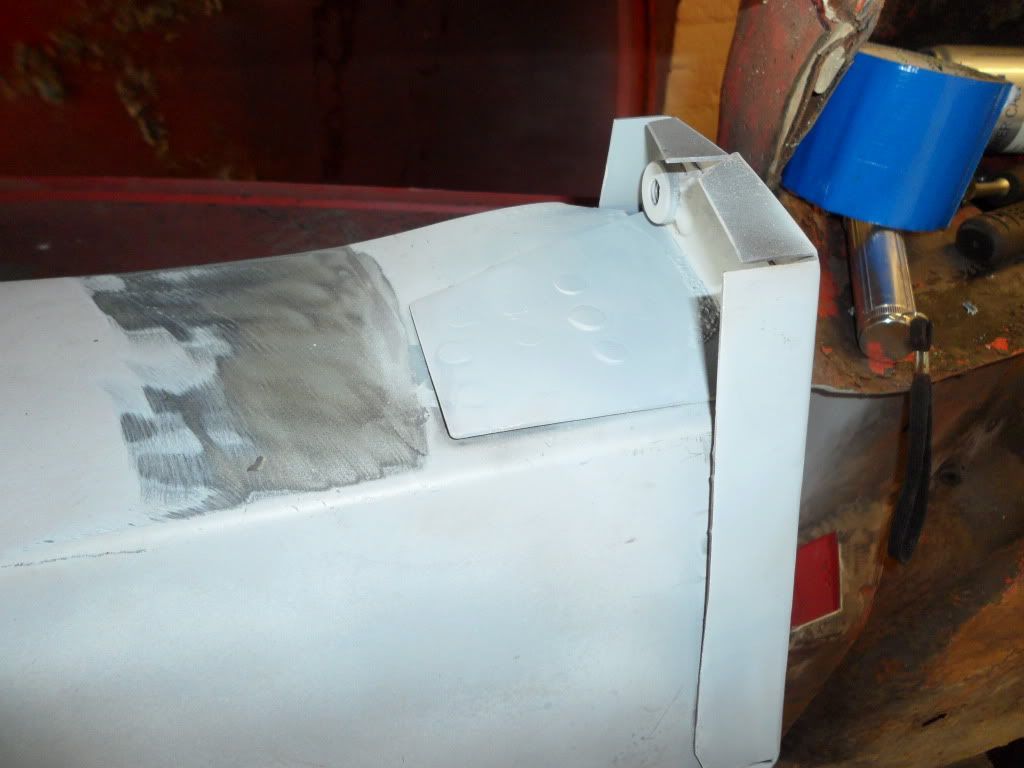
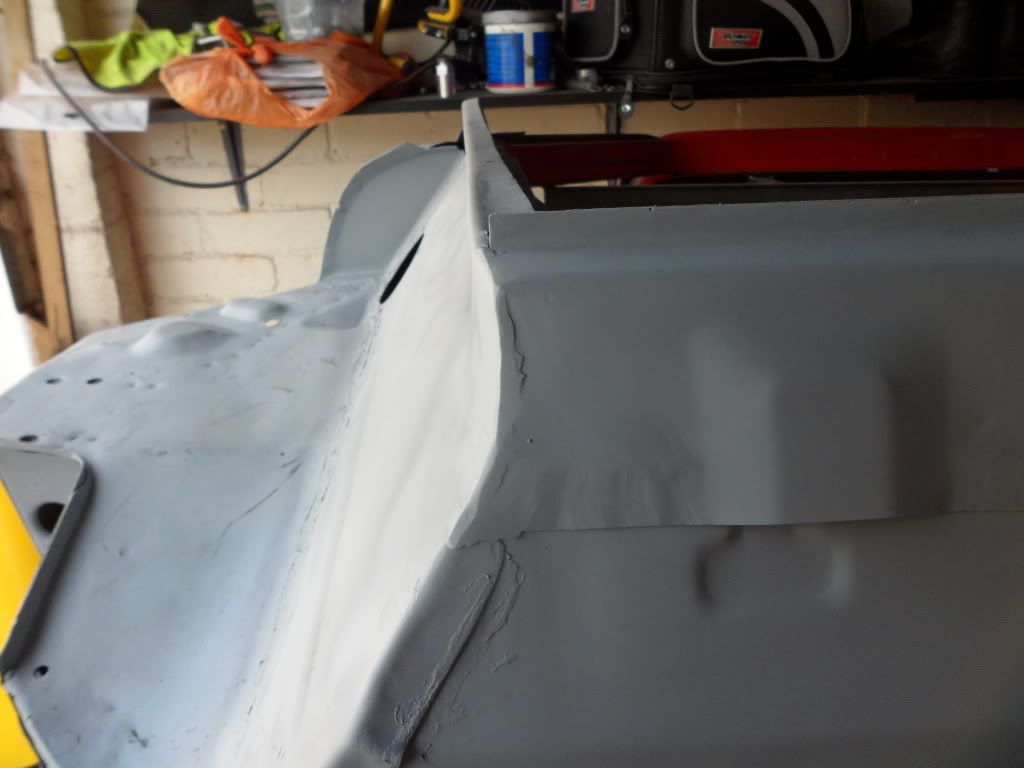
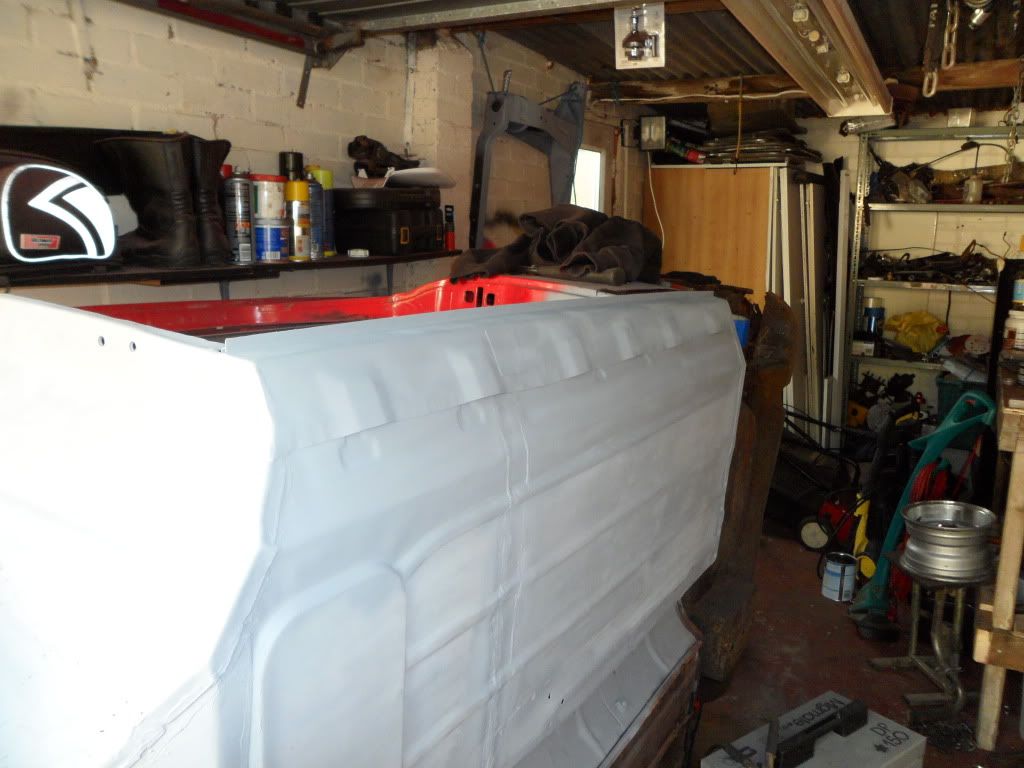
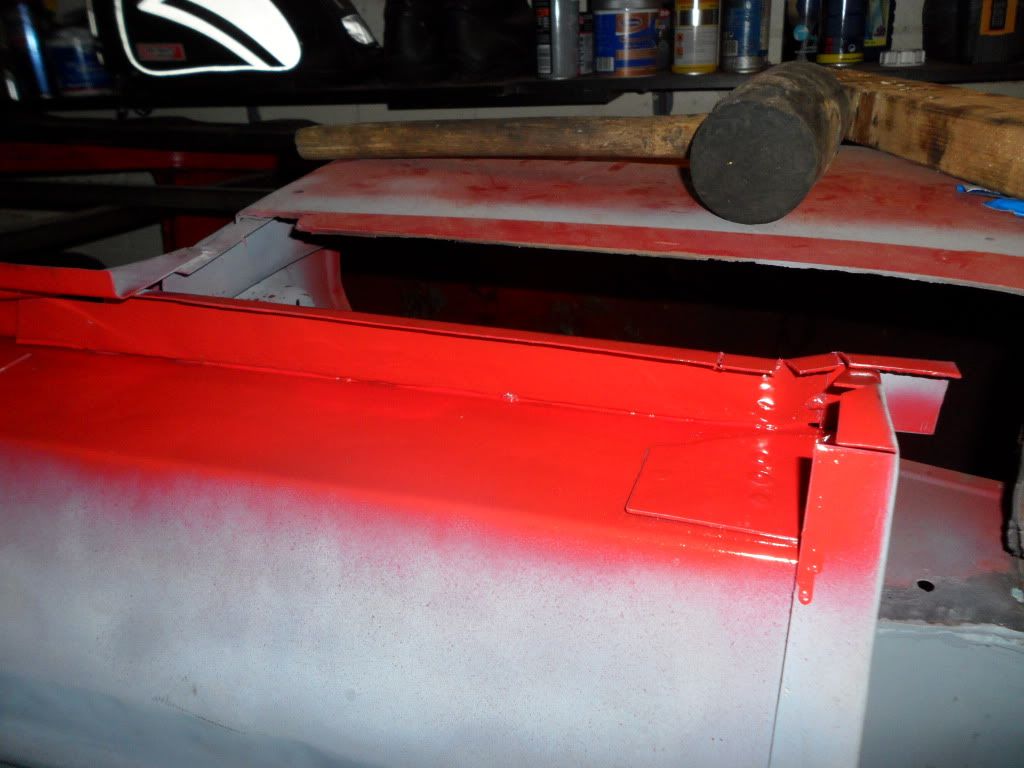
and with the depression of the whole doorstep saga i needed something else to take my mind off it for a while so i decided to deal up all of the welds i have done so far and it went ok but with everything mini was a lurning curve and as with everything on this car the otherside will be better i did not wet my finger when smothing it out so it is a little messy,

can seam sealer be sanded when it cures fully?

Posted Image

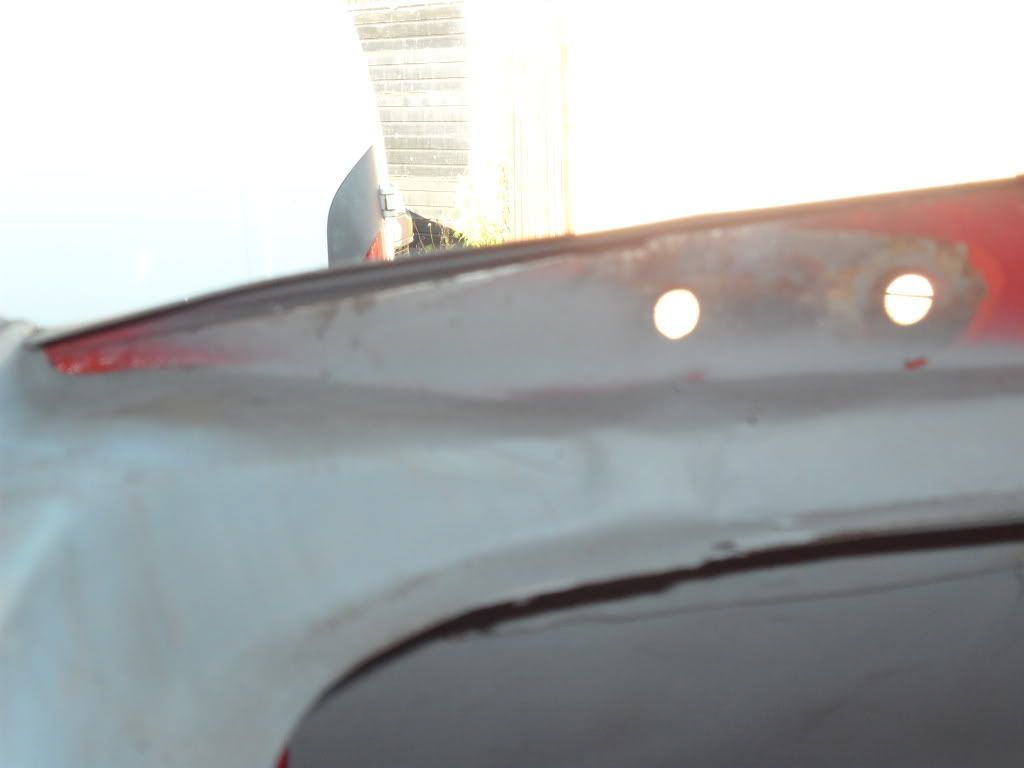
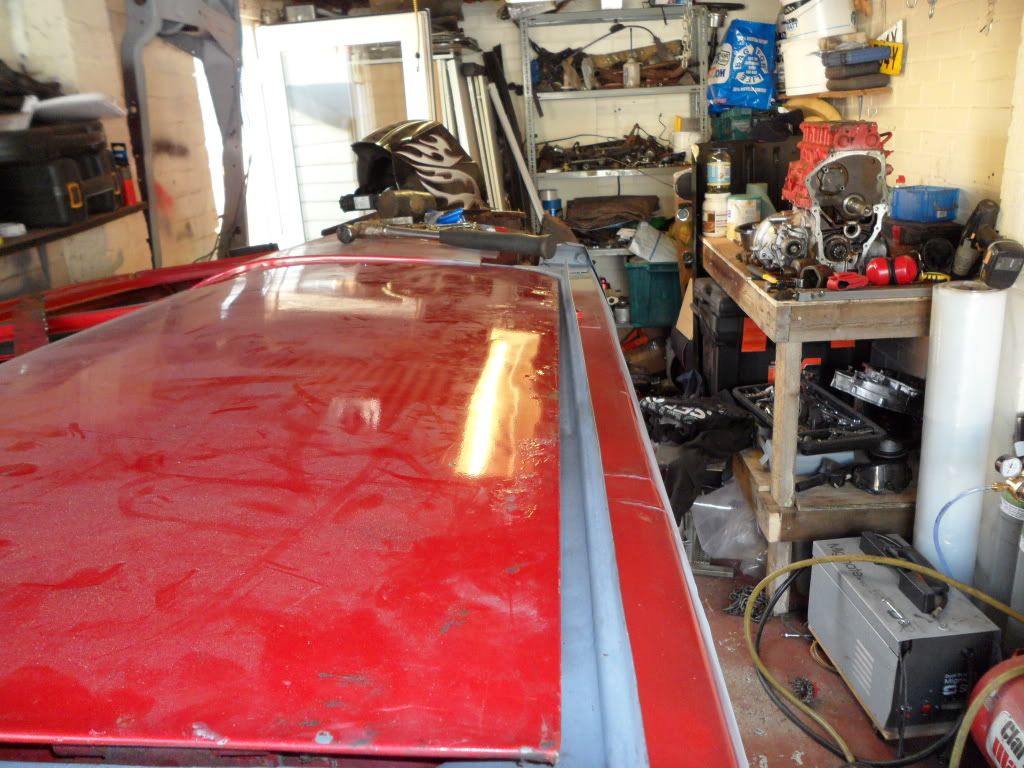
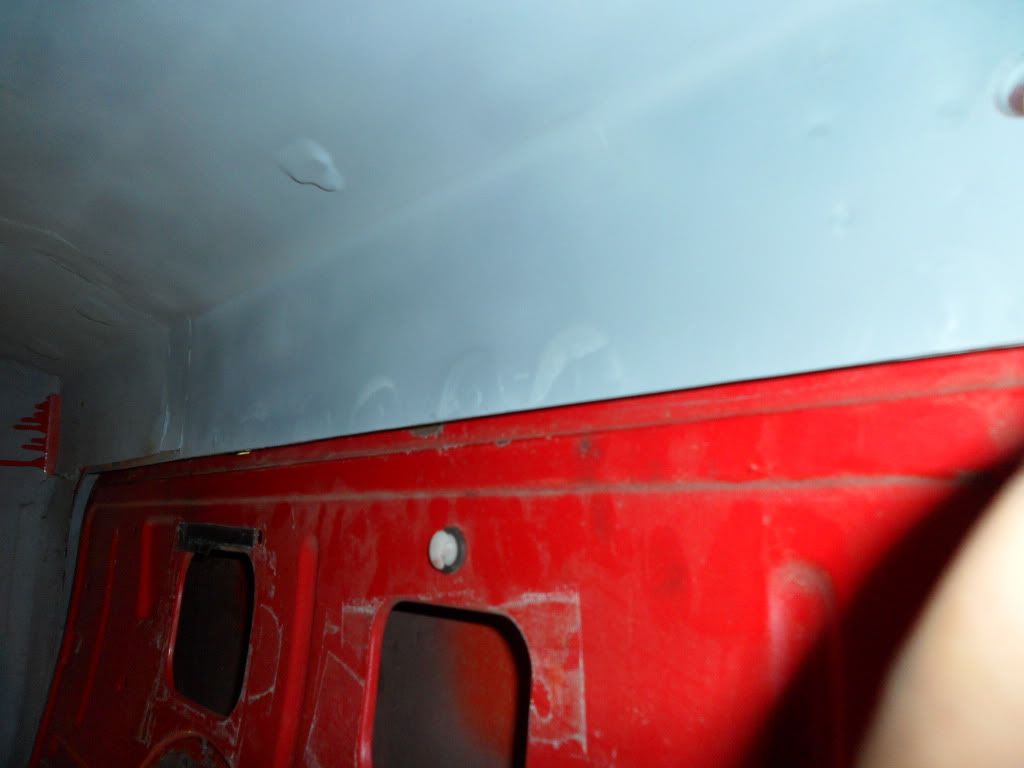
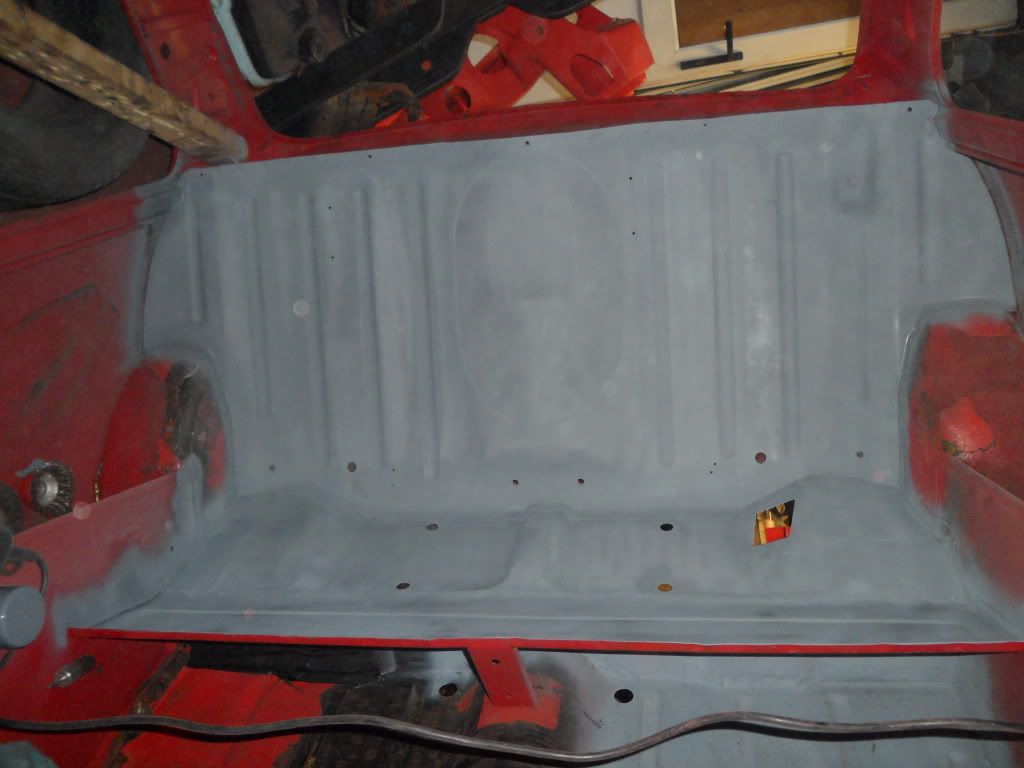
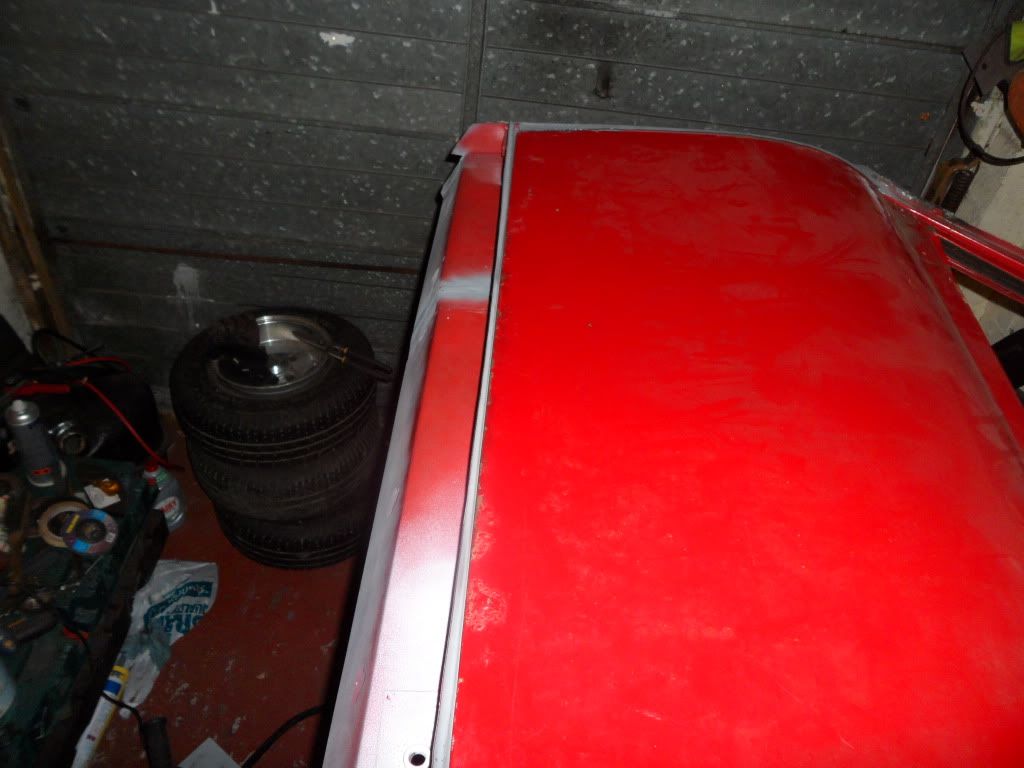
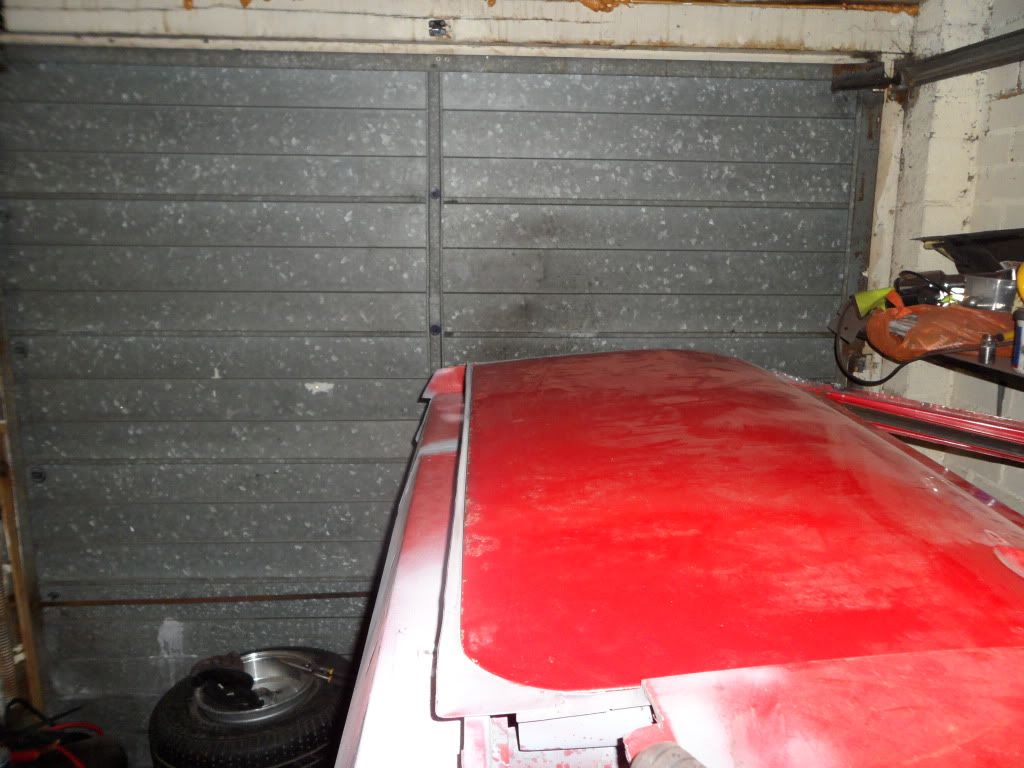
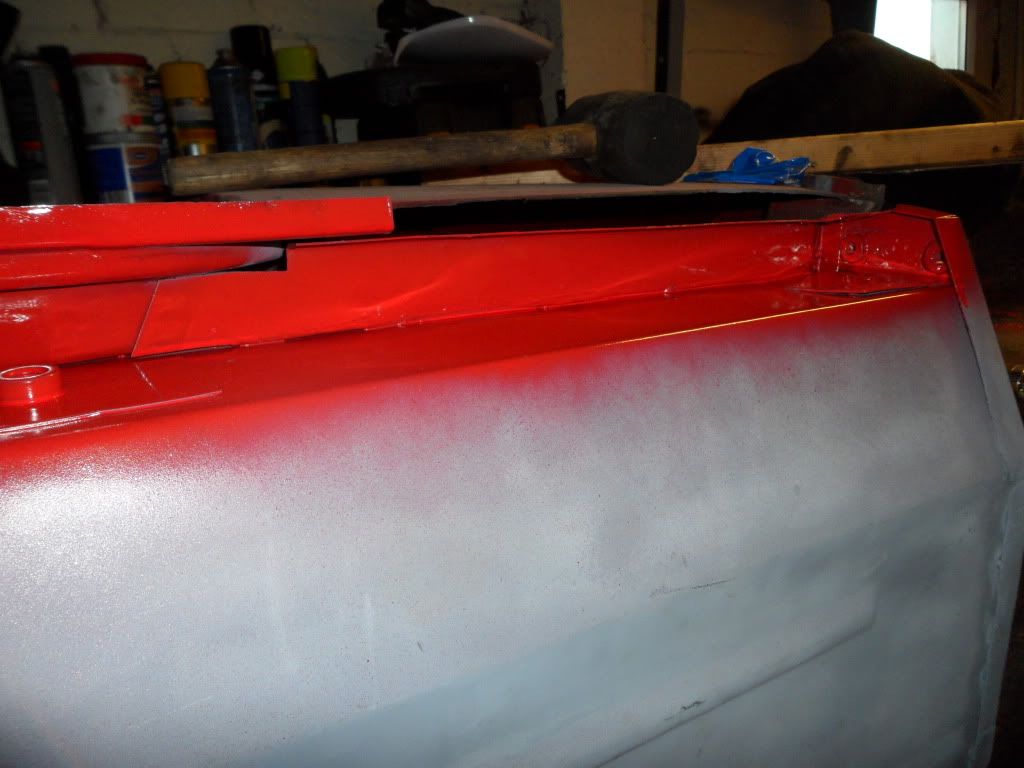
oh and also had another oopps as the car will be white when its done i wanted the inner sill cavity to be white so sploshed on some white over the hammerite red i had put on as a protection measure and it reacted almost instantly so will probably rub it back as best as i can and leave this side red but more lessons learned

Edited by Minidarren83, 06 August 2012 - 08:09 PM.


#28 Minidarren83

Minidarren83

    One Carb Or Two?

  • Members
  • PipPipPipPipPipPipPip
  • 1,207 posts
  • Location: Stanford Le hope

Posted 06 August 2012 - 08:14 PM

oh and just another small bit i poured the oil from my engine into my oil drum and this was in the bottom of the oil pan it was about a litre maybe 1.5cm thick on the bottom at some point my engine head gasket had failled and lots of water entered the oil ways which is not good not looking forward to what i find when i split the block and box

Posted Image

#29 Minidarren83

Minidarren83

    One Carb Or Two?

  • Members
  • PipPipPipPipPipPipPip
  • 1,207 posts
  • Location: Stanford Le hope

Posted 15 August 2012 - 07:17 PM

Update time!!!!!!

ive been a little bit lazy on this lately on the project had a bit of man flu over the weekend and still felt crapy about doorstep still but had to do something so i crawled into the shell and stripped the rear bulkhead and seatbase back to bare metal, plugged in the heel board in the seat base and ground the welds back down so thats all done and also went over the patches on the seat base then sploshed a load of primer on the lot

Posted Image

Posted Image

i even managed to get into all the little nooks and cranies to get the paint off

Posted Image

Posted Image

Posted Image

it makes such a nice surface when all the paint is off the primer looks so much smoother

Then i cheered the fcuk up and got on with sorting out the step fiasco. First i drilled loads of litlle holes in the panel and then split the gaps with with a chisel and also used one of my carbide burs for the more difficult to reach bits.
took some messurments and then took some more and cut the step panel lined the panel up and clamped it in place refitted the door and am pleased to say it looked ok. although now from pushing up the step the profile was off so i had to section the panel and hammer it back into the correct profile which was also a success so i welded it all in fitted the door AND!!!!

Posted Image

Posted Image

IT FITS!!!!! and breath. Thats all for now

#30 Minidarren83

Minidarren83

    One Carb Or Two?

  • Members
  • PipPipPipPipPipPipPip
  • 1,207 posts
  • Location: Stanford Le hope

Posted 23 August 2012 - 11:32 AM

update time!!

wow its amazing how quickly the threads fall off the top spot had to search down to page 4 to find my thread. Anyway finaly after getting my door sorted and fitting to an acceptable standard i decided it was time to put the outer sill on its a big step as it means this side of the floor is now done from the front all the way to the boot and i can now start on the rear quarter arches and boot floor then flip it over and do exactly the same.

it took me all day just to cut down the oversill and fit it. it was a scary moment as with 80 odd plug welds i am not un-doing it anytime soon, the sill was cleaned back to bare metal insde and out and scrubbed with 80 grit then primed and painted. i decided to cut off the little tabs at the front ans seam weld it for a cleaner look also on the back as the oversills are only repair panels and not proper sills they are not designed to fit inside the nice gap id left in the heel board as it pulls the line of the sill out of line if that makes sence, so it was plugged and seam welded to the outside and smothed of so it still looks decent. i got all the welds ground down and and the sill primered but only took pics of the finished item as i forgot along the way but here it is

Posted Image

Posted Image

Posted Image

Posted Image

those of you with a keen eye will notice that my cutting of the sill is not the best infact it is pretty bad wider at the front than the rear but it is on and when on the floor you will not notice at all


Should have some more by the end of the week comments alway welcome and encouraged
cheers darren


0 user(s) are reading this topic

0 members, 0 guests, 0 anonymous users