Jump to content


Photo
- - - - -

Ogy The Autocar!


  • Please log in to reply
193 replies to this topic

#1 Skortchio

Skortchio

    Camshaft & Stage Two Head

  • Members
  • PipPipPipPipPipPipPipPip
  • 1,596 posts
  • Location: Basildon
  • Local Club: EMC

Posted 09 August 2012 - 05:44 PM

The story starts much like any other I suppose;
Boy meets car, boy loves car, boy buys car. Evil witch casts spell on car making all the electrics fail and the body go a funny flakey brown colour...

Boy cries. But from the curse comes a better thing, he learns the beauty hidden within, sees past the apparent and starts to believe in what will be, on day. Boy has a dream.

This is the (ongoing) story of a boy and his dream of something beautiful, despite it being made of faulty electrics and the cheapest steel known to man...

Told you it was like all the rest ;)

Now that's out of the way, on with the show!
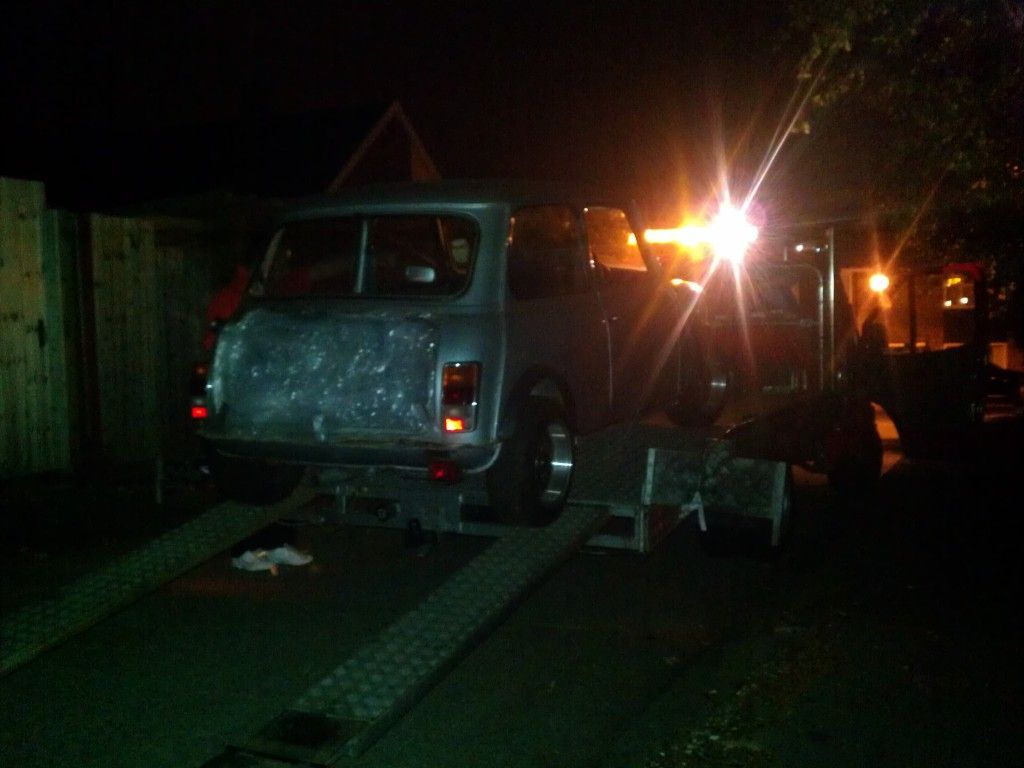
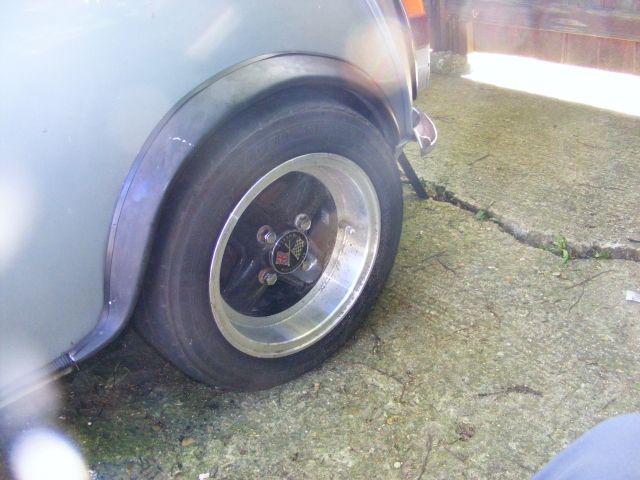
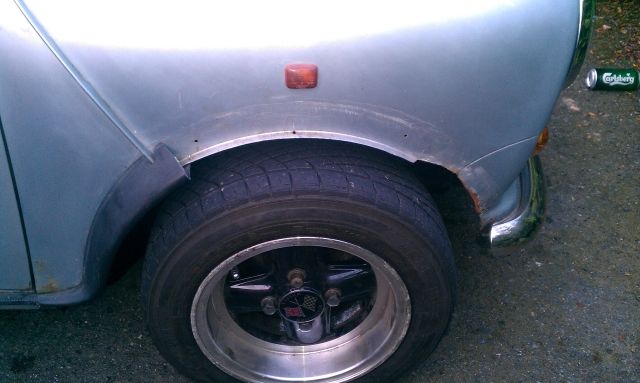
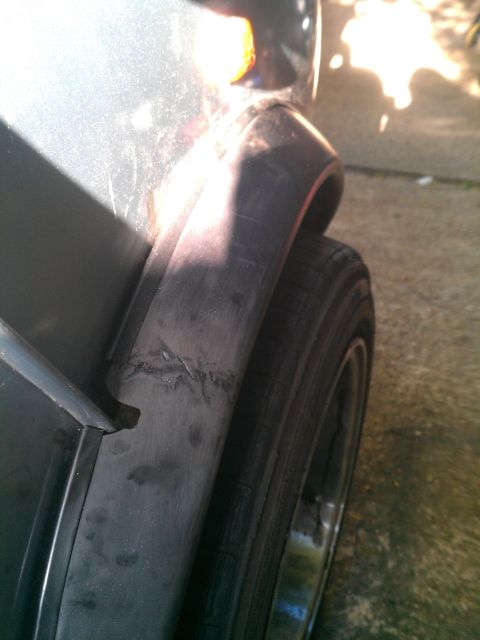
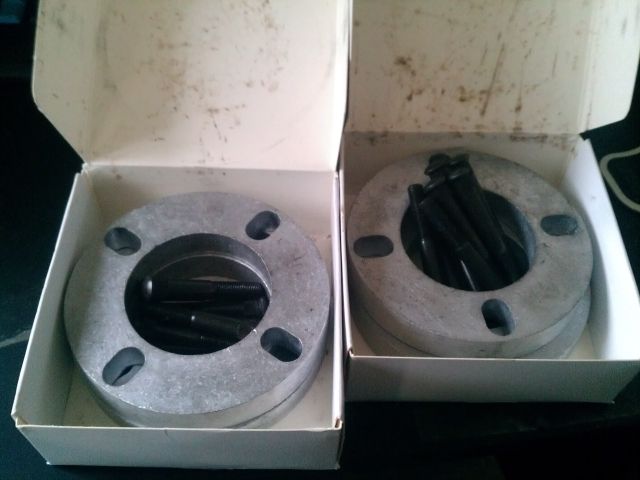
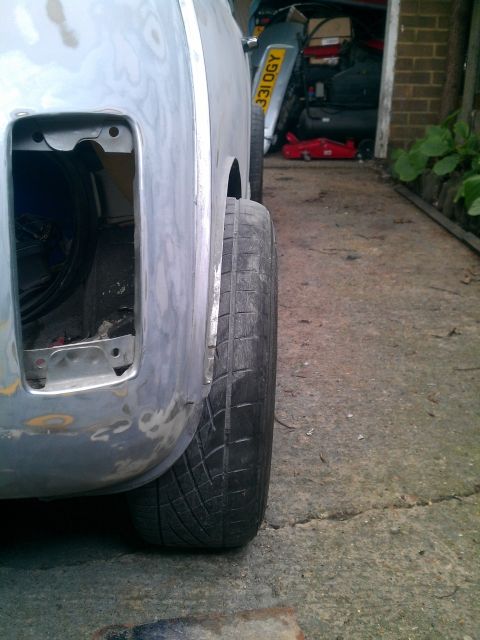
Ogy arrived home from Sittingborne in fine fettle. Having been sat for upwards of 4.5 years he made the 60mile trip pretty comfortably, until my dad kerbed the gorgeous Revolution wheels entering the last turn before my garage... Ho hum.


Still, it's those little quirks make you love a car (and disown your family), right?
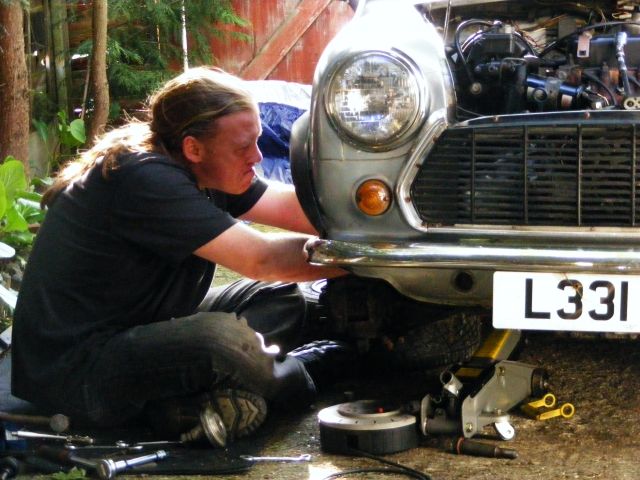
Next day it was time to start inspection and see what I actually had paid for.
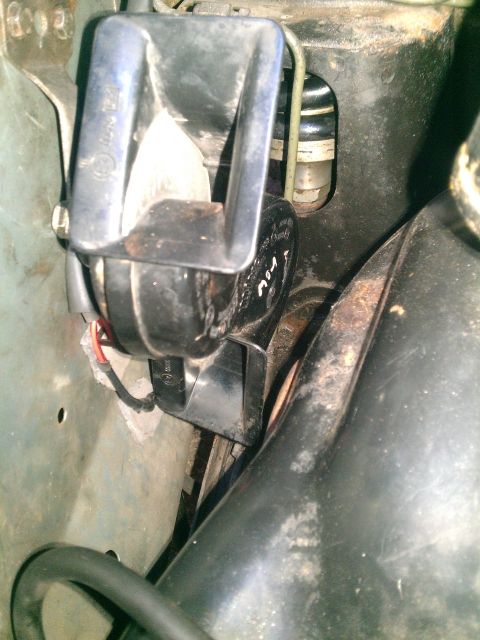
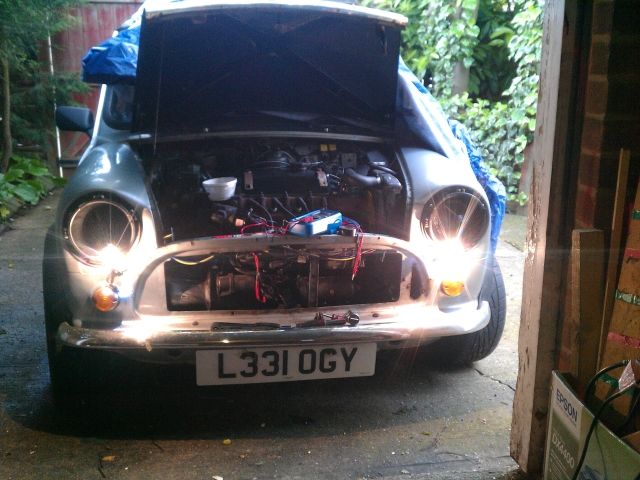
Well, for starters non of the electrics worked anymore... Odd, but simple enough I guess.
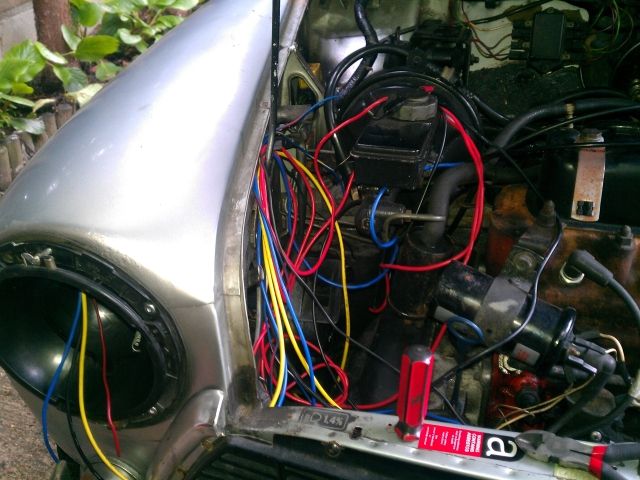
Electrics working courtesy of a large can of contact cleaner it was onto the important bits!

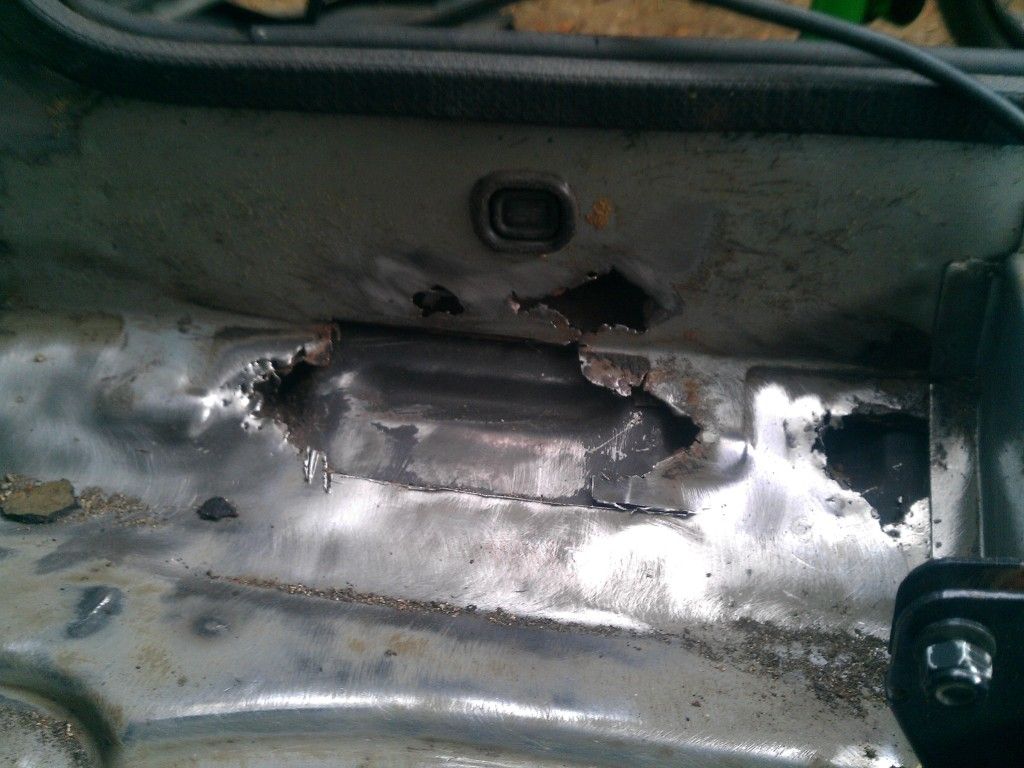
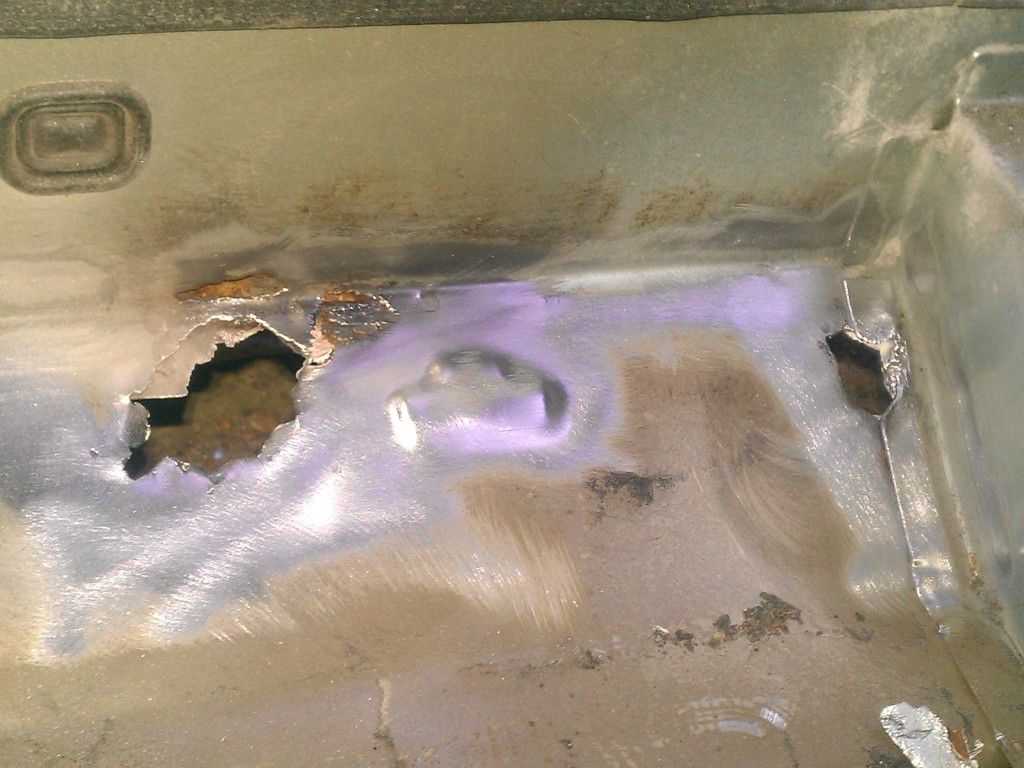
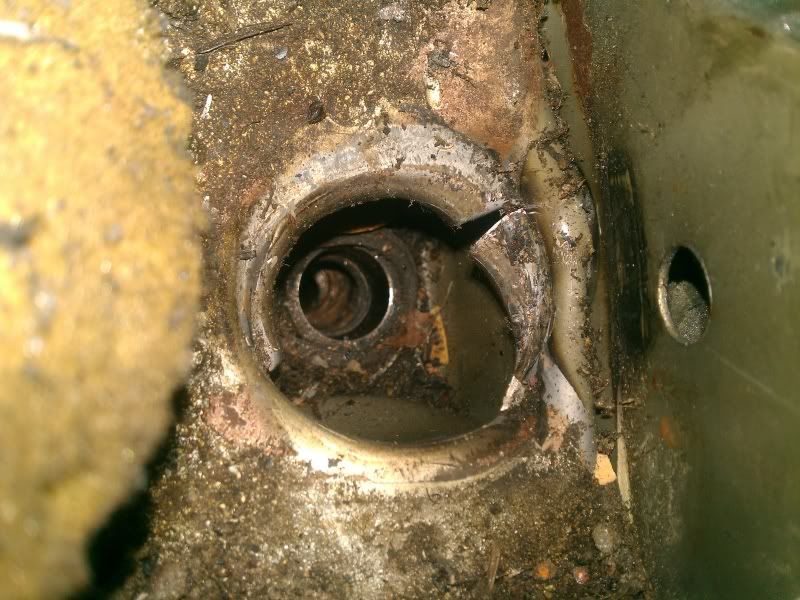
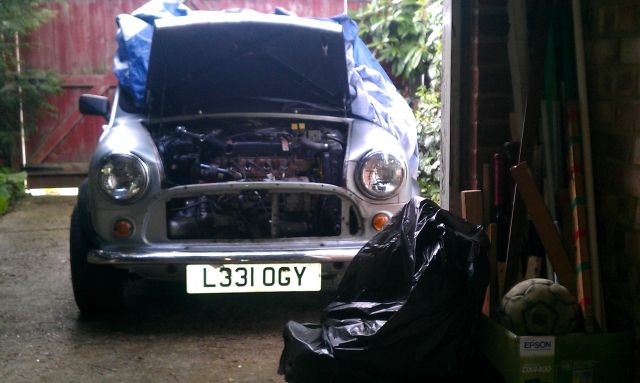
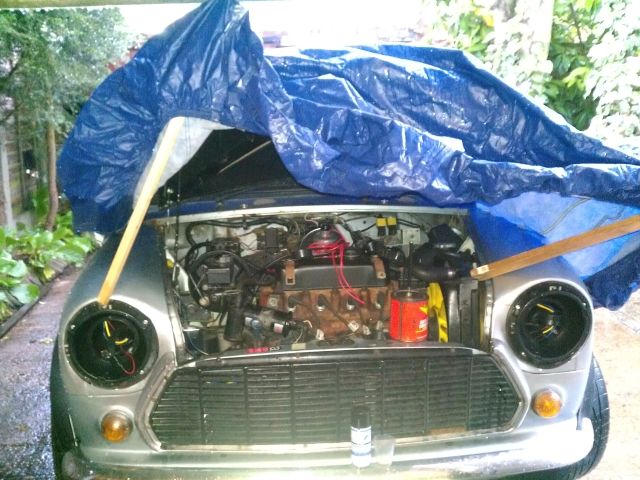
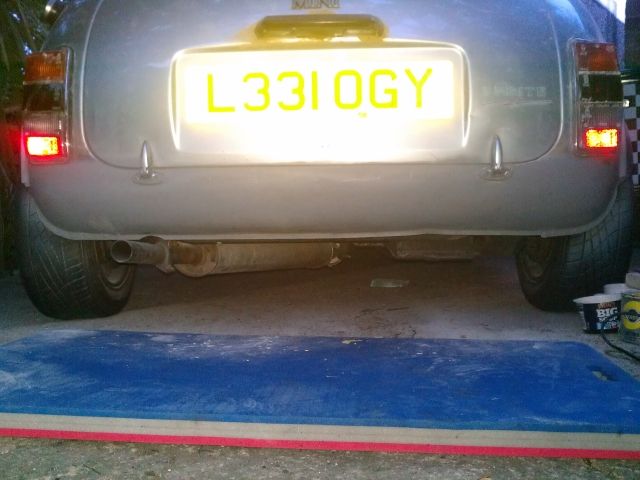
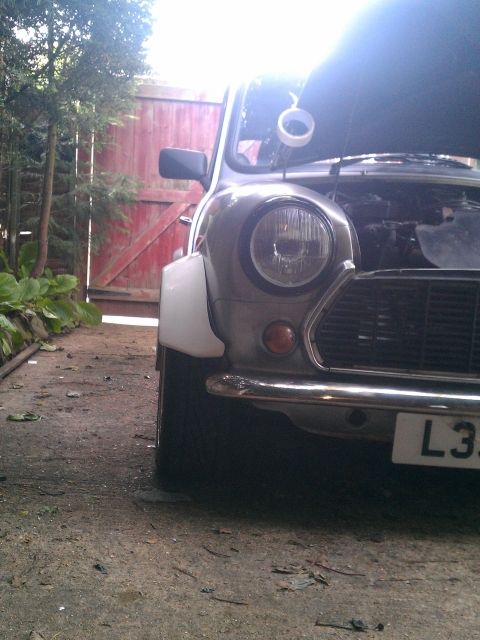
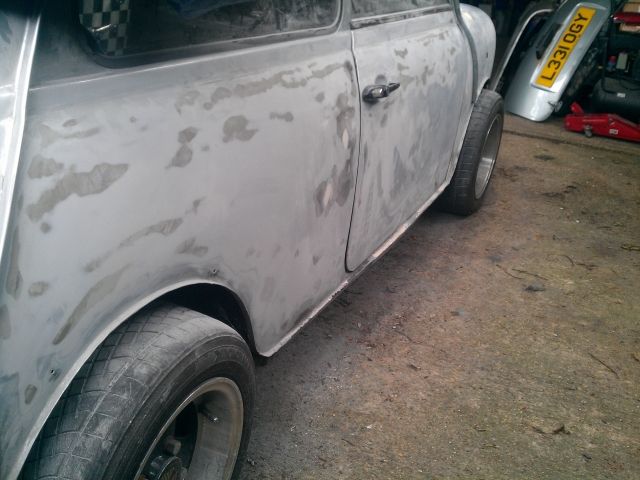
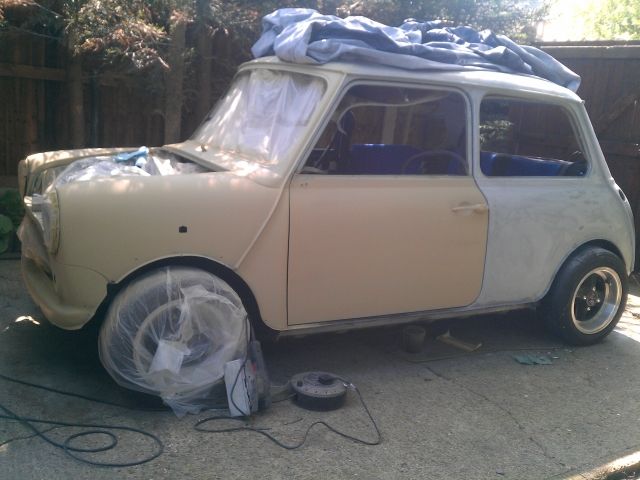
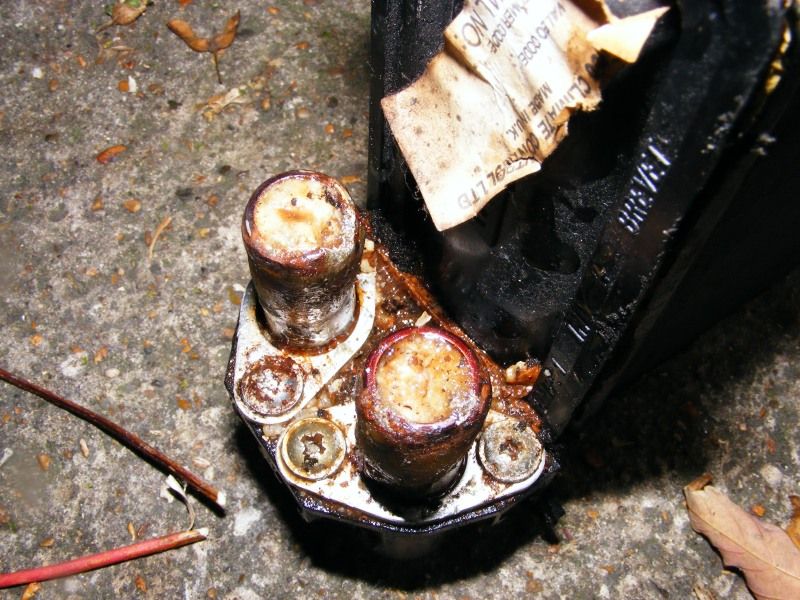
But first, here's where it started:
Posted Image
Posted Image
Posted Image

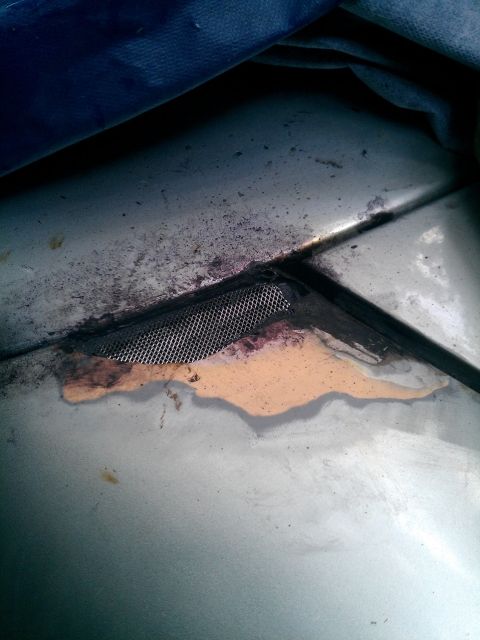
So first thing was of course a good service and to find out why the heater, well, wasn't. The pipes got hot under the bonnet but nothing but cool (and slightly musty) air came out inside the car.
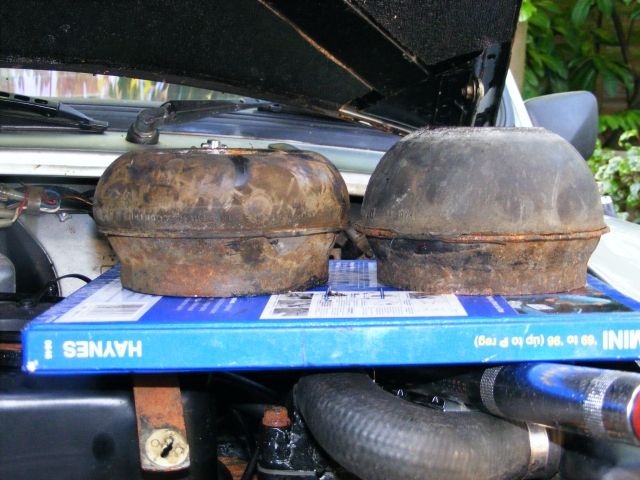
But as luck would have it, a clue presented itself when we drained the radiator.
Posted Image
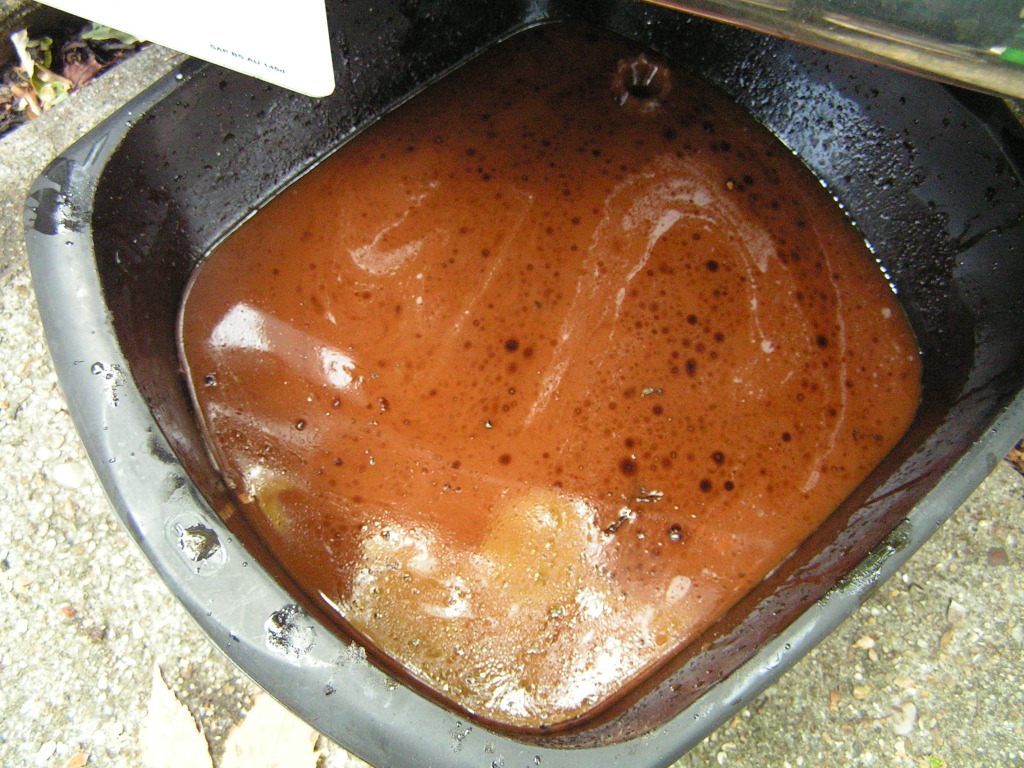
Note. Radiator, NOT sump.

This might have had something to do with it too...
Posted Image

With fresh liquids and filters Ogy was sounding like a champ (welterweight) and had a pleasently rattle free engine.
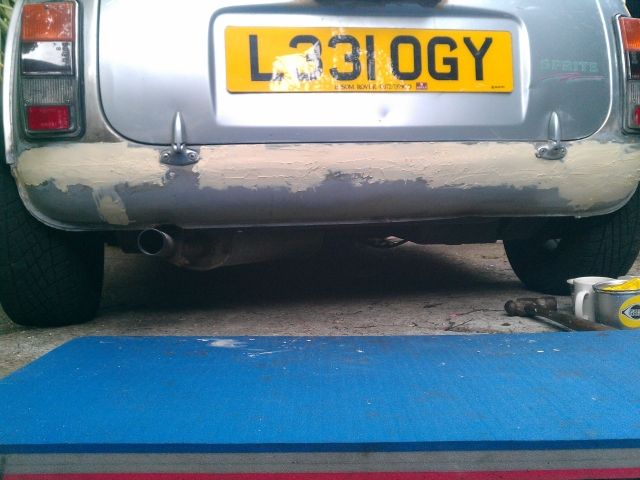
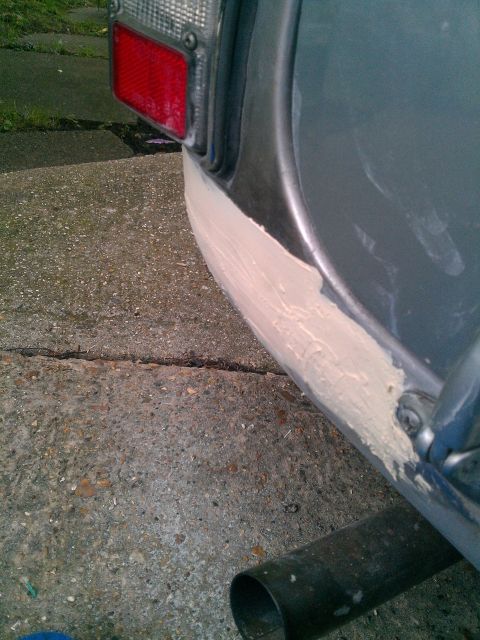
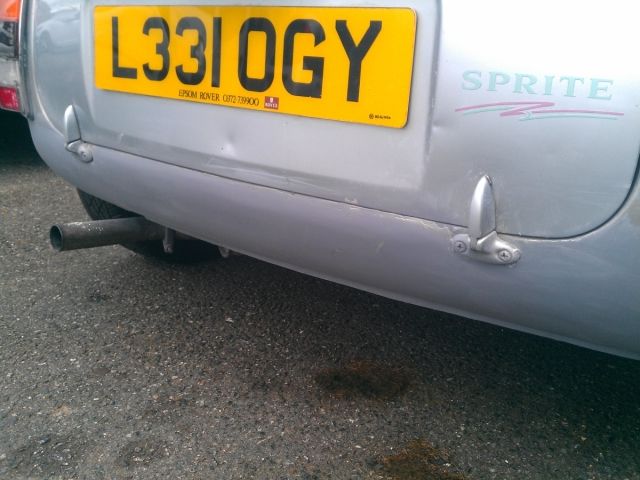
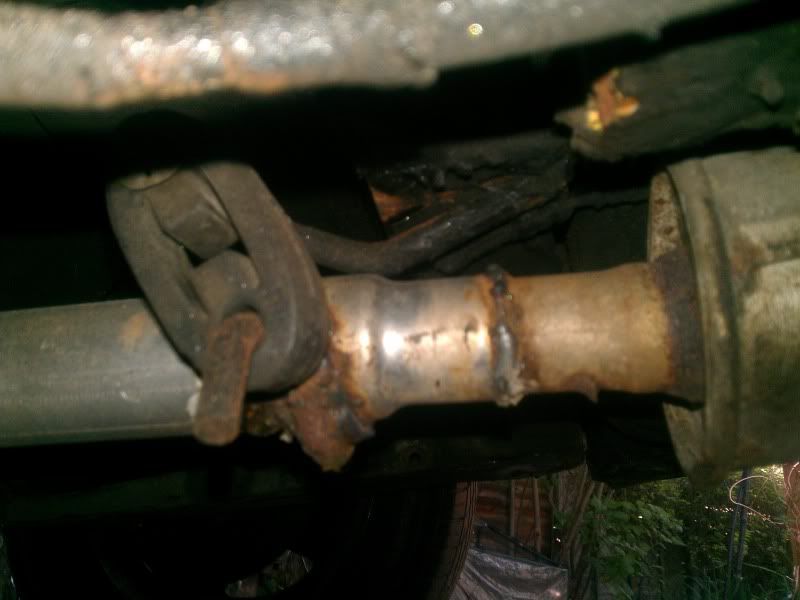
Actually a bit too quiet, the exhaust was horrible and on closer inspection... A scaffold pole!
Posted Image
Posted Image

Well that wouldn't do! As it happens, a friend from a biking website was on the team with Mike Cable back in the early 90's and had a ton of spares left (as you do) so he brought me some including 2 exhaust systems. Being a subtle sort, I tried the big bore first and while it sounded the business, I suspect it wasn't exactly boosting performance (not that anyone dared find out after hearing it).


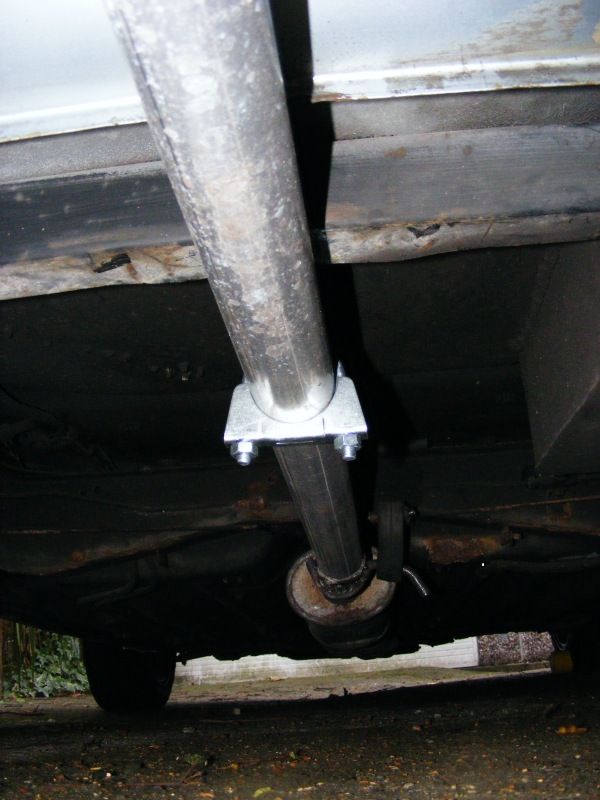
So that came off and on went an RC40, much better!
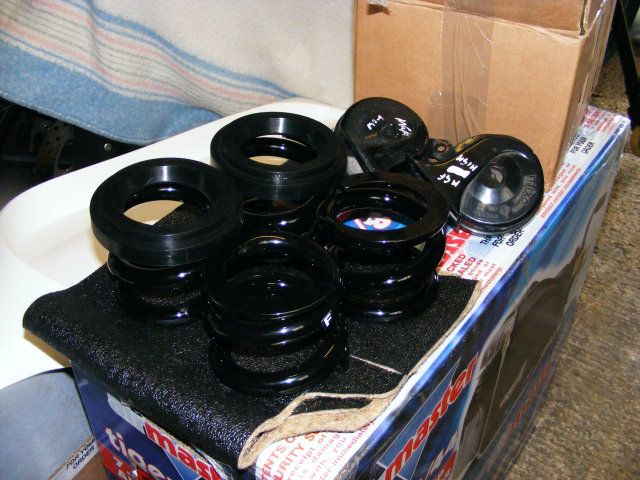
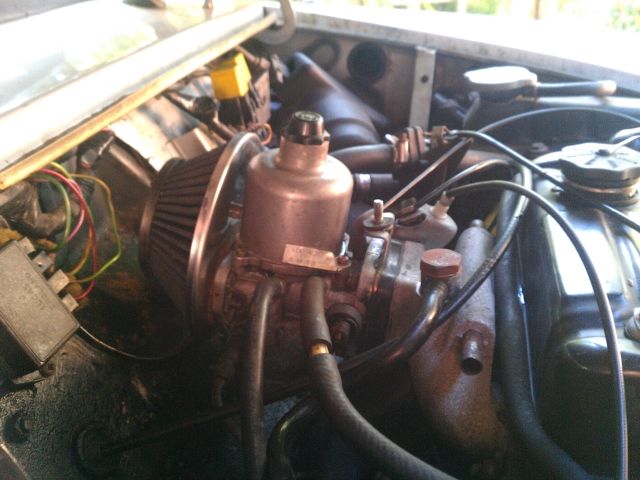
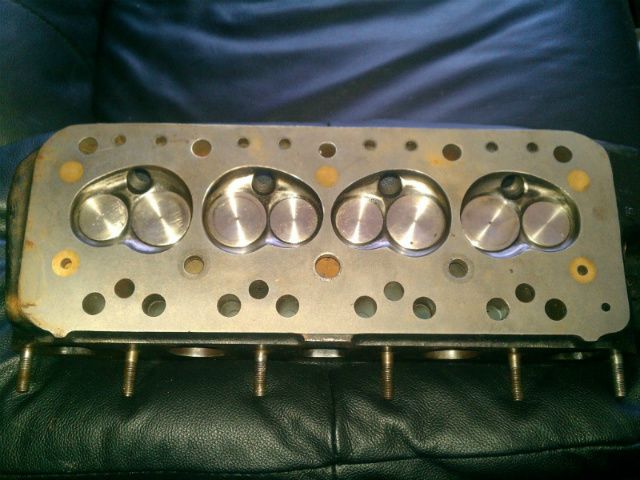
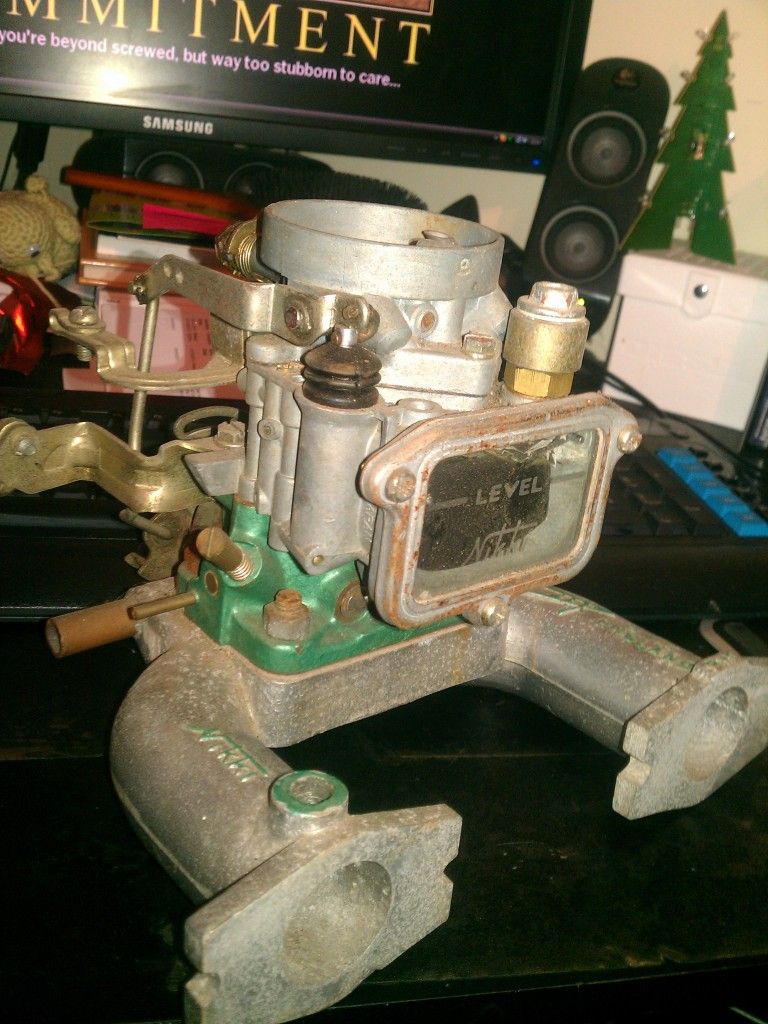
Along with the exhausts were some arches, various bits and bobs but also a cylinder head and a fish carb!
The head is way too much for my little car so I'll pass it onto someone at some point who can make use of the massive valves in it.
Posted Image
Posted Image
Where was I...
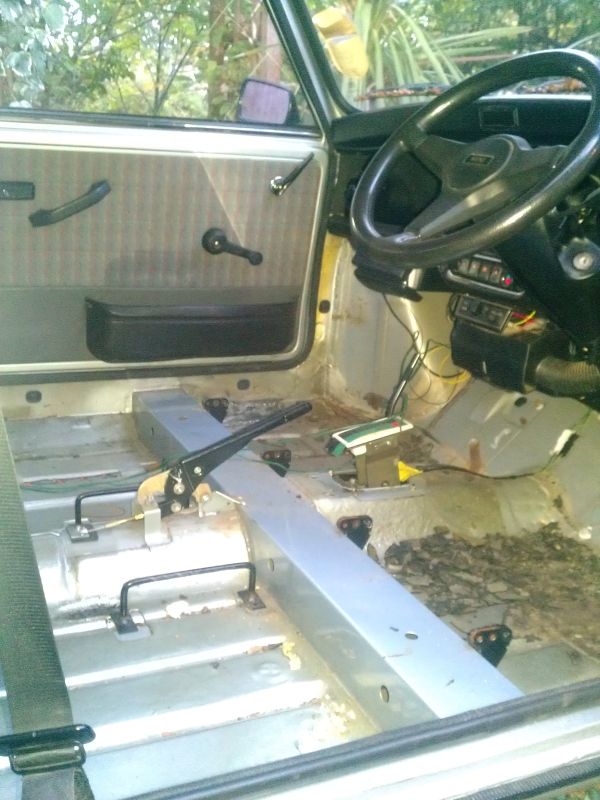
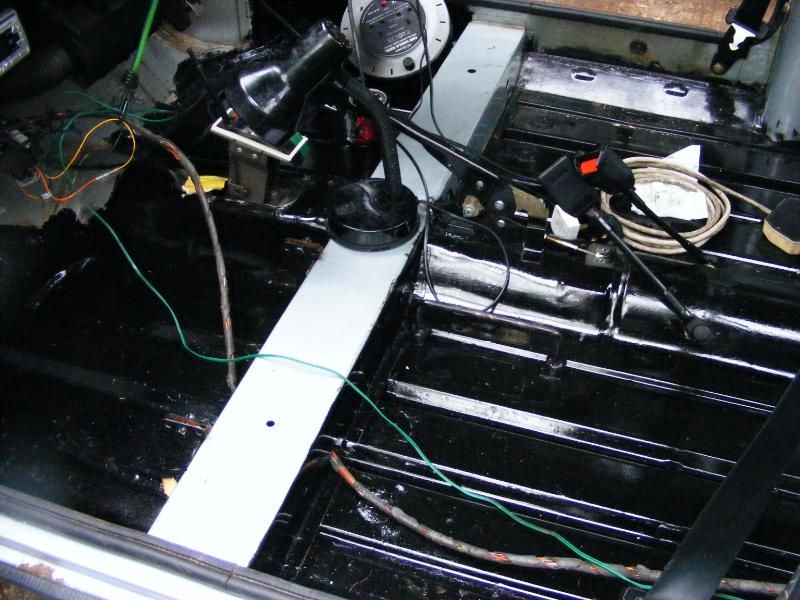
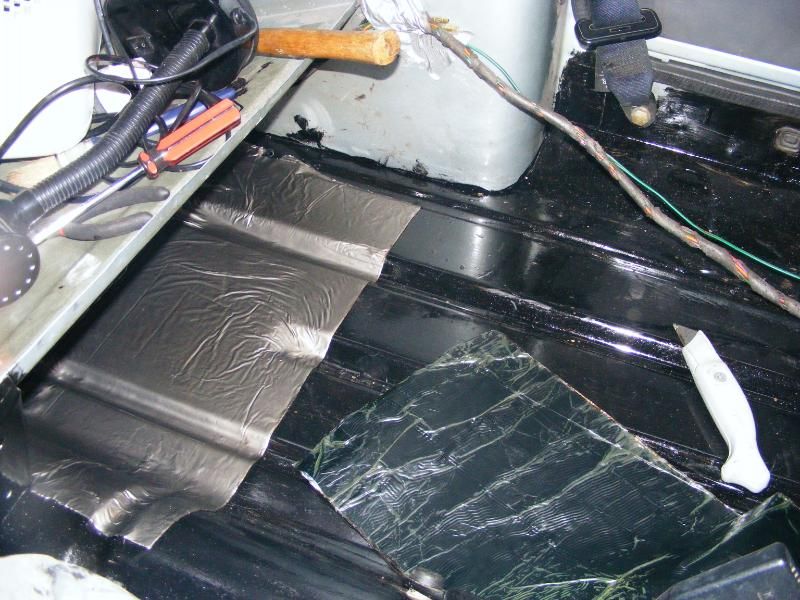
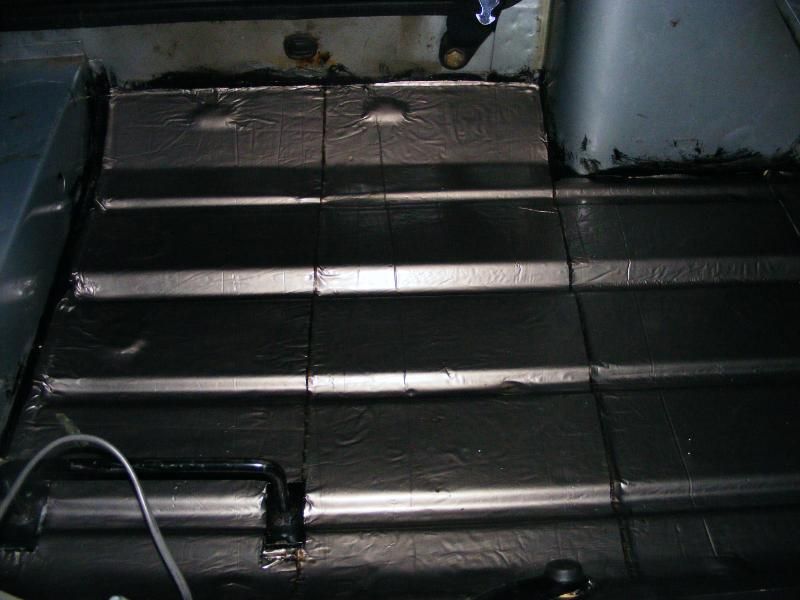
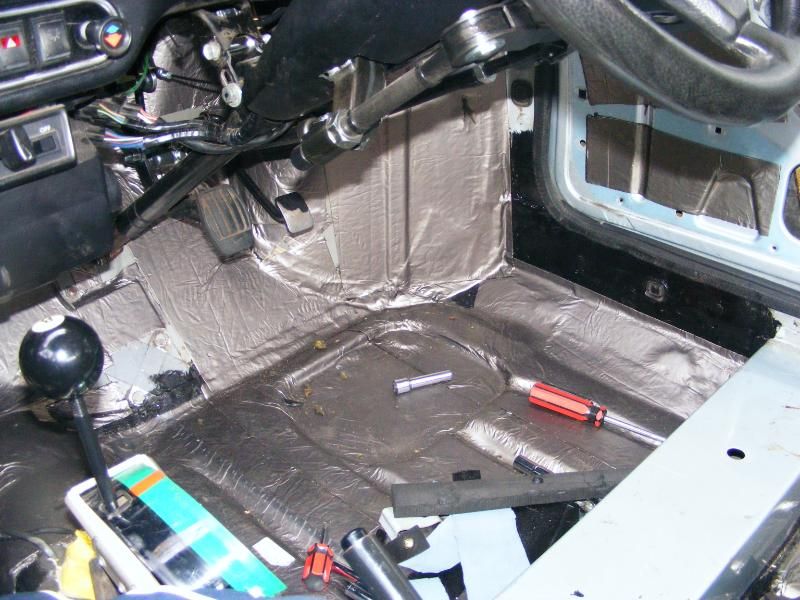
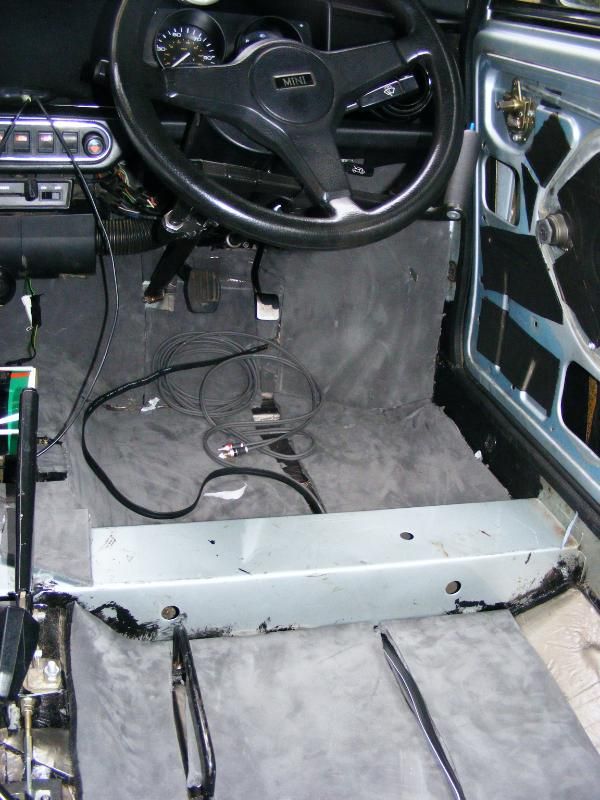
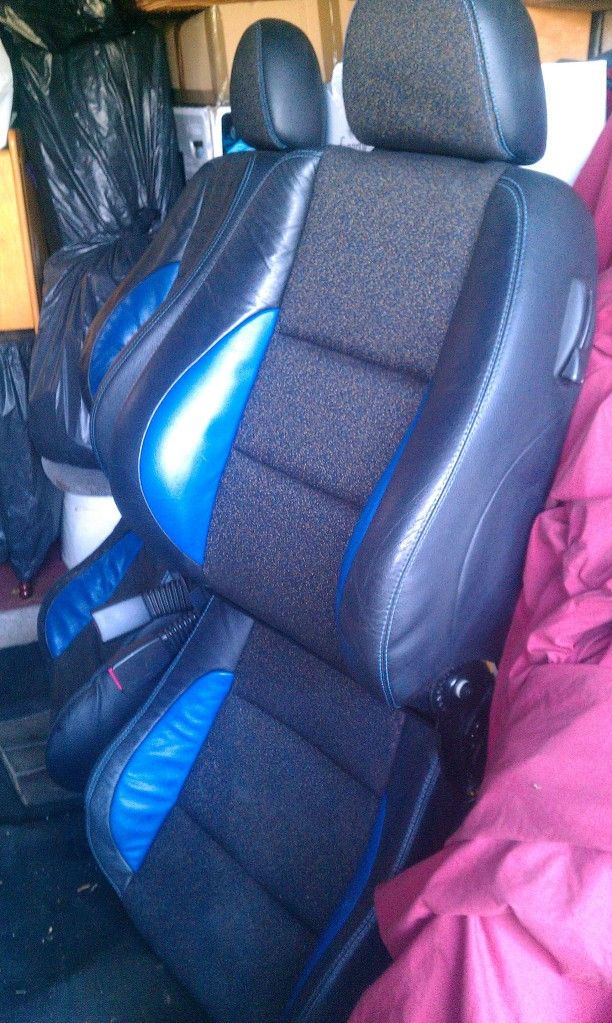
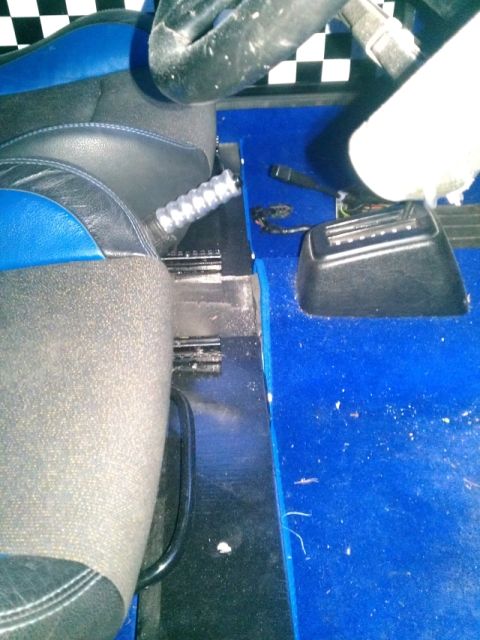
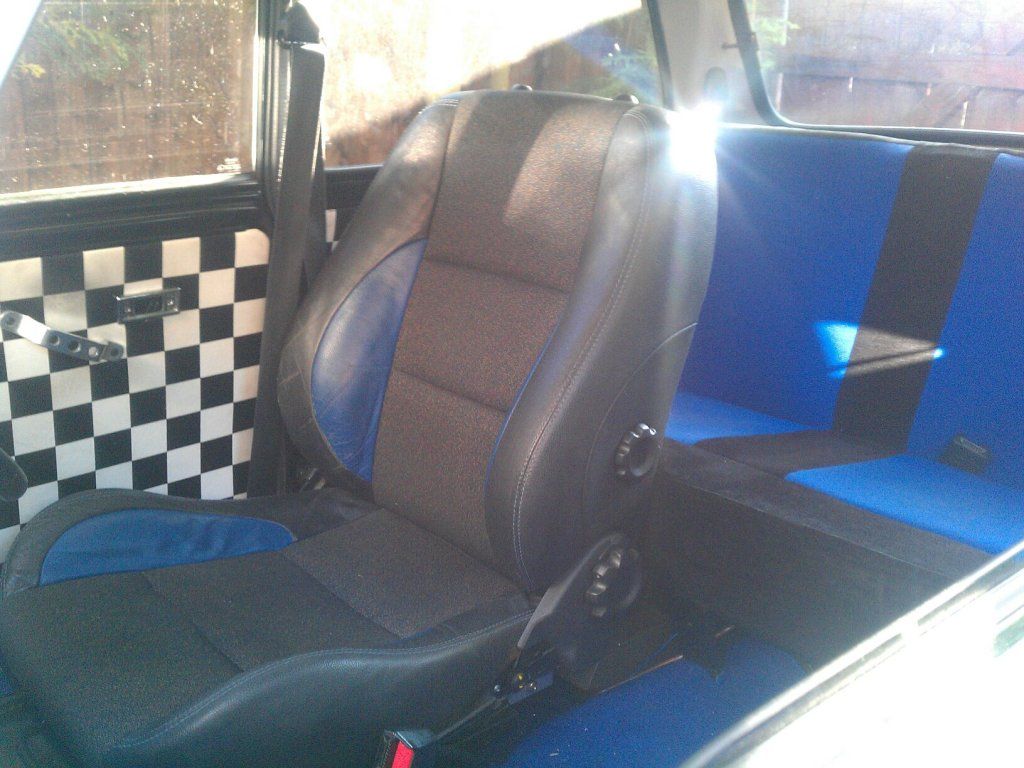
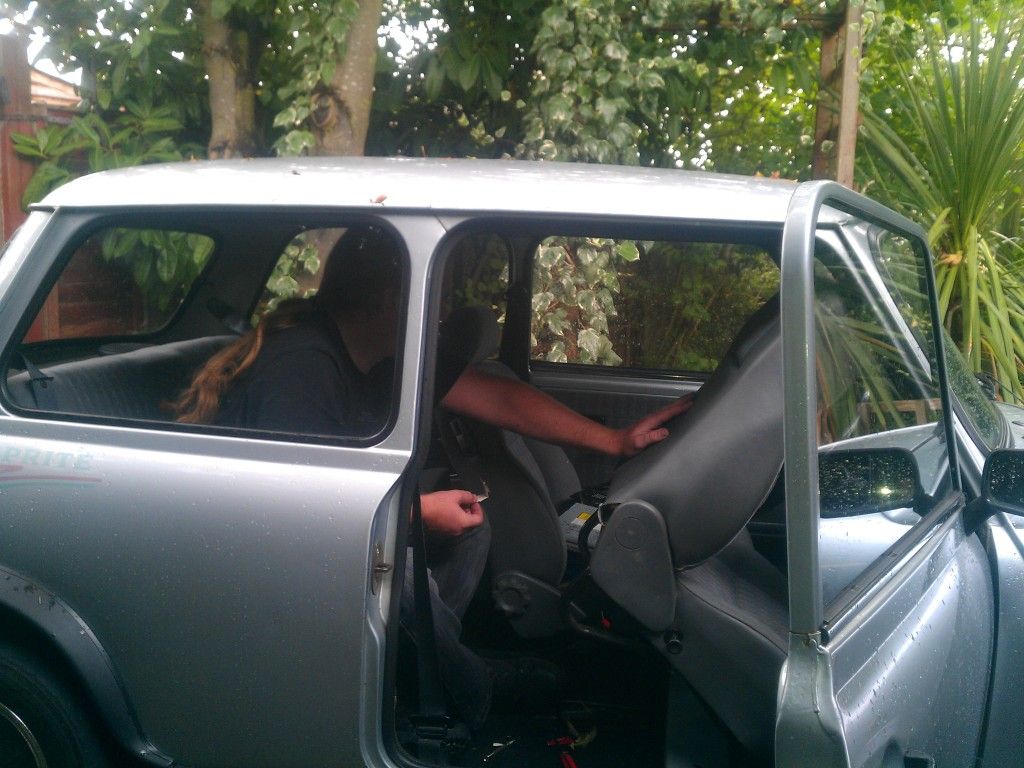
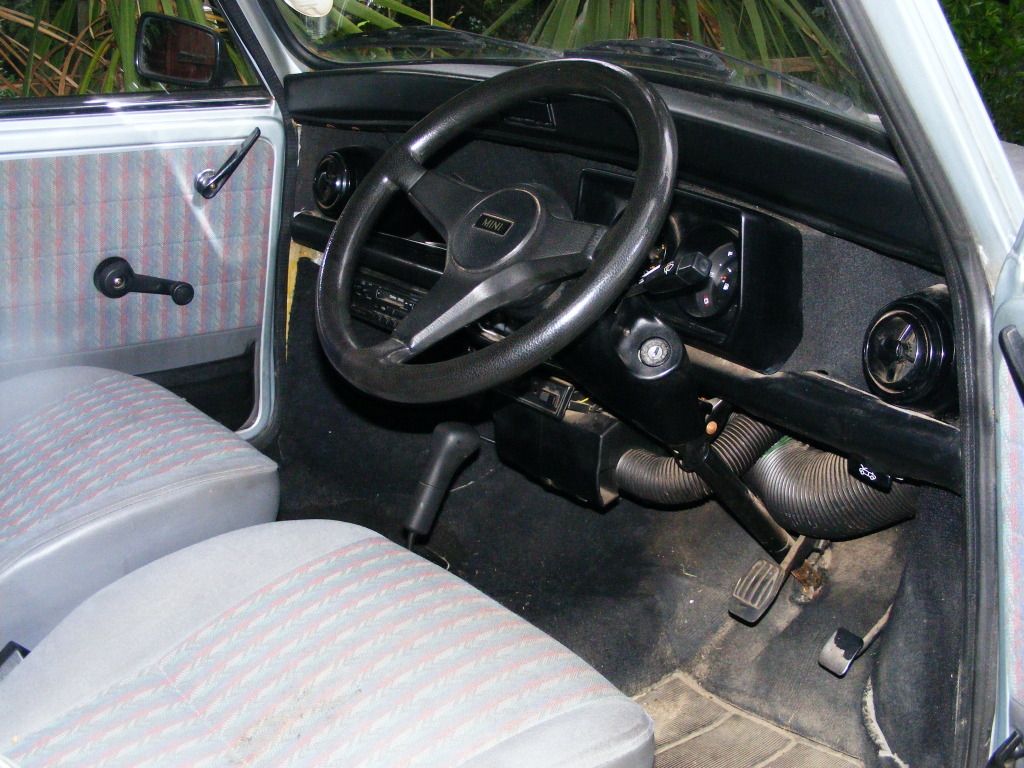
Oh yeah, so basic maintainance done it was time to look inside and try to spruce the old boy up a bit.

#2 Skortchio

Skortchio

    Camshaft & Stage Two Head

  • Members
  • PipPipPipPipPipPipPipPip
  • 1,596 posts
  • Location: Basildon
  • Local Club: EMC

Posted 09 August 2012 - 05:46 PM

Starting with the modest furnishings of your average Mini, ie. It looked like a very small bus. The obvious approach was clear...

Remove EVERYTHING!

The plan was simple. Comfortable, quiet, cool or warm at the drivers option and an enjoyable ride with a few creature comforts but still intrinsicly 'Mini'.

So it begins:
Posted Image

Posted Image

Posted Image

Then there was one of those moments that all Mini owners no doubt remember with crystal clarity, that one seemingly (at the time) foolish, foolish second where you see something a bit brown-ish in colour on bodywork / floorpan and decide to poke it...

Yeah, then you poke the rest and realise you were driving swiss cheese!
Posted Image

Posted Image

Posted Image

There was more, but you get the idea. It wasn't good. Of course I know now I got off lightly, but at the time it was a tragedy!

So having my plans for inside scuppered, could hardly put a carpet down now. I went outside and began to ponder why the driver side wheel was sitting on the arch, none of the others where... How odd. A call to a friend experienced in these matters suggested something was worn out and the knuckle joint were the cheapest place to start.

With compression tool in hand (well, engine bay) and suitable amount of upper body strength I began to tighten, all the while my chum (Terry) waggling the trumpet so I knew when I'd compressed enough.
On and on I tightened and it actually got a bit hard after about 8" of thread. So much I stopped for a breather and noticed something was up.

Posted Image

It was like that a minute ago, I quickly undone the tool and inspected what could be wrong. It didn't take a genius to figure it out

Posted Image

Apparently, might isn't right and BL's original design didn't include contingency for my enthusiasm.
At this moment I was a lot like this : :woohoo: :sick: :blink: :sick: :woohoo: :dry:

That was where Jamie and Scott, came in. They came over, drank my coffee, kicked my tyres... Okay, so in fact they were really reassuring and helpful. Told me it was a cracking example (never did tell me of what...) and that it would be no hassle to fix such little problems as a few holes and a slightly wonky crossmember.

So off went Ogy with them to be made well again, while I researched appropraite levels of torque to apply to metals.

Posted Image

A short while later, Ogy was back with metal where vents were and a flat piece of very thck metal in the crossmember!
Now it was staying dry inside it was back on with the interior!

#3 Skortchio

Skortchio

    Camshaft & Stage Two Head

  • Members
  • PipPipPipPipPipPipPipPip
  • 1,596 posts
  • Location: Basildon
  • Local Club: EMC

Posted 09 August 2012 - 05:48 PM

The drive back from Sittingborne and a few following trips had told me one thing, It was bloody noisy in a mini with nothing inside it except me!

A bit too loud for a car that I'd be using every day. So after some research and careful study of the mechanics of soundproofing I embarked on shutting Ogy up!
At least the transmitted noise.

For starters, mass loading - making the panels stop vibrating. There's a lot of ways to do it, but flashing tape (yep the roofing stuff) is definitely one of the cheaper. 2 rolls, whole car mass loaded up the wazoo!

A bare canvas
Posted Image

Flashing tape, knife and hairdryer (heat gun was a bit too hot) in hand I started laying it down! (How very gansta of me)

Posted Image

Posted Image

Posted Image

This carried on throughout the car and boot, plus doors rear wings, rear seat and will be roof (when I change the headlining).
Next step was stopping the sound that was actually coming in. This needs foam and dense foam at that, closed cell dense foam so it doesn't suck up the water (not that my Mini will leak...).

A helpful chap on eBay sold me some sticky back stuff at a wicked price in any size I wanted.
I went for 2m² of 10mm thick and another 2m² of 6mm thick.

Then basicly covered everything all over again with it!
Posted Image

Posted Image

Doesn't that look comfy!
Posted Image

Before I carried on with the sound proofing (yes, there's more) I ran the cabling for the audio. Thankfully the Mini makes this easy by having handy grooves for everything to run in and keeping the power lines away from the signal ones.

Posted Image

Following that was 2 layers of bog standard carpet underlay, foam stuff. This is just to pick up any frequencies the dense foam couldn't and add a bit of cushion to the carpet for that 'curl up and sleep' type softness. No pics of that, it's underlay, google it! ;)

All that was left for now was to add the carpet itself, plus parcel shelf etc.

Posted Image

Posted Image

Now I had all this wonderful sound proofing it seemed only sensible to fill up the silence with some noise of my choice!
Enter some speakers! Following the guru's advice in these matters, 2 x components up front and a sub in the rear.
The speaker pods themselves didn't allow much in the way of internal volume (capacity, not loudness) without being really in the way, so to combat this I built an aperiodic membrane into the bottoms.

All homemade for bugger all (about £20), then a bit of clever jiggery with the boot lining and some seam sealer meant I could mount the sub out of the way and make use of more boot space while retaining the 21L needed for optimum output. It is a pain to get in and out though, working on that.

Washer bottle had to be moved into the rear bin, I'll never have a passenger on that side anyway!

Posted Image

Posted Image

Fibreglass, lots of it!
Posted Image

Aperiodic membrane
Posted Image

Full of the finest lambs wool (or the cheapest on eBay)
Posted Image

The wrapping is actually some old motorbike seat vinyl I had laying about, but if it works it works.
Posted Image

Bass!
Posted Image

Have still to locate the amp somewhere suitable, get a decent HU and run the sub in for the rest of it's 30 hour break in period but half way through and 40% power it's doing ok.


Better get something to sit on now I guess.
First idea was a reclining bucket seat. Generic means it fits anything, right? Wrong, not Mini's. Actually to be fair, 1 fits just not a pair.

Posted Image

Being a stickler for having a passenger seat another option was needed, a bit of a search and a trip to Hounslow netted me an MG ZR interior.

Posted Image

Plus some adaption of the bucket seat runners and we have matching seats.
They aren't as supportive as the racer crazy ones, but they fit. If I really don't get on with them I'll cut the buckets down so they fit.

Posted Image

Posted Image

Along with a new headlining, I have a dash (sans gauges currently) to go in. More on that once it happens.

Posted Image

#4 Skortchio

Skortchio

    Camshaft & Stage Two Head

  • Members
  • PipPipPipPipPipPipPipPip
  • 1,596 posts
  • Location: Basildon
  • Local Club: EMC

Posted 09 August 2012 - 05:50 PM

As the weather was nice, I was going insane with boredom and the pile of stuff to fit on the car was in danger of toppling over and injuring someone, I deemed today a good day to start back working on Ogy.

Nearly 3months have passed since I did anything, due to illness so it was going to be a bit of a weird step getting back in the garage.

First thing to do was uncover him, which I'm pleased to report showed no signs of mice, hedgehogs or rust coloured explosions!

Earth lead connected back to the battery and i was time to see if the break had any ill effects, turned the key and a loud *Click* and nothing else.

Odd... Okay, S.O.P - checked the fuses, wire brushed the earth point and covered terminals in contact cleaner.
Tried again, *Click*.
Hand brake off, into gear, heafty shove, slight cracking noise and a light squeak as the brakes freed up.
Turn key... *Vrooom!* Was off choke after 20secs and idling smoothly, that'll do. Now onto business!

Todays challenge - New suspension, the donuts were at least 5years old, maybe more. I'd already ordered the Ministastic fast road springs before going into hospital so tore the package open like a feverish infant at Xmas and got busy!

Not overly exciting in terms of story; Crack wheel nuts, jack car, add axle stands, wheels off, wind in hi-lo's, undo top shock mount, take suspension out, put suspension in, attach shock mount, wheel on, lower car, tighten nuts.
Simples.

1 tip, should you replace your knuckle joints when doing this (and why not, they're only £12 a set), should you like me, find the cup is happily stuck in it's housing with no plans to leave. Get your old soldering iron and melt it in half, saved countless time trying to tug it out of a confined space with mole grips!

Anyway, enough of that, here's some pictures!
Wheels seem wider than I remember, but not nearly wide enough!
Posted Image

Shinies.
Posted Image

Shinies in place (soon to become dirties, no doubt).
Posted Image

Of course there's some travel in the suspension, but It's not like there's any weight in the back...
Posted Image

Faithful assistant (Terry), willing the hi-lo's to come free
Posted Image

Okay, so just maybe, maybe, the donut had collapsed... (The one on the right is actually pretty squashed itself)
Posted Image

In true engineering fashion, I just kept undoing bits until the parts I needed fell out.
Posted Image

Fin!
Posted Image
More tomorrow (Maybe Monday)!

#5 Skortchio

Skortchio

    Camshaft & Stage Two Head

  • Members
  • PipPipPipPipPipPipPipPip
  • 1,596 posts
  • Location: Basildon
  • Local Club: EMC

Posted 09 August 2012 - 05:51 PM

Short vid of the progress!


Today was put on hold when stripping the N/S upper arm and finding the seal in 2 bits (bugger!), Chunky came hurtling round with a replacement but unfortunately a slight misunderstanding (by me) that the seal was normally seperate from the metal disc led to rain (or lack of rubber seals) stopping play.
Still, got it mostly done!

Did also find some rot hiding unde the scuttle and behind the headlight ring, bit of a pain but as the car was due to visit LL anyway, this should keep em busy a bit longer.

*Edit* No idea why my voice sounds so hight in the video, maybe I was excited? :lol:

Edited by Skortchio, 09 August 2012 - 05:54 PM.


#6 Skortchio

Skortchio

    Camshaft & Stage Two Head

  • Members
  • PipPipPipPipPipPipPipPip
  • 1,596 posts
  • Location: Basildon
  • Local Club: EMC

Posted 09 August 2012 - 05:53 PM

A week later and some good news!

Firstly, here's the offending upper arm seal that broke causing the delay:

Posted Image

So a few days wait and I was back on track. If you've never changed said seals (or any part of the upper arm assembly for that matter) my advice is, don't! :P

At least don't if you're paraplegic and have no way of gaining leverage on the suspension arm to hold it in position while sliding the shaft through the tiny window in the inner wing into the partially obscured hole to secure the upper arm in place.

Should you attempt it, remember the thrust washers, I didn't first time round :lol:
Anyway, once back together it should look a bit like this:
Posted Image

That done, it was wheels on and time to get the car on level ground to set the hi-lo's.
I also adjusted the Gaz dampers to 10 clicks in from full soft, having had them a few hundred miles and deeming them loosened up now.
Posted Image

Suspension leveled I dicided on a bit of mechanical fiddlling.
I knew (courtesty of Andy at MLM) the car was running lean all through the rev range, having fitted a K&N cone filter since then also I was slightly concerned about running too lean and causing that annnoying pinking noise followed by those cracking noises.

So using Mintylambs SU needle database I took my current needle (BBW) and compared it to the pile of spare ones I have, finding the BDP was similar with a thinner end profile (more fuel) I grabbed it plus my file and got shaping!

After 5minutes of delicate (okay frenzied) filing and a bit of smoothing with wet&dry I was left with a needle fairly uniformly thinner than the BBW in all areas.

Threw it on the car and got fiddling, idle mix is probably a bit off but it was running so a test drive of that plus the suspension was in order!

In car and out on the open road, so busy was I listening intently for coughs and stumbles of the engine that I didn't realise for about a mile how smoooooooth the car was driving.
Having come from totally knackered rubber donuts the comparison is hardly fair but bugger me! This was a comfy ride! There were no bangs or bumps or crashes, just polite acceptance that the road surface had changed. Oh it's great!

The needle seemed to be working too, with the car picking up from 30 to 85 with no hesitation and then although the rate slowed still went on a bit more (this was of course tested on a closed private circuit not the queens highways).

Happy with the days work I headed home, relishing in the comfort of the ride!
About 200m from home, exiting a mini roundabout I hit a pothole.
I felt the bump (not a crash you'll note) and heard another noise, kind of a twang!
Paniced I looked in my mirror to see a wheel arch parted company with the car and boomeranging off down a side road!
It would seem suspension that moves requires more room above the tyre (and possibly stiffer damper settings)

I was going to replace them anyway...honest.
The carnage:
Posted Image

With that done, we're onto the next step of the exterior. Namely covering up a few holes, some deseaming, new arches, widening of the wheels and some paint!

More soon, much more!

#7 Skortchio

Skortchio

    Camshaft & Stage Two Head

  • Members
  • PipPipPipPipPipPipPipPip
  • 1,596 posts
  • Location: Basildon
  • Local Club: EMC

Posted 09 August 2012 - 05:55 PM

No major updates just yet, some pictures to come tomorrow though.

Today I reattached the arch that flew off while driving home after the suspension upgrade - it seems that when your wheels move up and down to absorb bumps you need more ride height... Who knew?

Also tweaked the amp as the sub is nearly broken in now, up to 65%! Then altered the enclosure slightly to gain a little more capacity, it was slightly low before.

After that it was off to a BBQ down the bumpiest road in England! Which highlighted 2 things, 1 - the sound of the wheels briefly catching the arches on dips in the road is actually kind of cool and 2 - I need more ride height.

Fairly uneventful apart from that, Ogy cruises comfortably at about 80 and when opened up got to 95 on the flat in not too long a distance (closed private road for testing)

The only curiosity now is what arches to buy, I'm lead to believe I should measure from the bodywork at the top centre outwards, this gives me 3" front and 2.5" rear. Meaning only Mini Miglia and larger arches will fit, somewhat contradictory to the suggestions that most arches will swallow 12x6" wheels. Very odd.

Here's a rubbish quality pic of a spare 3" arch I have taped up against the wing:
Posted Image

Now to research the high pitched whistle that's started at only one point in the throttle.

#8 Skortchio

Skortchio

    Camshaft & Stage Two Head

  • Members
  • PipPipPipPipPipPipPipPip
  • 1,596 posts
  • Location: Basildon
  • Local Club: EMC

Posted 09 August 2012 - 05:56 PM

As threatened, here's the latest!
High pitch whistle, just the carb. Can hear it becaus of the recent addition of a K&N cone:
Ta da!
Posted Image

The repaired (hastily and not 'finished') wheel arch:
Posted Image

The improved sub enclosure:
Posted Image

See the difference? Probably not, but there's a 25mm ring under the carpetting now to improve the internal volume of the enclosure (and make getting the sub in place easier).

Last things I did was to fit a new (extra tone) horn, so now the car sounds less comical when I'm trying to be annoyed at other road users:
Posted Image

And to replce the bump stops, plus a little tweak on the dampers / hi-lo's.
Next week (when the stuff turns up) will see the rest of the seats being fitted with some proper mounts, a bit of amatuer porting on the spare head, a service and fitting of said head / exhaust / rockers and a trip to MLM to have it all made to work proper!

Oh and the dash, have to get that fitted too...

#9 Skortchio

Skortchio

    Camshaft & Stage Two Head

  • Members
  • PipPipPipPipPipPipPipPip
  • 1,596 posts
  • Location: Basildon
  • Local Club: EMC

Posted 09 August 2012 - 05:58 PM

Just realised it's been a while since I've updated this!
Not managed a whole lot of work, mostly due to continuing medical problems hindering my progress and speed of work. That and tons of hospital appointments gets in the way.

But that's dull and my car is interesting!

Here we are so far:

Headlights, standard ones are rubbish. So I changed 'em:
Bigger lights need bigger wires!
Posted Image

Then it rained, but that's no cause to stop work is it now.
Posted Image

Combo mounting point and earth in one.
Posted Image

Well, that's a good sign!
Posted Image


With the lights out the way and blazingly bright it was time to make Ogy a bit prettier.
After some deliberation I opted for a smooth ass amoung some other things, not being competent as a welder I put the car in to get the rear valence smoothed. Didn't turn out as smooth as I'd have wanted but some careful hammering and a bit of filler (reads tin) got it well on the way to the shapely curves I was after.

Posted Image

Posted Image

Test coat, sand, test coat, sand, test coat, sand. Why did I choose this again?!
Posted Image

Posted Image

Posted Image

In the meantime some new goodies arrived and soon as the weather stays dry I'll be attaching one to allow the other to be fitted:
Posted Image

More importantly!
Posted Image

Posted Image

But with all good news there's a counter. In this case it was a bit of filler on the wing I knew was there - it wasn't even. So I poked it to see how far it went...

Luckily, not that far so after a short ponder I decided that it wasn't worth the welding as it was a tiny area, so cut back to good metal and built a repair.
Posted Image

Aside from the wheel arches flying off several times and the car approaching a service, that's about it for now.
The dash is just about finalised in design but still some tweaking to go, no pics of that until it's ready ;-)

Actually nearly finishe with 'phase 1' now, just remaining is painting and the dash + headlining, then the engine mods.

Overall I have to say, I bloody love my car!
More to come!

#10 Skortchio

Skortchio

    Camshaft & Stage Two Head

  • Members
  • PipPipPipPipPipPipPipPip
  • 1,596 posts
  • Location: Basildon
  • Local Club: EMC

Posted 09 August 2012 - 06:14 PM

Right, that's us all caught up from the past 10months!

What's happened recently... (And in no particular order)

Front seats have nice shiny mounts fitted and not just chocked up on wood (I didn't drive it like that... honest)
IMAG0302.jpg

Rear seats have been replaced by some swanky colour matched ones with flip up storage to boot, cheers Deanymini!
621911_10151955608290556_1035747932_o.jp

Finally picked some paint, mostly thanks to BigMan's write up's on Dulux I'm going with a roller too!
IMAG0450-1.jpg

Aside from collecting a whole bunch more things to bolt on / replace / fit into Ogy I've also got started on the prep for the paintwork:

IMAG0468.jpg

IMAG0469.jpg

IMAG0474.jpg

IMAG0478.jpg

IMAG0477.jpg

Also, I replaced the bogglesome olive fitment oil pipe fitment with a swish looking braided line and the pressure relief valve with a ball bearing type, solved the leak but has uncovered a slight problem in that the oil pressure light stays on a little longer than I'm happy with on start up.

It's fine once running but I fear it could be an early sign of oil pump failure. A few calls brought the unhappy news that like most auto tranny stuff, it's more pricey and harder to get than the manual equivilent.
Manual oil pump £15, auto £165...Add to that the restricted upwards potential of the auto box for tuning and the cost of having it refurbed (next likely job), the plan is currently looking like an engine conversion is on the cards. What type is confirmed but I'm erring towards something from Honda.

More on that once I blow up the A series ;-)

Soon as I remember what else I've done in the last month, I'll update that too :D


Edited by Skortchio, 31 May 2013 - 09:54 PM.


#11 hughJ

hughJ

    Soldiering Along

  • Members
  • PipPipPipPipPipPipPip
  • 727 posts
  • Location: Highlands, Scotland

Posted 09 August 2012 - 07:05 PM

That is different but very interesting - enjoyed the read

Hugh

#12 Skortchio

Skortchio

    Camshaft & Stage Two Head

  • Members
  • PipPipPipPipPipPipPipPip
  • 1,596 posts
  • Location: Basildon
  • Local Club: EMC

Posted 09 August 2012 - 07:12 PM

That is different but very interesting - enjoyed the read

Hugh


Which bit?! :D

#13 Alex_B

Alex_B

    Doesn't put foot in mouth enough!

  • TMF+ Member
  • PipPipPipPipPipPipPipPipPip
  • 4,573 posts
  • Location: Eastbourne

Posted 09 August 2012 - 07:19 PM

You certainly work fast, all that progress in one day!

:P

#14 Skortchio

Skortchio

    Camshaft & Stage Two Head

  • Members
  • PipPipPipPipPipPipPipPip
  • 1,596 posts
  • Location: Basildon
  • Local Club: EMC

Posted 09 August 2012 - 07:22 PM

You certainly work fast, all that progress in one day!

:P


I got up early, had coffee and didn't stop for lunch! :D

I've been meaning the start the thread for a while (like 6months) and as I'm feeling productive after finally finishing the sanding and getting the primer on today I thought why not!

#15 Alex_B

Alex_B

    Doesn't put foot in mouth enough!

  • TMF+ Member
  • PipPipPipPipPipPipPipPipPip
  • 4,573 posts
  • Location: Eastbourne

Posted 09 August 2012 - 07:37 PM

Well why not indeed, its always good reading how much busier other people are :P but good project so far and interested to see how the paintjob comes out!


0 user(s) are reading this topic

0 members, 0 guests, 0 anonymous users