Jump to content


Photo
- - - - -

How To Change Gear Selector Oil Seal (With Photos)


  • Please log in to reply
37 replies to this topic

#1 Sisco

Sisco

    Previously known as msisask1

  • Noobies
  • PipPipPip
  • 81 posts

Posted 16 August 2012 - 08:23 PM

Hi,

I fixed my gear selector oil seal after work today, never done it before but it ended up being fairly easy. I took some photos whilst I did it which I thought somebody might find useful. I used this kit from minispares. http://www.minispare...06.aspx|Back to

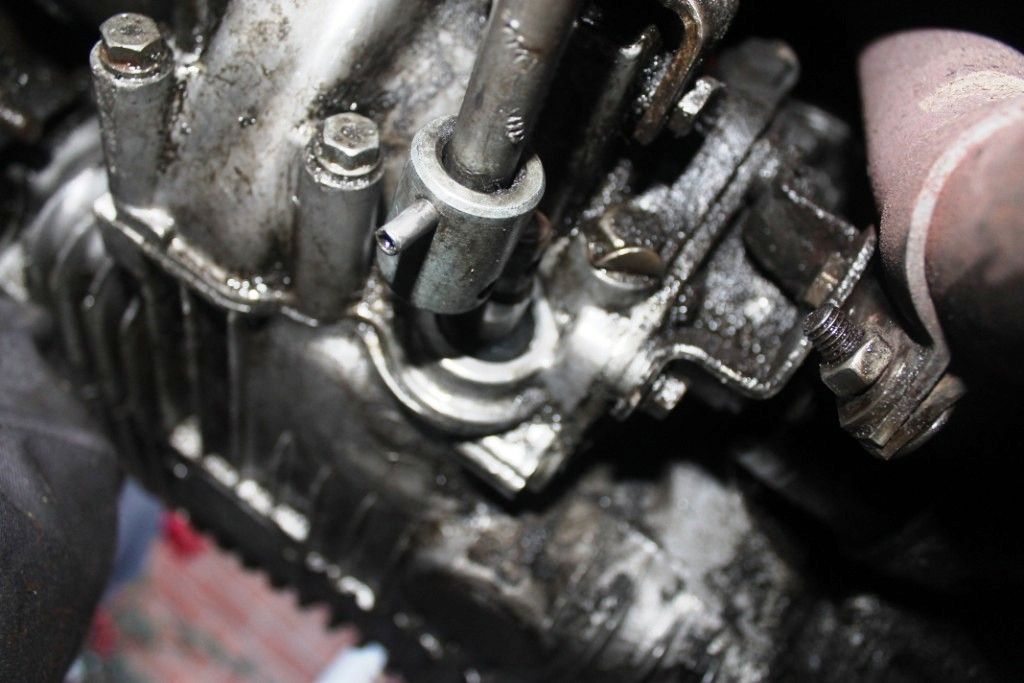
First step is to remove the pin that joins the shaft to the selector rod. Just the one nearest gearbox needs removing, although the other is half out in the photo so shows it well. I used this tool here which made it so much easier, well recommended.

http://www.minispare...16.aspx|Back to

Posted Image

I removed the joining part completely but it can be left on the selector rod. Here is a picture showing the old seal.

Posted Image

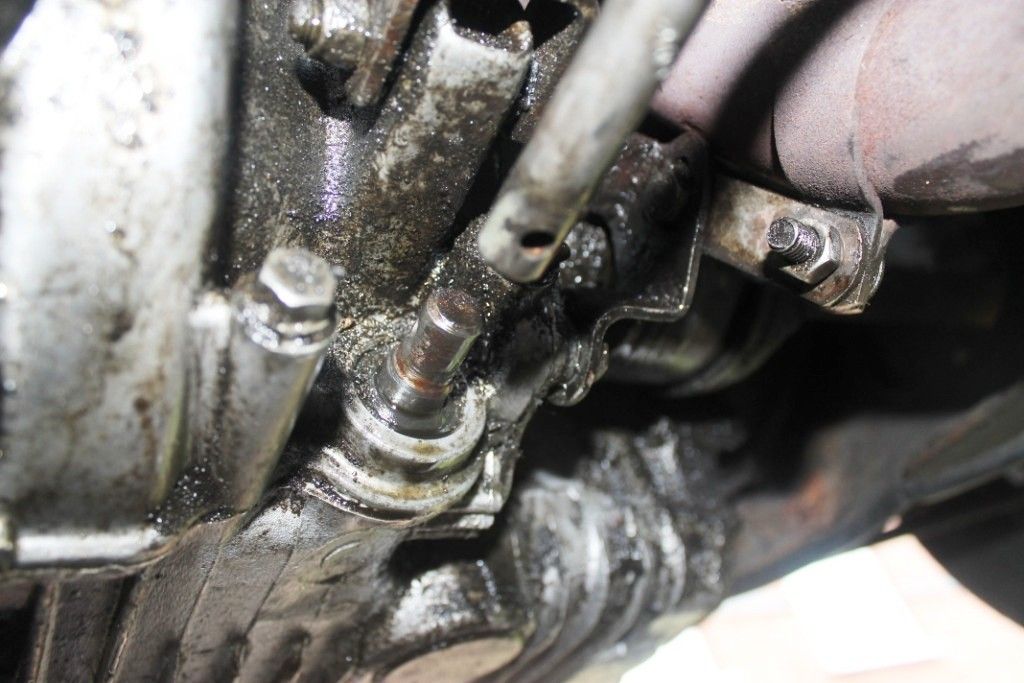
I then removed this old seal and inner metal ring, I used a thin kitchen knife for this. I rammed it down the side of them with a hammer and wiggled them both out. Worked for me but there is probably a better way.

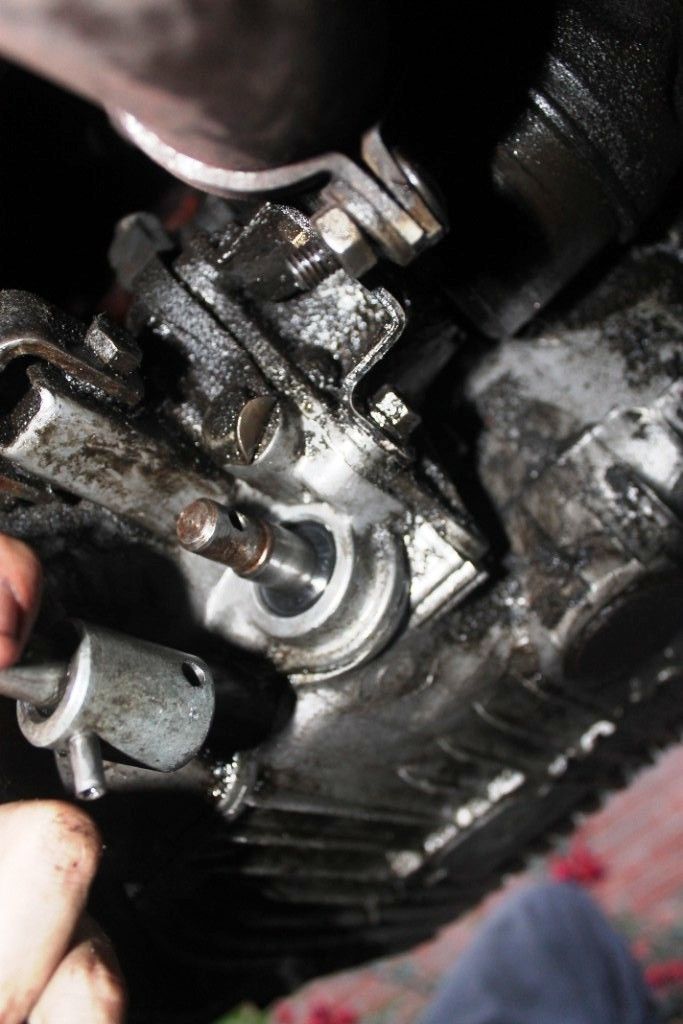
I then fitted the replacements from the mini spares kit. Metal first and then the seal with the open bit facing inwards. I used a spark plug socket and slowly tapped them in using this over the shaft.

Here is the new grommet fitted in place, a good seal and tight fit.

Posted Image

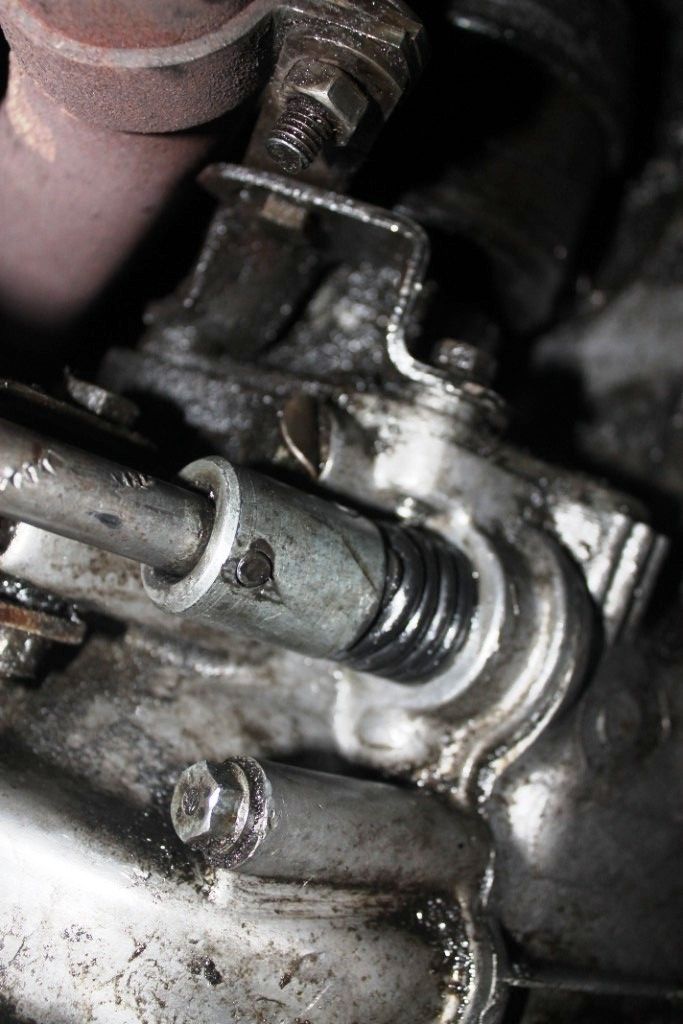
The kit also comes with a rubber gaiter for the shaft to stop dirt getting the new seal. I smeared vasoline all other the seal and then placed this gaiter on top.

Posted Image

Then is just a case of joining the shaft with the selector rod. Lining up the hole in the shaft and inserting the pin, tapping it in with a hammer.

Posted Image

Here is the finished result and hopefully no more leak from here.

Posted Image

This is a fairly straight forward job that most people have done before but hopefully this guide comes in useful to someone who has never tackled this before.

#2 miniyellowmini

miniyellowmini

    Super Mini Mad

  • Members
  • PipPipPipPipPipPip
  • 595 posts
  • Location: My Mini
  • Local Club: British Mini Club

Posted 16 August 2012 - 08:47 PM

Thanks for the guide :D I've got to do this job at some point. It's the only place my Mini leaks from so will be great to have it leak free, at least till it develops another leak somewhere else... cause it's a Mini! :lol:

#3 MiniElliott

MiniElliott

    Speeding Along Now

  • Members
  • PipPipPipPipPip
  • 378 posts
  • Location: England

Posted 16 August 2012 - 09:09 PM

This is a good guide. Hopefully it can get pinned as there are lots of threads asking about this.

#4 tiger99

tiger99

    Crazy About Mini's

  • Members
  • PipPipPipPipPipPipPipPipPipPip
  • 8,584 posts
  • Location: Hemel Hempstead

Posted 16 August 2012 - 09:09 PM

It is the one thing that is guaranteed to need fixing, if not already fixed, on every rod change Mini, till Rover introduced a similar mod.

The mods might want to consider putting this in the FAQ section, as it is very useful.

#5 PaddyShepherd

PaddyShepherd

    Super Mini Mad

  • Members
  • PipPipPipPipPipPip
  • 687 posts
  • Location: Billingham
  • Local Club: BOGMOG

Posted 16 August 2012 - 09:12 PM

Good guide, will be using it some time in the future I think.

#6 Simont

Simont

    Mini Mad

  • Members
  • PipPipPipPip
  • 197 posts
  • Location: Farnborough
  • Local Club: Thames Valley Mini Club

Posted 16 August 2012 - 09:30 PM

i found using a self tapping screw into the rubber and pull was an easy way of removing the old seal

#7 minimuk

minimuk

    Camshaft & Stage Two Head

  • Members
  • PipPipPipPipPipPipPipPip
  • 1,946 posts
  • Location: Midlands

Posted 16 August 2012 - 09:40 PM

nice one, well done ;D

#8 Sisco

Sisco

    Previously known as msisask1

  • Noobies
  • PipPipPip
  • 81 posts

Posted 16 August 2012 - 09:45 PM

Glad this seems useful. I struggled to find a guide with photos, maybe it's quite straight forward but its always nice to see what's involved before you start.

Good idea, I am not sure it would work on the seal that I found in there as it had a metal piece built into the seal ( seemed strange compared to the new one and it took a while to get out) but that would be great for the new seal that is only rubber with a spring. I've heard of people drilling a small hole in the metal piece but this seems quite a hard way considering the space under there.

It's quite a satisfying feeling knowing that oil shouldn't seep out of there now. I left my car in a friend's garage for a couple of weeks and when i went to collect it there was oil on the floor.. When I got home and checked the drive I realised that it had been doing this for a while.

Fingers crossed no more spots on my drive and maybe my friend will let me store it there again!

#9 mk1leg

mk1leg

    Crazy About Mini's

  • Members
  • PipPipPipPipPipPipPipPipPipPip
  • 9,341 posts
  • Location: Jersey
  • Local Club: Mini Club Jersey, MCR

Posted 16 August 2012 - 10:26 PM

I just refit 2 seals back seems to stop the leaks............cheaper............... :proud:

#10 Domlin

Domlin

    Stage One Kit Fitted

  • Noobies
  • PipPipPip
  • 90 posts

Posted 20 August 2012 - 01:18 PM

Thanks very much for the guide :) Just about to do this myself, did you do an oil change at the same time? the haynes suggests that you have to...

#11 Sisco

Sisco

    Previously known as msisask1

  • Noobies
  • PipPipPip
  • 81 posts

Posted 20 August 2012 - 08:38 PM

I had drained the oil as I was taking the head off.. so yes..

Personally I think if you were just replacing the rubber seal you could get away with leaving the oil in as the there isn't much room for it to leak out of and if it's leaking chances are the rubber seal is not doing much anyway.

If you are doing the metal ring also then I would drain the oil as when you remove that it could get quite messy. :nuke:

#12 myredmini

myredmini

    My Mummy Says It's OK

  • TMF+ Member
  • PipPipPipPipPipPipPipPipPip
  • 3,211 posts
  • Name: Dan
  • Location: Teesside
  • Local Club: BOG MOG

Posted 20 August 2012 - 08:40 PM

Why did you drain your oil to remove the head? You dont need to. Good guide. Should be pinned.

#13 PaddyShepherd

PaddyShepherd

    Super Mini Mad

  • Members
  • PipPipPipPipPipPip
  • 687 posts
  • Location: Billingham
  • Local Club: BOGMOG

Posted 20 August 2012 - 08:44 PM

Think this is gonna come in handy sooner rather than later!

#14 Sisco

Sisco

    Previously known as msisask1

  • Noobies
  • PipPipPip
  • 81 posts

Posted 26 August 2012 - 08:54 PM

hmm.. you have me thinking now as I imagine you don't if its all sitting in the sump but I have always given minis an oil change when refurbishing the head or replacing the head gasket. Plus I like to know there isn't oil in the engine when I have the top off..

I know it makes little difference but after going to the effort and time in replacing head gasket, relapping valves, replacing valve stems etc in my mind it would be a shame not to change the oil too while I am at it but maybe that's just my feeling. I would have the image of all that dirty oil covering my de-coked cylinder head :lol:

Glad the guide seems useful

#15 myredmini

myredmini

    My Mummy Says It's OK

  • TMF+ Member
  • PipPipPipPipPipPipPipPipPip
  • 3,211 posts
  • Name: Dan
  • Location: Teesside
  • Local Club: BOG MOG

Posted 26 August 2012 - 08:57 PM

I replace the oil too. But i leave it in. Once finished. Run the engine so its hot hot hot then drain and fill with new oil. That way any bits get flushed out. Just a little tip for you :)


0 user(s) are reading this topic

0 members, 0 guests, 0 anonymous users