Jump to content


Photo
- - - - -

Therapist-My 76 Mini


  • Please log in to reply
128 replies to this topic

#16 Niko-mini1275

Niko-mini1275

    Mini Mad

  • Members
  • PipPipPipPip
  • 175 posts
  • Location: dubrovnik,croatia

Posted 05 January 2013 - 10:03 AM

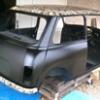
after it came back from sand blasting

Posted Image

Posted Image

Posted Image

Posted Image

Posted Image

it all went trough thorough inspection and the process of searching for the parts had began
#17 Mini-Mad-Craig

Mini-Mad-Craig

    Crazy About Metro's

  • Members
  • PipPipPipPipPipPipPipPipPipPip
  • 9,298 posts
  • Location: Travelling in a fried out Kombi

Posted 05 January 2013 - 02:55 PM

That has come out really well mate, I think a lot of UK based members would be pleased with that outcome!

If you need any help with getting parts from the UK (ebay, or other sites where the postage is UK only) drop me a PM and I will be happy to help out :-)

#18 Niko-mini1275

Niko-mini1275

    Mini Mad

  • Members
  • PipPipPipPip
  • 175 posts
  • Location: dubrovnik,croatia

Posted 05 January 2013 - 03:12 PM

thanks mate!
i am settled for now part wise,but sometime in the future that would be very highly appreciated! ;D thanks in adwance!
by the way,this is considered to be one of the better preserved minis for its age even here,it was situated in good climate area most of its life so rust didnt take too much of it yet,and i hope the bad years are far behind him! it is a plan to drive it only as a summer car,for fun.maybe one or two weekends during spring and fall...we dont get too much snow and rain here !

#19 The Matt

The Matt

    You don't escape that easily.....

  • Admin
  • PipPipPipPipPipPipPipPipPipPipPip
  • 17,229 posts
  • Name: Matt
  • Location: Overton, North Wales
  • Local Club: Welsh Border Minis

Posted 05 January 2013 - 04:23 PM

This shell looks solid and worth restoring. It looks like it is going well so far!

#20 Niko-mini1275

Niko-mini1275

    Mini Mad

  • Members
  • PipPipPipPip
  • 175 posts
  • Location: dubrovnik,croatia

Posted 07 January 2013 - 05:29 PM

Posted Image

Posted Image


body parts i needed to continue the work were there very soon,not all genuine rover or anything but that didnt matter,as long as we have something to do..so,we started with the work...a friend is inspecting the rust and where to start,he will be doing most of the work,and i am watching,learning and soaking up the knowlege,passing spanners and beer ;D ...

Posted Image


I used this thing as a base coat on bare metal,supposed to be good for the job,and since its upper midlle price range so to say,it damn should be...


Posted Image

#21 Niko-mini1275

Niko-mini1275

    Mini Mad

  • Members
  • PipPipPipPip
  • 175 posts
  • Location: dubrovnik,croatia

Posted 08 January 2013 - 04:39 PM

so,the work started...first,we started opening the sills on the driver's side to deal with rust that couldn't be reached in sandblasting process...

Posted Image

driver's side floor was also removed due to heavy beating over the years and rust,seemed ok to change it 'because it came pretty cheap..

Posted Image

Posted Image

rear valance also needed some attention:

Posted Image

and the passanger side sills were opened aswell:

Posted Image

Posted Image

hm,seems like there would be plenty of work on this side ;D
After i had grinded all the rust away,as much as i could with the wire brush and angle grinder,i used this chemical rust stop/remover thing i found at the local paint store.and i can tell you it did wonders and it came very cheap,i was very surprised!it became my best rust fighting buddy in following weeks :D

Posted Image

#22 rally515

rally515

    Up Into Fourth

  • Members
  • PipPipPipPipPipPipPipPipPip
  • 3,848 posts
  • Location: ask!

Posted 08 January 2013 - 04:43 PM

NOOOOOOOOO :cry: :crazy: dont use those silll's there evil >:(

#23 Marco1972

Marco1972

    One Carb Or Two?

  • Members
  • PipPipPipPipPipPipPip
  • 822 posts
  • Location: Birmingham

Posted 08 January 2013 - 05:13 PM

Hi couldn't agree more

NO OVERSILLS !!!

Just spent the weekend cutting mine off be a real shame to ruin your car with those dam things.


Rant over lol.....

#24 Niko-mini1275

Niko-mini1275

    Mini Mad

  • Members
  • PipPipPipPip
  • 175 posts
  • Location: dubrovnik,croatia

Posted 08 January 2013 - 05:14 PM

what do u mean?

#25 Niko-mini1275

Niko-mini1275

    Mini Mad

  • Members
  • PipPipPipPip
  • 175 posts
  • Location: dubrovnik,croatia

Posted 08 January 2013 - 05:16 PM

aha,i see what u mean,oversills...stay tuned,its not bad as it seems ;D

#26 rally515

rally515

    Up Into Fourth

  • Members
  • PipPipPipPipPipPipPipPipPip
  • 3,848 posts
  • Location: ask!

Posted 08 January 2013 - 05:34 PM

Phew, glad you havent fitted them :proud:

#27 Niko-mini1275

Niko-mini1275

    Mini Mad

  • Members
  • PipPipPipPip
  • 175 posts
  • Location: dubrovnik,croatia

Posted 09 January 2013 - 08:55 AM

no,no i was warned about that before i even bought it.a friend working on a mini with me is experienced in those things so he gave me a warning ;D !

#28 Niko-mini1275

Niko-mini1275

    Mini Mad

  • Members
  • PipPipPipPip
  • 175 posts
  • Location: dubrovnik,croatia

Posted 10 January 2013 - 12:03 PM

so the welding started soon after we started to cut away the rust.the plan was to go from the ground up,first one side,then the other,than things on the back of the car and then we deal with the front end...

Posted Image

Posted Image

you can see from the pictures that we had cut away the excess of that oversill ;) and when needed the new parts were fabricated out of some 0.8 mm steel sheet...

Posted Image

turned over to tackle the other side...

Posted Image

after cutting off the rusty parts,i ground down surface rust,soaked everything in that anti rust liquid and went over with the primer to stop it from corroding as much as i could!

Posted Image

Posted Image

Posted Image

i used the mig welder,tacked everythig at first and then,after it all was in satisfactory position i welded it all with a full weld.i also used the 5mm drill to make holes to imitate the spot welds on some particular places...

Posted Image

Posted Image

Posted Image

Posted Image

Edited by Niko-mini1275, 16 January 2013 - 08:08 AM.


#29 Niko-mini1275

Niko-mini1275

    Mini Mad

  • Members
  • PipPipPipPip
  • 175 posts
  • Location: dubrovnik,croatia

Posted 16 January 2013 - 08:45 AM

Started working on the back side before finishing the sills.back corners were rotten so they had to be sorted aswell

Posted Image

Posted Image

cut out of 0.8 mm steel sheet,drilled 5 mm holes in it and welded in place

Posted Image

Posted Image

Posted Image

#30 Marco1972

Marco1972

    One Carb Or Two?

  • Members
  • PipPipPipPipPipPipPip
  • 822 posts
  • Location: Birmingham

Posted 16 January 2013 - 07:24 PM

So glad you cut those sills down some nice fabrication keep up the good work !!

It's far to cold here so my car is hibernating ( for now) enjoying following your resto..


0 user(s) are reading this topic

0 members, 0 guests, 0 anonymous users