Jump to content


Photo
- - - - -

92 Mini City


  • Please log in to reply
285 replies to this topic

#16 Marco1972

Marco1972

    One Carb Or Two?

  • Members
  • PipPipPipPipPipPipPip
  • 822 posts
  • Location: Birmingham

Posted 02 June 2013 - 06:51 PM

Had a few issues getting the new floor section to fit correctly where it meets the inner wing and discovered it had been repaired in the past so out came the grinder

Thought I'd have a crack at fabrication ( what's the worst that could happen !)

After much grinding,cursing and head scratching I ended up with a half decent repair piece so I thought bugger it and got the welder out

( now or never moment ) and after some extremely messy looking welding I ended up with this,

image_zps76f7bcfd.jpg

image_zps38e6fc5a.jpg

I spent an age filling in little holes and grinding ( is this normal ?)

It's been coated in acid etch primer and will be sealed when I do the rest , thats a long way off yet..

Still got a long way to go with my welding skills but got to start somewhere.

Edited by Marco1972, 24 October 2014 - 09:49 AM.


#17 Marco1972

Marco1972

    One Carb Or Two?

  • Members
  • PipPipPipPipPipPipPip
  • 822 posts
  • Location: Birmingham

Posted 03 June 2013 - 08:08 PM

Been blasting on today I was going to buy a new crossmember end section but I thought what the heck I'll have a crack at fabricating some new bits if it went tits up I would just cut it off and buy the proper bits but after a few hours with tin snips, mole grips and a hammer I ended up with two half decent fitting repairs
C3E23E4E-709D-4845-8931-3FB23BCCD014_zps

02E908F9-B9F8-4994-B30B-ABBEEE4FC348_zps

7C53C94D-058B-4E03-B1FB-7B91EA743778_zps

after I ground it down and gave it a coat of primer
3A8657EB-3B0C-4F2B-9B1F-2DB26AE8F999_zps
door step repair
C3FA9BF3-F25A-418C-AFAA-D7BCCA753822_zps

Edited by Marco1972, 24 October 2014 - 09:50 AM.


#18 Marco1972

Marco1972

    One Carb Or Two?

  • Members
  • PipPipPipPipPipPipPip
  • 822 posts
  • Location: Birmingham

Posted 14 July 2013 - 06:14 PM

Hi all

I haven't updated my thread for a while so I made some time and got busy with the welder

I have removed the rear passenger bin to allow access to the inner sill stiffener and as the closing panel was toast that has been removed


After drilling many 6mm holes I have fitted the new inner sill think iv finally got the hang of this welding lark changing to 0.6 wire and argon gas made a huge difference

I still have more welding to do to join the remaining tacs then I will weld in the heel board repair / closing panel and new bin ( when I get it ) then the outer sill that will be one side done as least..


#19 Marco1972

Marco1972

    One Carb Or Two?

  • Members
  • PipPipPipPipPipPipPip
  • 822 posts
  • Location: Birmingham

Posted 14 July 2013 - 06:20 PM

Pics of progress so far

image_zps011eaddd.jpg

image_zpsee18730e.jpg

image_zps2d8572cc.jpg

image_zpsfdf4294c.jpg

image_zps7dd258aa.jpg

Edited by Marco1972, 24 October 2014 - 09:50 AM.


#20 Marco1972

Marco1972

    One Carb Or Two?

  • Members
  • PipPipPipPipPipPipPip
  • 822 posts
  • Location: Birmingham

Posted 18 August 2013 - 05:18 PM

Hi to any one who's following this ??

Well the inner sill is now fully fitted and ground down its also had a coat of acid etch prime ( first of many ) and I've started to seal it in with tiger seal
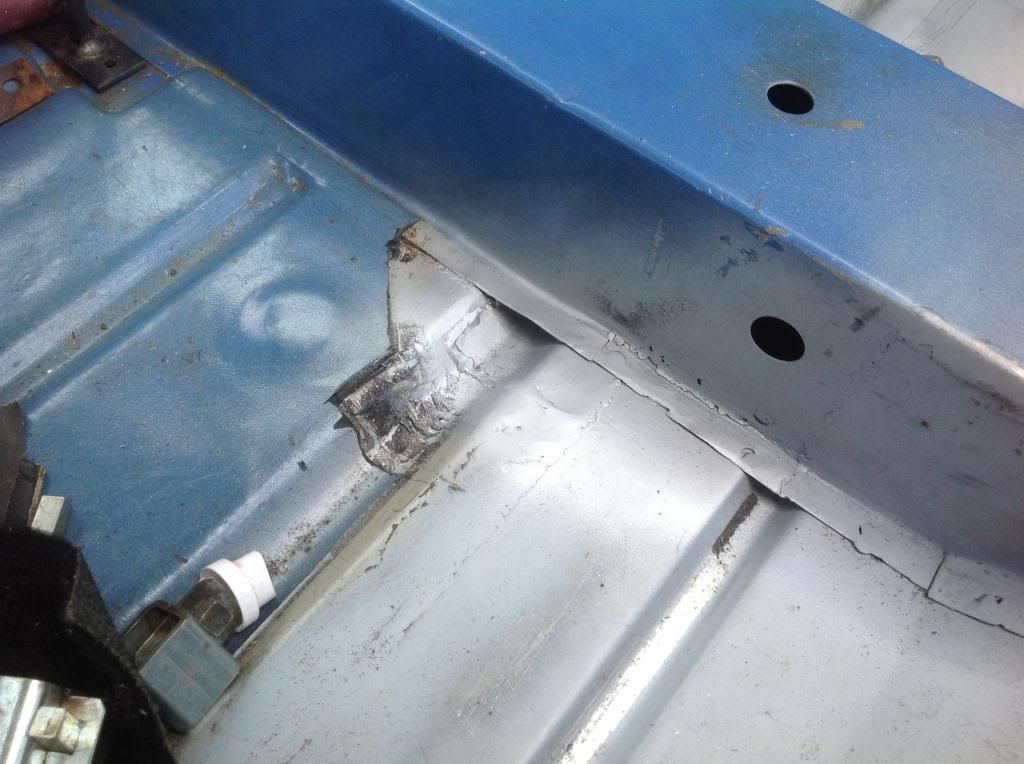
I had to fabricate a repair panel as there was a section under the cross member that had corroded and my new floor was an inch or so too short to cover it.
It's no easy job bending metal with just mole grips pliers and a hammer but the finished result came out pretty good

image_zps427022e9.jpg

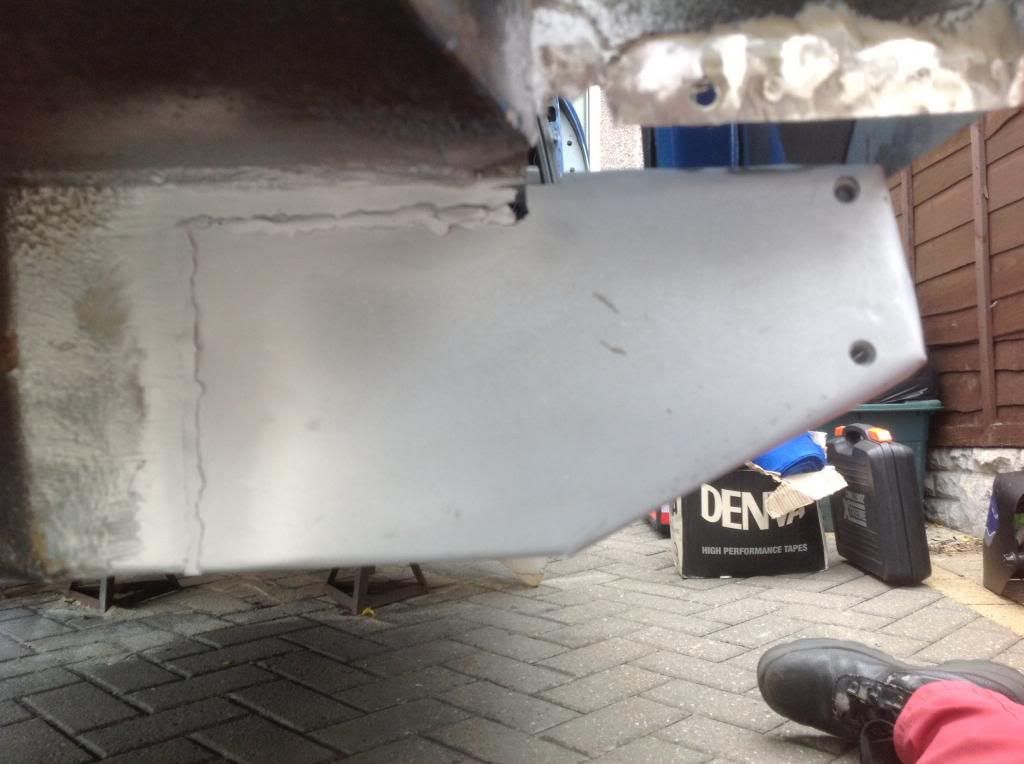
Ive also welded in the new heel board section and gave it a grind down I'm not going to make it flush as it will be tiger sealed over and then stone chipped and anyway it will be hid behind the subframe

image_zps1d4b1535.jpg

As you can see I've welded the flange that goes to the inner sill a bit OTT but at least it's not going to come off !!

image_zps459b401c.jpg

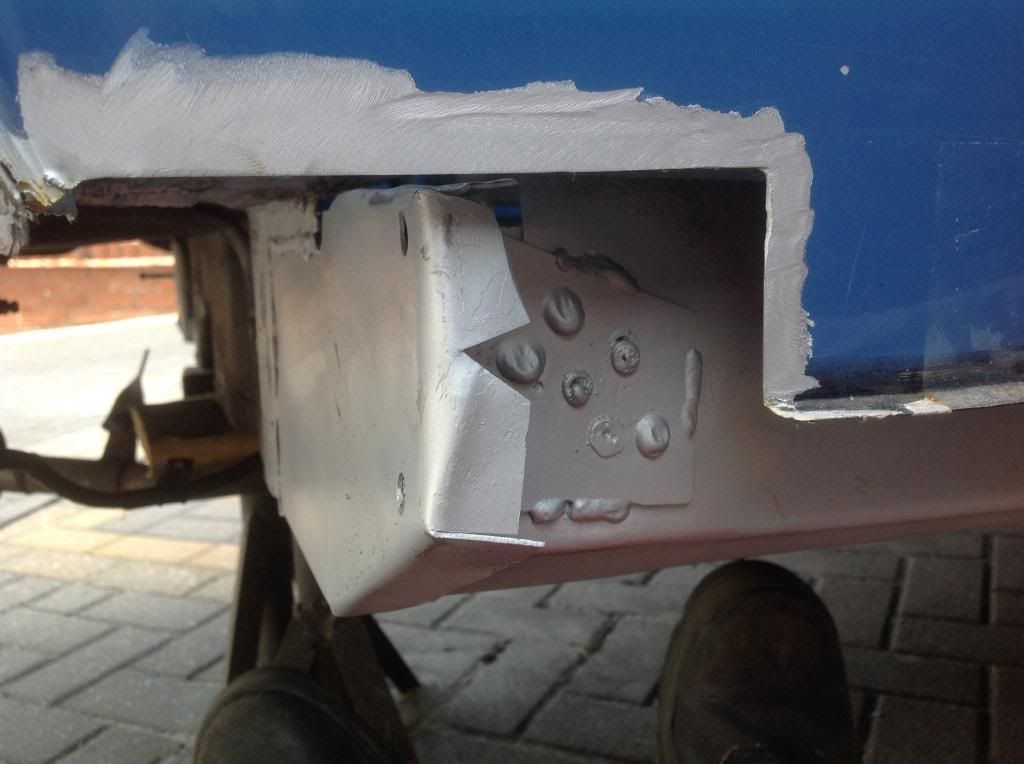
Ive also fitted the inner closing panel which was a pig to try to get right I had to end up cutting part of it off to make it fit and it was a heritage panel too ! So I'll just have to fabricate the inner closing part when I've fitted the new outer section.
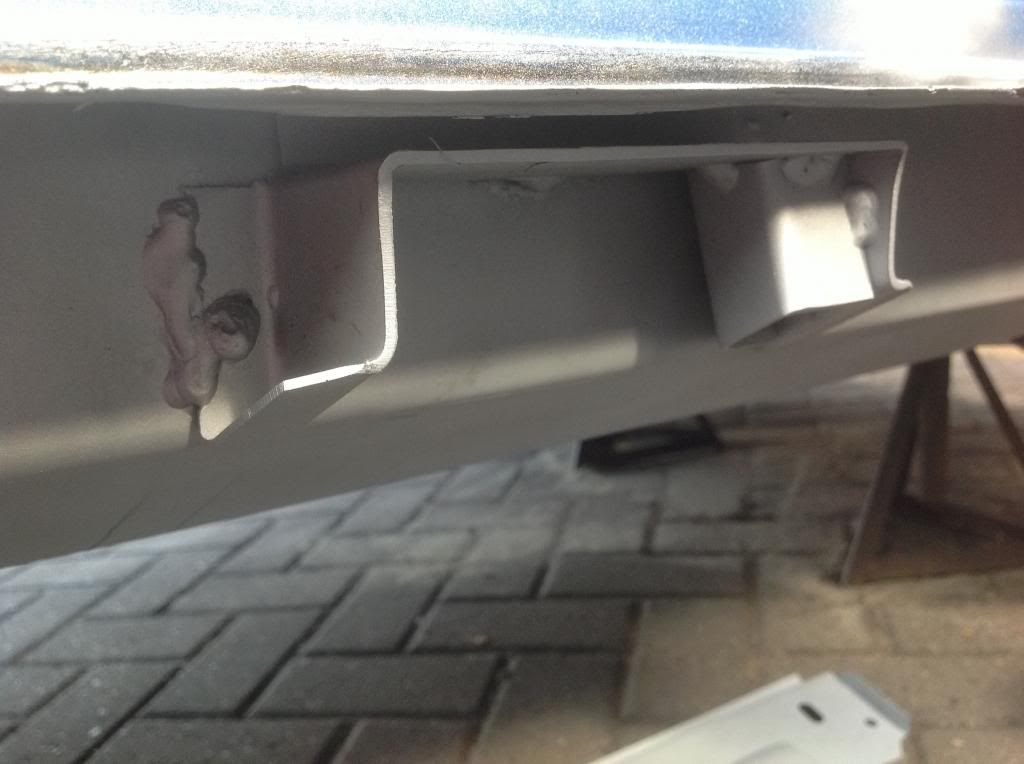
Well sods law I ran out of 0.6 wire so there was no way I was going to fit the outer section especially with it being so thin so I popped in some 0.8 and decided to weld in the new jacking point as you can see plenty of weld so it's not going to fall off in a hurry .
To be honest I probably wouldn't use the factory jack anyway but I'm trying to get it as original as possible.

image_zps0e150a82.jpg

All the work will have a couple of coats of primer and then some top coat followed by wax oil on the internal sections all the outside will be stone chipped then top coat where needed.

Well that's it for now I've sealed all the welds over with tiger seal and will post pics next time and my subframe came back from the powder coaters the other day and I have to say it looks great I will post pics on my next post.

Edited by Marco1972, 21 October 2014 - 09:13 PM.


#21 Teapot

Teapot

    TMF Legend

  • Members
  • PipPipPipPipPipPipPipPipPipPip
  • 5,010 posts
  • Location: Seaton, East Devon

Posted 18 August 2013 - 05:53 PM

Well done, keep going :-)


Edited by Teapot, 18 August 2013 - 05:54 PM.


#22 Grilled

Grilled

    Stage One Kit Fitted

  • Noobies
  • PipPipPip
  • 52 posts
  • Location: Leighton Buzzard

Posted 18 August 2013 - 08:38 PM

Some really good work being done here :) have you got a flap disc for grinding welds down? They're very useful

#23 Archived4

Archived4

    One Carb Or Two?

  • Archived
  • PipPipPipPipPipPipPip
  • 822 posts

Posted 18 August 2013 - 08:49 PM

Some fantastic fabrication work! Love this! And I also vouch for flapdisks, first use a grinding disk to get the bulk of the weld ground down, and then a flapdisk to get it super smooth.

Watching closely ;)

#24 Marco1972

Marco1972

    One Carb Or Two?

  • Members
  • PipPipPipPipPipPipPip
  • 822 posts
  • Location: Birmingham

Posted 22 August 2013 - 07:55 PM

Teapot ,grilled,smiler258

Thank you for your kind comments there very appreciated and yes I have got some flap discs I've been using some 40 grit gets the welds down nice and smooth
Well after work today I decided to weld in the corner repair panel I took my time and tacked it in slowly to avoid distorting the panel seems to have paid off and after a quick grind down with a flap disc it looked like this
image_zps04e3be09.jpg
image_zps8bbcf1d2.jpg

I've also posted pics of the closure panel I welded in the other day and also a pic of the floor sealed with tiger seal this will be primed shortly
Lastly I've plug welded the heel board to the inner sill ground down and dusted it with primer.

image_zps56429da7.jpg
image_zps0ebe4ca5.jpg
image_zpse3e47ed0.jpg

Just got the inner sill stiffener,new rear companion bin and the outer sill then that's the driver side finished

Just the rest of it to do lol.

Edited by Marco1972, 22 October 2014 - 05:43 PM.


#25 Zeemax Adventure

Zeemax Adventure

    Speeding Along Now

  • TMF+ Member
  • PipPipPipPipPip
  • 301 posts
  • Location: Llandudno

Posted 22 August 2013 - 09:36 PM

Good work matey.  Keep up the momentum and youll soon be finished.  I put the screwdriver through my inner and outer sills last night so they have been added to my list too


#26 Ben_O

Ben_O

    Mill Road Garage

  • Paint Doctor
  • PipPipPipPipPipPipPipPipPipPip
  • 9,781 posts
  • Location: Isle of Wight

Posted 23 August 2013 - 04:34 PM

Excellent progress so far!


Ben


#27 Marco1972

Marco1972

    One Carb Or Two?

  • Members
  • PipPipPipPipPipPipPip
  • 822 posts
  • Location: Birmingham

Posted 25 August 2013 - 05:04 PM

Ben_o ,zeemax adventure

Thanks for your comments..

Just a couple of pics of progress so far.

I had a couple of pin holes in the corner repair section so sorted those out today with a quick spot of weld and ground back down.
Then I prepped the inner sill stiffener with weld thru primer. After drilling several Holes for the plug welds I lined it all up clamped it down and plug welded the holes.
After that it was a quick grind down and then a good coat of acid etch primer on all the bare surfaces.

Attached File  image.jpg   44.06K   11 downloads. Attached File  image.jpg   44.39K   10 downloads

Attached File  image.jpg   55.4K   13 downloads. Attached File  image.jpg   52.23K   9 downloads

Attached File  image.jpg   57.45K   9 downloads. Attached File  image.jpg   66.52K   15 downloads

Finally I've test fitted the new companion bin it's a pretty good fit so that's next on the list -:)

#28 Marco1972

Marco1972

    One Carb Or Two?

  • Members
  • PipPipPipPipPipPipPip
  • 822 posts
  • Location: Birmingham

Posted 26 September 2013 - 07:21 PM

Been a while since I last updated this due to a holiday in the sun so here goes

As I ran out of gas I thought this would be an ideal opportunity to start refurbing the radius arms as I'd had the subframe cleaned and powder coated
667E1EC6-9AFA-42FA-B9DF-4525F048F807_zps

The first arm came apart very easily and after a good session with a wire wheel it looked ok
I treated all parts with rust treatment then acid etch followed by a good coat of grey primer and then satin black and I think they look ok.
I could have just replaced these parts but it's really satisfying restoring parts and saves a packet along the way
image_zpsc72157fd.jpg
image_zpse70b2348.jpg
image_zps70e295c1.jpg

Came out ok....

image_zpsfbe3a2fd.jpg
The same can't be said for the second arm the flexi hose nut was seized and took an age to get off the brake pipe was also toast so that's been binned and to top it all the radius arm shaft was welded solid with rust so after much bashing and cursing I got it out complete with bush and bearing
I now have a nice little list for when I visit mini spares this weekend -:(
My local engineering shop is going to fit the new radius arm bearing and bush and ream it out £ 15 I think that's a good price ??

After using the new small argon gas mix from BOC I've found a new supplier ( hobby weld ) no rental just a one off deposit and pay for refills as needed so as long as the weather holds out this weekend it's back on with the welding

7D1BF581-8562-4271-91B0-87C077D7489A_zps

This should last a bit longer -:)

Thanks for looking..

Edited by Marco1972, 22 October 2014 - 05:36 PM.


#29 Marco1972

Marco1972

    One Carb Or Two?

  • Members
  • PipPipPipPipPipPipPip
  • 822 posts
  • Location: Birmingham

Posted 27 September 2013 - 04:45 PM

Finished cleaning up the second radius arm after work today


Cleaned up ok considering the state it was in
image_zpsaccd9e47.jpg

Gave the drum,backplate and other bits a good coat of rust treatment I will paint it all tomorrow etch primer,primer then satin black
image_zpsd4cd9f18.jpg
image_zps219ee999.jpg

Off to mini spares tomorrow to get radius arm repair kit, hand brake adjuster and tappets,rear brake pipe ,rear suspension knuckles and hand brake quadrant pins,washers and split pins.

After reading other folks posts it seems that UPOL gravi guard reproduces the original stone chip finish so I've got 4 cans of that today for when I finish the welding
Have to chuckle to myself this car was only meant to have a quick tidy up it's turning out to be an ever growing project !!

Edited by Marco1972, 21 October 2014 - 08:37 PM.


#30 Marco1972

Marco1972

    One Carb Or Two?

  • Members
  • PipPipPipPipPipPipPip
  • 822 posts
  • Location: Birmingham

Posted 28 September 2013 - 08:50 PM

Visited mini spares today unfortunately they were out of stock on radius arm repair kits so that on hold for now

In the meantime I've finished off prepping and painting the rest of the parts

image_zps0285e1c9.jpg
image_zps9c1a9e53.jpg

Now that little lot is sorted it's back to the bodywork while mooching around I found a small patch of rust behind the fresh air vent which turned out to be a hole so I've cleaned it up using the draper multi tool my son brought me great tool I recommend it ..
image_zps381c06f7.jpg
image_zps39346ba3.jpg

With the rot cut out I made a repair patch and welded it in


Gave it a quick grind down and a coat of rust treatment

image_zpse1d39453.jpg


That's all for now .

Edited by Marco1972, 21 October 2014 - 08:46 PM.


0 user(s) are reading this topic

0 members, 0 guests, 0 anonymous users