Jump to content


Photo
- - - - -

Spot The Micra Mini


  • Please log in to reply
63 replies to this topic

#16 fuzzy-hair-man

fuzzy-hair-man

    Mini Mad

  • Members
  • PipPipPipPip
  • 181 posts
  • Location: Armidale NSW
  • Local Club: Minis in the Gong

Posted 08 February 2014 - 02:07 PM

What's the wisdom on radiator fans which fit between the rad and the guard? I don't want to cut away the inner guard and fit the Micra fan (I'm weird that way)


I've seen the Revolite and Kenlowe kits but they are getting on for $200 or more before I get them to Australia...


dimensions of clearance of the shroud are: 270mm wide, 290mm high, 20mm - 70mm deep


Craig Davies are an Australian brand but I'm currently looking at Spal fans, there's a 9" and a 10" that'll fit and they seem thinner than the alternatives.

https://webstore.spa...a-10-s-12v.aspx

https://webstore.spa...1a-9-s-12v.aspx

https://webstore.spa...a-10-c-12v.aspx


The 10" is 269mm wide! but I don't know if I dare go for that tight a clearance.. all the Spal low profile fans are 52mm deep at maximum and 28mm at the thinnest.


Specs and dimensions are in a pdf in the links, the Kenlowe  8" seems a relatively poor fit at 202mm wide the maximum thickness is 58.9mm.


The Revotec is thinner at 52mm but I can't find any other dimension or flow specifications?


The Davies Craig 10" is too big their 9" is OK but still thick at 55m max and 37mm at the outside which probably rules it out.


Any other suggestions? any wrecker candidates that are thin enough?


Any thoughts? Anyone know the specs for the revotec fans? as they don't seem to be on their website.


Oh going to order one of these heaters:

http://www.t7design....products_id=310

Anyone used them? are they any good? They are very compact by the looks of things.


#17 rids

rids

    Super Mini Mad

  • Members
  • PipPipPipPipPipPip
  • 670 posts
  • Local Club: british mini club

Posted 08 February 2014 - 05:30 PM

That exhaust looks the same as Mine.
As for fan, I used mini rad micra fan and homemade shroud. No alterations to inner wing

#18 fuzzy-hair-man

fuzzy-hair-man

    Mini Mad

  • Members
  • PipPipPipPip
  • 181 posts
  • Location: Armidale NSW
  • Local Club: Minis in the Gong

Posted 08 February 2014 - 10:48 PM

That exhaust looks the same as Mine.

My Hurricane extractors are a very similar design to the ones you got, I had your thread open on the laptop whilst I was planning how to modify them. ;-) I had to change the first branch though because it needed to miss part of the subframe. Quite happy with how they turned out.
What size exhaust did you run back from there? I seem to remember it was the mini's rc40 etc that it had before, so 1 3/4? The micra guys seem to favour about that up to 2" for n/a. What do you reckon?

As for fan, I used mini rad micra fan and homemade shroud. No alterations to inner wing

Your mini doesn't have the radiator shroud that mine has so I think this has given you some more room for the micra fan.
I'm kind of hoping to leave the area over the gearbox clear as I need to get a filter box in there somewhere and just to make clutch adjustments, gearbox filling (if I drill and tap a filler), wiring etc. easier.
Constantly worried that little differences between Aussie minis and UK ones will stuff things up.

#19 rids

rids

    Super Mini Mad

  • Members
  • PipPipPipPipPipPip
  • 670 posts
  • Local Club: british mini club

Posted 09 February 2014 - 01:13 PM

My exhaust is 1 3/4. I wouldn't worry about the slight differences, they can all be overcome

#20 l_jonez

l_jonez

    One Carb Or Two?

  • Members
  • PipPipPipPipPipPipPip
  • 1,453 posts
  • Local Club: south wales mini club

Posted 09 February 2014 - 02:31 PM

Same here I use a 1 3/4 exhaust. The Micra is also 1275 so won't be strangled by a decent mini exhaust.

#21 fuzzy-hair-man

fuzzy-hair-man

    Mini Mad

  • Members
  • PipPipPipPip
  • 181 posts
  • Location: Armidale NSW
  • Local Club: Minis in the Gong

Posted 19 March 2014 - 11:30 AM

Some more updates, the alternator mounting and bracket as it was when I was last up doing stuff to the mini.


P1010107.jpgP1010108.jpg


Some shopping that I've been doing:

Spal 10" low profile fan: webstore.spalusa.com/content/files/content/PDF/30100435_SPEC.pdf


P1010105.jpgP1010106.jpg


The fan fits really nicely inside the original fan shroud with no room to spare (it's like it was made to fit there!!) the fan also nicely fits the back of the radiator.

This doesn't space my radiator at all out towards the engine, super happy about that!


Lastly I got some panels to sort my floors:

P1010110.jpg


I previously got some other floor panels, but they didn't have the ridge down the middle to take hydro, fuel and or brake lines (when the mini started production in Australia they made some local improvements) so the brake, fuel and hydro lines aren't going to get wiped off. So now it matches the rest and I get some protection for my lines.


#22 fuzzy-hair-man

fuzzy-hair-man

    Mini Mad

  • Members
  • PipPipPipPip
  • 181 posts
  • Location: Armidale NSW
  • Local Club: Minis in the Gong

Posted 21 March 2014 - 11:42 AM

A bit more has happened since the last post, the extractors have been finished off but unfortunately there may be some clearance issues requiring some more subframe mods... but some progress...


I've found a panel beater who is willing to do the mini (a lot of panel beaters aren't taking on restorations) but next time things will be moving again is Easter. :unsure: 


Anyway I thought it'd be good to have a rotisserie, and as I hadn't done any welding before so it seemed like a good place to start.


Completed stand, with patent pend* rotational locking device

P1010111.JPG


* Rotational locking mechanism which bears no relation to a worn out Landcruiser disk brake rotor...(A bar goes through the vents in the rotor to stop the pole turning)


P1010115.JPG


Edited by fuzzy-hair-man, 21 March 2014 - 12:08 PM.


#23 fuzzy-hair-man

fuzzy-hair-man

    Mini Mad

  • Members
  • PipPipPipPip
  • 181 posts
  • Location: Armidale NSW
  • Local Club: Minis in the Gong

Posted 01 October 2014 - 01:08 AM

Ermmm....   :tumble: 


So a bit of an update so you don't think I've abandoned the project...


The rotisseire works well and has been great in allowing me to get the rusty panels off.

P1010116.JPG

So had spoken to the guy who's do the body work on Spot and he was more than happy for me to take off the rusty panels to make things cheaper.

So floors out;

P1010117.JPG

and the other;

P1010118.JPG

So panels to go in so far are;

2 x Aussie hydro floors with ridges for hydro lines which I'll use for brake and fuel lines,

2 x some new jacking points.

2 x sills (the Australian ones don't have the vents but they are not over sills either as there's no bumps at all standard) but mine do have vents as they are UK replacements (still trying to decide if this is a good thing or not)

I got an extra cross member for mounting the rear of the MR2 seats but I'm not going to use it as we will make up a lower rear cross member to sit the back of the seats lower, I'm also going to space them in towards the centre so the steering wheel and pedals are more central and I can still work the seat adjustments with the door closed.


A new  front panel as the old one was bent and it's easier to put a new one on than straighten it out.

P1010121.JPG

Floors will be lapped in not butt joined as it'll be hidden and stronger and easier this way. ;-) 

There's a small patch of rust in each of the wheel arches but the panel beater reckons he can deal with that without replacing the panels. :mrcool: 

P1010120.JPGP1010119.JPG

Front panel gooone!

P1010123.JPG

So one of the reasons I'm updating at the moment is that the mini got picked up by the panel beater on the weekend so I should get it back all nice and rust free with mounts for my MR2 seats  :D 


Oh I did the clutch too...


OK and lastly a bit of a question, how far can you space the grill forward without it looking rubbish or obvious, I'm still not sure I'm going to get the required clearance on the subframe with my alternator at the back so I'm toying with the idea of spacing the grill forward a bit and cutting out some of the front panel to create room to put the alternator up front like this one: http://www.theminifo...mini/?p=2559691

My engine seems further forward than his and possibly a bit closer to the driver's side.


Unfortunately it will be at least Christmas before I see Spot again... :( 


Edited by fuzzy-hair-man, 01 October 2014 - 01:12 AM.


#24 BradleyRogerson

BradleyRogerson

    Stage One Kit Fitted

  • Noobies
  • PipPipPip
  • 94 posts
  • Location: Runcorn

Posted 06 October 2014 - 01:04 PM

my engine is far forward and over to the drivers side with a denso alternator up front, my grill sits pretty much up against the bumper on the drivers side but its doesnt look terrible you dont notice it looking at straight ahead at it although it had squashed my lambda sensor wires and ruined them so im gonna try and mount the whole thing abit forward or see if i can cut some more off the back of the grille.
oh i also had to cut my inner wing and move it a bit out of the way for my alternator pulley to fit but yours may not be as far over as mine :) hope this helps 

Attached Files


#25 Down&Out

Down&Out

    The King Of Retro Cool

  • Traders
  • PipPipPipPipPipPipPipPipPip
  • 4,833 posts
  • Location: -

Posted 01 November 2014 - 02:17 PM

Love the subframe on this, keeps a lot of the original subframe which is nice.


#26 fuzzy-hair-man

fuzzy-hair-man

    Mini Mad

  • Members
  • PipPipPipPip
  • 181 posts
  • Location: Armidale NSW
  • Local Club: Minis in the Gong

Posted 07 November 2014 - 05:17 AM

my engine is far forward and over to the drivers side with a denso alternator up front, my grill sits pretty much up against the bumper on the drivers side but its doesn't look terrible you don't notice it looking at straight ahead at it although it had squashed my lambda sensor wires and ruined them so I'm gonna try and mount the whole thing a bit forward or see if i can cut some more off the back of the grille.
oh i also had to cut my inner wing and move it a bit out of the way for my alternator pulley to fit but yours may not be as far over as mine :) hope this helps 

Thanks, from your description mine may not be quite as far over as yours, I have the front panel I cut off so I might see how far out I can space the grill... I might play about with a front mounted alternator now I have the exhaust in and know what I have to clear.


Love the subframe on this, keeps a lot of the original subframe which is nice.

Thanks, I'm quite happy with the frame it's very compact with the engine in it, but with hindsight there's a couple of things I'd do differently;

  • Firstly the crossing bar that I cut to clear the sump needs to go at least an inch further forward, not just to clear the sump but it would also make the exhaust fitting much simpler. I'd sloped the front in case it hit something but this could be built out in front of where the two subframe mounting points are without too much hassle.
  • The other one is I'd probably move the brace between the two towers further down and bend it to the shape of the webbing between the towers to make some more room inside the frame and make it easier to get the engine in..

The original subframe behind the towers has all been re-enforced at the engineer's request so in some respects it may as well of had something like the allspeed frames, keeping the original bit there means less worries trying to guess clearances though.


#27 fuzzy-hair-man

fuzzy-hair-man

    Mini Mad

  • Members
  • PipPipPipPip
  • 181 posts
  • Location: Armidale NSW
  • Local Club: Minis in the Gong

Posted 19 April 2015 - 04:34 AM

So I haven't updated this in ages so I'd better do something about that:


I haven't abandoned this!


Since last time we managed to get Spot in with the panel beater as he was able to clear about a week for us to work on it, I say us because he was keen for me to help him out and I was keen to see how it was done.


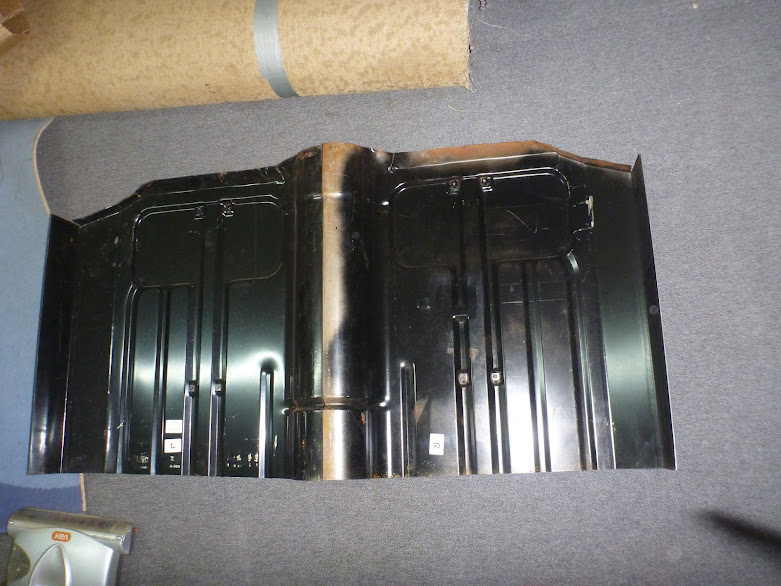
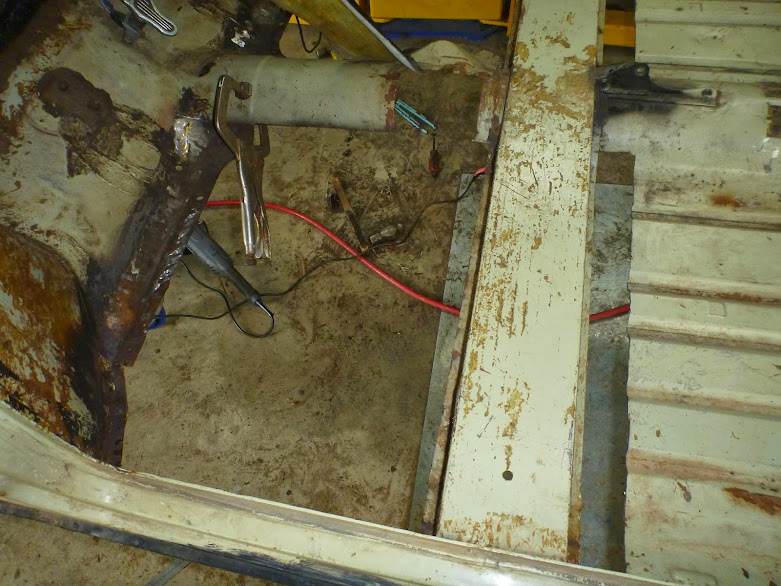
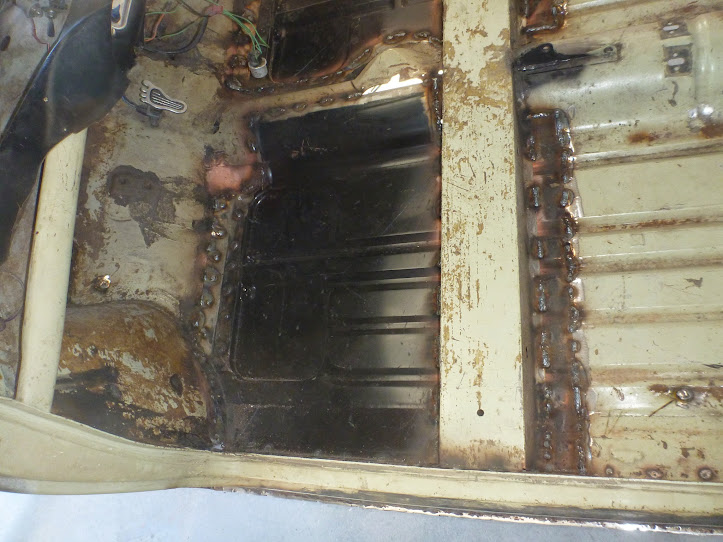
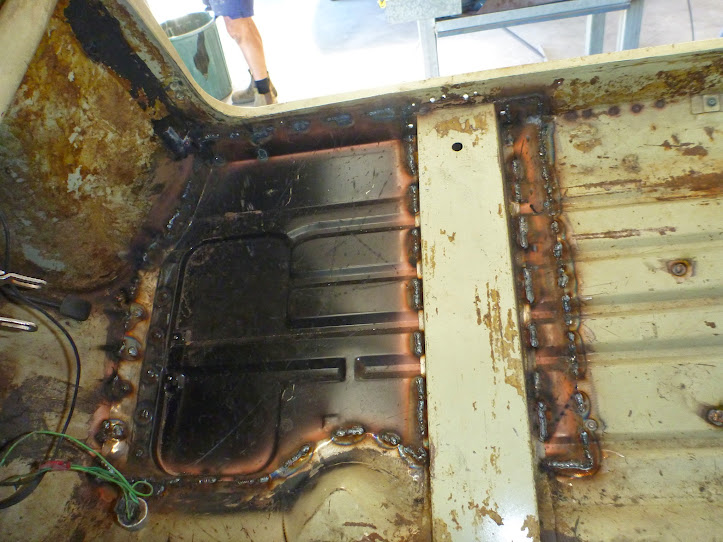
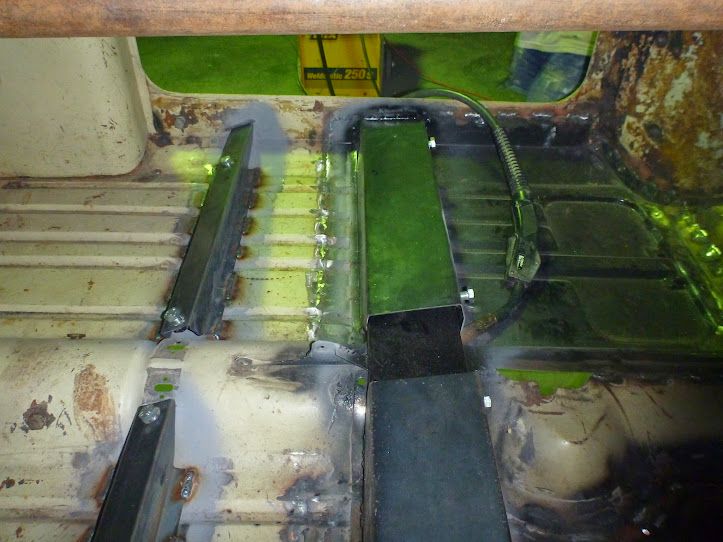
So the floors went back in:

P1010166.JPGP1010167.JPG

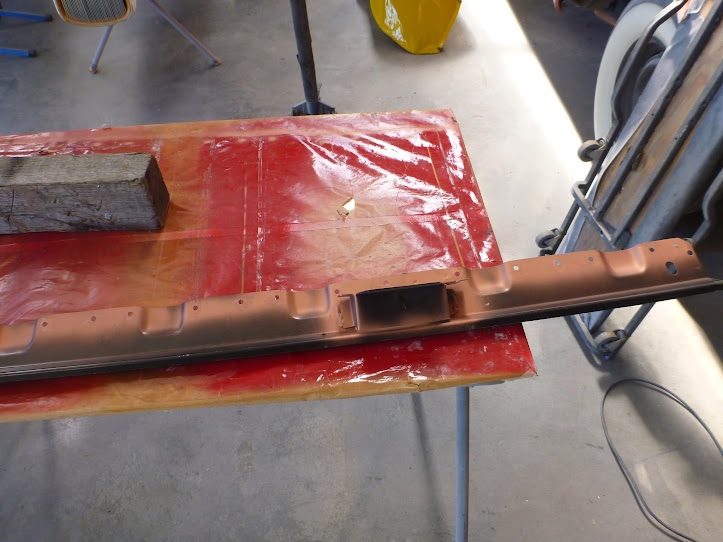
We put the original jacking points back on the sills (lots of Aust. mini parts places didn't stock them apparently no one wants the old jacking points? I figured at least it braces to the cross-member inside):

P1010172.JPG


P1010173.JPG

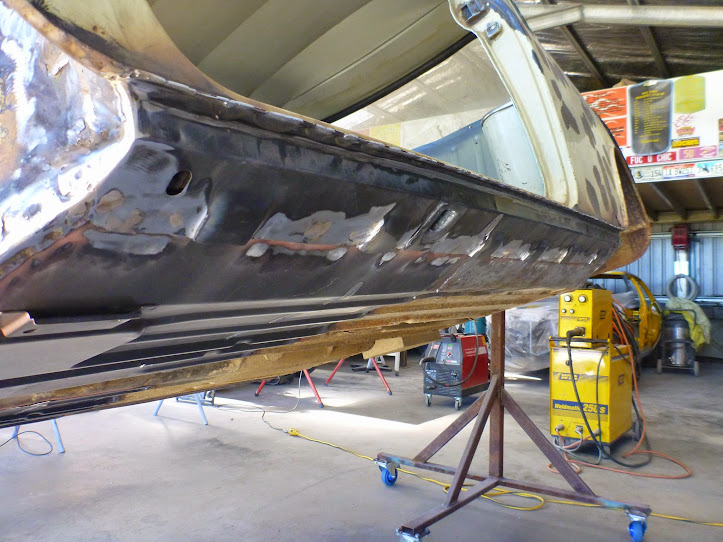
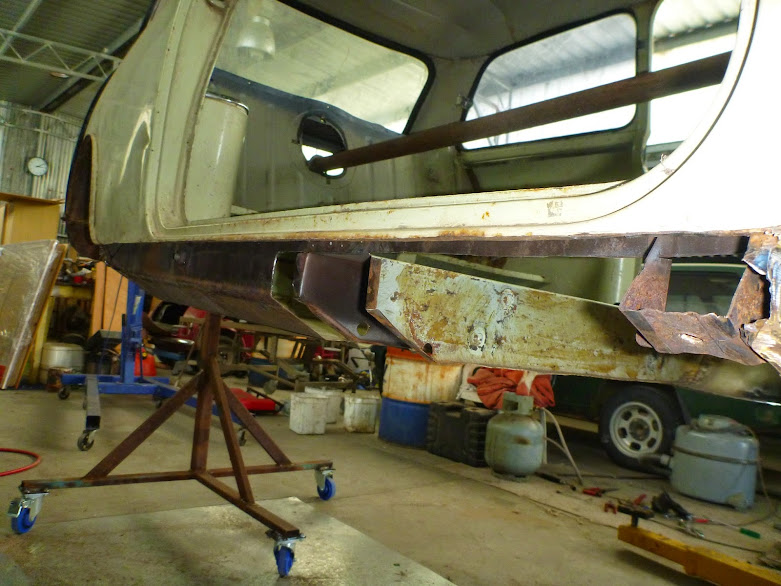
We then started working on the front and Spot got his smile back:

P1010175.JPG

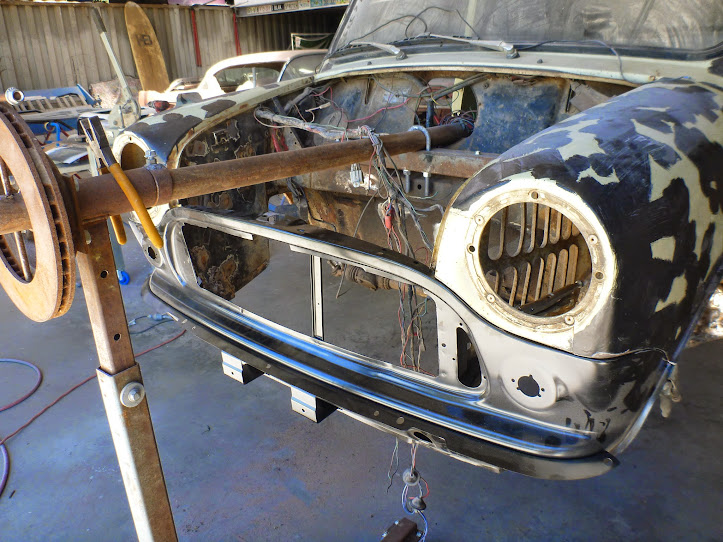
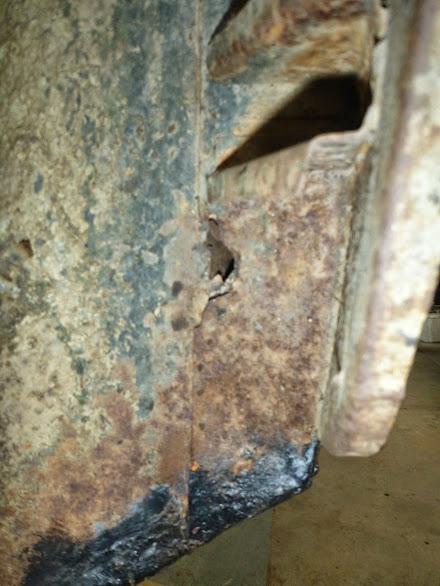
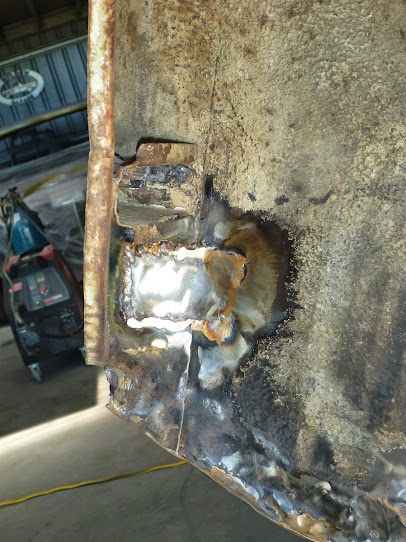
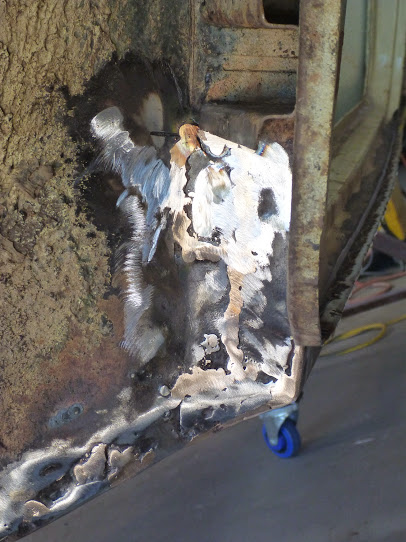
then fixed the rust spots on the front wheel wells(since been cleaned up etc and looks better):

P1010169.JPGP1010168.JPG


That left us with seat mounts and rear seat belt mounts left to go:

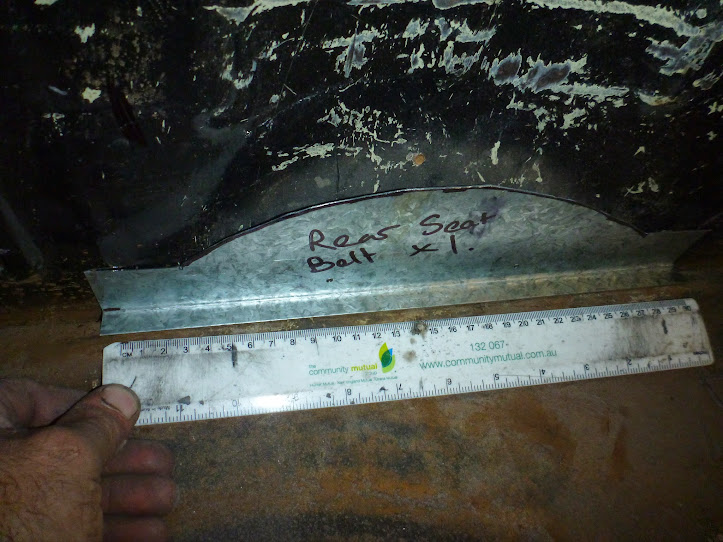
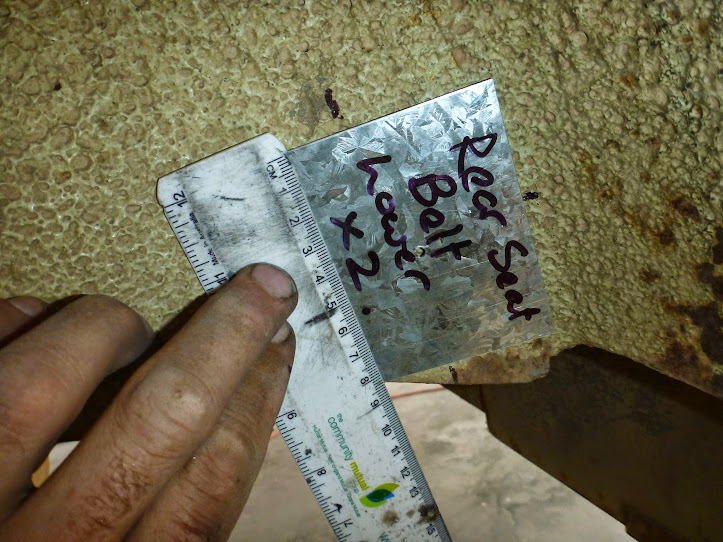
So we made some galvanized iron templates (more rigid than cardboard that I could take to go and get the proper mounts folded up):

P1010190.JPG


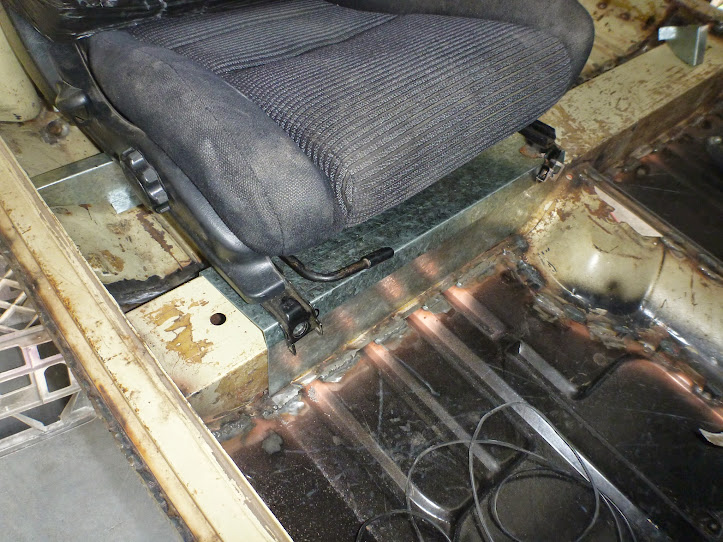
I had thought about putting another cross member behind the original but it would have made the rear of the seat too high and my head was lightly brushing the hood lining (which would get annoying) so we scrapped that idea and were going to make up feet to lift the rear, that got changed to making a full cross member.

P1010194.JPG

The seats have room down the sides (with the door pockets on) to work the seat adjustments and there's room enough in the middle to pull the hand brake  :highfive:

And... the seats are as far towards the middle as practical so now the seat lines up with the steering wheel so no more off centre steering wheel for me!! :w00t: (somehow I don't have a picture though)


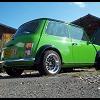
We then moved on to the seat belt mounts: (pictures of Gal templates only but the real ones are in) these were made to copy the ones on my green '78 clubman.

Rear seat base:

P1010186.JPG


Rear parcel shelf (tying into either side of where someone welded in a replacement)

P1010188.JPG


and lastly on the rear wheel well for the last of the mounts

P1010189.JPG


Unfortunately that's all I've got pictures for.... :ohno:


But other things that have happened.


  • The clutch pedal has been finalized including a brace over the hole where the hydro one used to be to limit firewall flex.
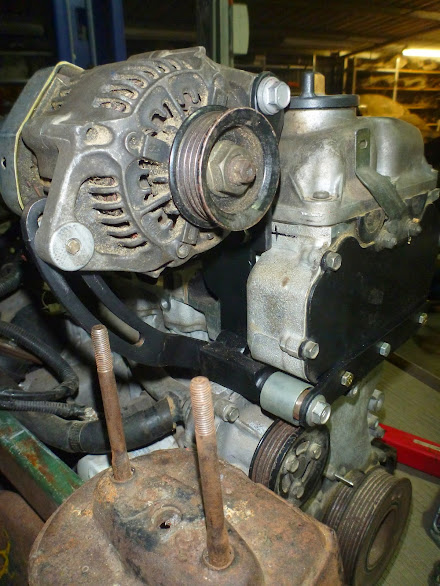
  • Alternator mounting has been redone for what seems like the tenth time including getting a different alternator (same type but a different mounting) that allowed me to get it closer to the oil filler cap.
  • Gear shifts are made up and shift well, I straightened out the gear lever and made the mistake of thinking the ball was metal (it's plastic) and melts so got another from a pulsar / almera.
  • Rear subframe has been sand blasted, painted and completely rebuilt and is waiting to go in.
  • Fuel lines scavenged from the micra were straightened and installed on the mini.
  • Micra fuel pump installation and wiring finalised.
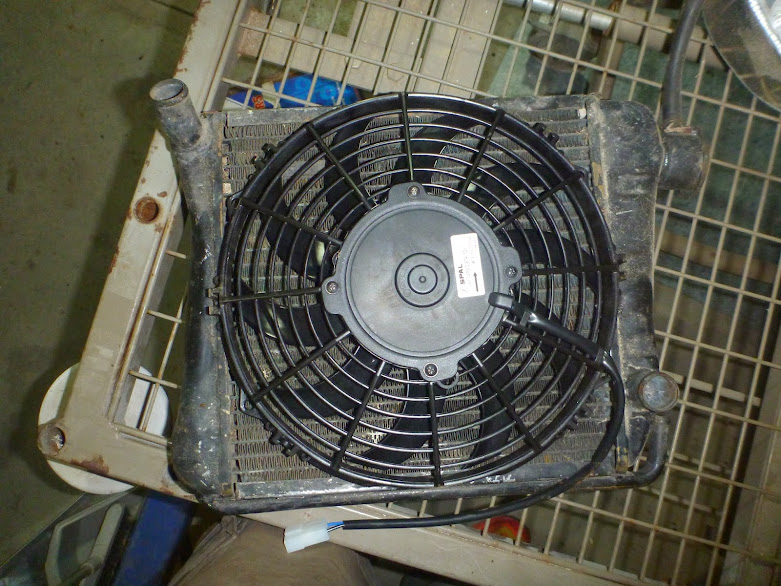
  • Radiator and Spal fan mounted and the bottom rad pipe turned around to make it easier to get a hose on it.
  • Water hoses to and from the radiator cut and finalised.
  • I bought a air filter made a lovely box (bell mouths and everything) for it to fit between the head and radiator only to discover there's not enough room. Now getting a Green Cotton Wind or Nano Storm which will JUST fit.
  • Cut back the front panel to clear the extractors.
  • Front subframe has been sand blasted and painted and is waiting for me next time I'm up in Armidale.
  • The flywheel is off and away to be lightened.
  • I've been chasing nice small inner CV joints particularly for the gearbox / passenger's side as clearance is tight... got two now but one is for the other side (not sure if it makes a difference)


So now a couple of thoughts / questions:


I've been wondering if I ought to use Nistune on my ECU it's $600 Aust. but will give me control over the timing. I already have a Apexi Neo AFC so not sure if a N/A warrants going nistune but I also like the stealth factor and that it is doing it properly rather than intercepting signals.


The other question is most of the pulsar / micra driveshafts don't match the mini disk brake CV joint splines, but I thought they did on a couple of conversions on here...? The one that does match is the driveshaft for the smaller inner CV (the ones I've been searching for) which makes me wonder if the CG10 gearbox uses the smaller shafts with less splines and if the inner CV's are smaller. We only got CG13's here in Australia.

Could anyone with a CG10 measure the diameter of inner CV joint at the widest point? with or without the CV boot is OK.


#28 Archived2

Archived2

    One Carb Or Two?

  • Archived
  • PipPipPipPipPipPipPip
  • 1,093 posts

Posted 19 April 2015 - 12:11 PM

Its nice to see a well designed and correctly welded front frame. I have seen so many with pigeon poo welds out on the road its frightening!


I would love a copy of your front frame  :thumbsup:


#29 vGmini

vGmini

    Starting My Mini Up

  • Noobies
  • Pip
  • 1 posts
  • Location: Cairns

Posted 15 October 2015 - 03:11 PM

Hi fuzzy-hair-man how is the build going it looks really good and I cant wait to see the finished product. I'm about to tackle the cg13de engine swap myself are there any tips you can give me in regards the building the subframe?  


#30 fuzzy-hair-man

fuzzy-hair-man

    Mini Mad

  • Members
  • PipPipPipPip
  • 181 posts
  • Location: Armidale NSW
  • Local Club: Minis in the Gong

Posted 19 October 2015 - 01:51 AM

Hey, sorry I haven't updated in ages...


So since last update:

  • Brake lines sorted
  • The front subframe has been rebuilt with new wheel bearings, ball joints, seals.
  • Front brakes overhauled with new pistons, caliper seals and stripped and painted.
  • The machining guy was having trouble with the flywheel so it's back in at it's full weight. (I'll get to it later)
  • Engine is back in the frame for hopefully the last time.

So more exciting is that in the last trip up to Armidale I got the driveshafts sorted (it was an 11hr return trip in one day but...). The guy I got to do it was really good rather than cut and weld he cut off the shaft and machined the Mini CV joint splines on the shortened shaft, the result looks great and is probably a fair bit lighter than otherwise.

I've also ground out the driveshaft holes for a bit more clearance.


I managed to find another 2 of the small DOJ75 inner CV joints after a lot of looking so I have a couple of spares... just in case.


So next mission is to get the engine and subframe back in the car and commence wiring, wiring is the bit I've been dreading a bit, but I have the guide and if I take my time...


Hi fuzzy-hair-man how is the build going it looks really good and I cant wait to see the finished product. I'm about to tackle the cg13de engine swap myself are there any tips you can give me in regards the building the subframe?

 I just noticed you were in Cairns!

Just as a FYI Matt at Readspeed in Brisbane is doing a couple of conversions at the moment so it may be an option for you as well.

http://www.ausmini.c...hp?f=23&t=79731


That said I'll try to answer your question.


Queensland has slightly different rules than NSW so it be a bit different although it's supposed to be going to a national scheme.

You need to talk to an engineer before you start anything there seemed a lot of engineers that didn't want a bar of it, so try to find one that's keen and not to restrictive.


Here's some thoughts that may be helpful, wrong or anything in between.

  • The strength of the mini subframe seems to be down low so I tried to build from there.
  • Where the tie bar rods attach is subject to huge forces, I found a reference saying typical braking was 1G which would be equivalent of having the entire weight of the car on those points under braking.
  • I tried to decrease the ride height as little as possible, some decrease is difficult to avoid.
  • Going inside the sump gearbox gap avoids possible clearance issues with the tie bars, the sump, and inner wings but it makes it so the exhaust must be a custom item and more difficult.
  • I don't like where people cut out the front side of the driveshaft hole, I figure the frame was never designed to support weight that way.
  • The diff and water pump are the limiting factors on how far back you can get the engine, even if you tilt the engine forward I think I found my ground clearance was reduced and drive shaft alignment wasn't as good.
  • Don't worry too much on clearance between the sump and the tie bar you can bash the sump inwards a fair way without problems or it cut and welded.

Things I might do differently:

  • I used a 45 degree angle on my engine mounts, it makes it harder to get the engine in so if I did it again I'd go 30 or maybe lower many go flat but I think some angle limits engine movement.
  • The rear bar between the towers I'd move back and think about fitting to the bends of the firewall, this would make more room in the frame to get the engine in and out. (Watch that you can get the speedo cable past)
  • The bar that runs across the front of my frame is too far back (I had to cut some out) but it also makes the exhaust harder, so I'd bring it forward another couple of cm.

@minihobbymini Thanks for the compliment on the frame I am quite happy with it, I don't know that I will be making a copy though and I'm in Australia so it kinda rules it out.


0 user(s) are reading this topic

0 members, 0 guests, 0 anonymous users