looking good ben ![=]](https://www.theminiforum.co.uk/forums/public/style_emoticons/default/sideways.gif)


 3 votes
Mini 25 Full Rebuild
Started by
Ben_O
, May 03 2013 10:05 AM
1498 replies to this topic
#46

ToM 2012
-

- Members
-

- 4,066 posts
Up Into Fourth
- Location: halesowen
Posted 19 August 2013 - 08:26 PM
#47
Ben_O
-
- Paint Doctor
-
- 9,781 posts
Mill Road Garage
- Location: Isle of Wight
Posted 19 August 2013 - 08:32 PM
cheers
#48
Ben_O
-
- Paint Doctor
-
- 9,781 posts
Mill Road Garage
- Location: Isle of Wight
Posted 24 August 2013 - 05:01 PM
Right, I have been busy on the Mini again today. Still not much to show for it but been working on a time consuming job on it.
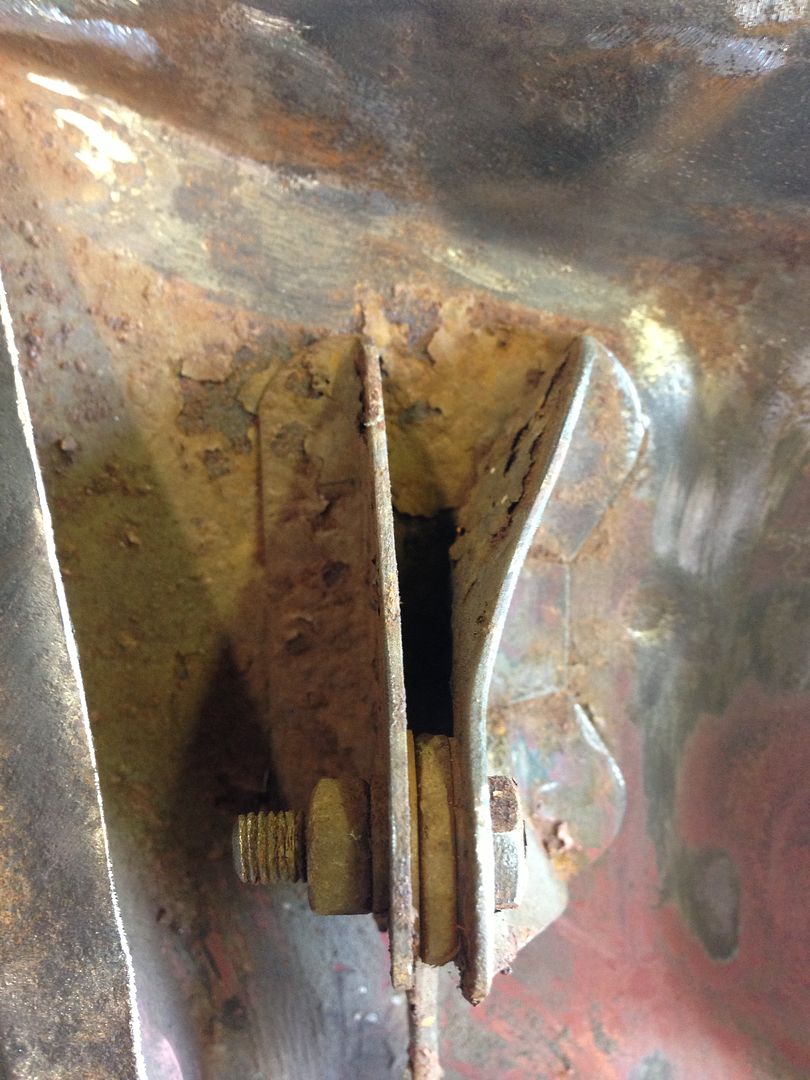
Here is a picture of the area in question.
 It is the part of the crossmember where it starts to dip down in the middle and where the heater cable passes through. The edge of the crossmember and the bulkhead behind it had puffed up with rot and so needed cutting out and sorting.
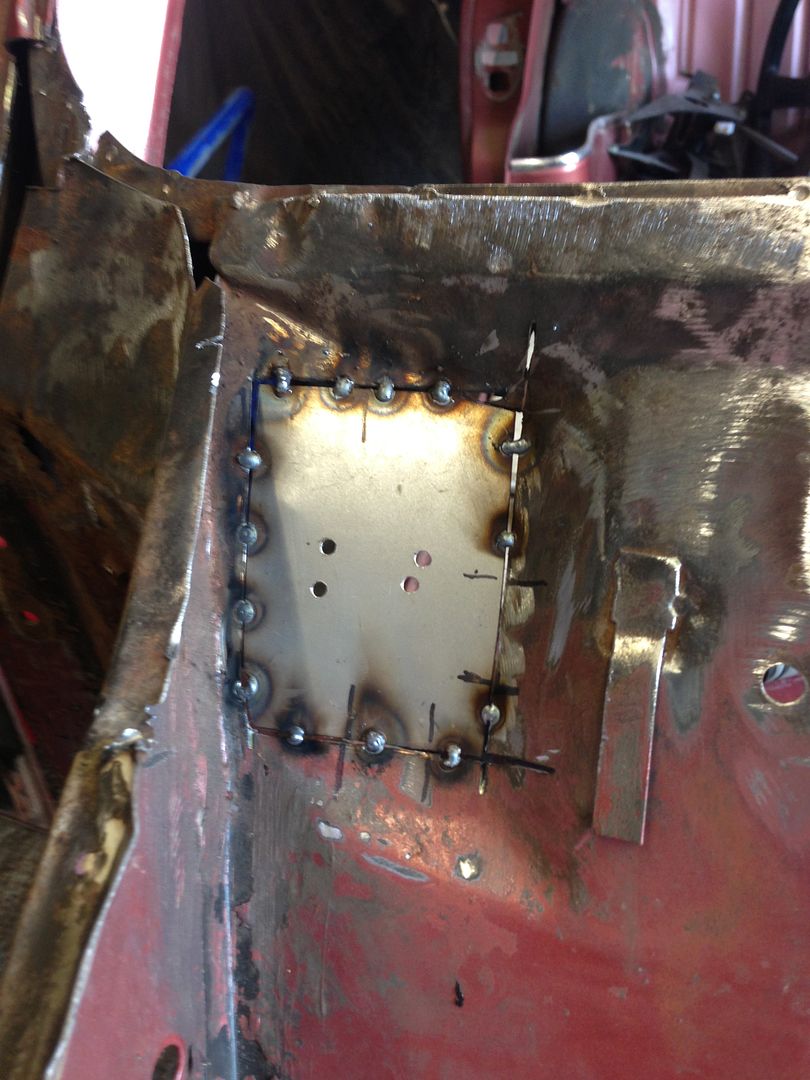
I started by removing the piece of crossmember where the rot was. The bulkhead behind was very thin and pitted so I cut that out and made up a new piece to go in it's place.

Once it was fitting and welded in, I ground it all down and began to make up a replacement part for the crossmember that goes infront of it.

This is it just roughly cut and shaped and laying in place.
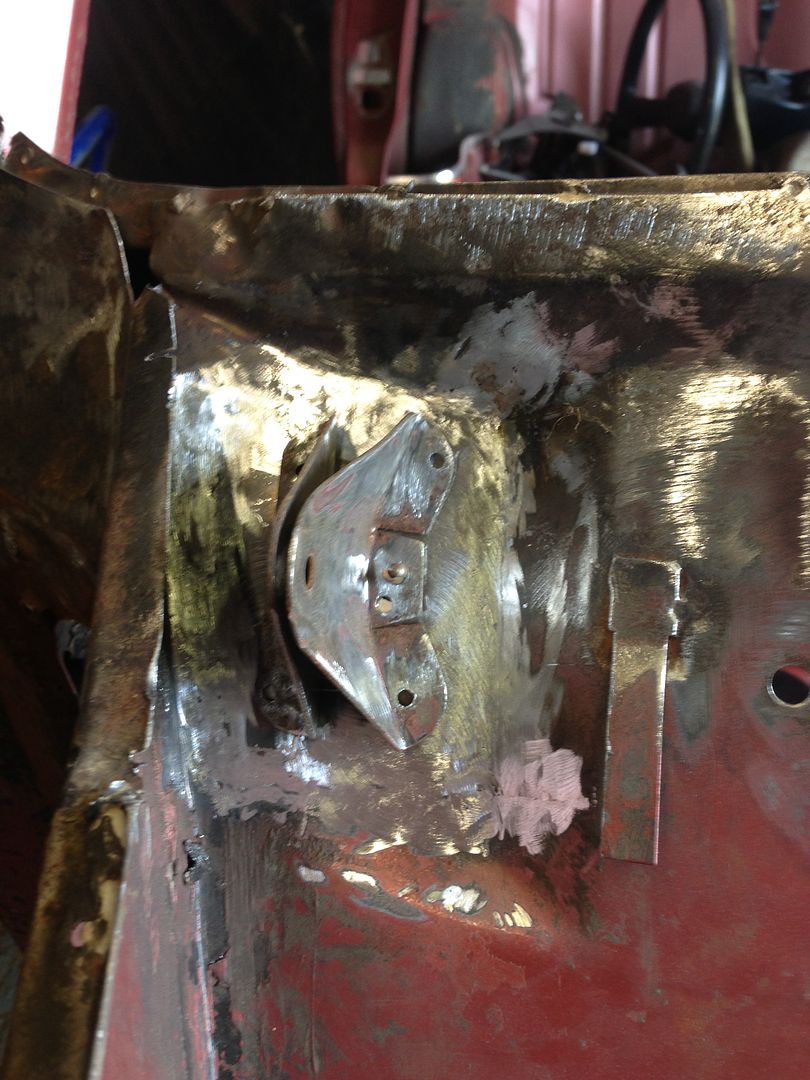
And so after final fitting and welding I now have this.

It just needs a grind up then I shall drill and plugweld it to the bulkhead at the same time as the other repair piece I did before.
Its nice and strong now so another nit ticked off the list!
Cheers
Ben
#49
Ben_O
-
- Paint Doctor
-
- 9,781 posts
Mill Road Garage
- Location: Isle of Wight
Posted 24 August 2013 - 06:56 PM
Went back out to the garage and decided to grind it all up and get some primer on it.
Looks ok, but still needs a bit more fettling.

Cheers
Ben
#50
Ben_O
-
- Paint Doctor
-
- 9,781 posts
Mill Road Garage
- Location: Isle of Wight
Posted 28 August 2013 - 08:42 PM
Little bit of an update.
I received these today.

As well as the roof parts, the bulkhead will enable me to finish repairing my bulkhead at the top corners and where the wiper motor sits.
I have also finished the lower bulkhead beneath the cross member so not much left until I can move on to doing the inner wing, inner sill, boxing plates etc and start making this rusty box start looking like a mini again!! woo hoo!!
Cheers
Ben
#51
1984mini25
-

- Members
-
- 8,781 posts
Crazy About Mini's
- Location: -
Posted 28 August 2013 - 10:01 PM
Pretty much had to do a similar repair the bulkhead/bonnet hinge mounting... http://www.theminifo...-madness/page-4
At least you have a rather solid looking repair section, the one I eventually found turned out to be so bad after cleaning it up that I ended up making the repair up in sections.
#52
Ben_O
-
- Paint Doctor
-
- 9,781 posts
Mill Road Garage
- Location: Isle of Wight
Posted 28 August 2013 - 11:18 PM
Yeah, I saw that a few days ago. I didn't realise it was you doing the work.
I did get pretty lucky with the bulkhead. I hadn't planned to buy that to do the repair and was going to make up the pieces but this came up and I thought it would save a lot of messing around.
Cheers
Ben
#53
Ben_O
-
- Paint Doctor
-
- 9,781 posts
Mill Road Garage
- Location: Isle of Wight
Posted 29 August 2013 - 01:03 PM
Right I have began the upper bulkhead repairs using the second hand bulkhead I bought.
I started by straightening out all the rough edges of the new bulkhead part.

Then I marked out what I needed and carefully cut it out.

Next I welded up all the holes that had been drilled when the repair section was removed from the other car and ground it back

After I had removed the hinge bracket from the car I laid the new piece over the top and marked it out.

And then I cut the old bit out.

Next I offered up the new piece to check the fit and when I was happy, I tacked it in.

So, I'm going to leave it tacked in for now, until I get the boxing panels and upper dash rail just incase, and then it will be fully welded.
So next I will be doing the same the other side.
Cheers
Ben
#54
SAL 821X
-

- Members
-
- 1,890 posts
Camshaft & Stage Two Head
- Location: Hinckley
- Local Club: Leicester Mini Owners Club
Posted 29 August 2013 - 01:42 PM
Crikey Ben some fantastic fabrication skills there.
Can I steal them!
Matt
#55
Ben_O
-
- Paint Doctor
-
- 9,781 posts
Mill Road Garage
- Location: Isle of Wight
Posted 29 August 2013 - 04:40 PM
Crikey Ben some fantastic fabrication skills there.
Can I steal them!
Matt
Cheers for the compliments matt!
It's getting there slowly!!
Ben
#56
Ben_O
-
- Paint Doctor
-
- 9,781 posts
Mill Road Garage
- Location: Isle of Wight
Posted 29 August 2013 - 04:47 PM
Right, I have done a load more now! I got carried away.
So next I decided to replace the top of the bulkhead the other side so I started off in the same manor. Ill let the pictures talk.


Again, I only tacked this in place as I want to make sure the bonnet sits ok first.
So then I moved onto the rotten part of the bulkhead where the wiper motor sits, You can see how bad it is in the previous photos so I cut out and fitted that bit too. Again ill let the pictures talk.


Unfortunately I ran out of Gas so had to leave it unfinished.
So not too bad I think, It looks like this now

But I wasn't ready to call it a day so I started grinding it up and ended up with this.

So there we go for today, have to get more gas tomorrow and continue with it.
Comments welcome as usual.
Cheers
Ben
#57
rally515
-

- Members
-
- 3,848 posts
Up Into Fourth
- Location: ask!
Posted 29 August 2013 - 04:55 PM
Absolutly smashing work Ben, may i ask how you get the panels to sit bang on flush ? or is that a trade secret ? 
Also are you pulse welding and is that better for a few reasons like to reduce warpage ?
Cheers
Cliff
#58
Ben_O
-
- Paint Doctor
-
- 9,781 posts
Mill Road Garage
- Location: Isle of Wight
Posted 29 August 2013 - 05:59 PM
Thanks for the kind words Cliff
And no mate, there is no secret to it. You just take the piece that you want to fit and shape it how you want. For instance I followed pre existing shapes on my bulkhead patches. Once you have the piece prepped and ready you clamp it over the top of the piece you are replacing as tightly fitting as you can and the scribe round the repair piece. Then you take away the repair piece and simply cut out the old bit following the lines you scribed then if you done it right the replacement part should fit straight it leaving you a nice 1-2mm gap between for your weld. Most of the time I spend lots of time filing small amounts off and keep trying it on the car until it is a good fit. The patch where the wiper motor took me about 45 mins of two and throwing shaving little bits off until it fitted properly.
I always find that when fitting quarter panels, door steps or panels similar to that, it is best to fit the new panel so it overhangs the joining edges of the existing panel then simply cut through both pieces with a hacksaw or air saw, that way when you remove the remains of the old bit, your new one will but up against the existing metal perfectly.
I prefer to pulse weld on thin metal like this but not only to keep the warping down but to prevent blowing holes (although I did have a few go today) I would only ever seam weld on thick structural pieces as I think its pointless doing it on thin panels. There is just no benefit from doing it. Obviously plenty of penetration id the key.
Cheers
Ben
#59
sonikk4
-

- Admin
-
- 15,885 posts
Twisted Paint Polisher!!!
- Name: Neil
- Location: Oxfordshire
Posted 29 August 2013 - 06:09 PM
Good going there Ben but i should have looked earlier to save you some potential heartache later on.
I'm in the process of doing a body resto for a work mate and there was serious rust under and around the bulkhead hinge mounts. This was a pain in the butt area to work in and removing the mounts, cutting out the old metal underneath and then refitting the brackets.
The same has been done to the other side.
When you had the section of r/h bulkhead out you could have sorted that out before fitting that section of bulkhead.
Good job though.
#60
Ben_O
-
- Paint Doctor
-
- 9,781 posts
Mill Road Garage
- Location: Isle of Wight
Posted 29 August 2013 - 06:16 PM
Thanks mate for the advice.
Fortunately though, the section of bulkhead and hinge bracket I have used is solid and only has minor flaky paint round the hinge brackets top and bottom and a little surface rust on the inside edges of each piece where the hinge sandwiches between and is all very accessible to clean off.
I shall do this once its all welded up fully.
Cheers
Ben


0 user(s) are reading this topic
0 members, 0 guests, 0 anonymous users


