Jump to content


Photo
- - - - -

White '94 Mayfair Refresh


  • Please log in to reply
17 replies to this topic

#1 Jamieboy

Jamieboy

    Stage One Kit Fitted

  • Noobies
  • PipPipPip
  • 60 posts

Posted 22 May 2013 - 09:06 PM

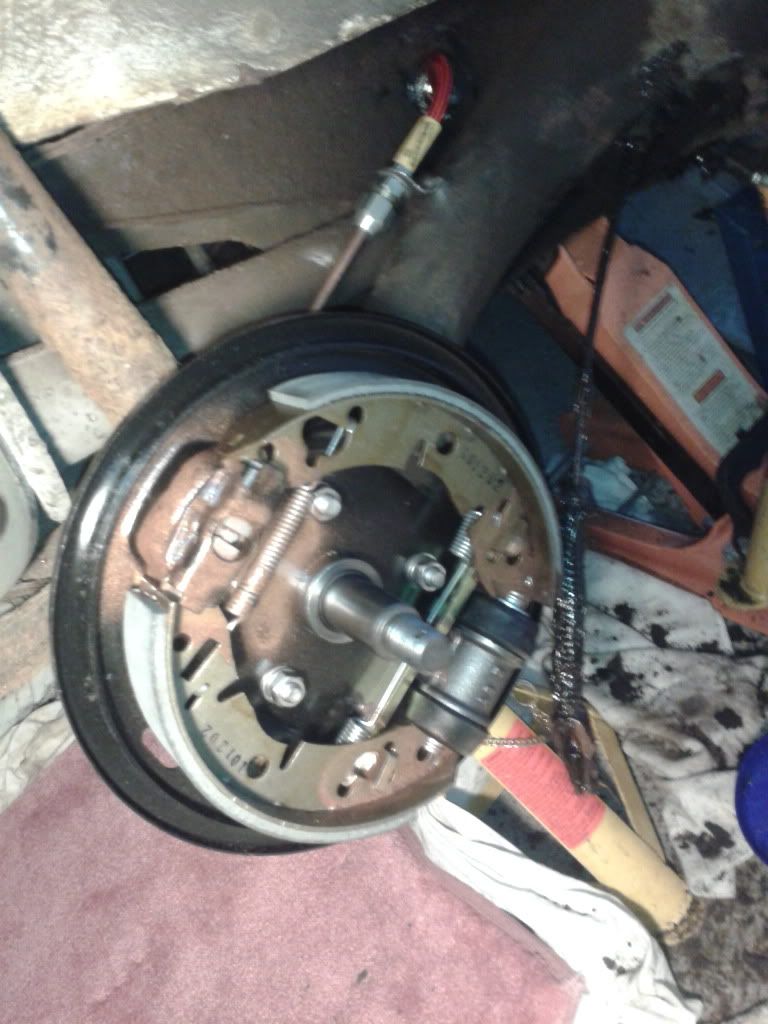
Hi all, now that the weather is actually tolerable up here in sunny Wick, I have again begun working on my beloved Mayfair.


I started off the work this summer with the intention of renweing all rear braking components, but when I went to the garage I was storing the car in, I noted that the clutch pedal was solid and, with a bit of aggro, it moved about 1/2 an inch before coming to a halt.


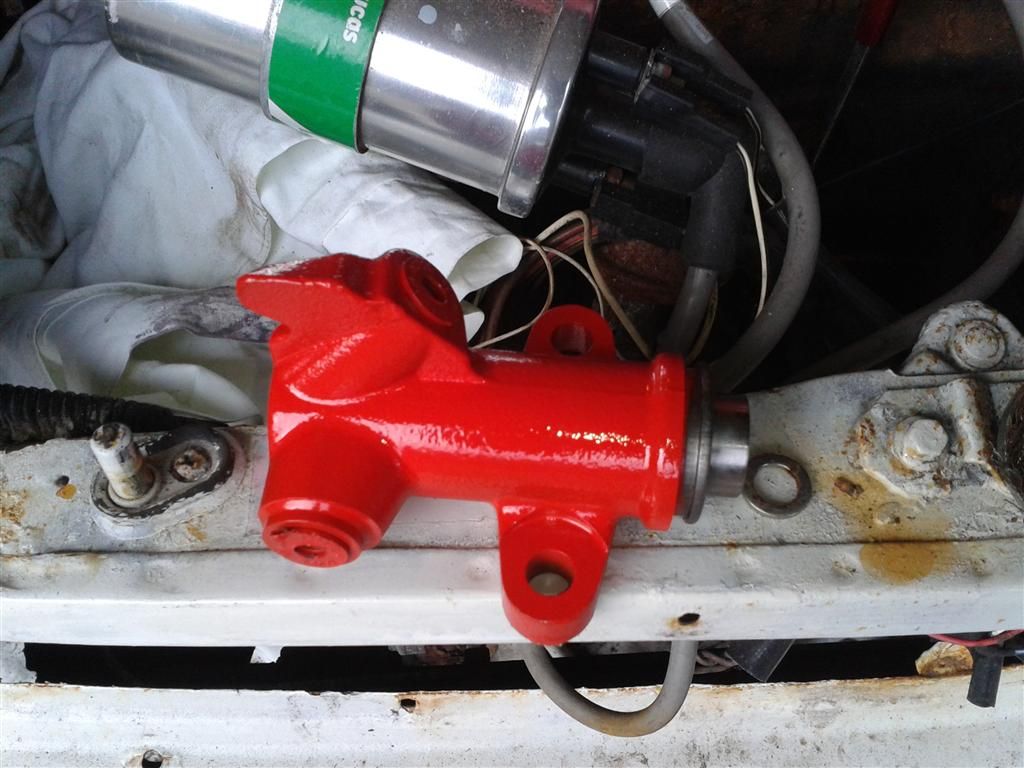
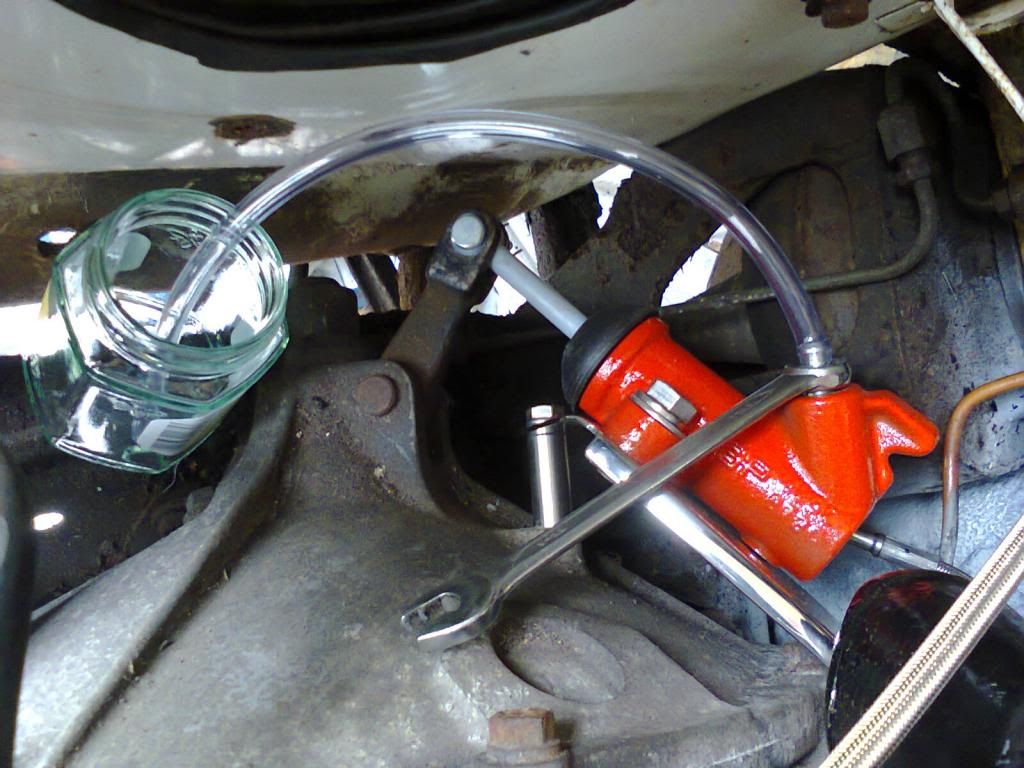
I had a look under the bonnet and found that the clutch slave cylinder was seized and the master cylinder was weeping slightly (just prior to me following suit).


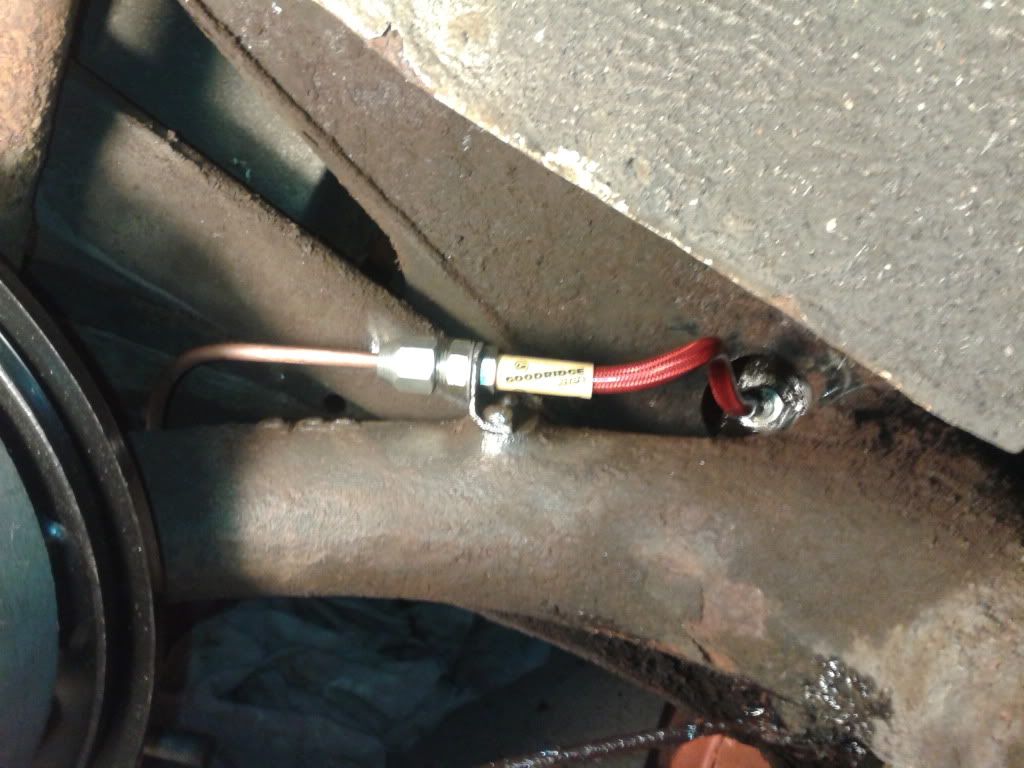
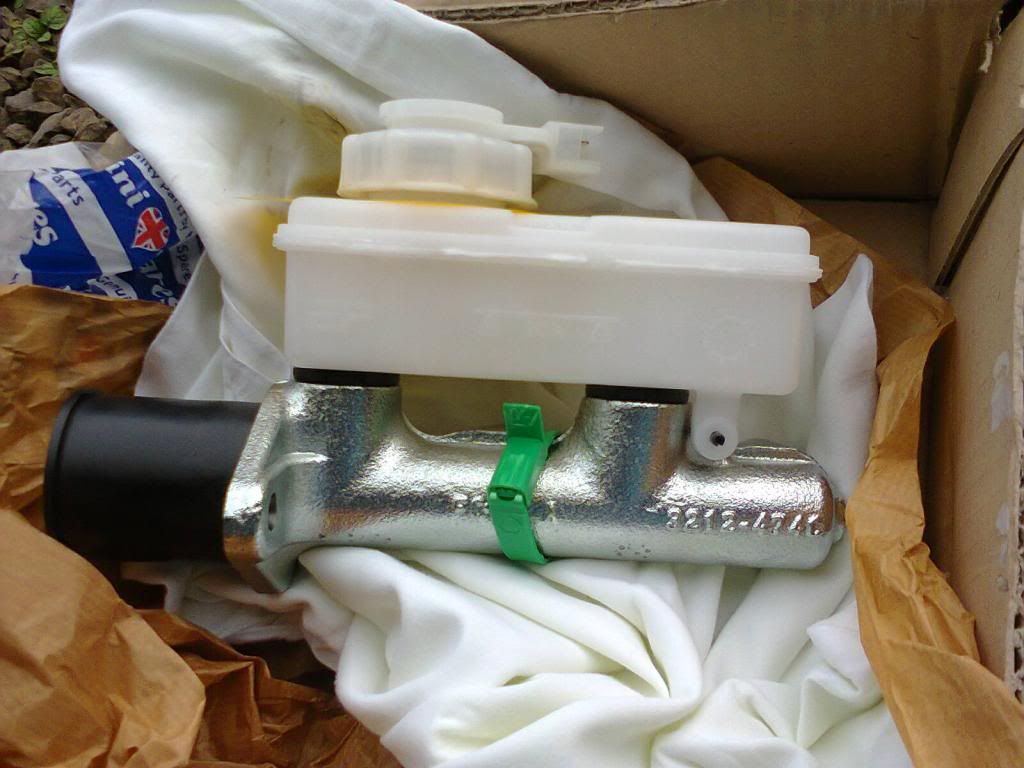
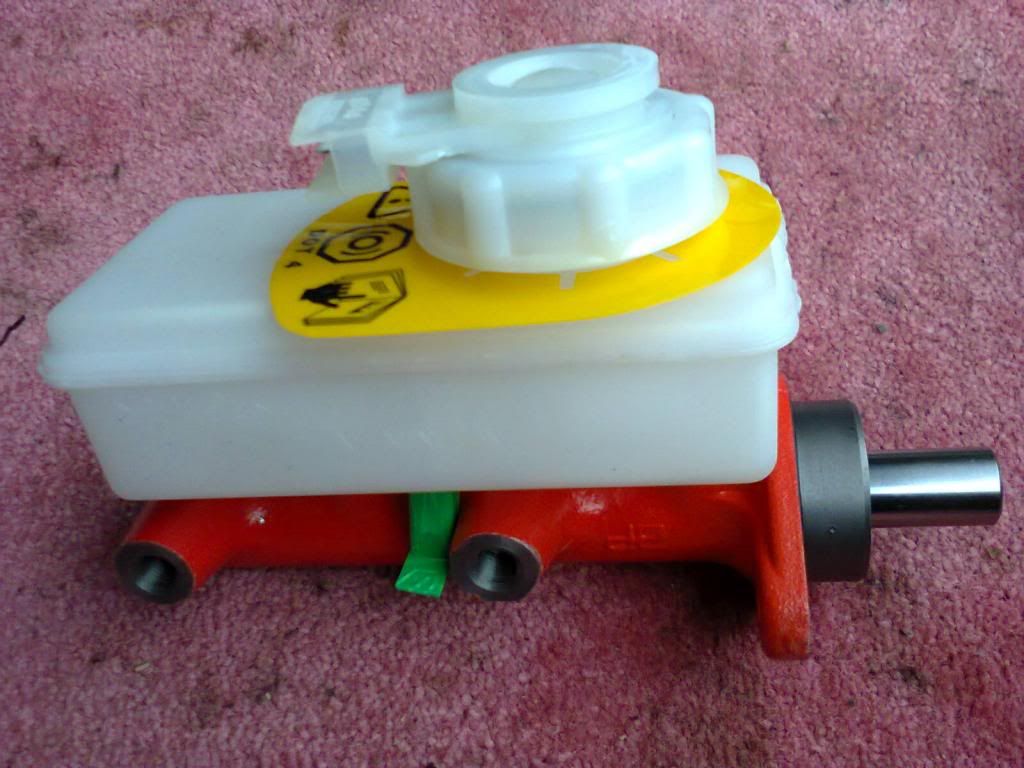
A quick stop online at one of the main Mini parts suppliers saw me get the two new cylinders, a braided hose to replace the aging and suspect-looking copper and flexi-hoses, followed by a stop off to get a stainless clutch master cylinder/ brake lever base-plate (plus gaskets) and clutch slave cylinder bracket.


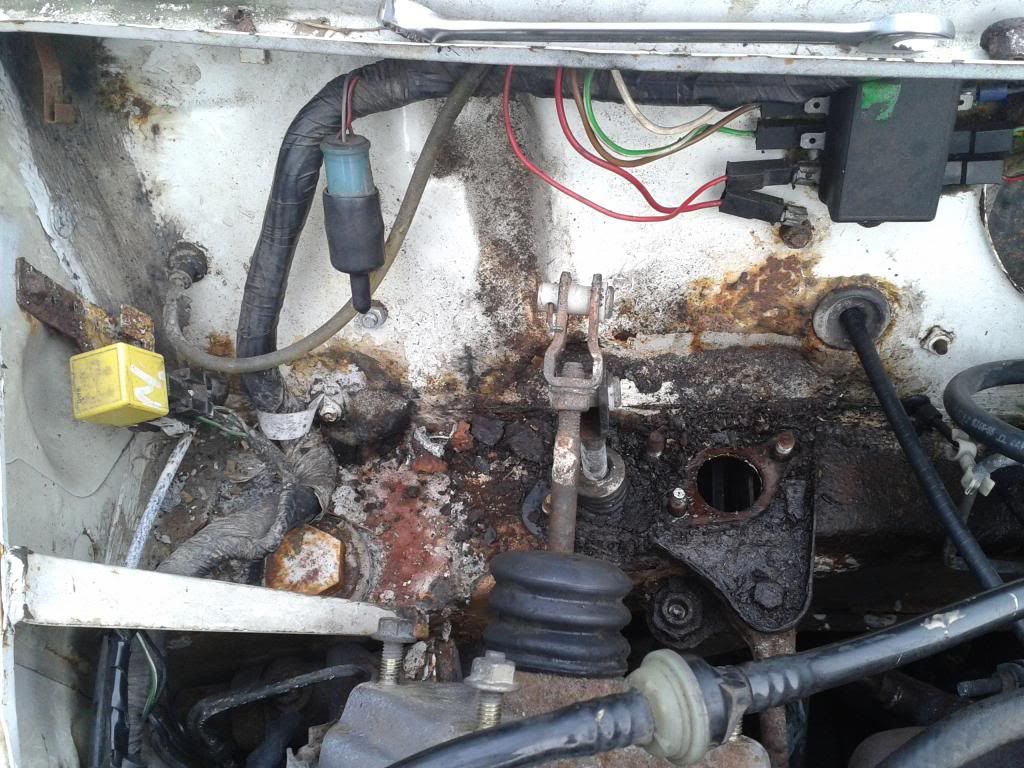
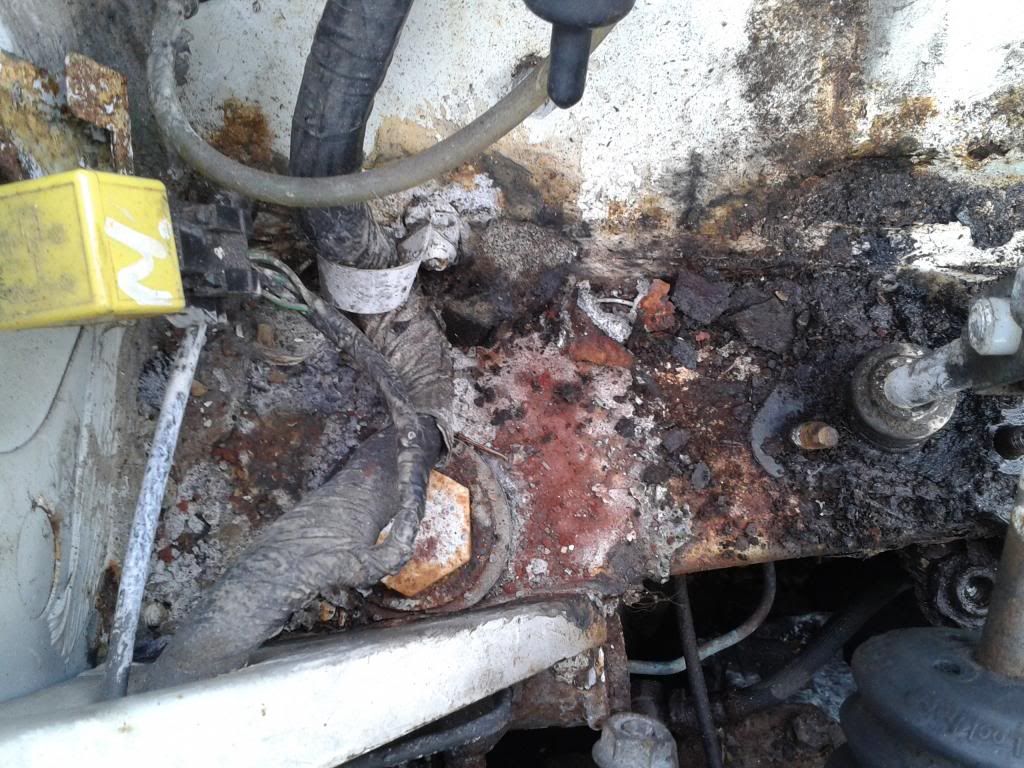
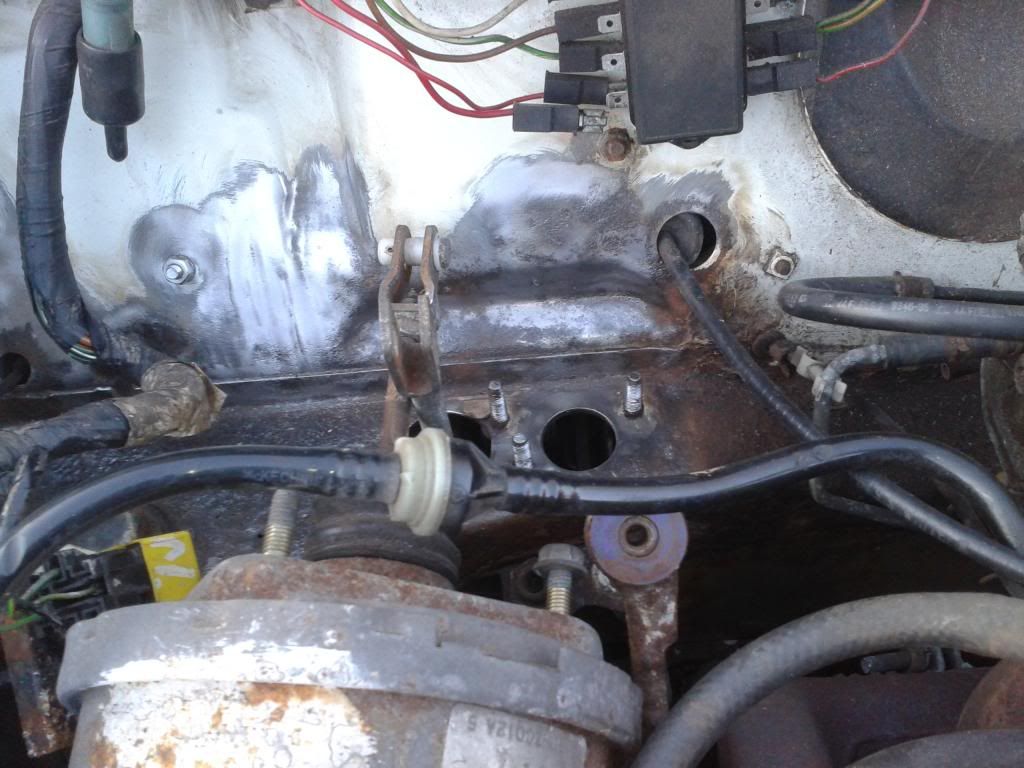
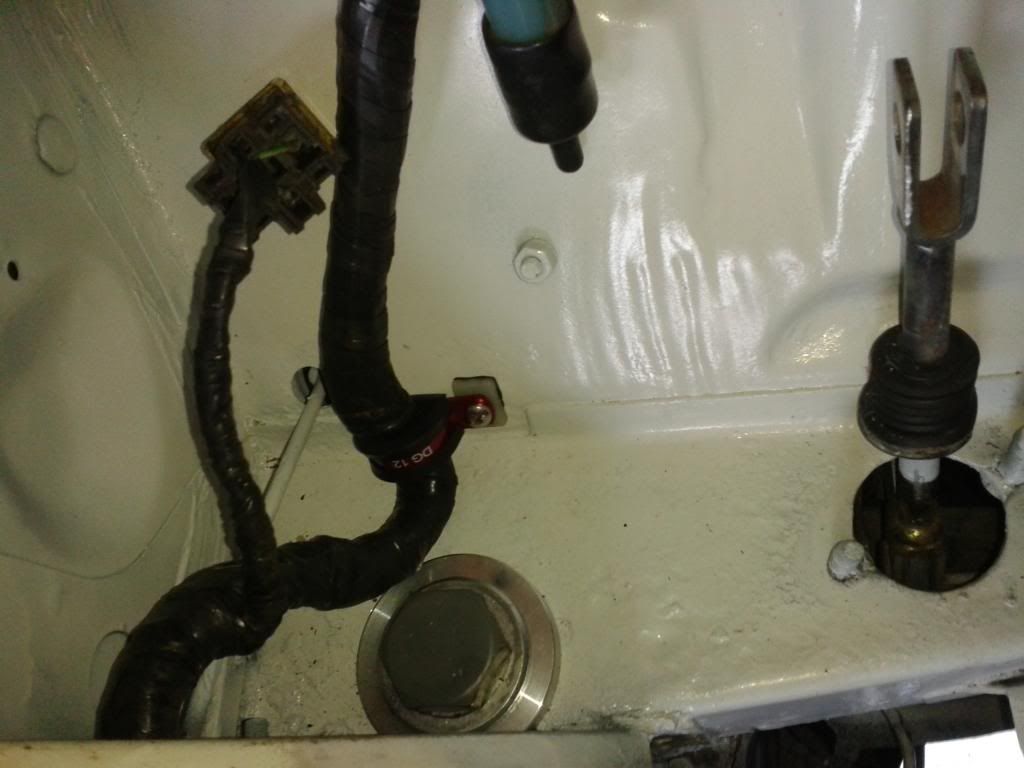
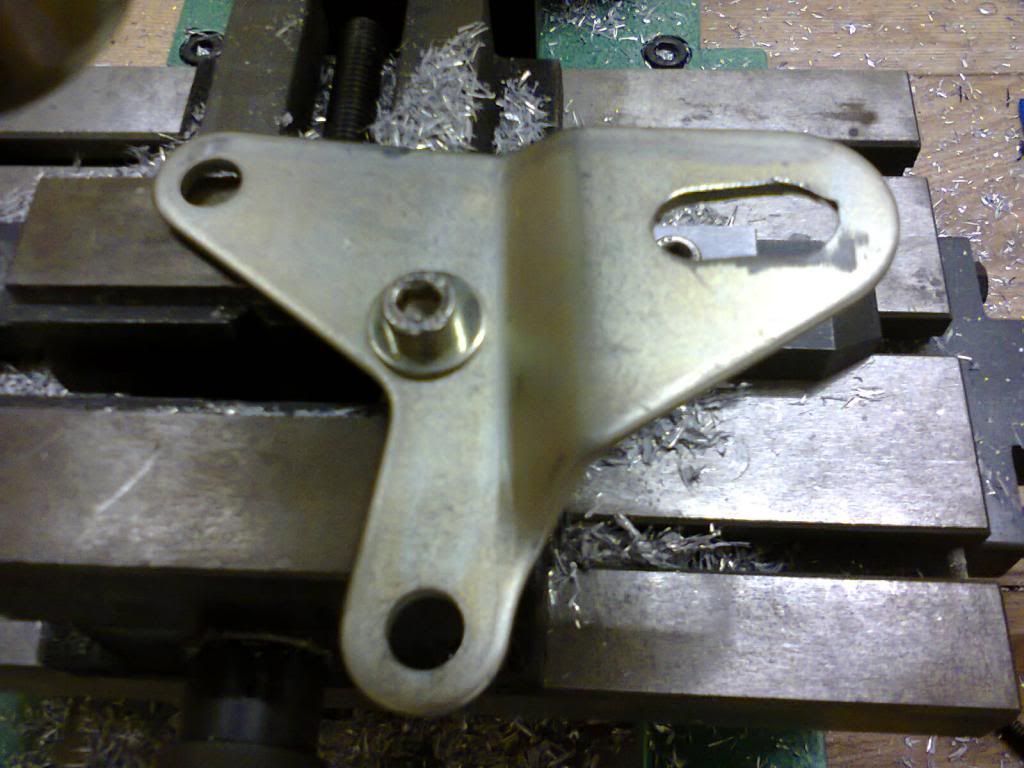
After removing the clutch master cylinder, servo bracket and brake pivot assembly, I was greeted with this horrid sight:


2013-05-19184024_zps254b45eb.jpg


2013-05-19184032_zps46a6df8a.jpg


2013-05-19184037_zps39ff095f.jpg


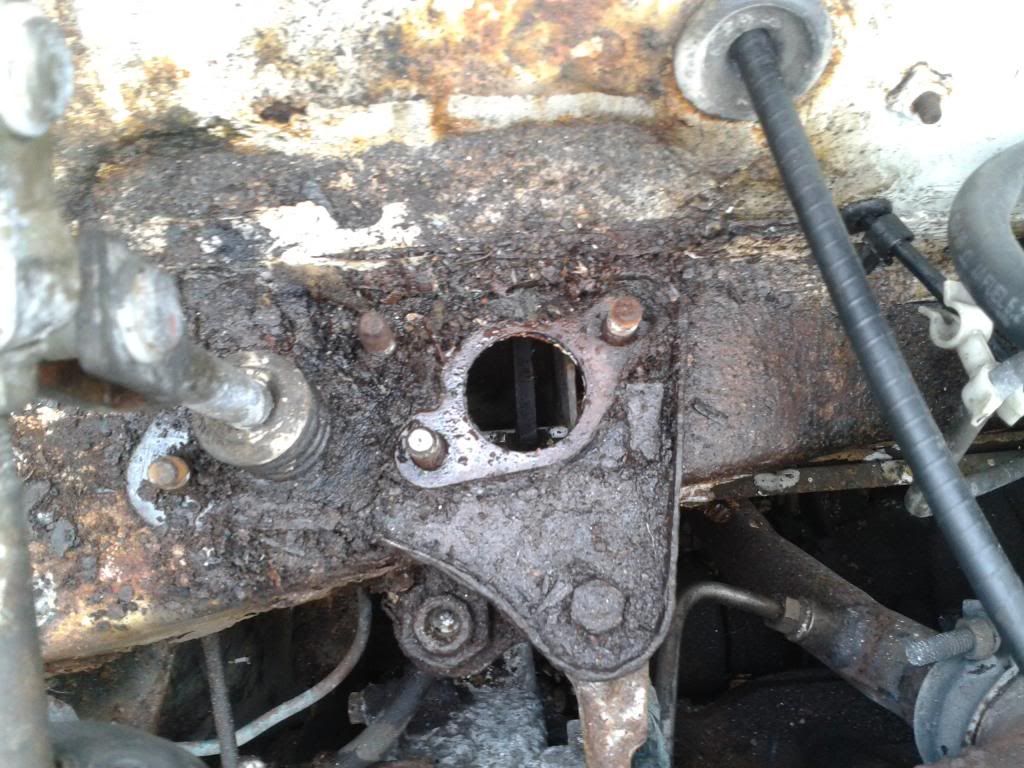
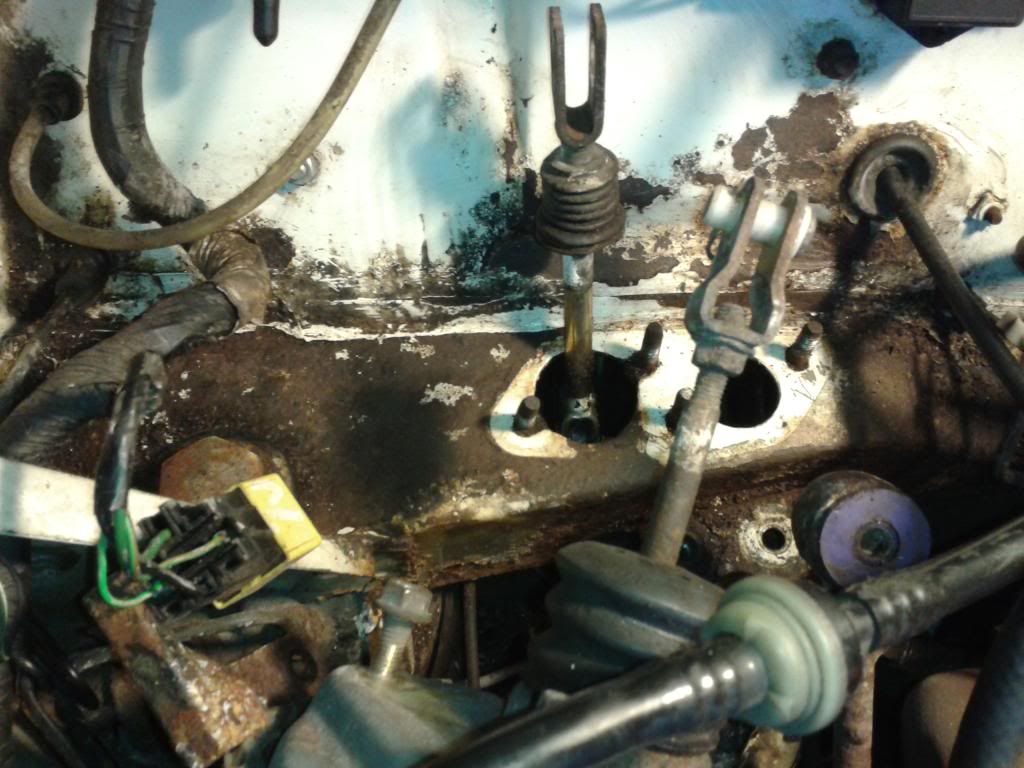
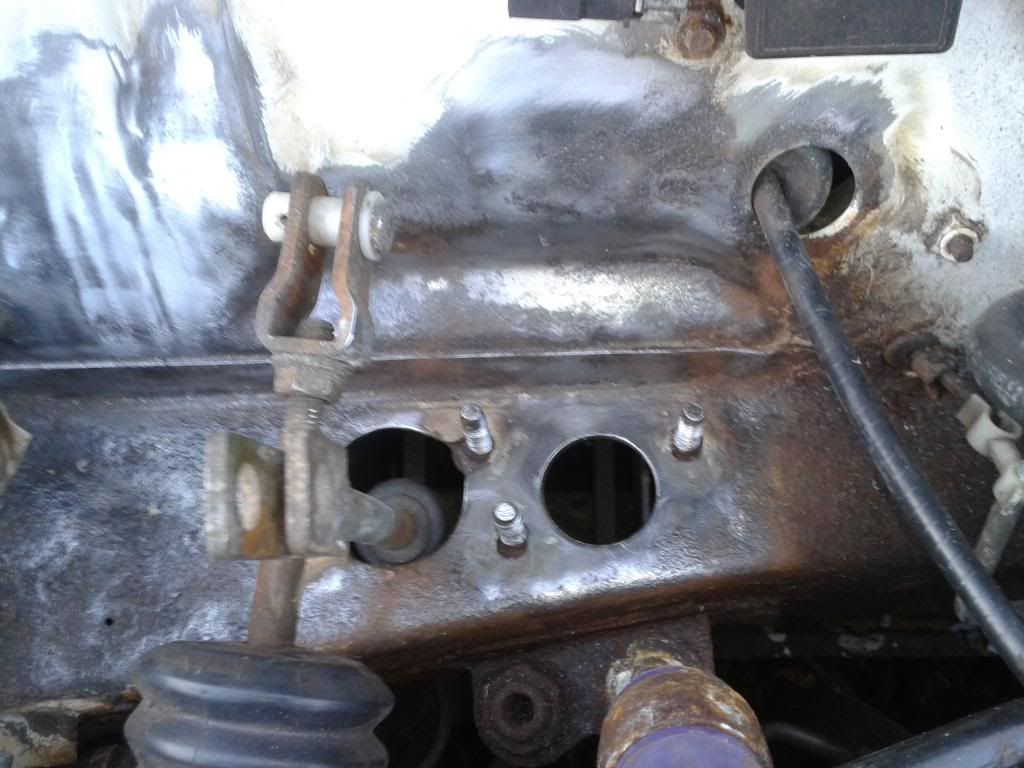
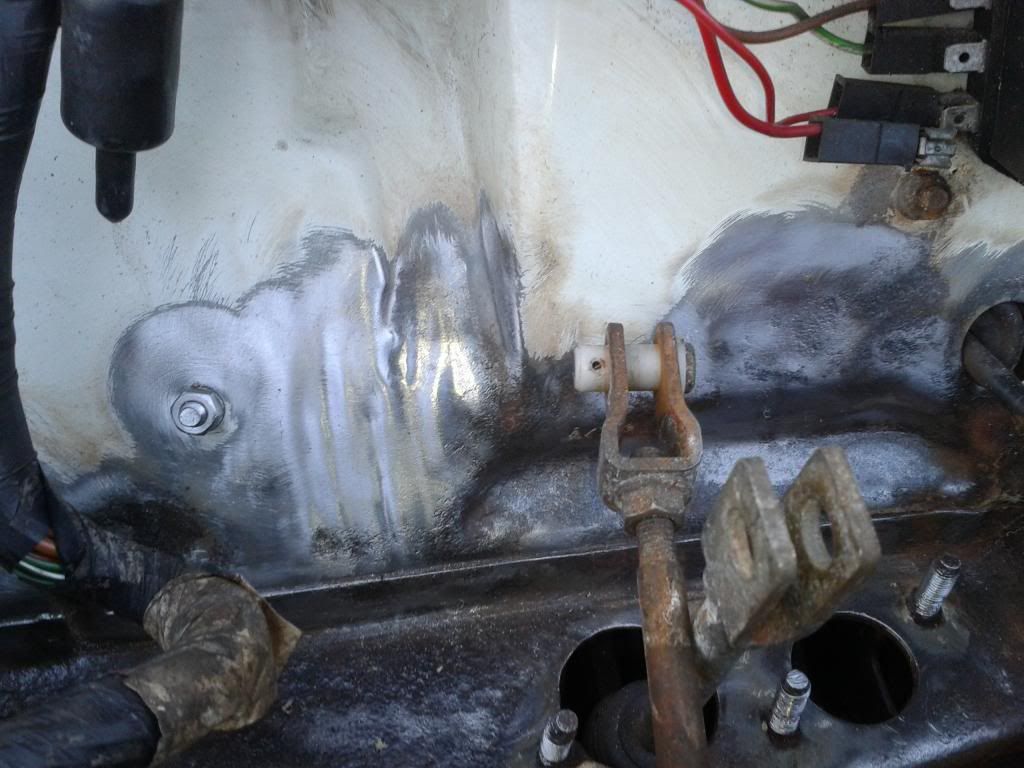
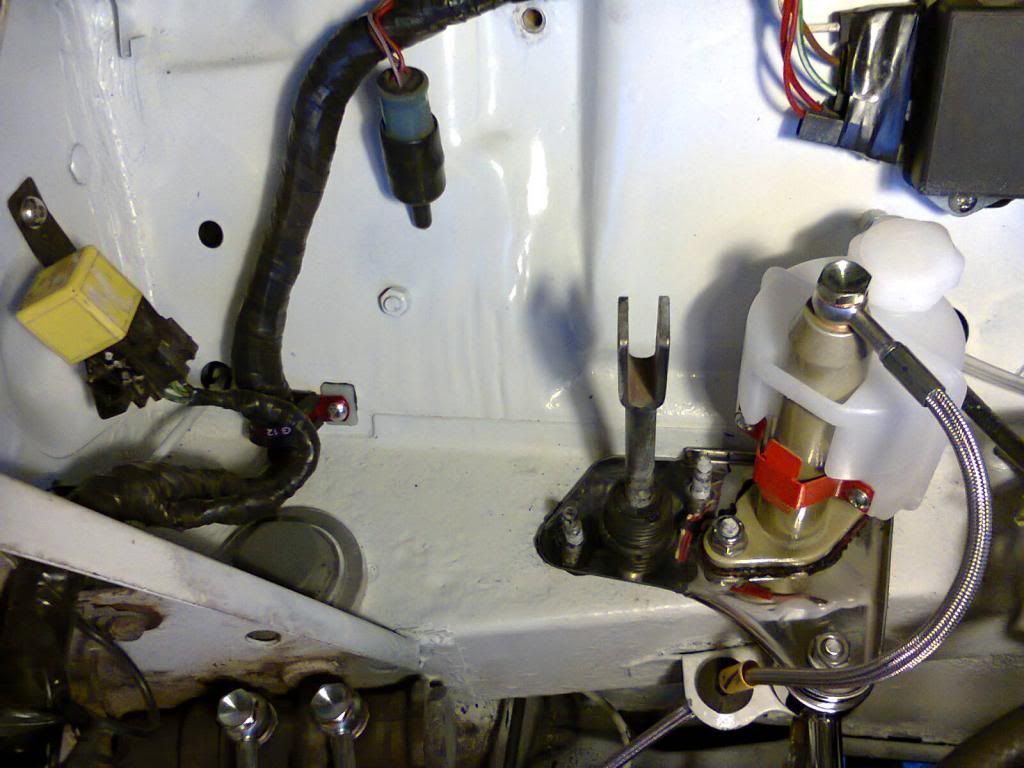
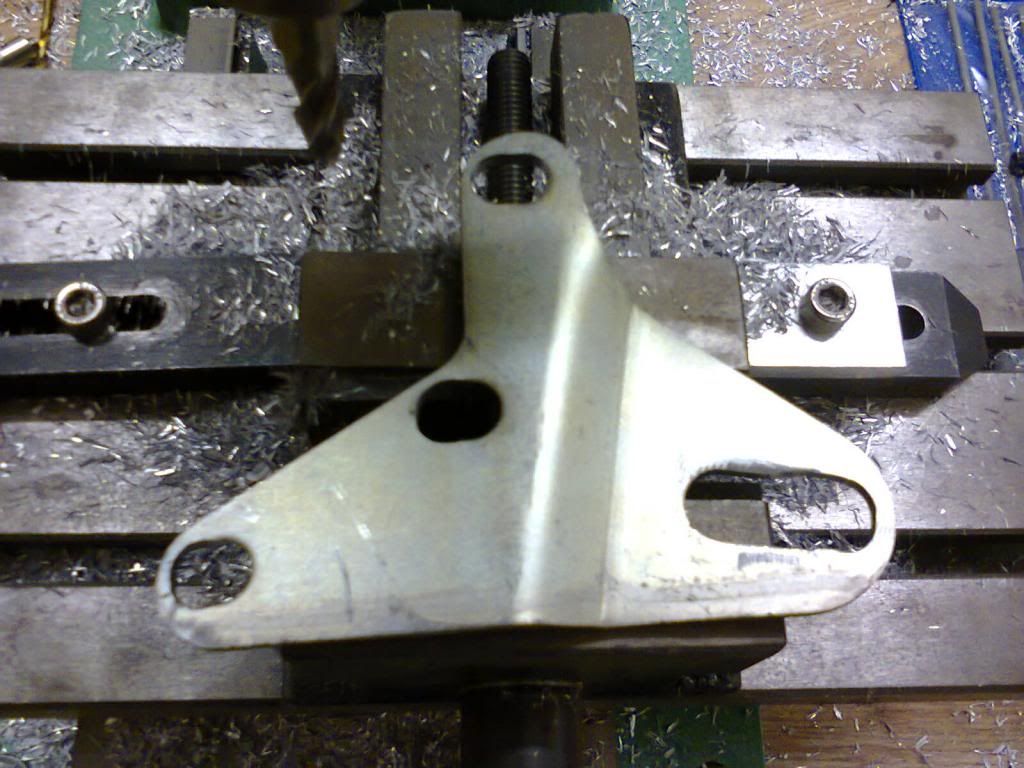
The first thing I did was use IPA (a chemical I highly recommend for degreasing, cleaning and removing oxidation) to clean off all the surface ick and leave this:


2013-05-20212250_zpsee224a85.jpg


2013-05-20212301_zps7860edff.jpg


2013-05-20212323_zpsea4d5bdc.jpg


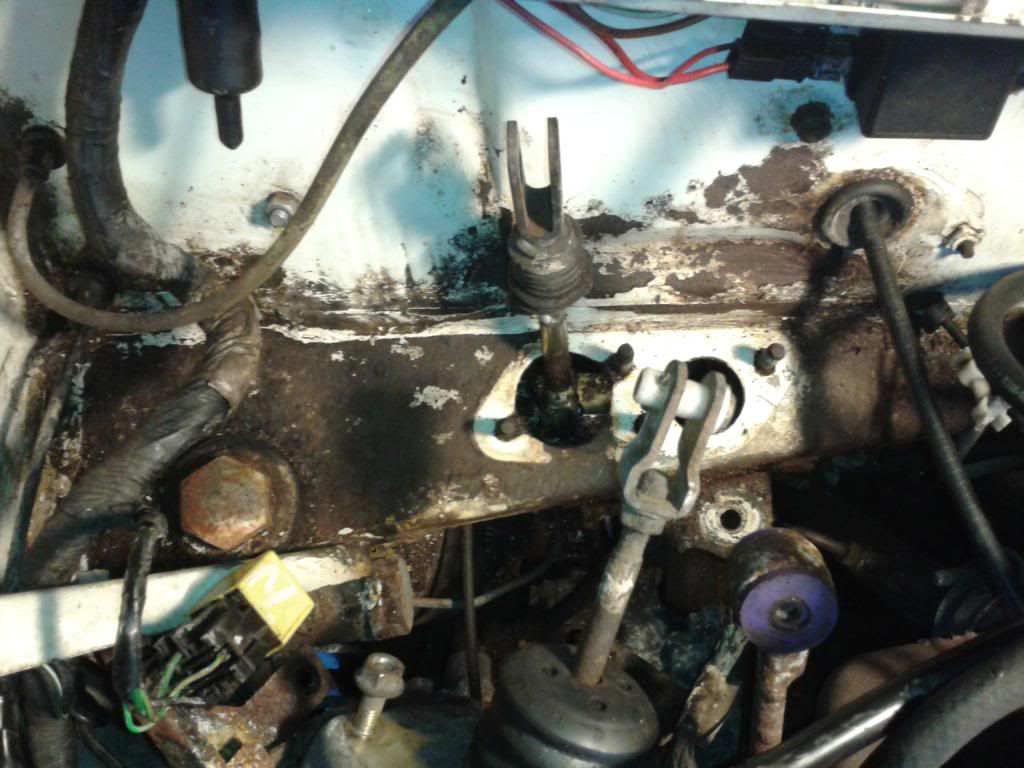
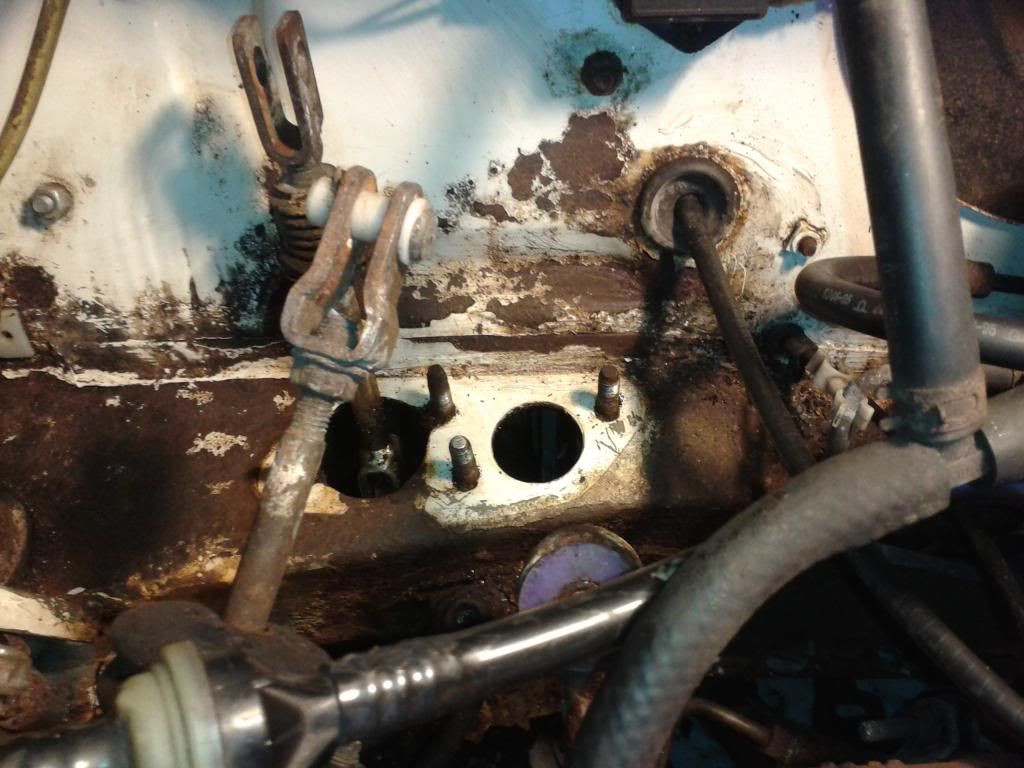
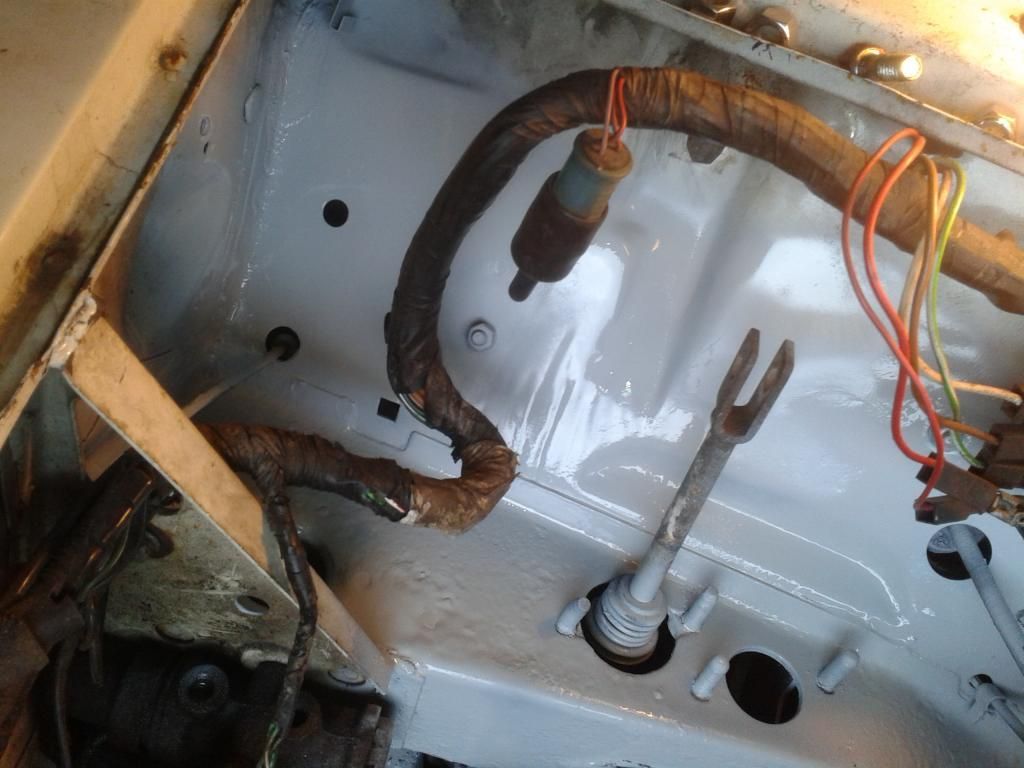
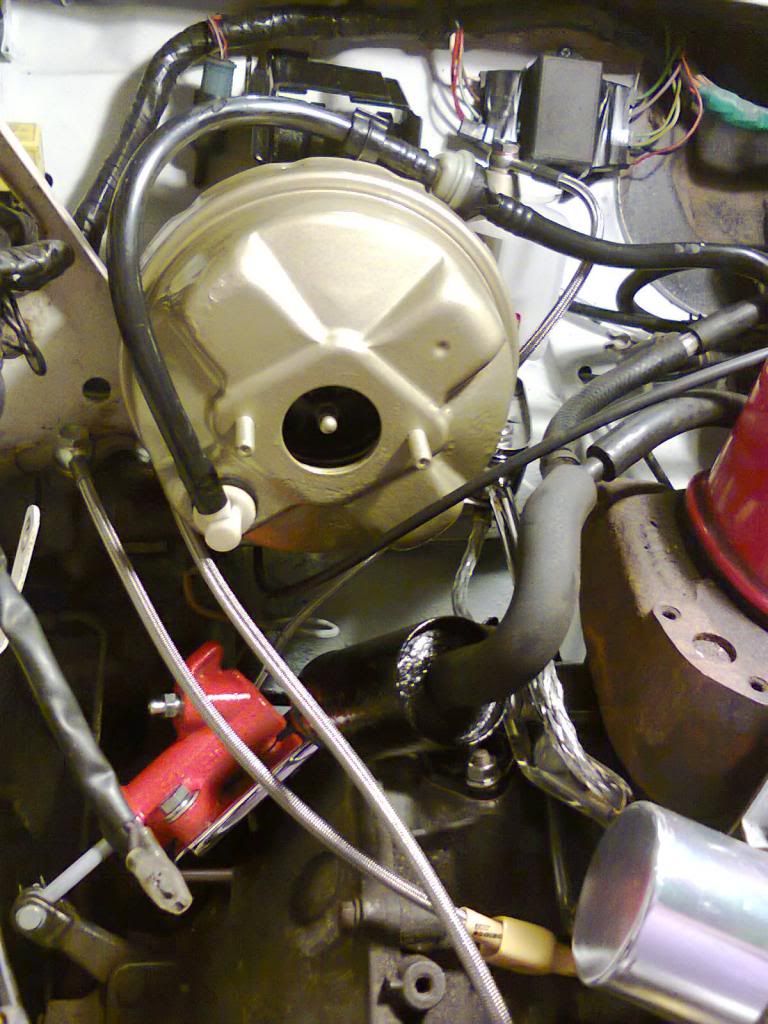
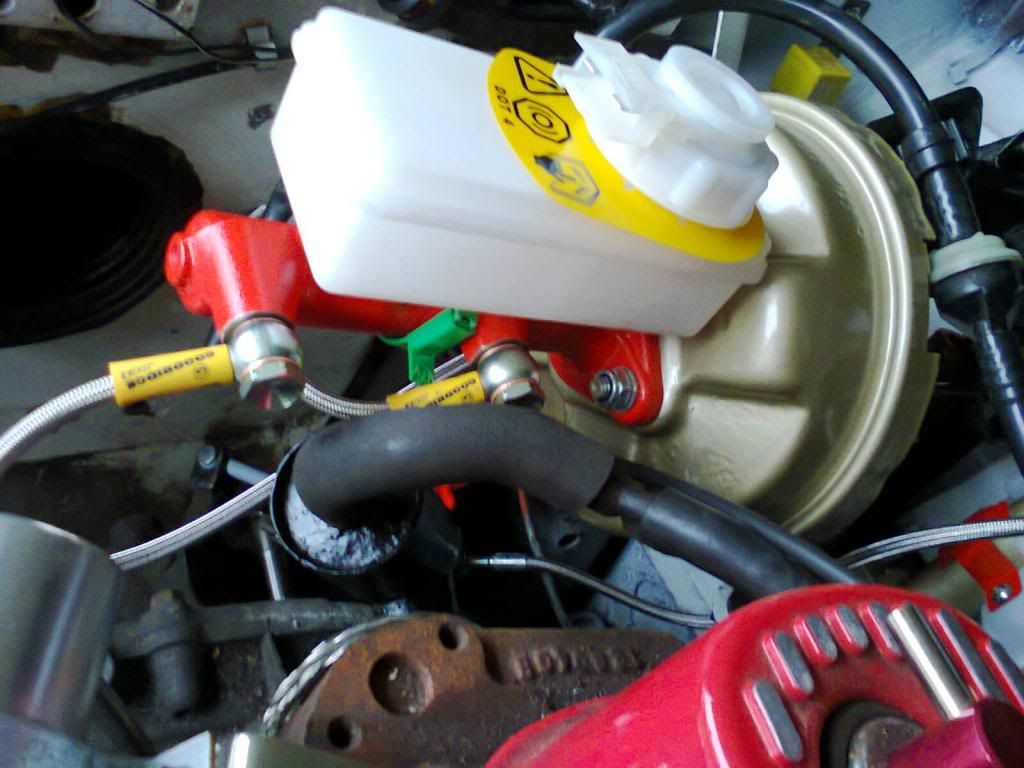
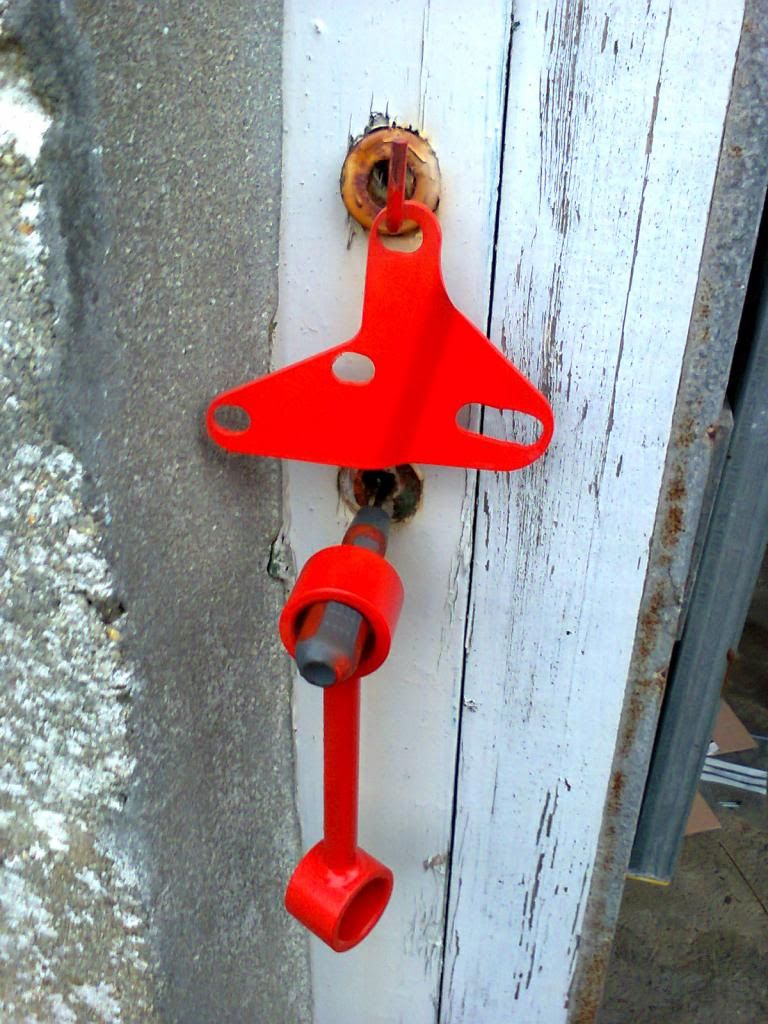
This evening, after I borrowed a 3m vapour particle mask from work, I got my collection of wire-brush bits and drill and set about it, with these results so far:


2013-05-22210252_zpsb4d46d00.jpg


2013-05-22210300_zps87509c03.jpg


2013-05-22210308_zpseb42d5d7.jpg


2013-05-22210316_zpse89edafc.jpg


I need to get a new, deeper cup-style brush and get more into those pedal box studs.


Quite want to replace the loom at this point as well, but that is quite a lot of work I'm guessing!


Edited by Jamieboy, 23 June 2013 - 03:48 PM.


#2 Jamieboy

Jamieboy

    Stage One Kit Fitted

  • Noobies
  • PipPipPip
  • 60 posts

Posted 04 June 2013 - 10:59 AM

Done some more work over the last week or so:


2013-06-01191603_zps2afb0ecb.jpg

This is the etch primer 1st coat. Don't worry about the overspray on that brake linkage boot, it's getting replaced and the linkage will be buffed and lacquered. 


I also renewed the driver side rear brake gear. I did the passenger side last year before the car went into storage so I thought it best to renew the other side now. Items renewed:


  • Flexi-hose (renewed with Goodridge item).
  • Connecting pipe, flexi to wheel cylinder in copper alloy.
  • Entire backplate assembly (backplate, shoes, wheel cylinder, springs, adjuster assembly).
  • Alloy finned brake drum painted with hi-temp red paint.
  • Stainless fixings backplate to Stub axle flange.
  • Drive flange and wheel studs
  • Wheel bearing (renewed with Timken bearing kit)
  • Hub nut, split pin and hub cap
  • Buffed and repainted old handbrake cable bracket.

Greased quadrant and radius arm while I was there too. The radius arm had about 5mm play before and about 2mm after. I buffed the stub axle and backplate mounting face too. A thin layer of silicon was used on the mounting face when the backplate assembly was attached, to allow it to bed down. 


2013-06-03212300_zps69f27ca6.jpg

(sorry for crappy focus)

2013-06-03212236_zps475d77d5.jpg


Edited by Jamieboy, 22 June 2013 - 06:34 PM.


#3 Jamieboy

Jamieboy

    Stage One Kit Fitted

  • Noobies
  • PipPipPip
  • 60 posts

Posted 22 June 2013 - 06:46 PM

I got a new clutch slave cylinder then primed and painted it:


2013-06-02195452Medium_zps4a42e92b.jpg


I also took off the crank breather, flushed it out and then buffed it back to bare metal. I then etch-primed it:


2013-06-02195503Medium_zpsb7d422d6.jpg


After respraying the bulkhead back to its original white, I fitted new solid top subframe  mountings were fitted (you can also just see the loom has been re-wrapped in Scotch 130C self-amalgamating tape) and the loom was secured to its clip with an anodised and lined P-clamp:


2013-06-16202132_zps5934b226.jpg


Stainless steady bar with poly bushes:


2013-06-16202153_zps5fea1b84.jpg


Stainless bulkhead plate fitted, new clutch master cylinder (painted), Goodrich stainless braided clutch line (and brake lines just visible):


Photo0000_zps6d87ce89.jpg


Brake pivot assembly and servo (which have been buffed, primed, painted and lacquered) refitted. Also, new servo vacuum grommet:


Photo0005_zps600c799a.jpg


Lower view showing breather and clutch slave cylinder refitted, also braided servo to brake master cylinder lines and earth strap:

Photo0008_zpsccdfad19.jpg


Just painting the new brake master cylinder now.


#4 HarrysMini

HarrysMini

    I do not have short legs!!!

  • Members
  • PipPipPipPipPipPipPipPipPip
  • 3,352 posts
  • Location: .

Posted 22 June 2013 - 07:18 PM

This looks like a good project, will be following.


#5 Sprite the little rascel

Sprite the little rascel

    Stage One Kit Fitted

  • Noobies
  • PipPipPip
  • 80 posts
  • Location: Sutton-In-Craven

Posted 22 June 2013 - 09:54 PM

Some good work there, looks like it will a good project you have going  :highfive:


#6 Jamieboy

Jamieboy

    Stage One Kit Fitted

  • Noobies
  • PipPipPip
  • 60 posts

Posted 22 June 2013 - 11:20 PM

This looks like a good project, will be following.


Some good work there, looks like it will a good project you have going  :highfive:


Aw, thanks for the kind words - I do appreciate that and intend to keep at it :proud:


As per my other thread, I (finally) got the right/hand additional engine steady installed:


Photo0018_zps9882659b.jpg


I also got the brake master cylinder in. Here it is as received:


Photo0013_zpse005a2ec.jpgIf left as-is all that shininess would soon become rustiness so I did the unthinkable and took the reservoir and its seals off, degreased it with IPA, masked off the ports and left the plunger-protector, which it comes wearing, on to protect from overspray. I even masked the green tag as I didn't want to snip it off! I etch primed, painted, moved the tag and painted where it masked off then lacquered the whole thing:


Photo0023_zps32c8a388.jpg


I left that pesky roll-pin in too as they are a total bugger to get out and refit again. I used a punch to move it all the way one way, unhook the reservoir lug, punched the pin all the way over the other way and removed the reservoir. I then masked the pin. Lots of work but less frustration than getting the pin out and back in again later! The finished article:


Photo0024_zpse029bffb.jpg


I fitted the master cylinder using stainless washers and nylocs before attaching the braided brake lines to the ports:


Photo0026_zps62384a4e.jpg


and from above:


Photo0027_zps587e1f72.jpg


Tomorrow I fill the tanks and bleed, bleed, bleed!


#7 Jamieboy

Jamieboy

    Stage One Kit Fitted

  • Noobies
  • PipPipPip
  • 60 posts

Posted 22 June 2013 - 11:26 PM

I also got the left hand stabiliser kit prepped for installation. I have learned from the R/H one that the stead bar supplied with these kits is too short for the later 1275cc models and that modification of the supplied mounting bracket is required to make it fit. here is the bracket as received:


Photo0021_zps7ff7c25f.jpg

Well almost- I did extend the bar's slot a bit, crudely, before I gave up and decided to get it in the mill at work! I then, more neatly, extended the bar's slot and the mounting holes so that it would have the extra reach it needs to land in the factory-drilled hole on the left hand subframe leg:


Photo0022_zps69d3ad2d.jpg


The last job of the day was IPA wash, etch-primer, paint and lacquer for the steady bar and mounting bracket:


Photo0030_zpscbcdc4d0.jpg


If the elongation is not enough then I will need to slot the hole in the subframe, which is not fun.


#8 andyt

andyt

    Speeding Along Now

  • Members
  • PipPipPipPipPip
  • 375 posts
  • Location: Melksham
  • Local Club: cooper register

Posted 23 June 2013 - 06:17 AM

Hi Jamie, got me inspired to clean up the area around my servo, nice job. I used to work up your way for a company that had a factory in a small town called Halkirk, from what I remember you have to make the most of any dry days!

Andy.


#9 Jamieboy

Jamieboy

    Stage One Kit Fitted

  • Noobies
  • PipPipPip
  • 60 posts

Posted 23 June 2013 - 01:01 PM

Hi Jamie, got me inspired to clean up the area around my servo, nice job. I used to work up your way for a company that had a factory in a small town called Halkirk, from what I remember you have to make the most of any dry days!

Andy.


Hi Andy, thanks and I hope you have as much enjoyment as I had while doing mine. I'd love to see pictures of your work as you go along.


If I may make a recommendation, go for this primer if you're going back to bare metal; it's extremely good.


Yeah, Halkirk is just up the road from me - what did you do?


Jamie


#10 andyt

andyt

    Speeding Along Now

  • Members
  • PipPipPipPipPip
  • 375 posts
  • Location: Melksham
  • Local Club: cooper register

Posted 23 June 2013 - 02:59 PM

Jamie, cheers for the primer tip I've tried some etch primer from a local motor factors that seams ok but I might try that one when I run out. I have been using Zinc 182 brush on primer on top of that and this really works as I have some parts of the car that I painted with it over 2 years ago and they are not rusty and the cars outside under a tarpaulin.

I started my car in 2008 and have rebuilt the back end, boot floor, hinge panel, rear valance and closing panels. Brand new subframe with new or rebuilt parts, I'm now onto the drivers side including fitting a new flitch panel new parts to inner sill and front of the floor, but having 2 young children and working 12 hours a day time is precious!!

Being on this forum and seeing other peoples work really inspires me and makes me go out and do something even at 8 at night for just half an hour, keep up the good work!


I used to work for a company called Stephens plastics ltd and they used to make nuclear work suits from flexible pvc for the Doonrae site just up the road from Thurso, I used to go up 2 or 3 times a year for machine maintenance in the early 90's


Andy.  


#11 Jamieboy

Jamieboy

    Stage One Kit Fitted

  • Noobies
  • PipPipPip
  • 60 posts

Posted 23 June 2013 - 11:43 PM

I think your restoration is much more involved than mine! That's an impressive amount of work to have done in your spare time with a family and working so many hours :highfive: . Those flitch panels scare me as they seem to occupy more than 3 spatial dimensions with all the bits they connect together!


I've only been in Wick about 3 years and with also a demanding job, I haven't a great knowledge of all the companies and places around yet but I do know that the site and decommissioning work creates plenty of opportunities for businesses.


I find I get loads of motivation during summer and very little during winter I'm sure it's a combination of willpower as well as having good tolerable weather.


Have you been photodocumenting as you've gone along?


#12 Jamieboy

Jamieboy

    Stage One Kit Fitted

  • Noobies
  • PipPipPip
  • 60 posts

Posted 23 June 2013 - 11:57 PM

I started off today fitting the L/H gearbox steady kit. With the prep work I got done yesterday, fitting was very easy, especially since the subframe hole is already there - I even had a bit of extra room so I suppose I'd have gotten away with only elongating the slot which the steady bar occupies. I'm glad I did the evil one first and had this one for pudding:


Photo0036_zpsd3469678.jpg


I then moved onto the clutch:

Photo0037_zps87841b17.jpg"I ain't got time to bleed". Well actually I had as that's what I was doing today. After having bled all the air out the new hydraulic system, I found, to my horror, that the pedal was still seized at its top position  O_O 
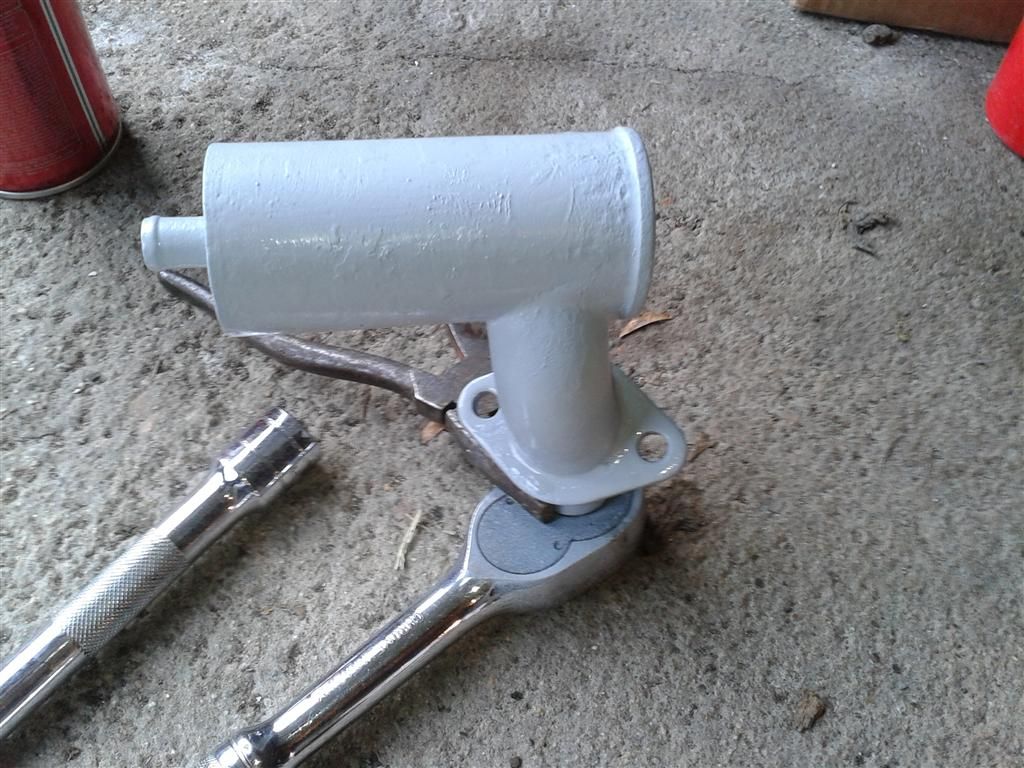
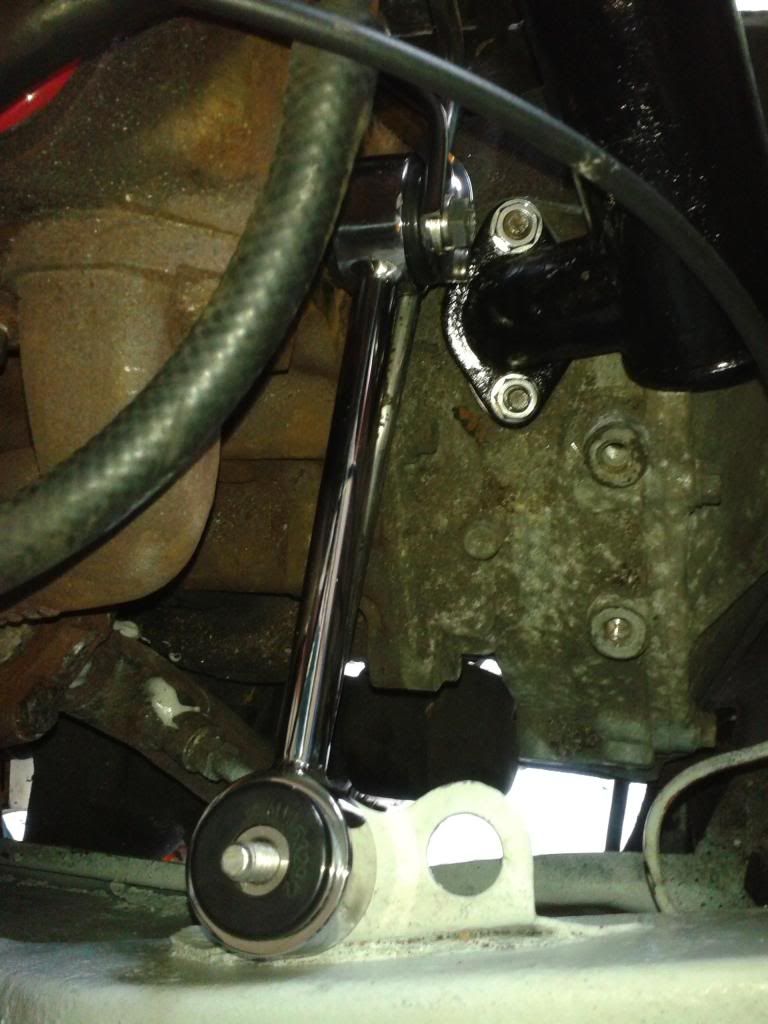
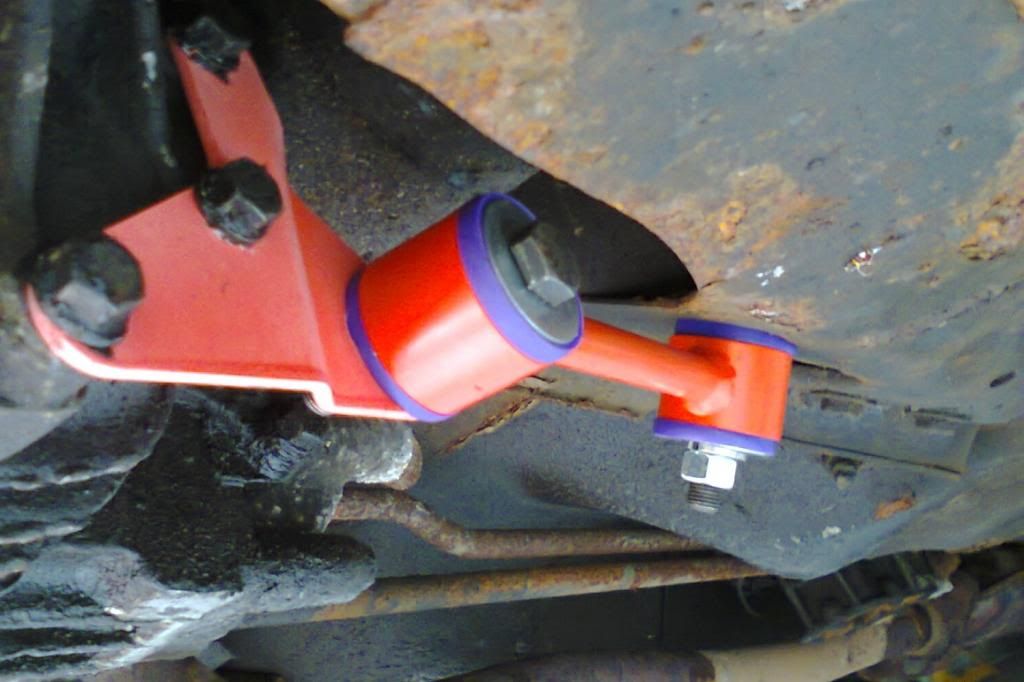
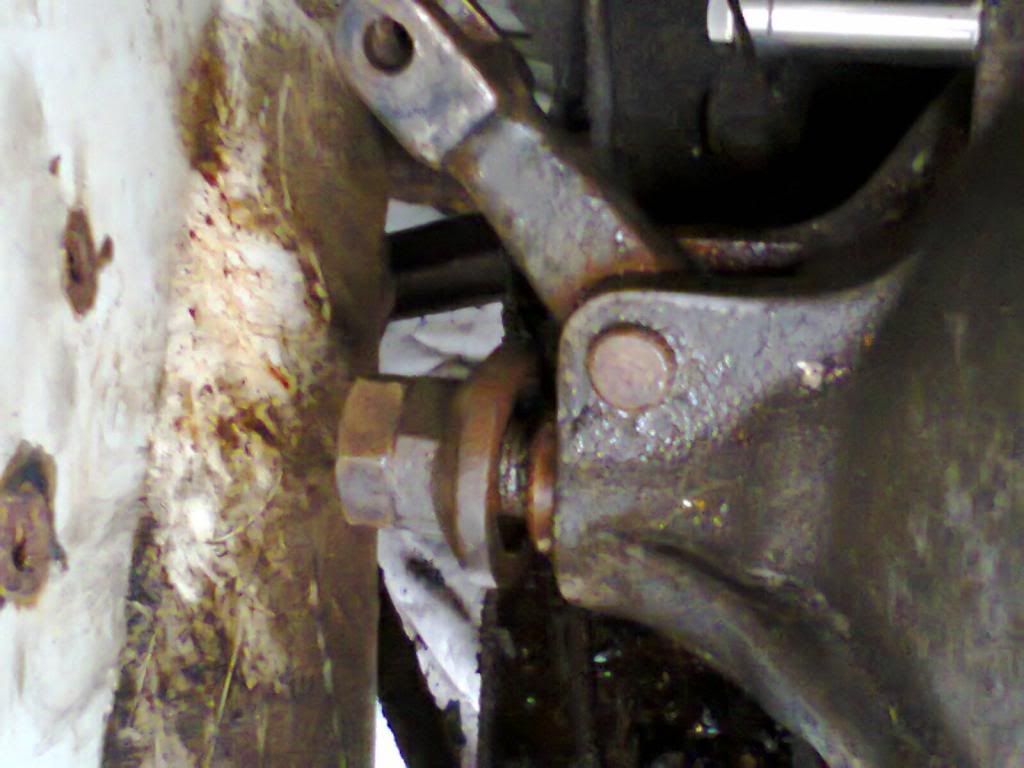
. After calling round at my mate John, he was kind enough to lend me a bellhousing with the pivot arm and throwout nut part in place. It turns out that mine was seized at this location.


After copious amounts of Plusgas, foul language and slackening off/jiggling the throwout nut, the arm and slider released with a "ping":


Photo0038_zpsf41f69f5.jpg


Thereafter, large quantities of grease were applied to as much of the exposed moving parts as possible. The clutch now works perfectly.


I then bled each corner of the car - the front bleed nipples on the callipers loosened off with surprising little effort aside from wire brushing beforehand. My front callipers look like they've been buried underground for 200 years, so I may elect to refurb/replace these after I road test the car.


It was a long day with not too much to show for my efforts, but tomorrow (well technically much later today) I will be starting the bugger.


#13 Jamieboy

Jamieboy

    Stage One Kit Fitted

  • Noobies
  • PipPipPip
  • 60 posts

Posted 27 June 2013 - 11:13 PM

I got my Mini started on Tuesday evening. I didn't try to start it on its own battery (which I actually had fully charged). Instead, I jump-started it from my Rav4 so as not to deplete the battery with what I knew was going to be an appreciable amount of starter cranking.
 
The engine bay now looks like this:
Photo0042_zpsc22193a4.jpg
 
...and when I got it, it looked like this:
 
SS104608Large_zps4a0ae09e.jpg
 
Looks a bit better now, but much more importantly, everything now operates correctly! Due to the rust build-p on the disks, they will need some full-bore stops before they're working well.
 
This weekend should see the timing and fuelling set correctly and the grille being attached. MOT should happen soon!

Edited by Jamieboy, 28 June 2013 - 07:46 PM.


#14 zony

zony

    Mini Mad

  • Noobies
  • PipPipPipPip
  • 165 posts
  • Location: Porthmadog
  • Local Club: Welsh Rarebit Mini Club

Posted 28 June 2013 - 08:45 AM

Coming along nicely.

#15 HarrysMini

HarrysMini

    I do not have short legs!!!

  • Members
  • PipPipPipPipPipPipPipPipPip
  • 3,352 posts
  • Location: .

Posted 28 June 2013 - 10:08 AM

If you paint the engine and tidy up the wires a bit, it will look one hundred times better. Just a suggestion.


1 user(s) are reading this topic

0 members, 1 guests, 0 anonymous users