Great read, this thread.
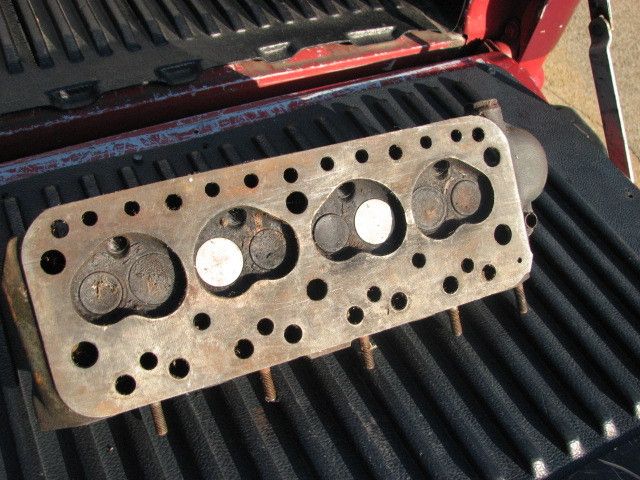
The 12G295 head has been skimmed around 72 thou inch assumed from the head thickness you gave, 68mm / 2.677 inch.
This is an odd number and probably not accurate and due to some inaccurate measurement or surface rust
The original chamber size was 28.3cc but with an approximate 0.072 skim, the chamber would have been reduced to around 23cc.
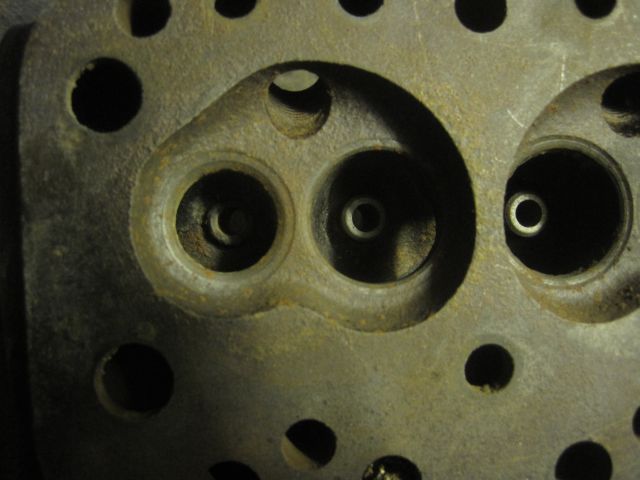
The chambers appear to have been ground. One can see the angle of the chamber sides. This was probably to restore the original combustion chamber size, you mentioned 28cc. Please compare the combustion chamber shape to these standard but rusty units.
Thanks, it's hard to find photos of standard heads. Do the intake and exhaust posts look similar to standard?
The heads had a soak overnight in vinegar. I gave one of the chambers a quick scrub and the gunk came right off...

Port face cleaned up nicely too

I was able to borrow a socket to get the crank out of the 1098. I needed a pretty long breaker bar to get it undone...

Thankfully the crank ended up ok. It will probably need to be taken a size under, but I need to confirm what size it is now. The 1098 one is on the right and 998 on the left.


It had +40 pistons in it already

The last 998 engine was in good condition internally, and had been stored with oil in it. Unfortunately the bores have a bit of rust in them. It had definitely been apart at some stage, the lock tabs on the big ends were a bit dinged, and there were new style gaskets throughout. It was in a similar condition to the other 998, if they had been stored indoors it would have been as easy job to get them going again.

At this stage I'm still not sure of the next plans for them. There is an option to pick up another 1098 for spares, which might be good even if that just yields another crank...
What to do with a spare 850 grille with flakey chrome?

Paint it white to match the wheels. I think it looks ok?

Special one for you guys from the UK. I was driving along a bumpy road yesterday and I could see something moving out from the sun visor... It is perfectly harmless, but they can be a bit of a surprise when you don't know they're there...

Edited by timmy850, 01 June 2014 - 10:19 AM.


 but it was pretty good once I got there! It was too windy for most of the aerial display to happen unfortunately