Jump to content


Photo

Replacing Full Floor - Guidance Please

rust repair

  • Please log in to reply
12 replies to this topic

#1 CBJ805T

CBJ805T

    Speeding Along Now

  • Members
  • PipPipPipPipPip
  • 430 posts
  • Location: Kenilworth

Posted 01 December 2013 - 04:19 PM

Hi all, the slow restoration of my '84 Mayfair continues and I'm now at the stage to start thinking about replacing the floor. So much of the floor, sills and headboard are rotten that the most cost and time effective way of repairing it all is the change the whole floor.

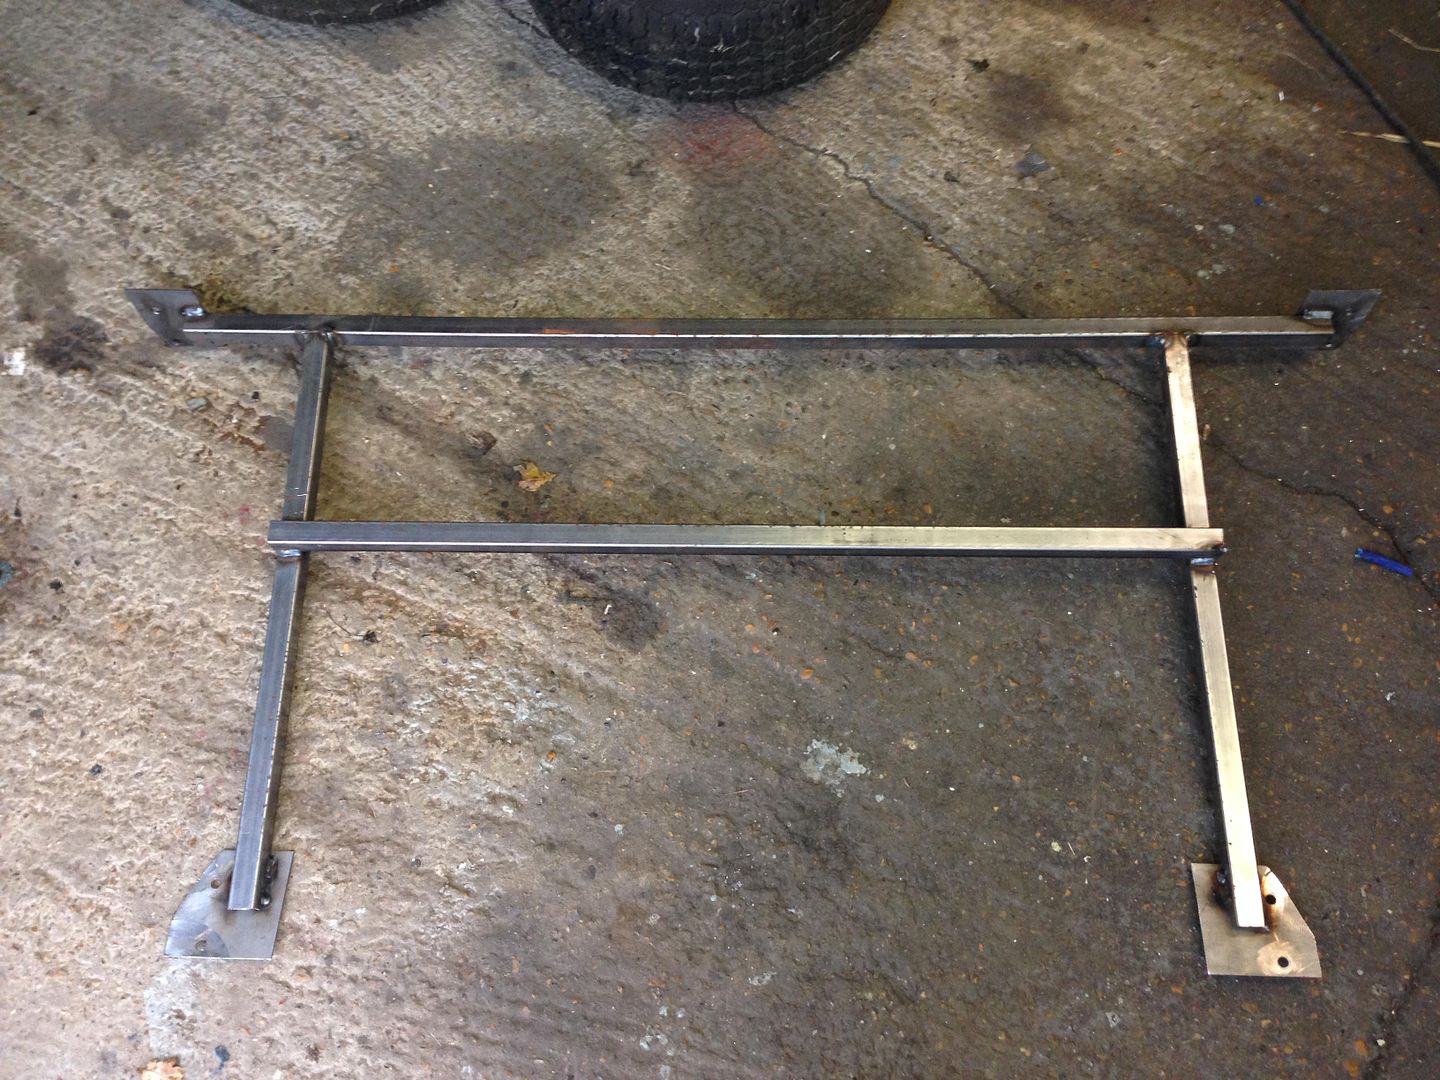
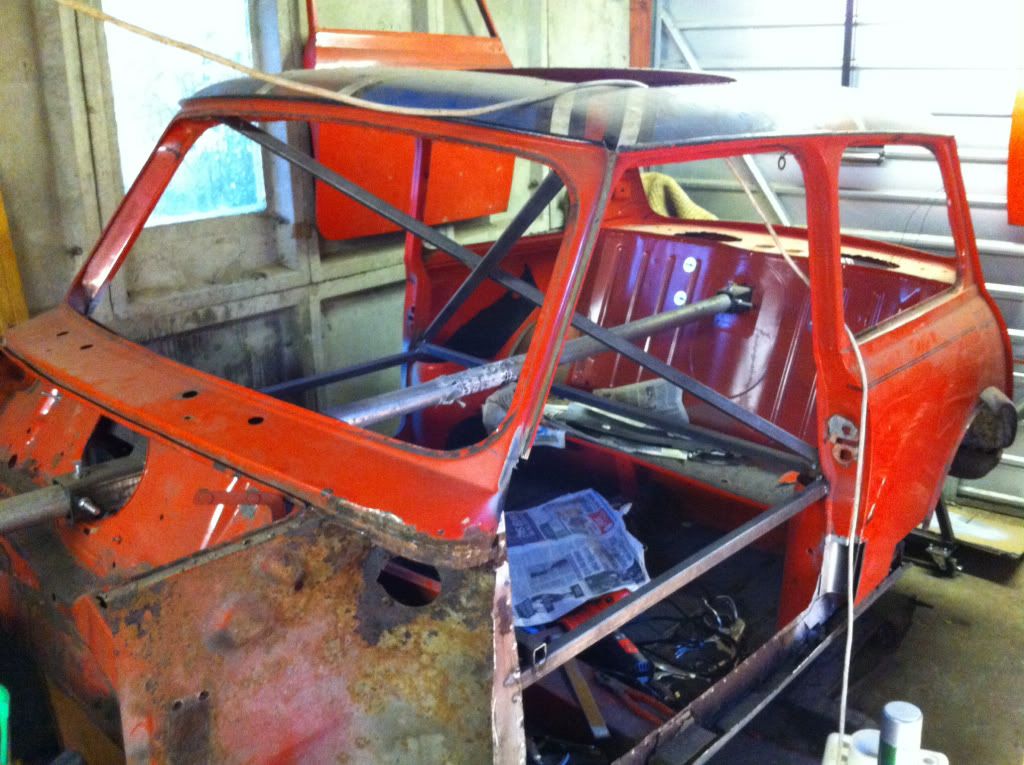
I have the car on a spit and full bracing is attached. I'll have the door step / a post in place before proceeding to the floor

d2278e20fb60249eeea7bc0d28a9f58c.jpg

Has anyone tackled this job before and if so have you got any tips or pitfalls to avoid?

I was going to make sure the rear sub is in place before removing the old floor, and then use this as a datum for locating the new floor.

As I have the car on a spit, would you turn it upside down to allow gravity to support the weight of the floor when welding?

Do I need any additional bracing before removing the old floor?

Would you drill out the old welds from the inside or underneath the car? I.e. When fitting the new floor,Which panel should have holes in it for plug welding?

Thanks Chris

#2 Daz1968

Daz1968

    Up Into Fourth

  • Members
  • PipPipPipPipPipPipPipPipPip
  • 2,058 posts
  • Location: Dudley

Posted 01 December 2013 - 07:02 PM

I wouldn't fit rear subframe but I would make up a jig bolting to its mounting points as it will be a lot lighter

#3 ANON

ANON

    More Jammy than a Jammy dodger.

  • Traders
  • PipPipPipPipPipPipPipPipPip
  • 2,682 posts
  • Location: my house
  • Local Club: pony

Posted 01 December 2013 - 08:16 PM

steps and bottom of rear quarters on, flip it over and drop the floor in place. worst part of the job is drilling all the bloody spotwelds out!!  done a few full floors and they are quite easy.


#4 thetrev.com

thetrev.com

    Stage One Kit Fitted

  • TMF+ Member
  • PipPipPip
  • 84 posts
  • Location: Glos

Posted 03 December 2013 - 07:30 AM

I will be watching this closely as I will be doing a full floor over christmas/new year after I have had the shell blasted.,


From other threds and project pages I have seen I think the bracing is ok and more than I have


I am in a similar position to you I was going to remove the bins and drill from the inside I was wondering if I needed to do the door steps before or after.


Have you got your floor yet or are you to order it? I was wondering if the stiffeners are fitter or if these need to be brought extra


are you taking photos of the project and creating a project page would be good to see progress.


Trev


#5 brum,brum,mike

brum,brum,mike

    Super Mini Mad

  • Just Joined
  • PipPipPipPipPipPip
  • 554 posts
  • Location: Gloucestershire

Posted 03 December 2013 - 08:12 AM

My shell is now braced up with a little more to do.

I do have the floor already, it has pretty much everything... jacking points, handbrake brackets etc.. If you specify which stiffeners your on about ill go and check for you ;D

We are leaving the rear subframe on its back mounts then lift the floor in and bolt them up to get us somewhere in the town, we are also doing the lower half of the bulkhead at the same time so i think we are also bolting the front subframe up with solid mounts .

Good luck, take lots of piccys!


#6 CBJ805T

CBJ805T

    Speeding Along Now

  • Members
  • PipPipPipPipPip
  • 430 posts
  • Location: Kenilworth

Posted 03 December 2013 - 12:40 PM

Hi All, 


Thanks for your feedback. I'll have a look at making a jig for the rear sub. 


Trev, if you're tackling this over xmas you'll be well ahead of me so I'd love to see some pictures. Do you know which project threads show a floor replacement? I had a quick search but couldn't find any. 


I've fitted the door steps first so I have plenty to weld the new floor to and I was using the old inner sill edge to  help line up the new step - hope that makes sense. 


As for the stiffener I'm not sure. Its not obvious from the images on somerfords etc. 


Brum Brum Mike, the stiffener is question is the between the inner and outer sill which runs from the heal-board to the b pillar (ish). Where did you get your floor from? is the floor pan 1 panel or made up from 2 full length 1/2 floors and a tunnel panel?


Cheers


Chris


#7 sonikk4

sonikk4

    Twisted Paint Polisher!!!

  • Admin
  • PipPipPipPipPipPipPipPipPipPipPip
  • 15,885 posts
  • Name: Neil
  • Location: Oxfordshire

Posted 03 December 2013 - 12:56 PM

Hi All, 


Thanks for your feedback. I'll have a look at making a jig for the rear sub. 


Trev, if you're tackling this over xmas you'll be well ahead of me so I'd love to see some pictures. Do you know which project threads show a floor replacement? I had a quick search but couldn't find any. 


I've fitted the door steps first so I have plenty to weld the new floor to and I was using the old inner sill edge to  help line up the new step - hope that makes sense. 


As for the stiffener I'm not sure. Its not obvious from the images on somerfords etc. 


Brum Brum Mike, the stiffener is question is the between the inner and outer sill which runs from the heal-board to the b pillar (ish). Where did you get your floor from? is the floor pan 1 panel or made up from 2 full length 1/2 floors and a tunnel panel?


Cheers


Chris


I made a jig using 3mm steel plate and 25 mm box section


3abfbba8-957a-439c-809c-65749dcb7933_zps


#8 brum,brum,mike

brum,brum,mike

    Super Mini Mad

  • Just Joined
  • PipPipPipPipPipPip
  • 554 posts
  • Location: Gloucestershire

Posted 03 December 2013 - 01:53 PM

Hi All, 


Thanks for your feedback. I'll have a look at making a jig for the rear sub. 


Trev, if you're tackling this over xmas you'll be well ahead of me so I'd love to see some pictures. Do you know which project threads show a floor replacement? I had a quick search but couldn't find any. 


I've fitted the door steps first so I have plenty to weld the new floor to and I was using the old inner sill edge to  help line up the new step - hope that makes sense. 


As for the stiffener I'm not sure. Its not obvious from the images on somerfords etc. 


Brum Brum Mike, the stiffener is question is the between the inner and outer sill which runs from the heal-board to the b pillar (ish). Where did you get your floor from? is the floor pan 1 panel or made up from 2 full length 1/2 floors and a tunnel panel?


Cheers


Chris


I was lucky with a buy from ebay... brand new genuine full floor with just a little blue paint on. Its one big panel with inner and outer sill fitted with the heel board already welded on


#9 thetrev.com

thetrev.com

    Stage One Kit Fitted

  • TMF+ Member
  • PipPipPip
  • 84 posts
  • Location: Glos

Posted 04 December 2013 - 01:06 PM

Hi Mike 


the bit i am interested in is this 


Closing plate against the bodyside in the base of the l/h rear companion/glove box now has a square pressing hole for later models


http://minispares.co...|Back to search


Thanks


Trev


#10 carlburt78

carlburt78

    Mini Mad

  • Noobies
  • PipPipPipPip
  • 239 posts
  • Location: cornwall

Posted 04 December 2013 - 11:35 PM

I wouldn't fit rear subframe but I would make up a jig bolting to its mounting points as it will be a lot lighter

how do you make a jig is it quite easy? Ive got heelboard work coming up too?

#11 carlburt78

carlburt78

    Mini Mad

  • Noobies
  • PipPipPipPip
  • 239 posts
  • Location: cornwall

Posted 04 December 2013 - 11:39 PM

Its ok ive just seen Soniks

#12 Minidarren83

Minidarren83

    One Carb Or Two?

  • Members
  • PipPipPipPipPipPipPip
  • 1,207 posts
  • Location: Stanford Le hope

Posted 05 December 2013 - 12:34 AM

Hi Mike 
 
the bit i am interested in is this 
 
Closing plate against the bodyside in the base of the l/h rear companion/glove box now has a square pressing hole for later models
 
http://minispares.co...|Back to search
 
Thanks
 
Trev


Those little stiffeners fit at the rear if the inner sill inside the companion bin and are a very easy part to make to save some penny's

SAM_1268.jpg

SAM_1267.jpg

Hope these pics come in handy

Darren

#13 brum,brum,mike

brum,brum,mike

    Super Mini Mad

  • Just Joined
  • PipPipPipPipPipPip
  • 554 posts
  • Location: Gloucestershire

Posted 05 December 2013 - 07:45 PM

Hi Mike 


the bit i am interested in is this 


Closing plate against the bodyside in the base of the l/h rear companion/glove box now has a square pressing hole for later models


http://minispares.co...|Back to search


Thanks


Trev

No, they are not on the floor already, you will have to buy them separately or just make your own


Also tagged with one or more of these keywords: rust repair

0 user(s) are reading this topic

0 members, 0 guests, 0 anonymous users