Jump to content


Photo
- - - - -

92 City, My First Rebuild.

roundnose

  • Please log in to reply
670 replies to this topic

#91 big-jay

big-jay

    Super Mini Mad

  • Members
  • PipPipPipPipPipPip
  • 518 posts
  • Location: Birmingham
  • Local Club: British Mini Club

Posted 07 April 2014 - 05:48 PM

Thanks for the kind words guys !

Are those seats real leather and suede?
Or are they vinyl and suede?

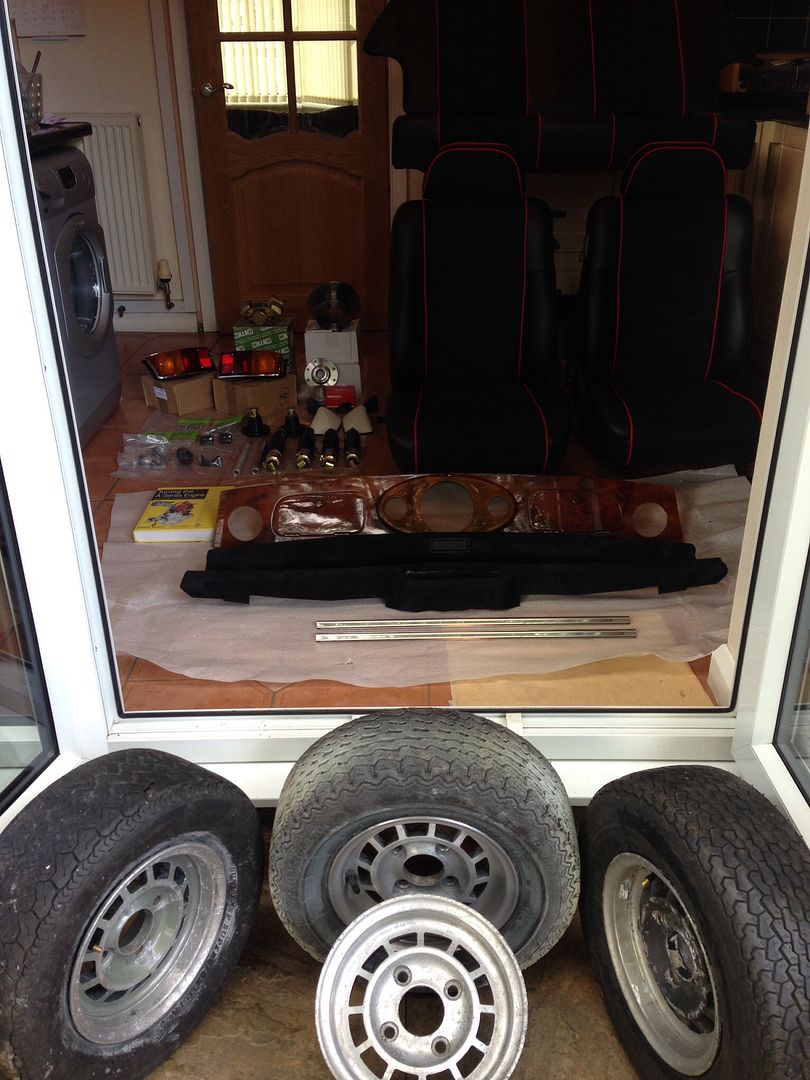
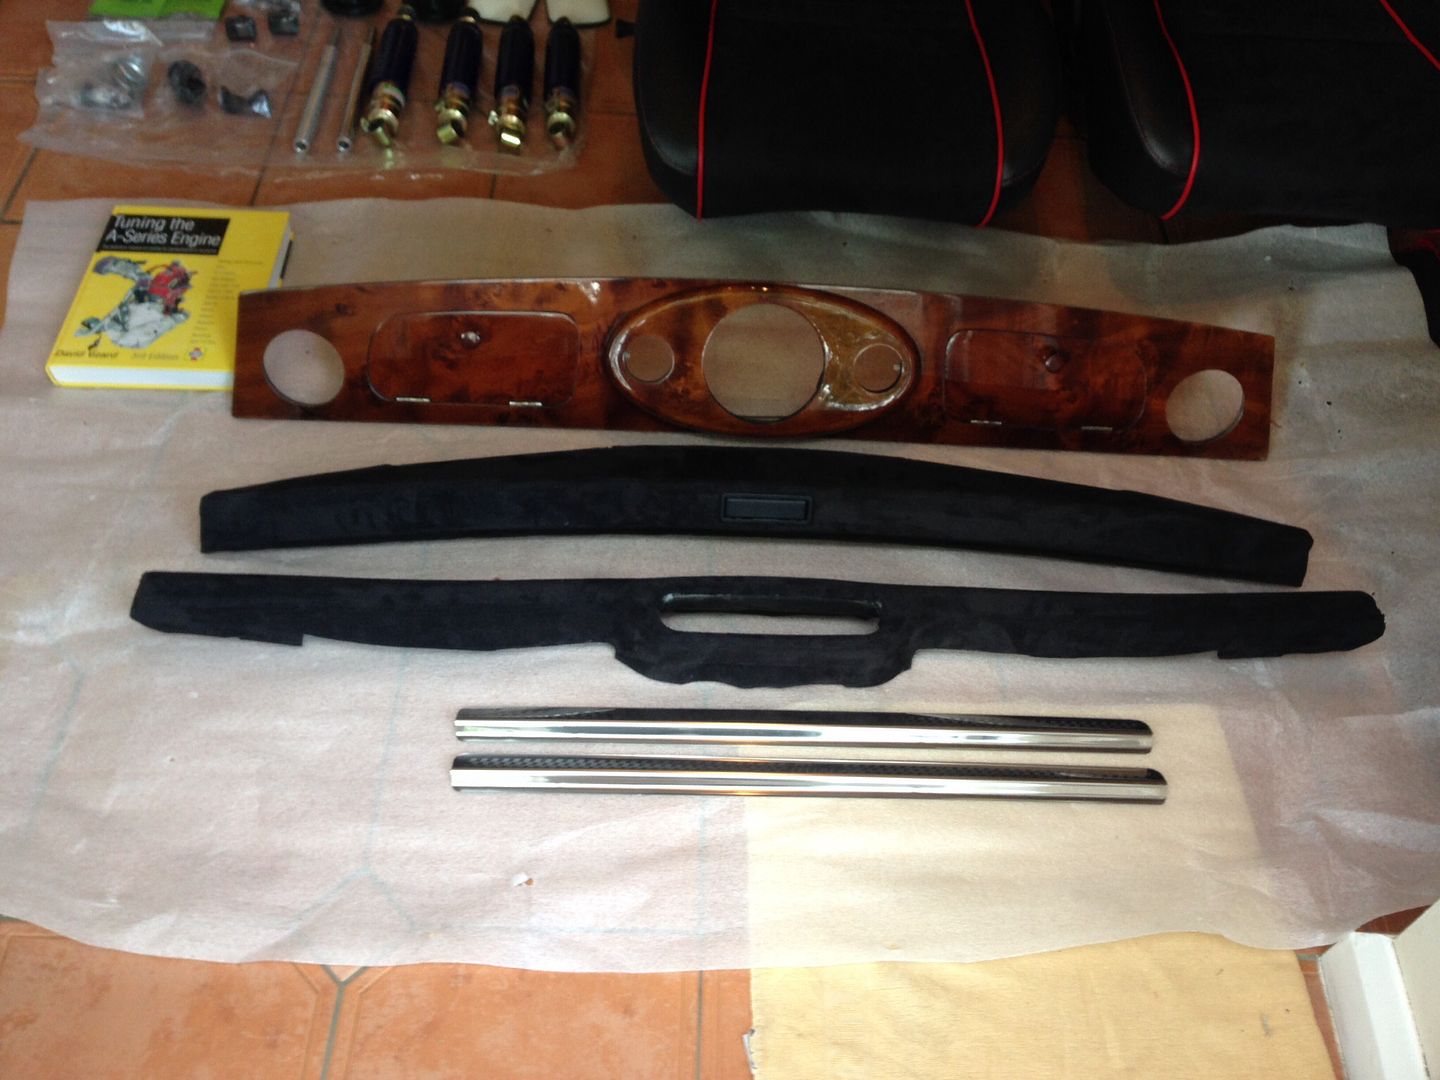
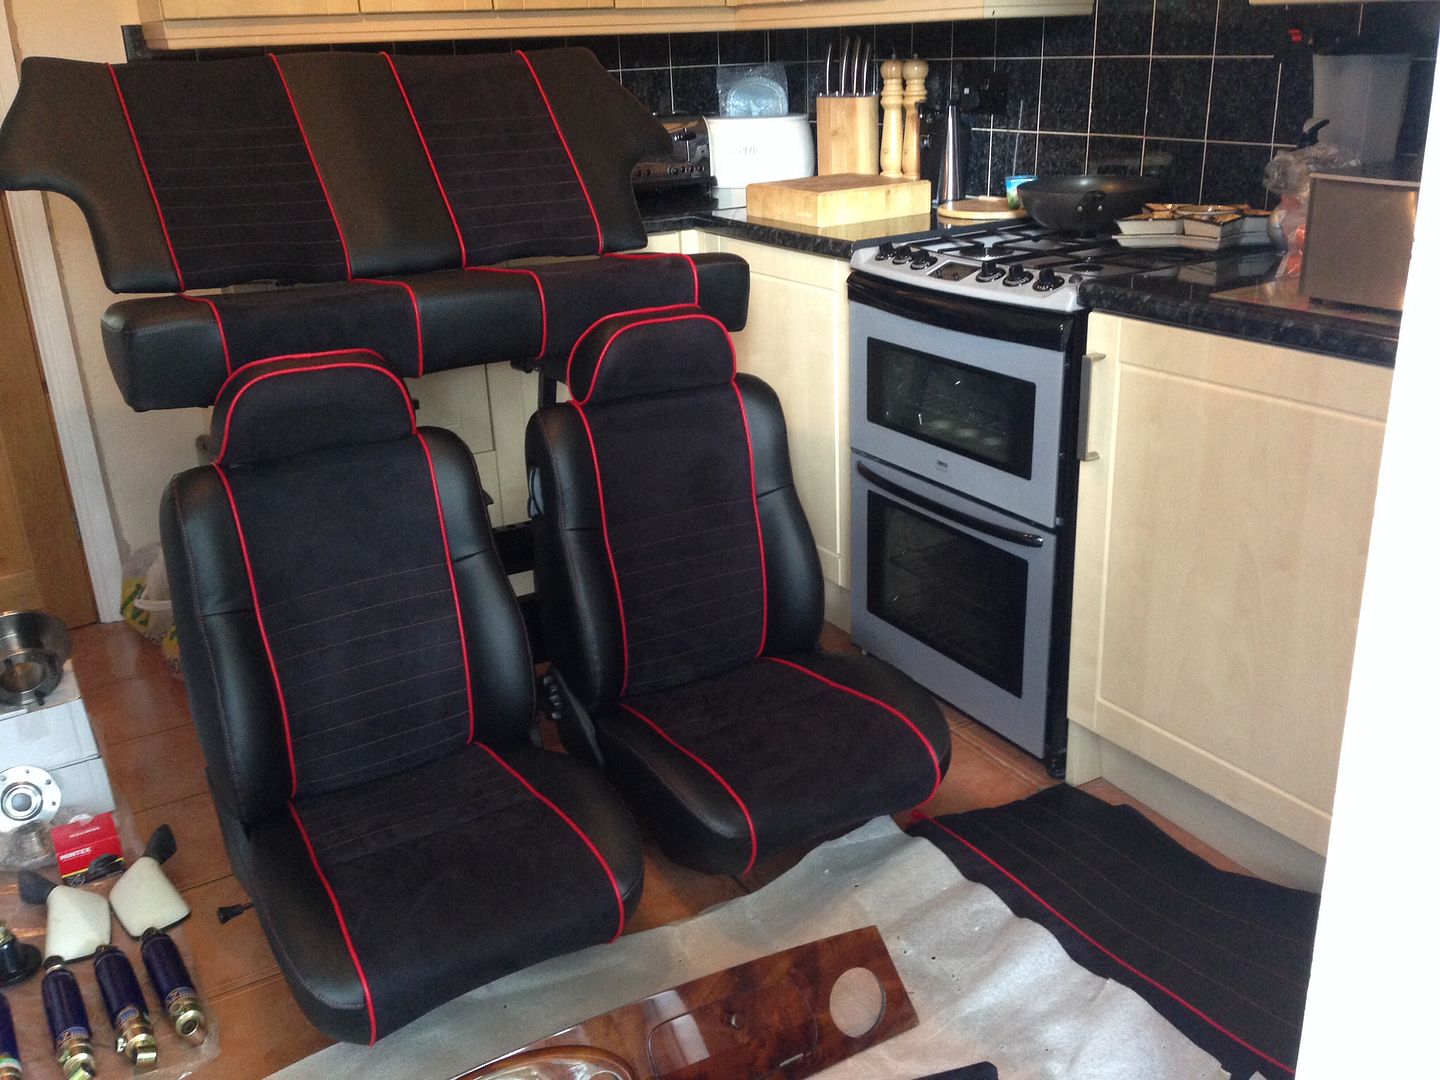
There Vinyl and Suede mate, to keep the price sensible.

Update,

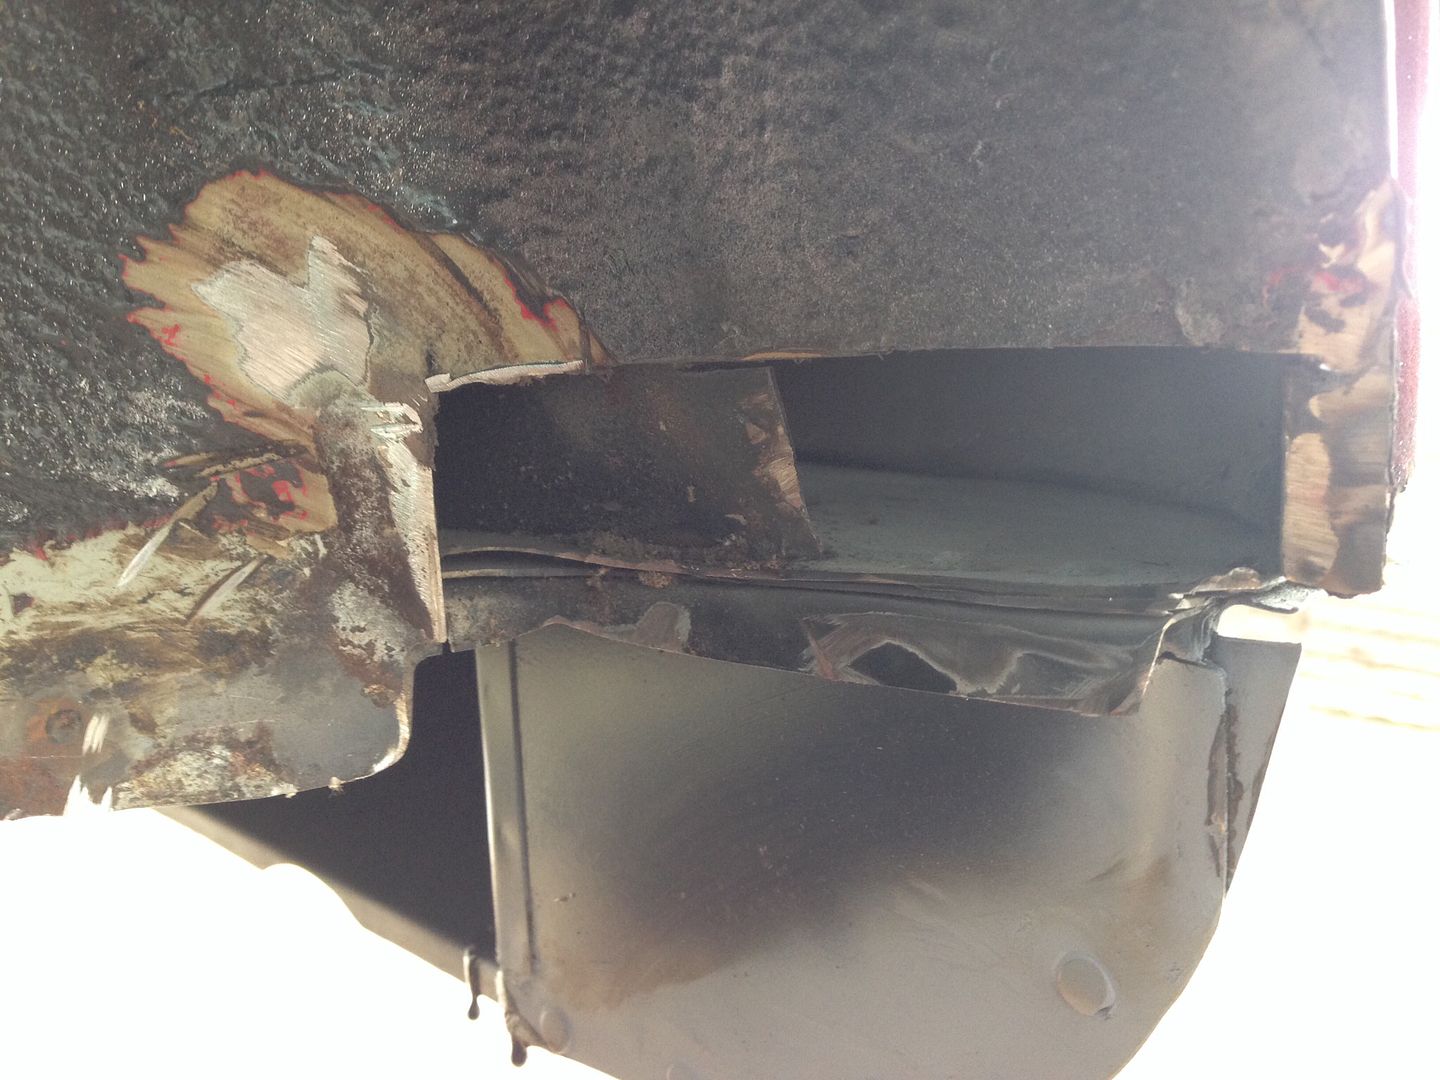
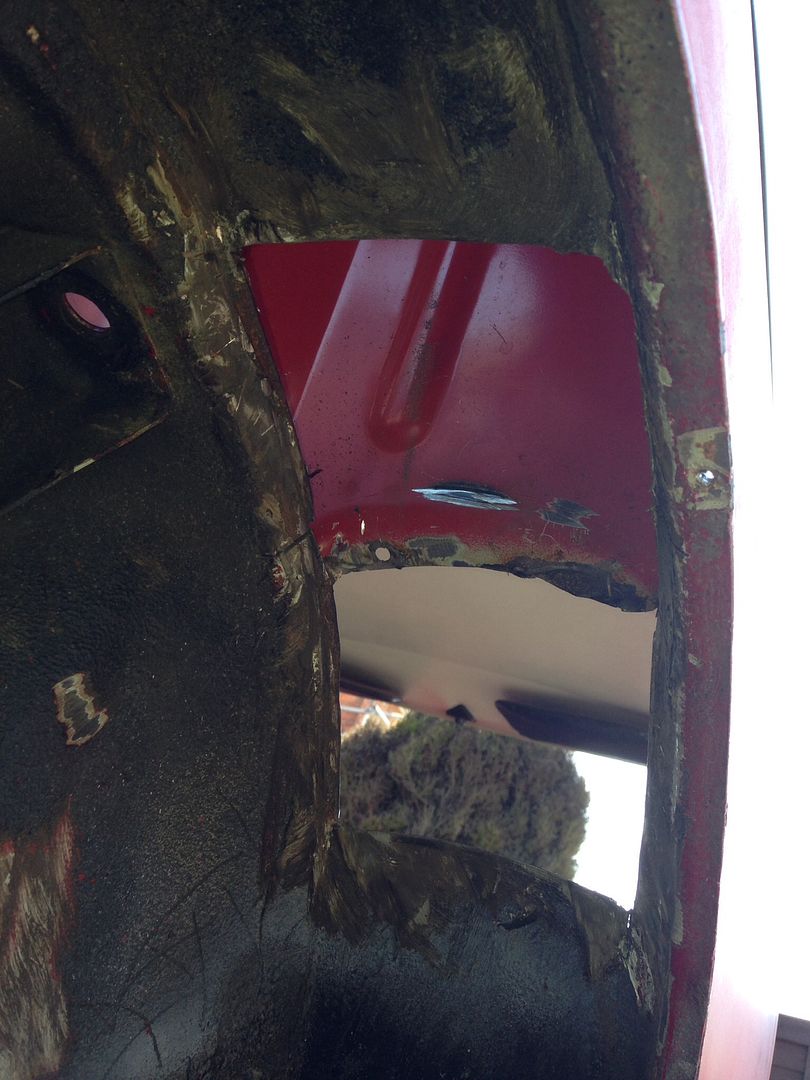
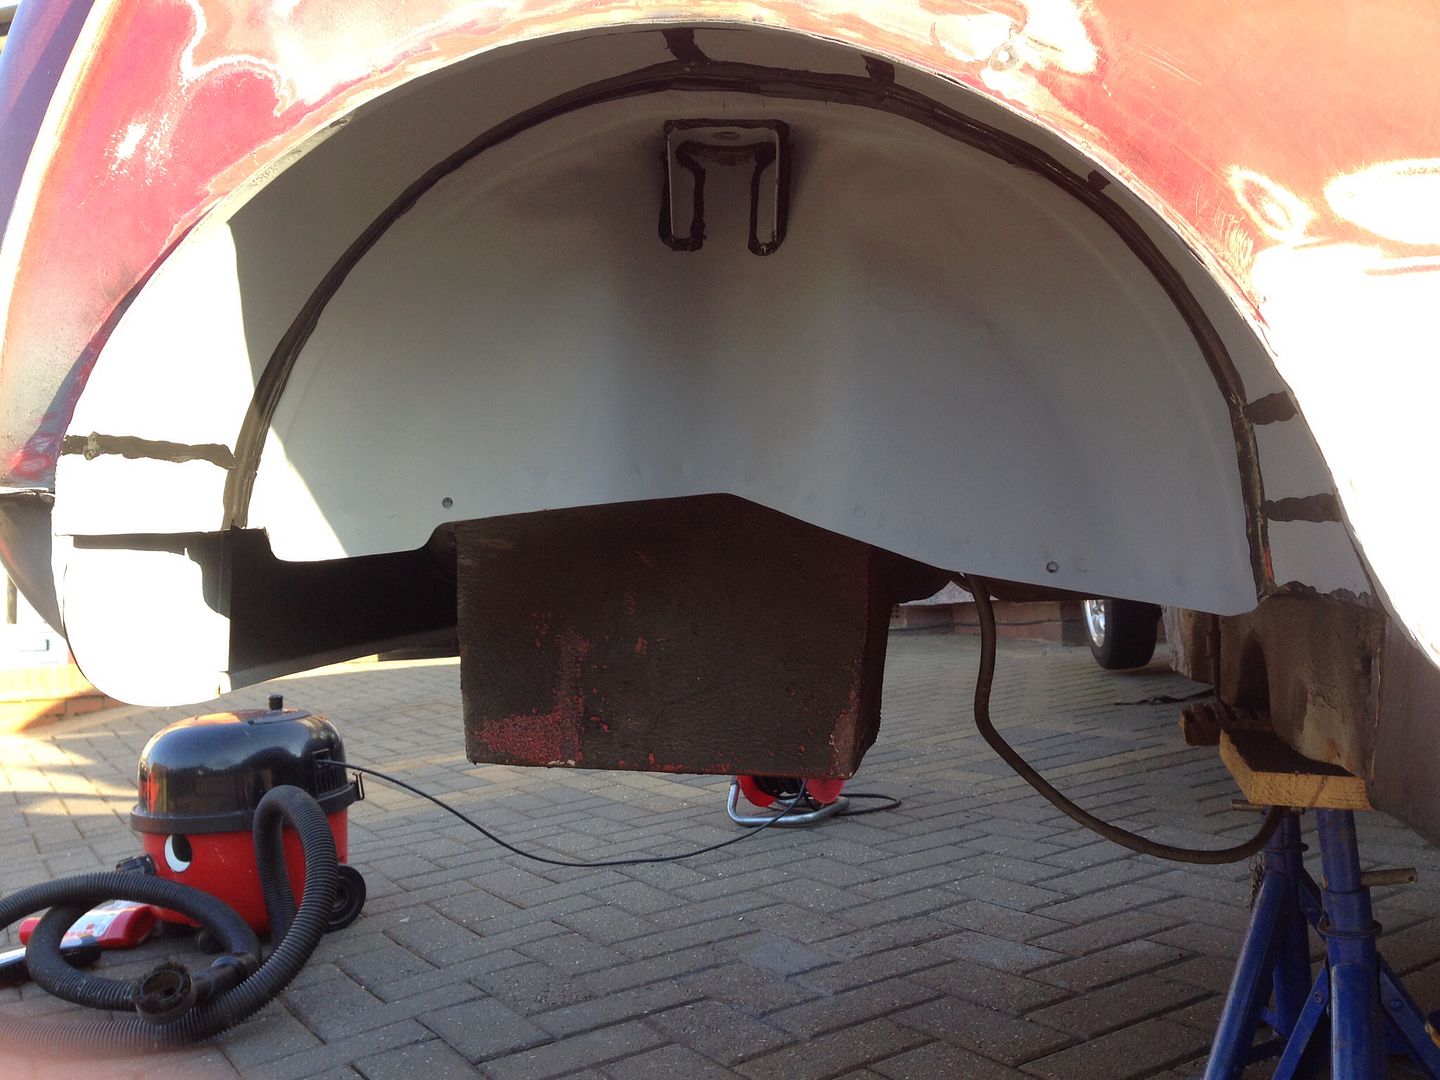
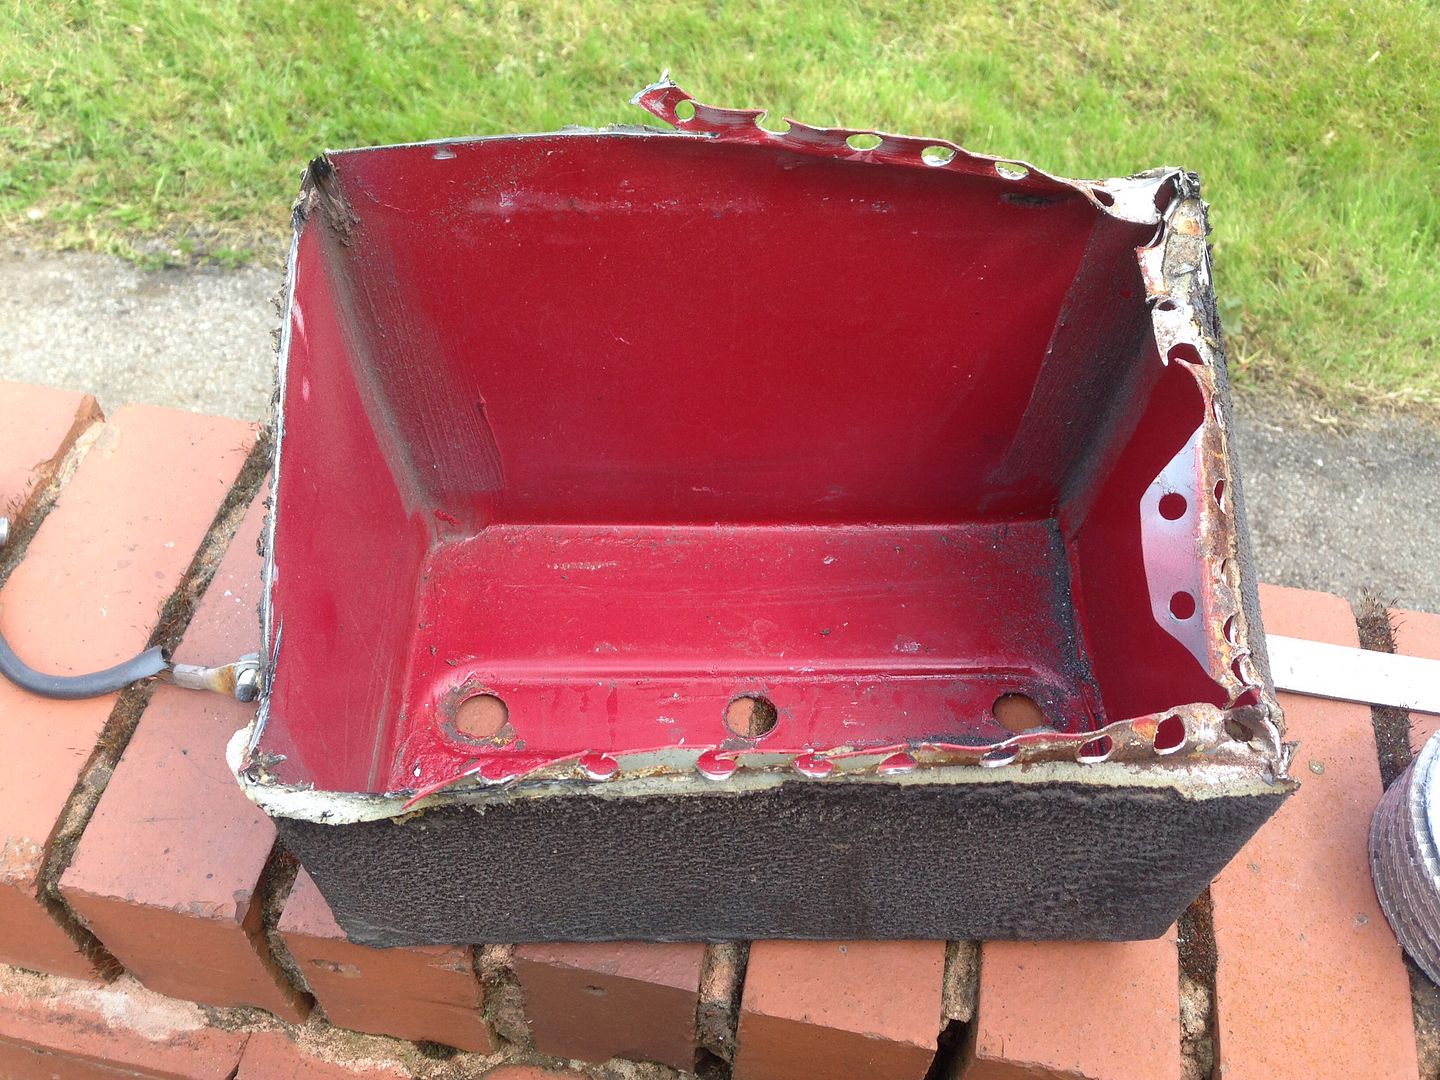
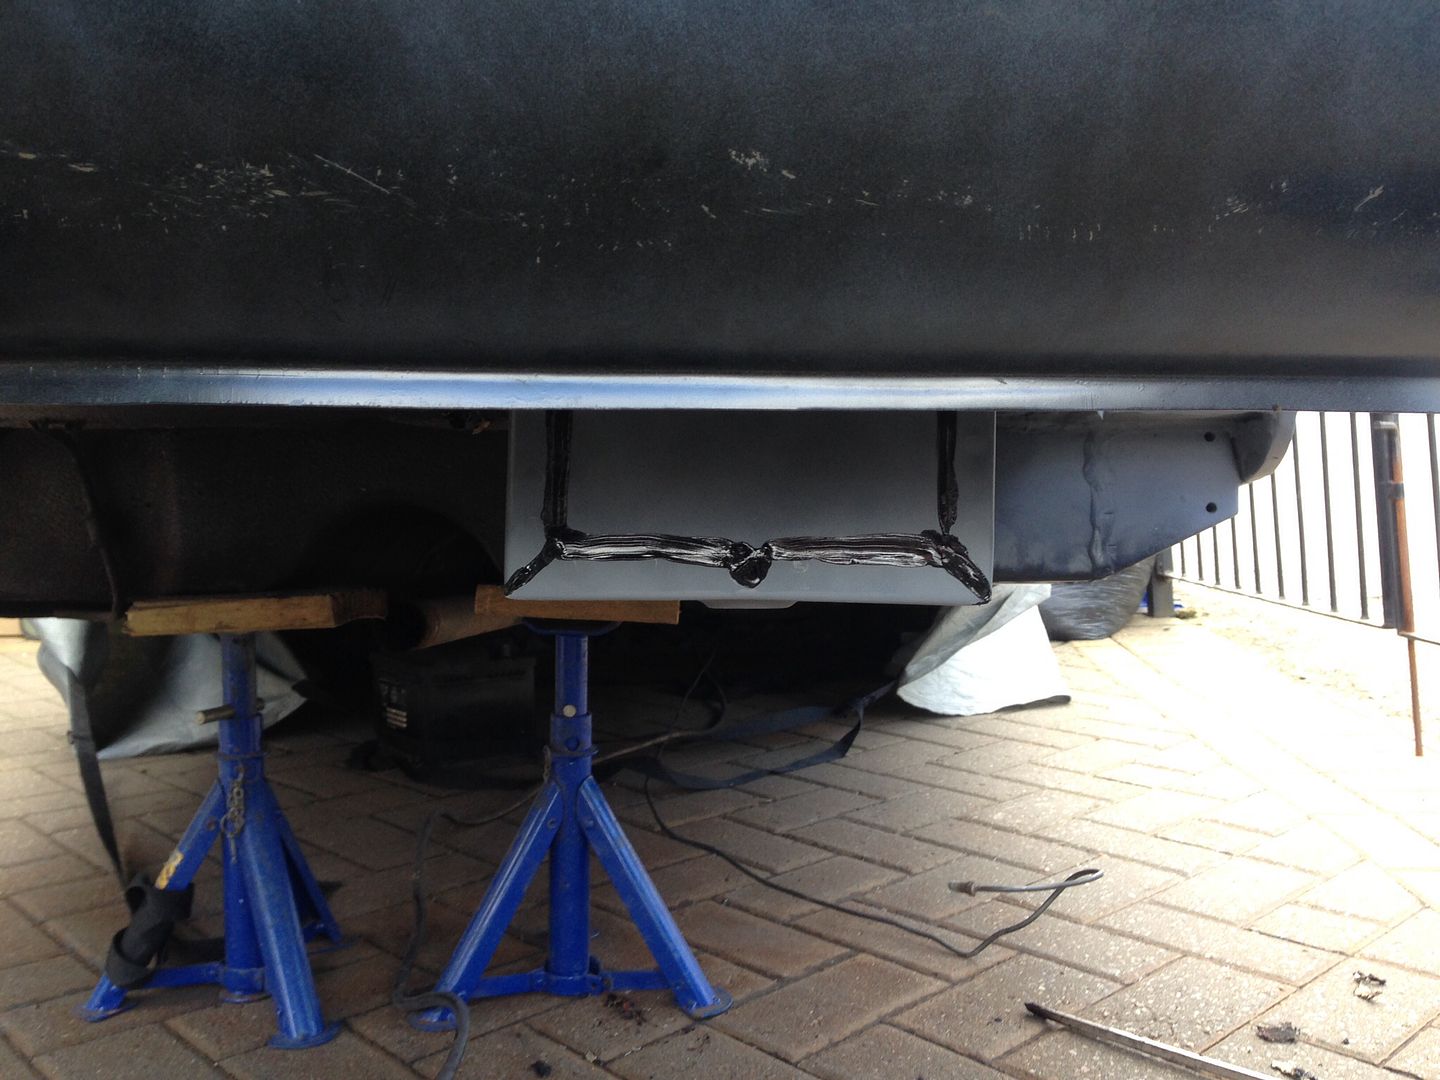
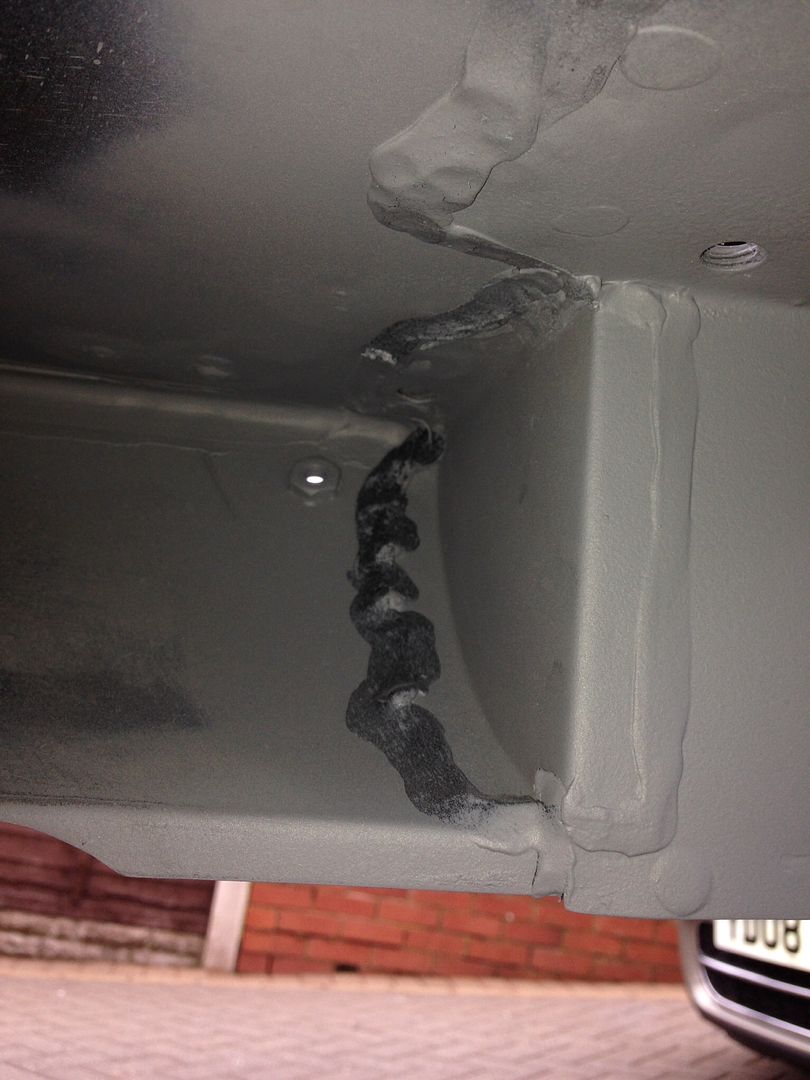
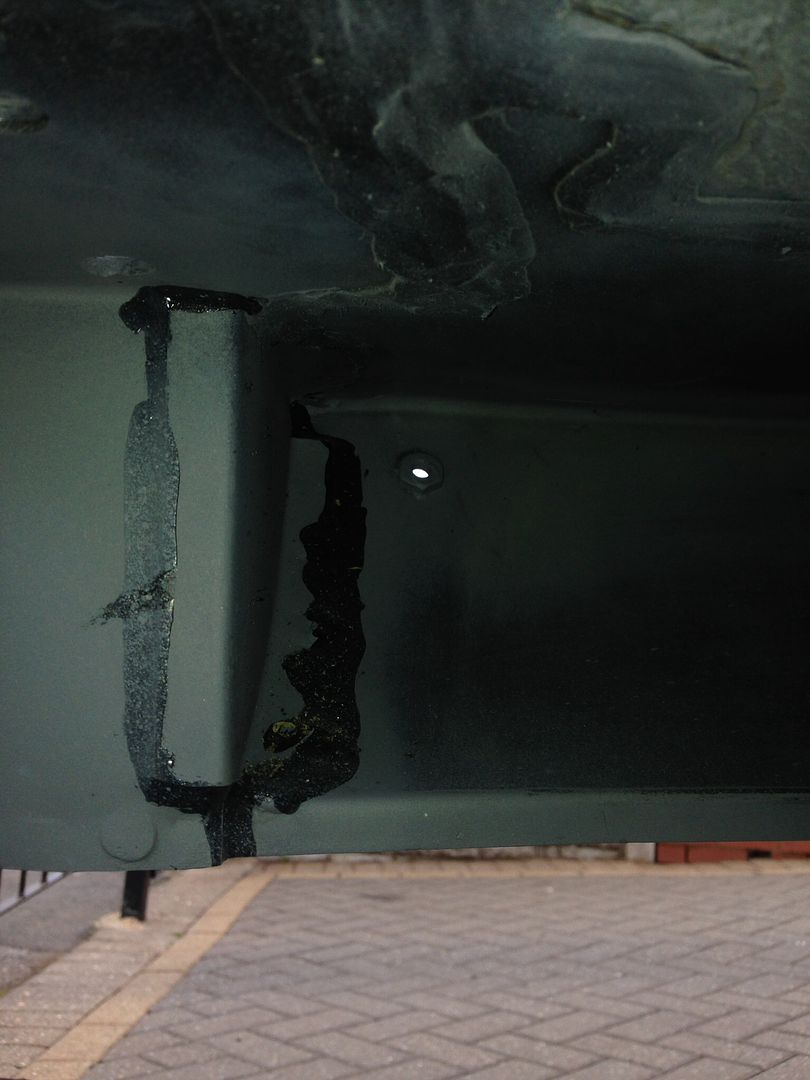
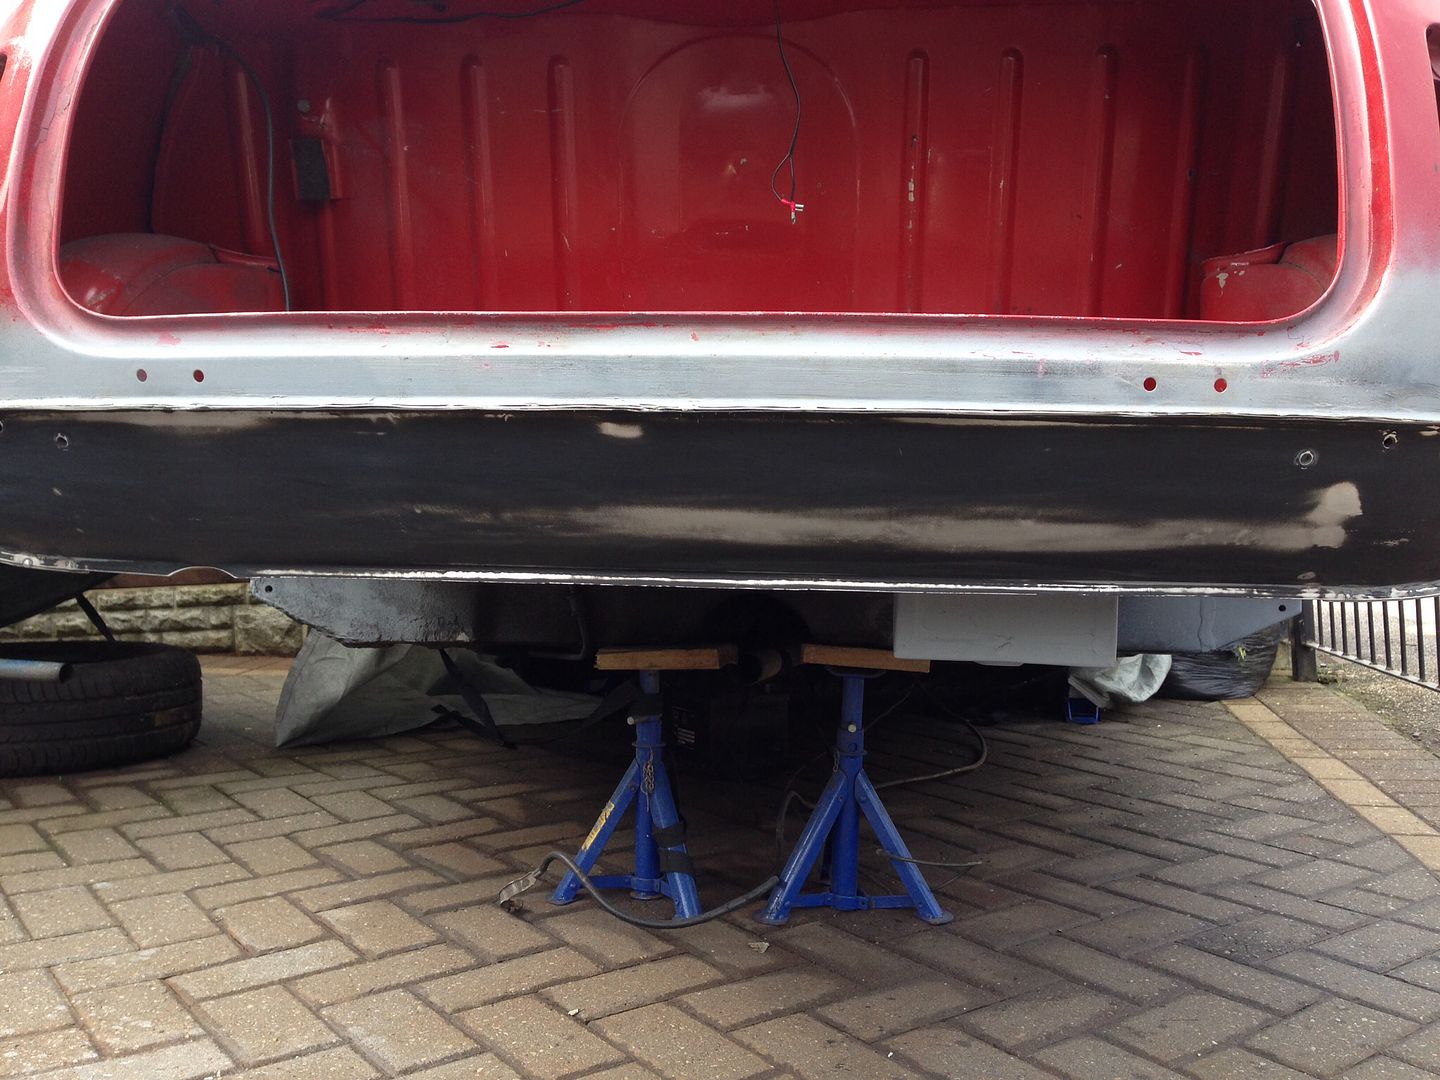
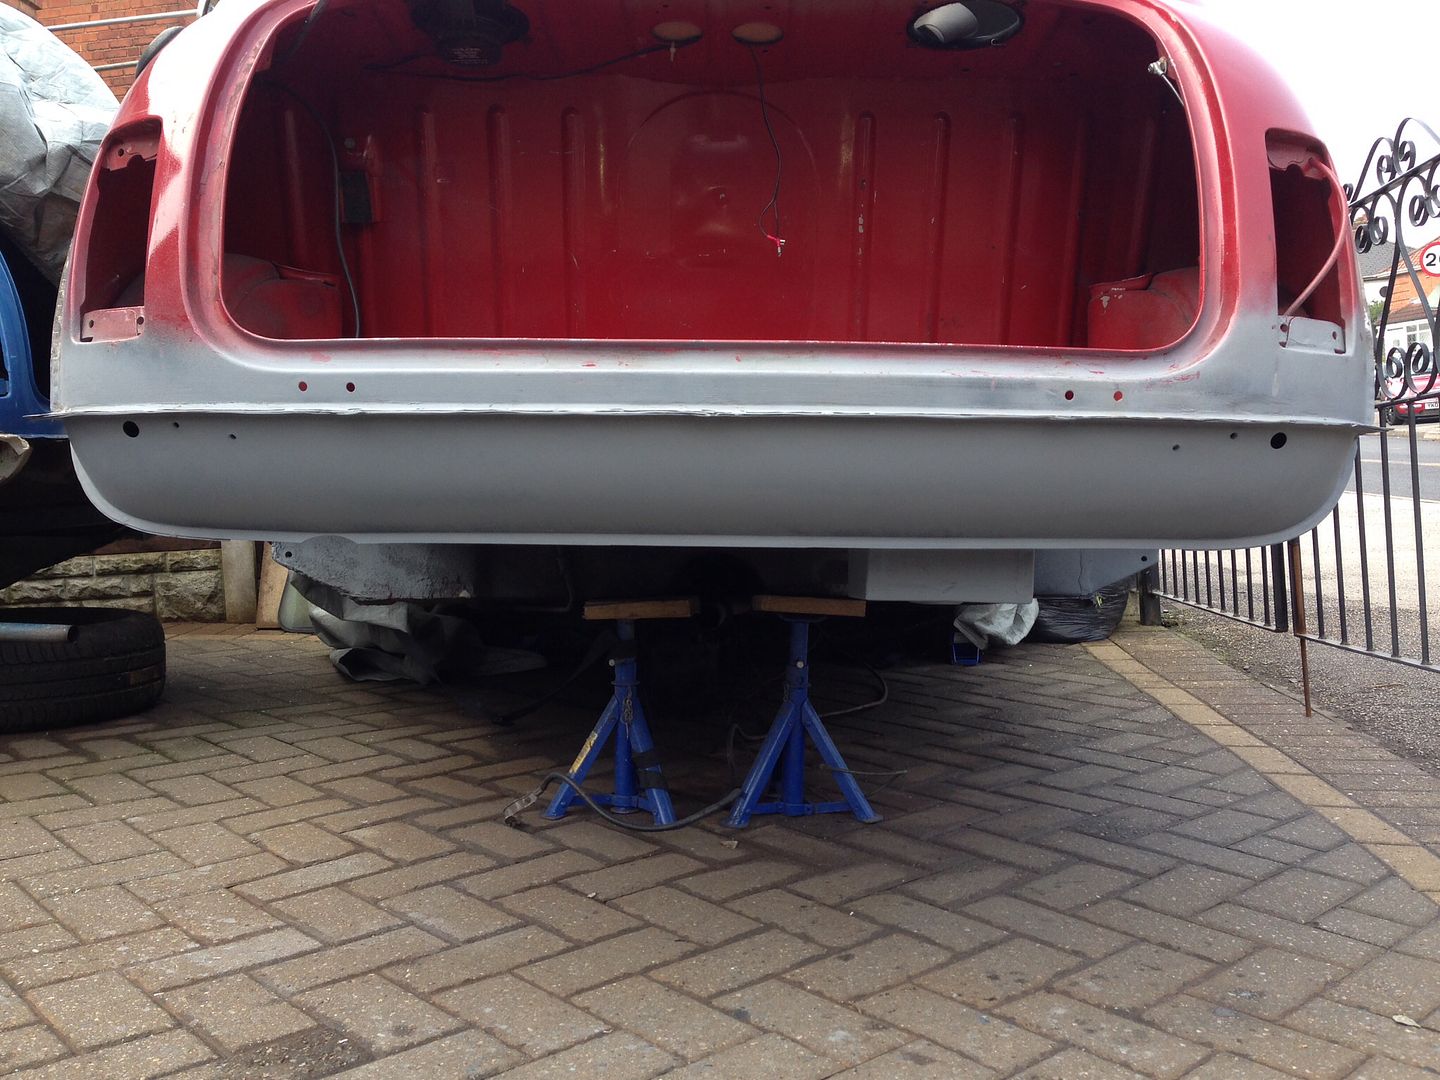
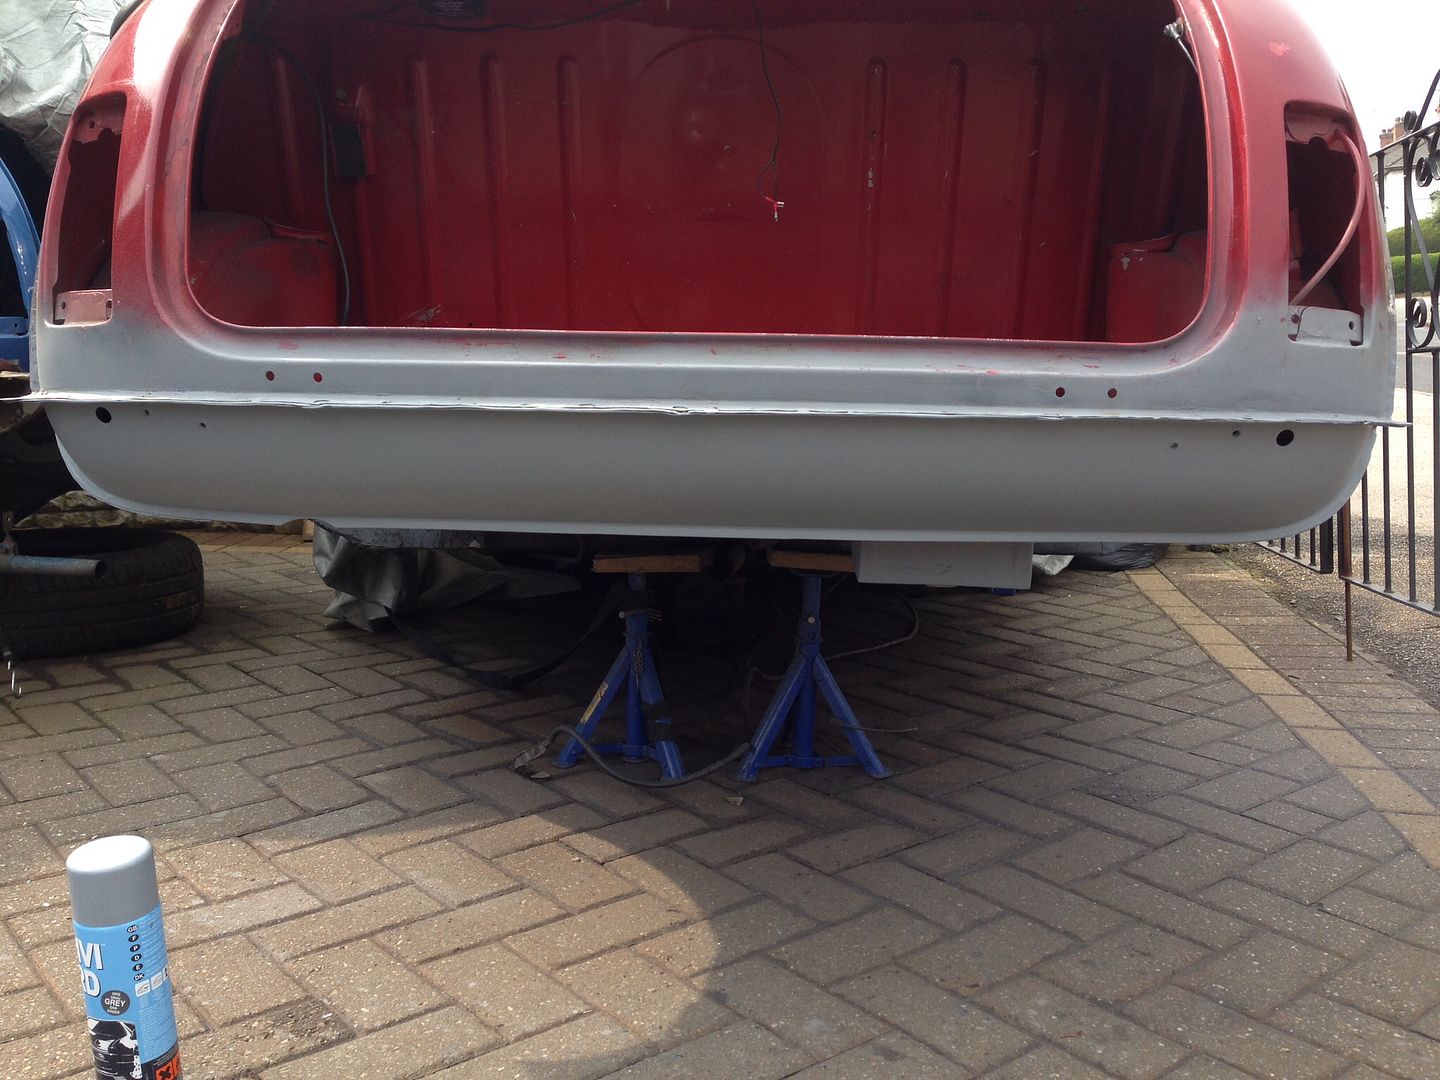
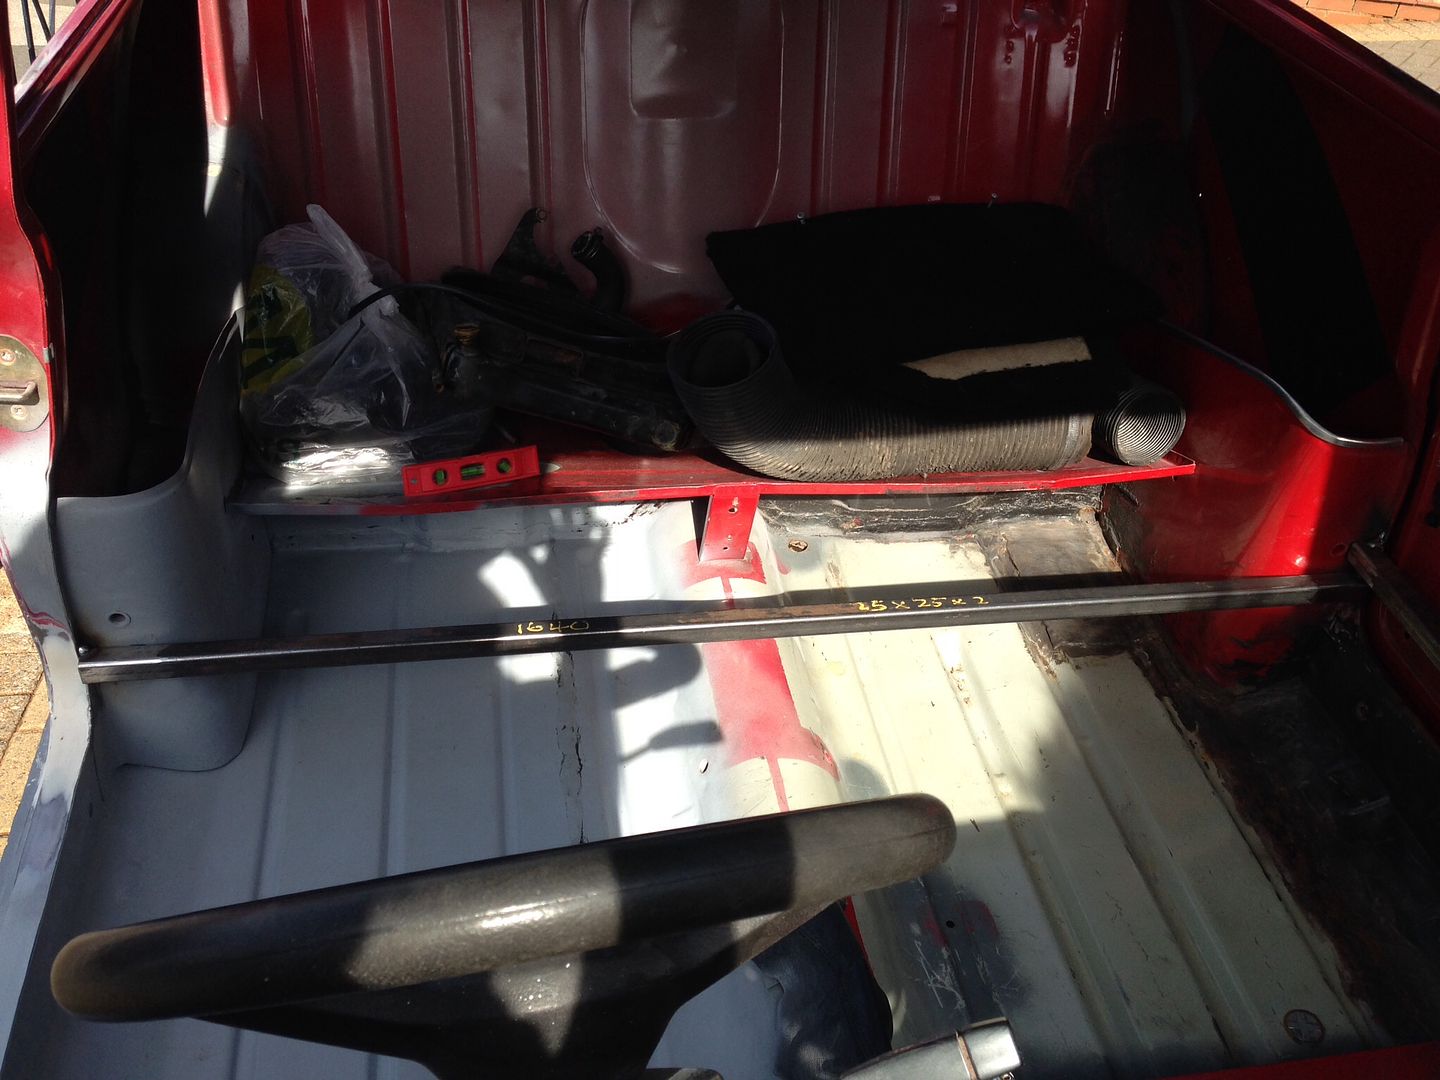
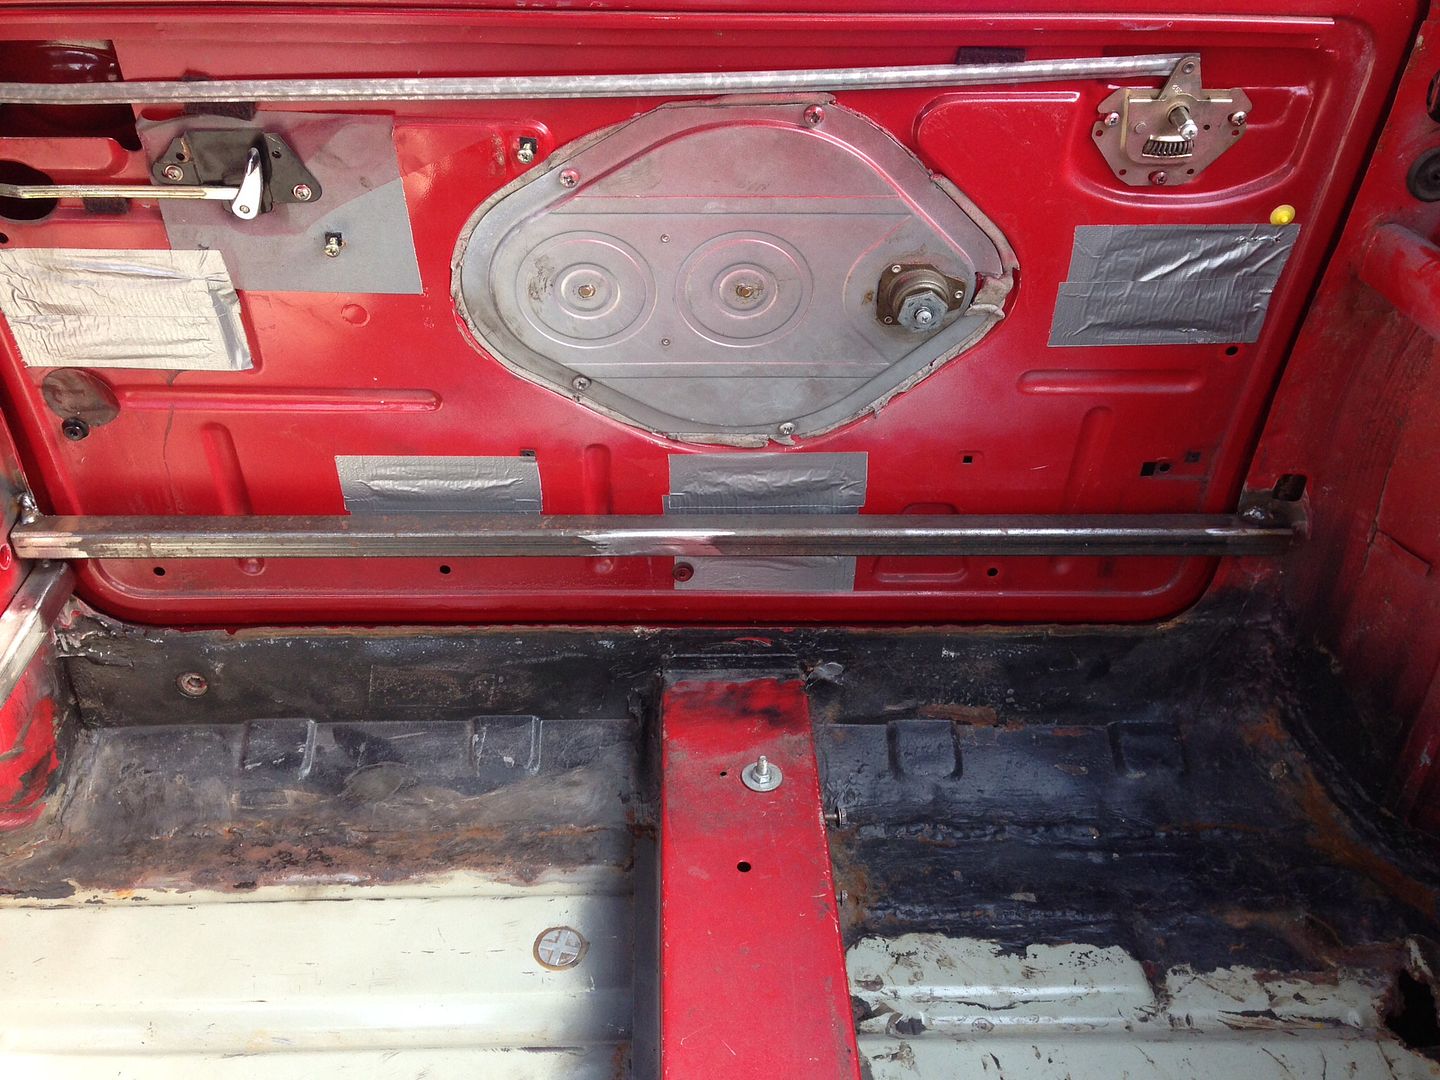
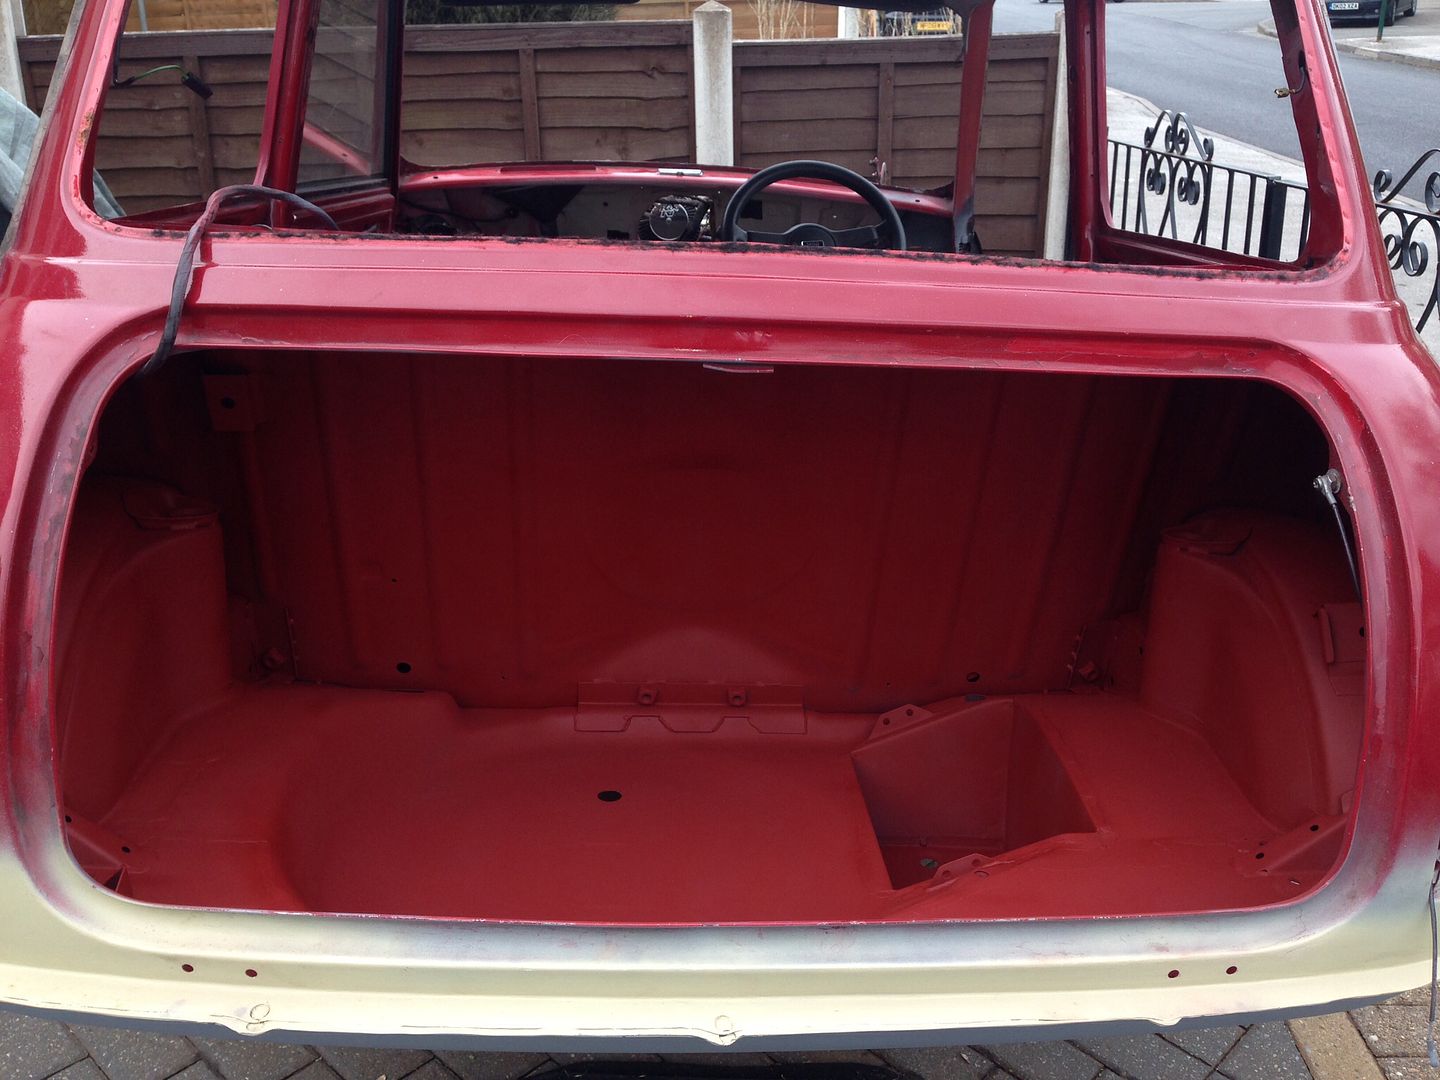
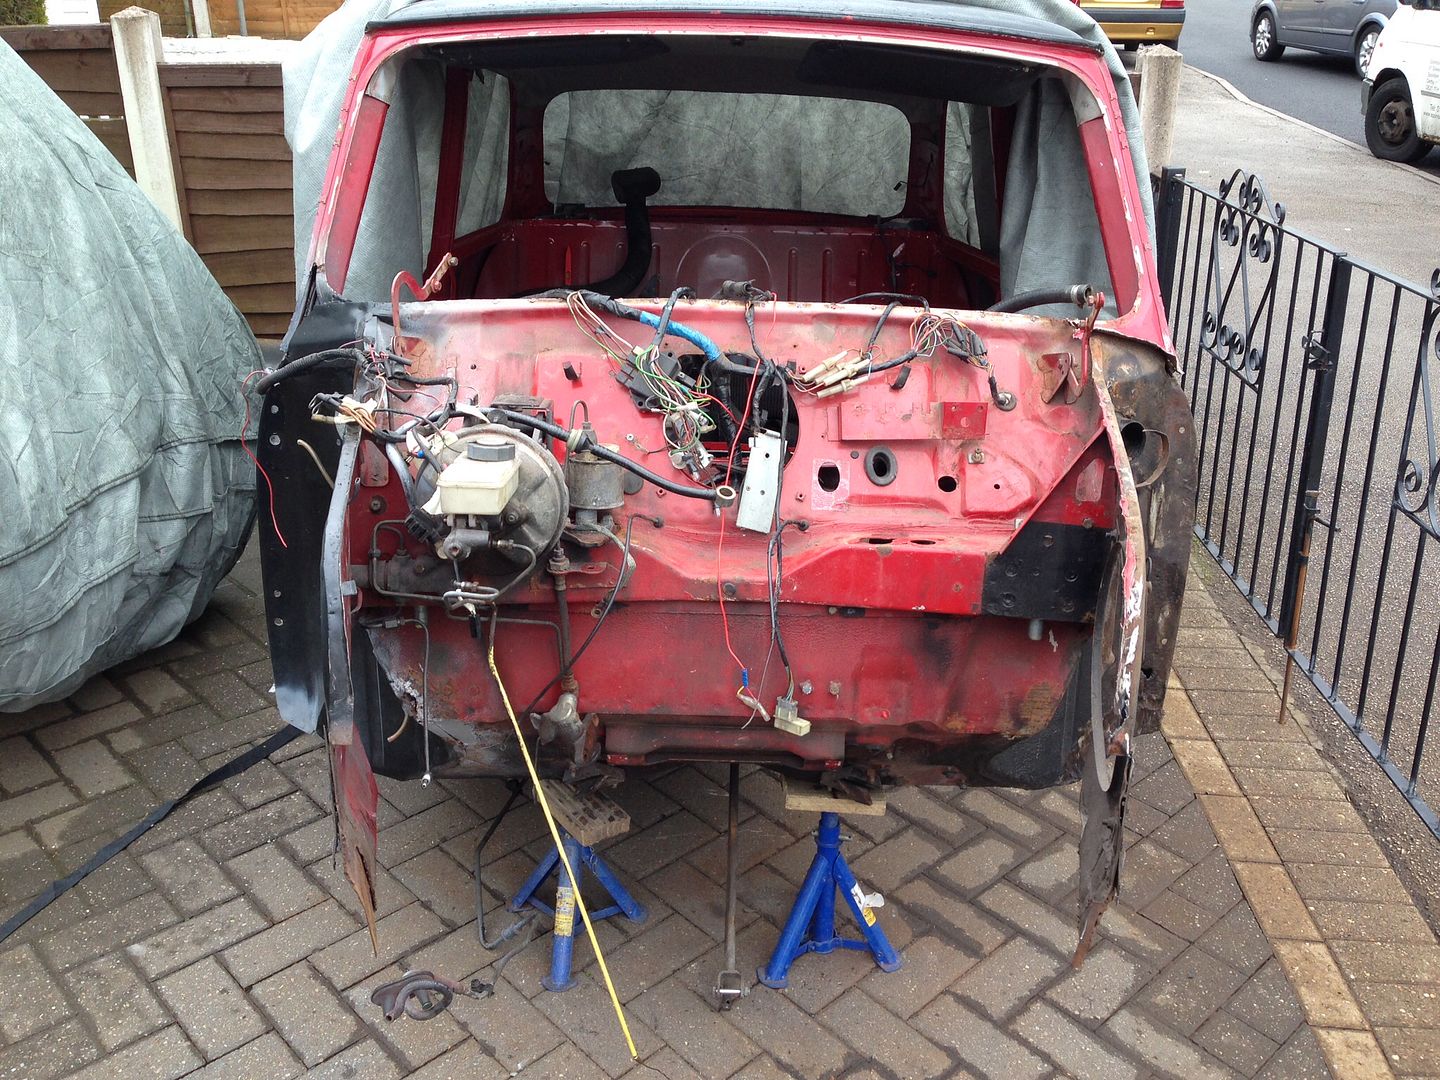
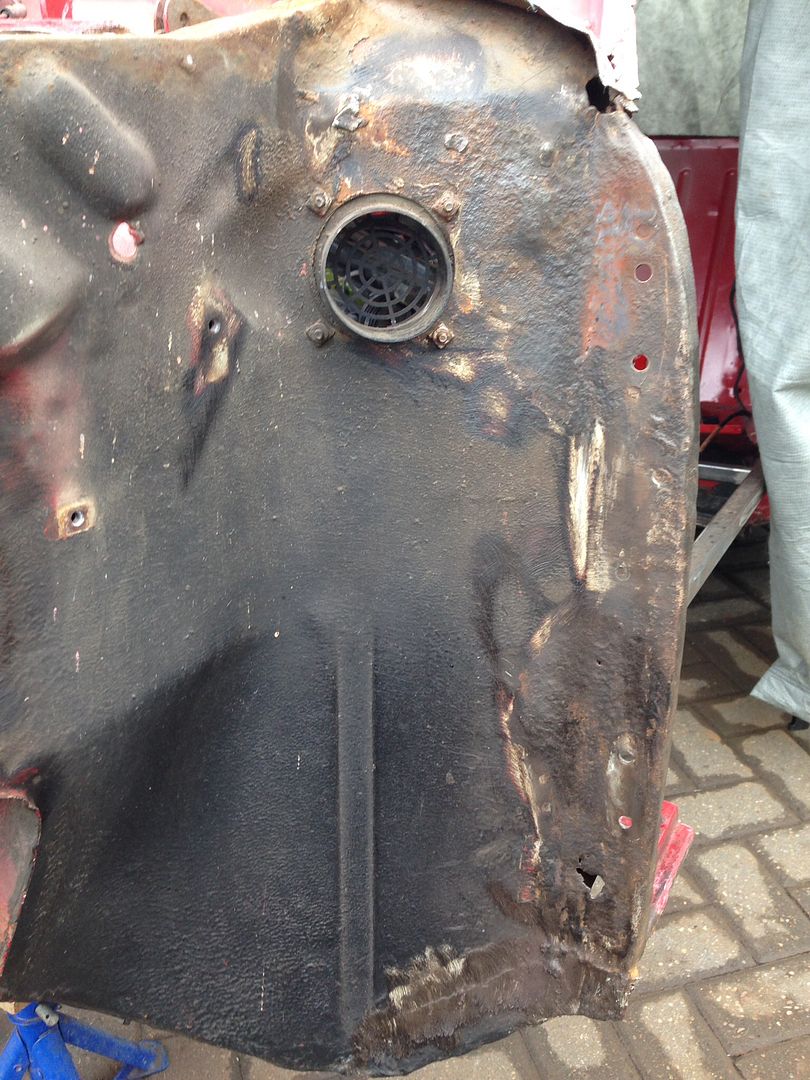
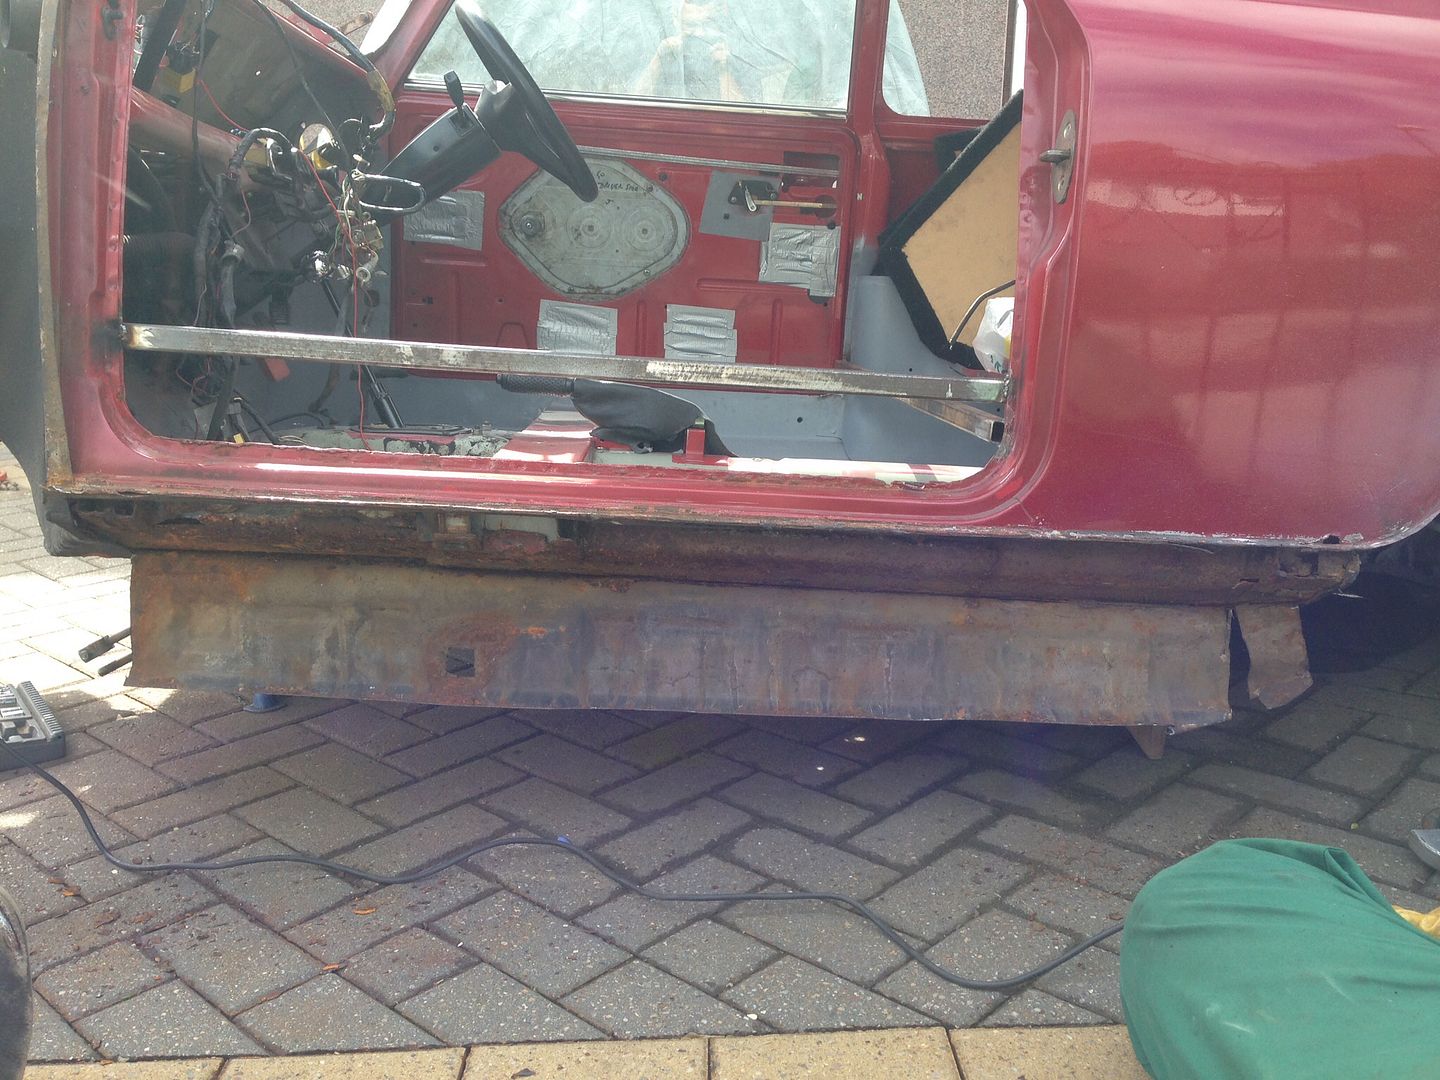
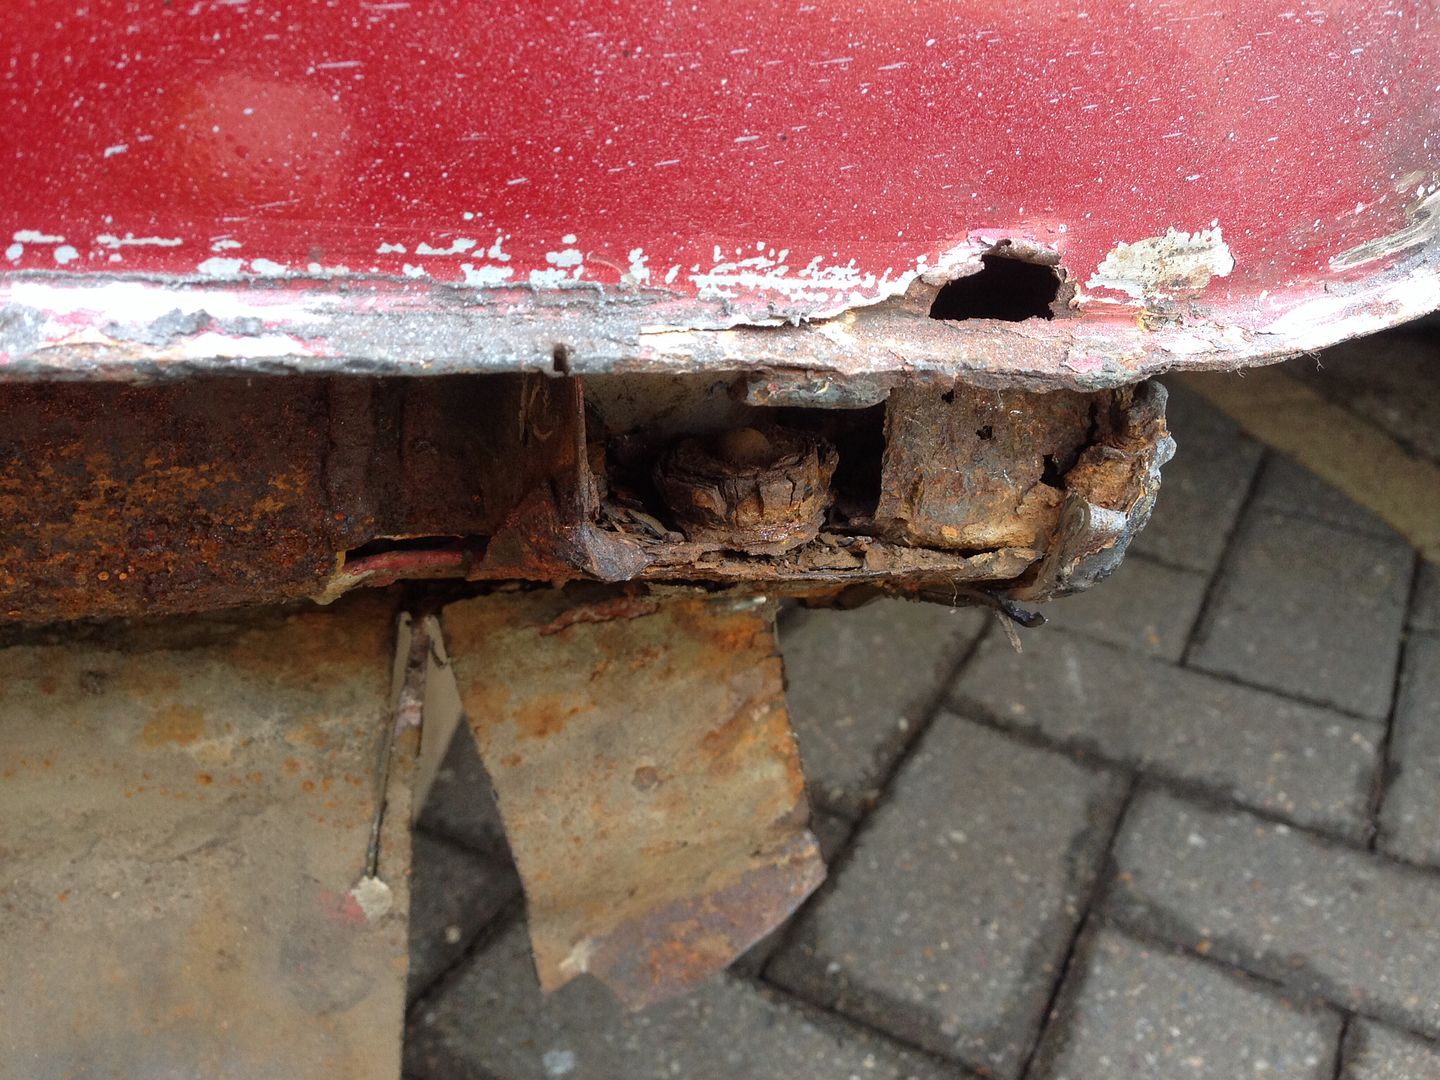
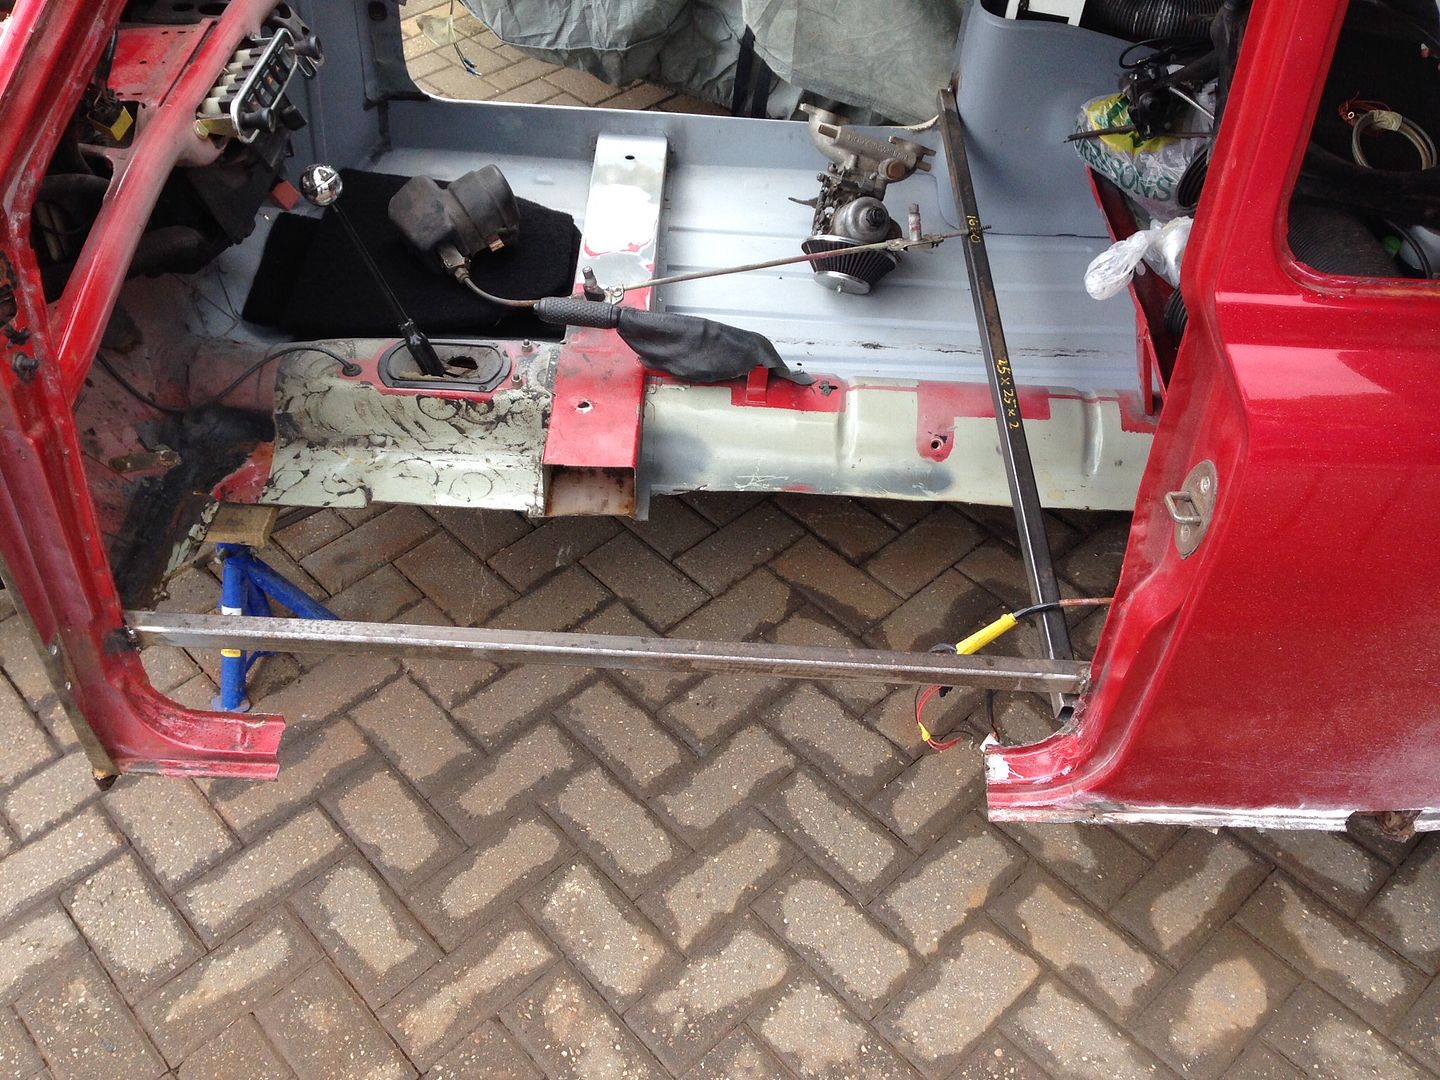
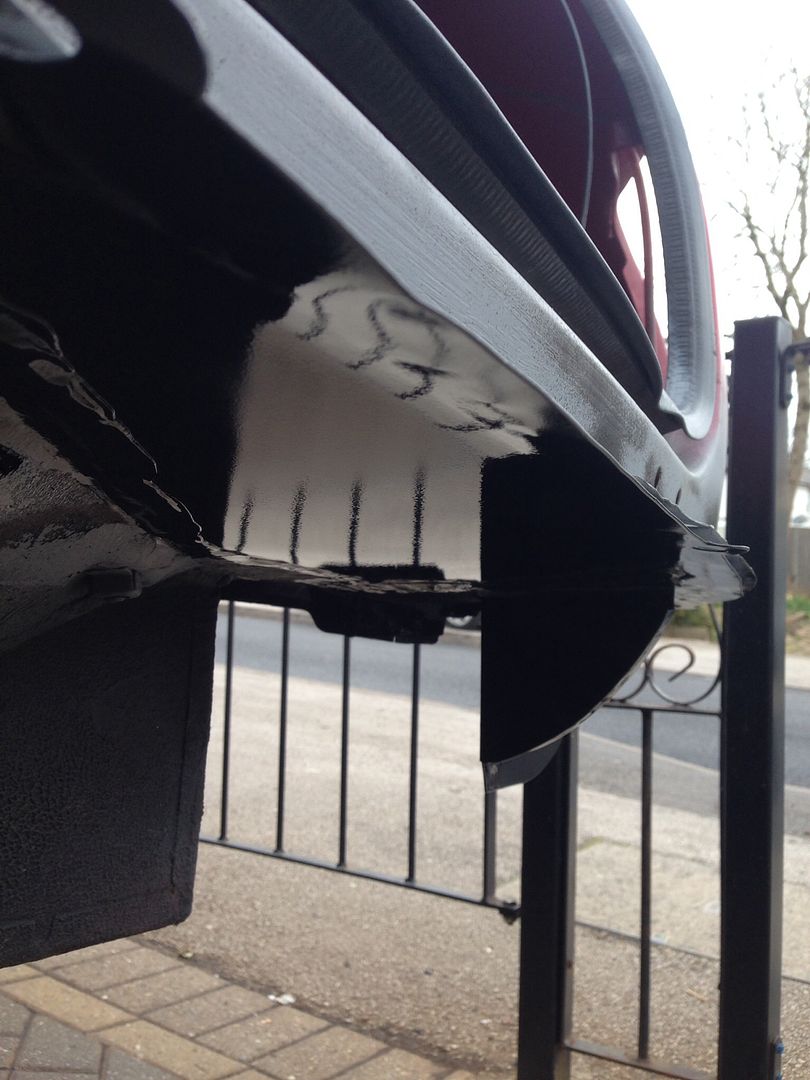
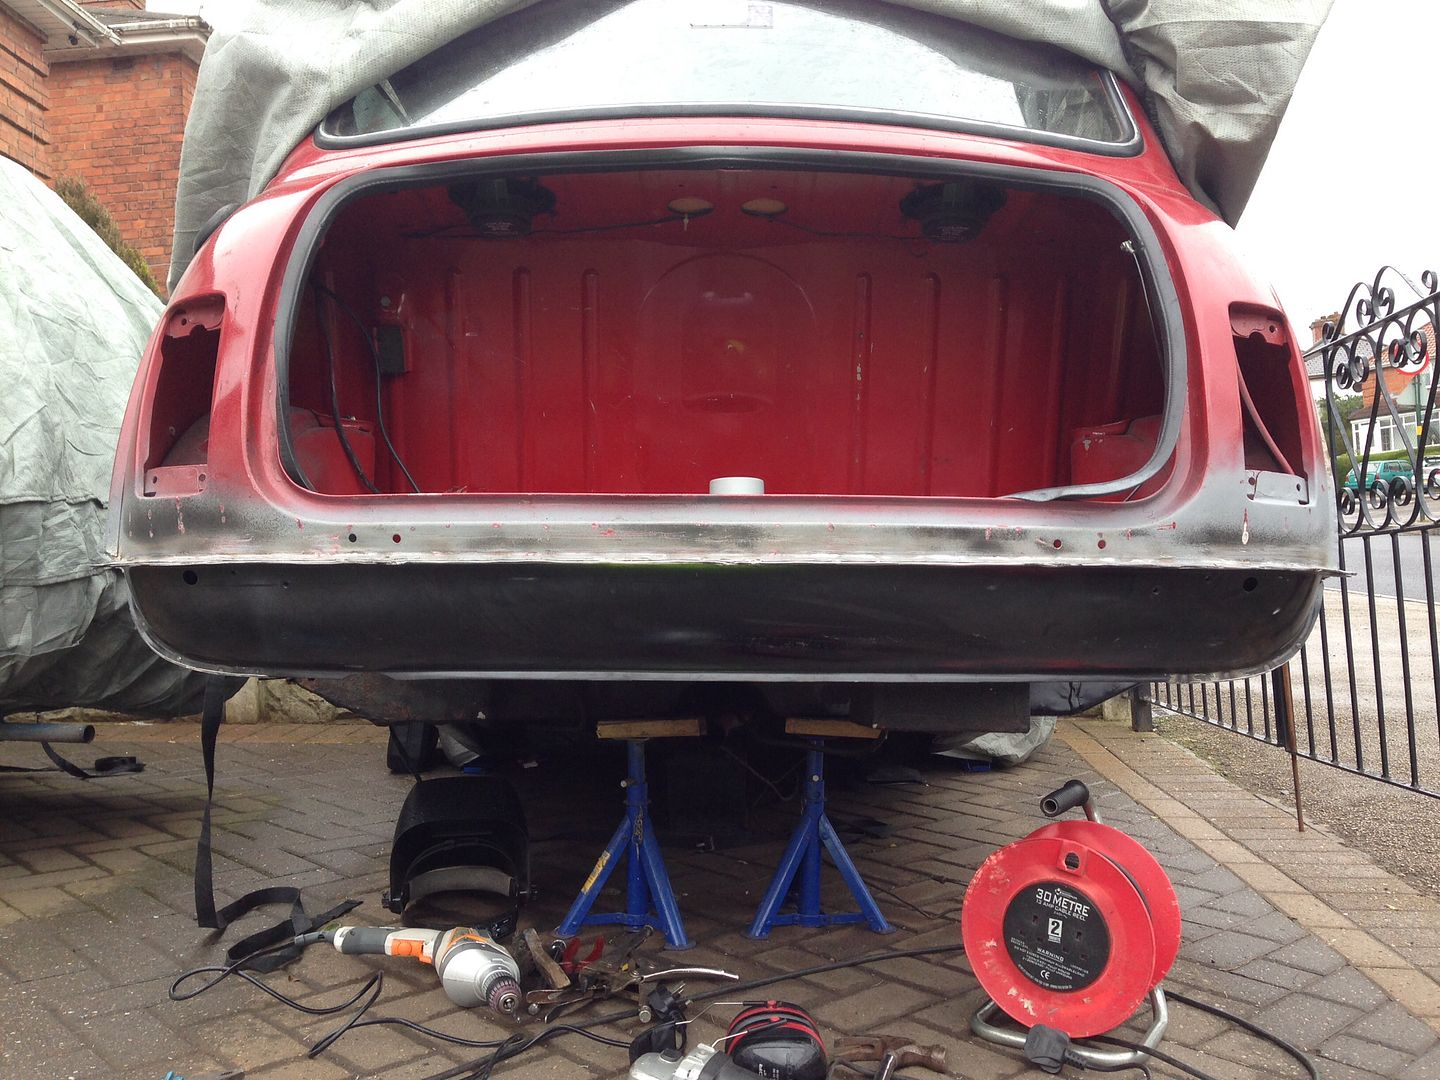
I've got the valance welded on now, so there's not to much left to do on the rear end, should only be a couple of small patches to make.

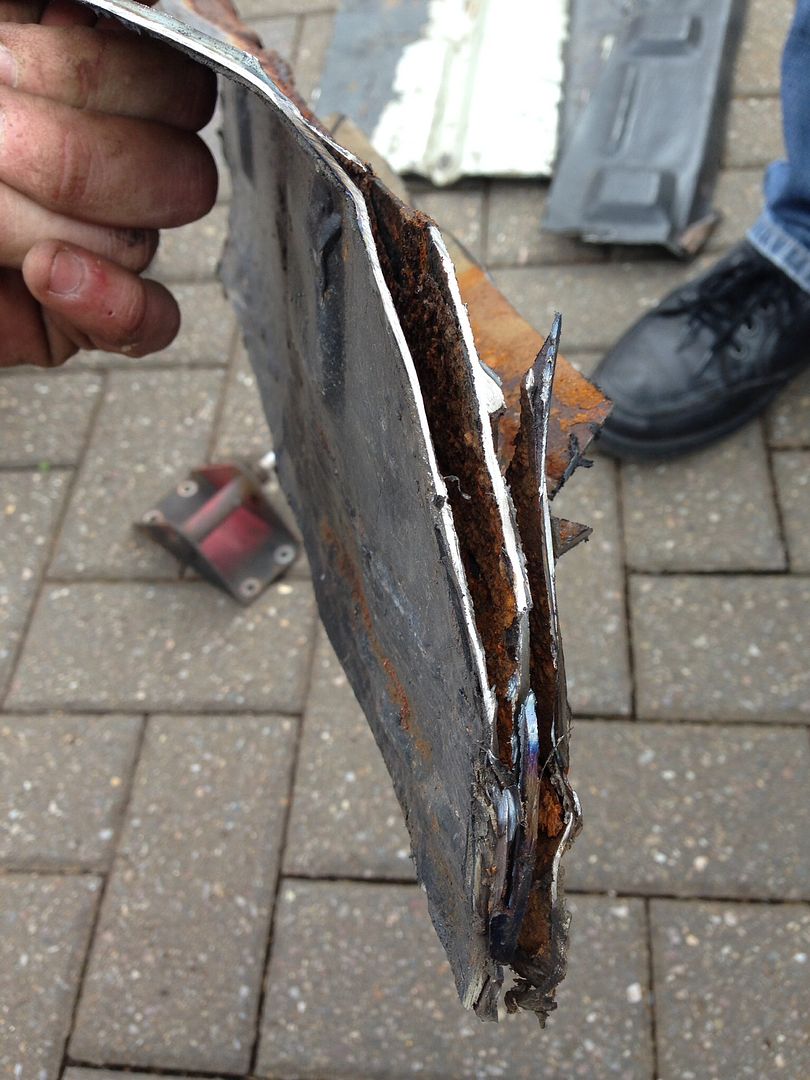
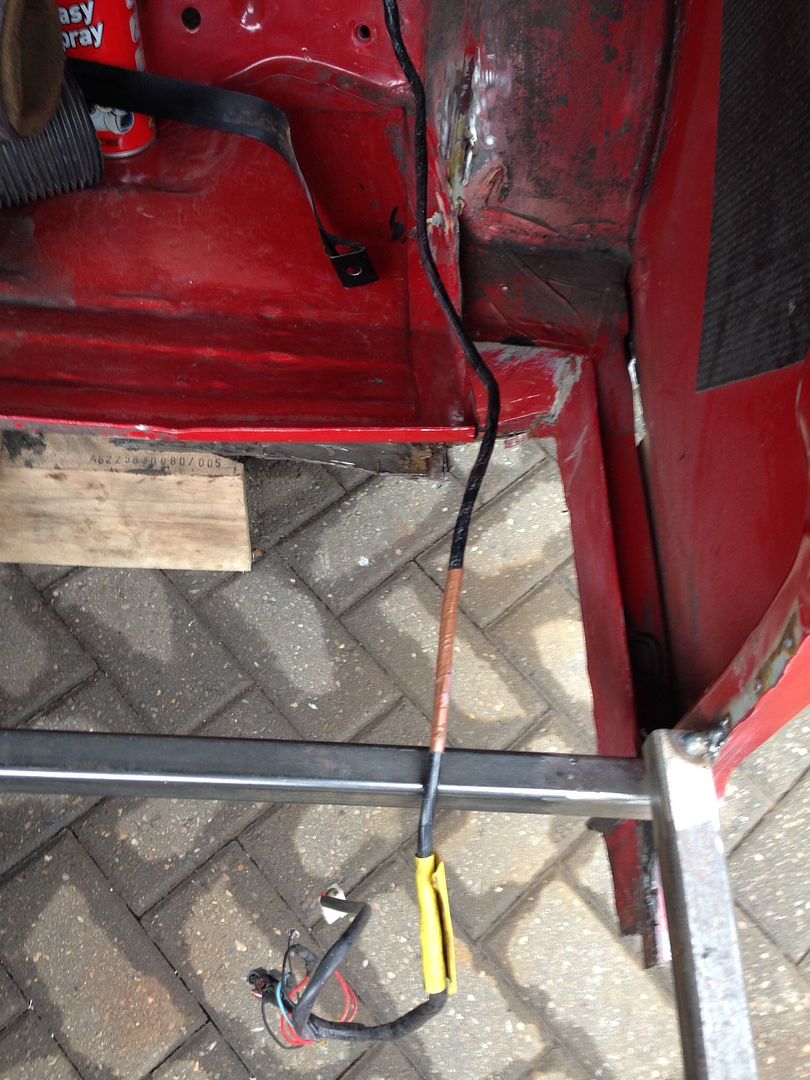
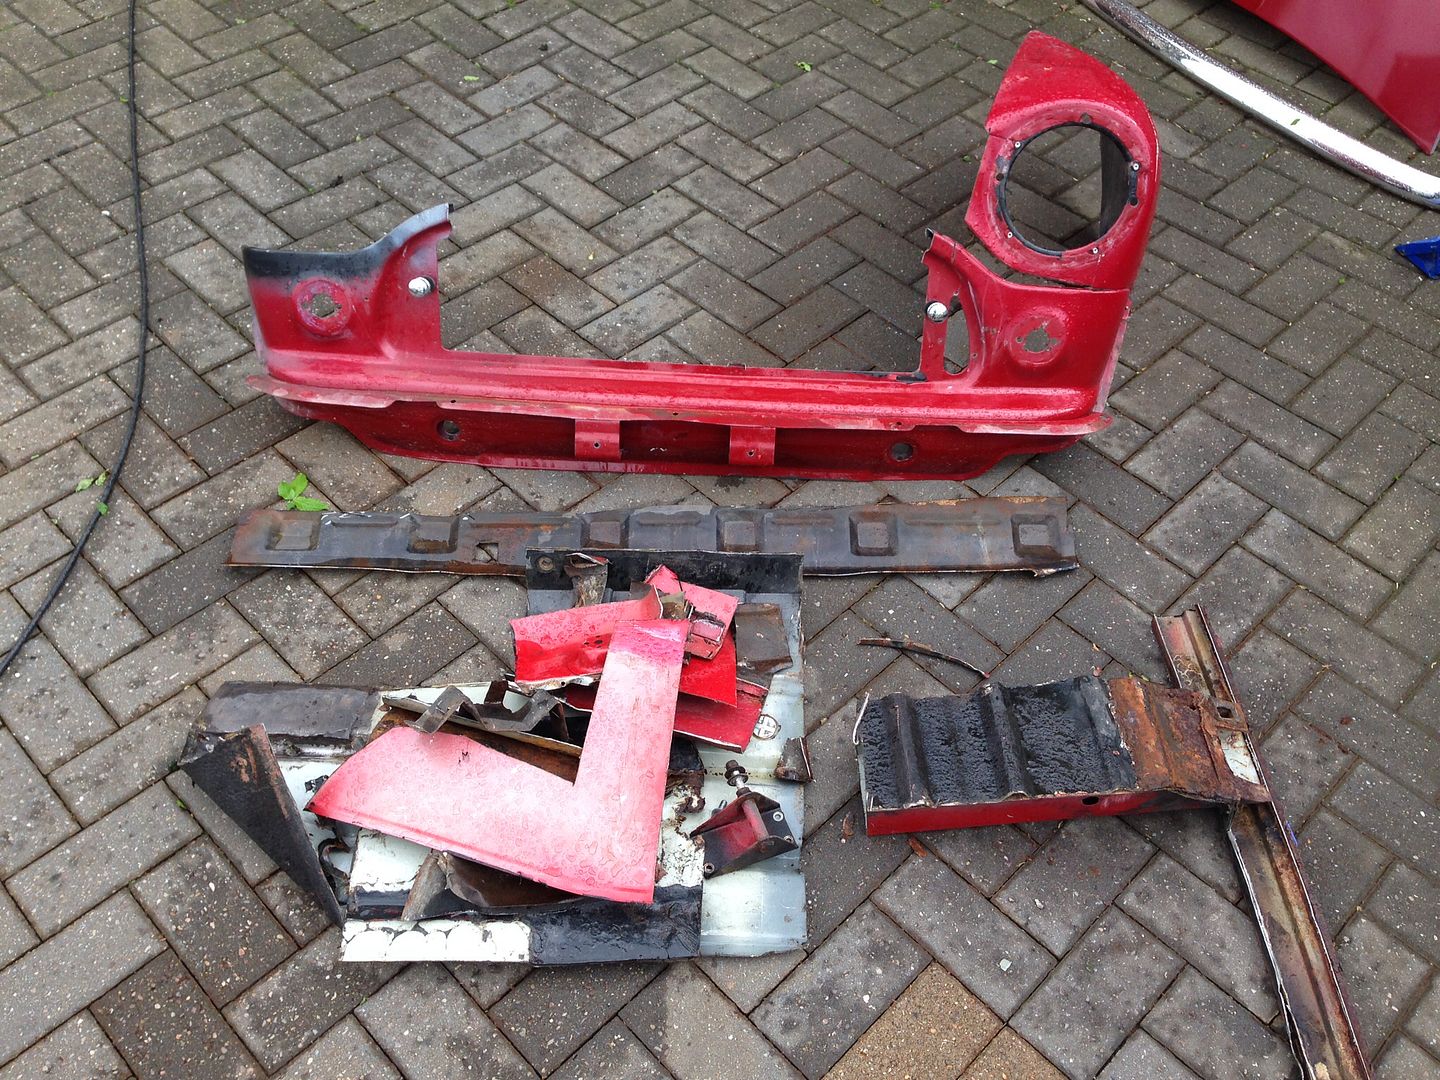
I'm slightly lacking in pictures of this repair, but I'll show what I've got anyway.

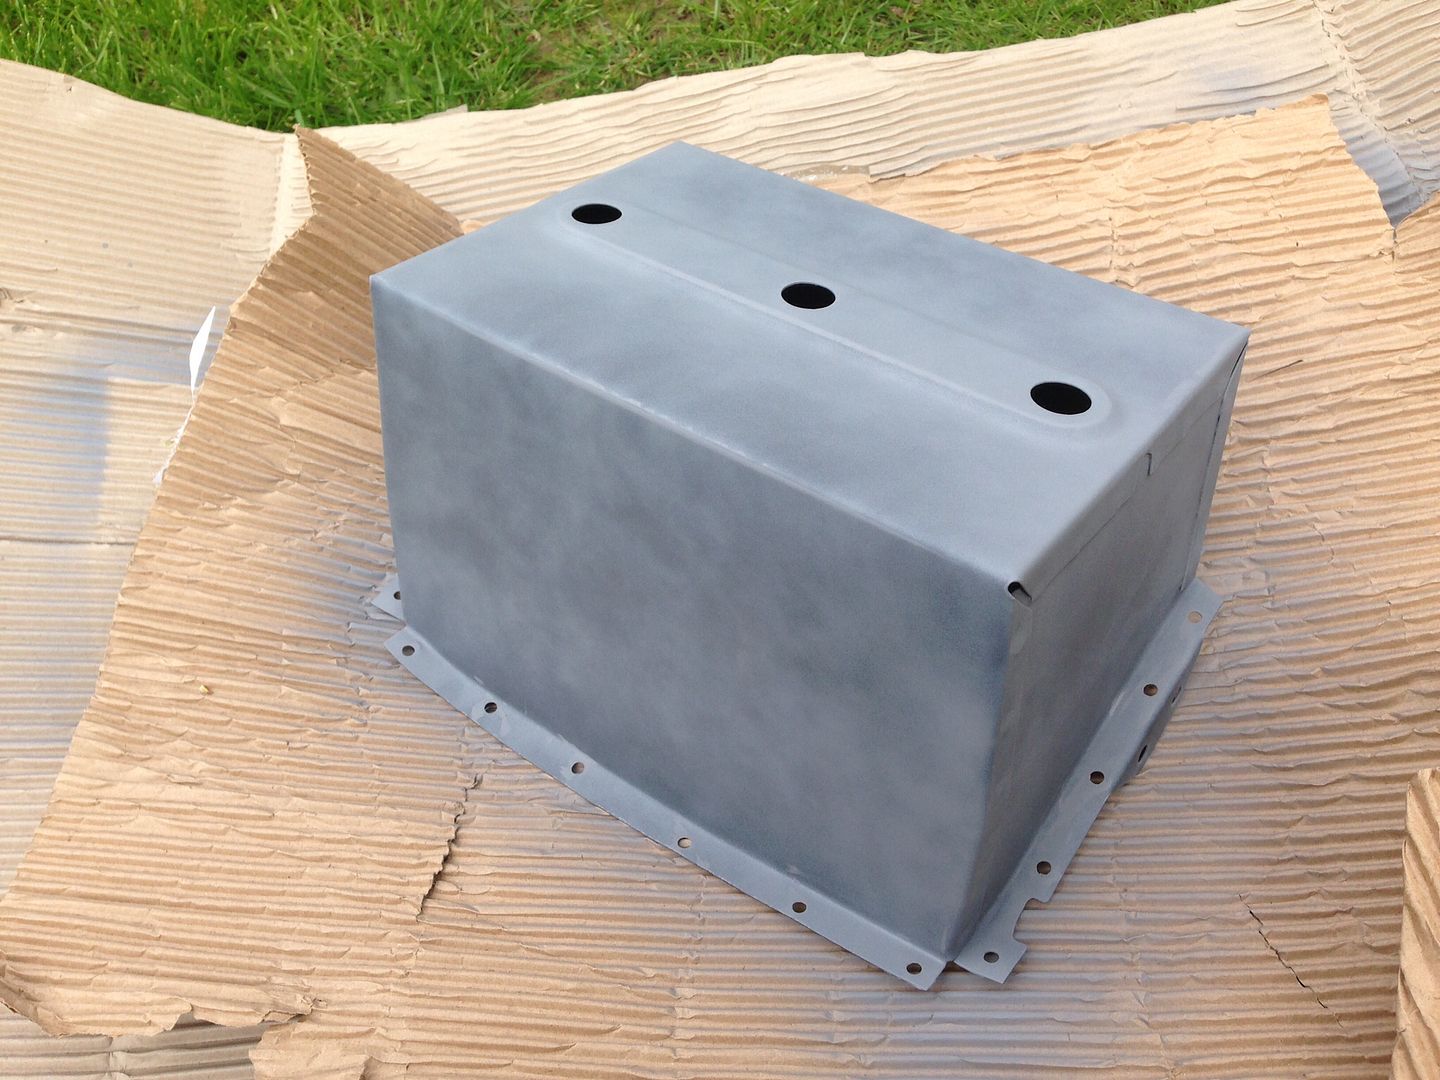
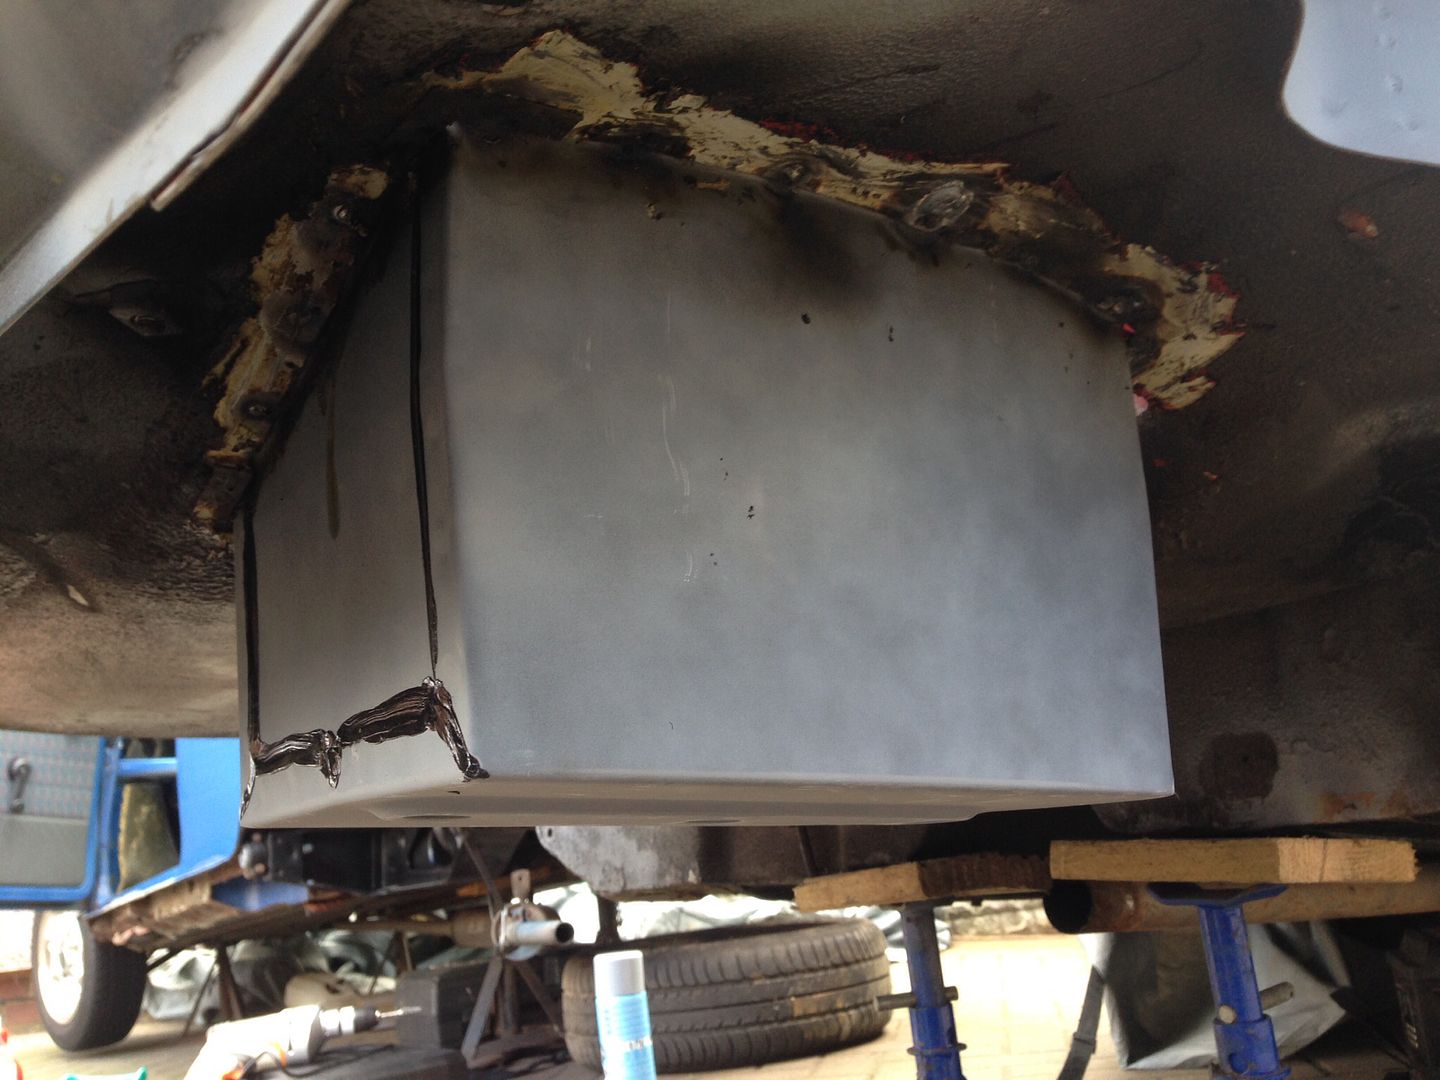
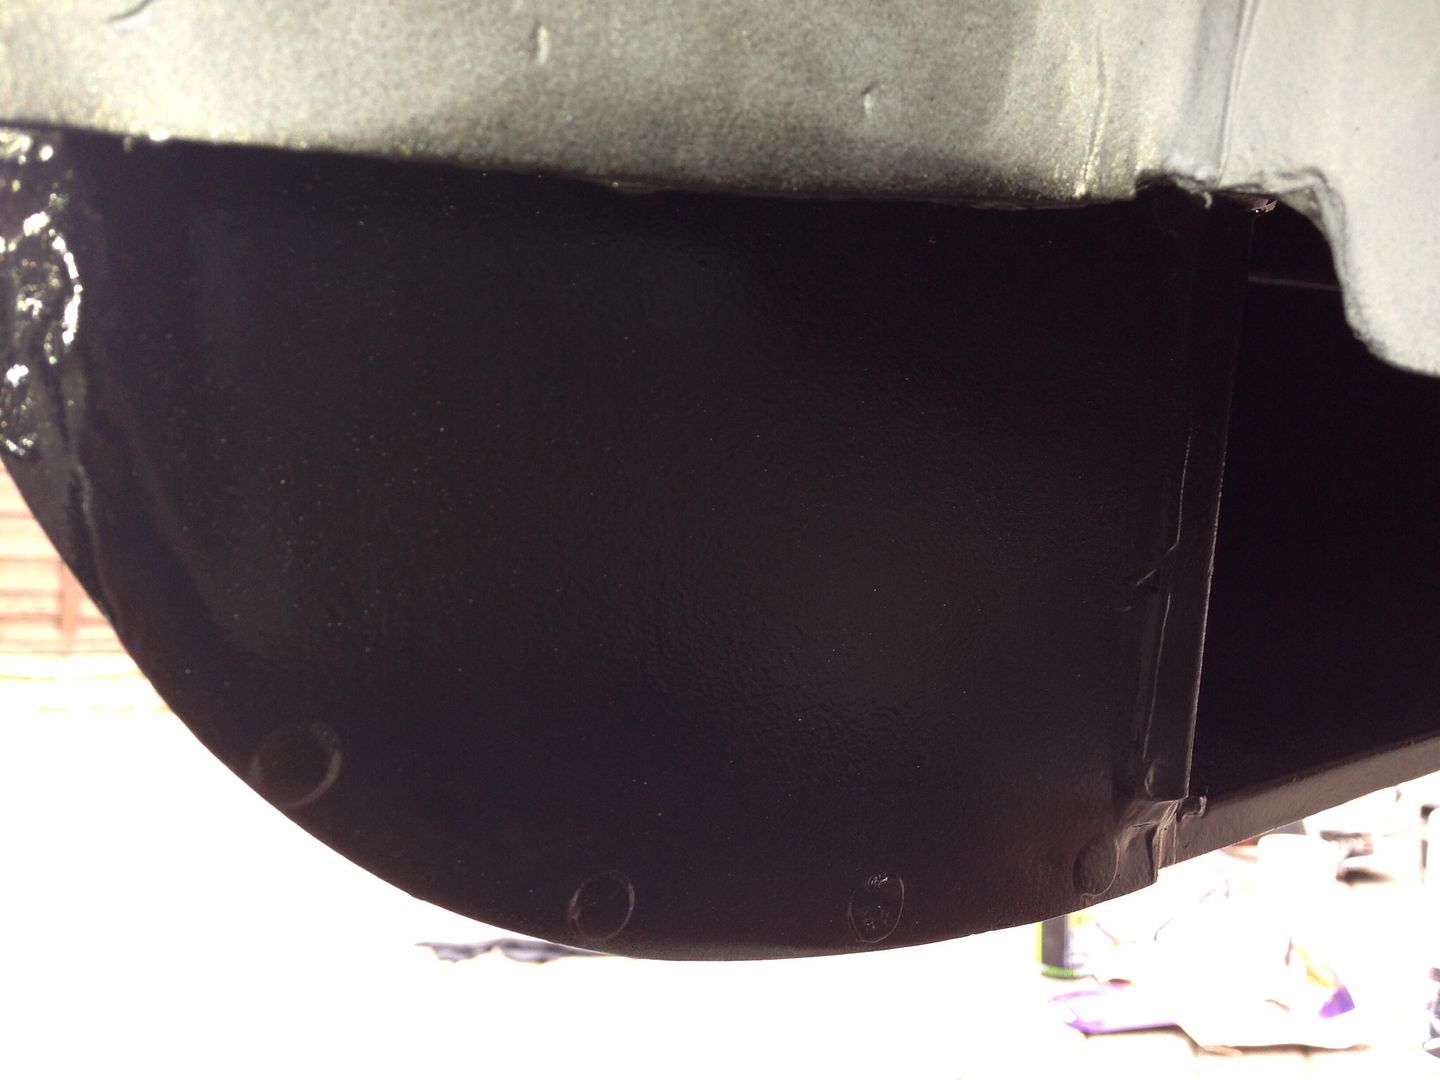
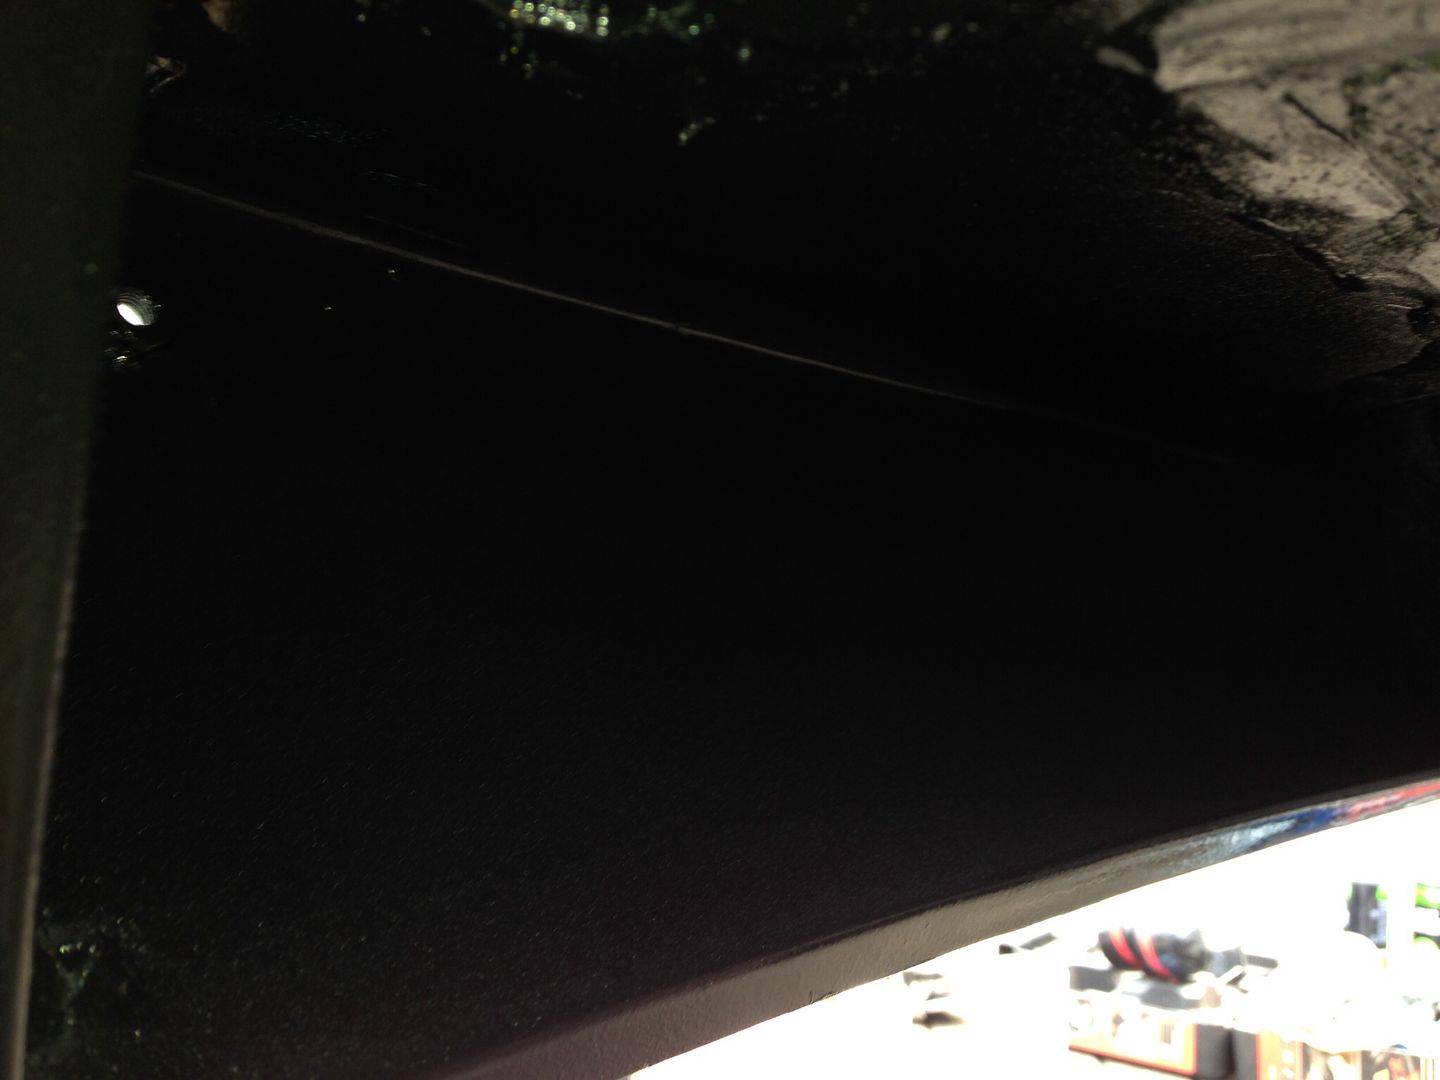
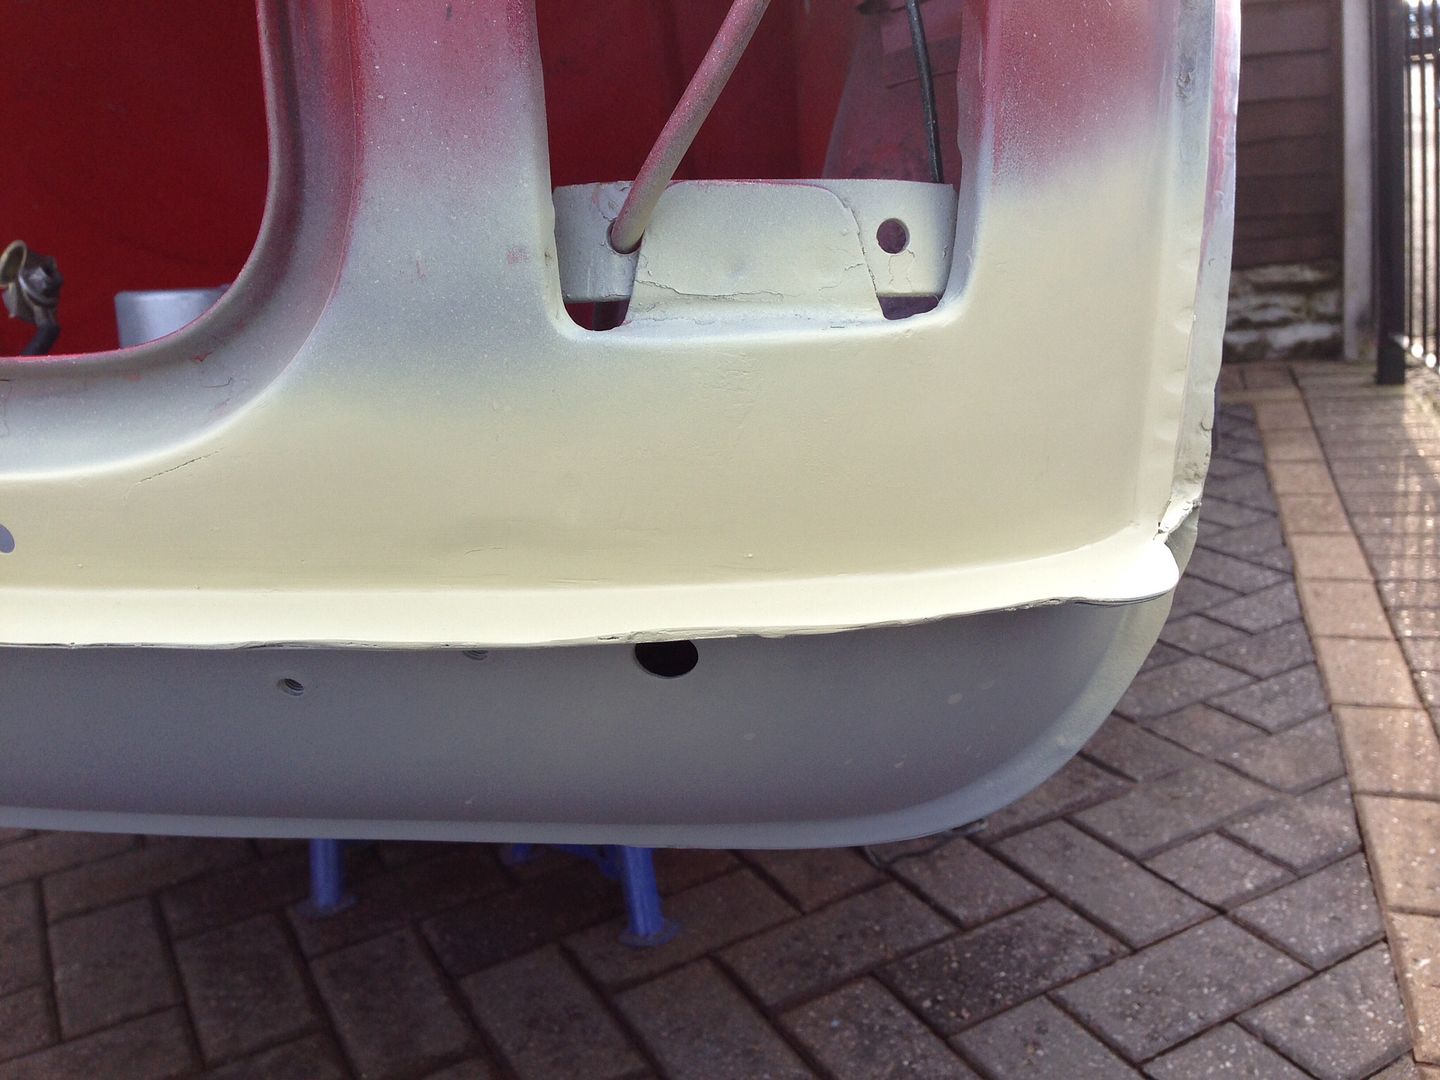
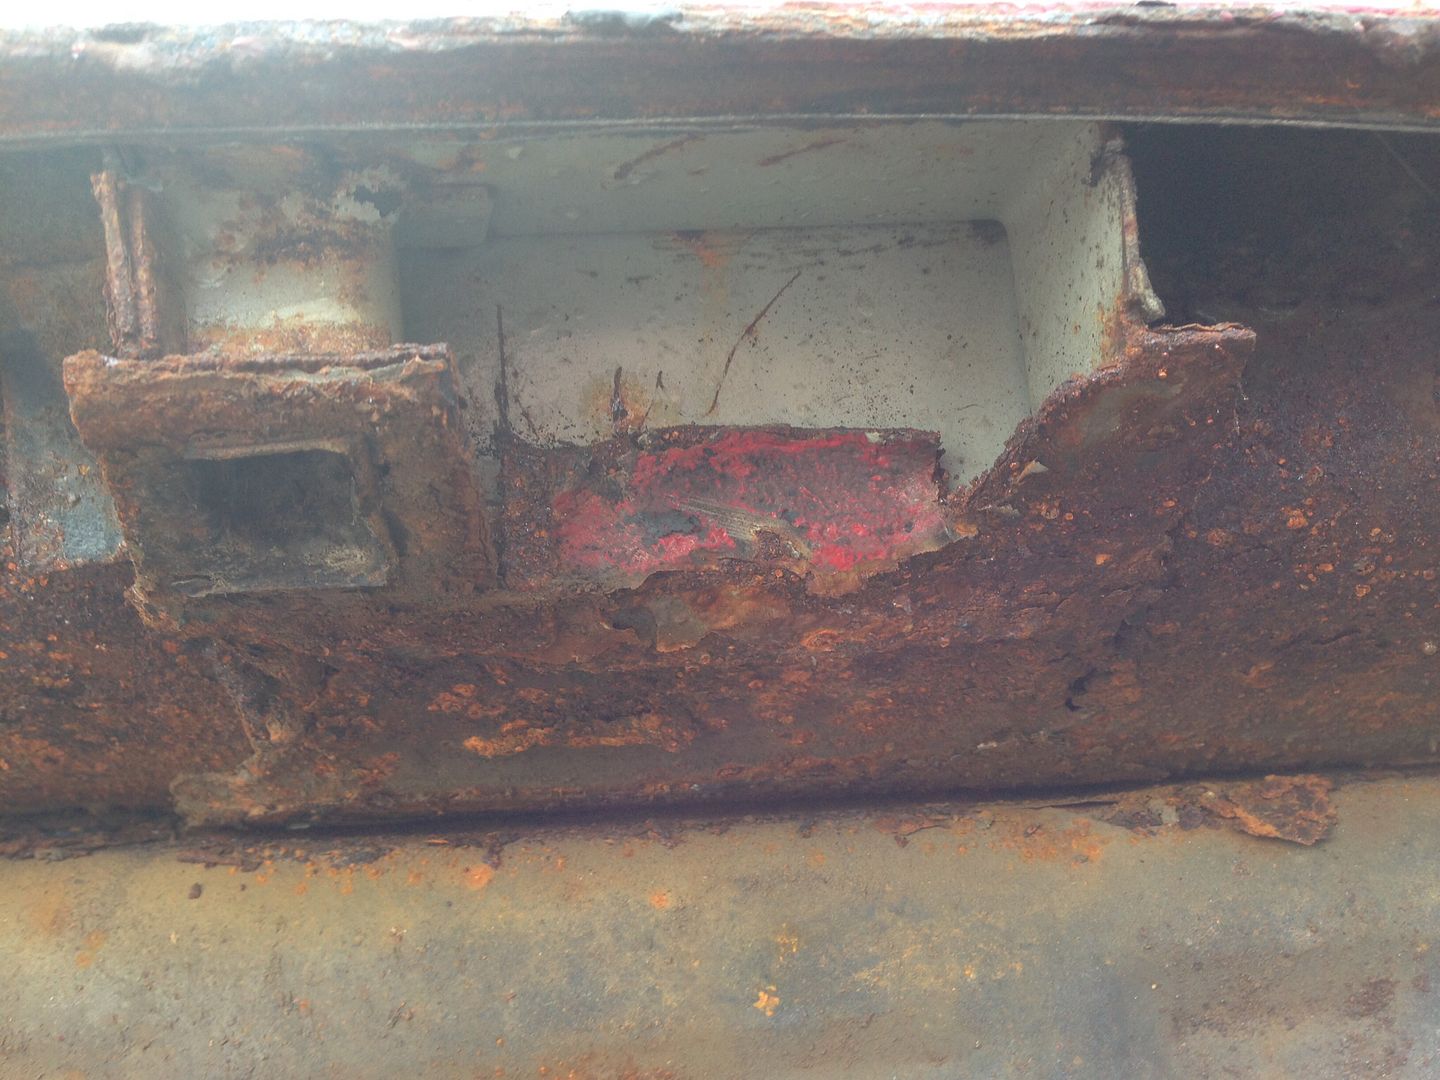
Painted the underneath of the repair with some black top coat -

890ff4829b6c562874dbf9c125bda7a9_zps9ac3

3eb2e8675bba2a54afba5ee472f1b229_zpsc255

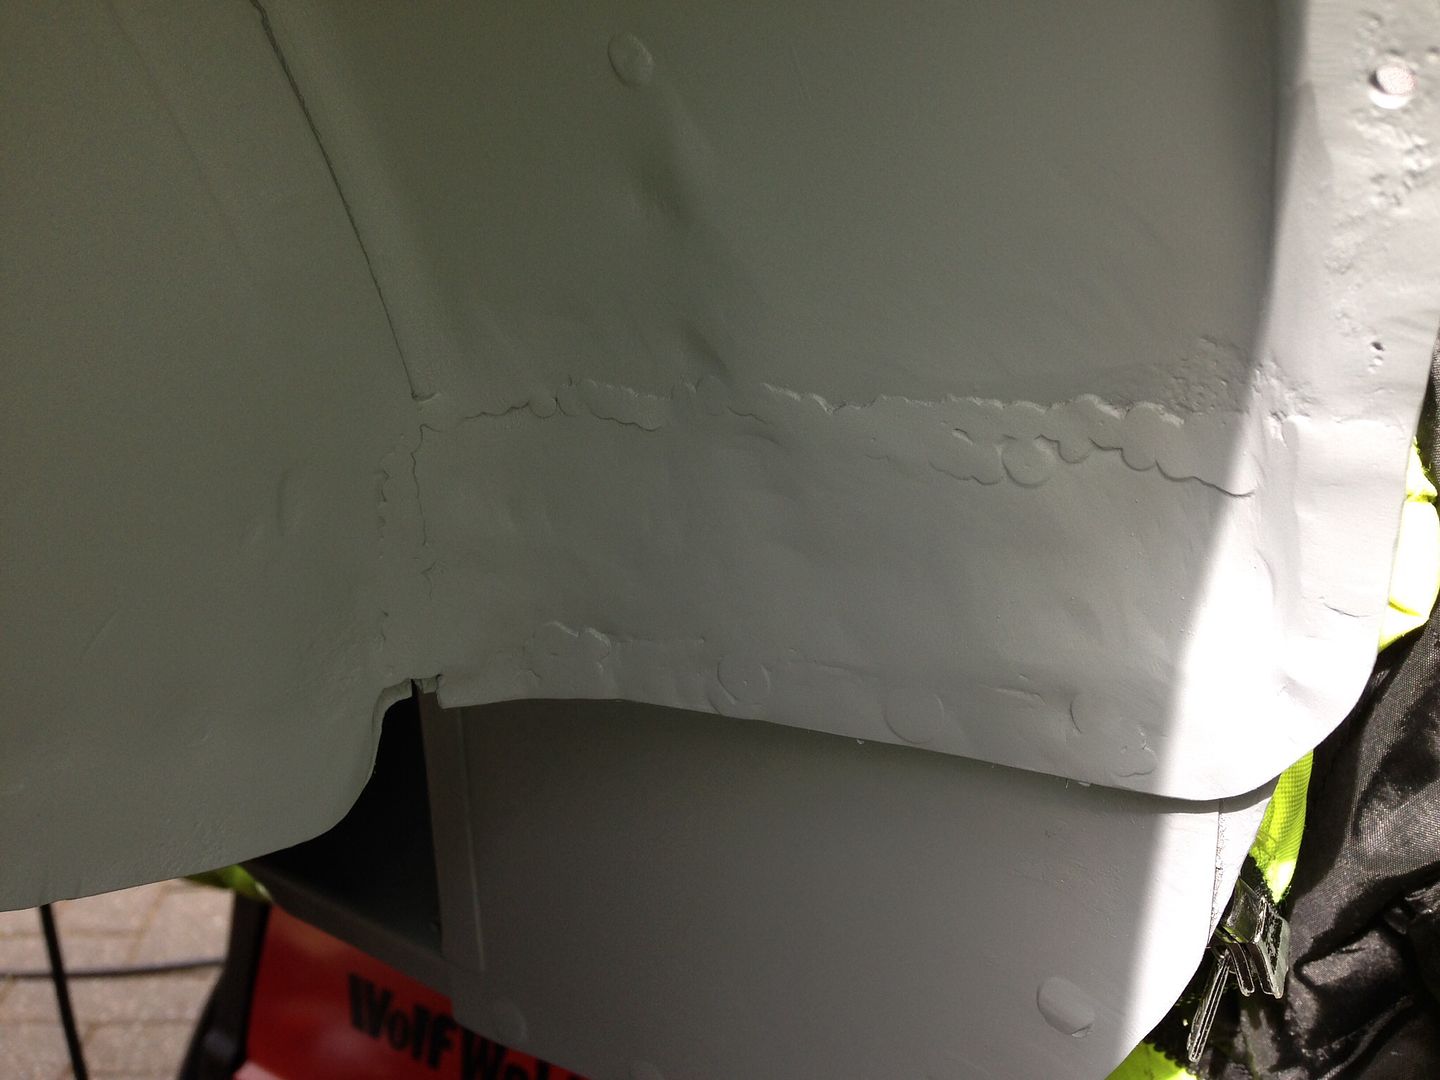
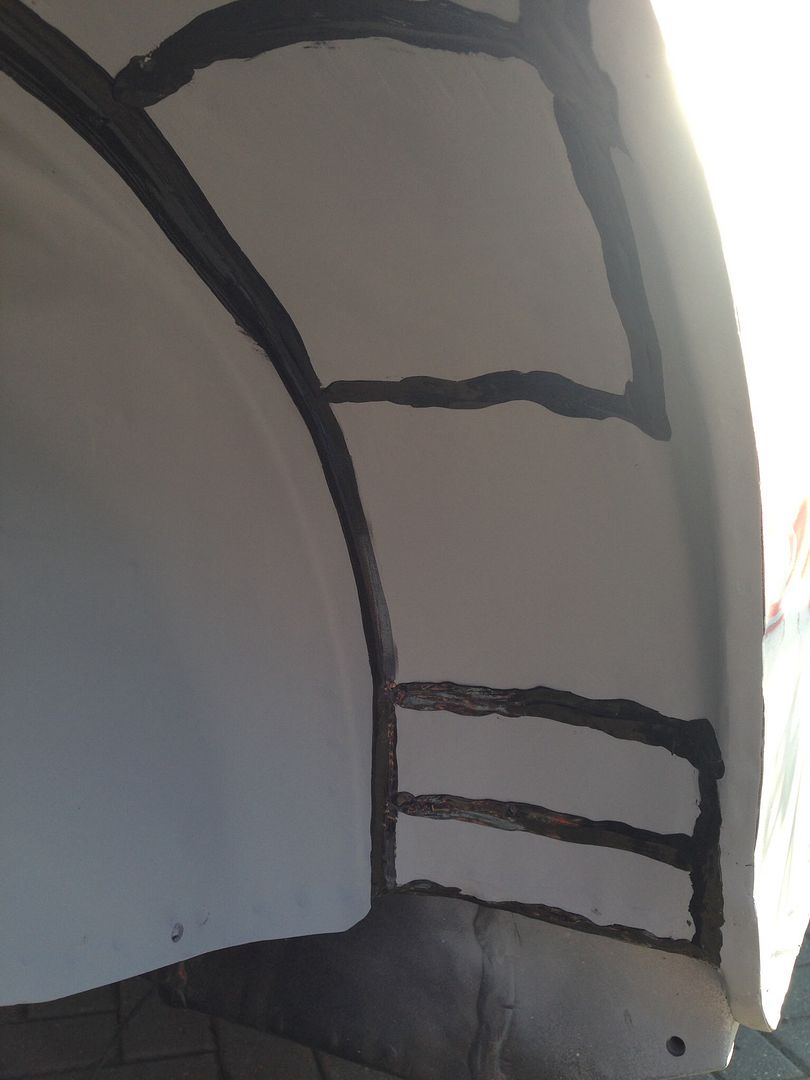
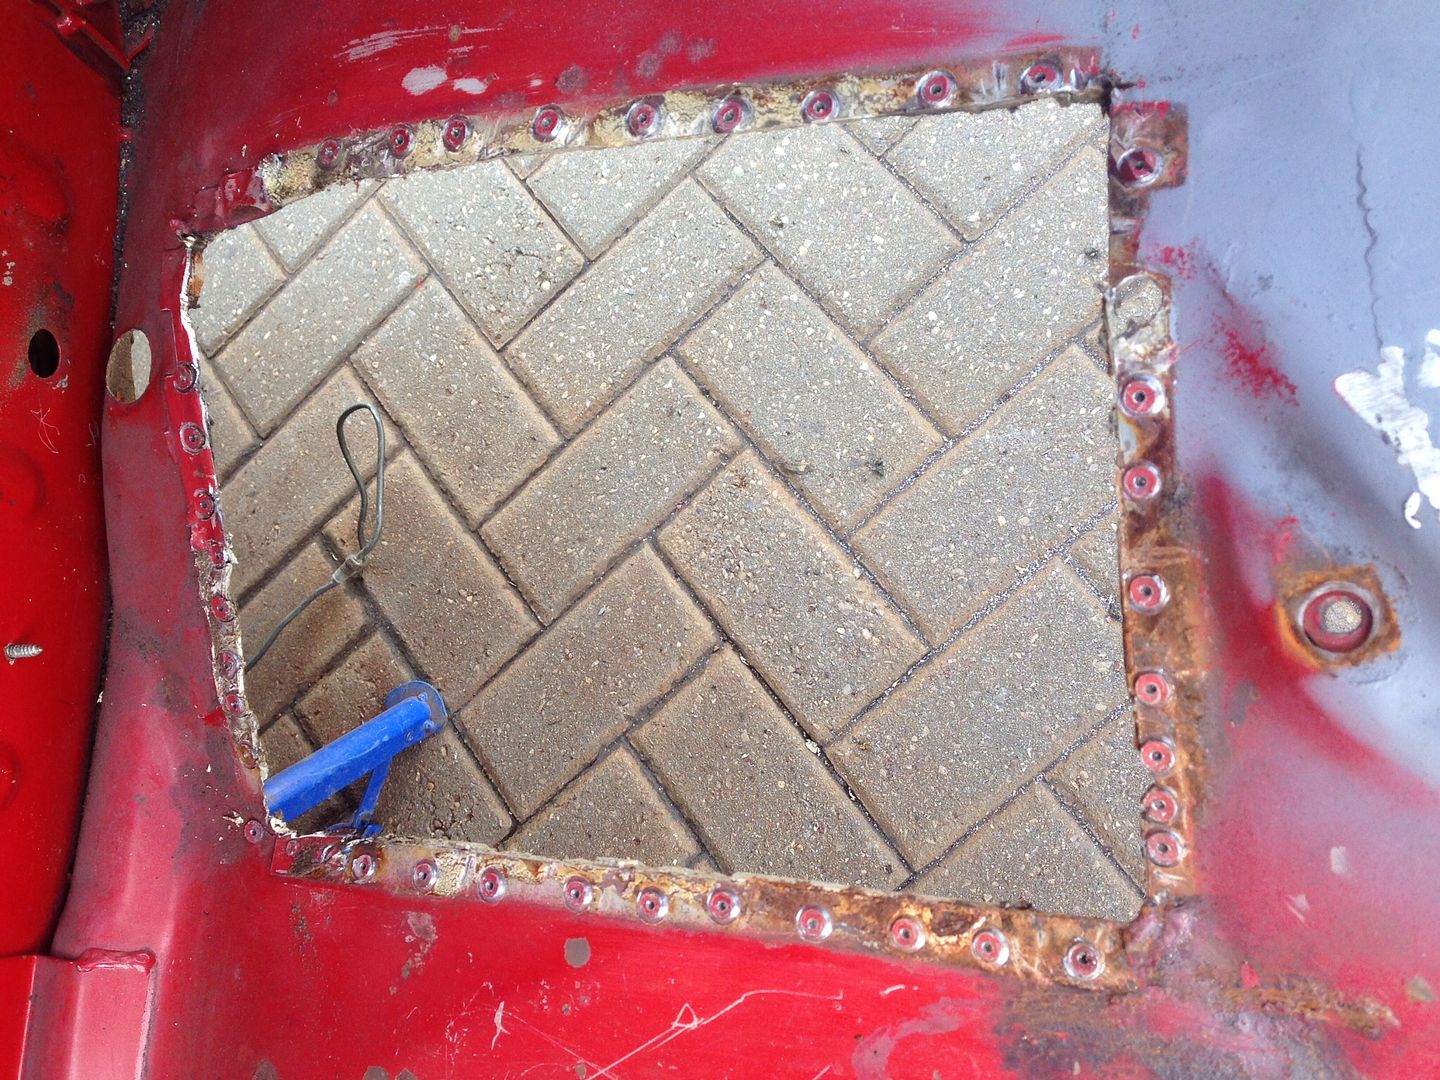
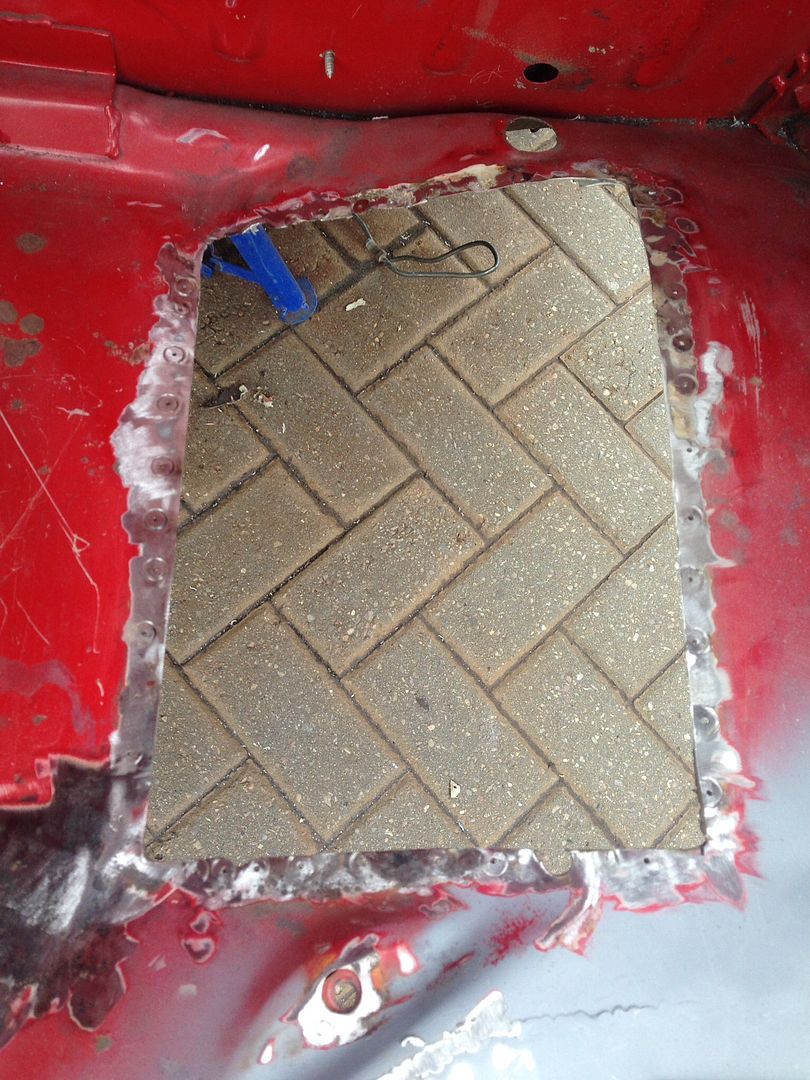
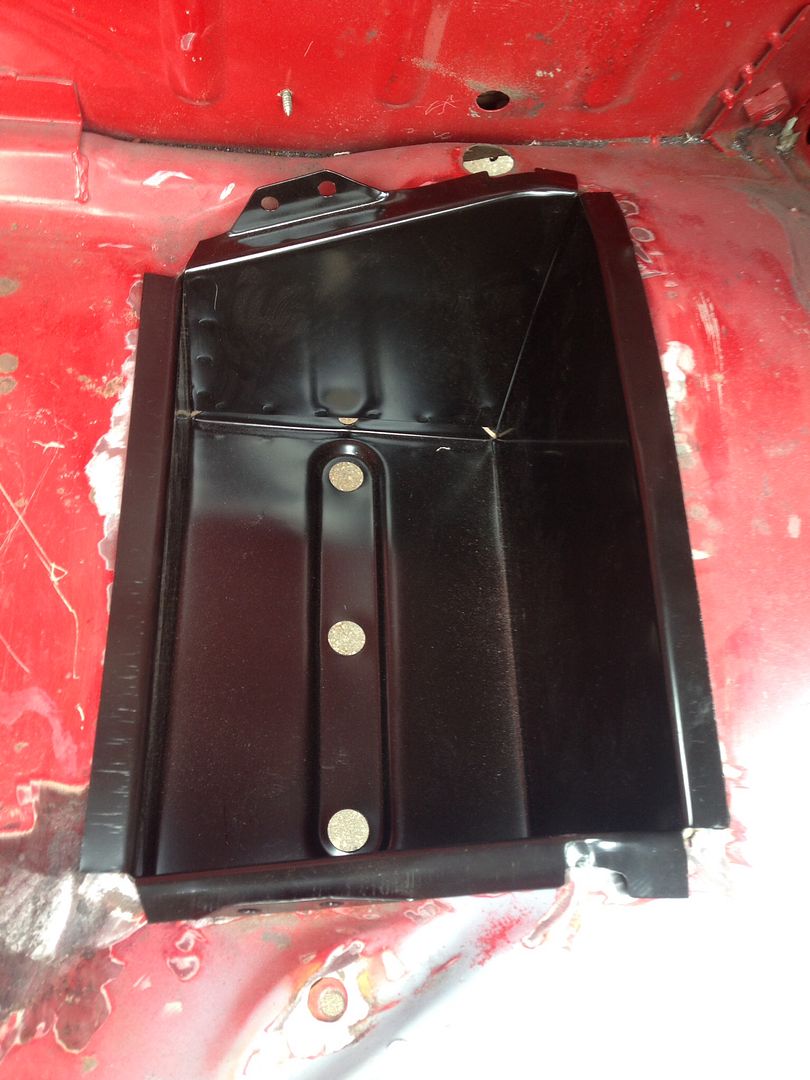
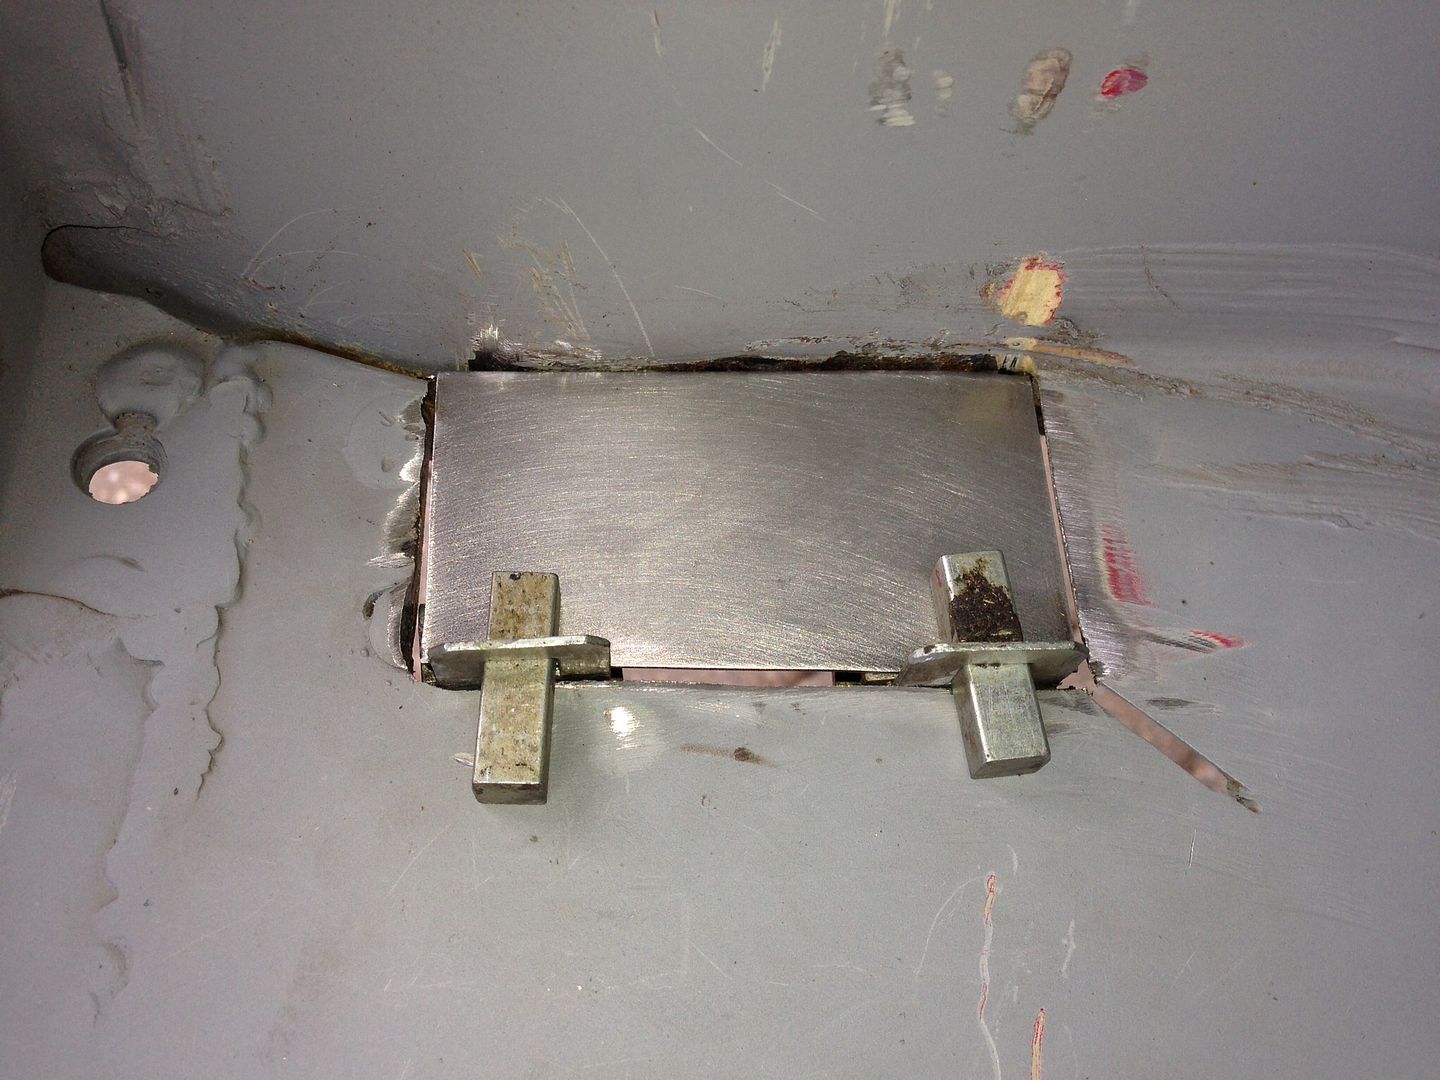
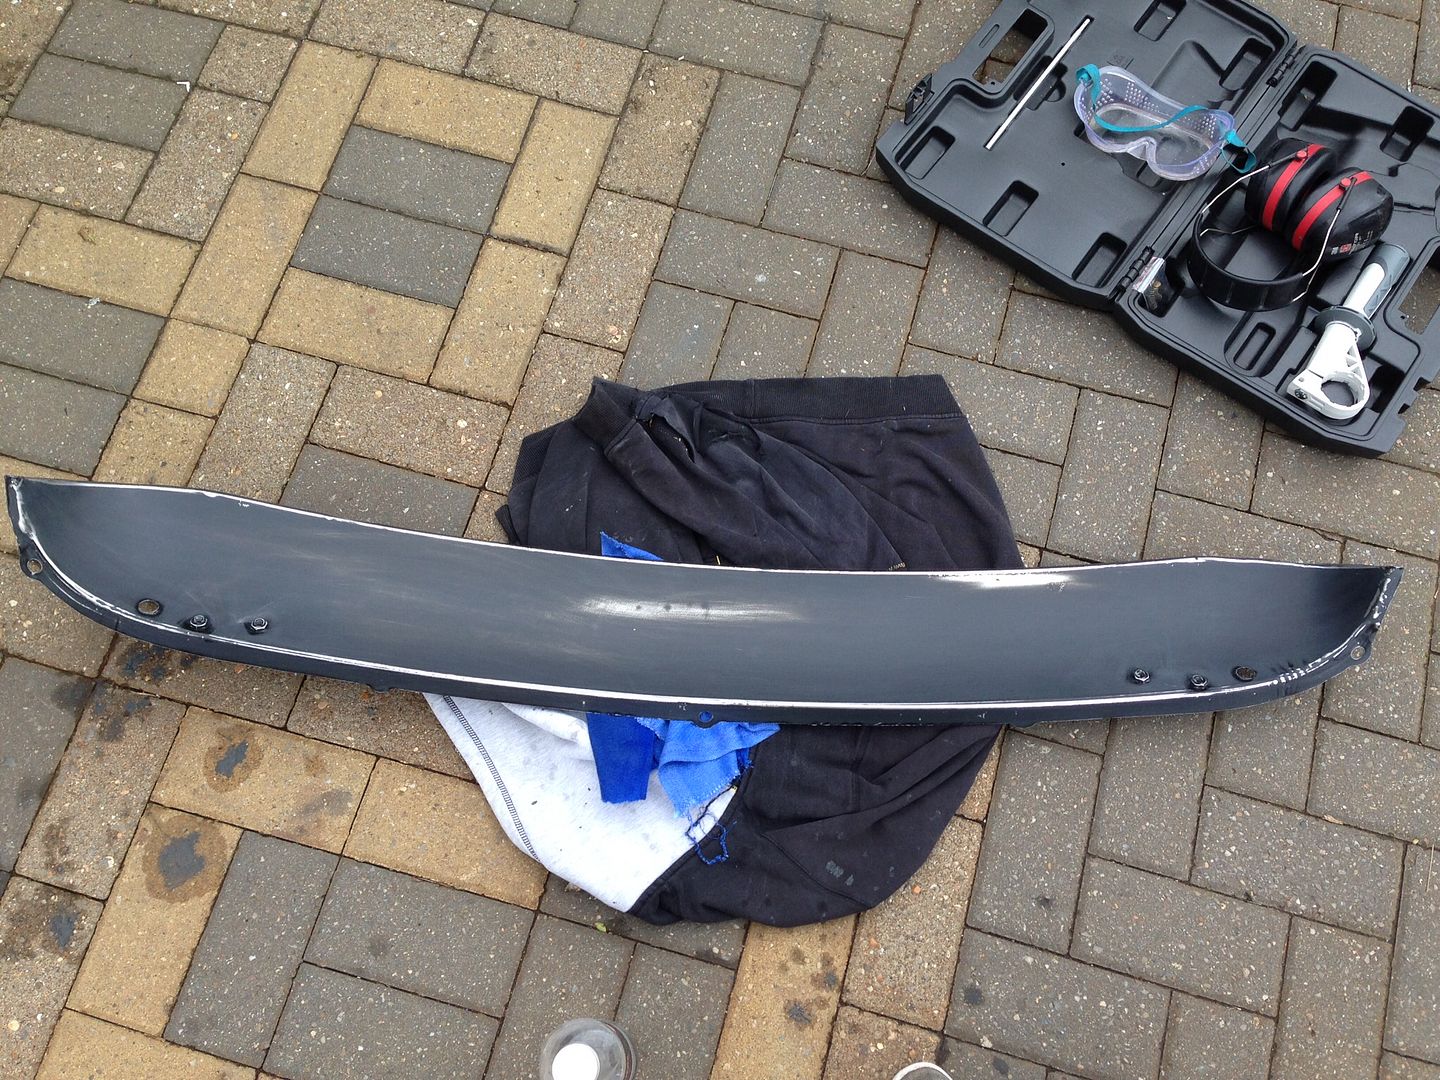
Drilled the holes ready for plug welding -

fc04fdf2782829f1c6bc9feadea20b62_zps82f2

279795271859b073aadd54063e2ad119_zps93bc

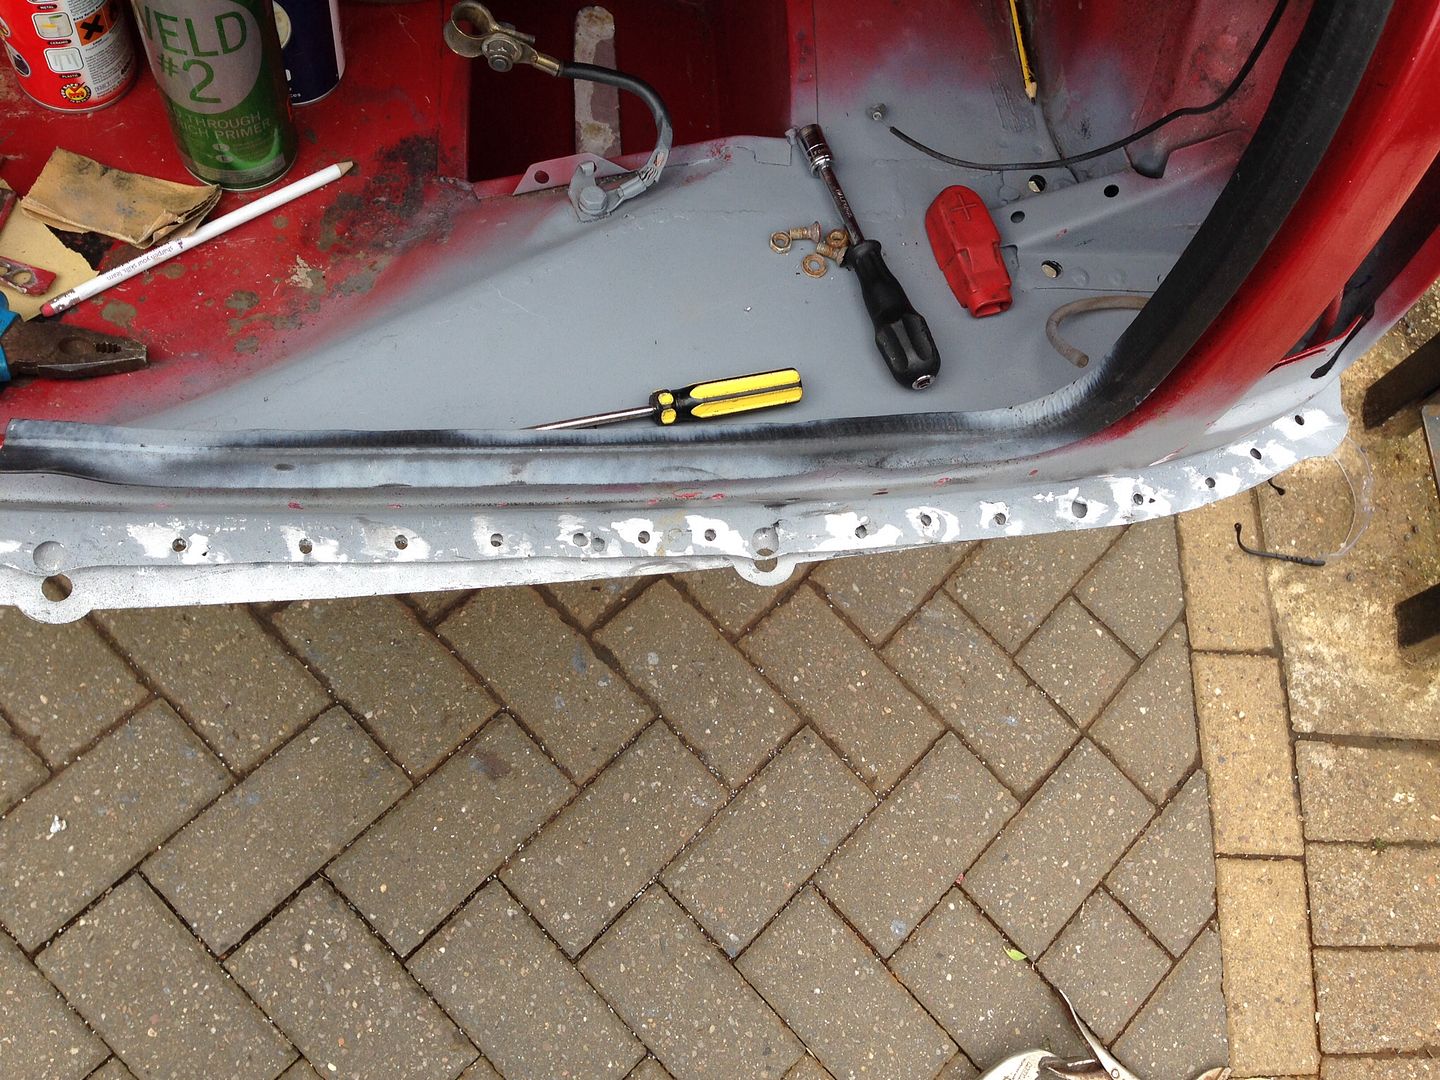
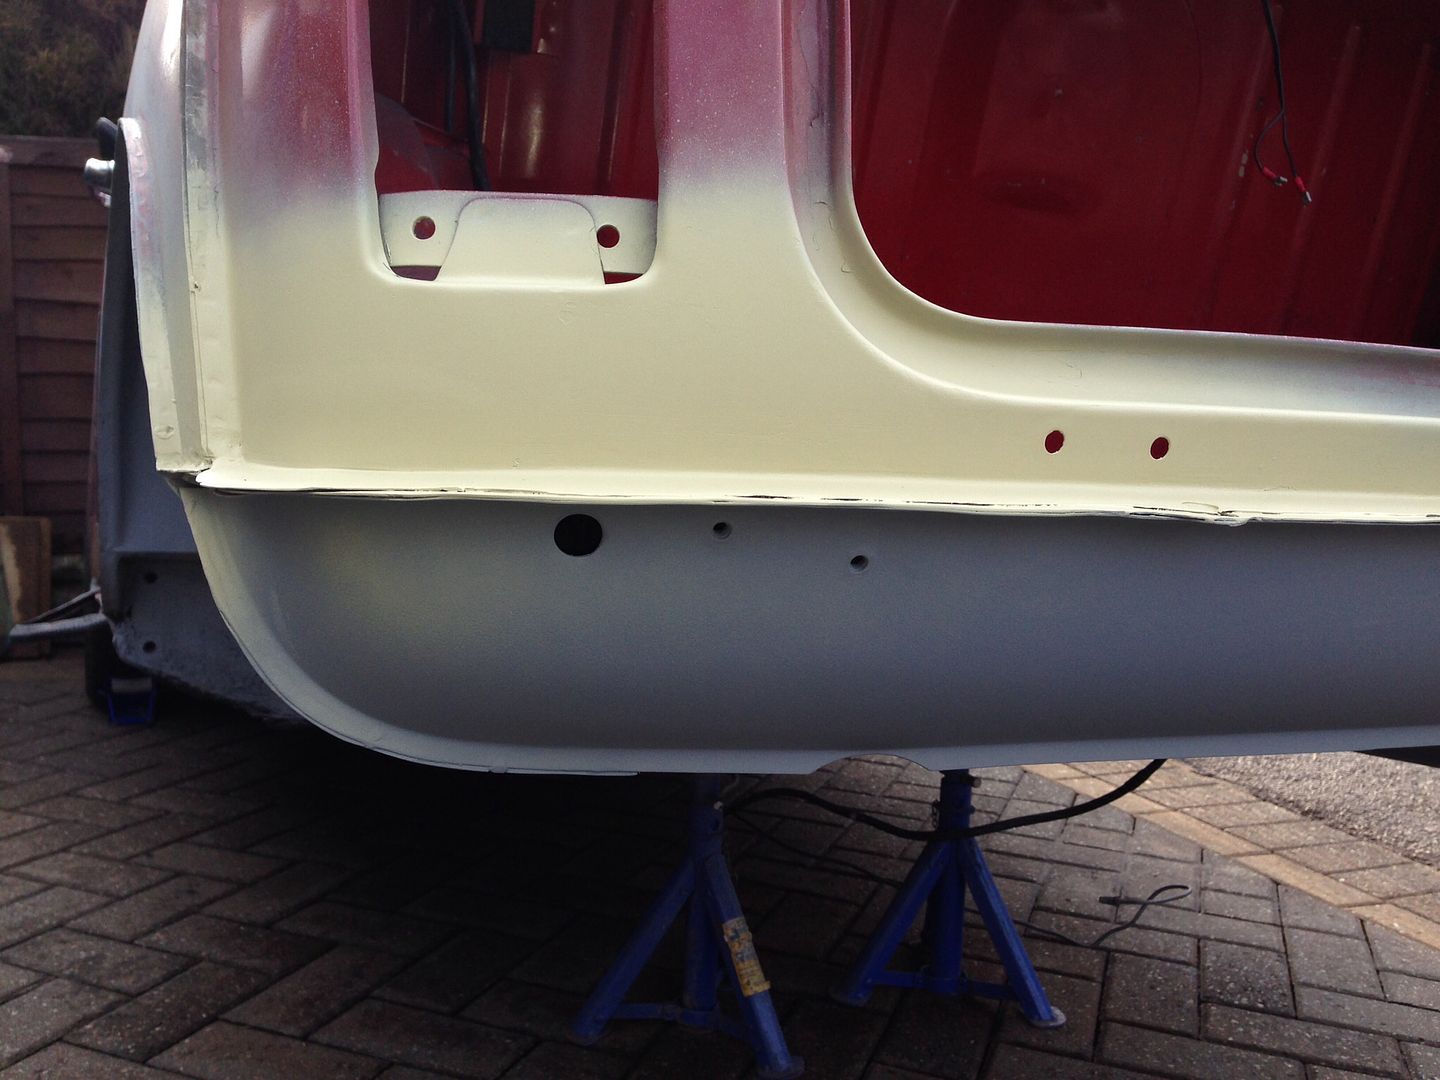
Sanded the inside of the valance down and I did prime and paint it but I forgot to take a picture of it painted -

54219b34923c5a5ba77c48e45df13ab3_zpsf71a

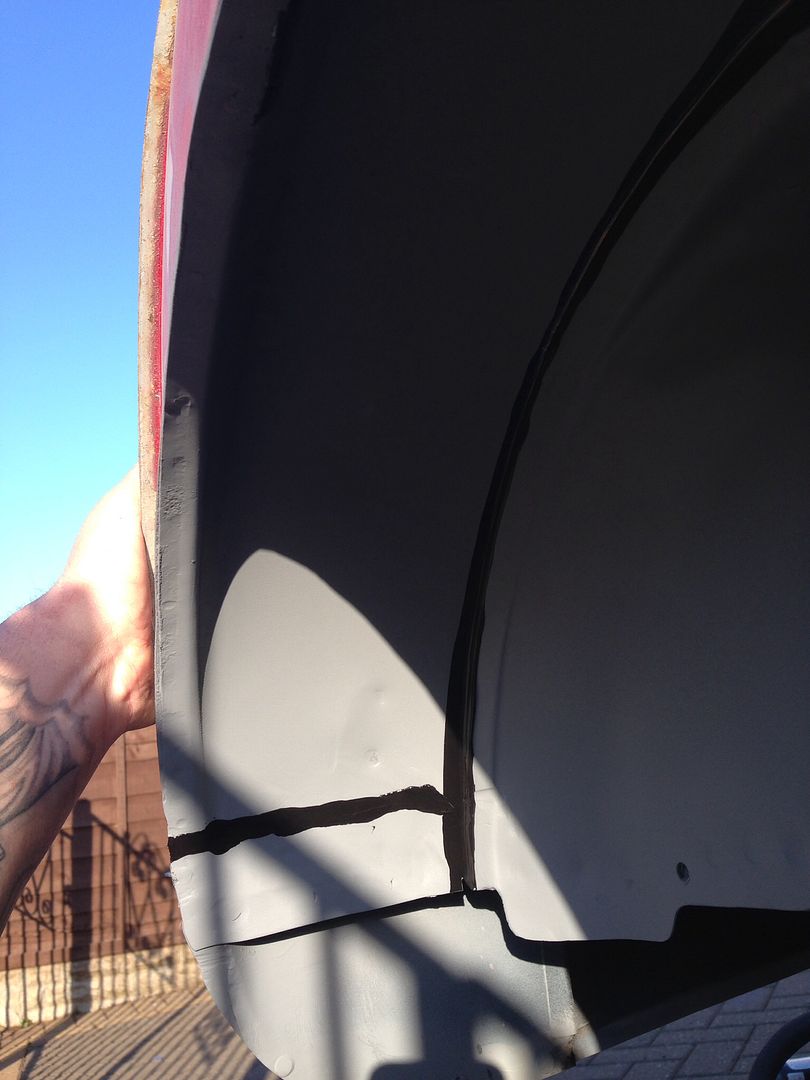
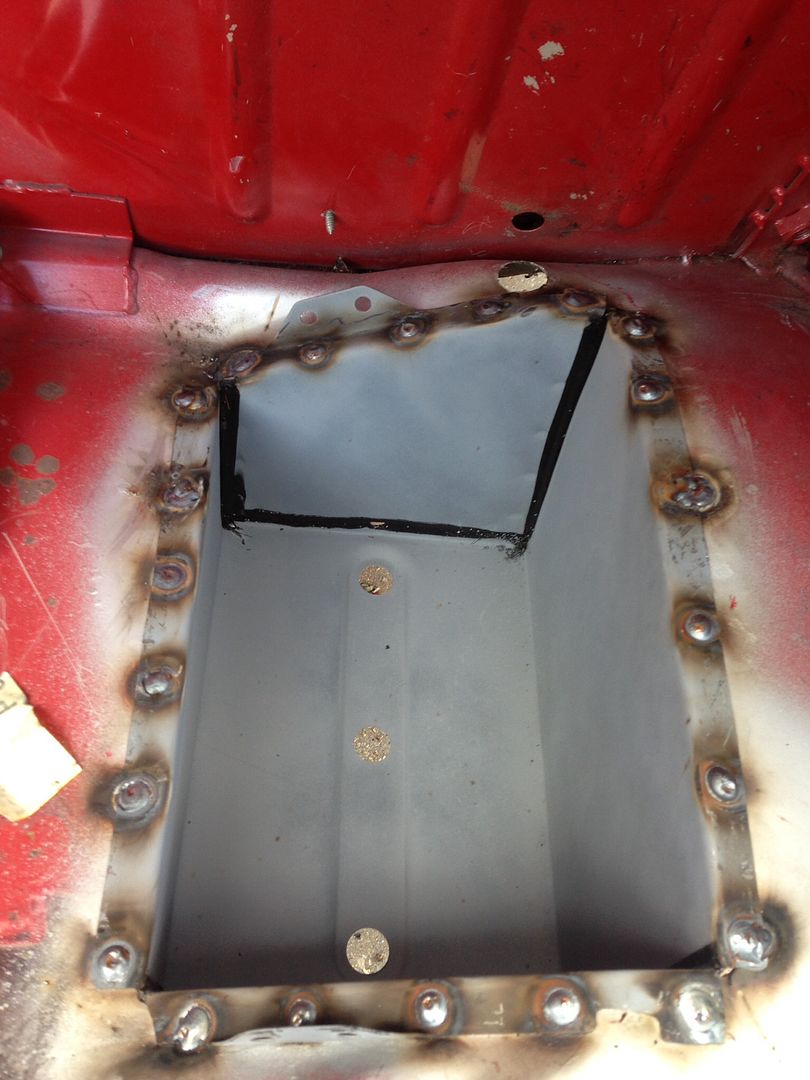
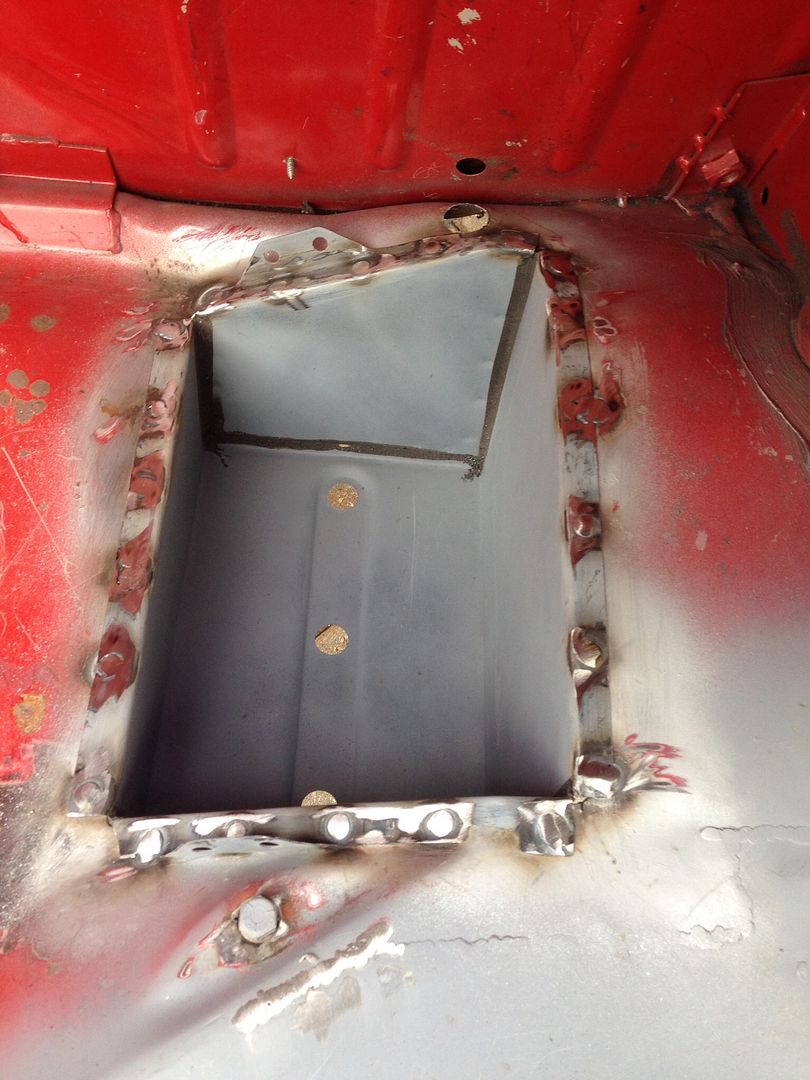
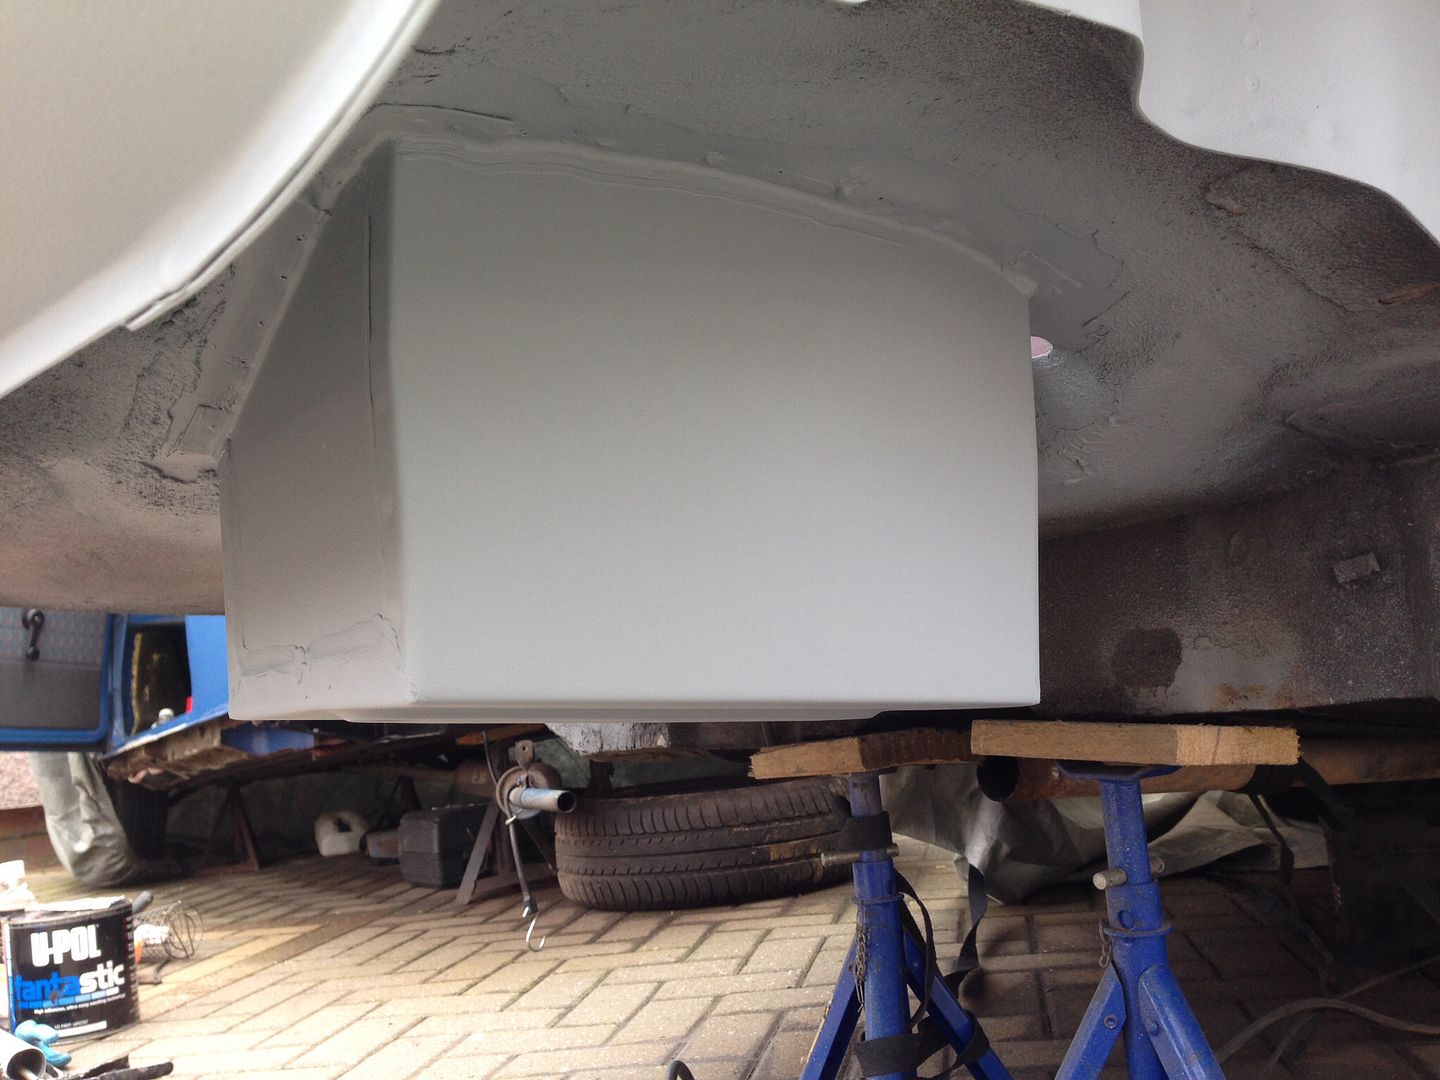
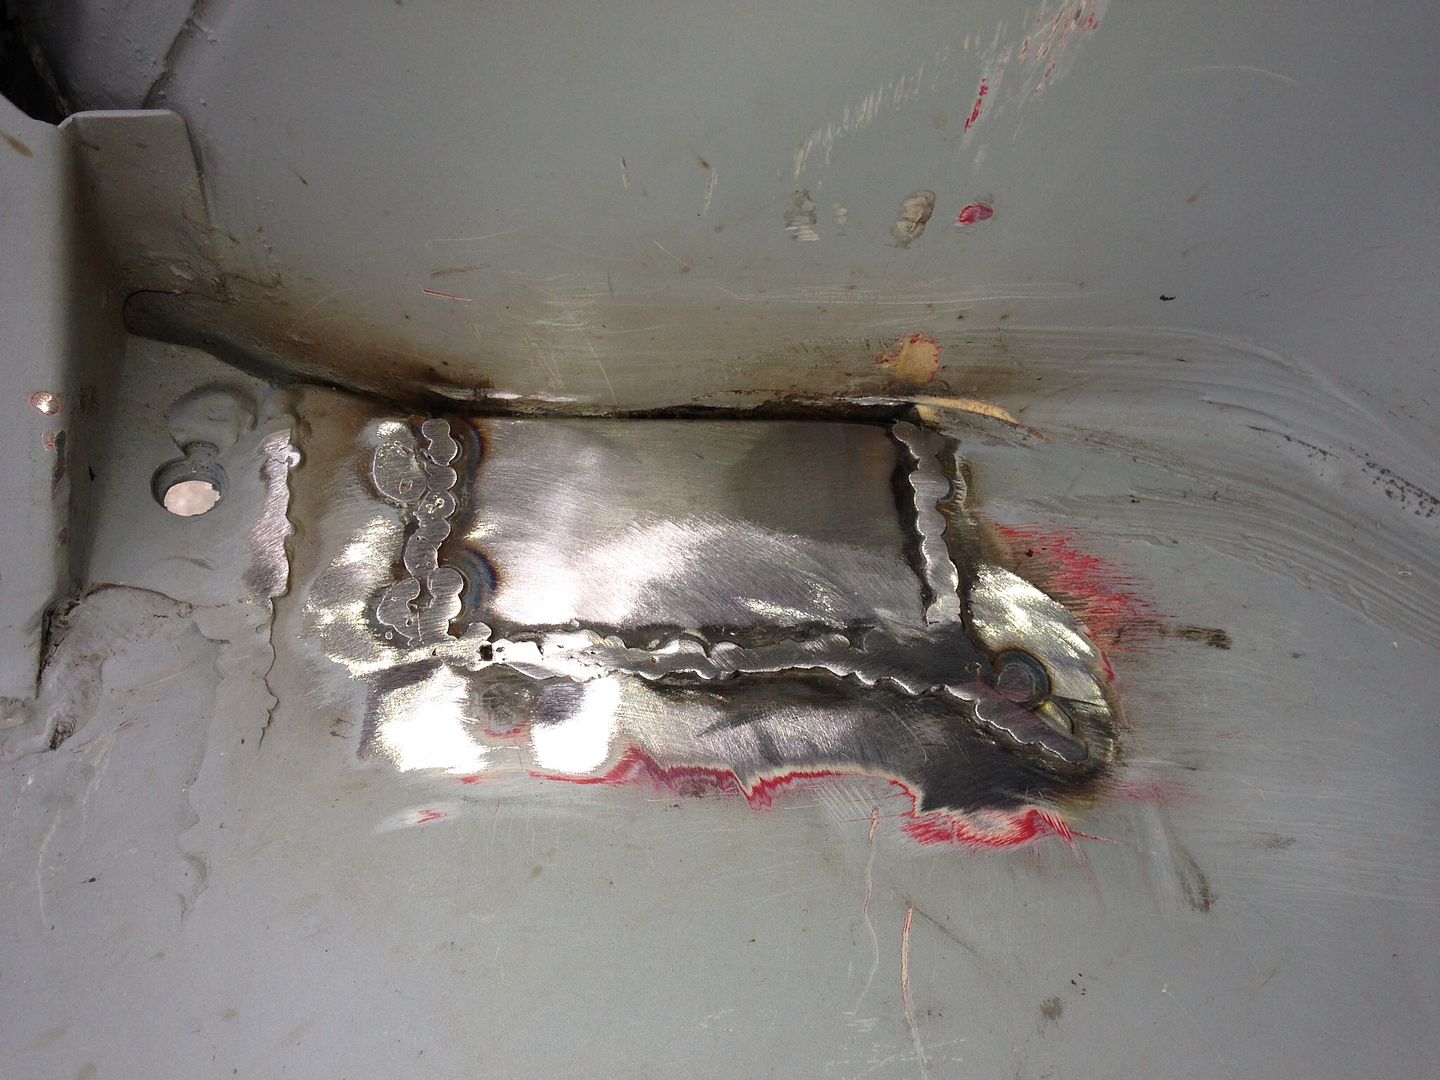
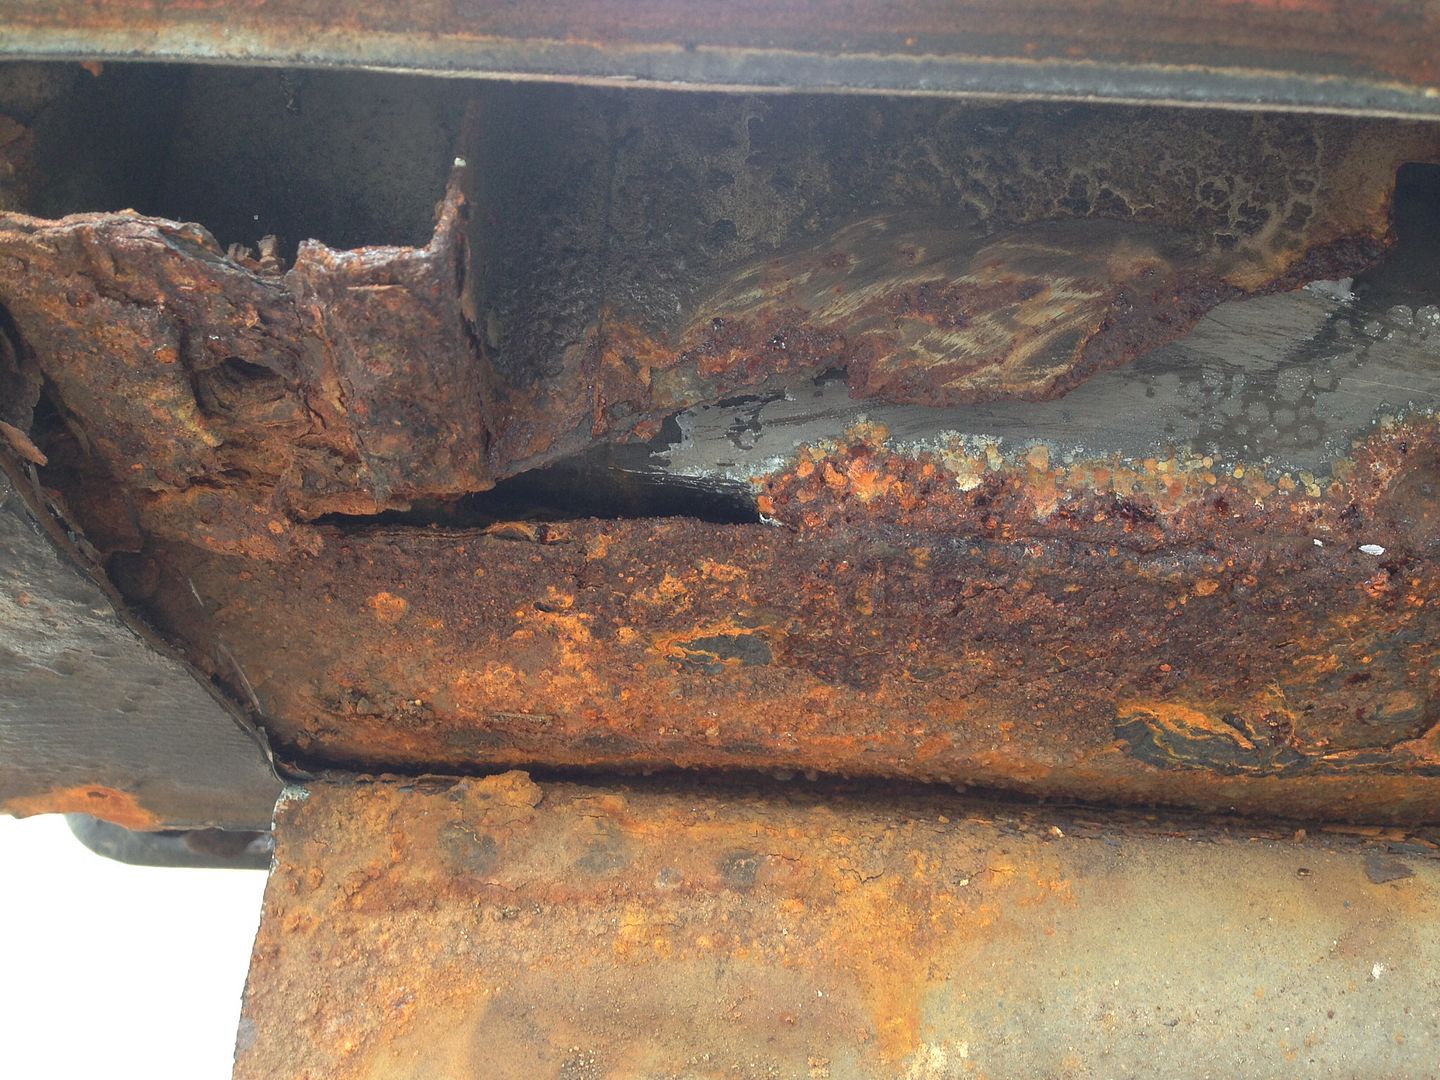
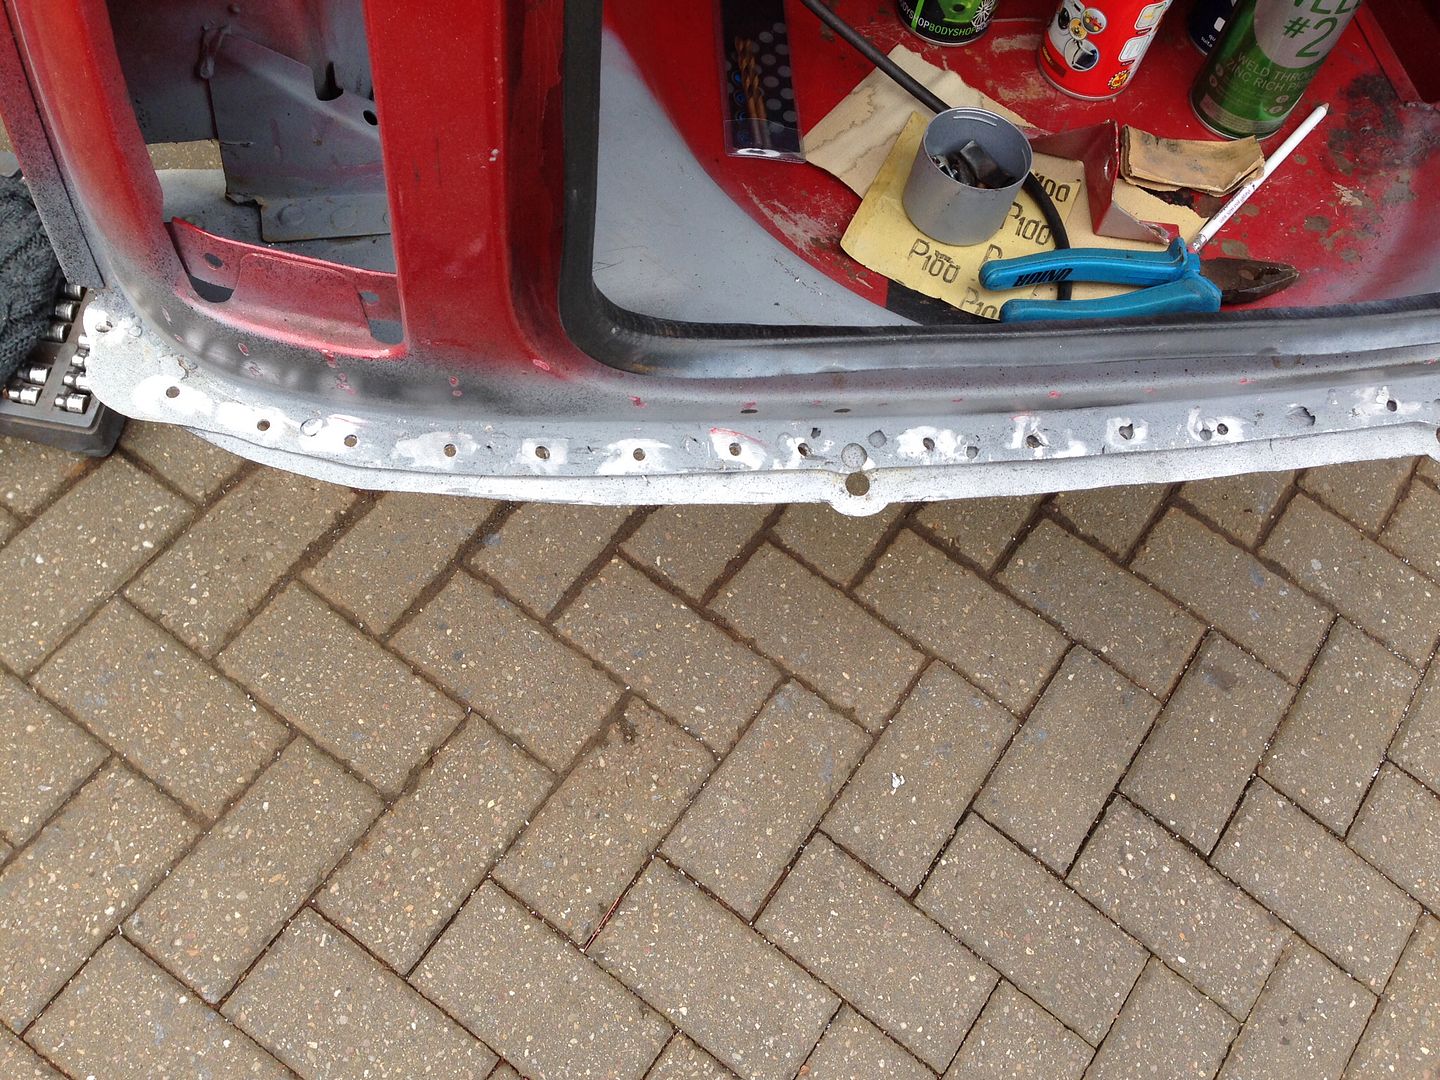
Welded in place and dressed -

a1b8b8b6c5dd2ed265f5d1deb5e97303_zpsbc6c

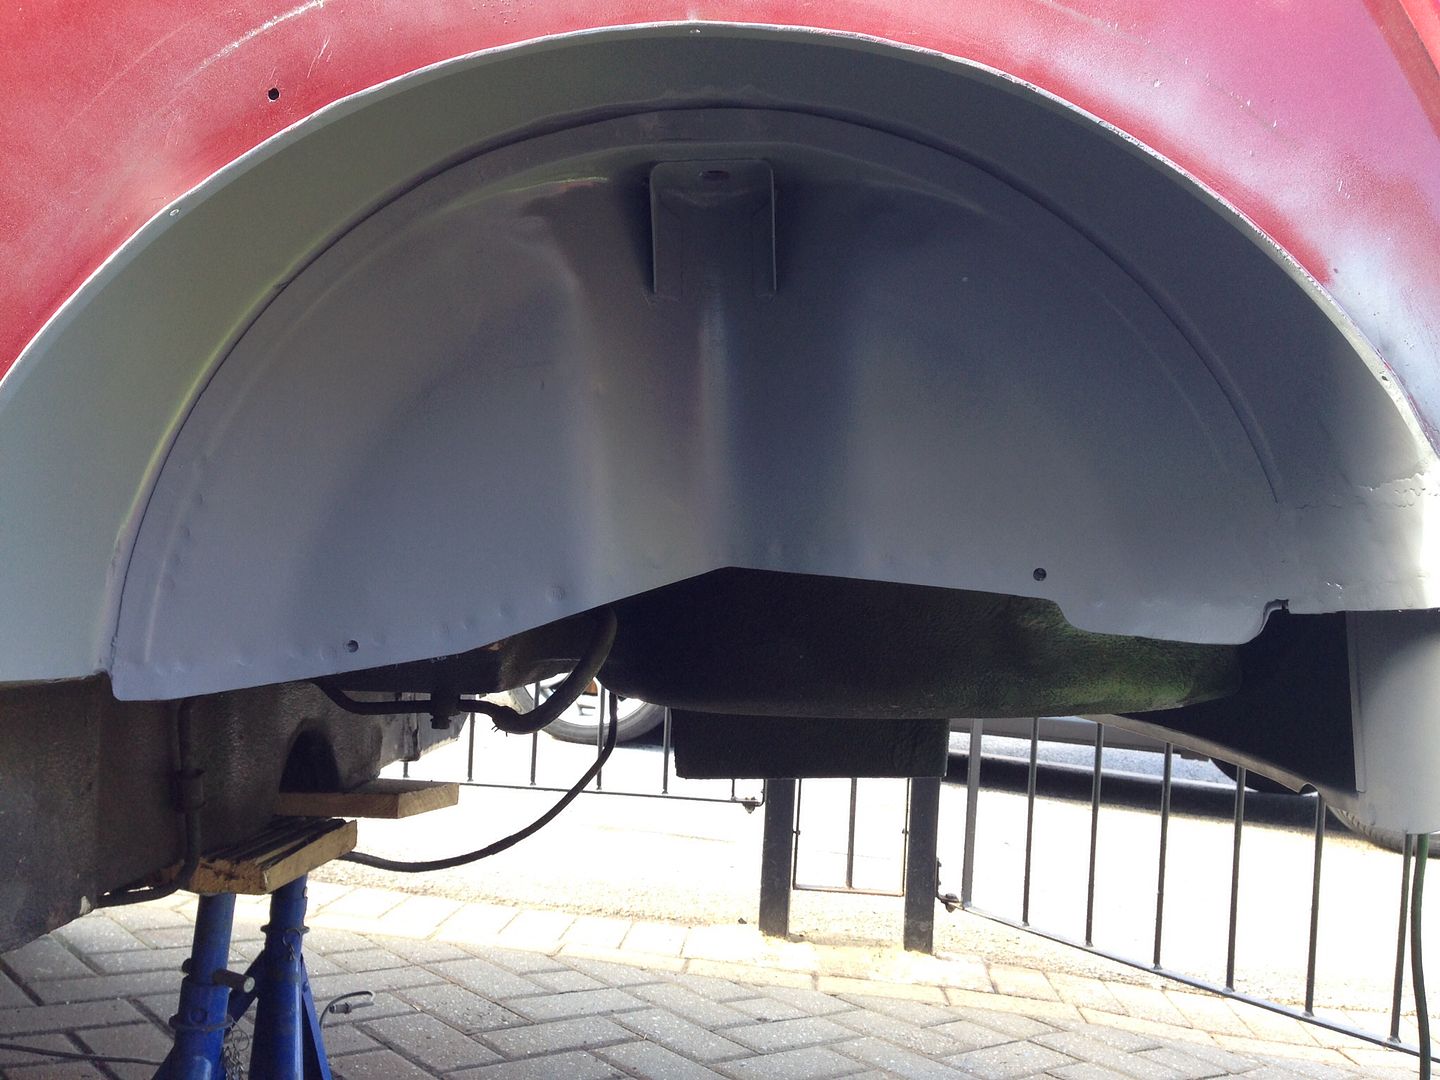
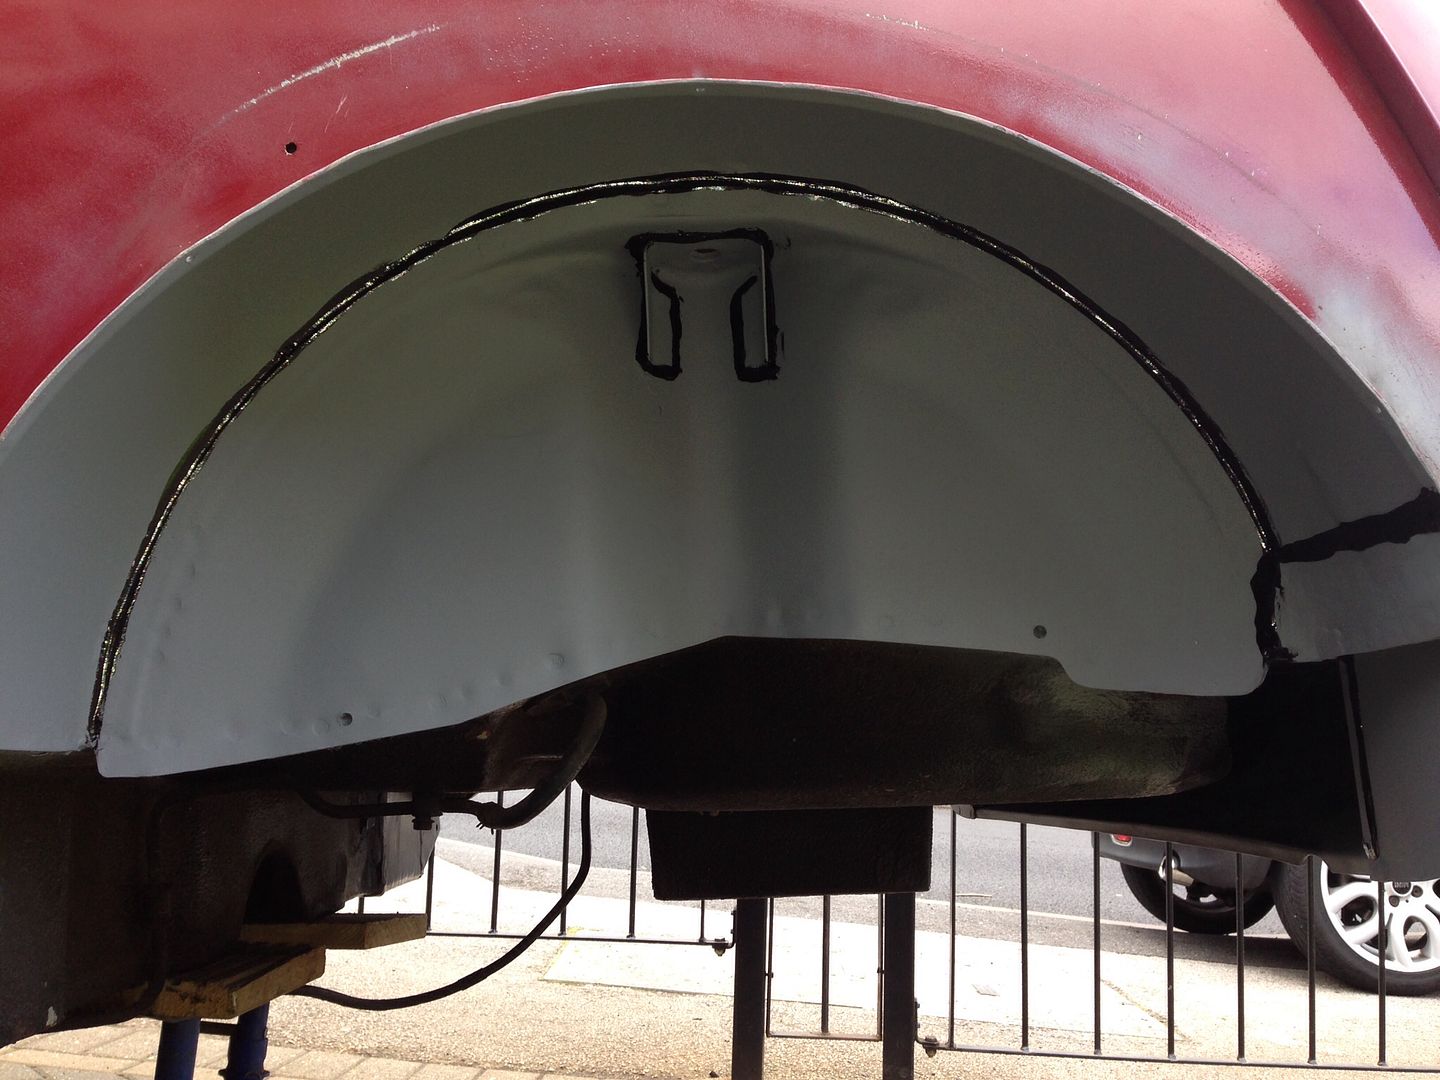
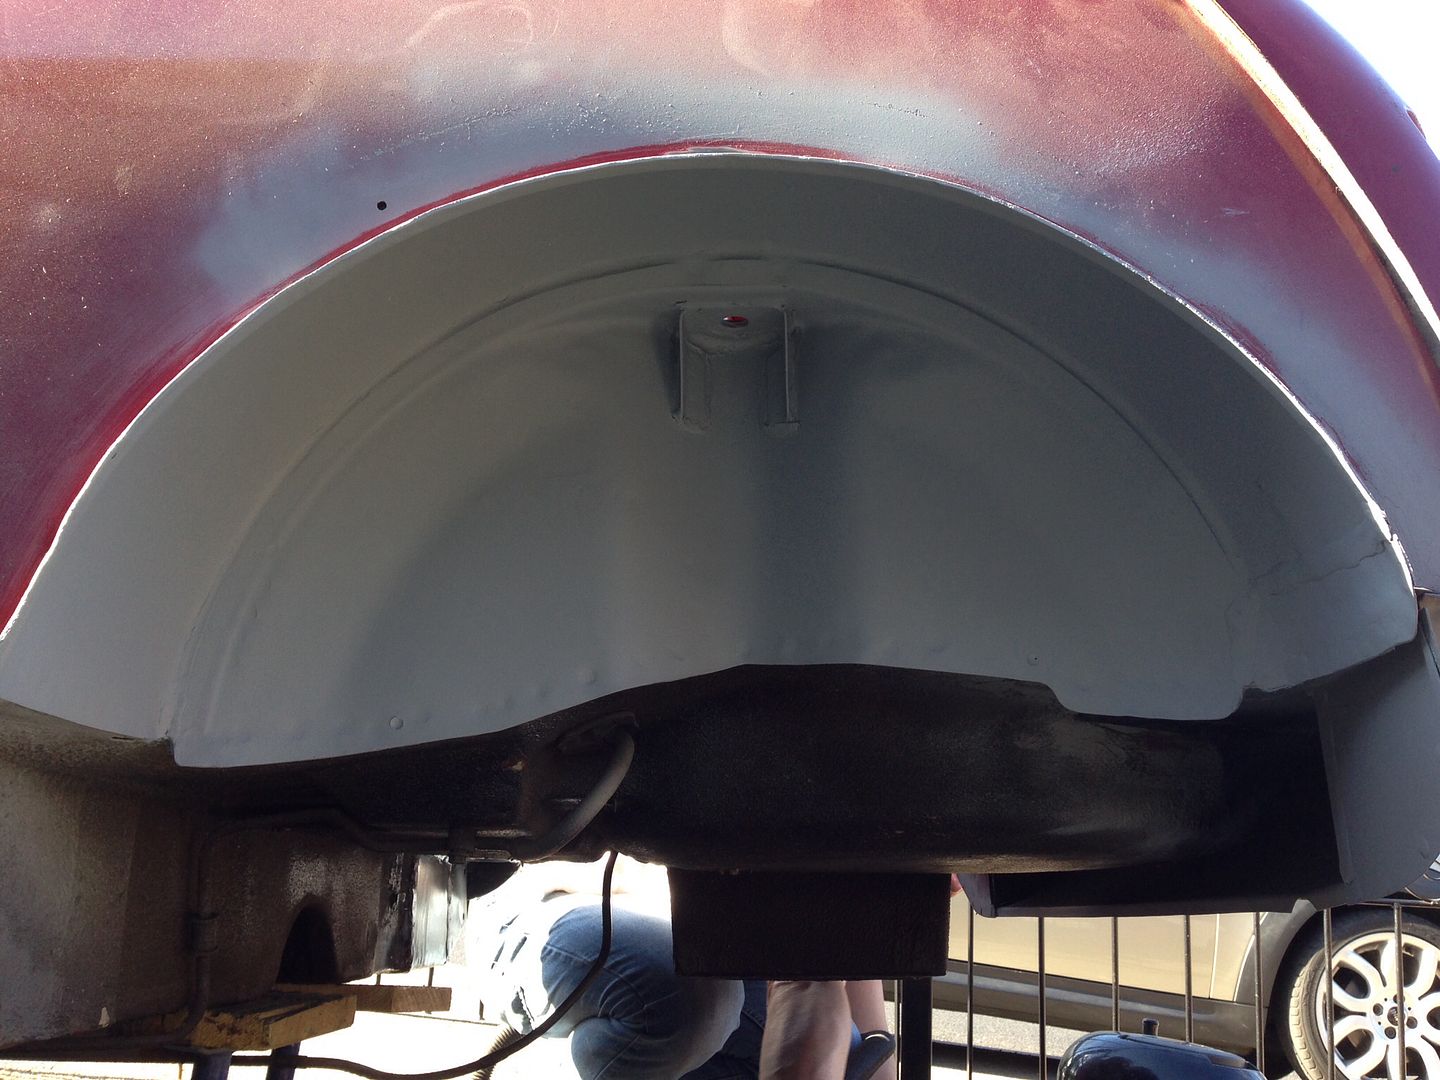
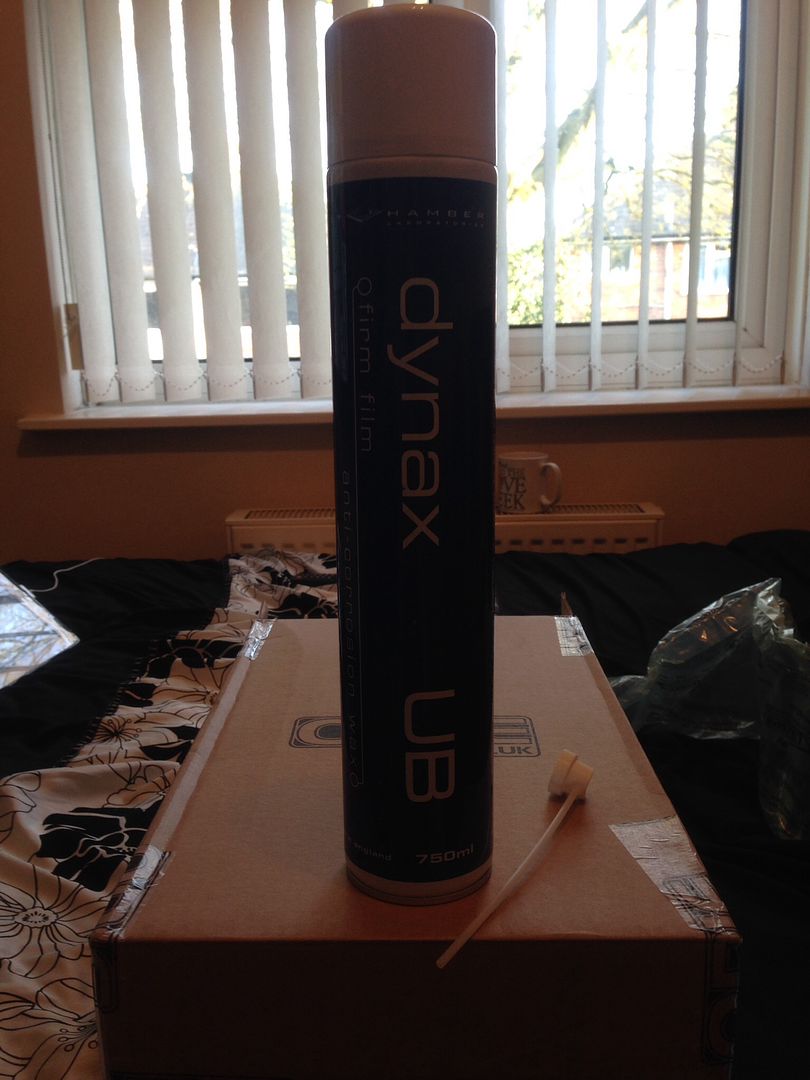
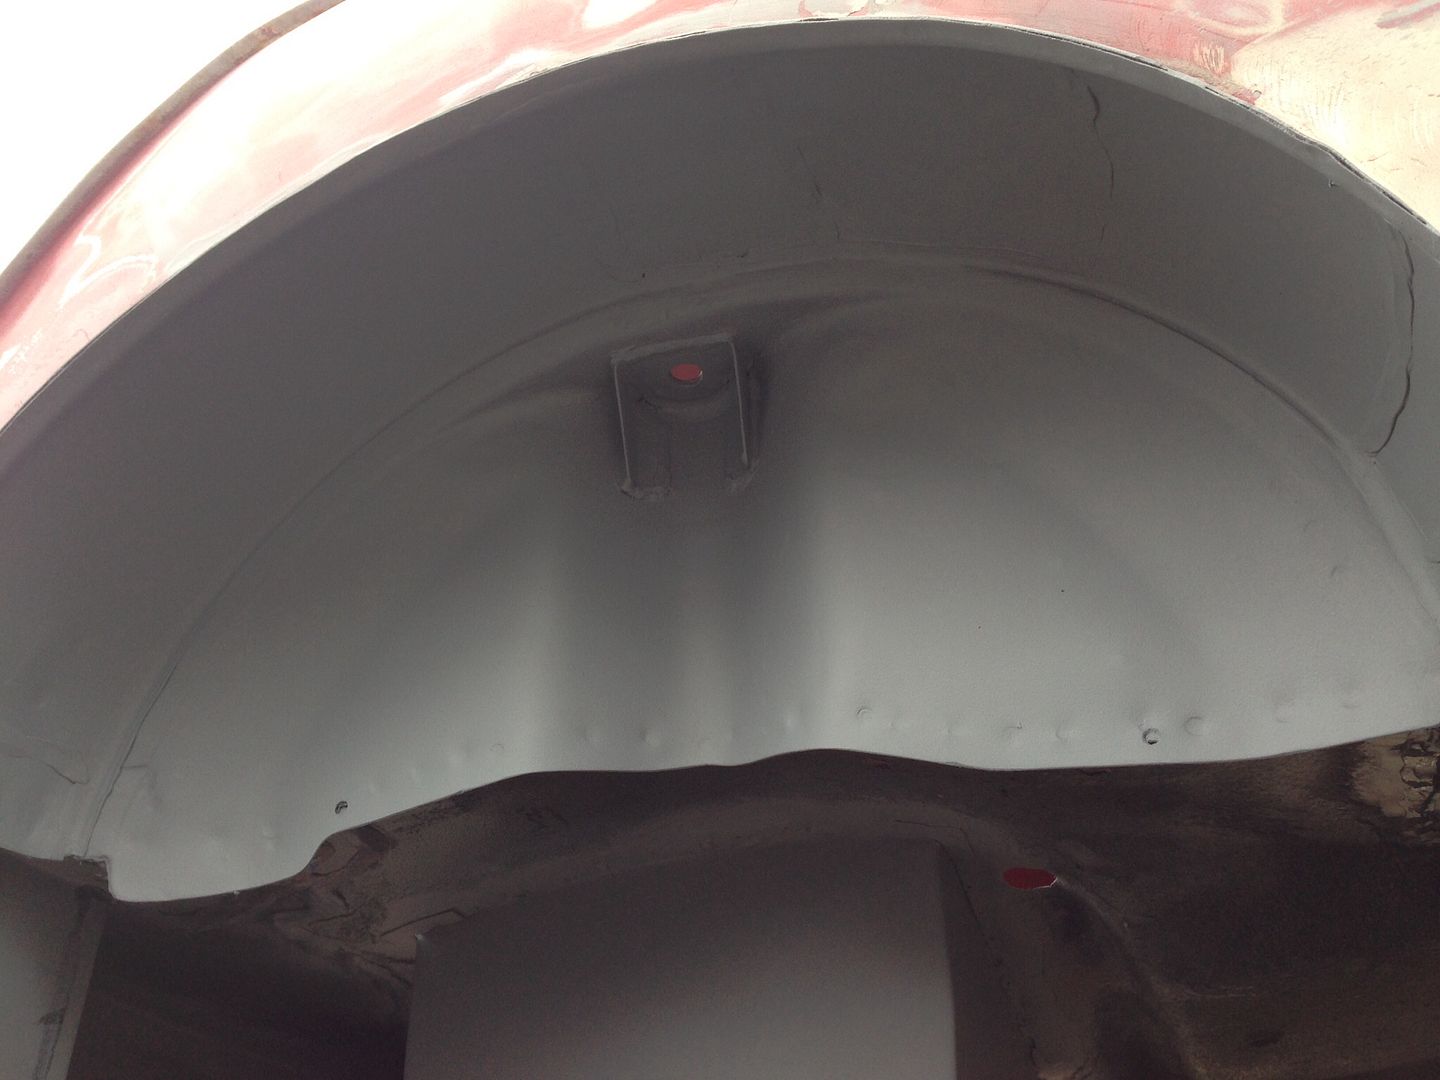
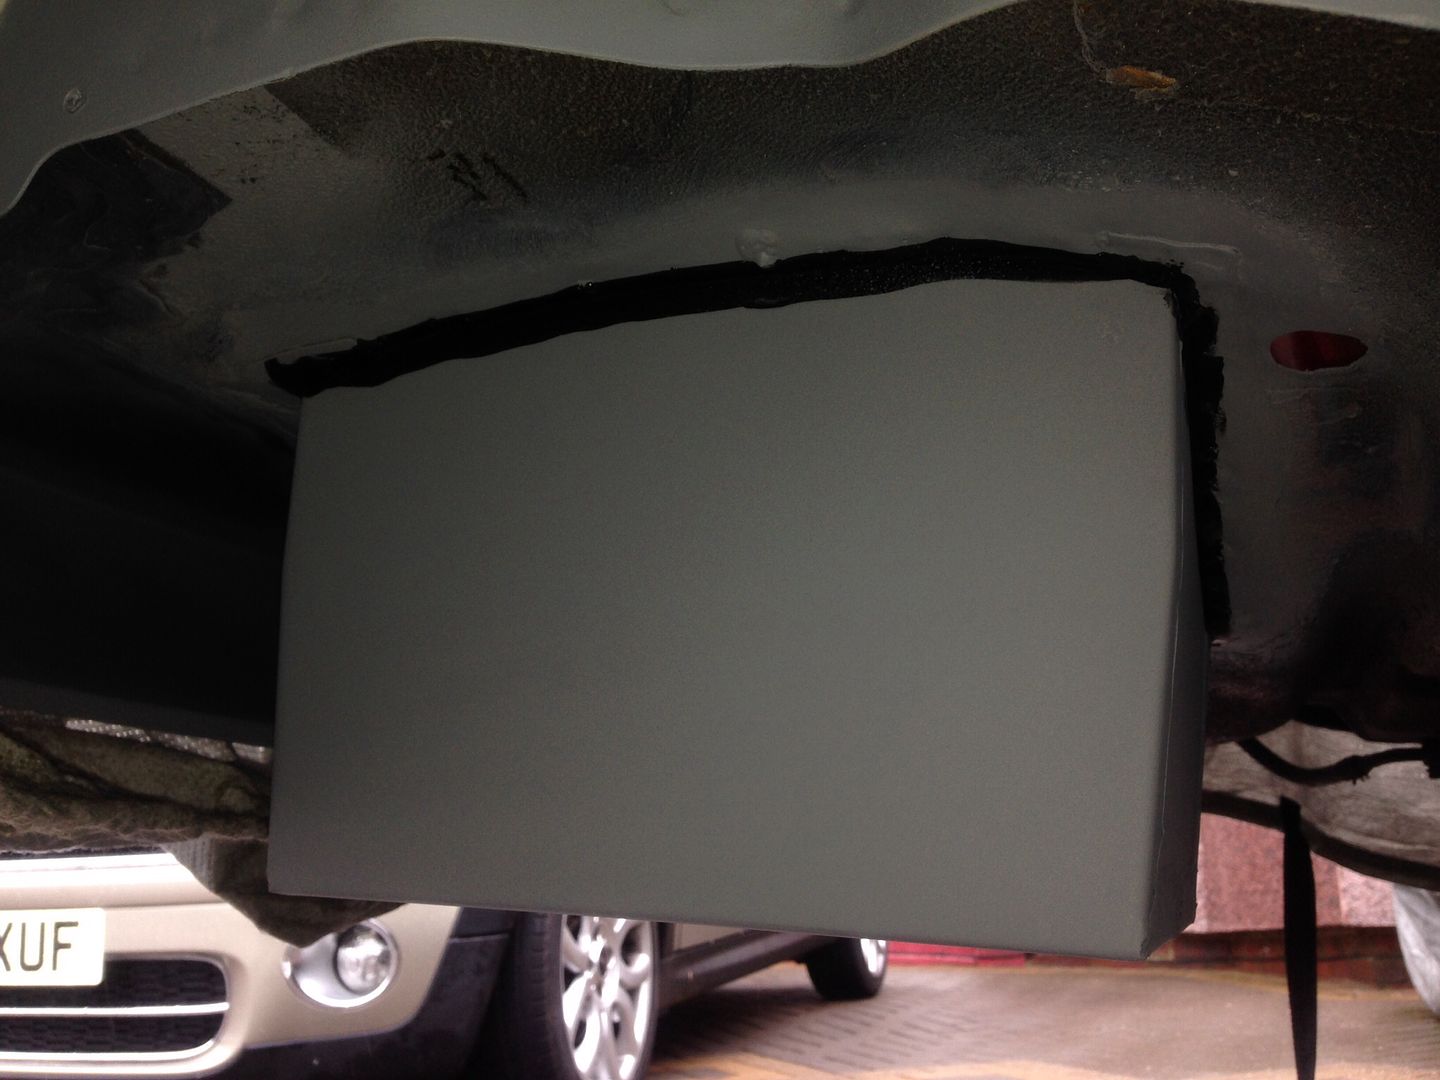
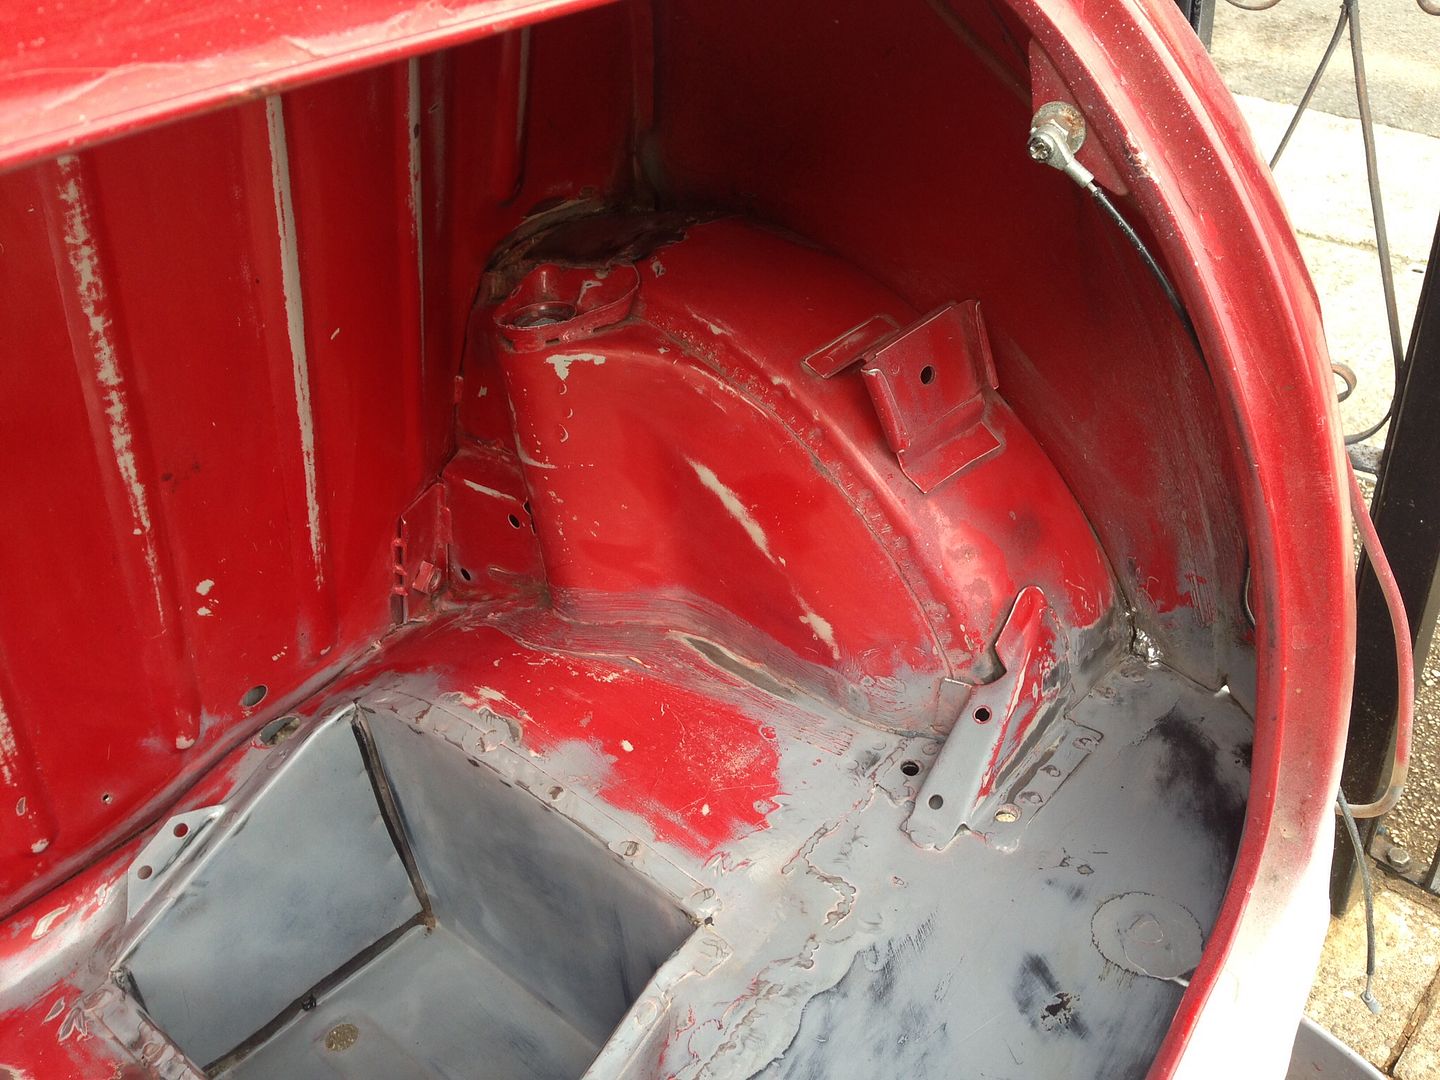
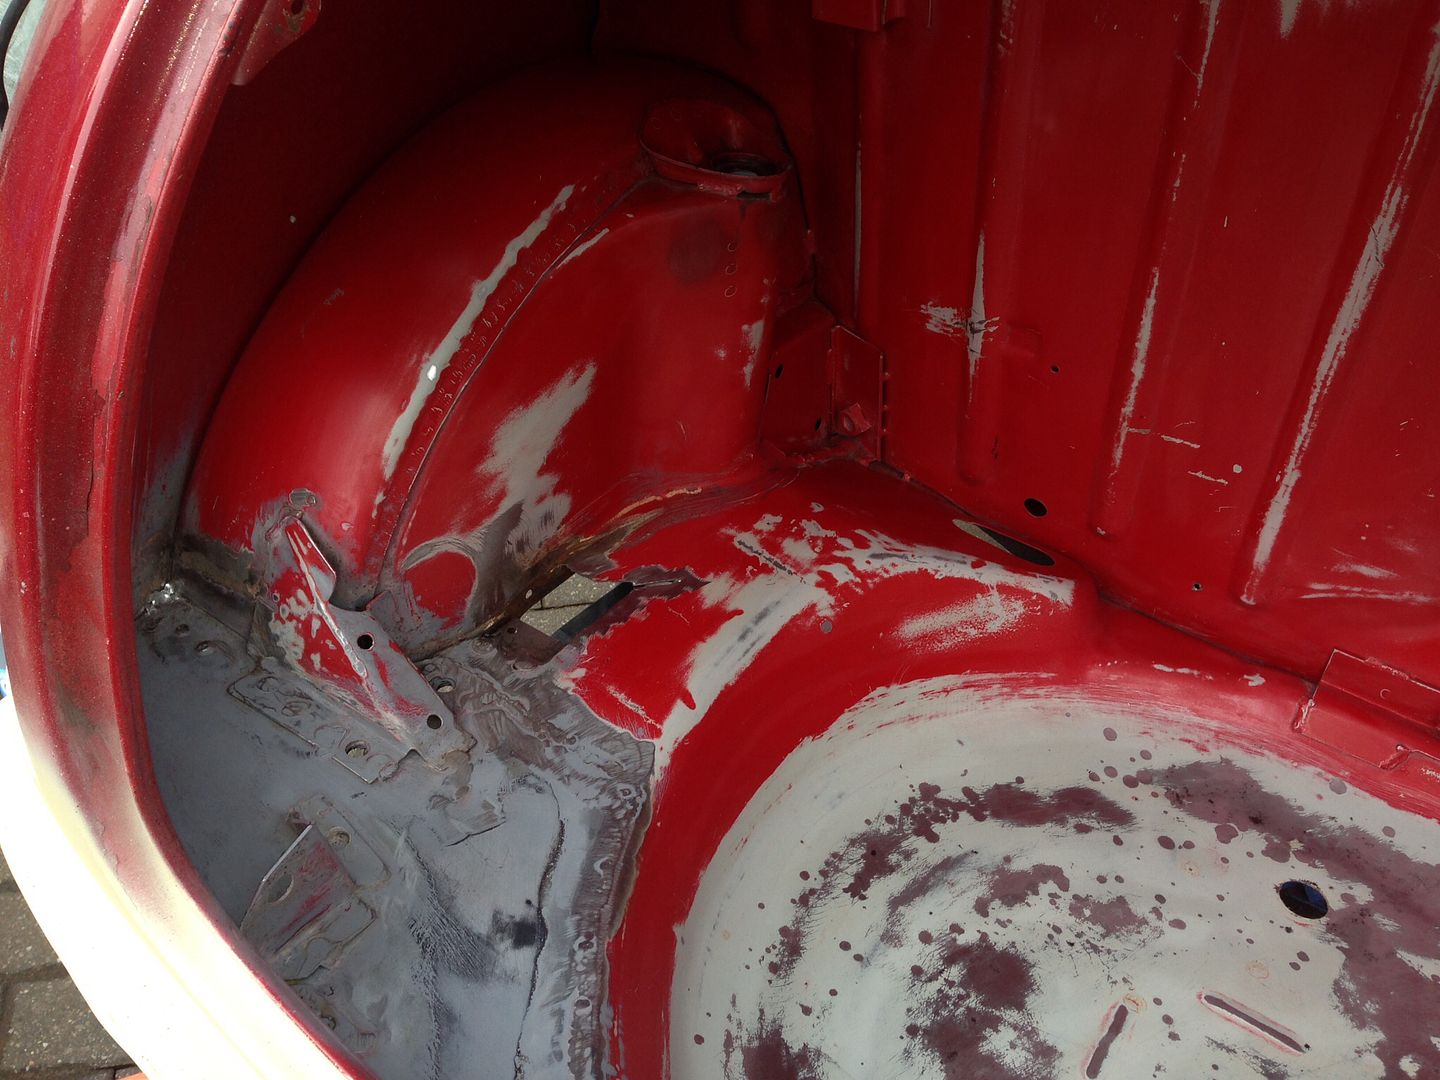
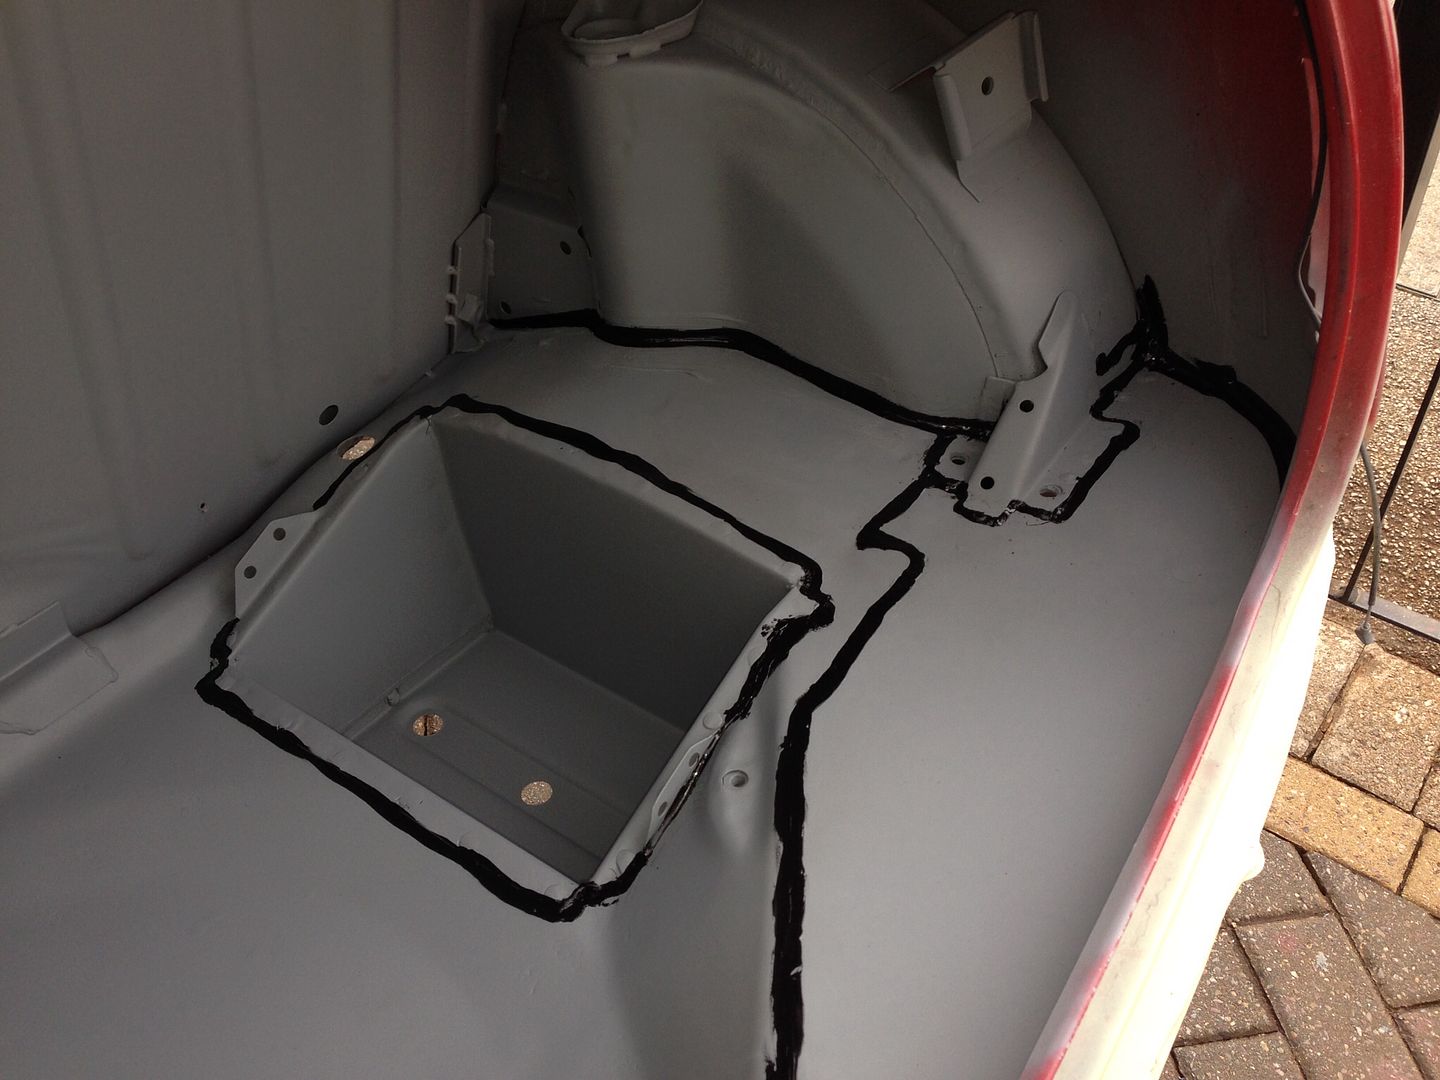
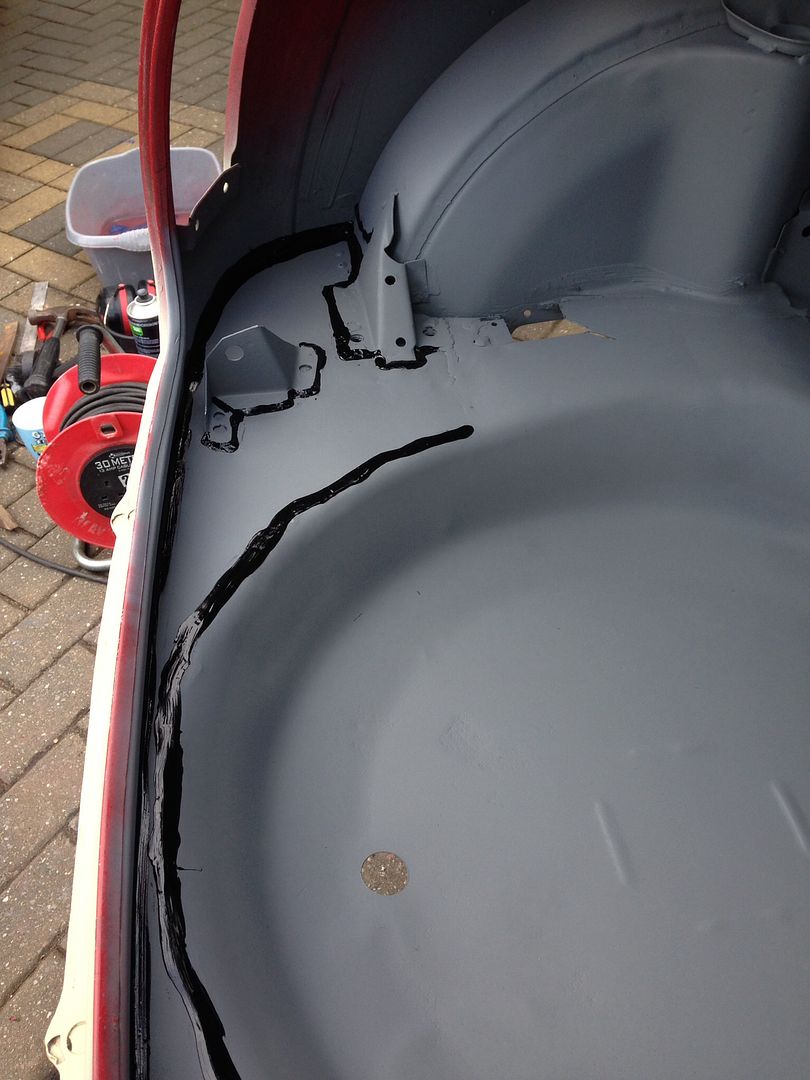
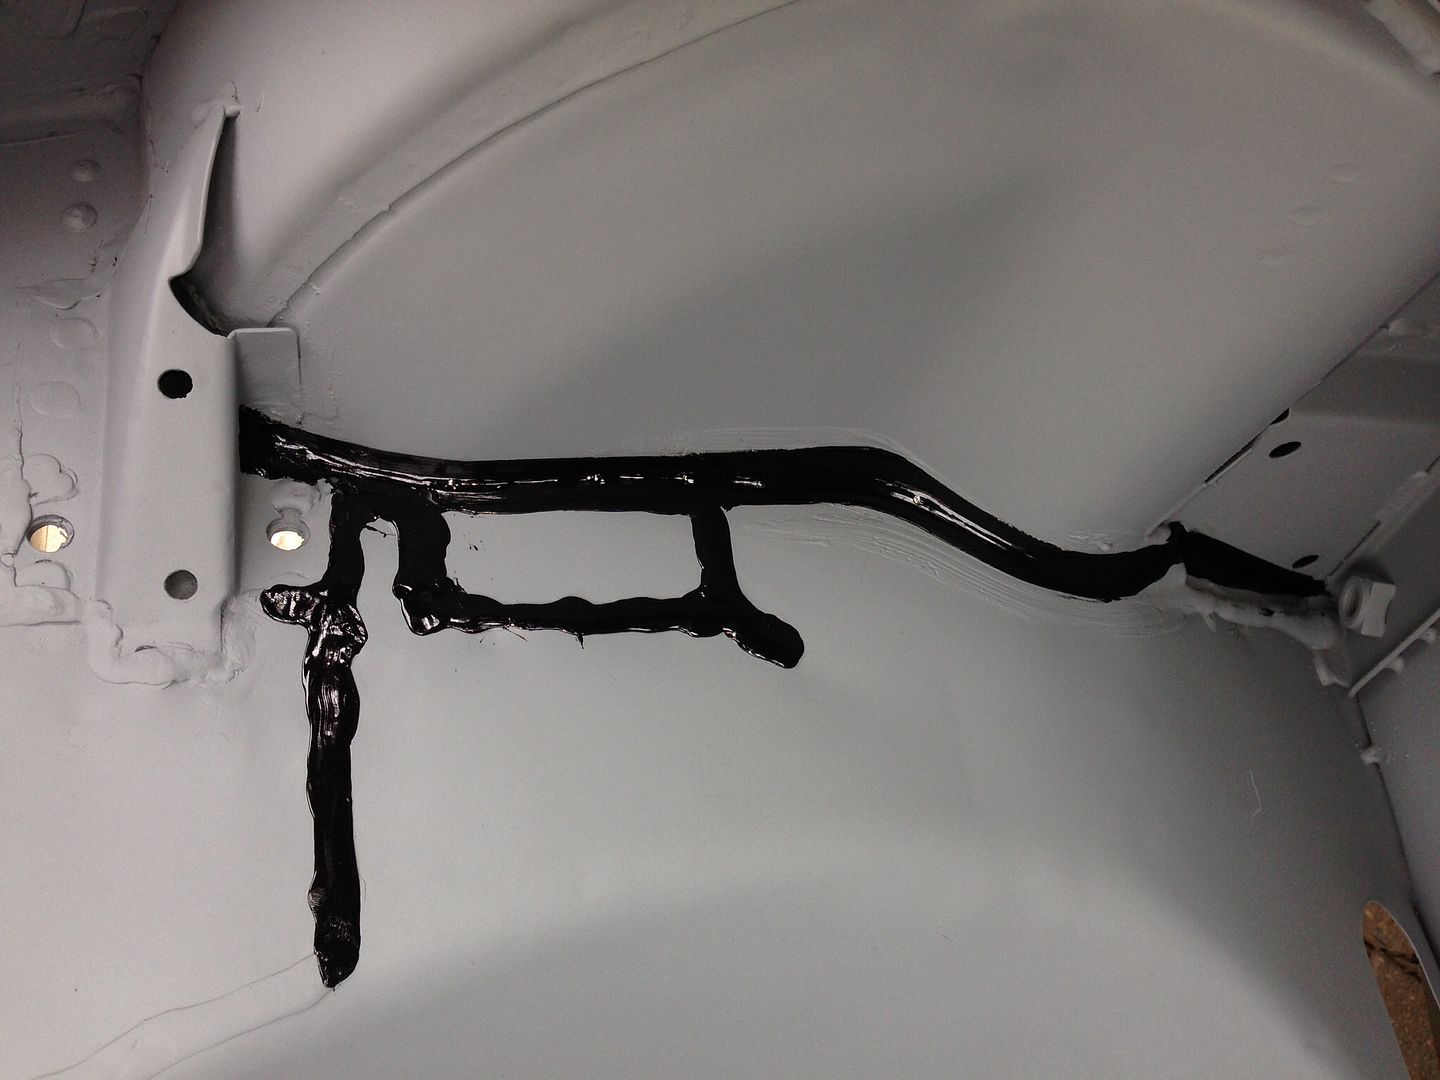
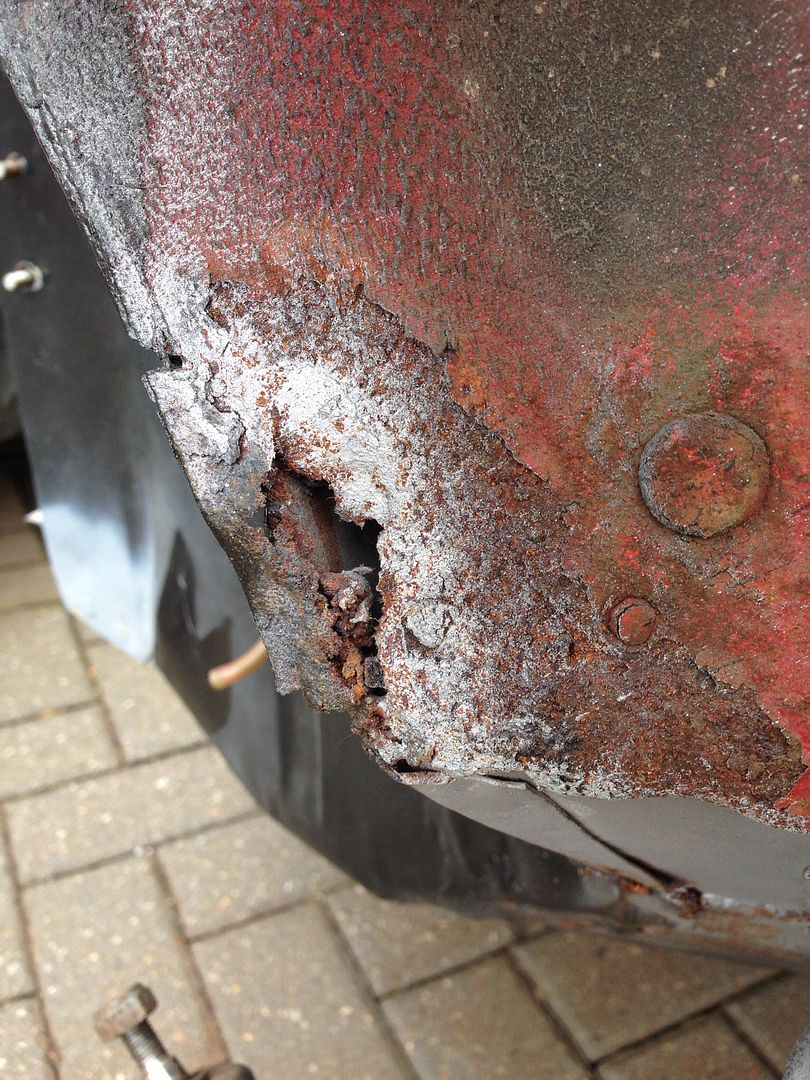
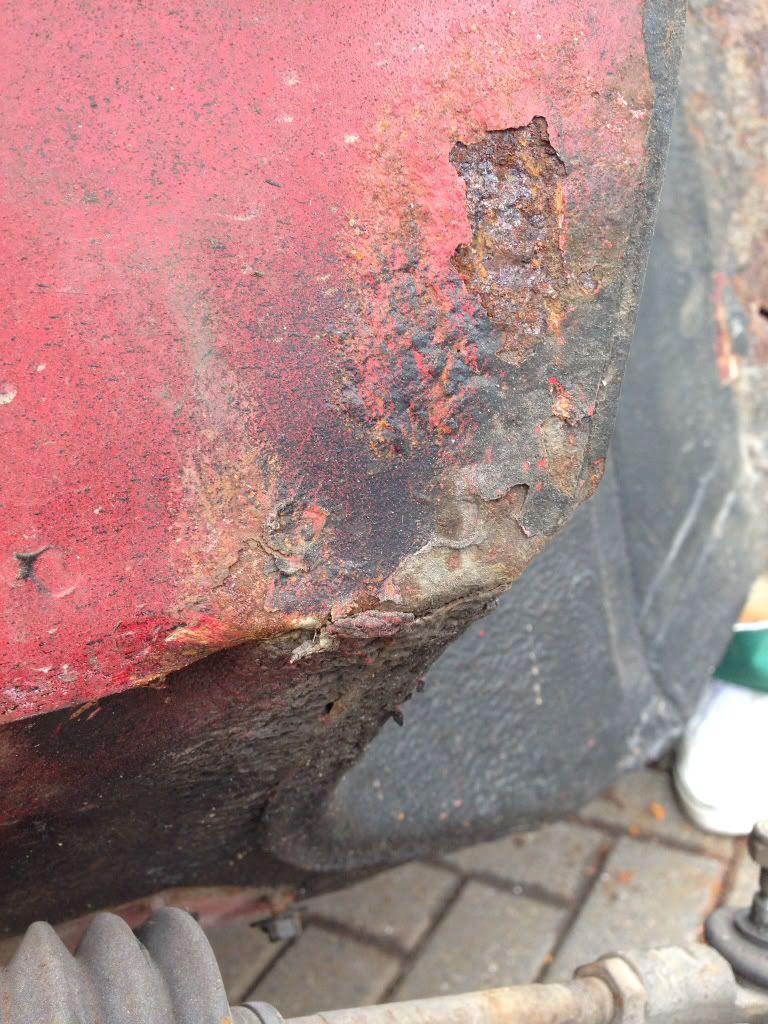
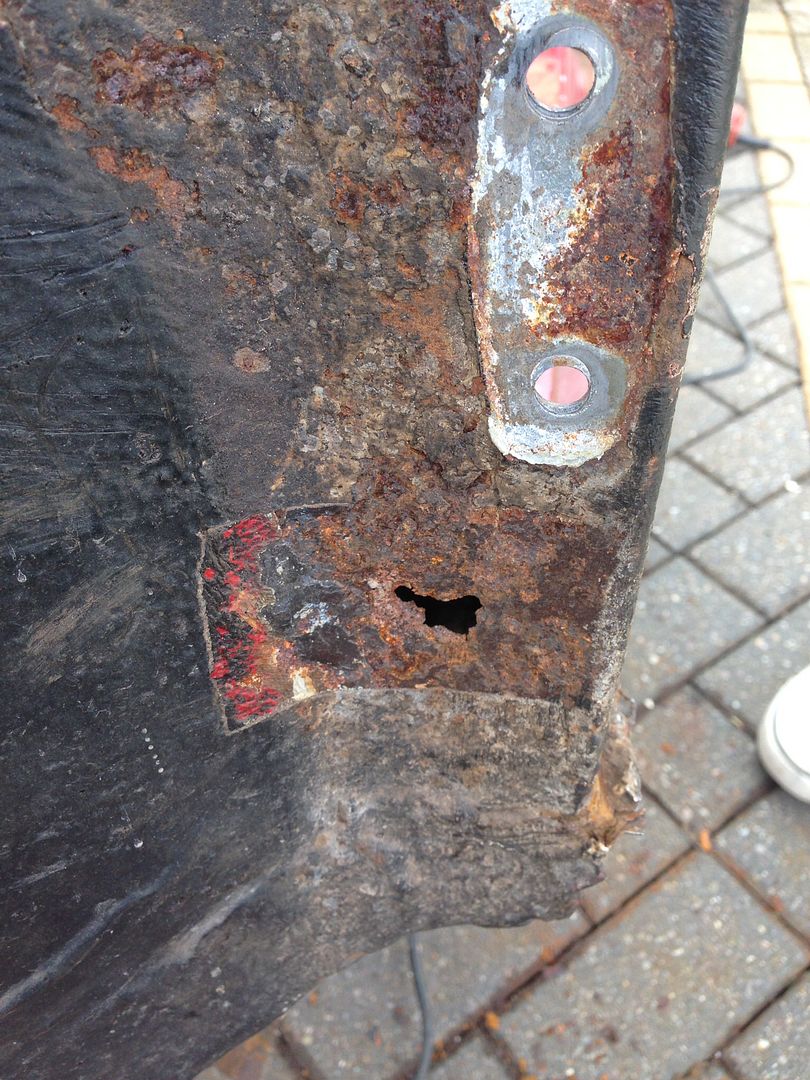
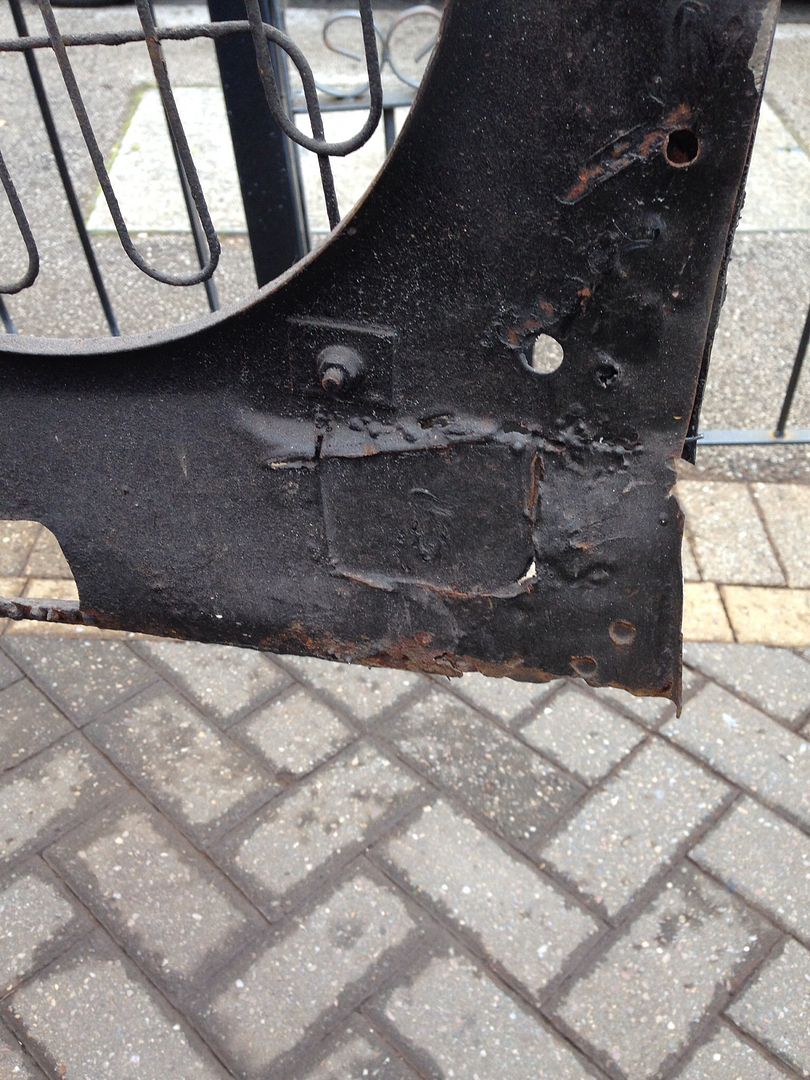
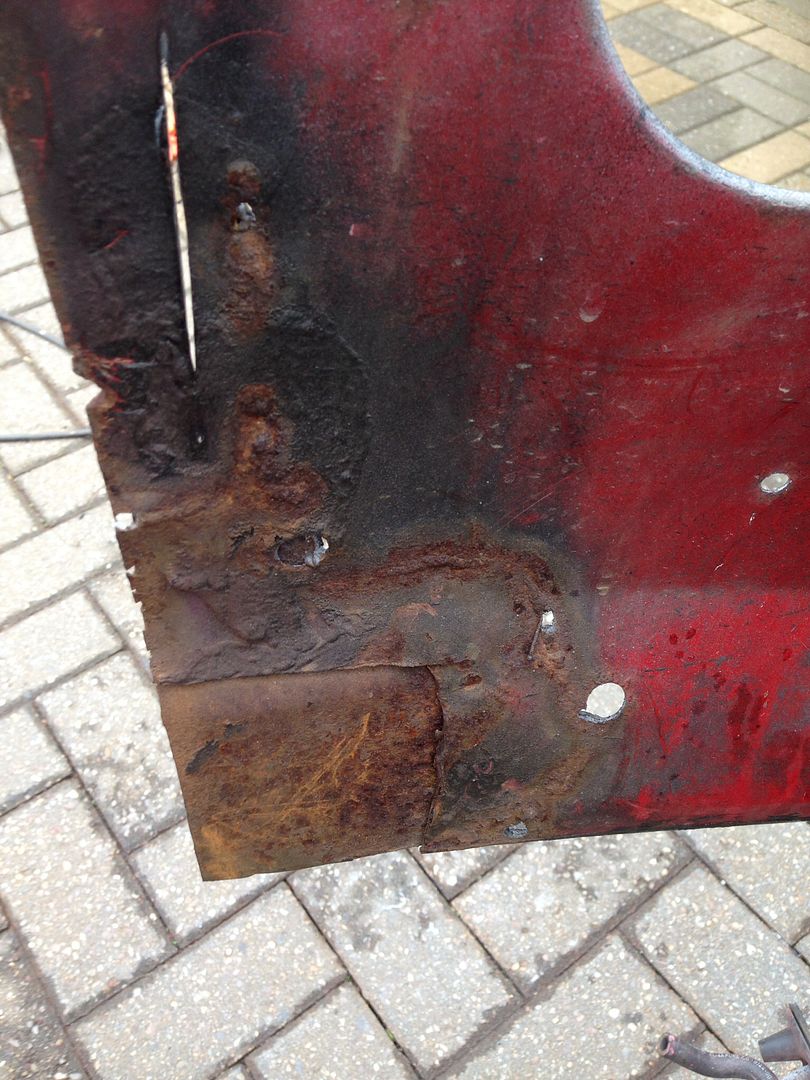
I will take more pictures of the finished thing when I've sealed and what not behind it. I've applied some Dynax S50 Wax to the closing sections today and have begun repairing the holes in the arch's. I'll put the photos up next weekend when I've finished them.

Should be starting the passenger side soon, but I'm going to paint, filler and seal everything on the drivers side and rear end before I start as I've already got surface rust coming through on my nice new fresh panels on the drivers side, which is very annoying !

Anyway that's all I got done this weekend as I've been quite I'll as of late and had to take it easy :-)

Edited by big-jay, 27 June 2014 - 11:10 AM.


#92 big-jay

big-jay

    Super Mini Mad

  • Members
  • PipPipPipPipPipPip
  • 518 posts
  • Location: Birmingham
  • Local Club: British Mini Club

Posted 10 April 2014 - 11:57 PM

Update,

I've been stripping my 4 pots down throughout the week before work and have completely disassembled them now, bar splitting them as I've been told this is a BIG no ! Wasn't easy, but got there eventually using a combination of a blow torch, a car pump and brute force !

80fe004612f51c0357f564945ff26b41_zps34dd

I'm going to take them, along with my drive flanges, up to a place called Bourne's to be blasted and powder coated on Saturday. I'm also going to replace all 8 pistons, bleed valves and all seals so they should look mint and work brilliantly when there finished. I'm going to use stainless steel pistons and valves to minimise the chances of them seizing up in the future. Was going to strip and paint them myself but I'll get a much better finish from powder coating and it will be one less thing for me to do !

Edited by big-jay, 27 June 2014 - 11:11 AM.


#93 big-jay

big-jay

    Super Mini Mad

  • Members
  • PipPipPipPipPipPip
  • 518 posts
  • Location: Birmingham
  • Local Club: British Mini Club

Posted 12 April 2014 - 05:52 PM

Update,

Went to the Pride Of Longbridge event today, was a good turn out, plenty of Mini's showed up, along with plenty more classics.

Here's a couple of snaps of some of my favorite editions -

Paul Smith ( my personal favourite ) -

b3943a260f3821f78fb40bb7ef93f2b5_zps3f15

ERA Turbo -

926ed8ee56bc0dcefc64b4cf183cd907_zps9d15

Both stunning editions I'm sure you will agree. Anyway I went there for a few hours with my dad and then came back and cracked on with my own Mini.

Like I said in a previous update I've started repairing the arches, I've completely finished the passenger side arch and that is now primed and has been tiger sealed. I've also made a plate and half welded that in on the drivers side, going to have a full day at it tomorrow though so should get the rear end mostly finished bar fitting a new battery box which is on the way from M-Machine.

So, hole in question -

f5f9696465b9e8c6d000a10ba000467d_zpsb086

Welded a piece in and tided up a bit -

d76e000cfb0df7460bb6776376cdd90f_zps2924

Then I removed all of the black underseal, used Deox Gel on the surface rust, and primed the whole arch -

e262fdd228aec618baa0411f25a25f13_zps0862

Tiger Seal applied -

5947f93780083c25a8c21773be94d07e_zps53b5

I'm quite happy with the way it looks, really motivates you when it comes out like that, definitely worth the hour or so it took to remove that underseal, horrible stuff ! I'm going to apply another coat of primer tomorrow and then use Upol Gravigard on top of that. Will be the same treatment for the drivers side then the arch's will be painted body colour along with the outer sills and flitches. The underside of the floors and under the boot area will be gloss black.

That's all for today :-)

Edited by big-jay, 27 June 2014 - 11:13 AM.


#94 Ben_O

Ben_O

    Mill Road Garage

  • Paint Doctor
  • PipPipPipPipPipPipPipPipPipPip
  • 9,781 posts
  • Location: Isle of Wight

Posted 12 April 2014 - 09:49 PM

Looks really good mate


Well done!


#95 big-jay

big-jay

    Super Mini Mad

  • Members
  • PipPipPipPipPipPip
  • 518 posts
  • Location: Birmingham
  • Local Club: British Mini Club

Posted 16 April 2014 - 04:32 PM

Looks really good mate
 
Well done!

Thanks a lot !


Update,

A bit of a late update but heres some of the work I got done last weekend.

Gravigard applied to the passenger rear arch -

91958229997c1b4da5f3721268279368_zps6d2b

Then I went to work removing a nasty plate on the drivers side arch that's been put on by mr bodge, which revealed this -

fa1ece536a2bf2355afa85a9d34f4297_zps3507

Chopped out the rot -

fd7de3f88148db63ad294068954d0854_zpsc67e

I have begun repairing it but not finished it yet so will upload pictures soon.

Anyway I woke up today to be greeted by a nice big parcel from Minisport -

d01b972422f36890c237213008e0981d_zpsed1b

The goodies inside -

5a788eb672992cb66c5a234bbbf73825_zps8896

I've changed my mind again and have decided I'll be running 10 inch wheels, they just look so much nicer then any other wheel size, especially in the deep dish style, so I've bought the braking set up, and it's very nice indeed !

I also got a package from M-Machine which contained a heritage battery box -

247132ae106b6f21eee5ad6cd7849bba_zps3562

f34d85aa1db838d5ee8b9775702eda0a_zps1710

And also received a couple of other bits I've ordered throughout the week,

Dynax UB -

aad799c74324593c8a6731d593201395_zpsa05d

And a MK2 rear light lens, as unfortunately when I bought my set from binley hall the passenger lens was chipped -

c852fd778869440e5f2c83ba408ed662_zpsd09c

So it's been a busy week for the postman :D

Edited by big-jay, 27 June 2014 - 11:15 AM.


#96 big-jay

big-jay

    Super Mini Mad

  • Members
  • PipPipPipPipPipPip
  • 518 posts
  • Location: Birmingham
  • Local Club: British Mini Club

Posted 20 April 2014 - 04:23 PM

Update,

Right, got a fair bit done so I'll start with that arch repair. I've got no pictures of the actual patch I made as I forgot to take some but I have got pictures of it primed and sealed.

So, drivers side arch repaired, primed and sealed -

effe72160460c204577bf8c3db73276e_zpsb8d8

b58faa27e820b4dd91f8fb83b298d844_zps5fc7

e9b47523e3c96e143e9b040c50ea6afc_zps56cc

Another coat of primer and then Gravigard applied -

d428d98968e658ae479fbfb0636e140a_zpse163

Next on the list was to fit the new battery box.

Old box removed -

380fbaba93de241badc8573cdb95a6ad_zps5f47

e1ebf2fcd8e115379bd68f0f99d4bf3b_zpsba91

Tidied the lip up a bit -

f50c9cec86bb8fda0fe26dc7933f7713_zps0f79

Test fit of the battery box -

6583e65c65a114cf62bb6abed5c575b8_zpsaecb

Fits brilliantly as you can see, it's definitely worth buying heritage, so much less hassle. So I drilled the holes for plugging, sanded it down and gave it a dusting of primer. I also sealed all the way round but didn't take a picture of this, you'll see it in the rest of the pictures though -

7875a9284a37df9dda4bbaf58b1ea95a_zps8444

Welded in place -

822c16e73a0896c850abe6d15591f6bc_zpse709

Tidied up a bit -

f927028e6be094e3b34583505fb9e212_zpse544

Sits bang on level underneath -

63a3d5a2f7d0d582a6e4b98e9deff9ec_zpsaddb

af4353b0cd1a34966e6c298a137c5884_zps7cfb

Primed and sealed the underneath ready for Gravigarding -

dd826bbaee50dda3578c2283527582ff_zpsb15e

Then we welded in the tank bracket -

24ea3e1d8e476ba4943df09816097958_zps454e

Then we welded the closing panels to the back of the valence and seam sealed everything up -

93ffb10e3506f0f771f2cfb3abd9dafb_zps8c8c

9f8a5bb87f94918c38d663631b1ee01a_zps2ff5

Will be top coating all the underside gloss black and then using Dynax UB.

On a side note, I currently have these for sale -

a863cb901a9d1b7bd225e2715be7a8de_zps1c00

38b3258059afa233504ba9037bd6a1b9_zps2c74

8f8abf21b7db9d1837c8dbd859974353_zps31ba

12 x 6 deep dish Minilites, two have brand new yokohama A539 tyres, and the other two have almost new Yokohama A048 tyres fitted. There in immaculate condition, need them gone so make me an offer if your interested, also if you want more pictures and information there listed in the for sale section on here.

Got lots of painting, sealing and fillering to do tomorrow, I hate fillering !

Edited by big-jay, 27 June 2014 - 11:21 AM.


#97 Ben_O

Ben_O

    Mill Road Garage

  • Paint Doctor
  • PipPipPipPipPipPipPipPipPipPip
  • 9,781 posts
  • Location: Isle of Wight

Posted 20 April 2014 - 04:37 PM

Looks like you had great weather today. Its been peeing it down all day here  :shy:


really nice progress on this. 


Ben


#98 big-jay

big-jay

    Super Mini Mad

  • Members
  • PipPipPipPipPipPip
  • 518 posts
  • Location: Birmingham
  • Local Club: British Mini Club

Posted 20 April 2014 - 04:43 PM

Looks like you had great weather today. Its been peeing it down all day here  :shy:
 
really nice progress on this. 
 
Ben


Thanks Ben, This is mostly yesterday's work, been raining most of the day over here too, rubbish weather lol

#99 big-jay

big-jay

    Super Mini Mad

  • Members
  • PipPipPipPipPipPip
  • 518 posts
  • Location: Birmingham
  • Local Club: British Mini Club

Posted 26 April 2014 - 07:59 PM

Update,

Been doing quite a bit of fillering and painting. Not my favourite job but these things have to be done !

Painted the closing panels and inside the valance -

02529cd7227a93152e24ee7645b33160_zps100f

1b1c42713be1886139693de3be1c235a_zpscc7d

Sanded down the outside of the valance, no need to go back to bare metal everywhere as the E-Coat on heritage panels is good stuff -

4138da56fe15f34cdebe7a2bbbf5966a_zps8afc

Primed -

3490f705f054cf38b9a510a6cb479dc2_zps1b80

Gravigard applied, you can't see the texture of it in these photos but it looks good in the flesh -

20e3e7a5c0f3fa4401f05f0dd4545183_zps0f5f

Then gravigarded the underneath of the battery box -

7bec7a8442aa7778cec411735c63718c_zps8145

Then I done a bit of fillering underneath the light area where I'd made a small repair, then filler primer on top of that, quite pleased with it -

3754d5b5daed98d04586e334f6a3071c_zpsffee

Where you see the crack in the filler underneath the boot lip has nothing to do with me, that's a previous 'repair' by Mr Bodge. Will be dug out and done properly -

ecd34e2f54183cd8e29aa25ee37e7966_zpsd816

Then the real graft started, took me three hours to sand down the whole boot area, some pictures -

485e1985c0c55d2248f9d4d095594b50_zpse5d9

317d7847748ff2dfb0dbb24f92955390_zpsea20

Found another patch of rust, so cut it out and will repair it at a later date, no welding for me this weekend, couldn't be bothered :D

f595cb4fd3db7d875d62759ee09b6b31_zps693e

Then I primed the lot -

d9ca3c5aa4508b1d3d7ba2cb0a3ddee9_zpsc3b9

And sealed her all up -

41b19a71067cb70e8da8d7152ffb6b60_zpsdfb2

d798c27d6032049bf0aeb01672c12149_zpsdf1d

That's it so far, might get a bit more done tomorrow providing it doesn't lash it down !

Edited by big-jay, 27 June 2014 - 11:24 AM.


#100 big-jay

big-jay

    Super Mini Mad

  • Members
  • PipPipPipPipPipPip
  • 518 posts
  • Location: Birmingham
  • Local Club: British Mini Club

Posted 02 May 2014 - 04:51 PM

Parts Update,

I managed to get myself a nice set of Exacton wheels last weekend, had to travel down to wales to pick them up but was worth it for the price I paid. They're going to need a refurb as they're a bit tatty, considering they're 30+ years old, and I'm also planning to make them into two piece split rims.

I was planning on using a courier to take them down to Force Racing to be split, but my dad has found a place that's local to us called Prestige Wheels that will dip, blast, refurb, paint and split them for what sounds like a very reasonable price, so we're going to take them down tomorrow !

Anyway here's a snap of them -

57d4b0ee13aec72a69dfc24caef3a349_zps7215

I've also put down a deposit on a nice low milage 1275 Engine. It looks to be in very good condition, nice and original and from what I can see unmolested. I've also heard it running and it sounds great. I've just got to wait for the guy to take it out now and I will admit I can't wait until we go and pick it up :D. I'm not after massive speed, just going to tidy it up and fit a few nice extras, maybe a nice cam and flowed head and a few other bits and pieces !

I should also have a few very nice interior bits and pieces coming through the post shortly so will put pics up as soon as I've got them.

Going to be helping my dad do a bit on his Mini over this weekend as he hasn't got a lot left to do welding wise so shouldn't take us to long. I'll also be doing the finishing bits of fillering and painting I've got left to do on the drivers side and rear end of my car in between, so will still have a few pics to update with, then next weekend turn the car around and start cutting out the passenger side.

It's also Himley Hall Mini show on the Sunday next week so will be spending some more hard earned cash ;-)

Edited by big-jay, 27 June 2014 - 11:26 AM.


#101 big-jay

big-jay

    Super Mini Mad

  • Members
  • PipPipPipPipPipPip
  • 518 posts
  • Location: Birmingham
  • Local Club: British Mini Club

Posted 04 May 2014 - 06:02 PM

Update,

Spent most of the day yesterday disconnecting my engine and labelling the loom ready for removal. Quite enjoyed it to be fair, nice to do something other than bodywork.

But today I was back at it, repaired the small hole I had in the boot and made some bracing up and fitted that ready for removal of the passenger side floor pan.

The repair piece in place -

7c7dcf0e3bf20a5478b4e20633c111d1_zpsae57

Welded in -

541117a737be3c0a52a1666f54dfb49d_zps4b69

Zinc primed, primed and then tiger sealed, same goes for the underneath -

ac19604380eab7c97af9a9bb7e7b7ee2_zpse617

That's officially all the welding done in the boot area now, feels like a milestone has been reached !

Then it was time to fit the bracing, you can see how bad the passenger floor is in this pick, properly bodged -

663b1bf71a4ba515a9b204611e76bbc9_zpsabd8

And across the passenger door frame in preparation for the doorstep to be removed -

94ea29697bd8975fbbecf966521c88b6_zps047e

That should keep it all in place while the work is carried out. That's all for today anyway as was giving my dad a hand with his car, may get the boot area painted up tomorrow !

#102 big-jay

big-jay

    Super Mini Mad

  • Members
  • PipPipPipPipPipPip
  • 518 posts
  • Location: Birmingham
  • Local Club: British Mini Club

Posted 06 May 2014 - 05:31 PM

Update,

Didn't do too much yesterday, being a bank holiday and all, but did get my boot area in red primer ready for the top coat.

So here it is primed -

80d9b9ef09c53f4003ae04d1b22a1132_zps7e61

May be applying the top coat the weekend, but I'll see what happens as I may be quite busy. I also took delivery of Mr. Vizards finest -

80ac2315ee2d5596e6b52f8d0ddfe940_zpsd150

That lead to me getting EVERYTHING I own Mini related down stairs and laid out on the floor :D. Wanted to see what all my money's been spent on over the past few months !

So, here it is, laid out -

c7b9d0618a2f9abb5ffbb5a7d16584cf_zpse4c7

A few close up shots -

a595ed407c69c858f0e49fe1ae8cc950_zpsf6d2

06730d5a741e8c85deb7dbf62a0ab0c0_zps7b5d

cbf8842392f05c82ce4f8830bd963db5_zps434d

And that's actually still not all of it, I've got two sets of four pot calipers and I'm not including all the panels I've got and the consumables I've bought. I've also still got more to come, just ordered a stainless steel heavy duty steering drop down bracket, a whole black seat belt set to match my interior, a load of smiffys stainless bolts and I've still got a 1275 engine to pick up, AND, it's Himley Hall this Sunday !

I don't think I'd want to count up the receipts and there's still a hell of a lot more to be bought. My wallet needs a break ;-)

Edited by big-jay, 27 June 2014 - 11:30 AM.


#103 domdee

domdee

    Formally known as dominicdee

  • Members
  • PipPipPipPipPipPipPip
  • 1,183 posts
  • Location: hull
  • Local Club: hull clubs on FB

Posted 06 May 2014 - 07:14 PM

Bring on the rebuild

#104 big-jay

big-jay

    Super Mini Mad

  • Members
  • PipPipPipPipPipPip
  • 518 posts
  • Location: Birmingham
  • Local Club: British Mini Club

Posted 08 May 2014 - 02:51 PM

Parts Update,

Received my drop down bracket today from Kiddspeed. I went for the polished option, Purely because I can't resist shiny things, and the workmanship looks to be of a high quality.

6ba4464e7771872f43c415be46db82cc_zpsa9ec

#105 big-jay

big-jay

    Super Mini Mad

  • Members
  • PipPipPipPipPipPip
  • 518 posts
  • Location: Birmingham
  • Local Club: British Mini Club

Posted 11 May 2014 - 07:27 PM

Big Update,

Made some great progress on my car yesterday. Here's some pictures.

We started off by removing my 998 engine, this will be stored away as I'll be fitting a 1275 when the cars finished -

b08b2cf22a959ecce18b4be319286cf5_zps8f39

9397522784dc396967e4b83909fd1fcd_zps3876

Next was the front subframe assembly -

3e9ed170d5986f459b68facdfe777a49_zps4b9a

9e1a87ef9e70da8dfd6f06ef8a6c5c2c_zps8acd

Then i got the grinder out and what was left of the front end was removed -

f7a4ba02f2aa62c0b3045d753e9f340f_zps5b4b

edcea4b2fd7f26dc687a5b2c1c3b209e_zpsd73b

Bottom corners of bulk head and toe board corners are shot so will need replacing -

f39971db70fe83f2100299cb3721762b_zpsb87a

0430937281b05c173d21beaa5b54ff2b_zps6755

State of the passenger side flitch and inner wing -

e8a08fbf5eeeabefe35edc08dbd8079d_zps2fb1

8f3056410640d45c0e432143e9d824b1_zpsae76

81cf88e7c48c9fc10f22717855eb999f_zps485e

32106a35871774fa183c478d0962555f_zps0fcf

I'm going to be buying the whole flitch and inner wing heritage panel as it's just too time consuming patching it up like I did with the other side.

State of the drivers side inner wing -

3451989e20dff2f9d91a4638cd4aed0e_zpsbe05

Again I'll be buying the front half of the inner wing, M Machine do a panel and it looks decent to be fair so I'll give it a try, should be a lot more tidy then patching it up.

Then it was time to remove the dreaded over sill -

c265cd99fd6a31933aaff7cad5eeef62_zps6e33

e8a52ead0f5b6dd16acc7279e8d653fb_zpsc660

0850a7022024d3e49bab9b03539a723e_zpseaf9

8fbca4ffb07fe63daedbbb4861a147ea_zpseab3

I CAN NOT emphasise how important it is that you do not fit oversills, these are only two years old and look at the mess they have made !

Layers of Bodge -

90f4ca76c273a020302d39a93d411ae5_zpsbe82

So Ive roughly cut all that nastiness out and this is what I'm left with -

5dafbeba5b4b22799db2183d0303717c_zps3fba

cd35476e15da23f65f924b5f1a9c92b2_zps7750

All of the rot that was cut out of my Mini -

026ba0e7ba732db953ce7c4ca8aae9b1_zpsd2e8

I did feel as if I was getting somewhere with this but now I've chopped all that rot out it feels like a massive step back. Got to look on the bright side as my drivers side is now solid and my rear end is also solid. I've ordered the full front to rear floor pan from Minispares but will have to wait until next week to pick it up as there made to order.

After all that, depression had set in big time. So today I went to Himley Hall and had a splurge of spending to make myself feel better :D. It's the last time I'm going to be able to buy anything that are not panel related for a while.

Here's a few pics of what I got -

8e108dfe580e4d2be2813f102d6ac5a6_zpsae8e

A few close ups -

9d449dd7dde0a9fa5b013eee580b472a_zps5db7

82c17a015b7f71f4dde95bdc8dca4dca_zpsb505

1e2b1b5d13044a7ce87e0f9ead04a27e_zps1678

9325d64d46b59fb7c76267afe08d490e_zps3ec2

Ill list the items,

- Top tint windscreen.
- Wipac free form headlights.
- Exacton wheel.
- Stainless bumper.
- Standard arches.
- Black perforated headlining.
- Smiffys bits bolts.
- Standard door lock surrounds.

I also got the old tyres removed from my Exacton wheels, so there now ready to be sent of to be split real soon -

4ab44bcfa1eaf80f8fef853bfa470b08_zps4ede

Well that made me feel a lot better about the car so now I've just got to keep positive about it !

Edited by big-jay, 27 June 2014 - 11:35 AM.


Also tagged with one or more of these keywords: roundnose

0 user(s) are reading this topic

0 members, 0 guests, 0 anonymous users