Jump to content


Photo
- - - - -

The Flinstone Mini - Loads Of Pics


  • Please log in to reply
134 replies to this topic

#1 bluemini17

bluemini17

    Mini Mad

  • Members
  • PipPipPipPip
  • 158 posts
  • Location: Bangor

Posted 18 July 2014 - 08:29 PM

Current stage-


hdorGV.jpg


Build thread -

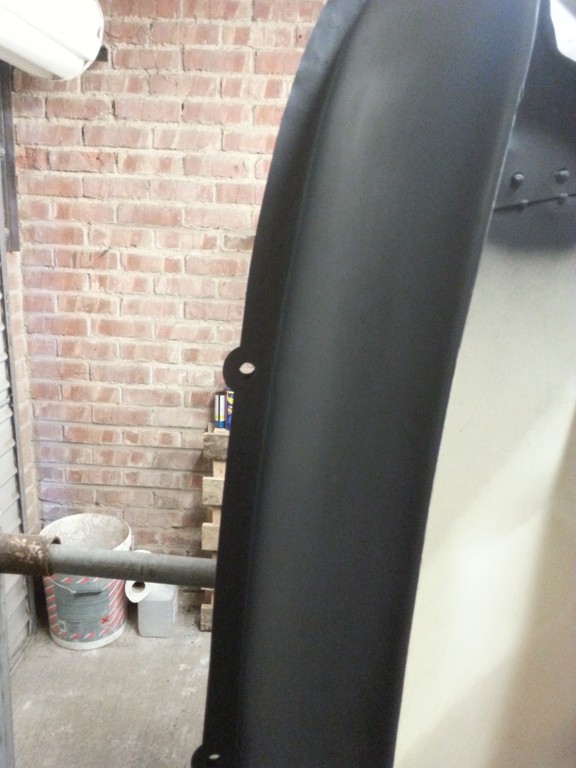
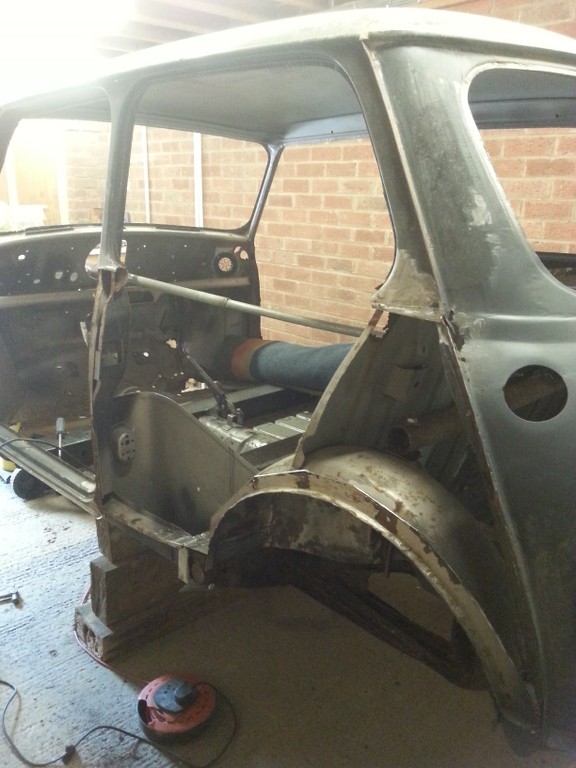
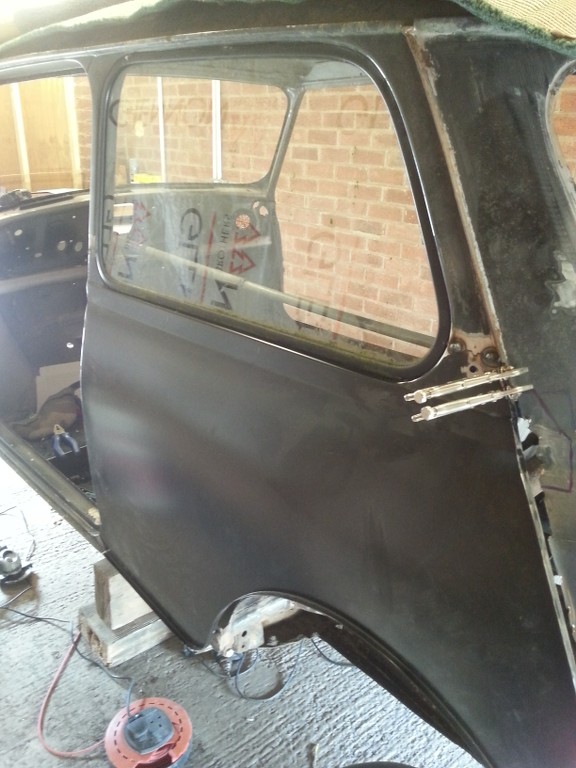
The mini is in the building

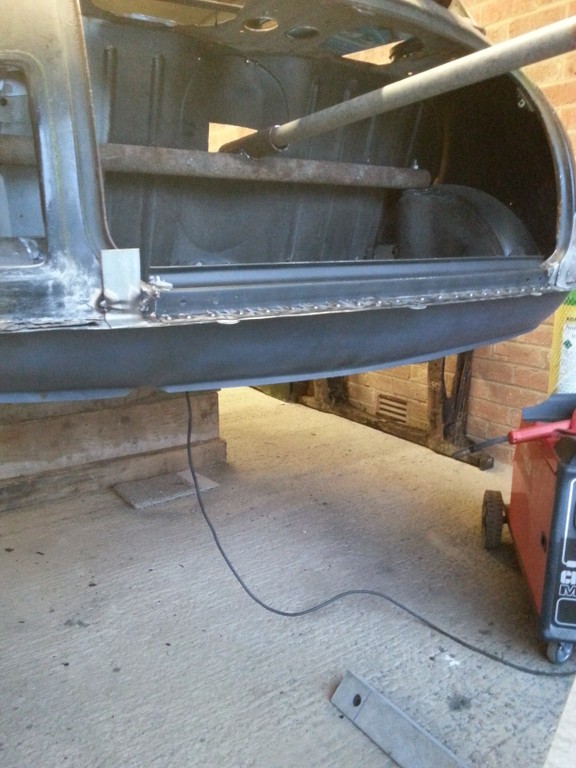
After many, many, many years of neglect, perhaps TEN, the mini is at long last warm and snug in my garage.

The plan is for a full strip down, weld-a-thon, and then paint. Followed by a sensible engine choice of the 998 variety, but who no's, only time will tell.
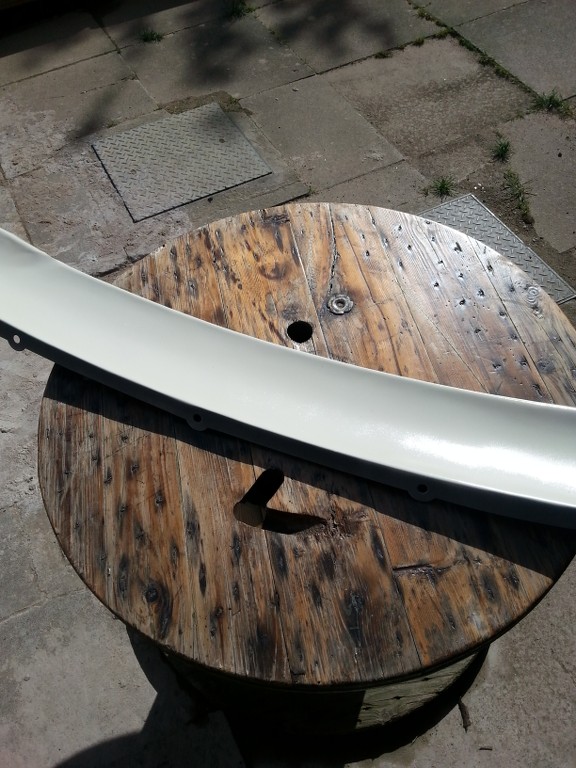
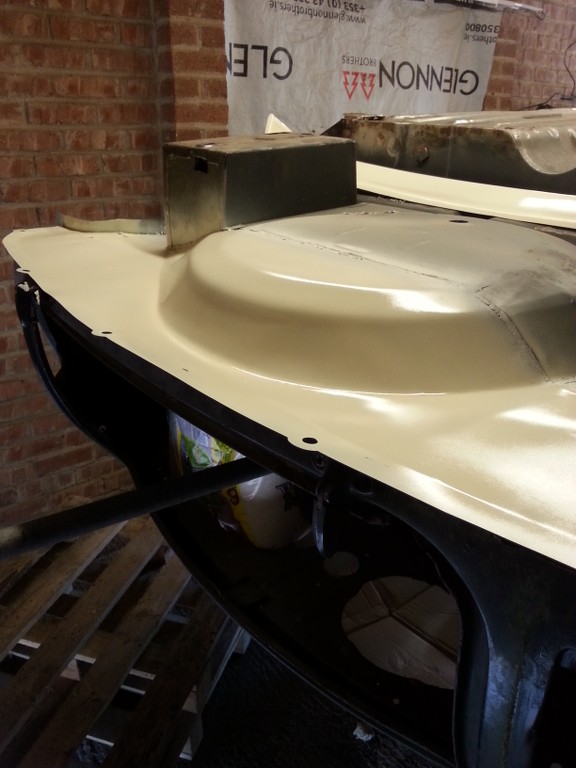
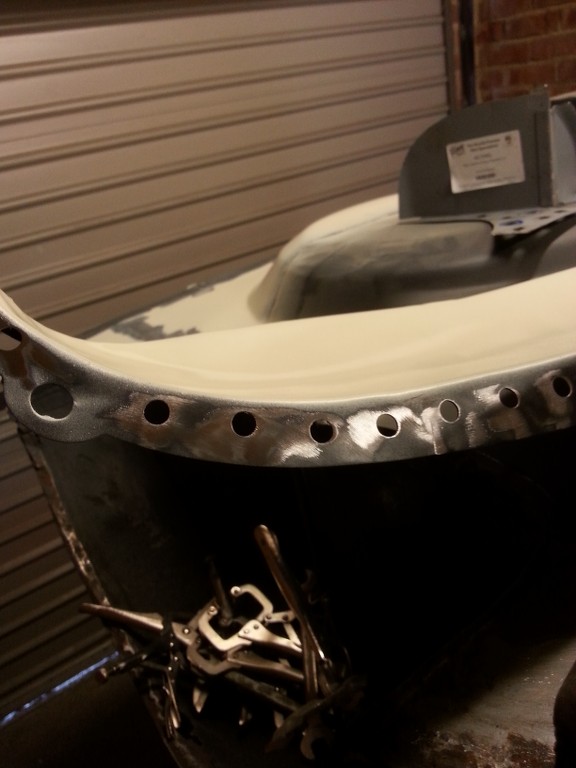
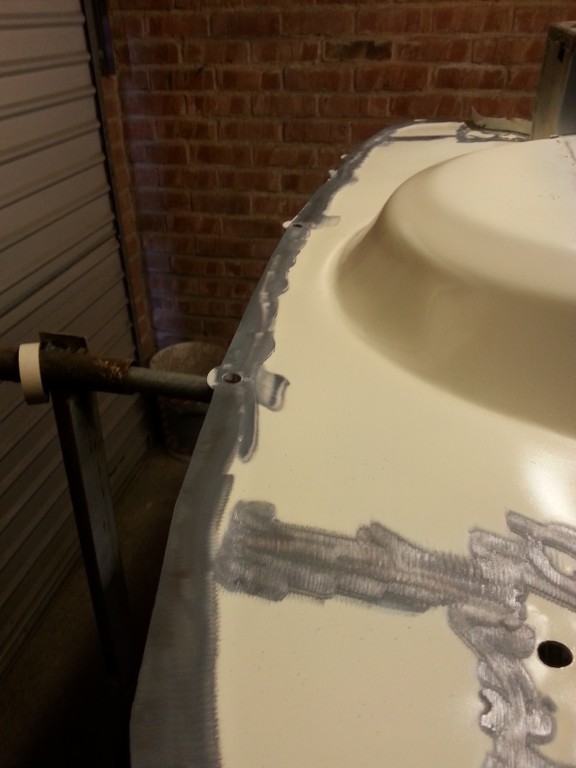
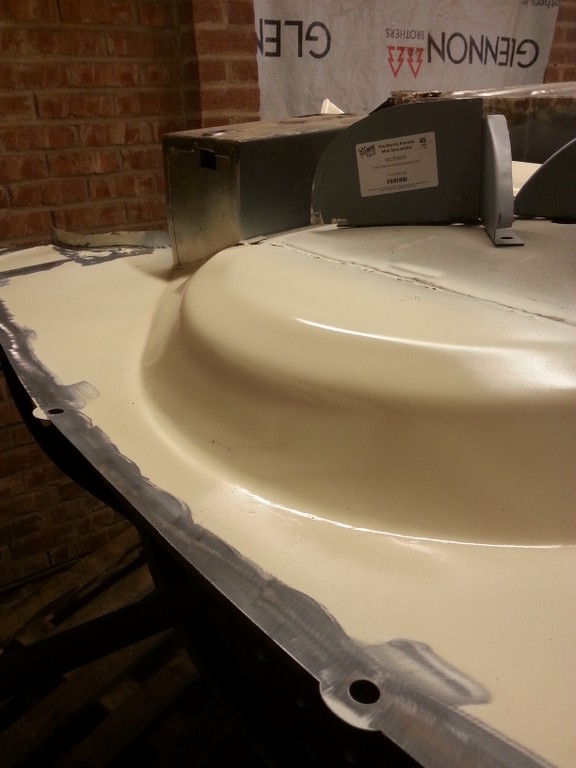
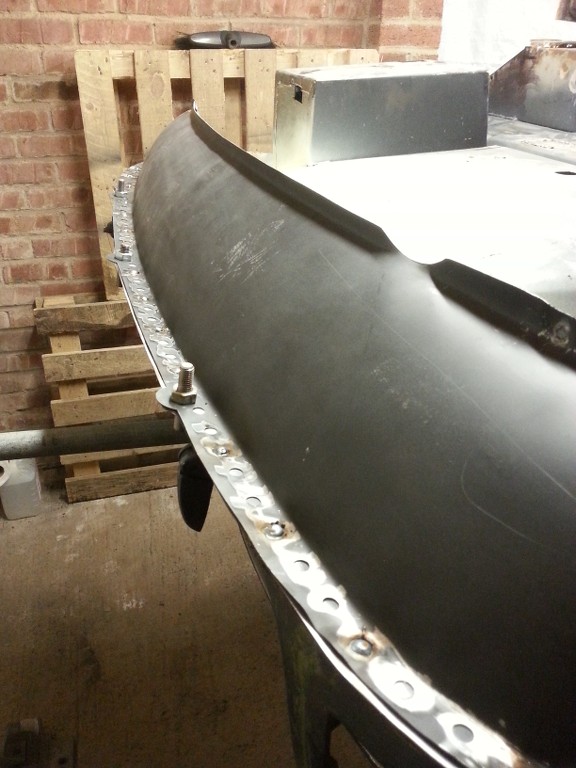
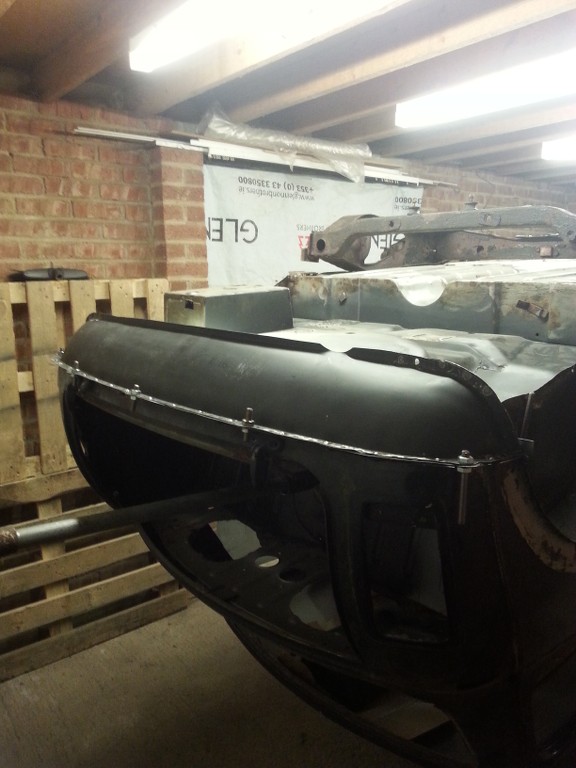
Here are some pics.

z3fz.jpg

5un6.jpg

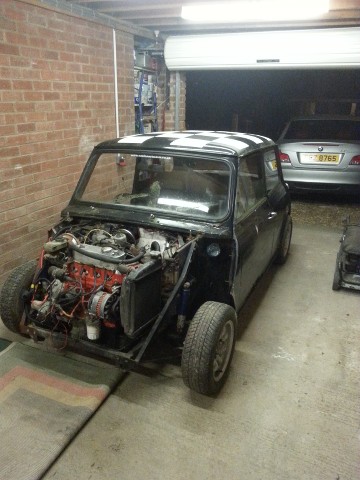
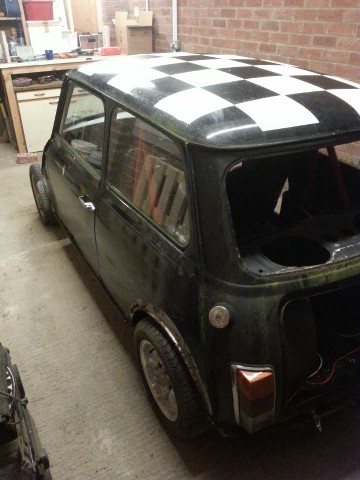
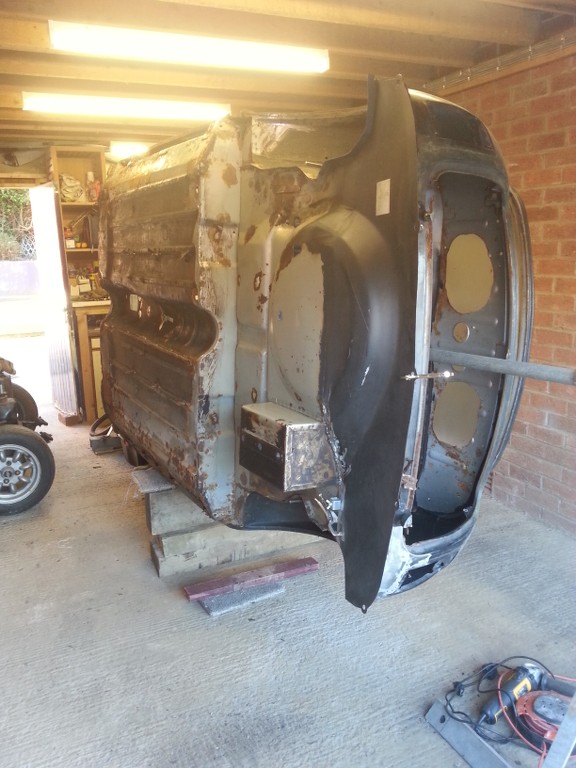
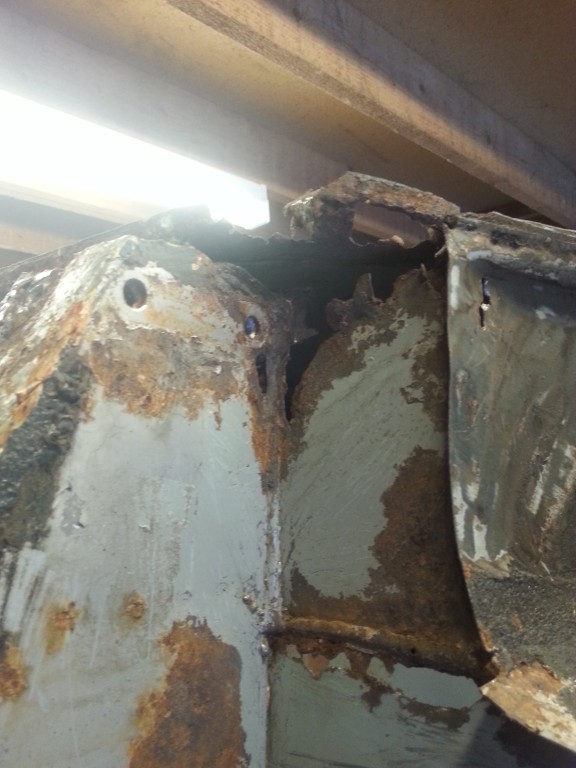
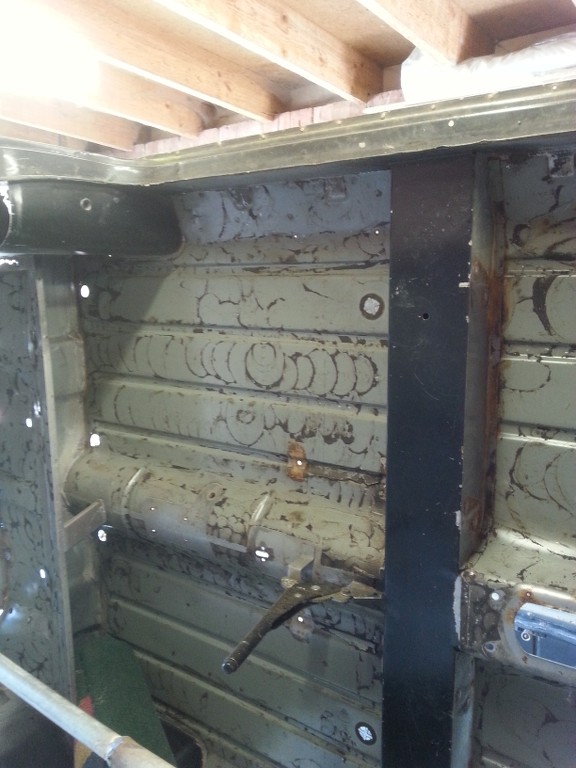
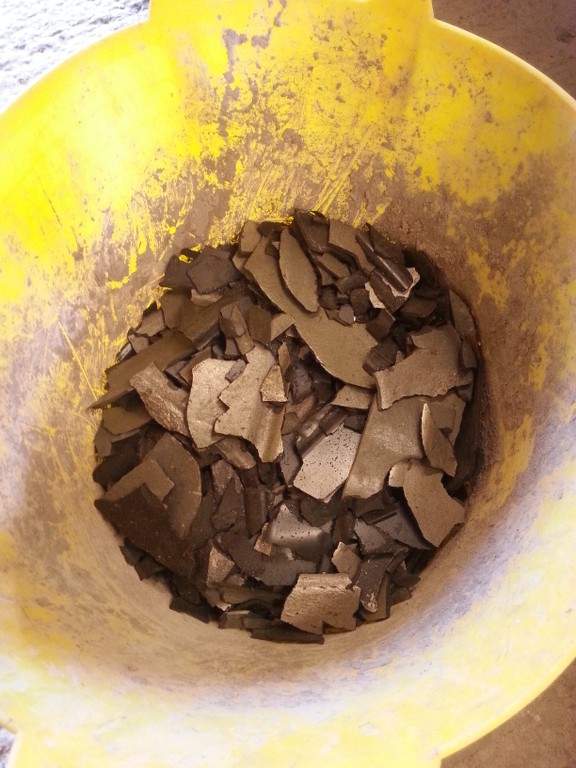
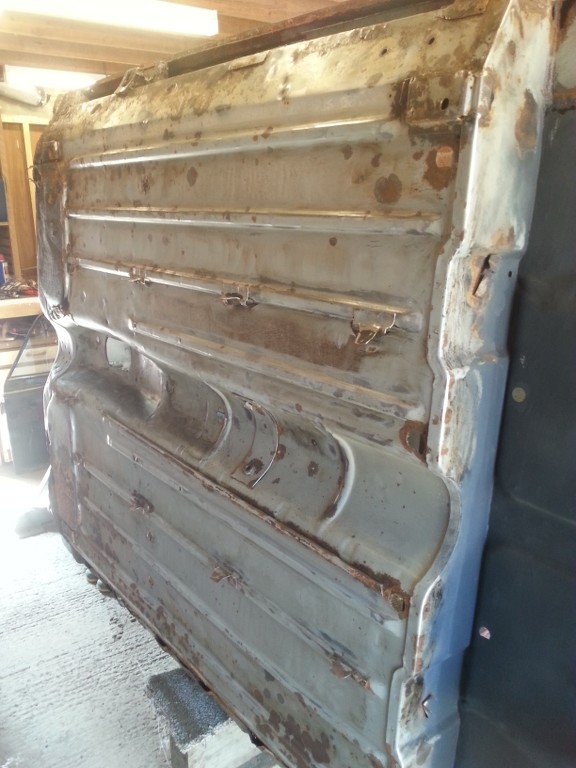
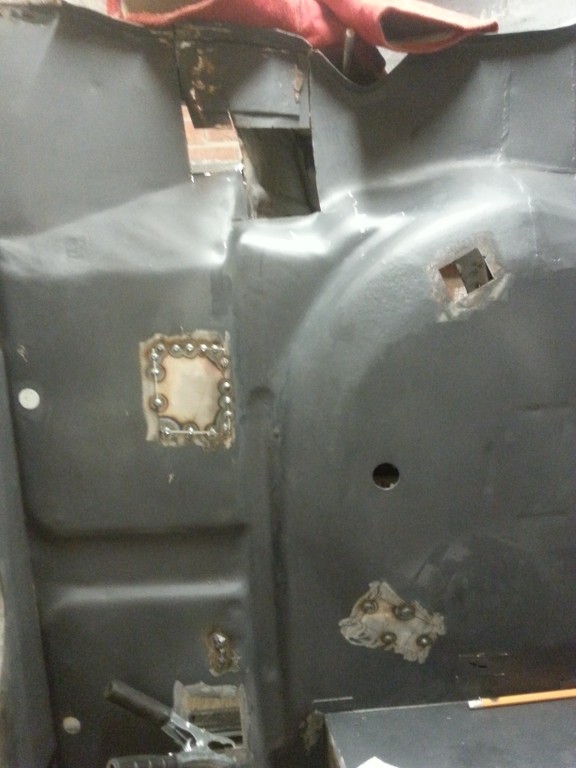
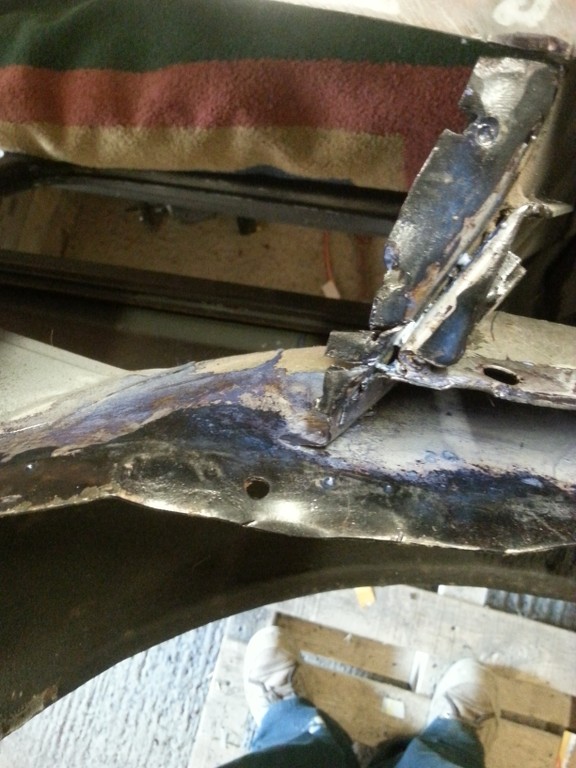
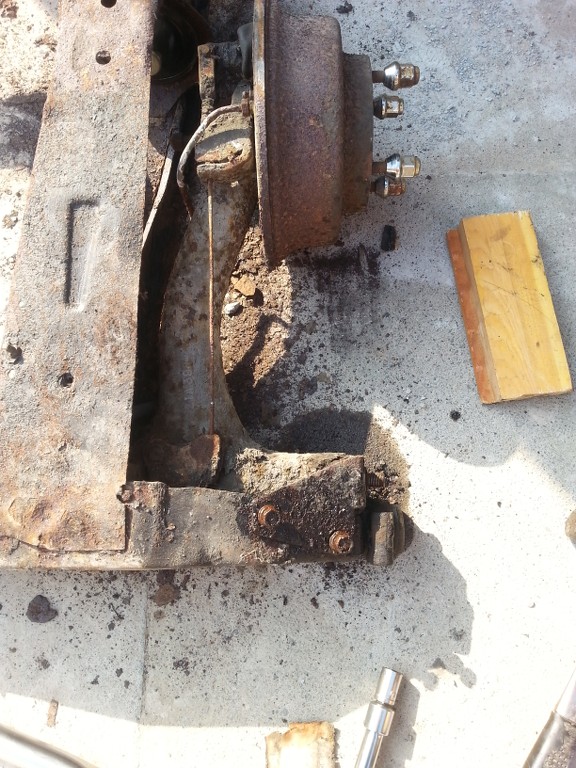
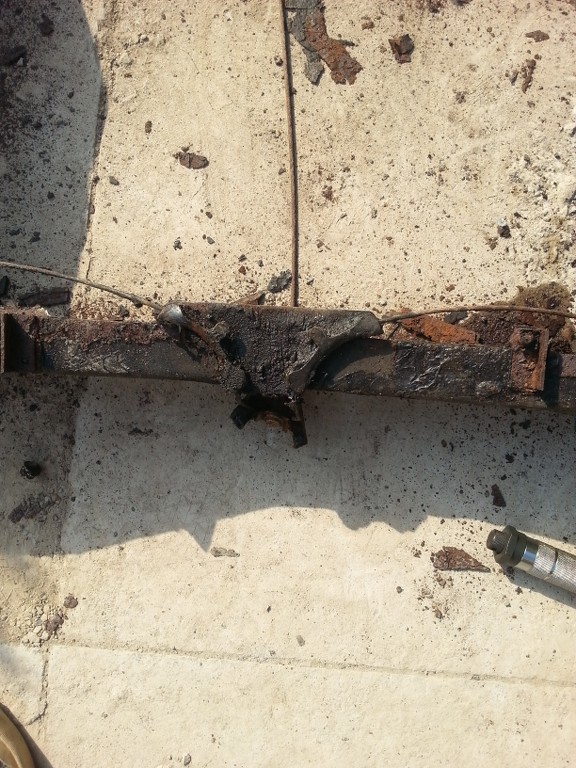
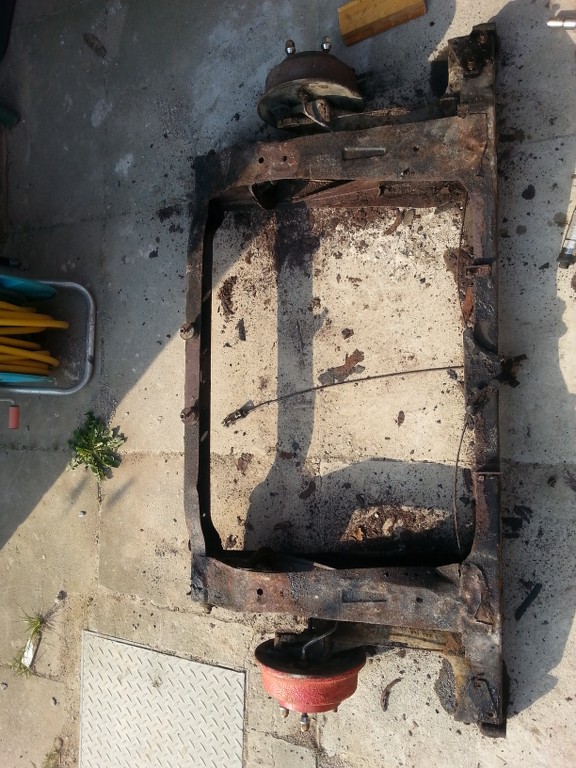
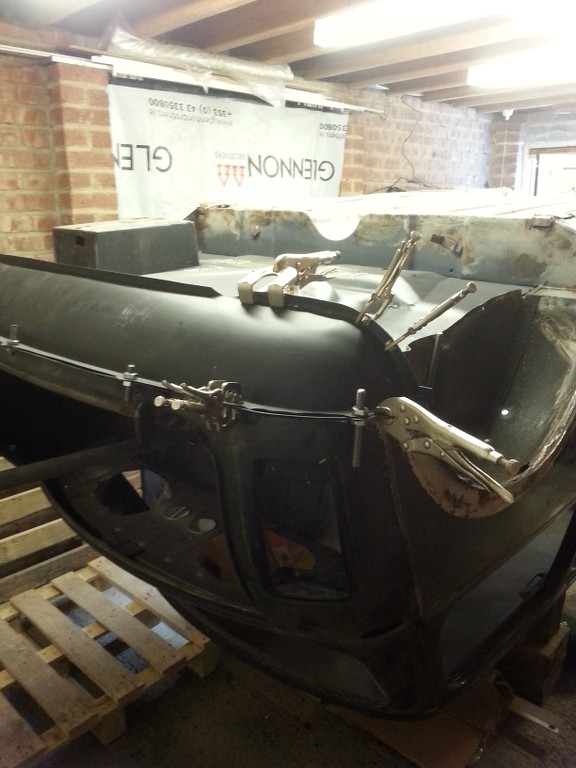
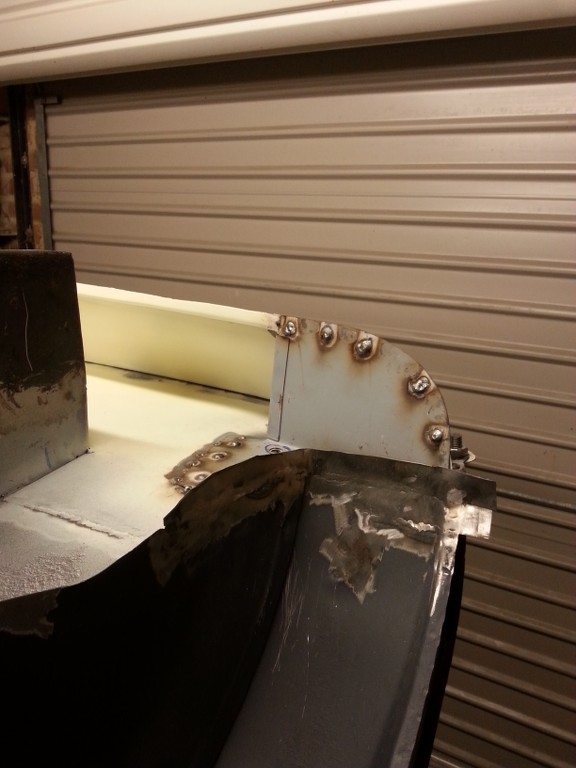
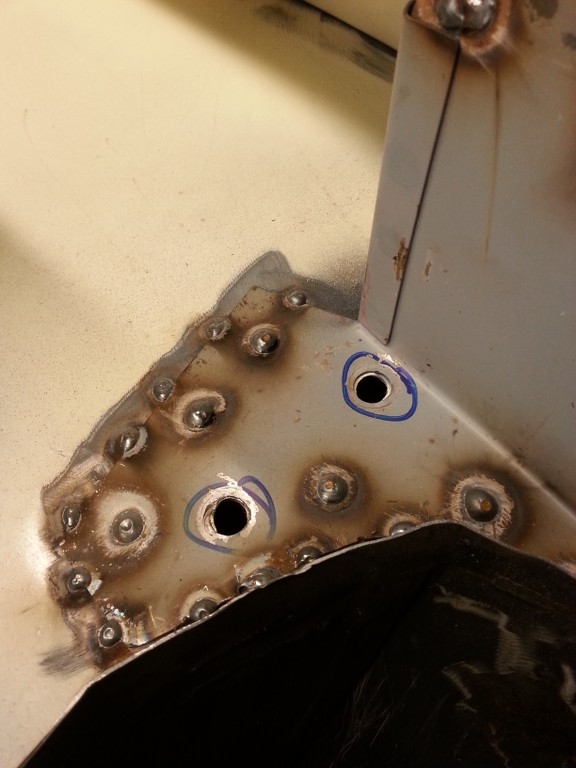
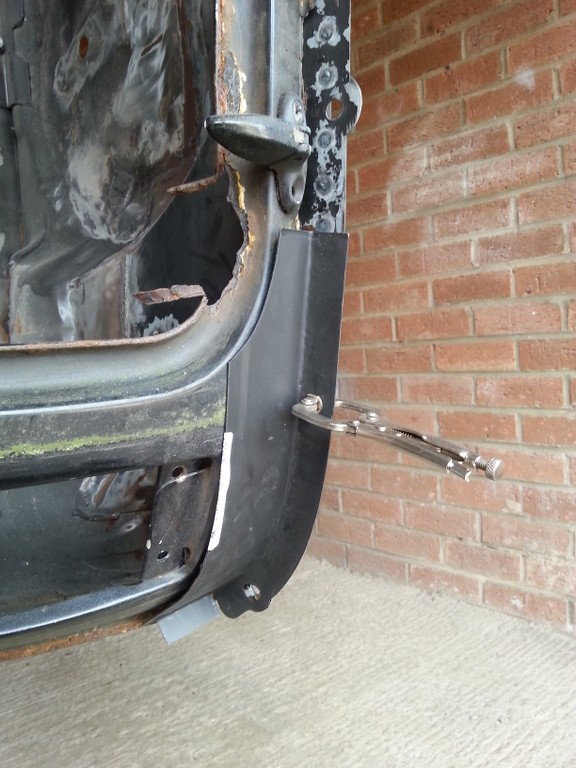
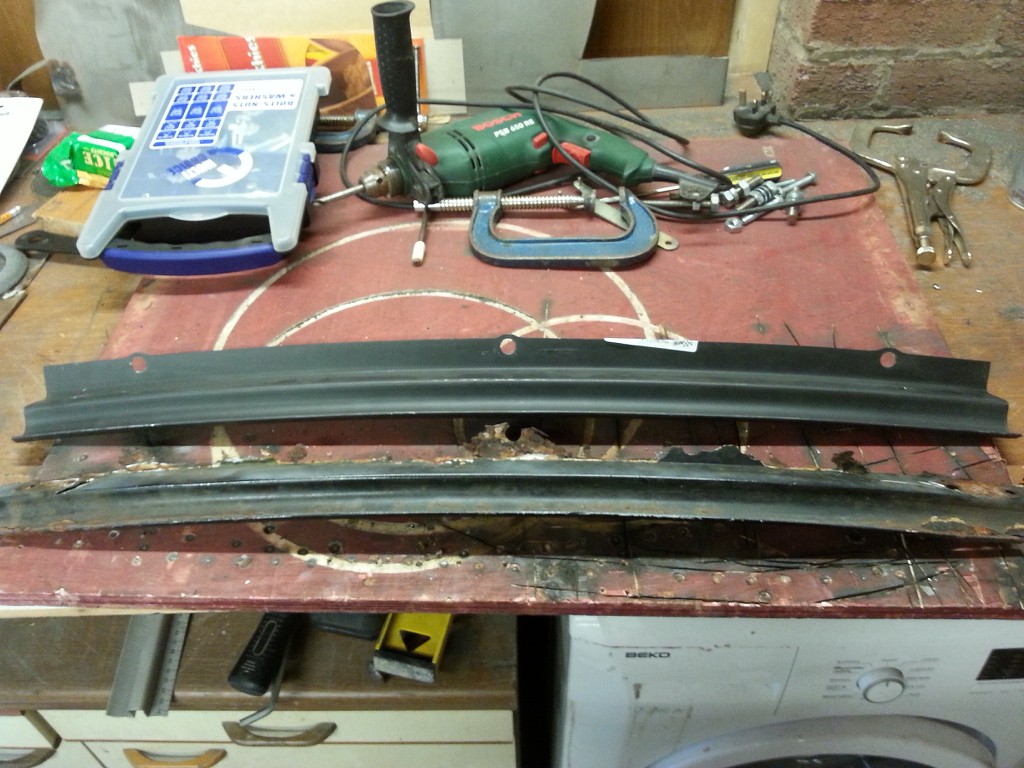
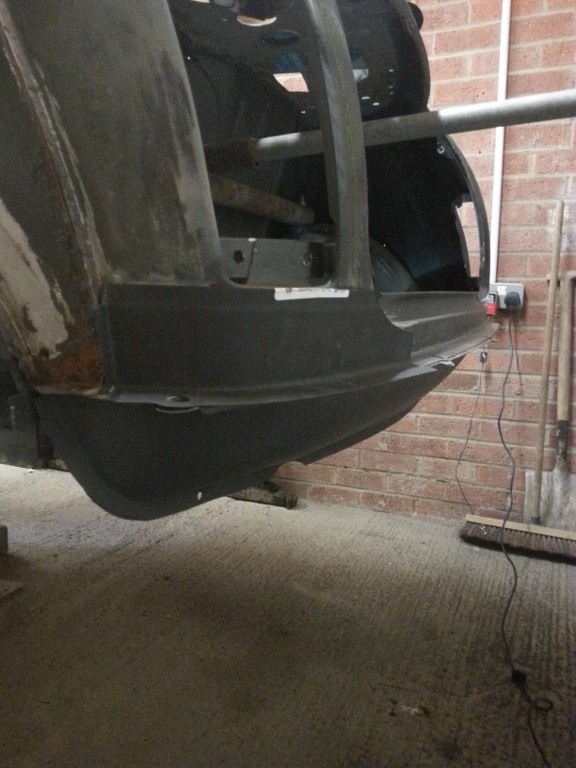
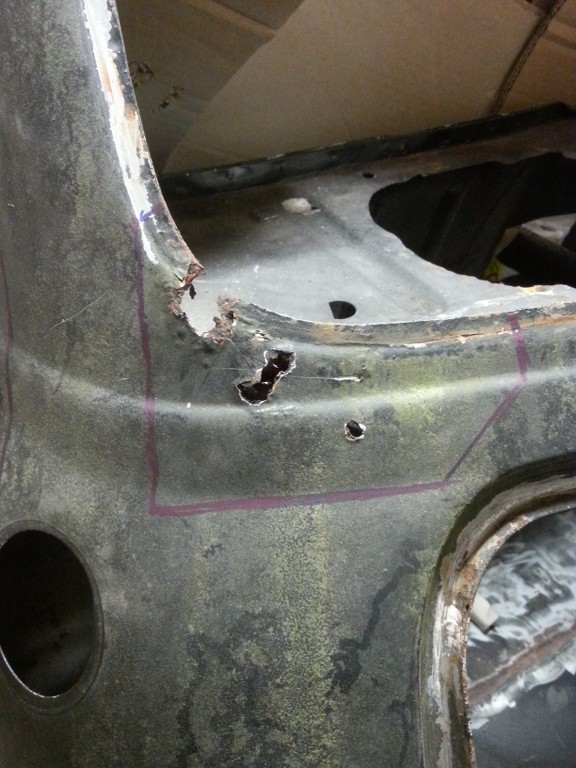
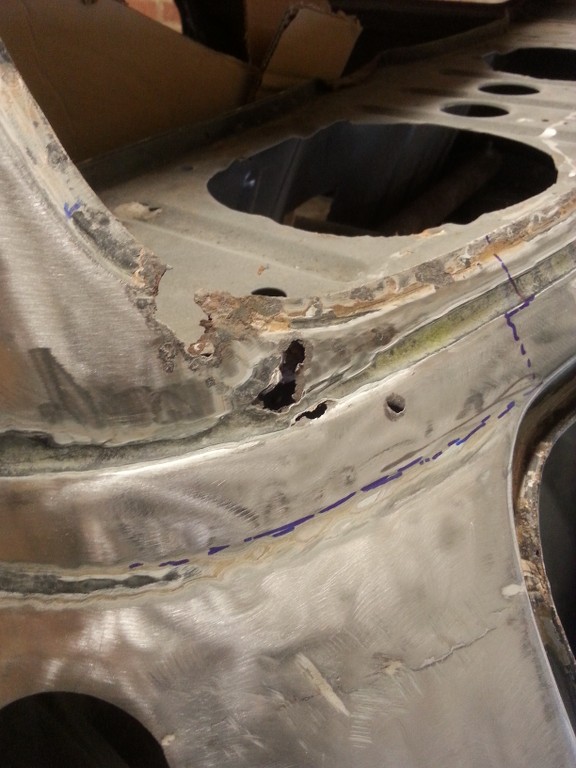
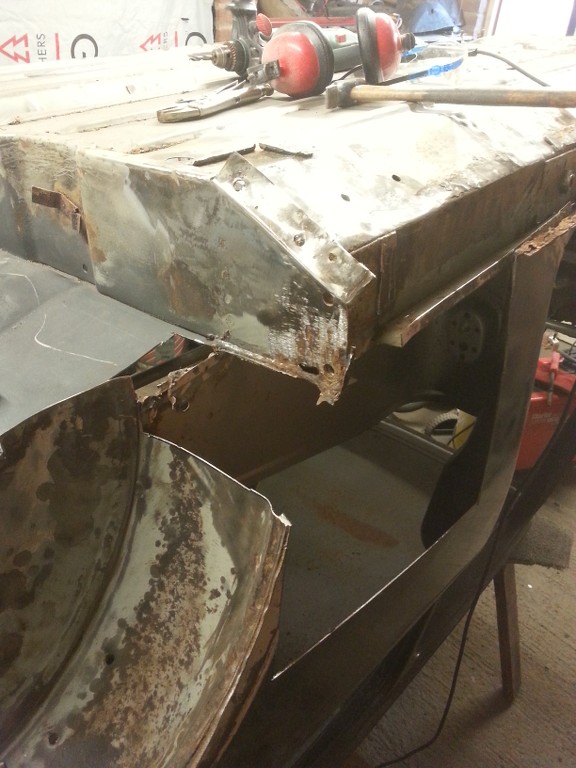
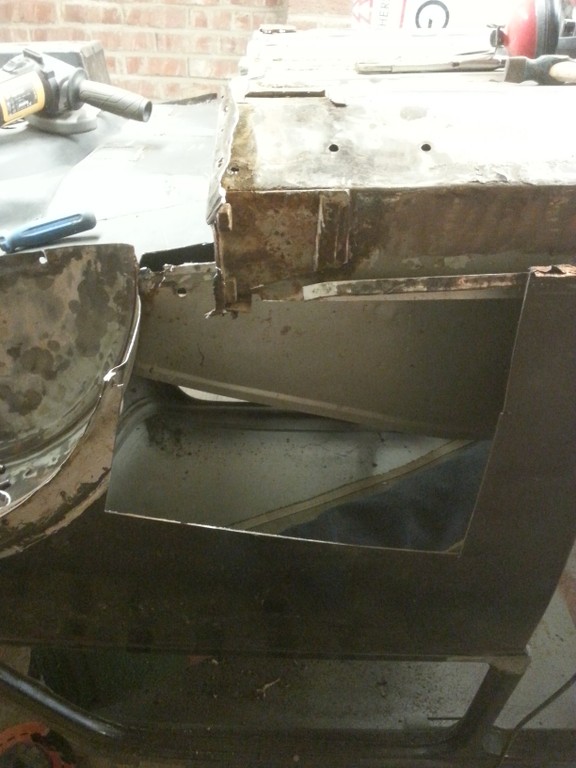
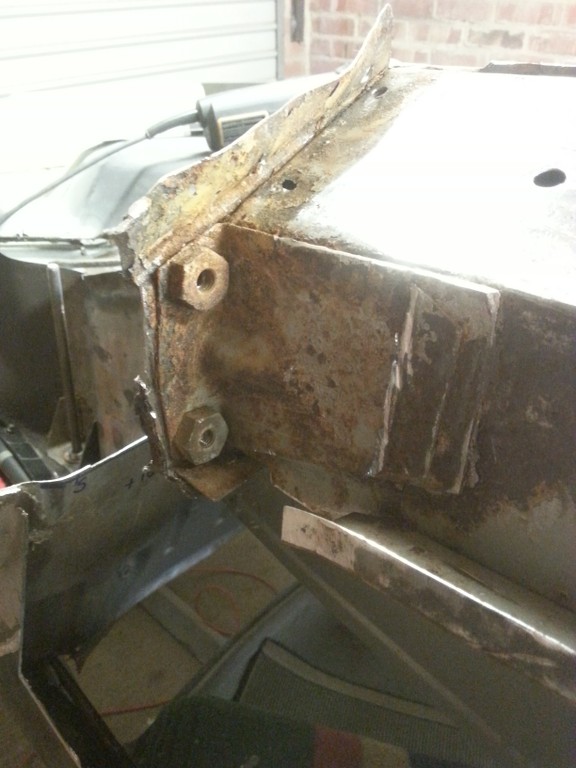
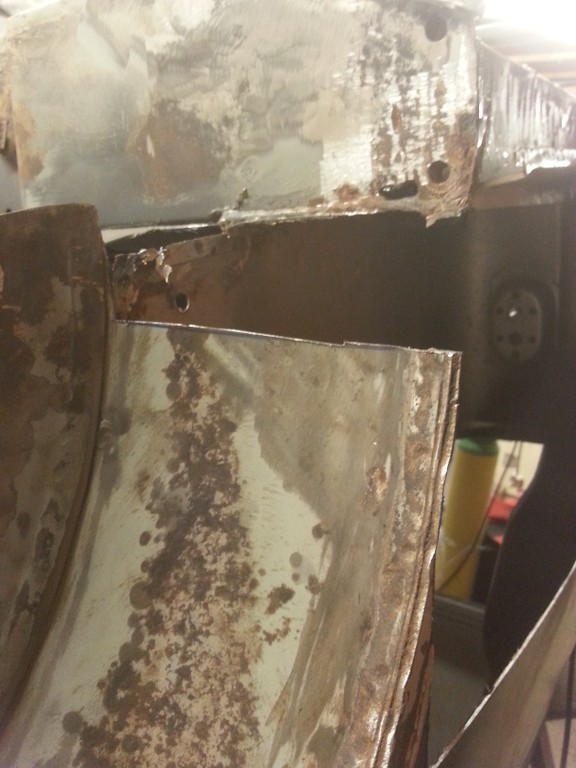
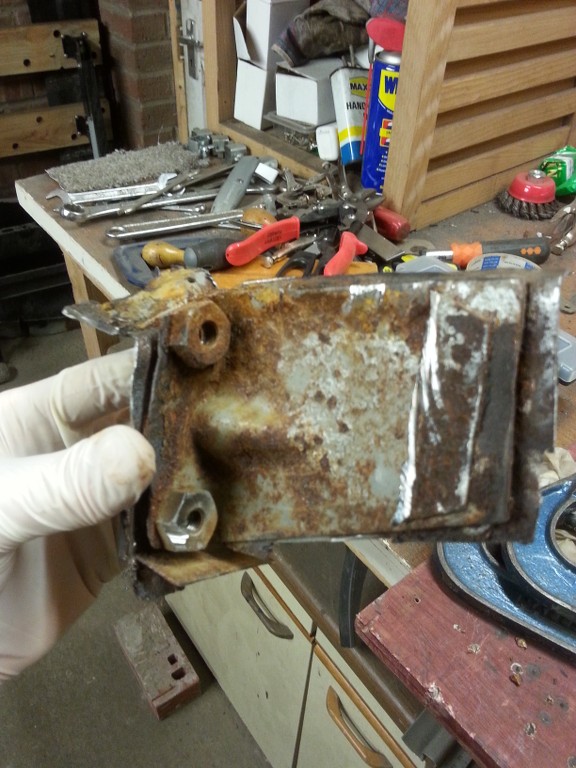
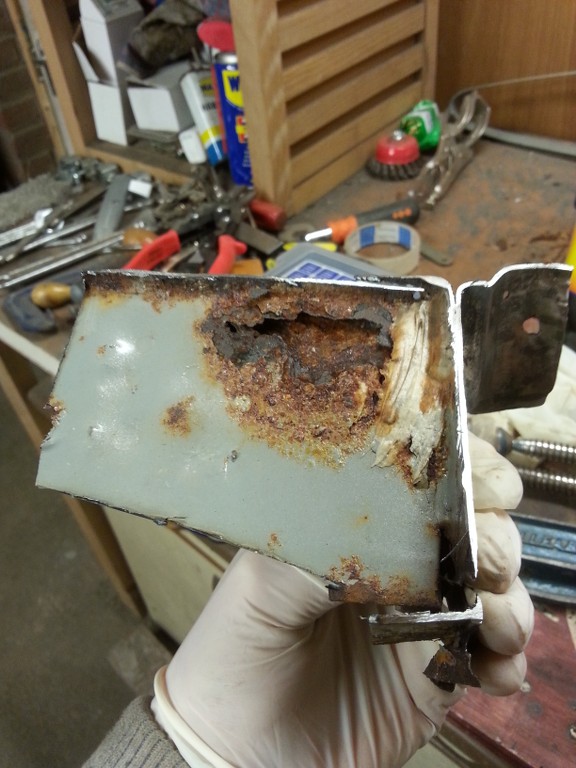
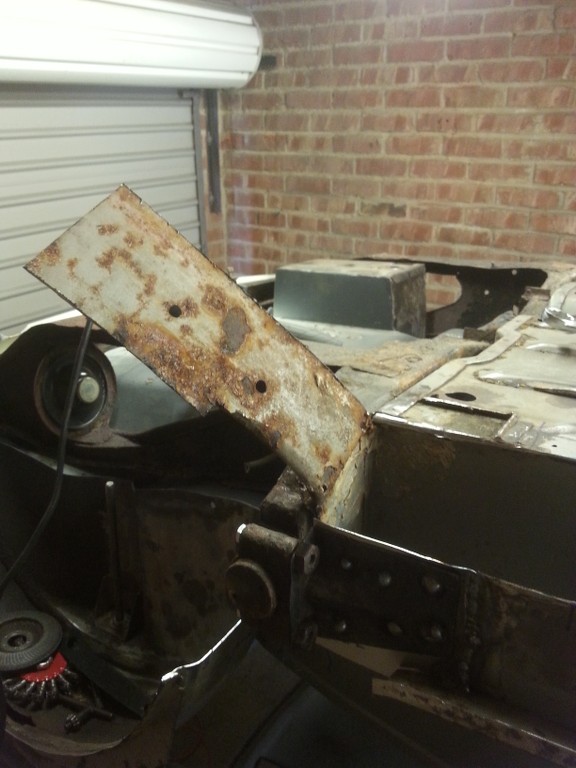
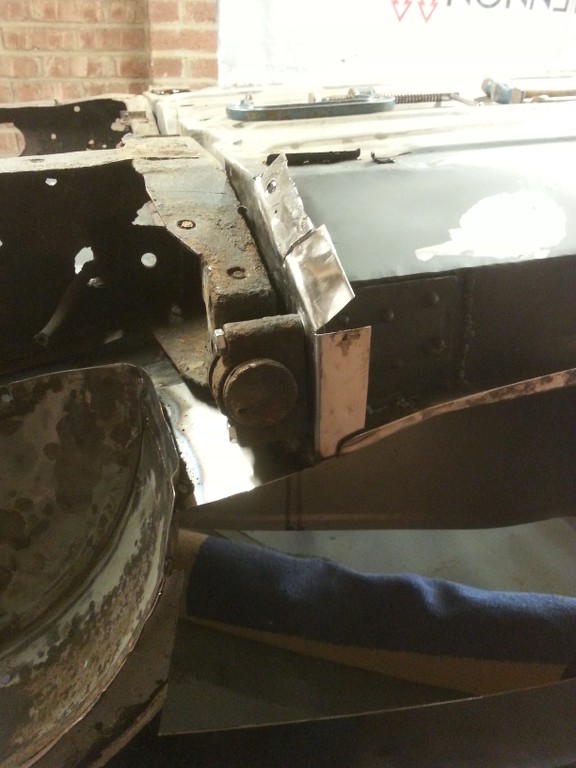
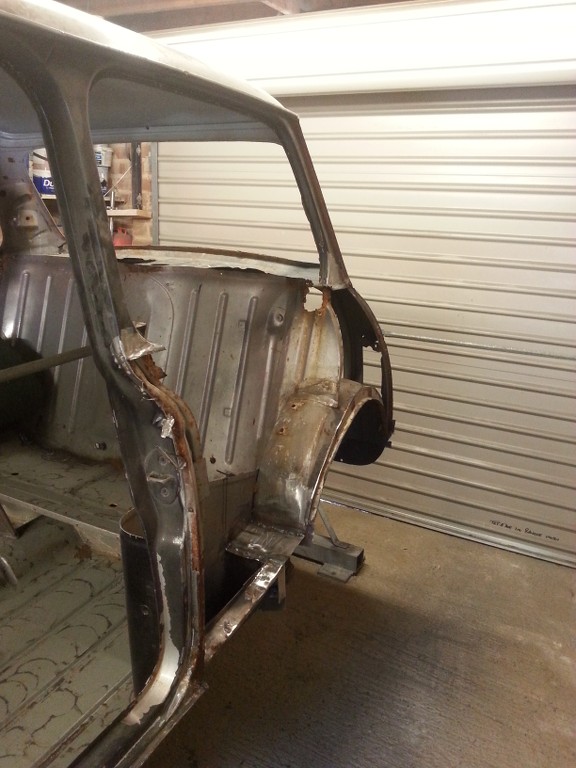
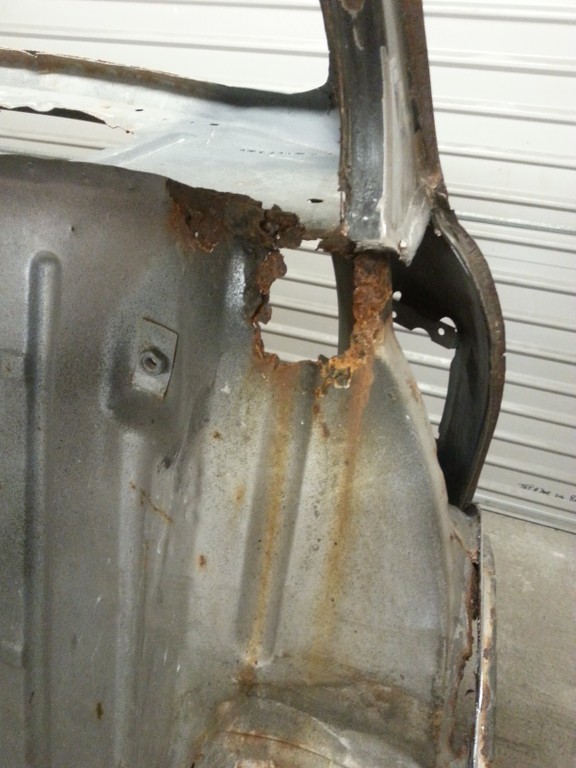
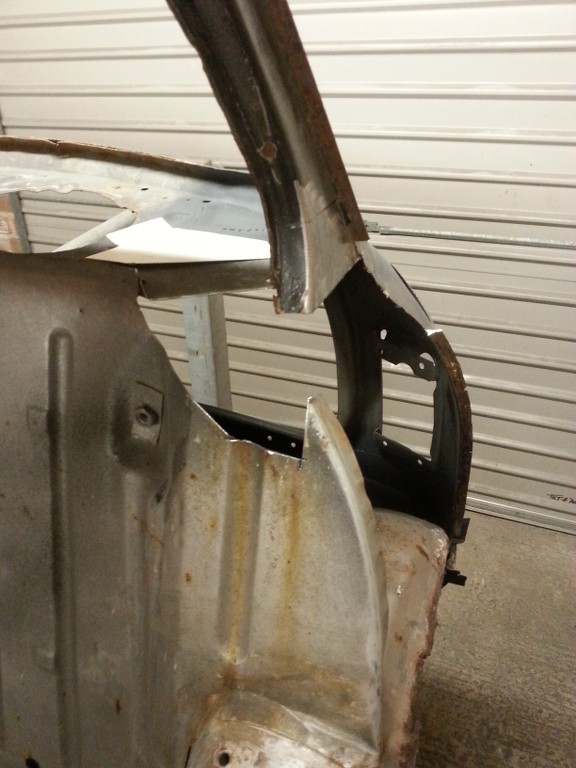
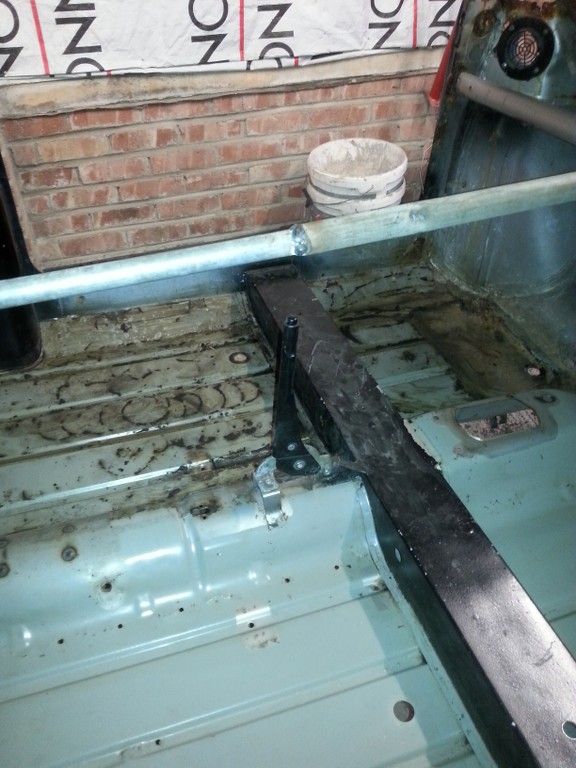
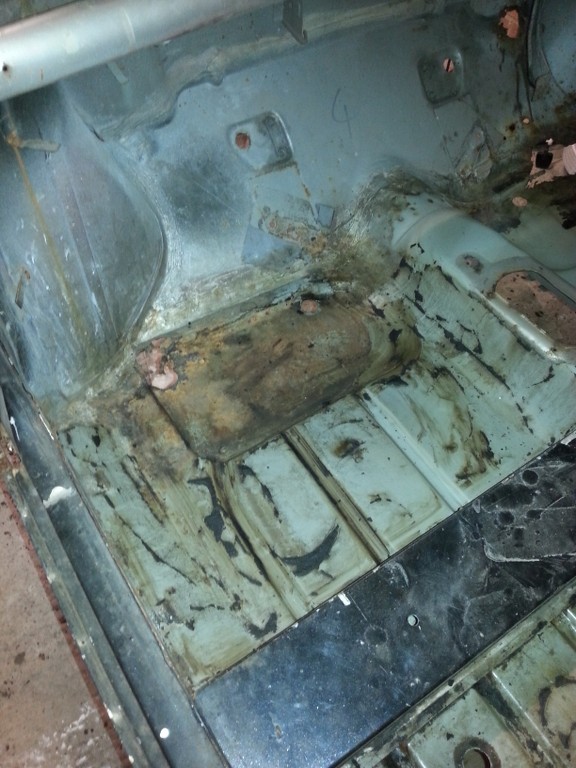
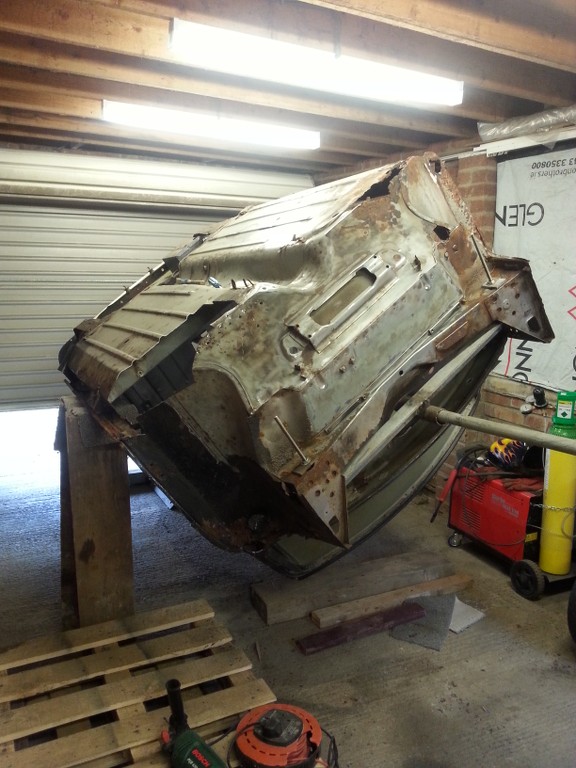
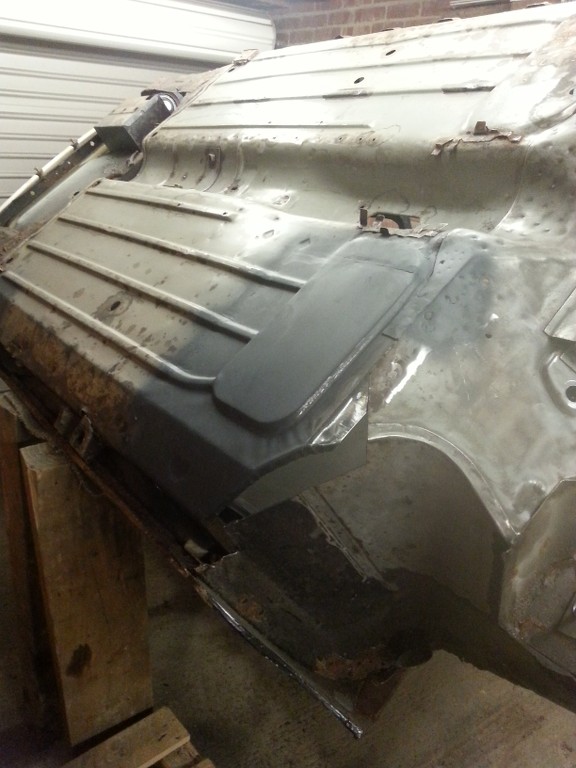
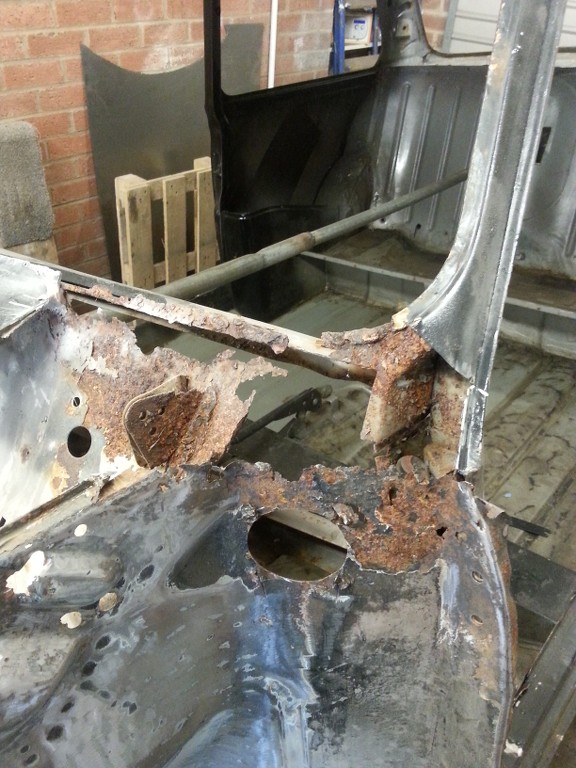
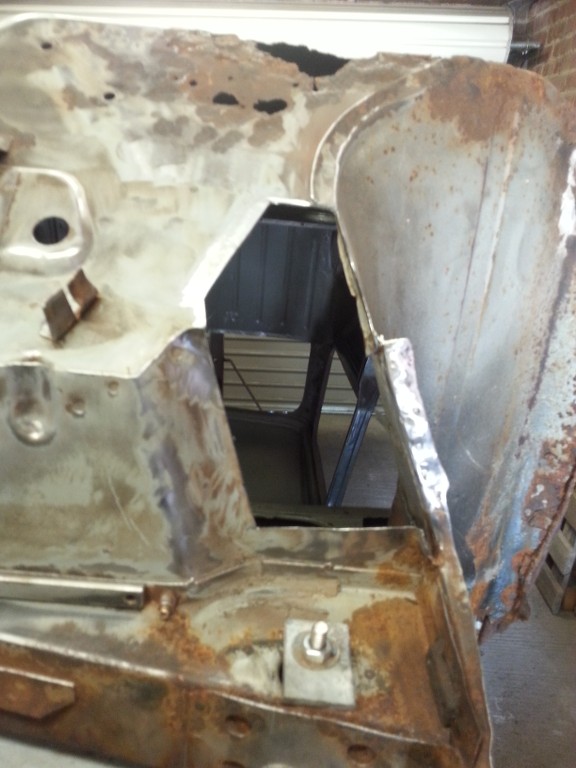
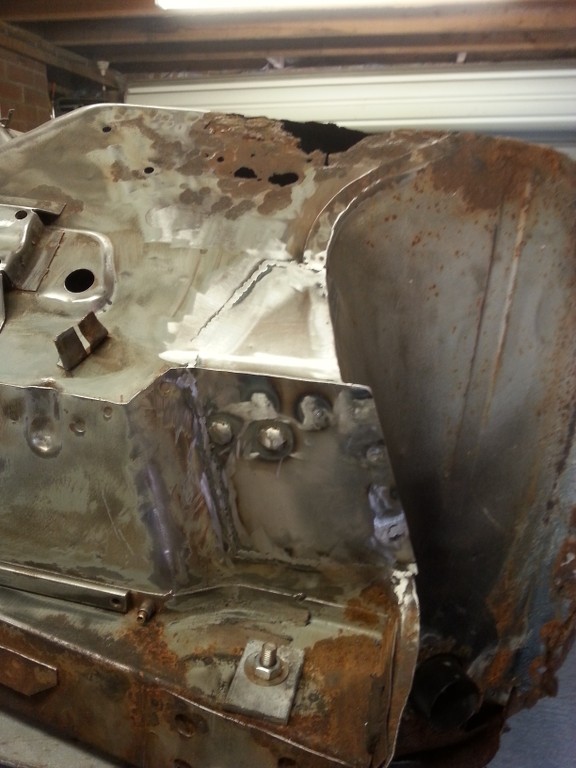
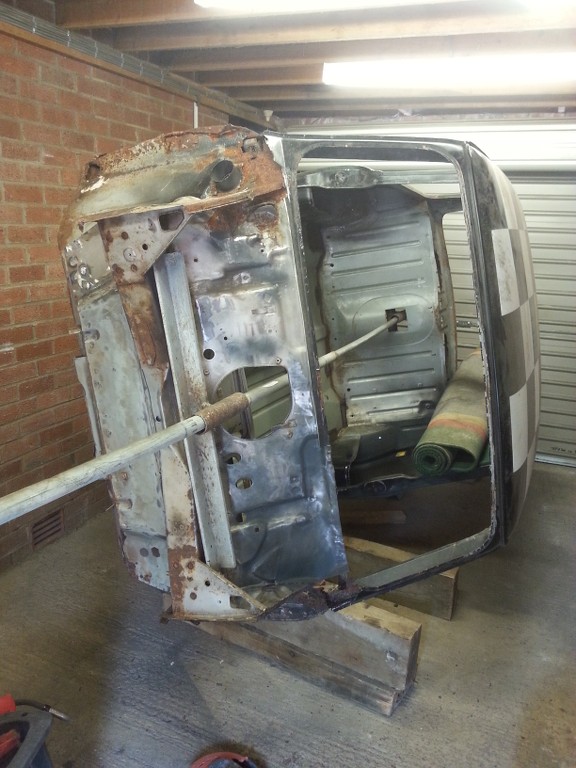
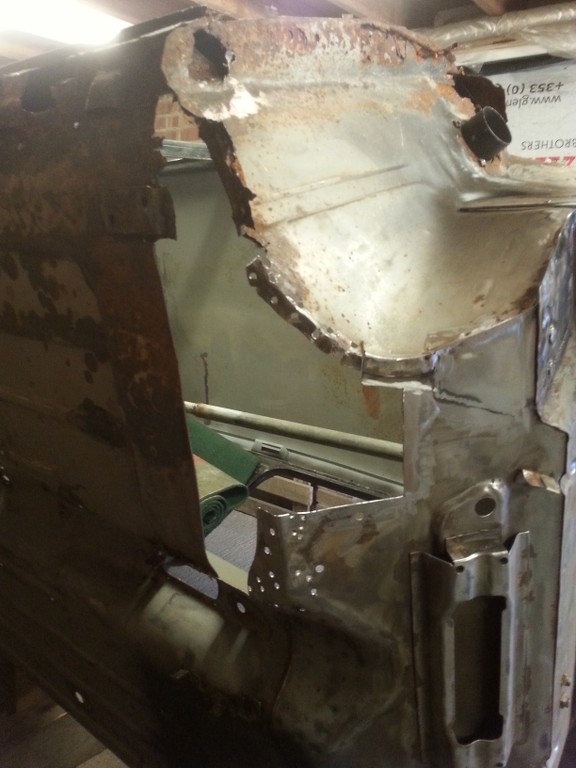
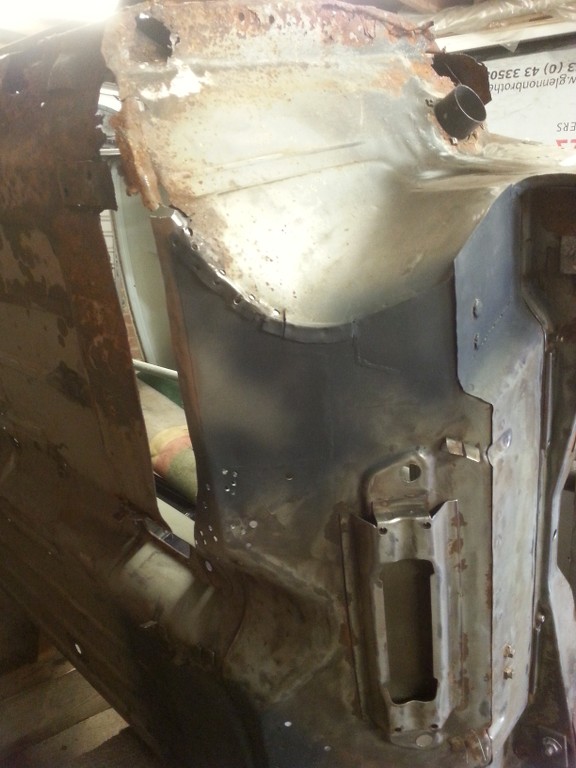
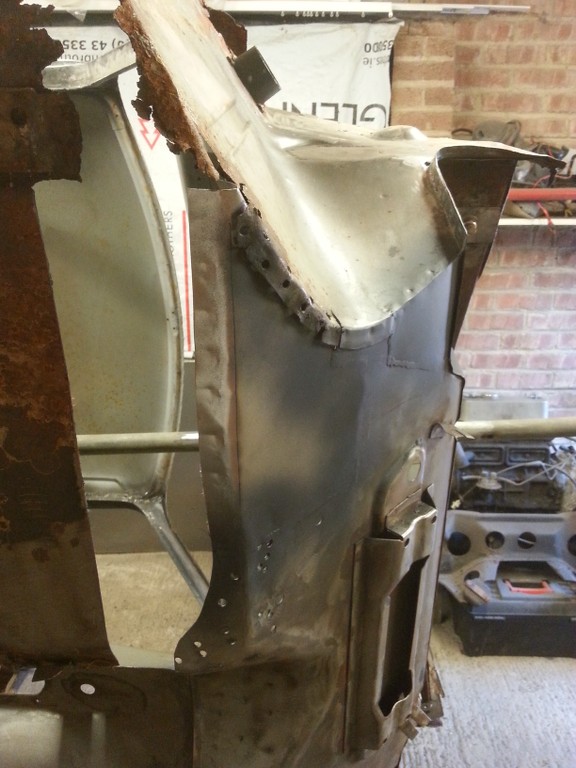
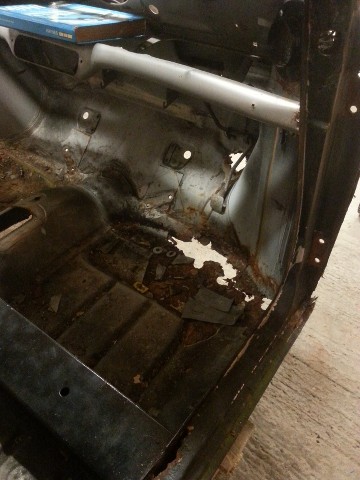
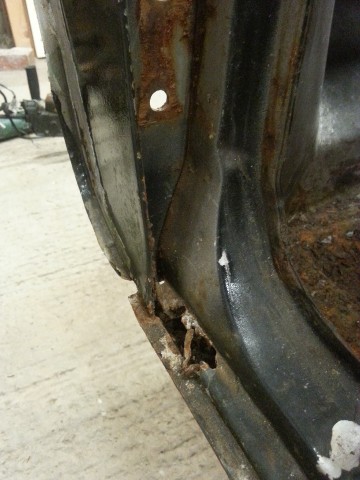
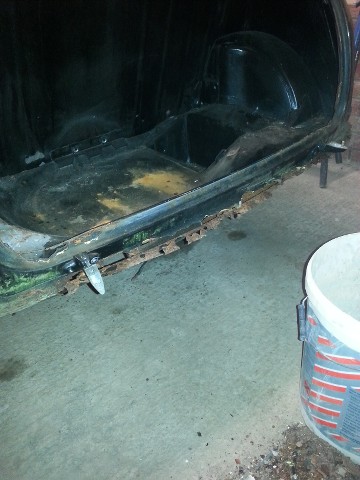
The first stage is to strip the mini down to bare shell........

2yqv.jpg

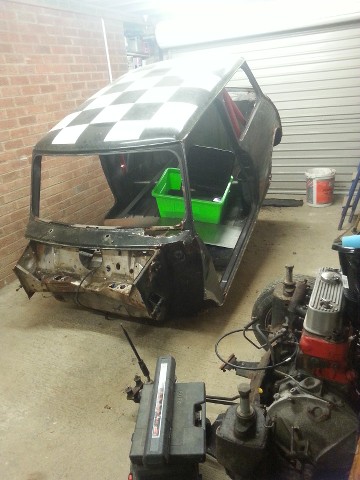
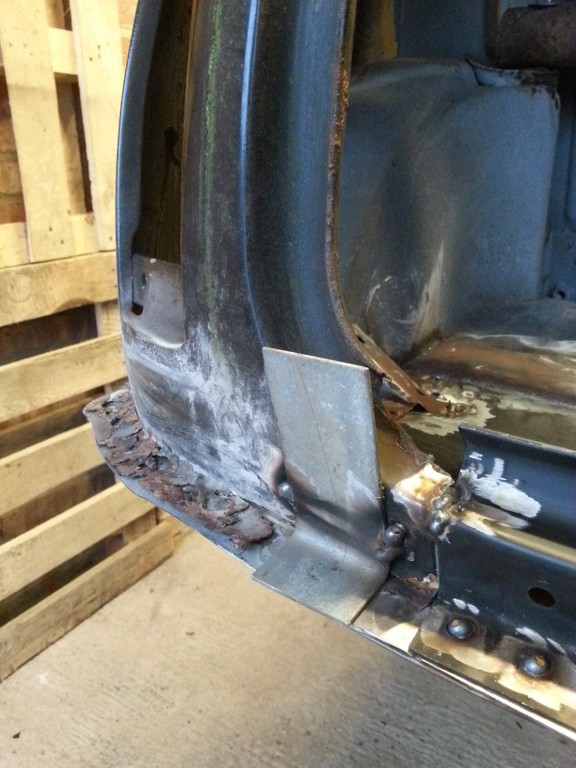
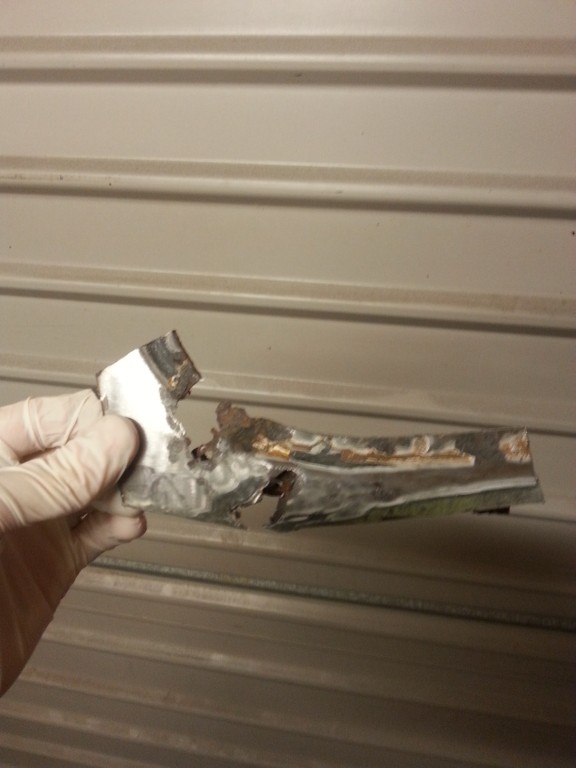
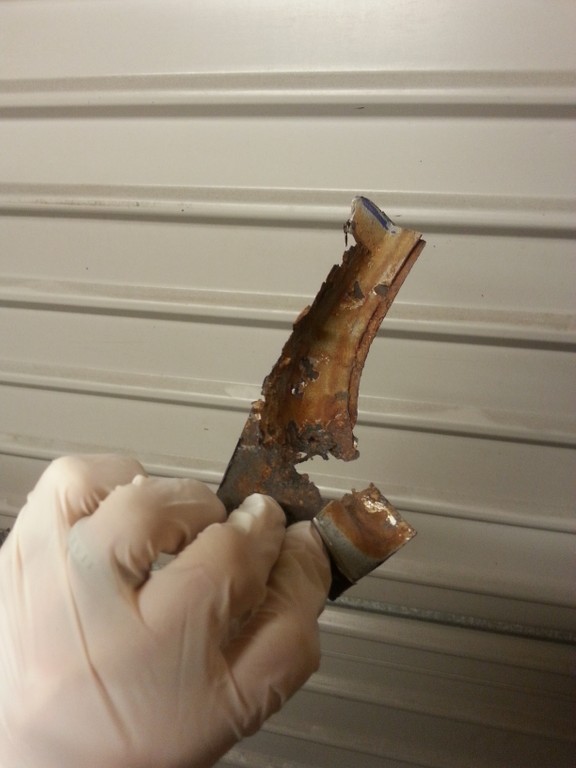
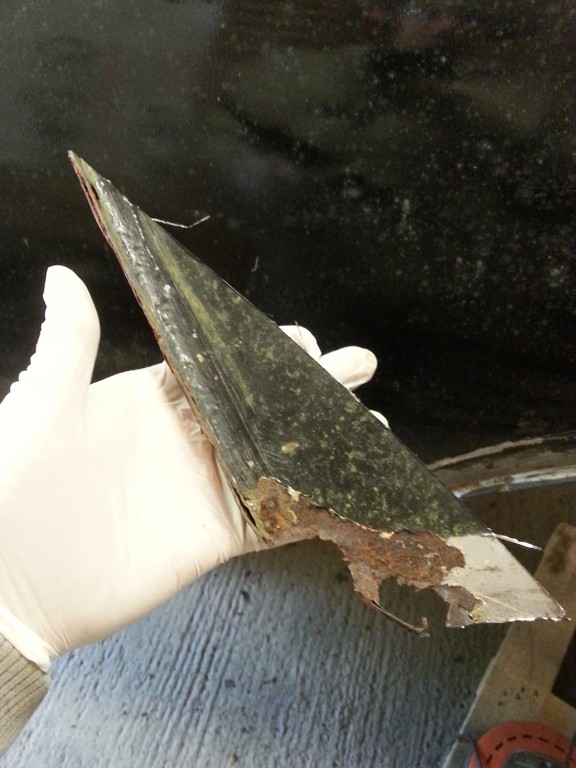
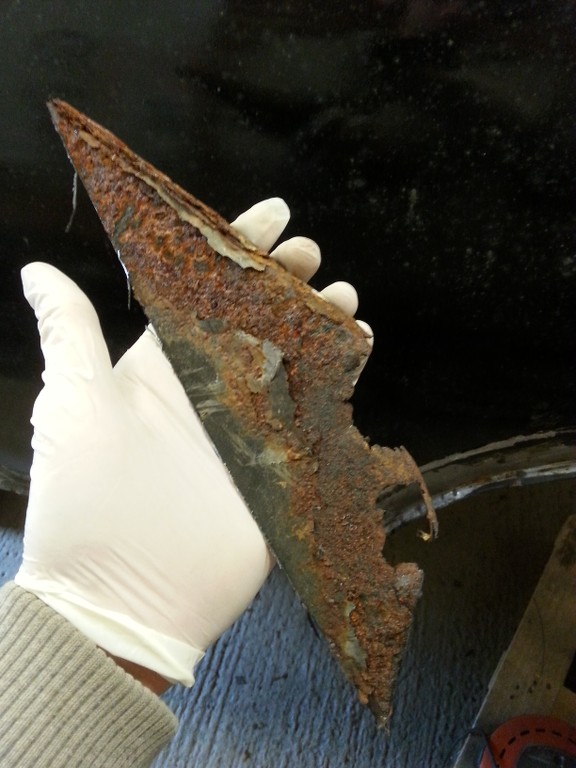
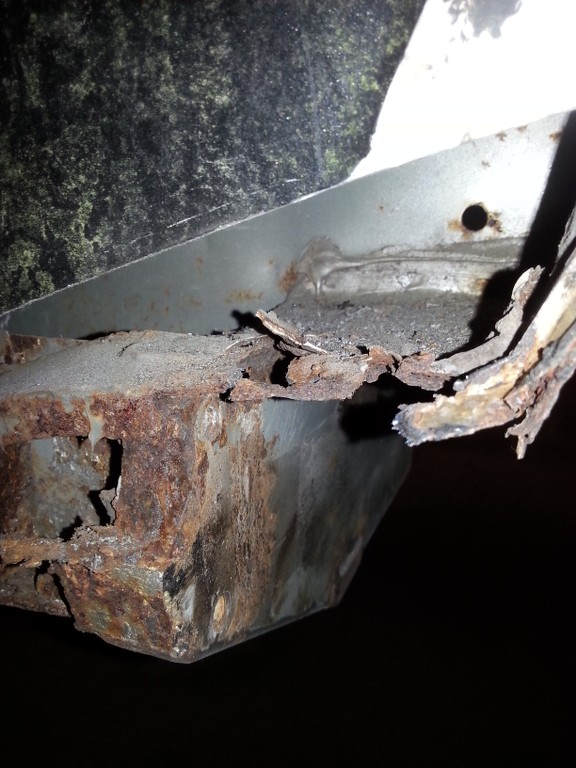
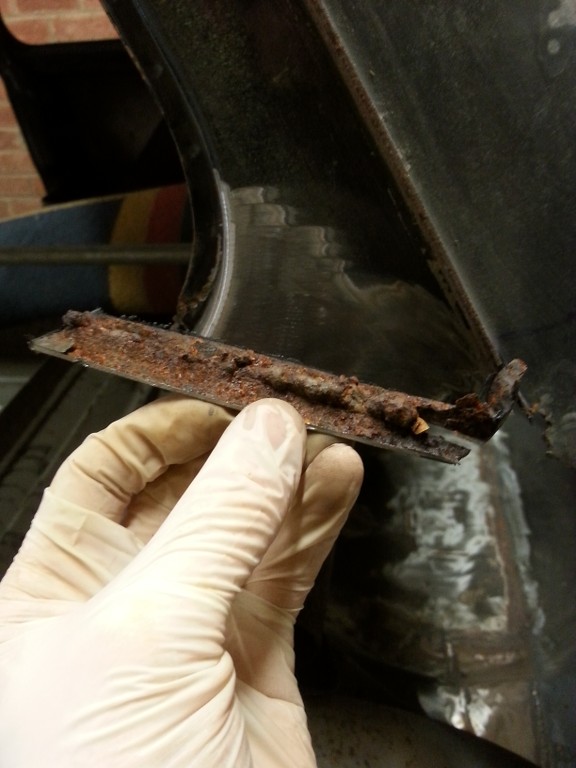
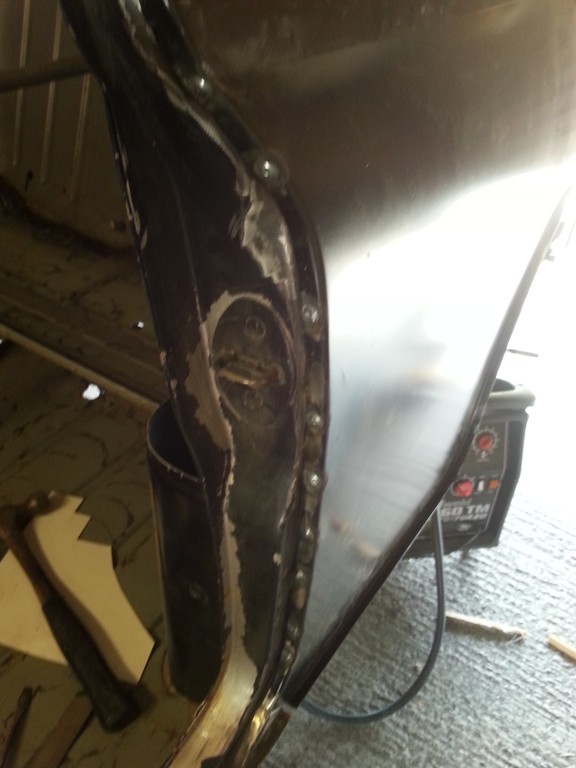
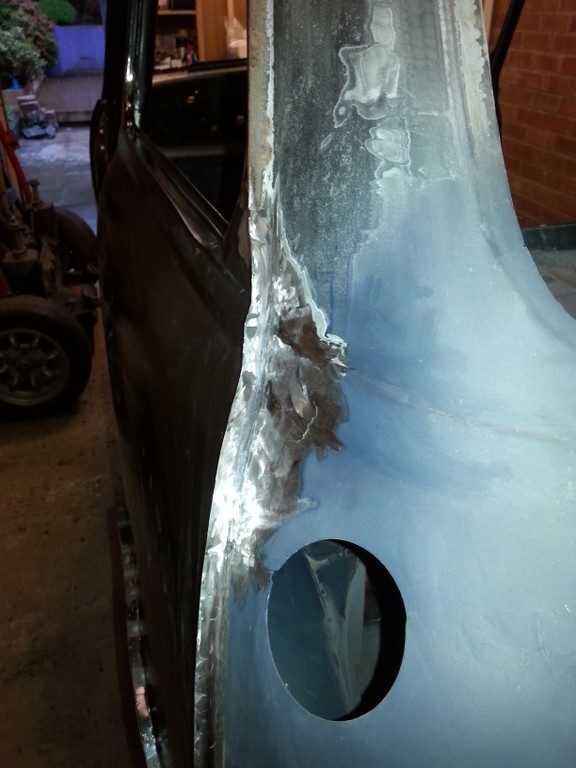
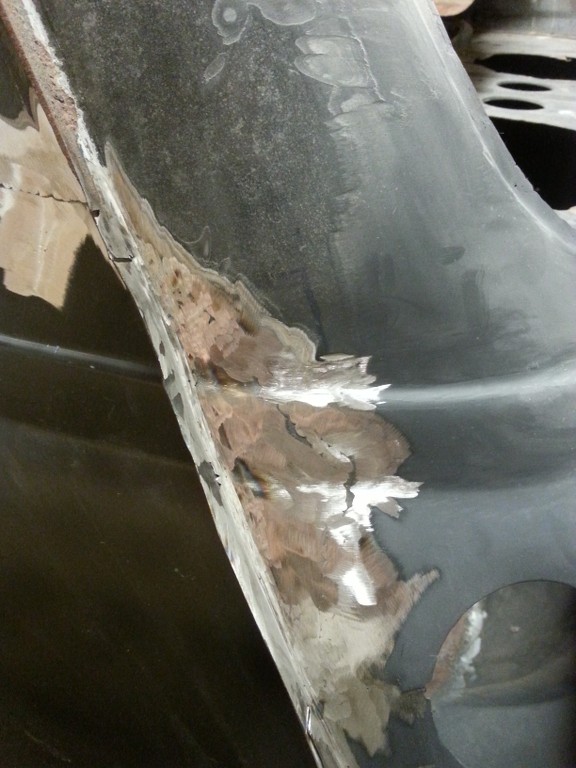
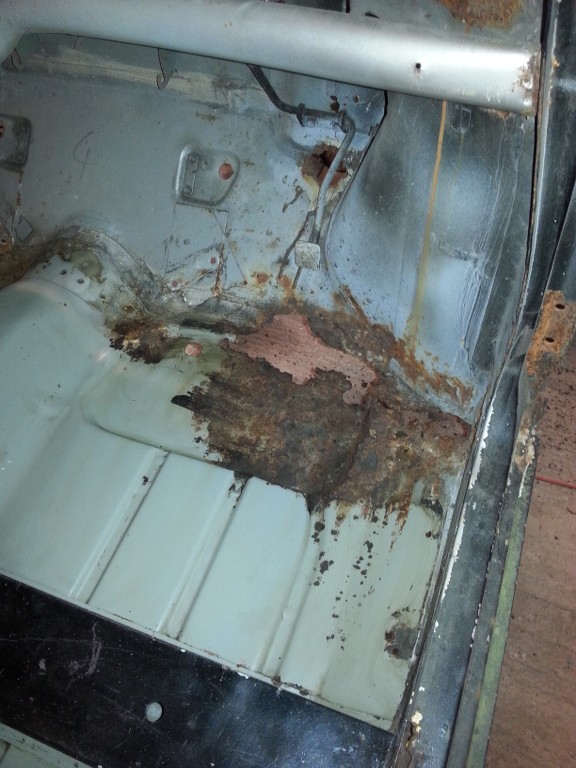
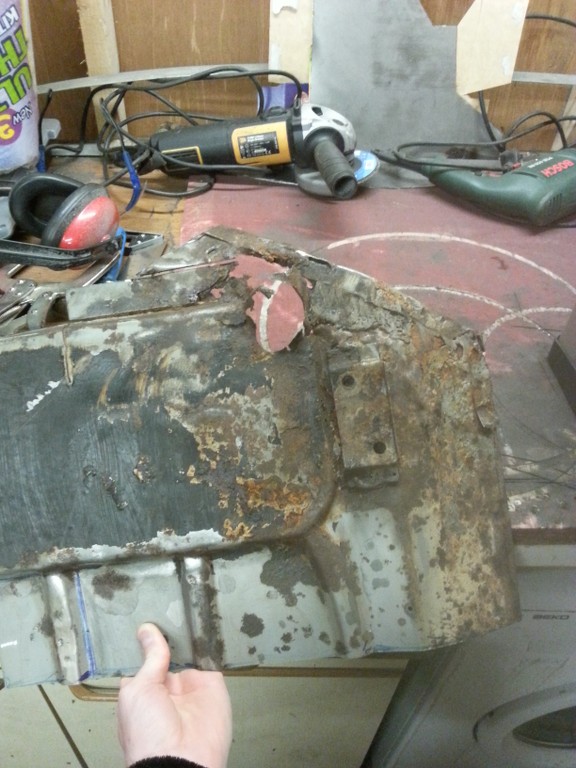
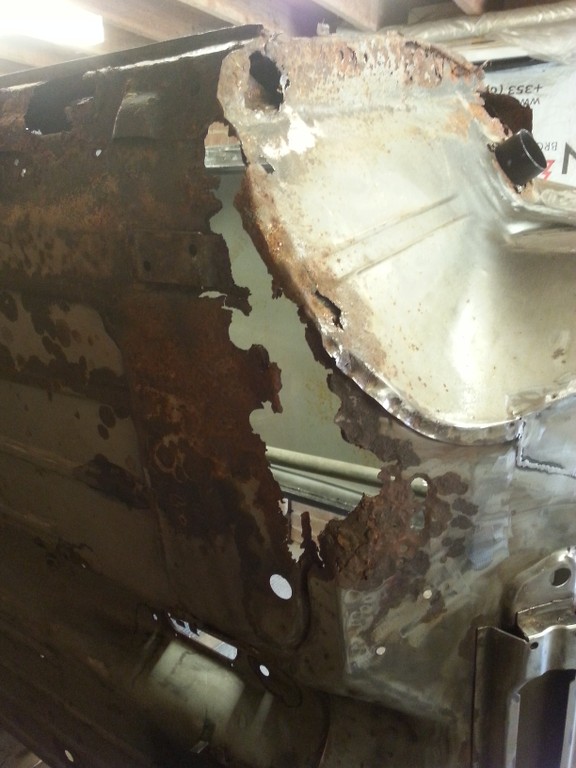
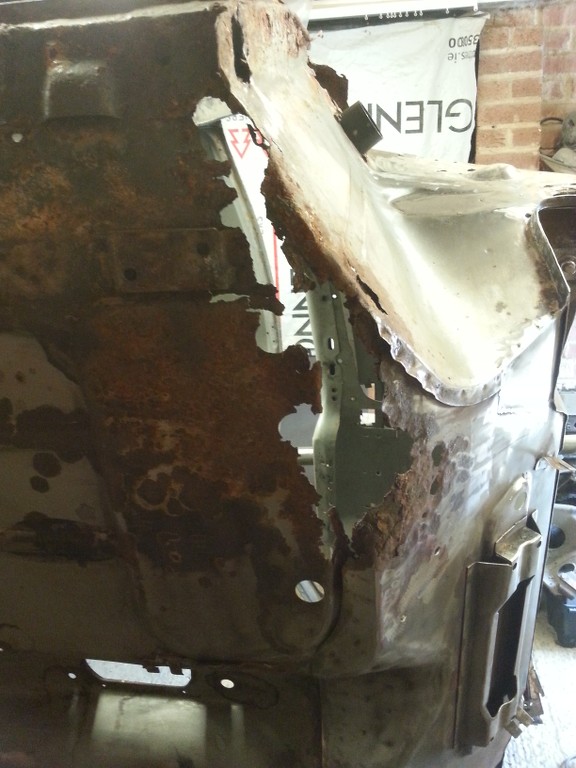
and then get poking with the trusty rust finding device  (RFD) aka the screwdriver

gc3i.jpg

cq7e.jpg

g90e.jpg

xduh.jpg

gbny.jpg

7ly7.jpg

xxtm.jpg

94f5.jpg

zfw9.jpg

fyb6.jpg

83en.jpg

xnfd.jpg

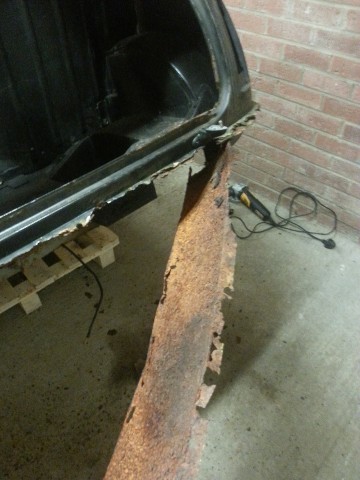
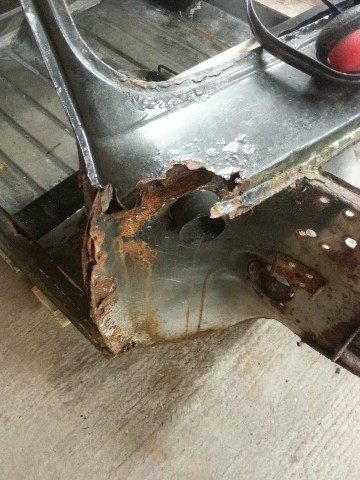
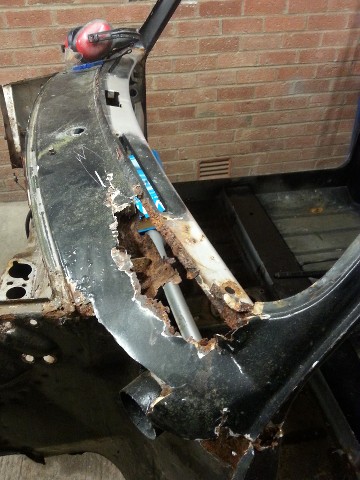
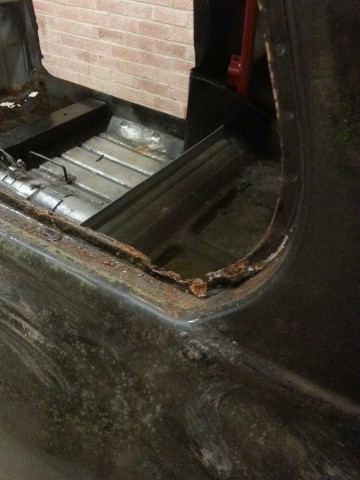
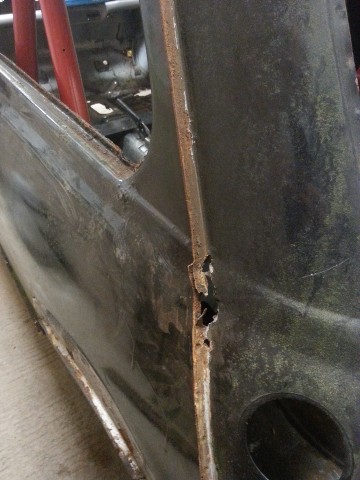
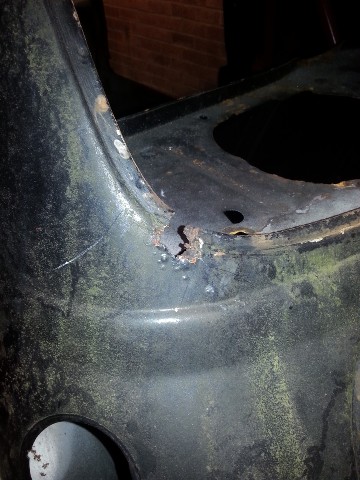
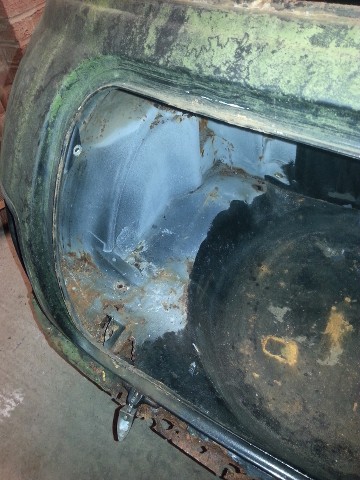
so........ after finding all this rust what does any sane man do but buy a welder, a tank of argon, some 1mm cutting discs and a cheeky flap disc of course....

One small problem, I don't no how to weld  :lol:

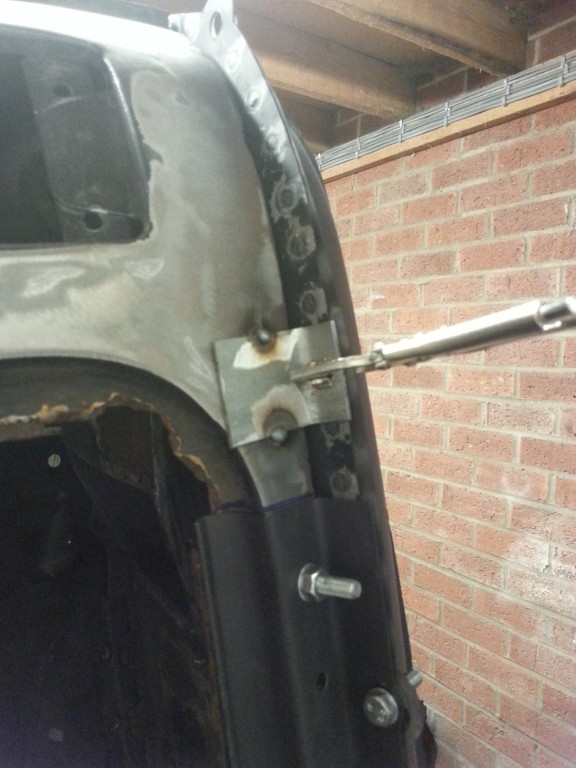
Stage two.... Welding

Lets see now, electric plus argon apparently equates to welds... good stuff. Lets see if I can make things stick together.

mmn2.jpg

vvth.jpg

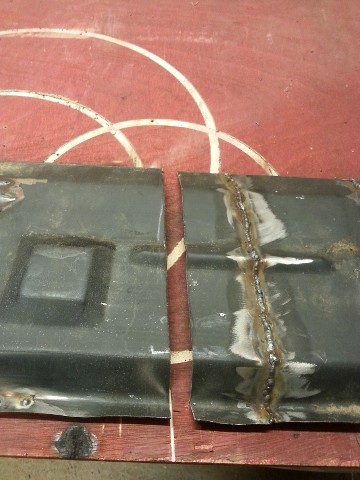
dodgy oversill purchased many years ago, cut in half and cleaned up ready for tack welds. Im experimenting with my butt welds.

4j7p.jpg

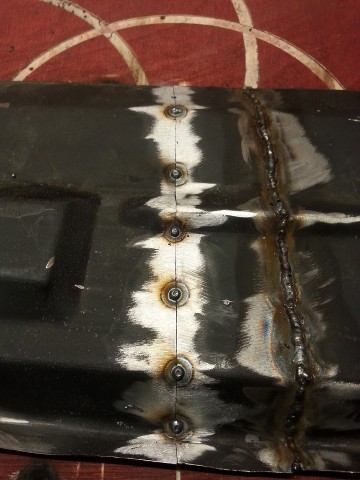
cheeky few tacks, not bad for only 1hr play time with this beast.

Time to read up on a few things........ http://www.mig-weldi...uk/tutorial.htm

Right sooo, the trick is to pulse the weld, lets try this......

fro5.jpg

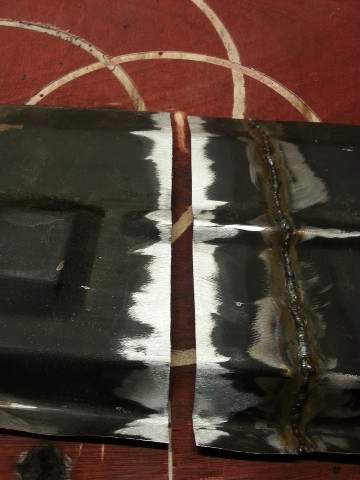
Not too bad for only round two, lets see the penetration

azvv.jpg

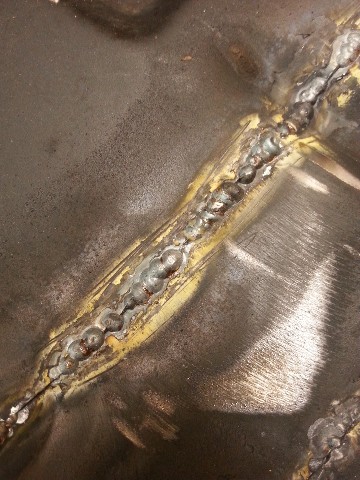
Getting there, must remember to hold it in position for a fraction longer.

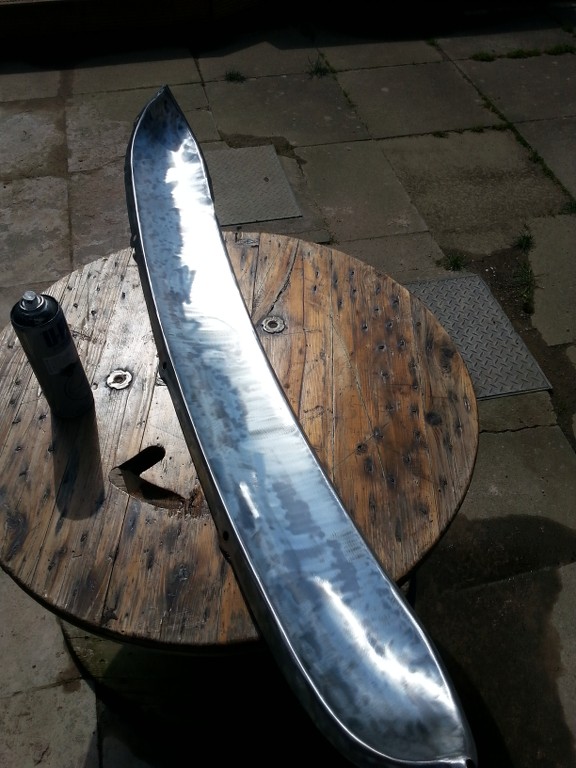
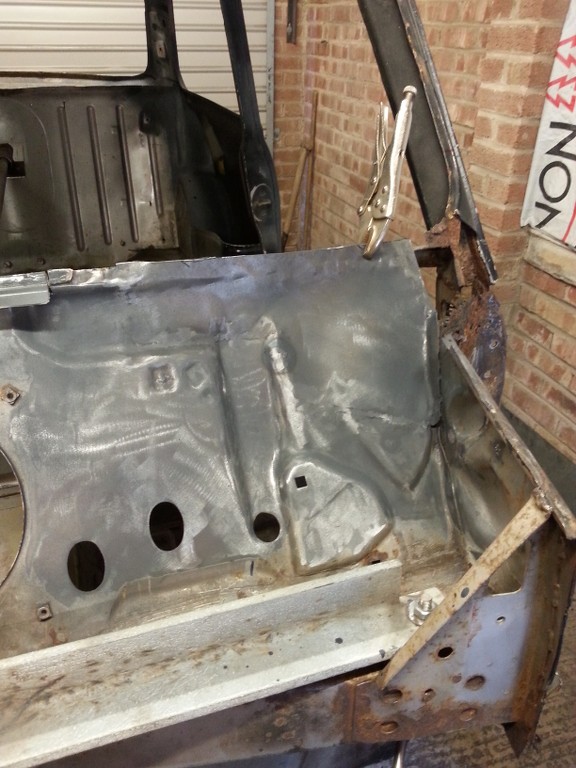
Time to grind this bad boy down and see what were left with.

ep9v.jpg

Im happy with that. Time to see if I can replicate this on the real thing.

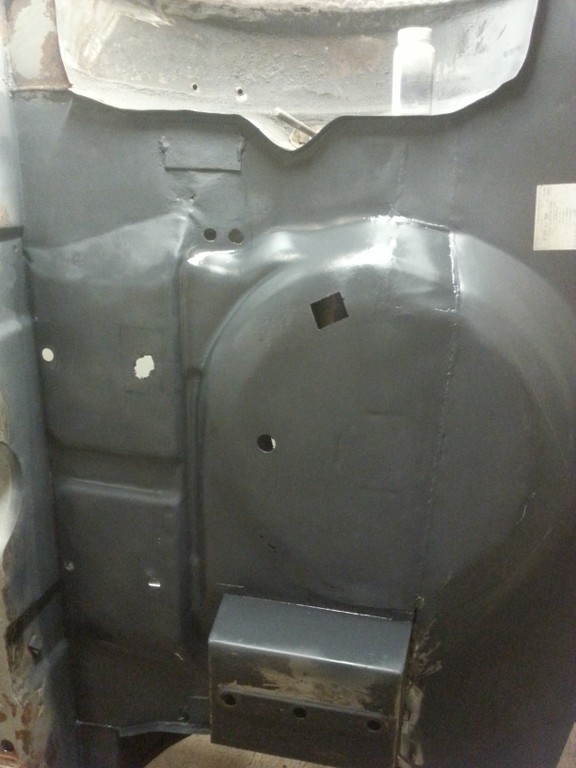
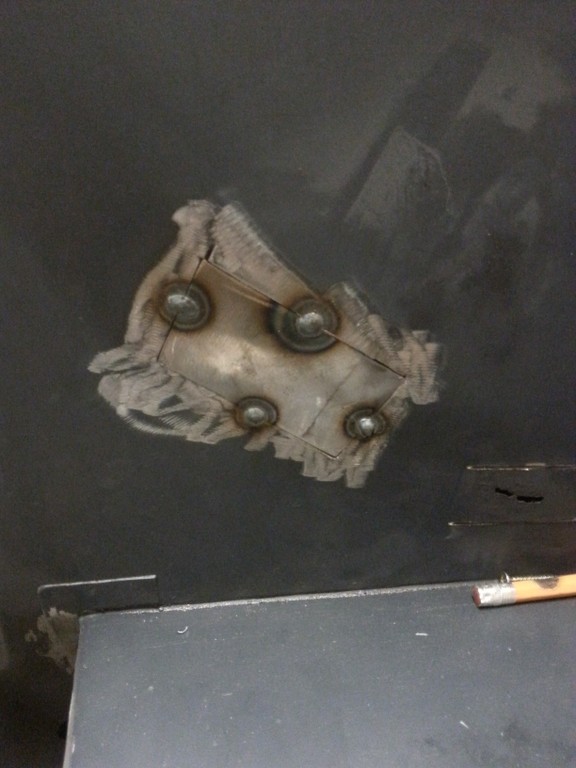
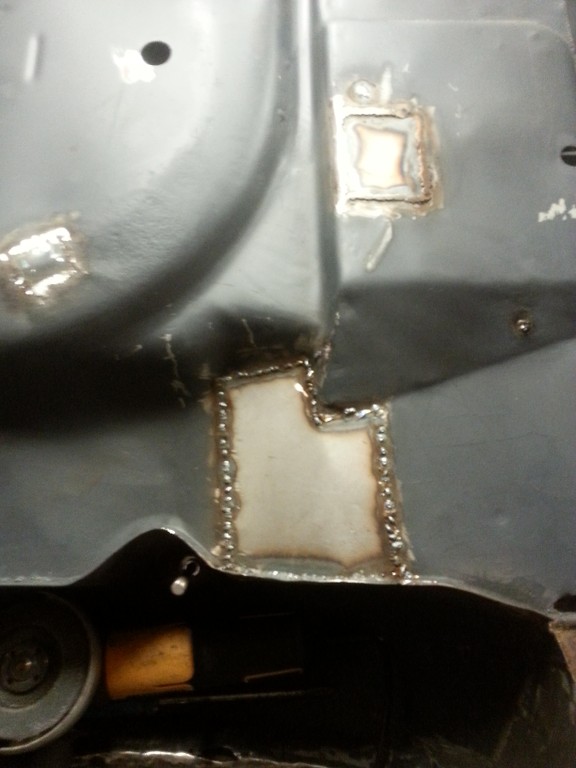
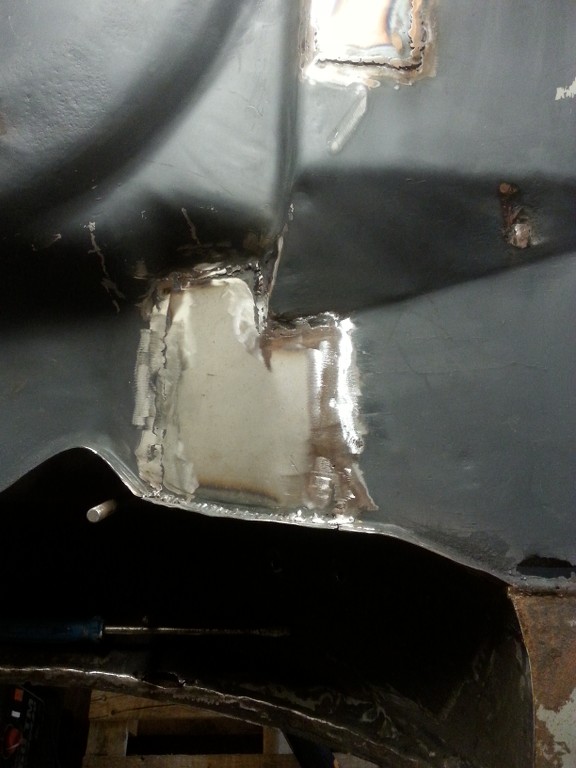
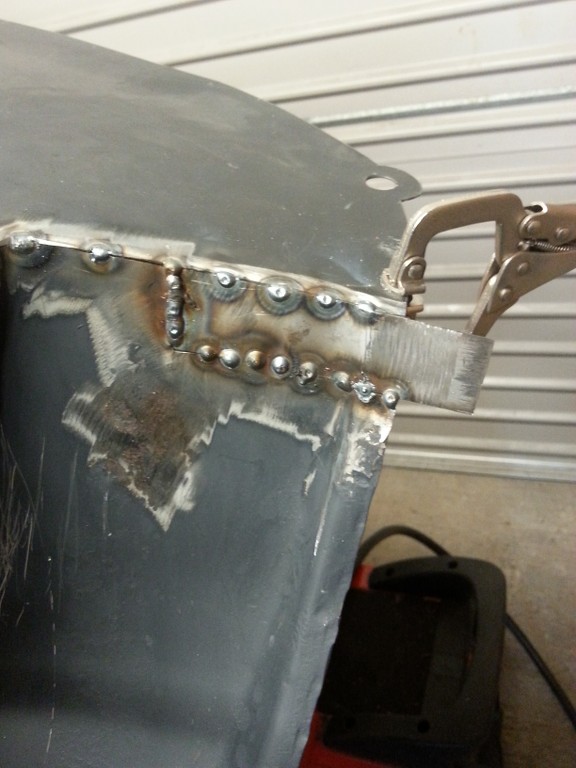
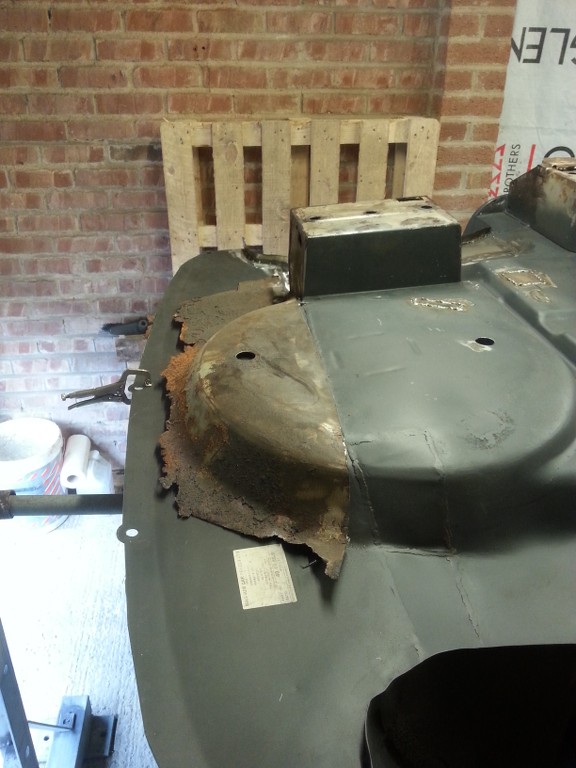
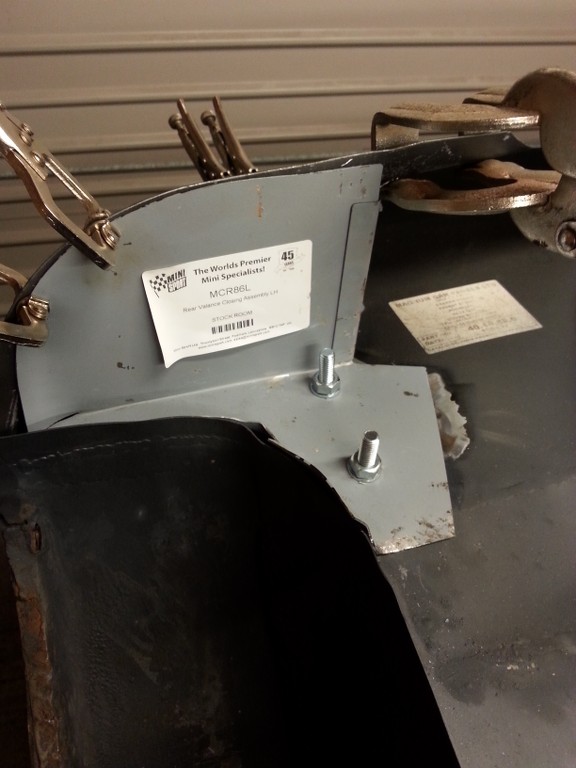
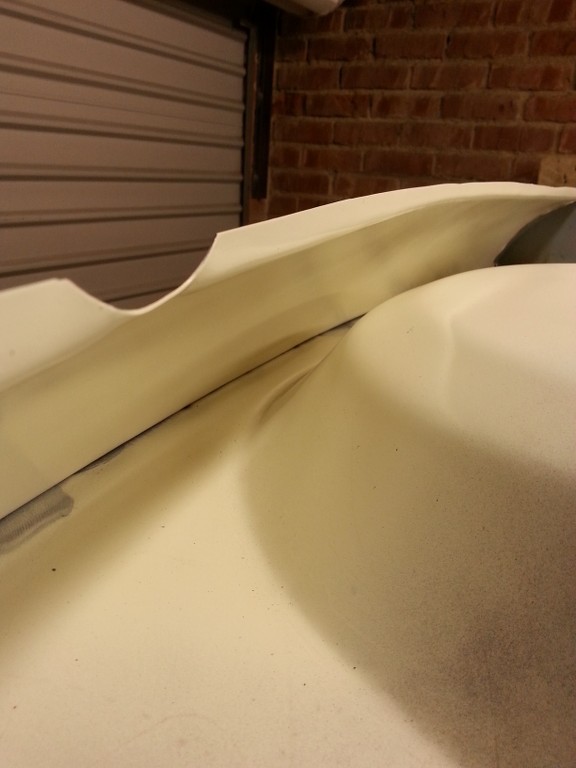
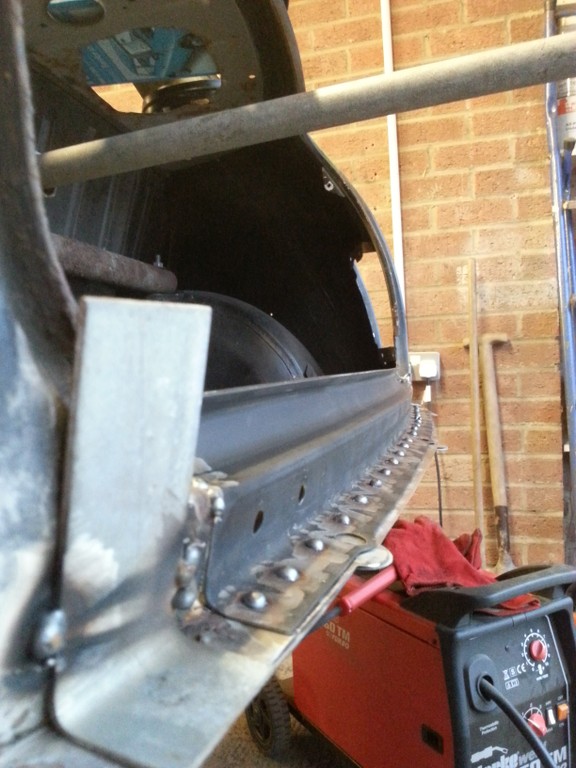
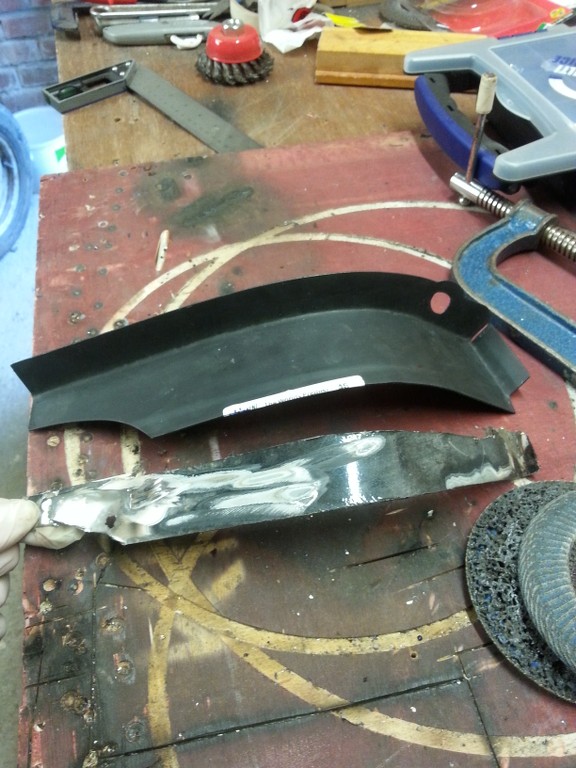
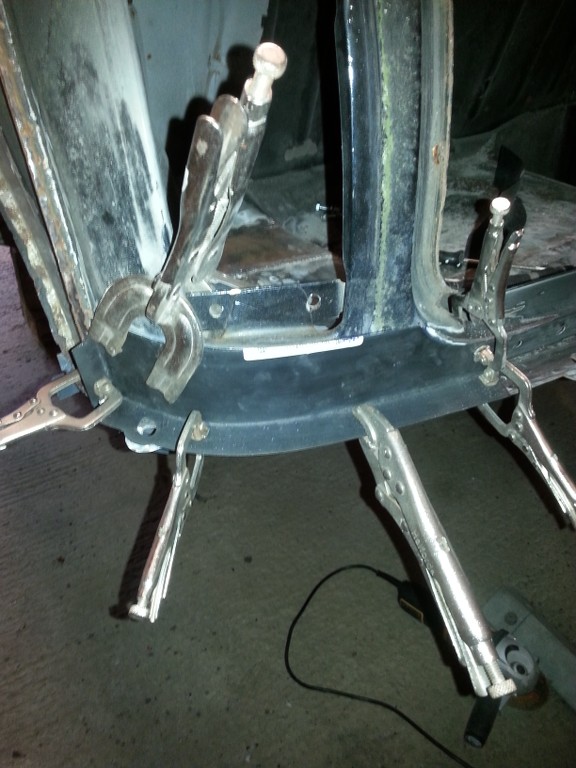
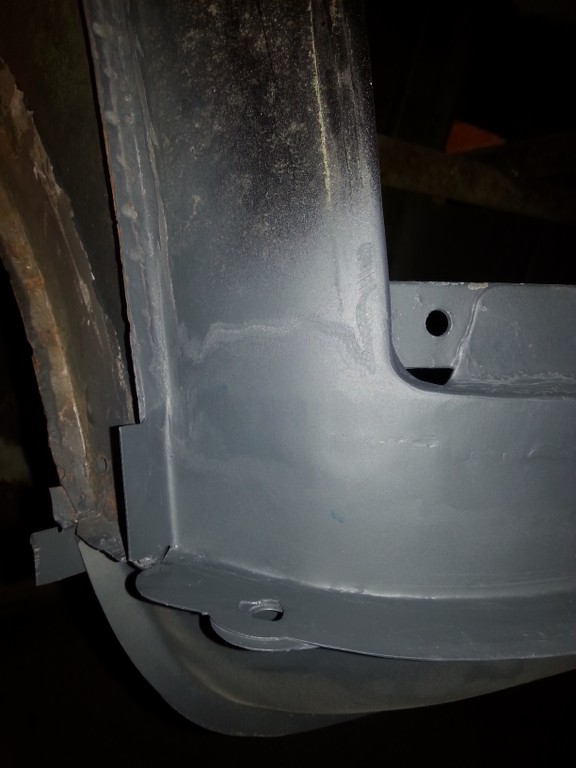
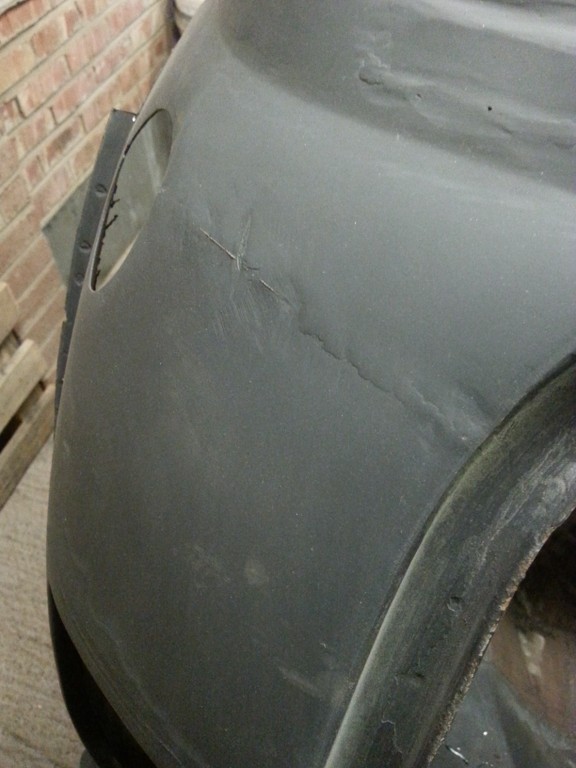
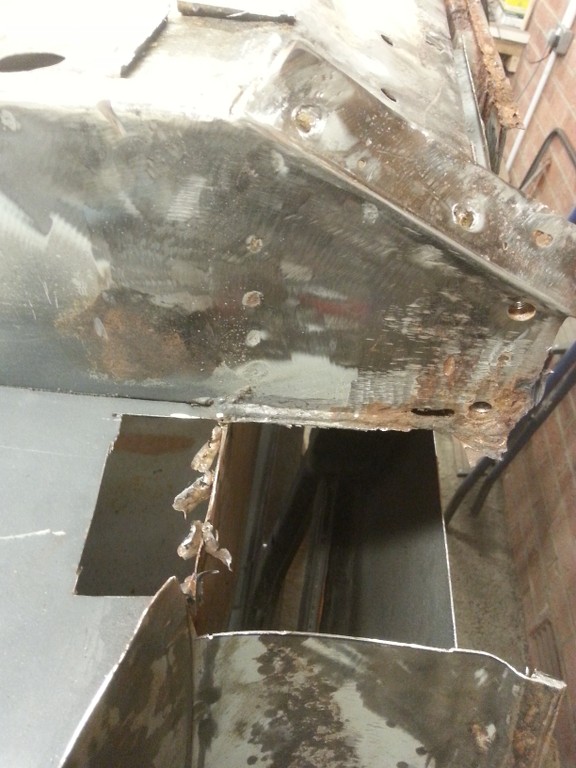
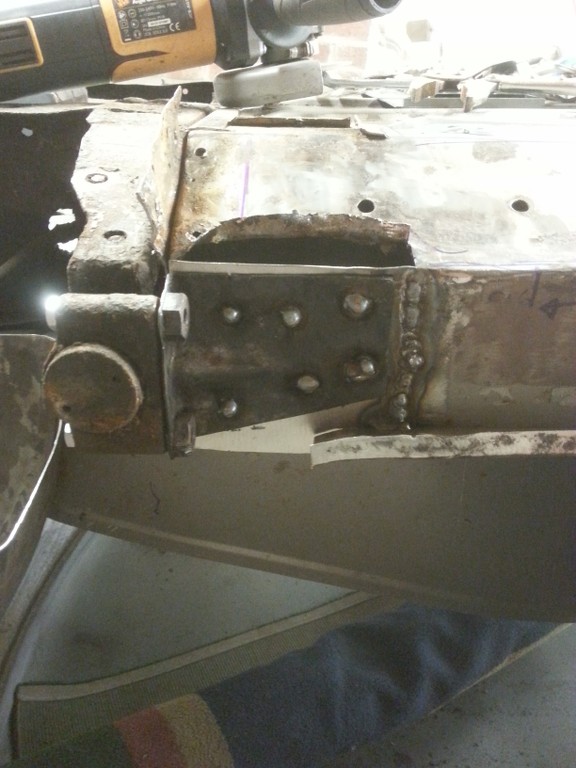
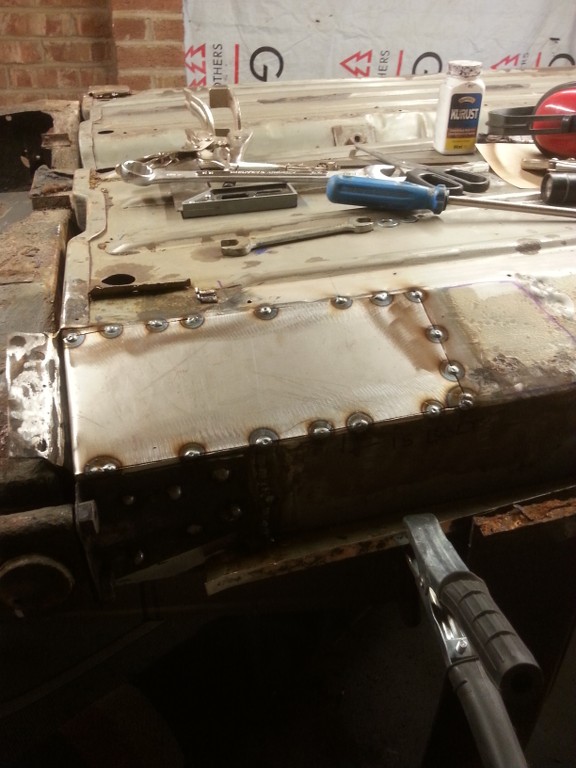
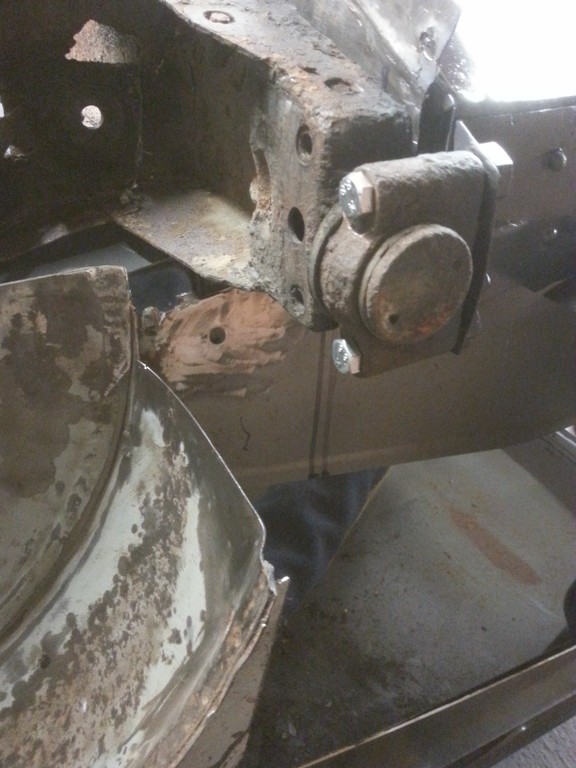
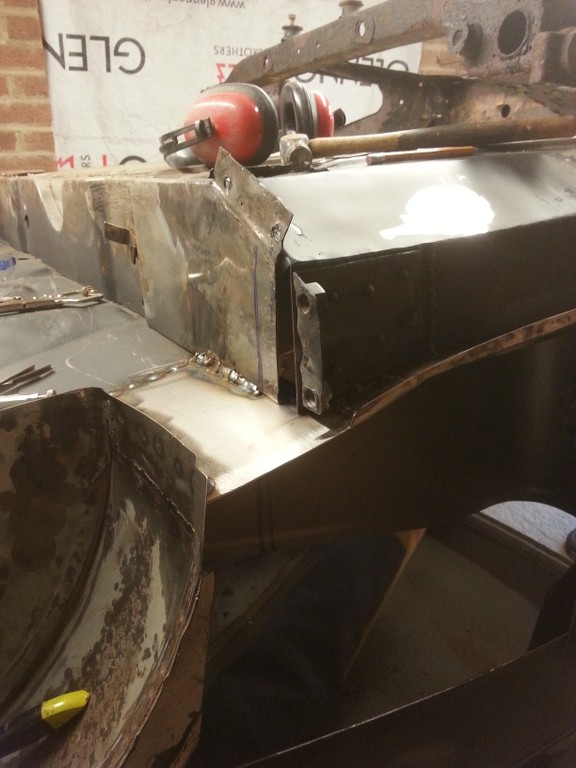
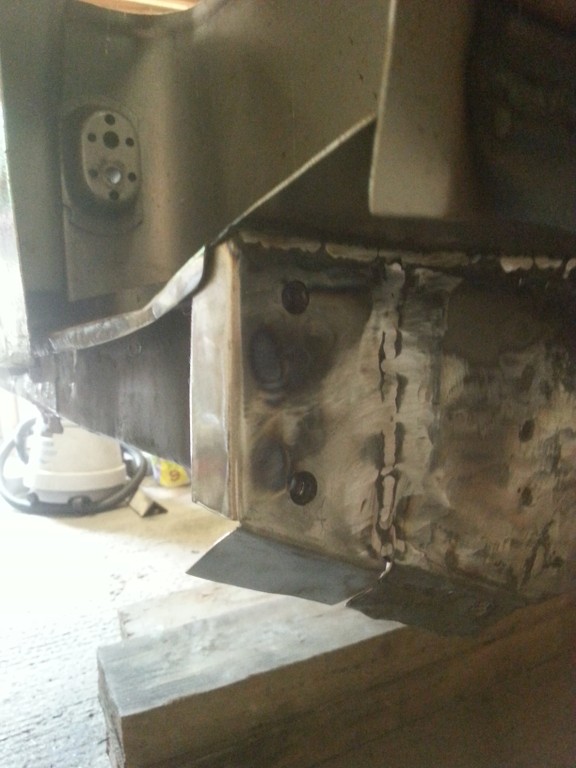
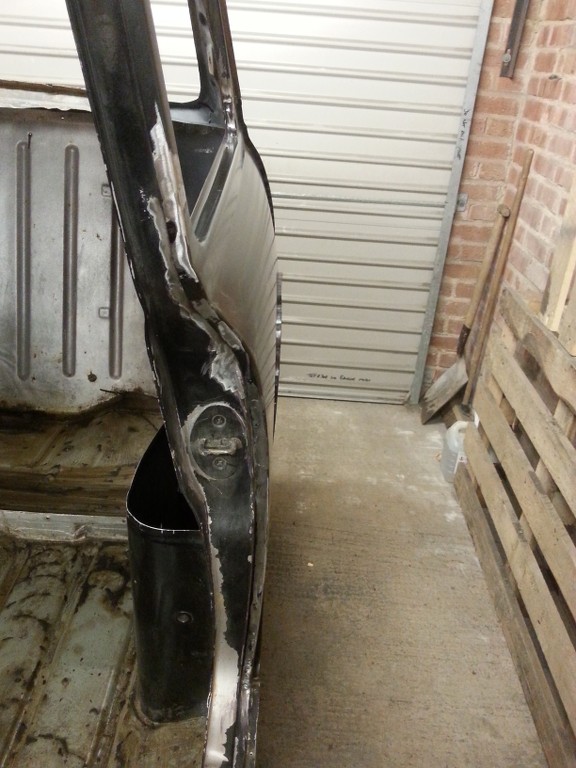
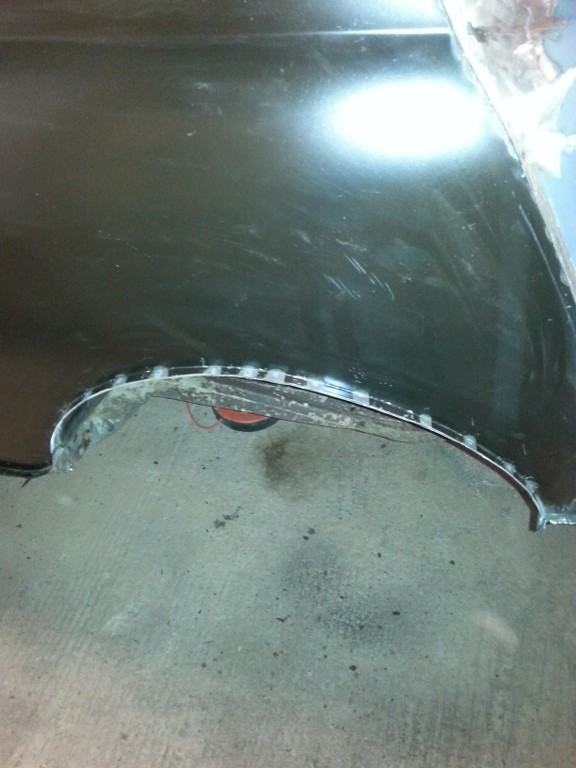
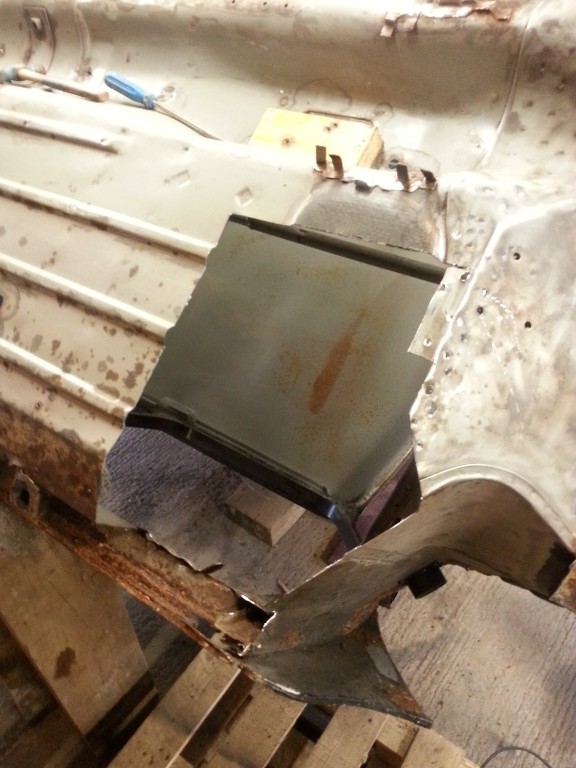
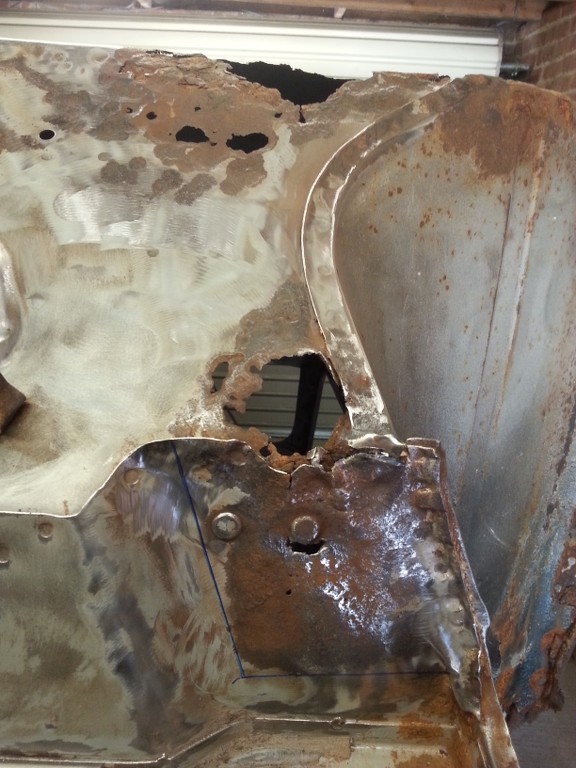
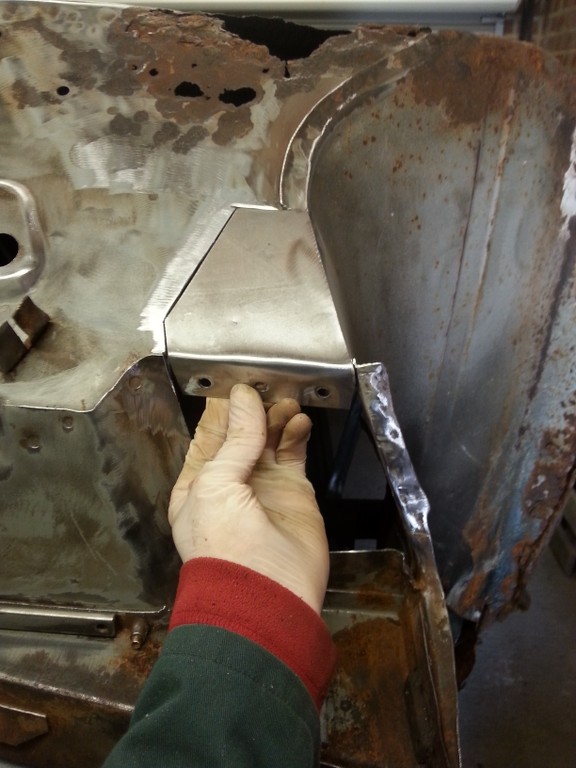
For obvious reasons I didn't want to jump ahead of my whooping 1Hr weld time so thought I would start with a simple job, blanking off the air intake hole in the driver wheel arch.

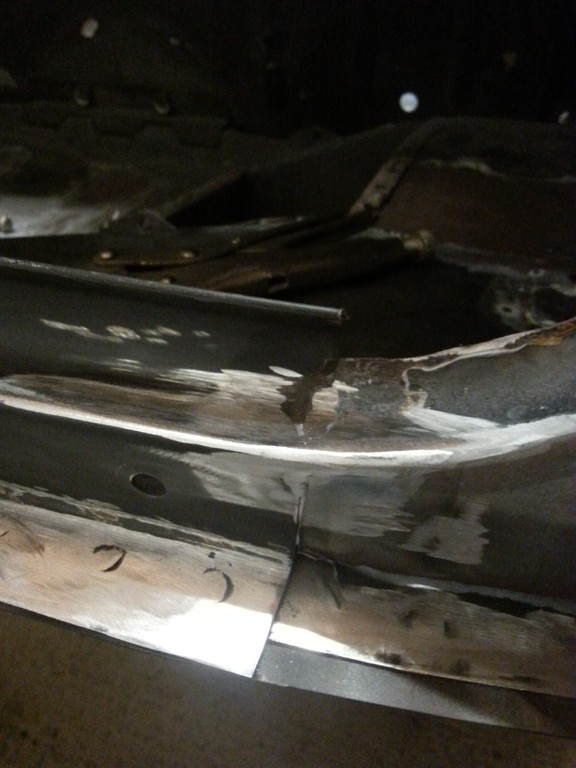
Offending flange removed
7s78.jpg

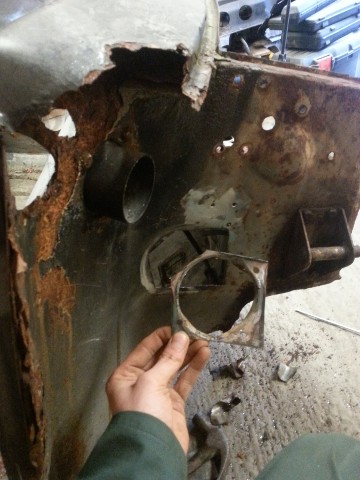
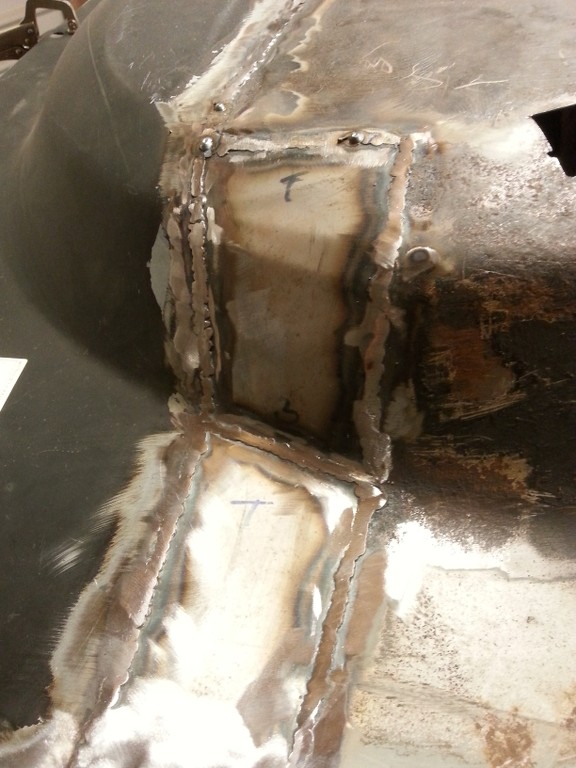
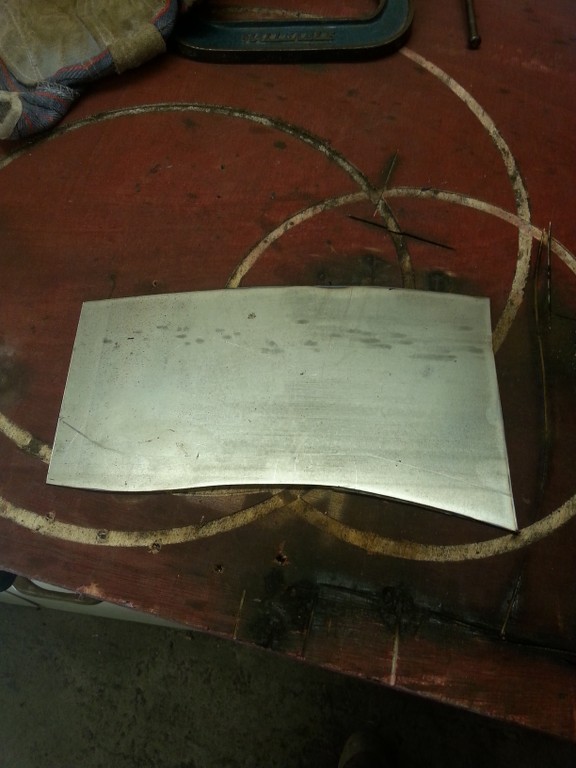
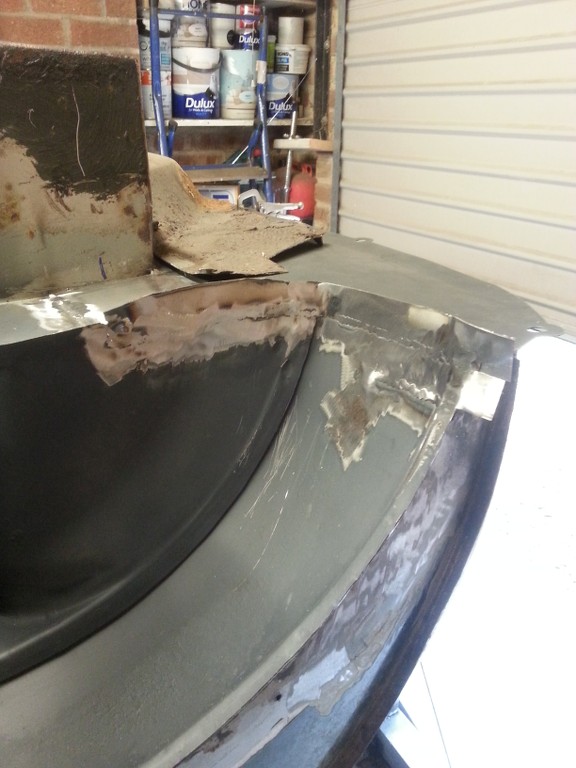
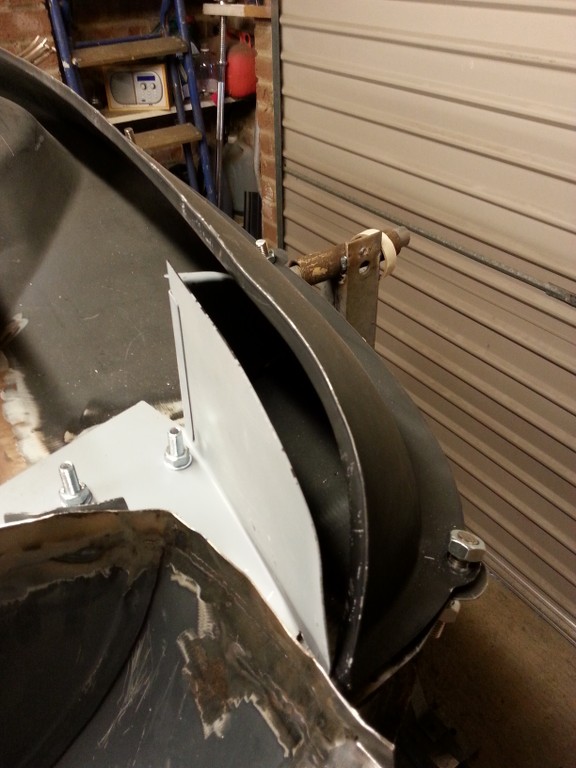
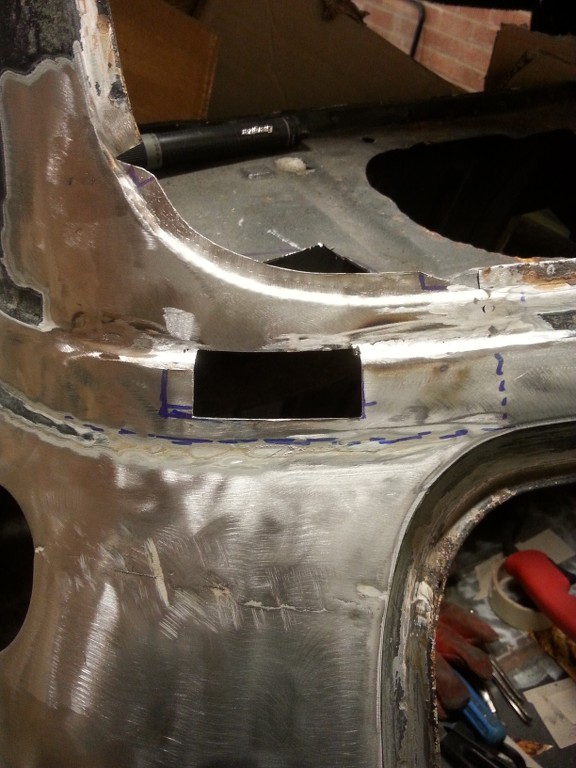
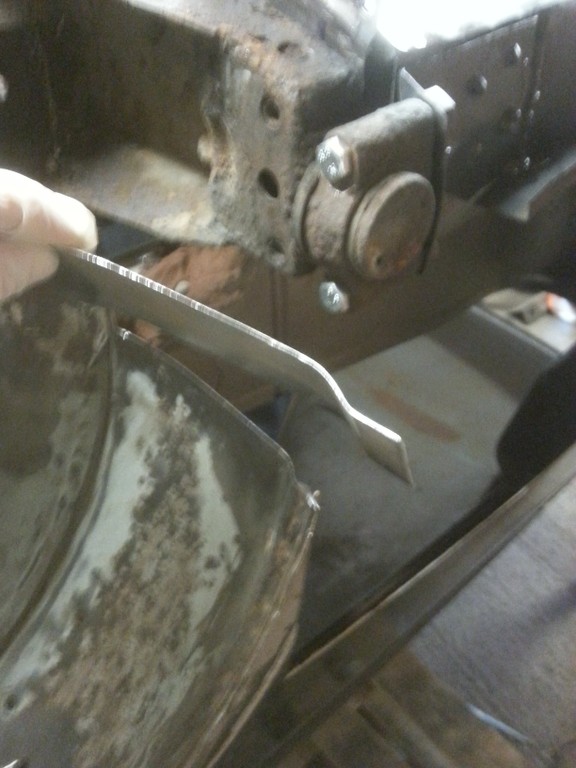
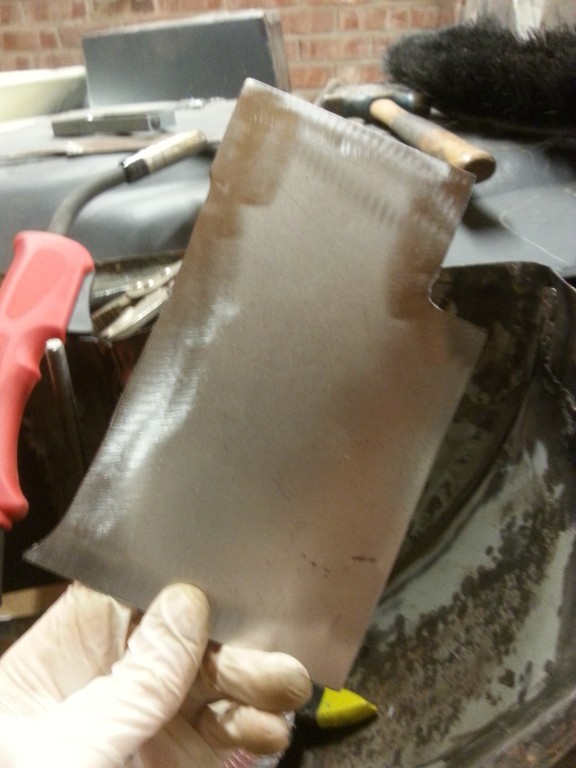
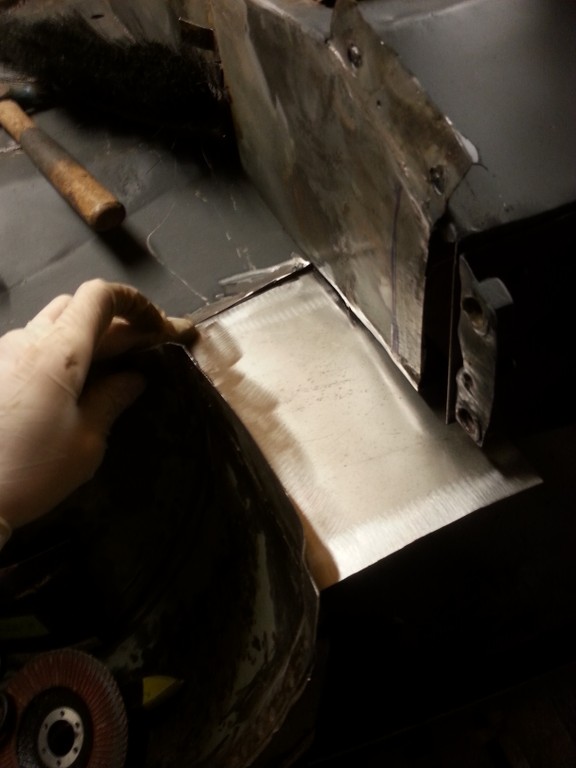
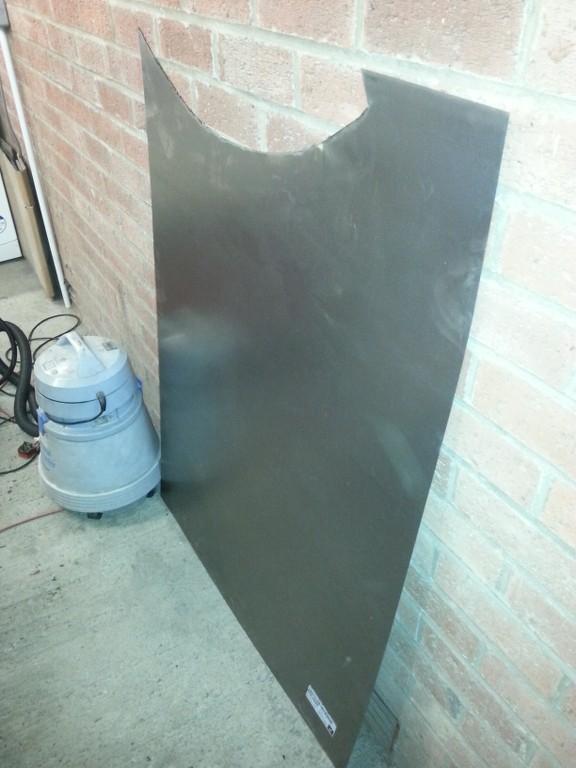
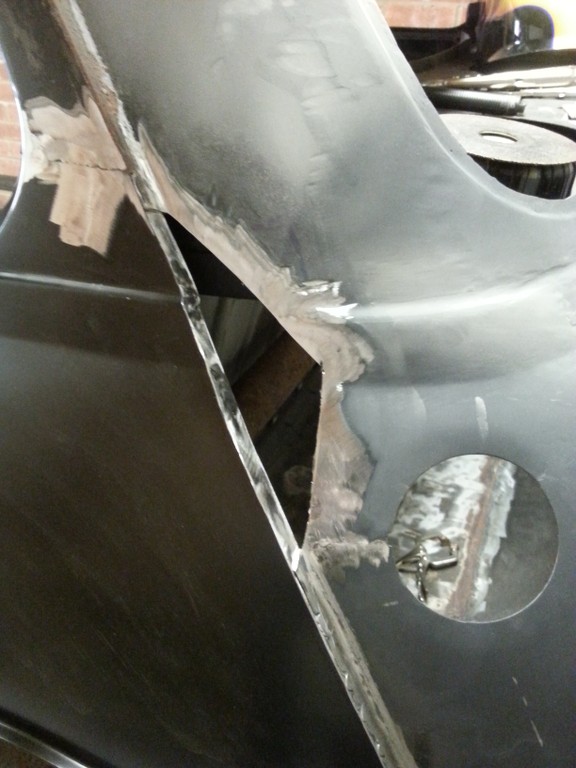
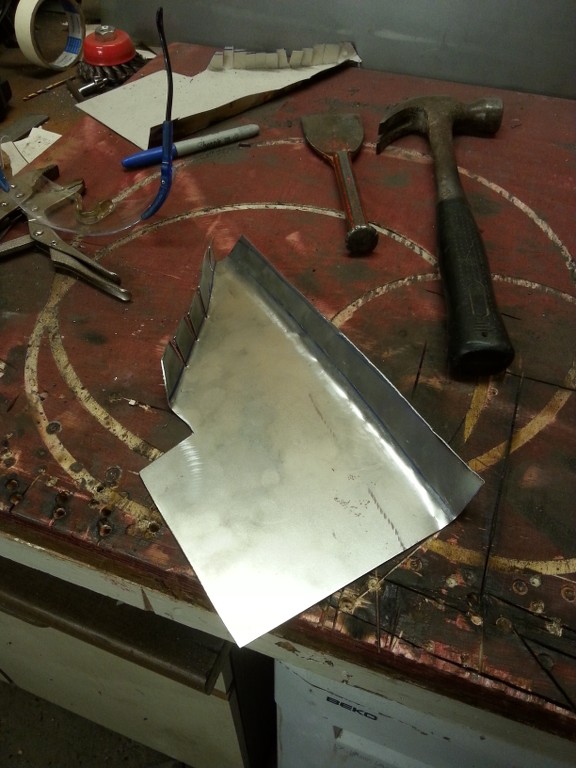
Time to make a template with some card and then cut it out of some new metal
tgmq.jpg

1nss.jpg

kypp.jpg

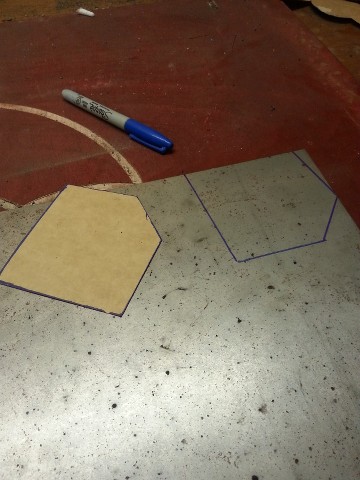
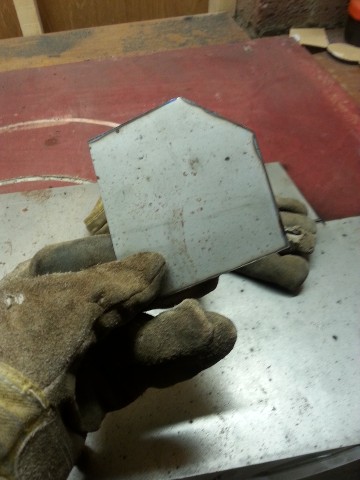
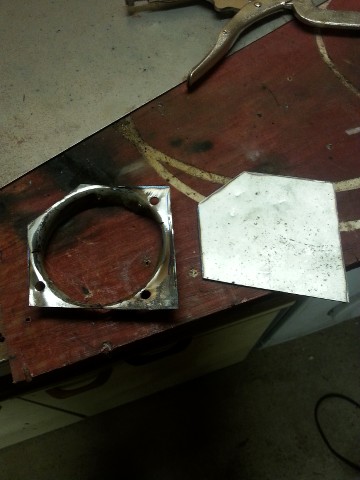
Some fettling later...... a good fit

iued.jpg

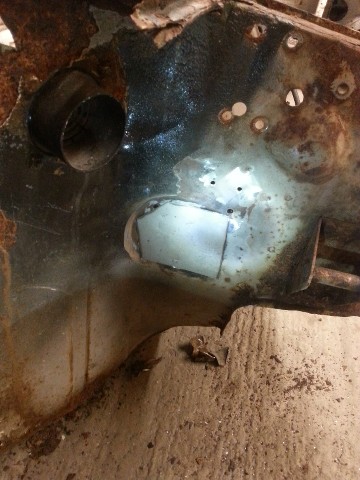
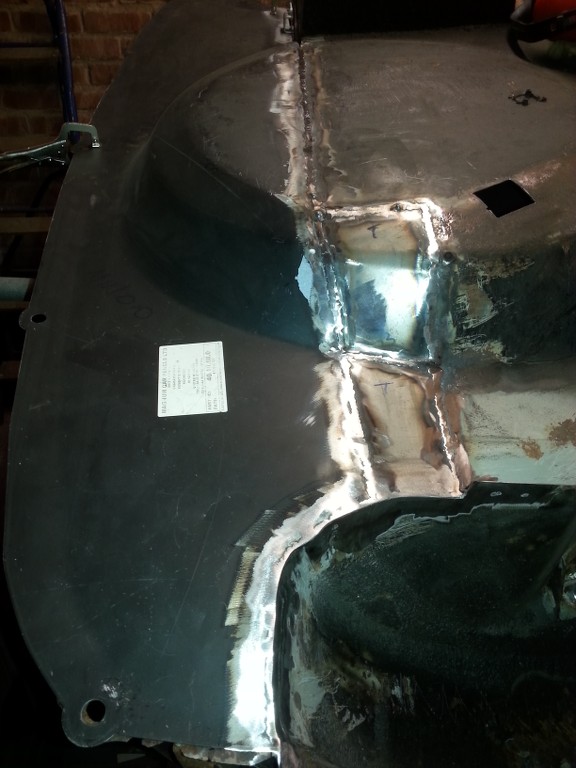
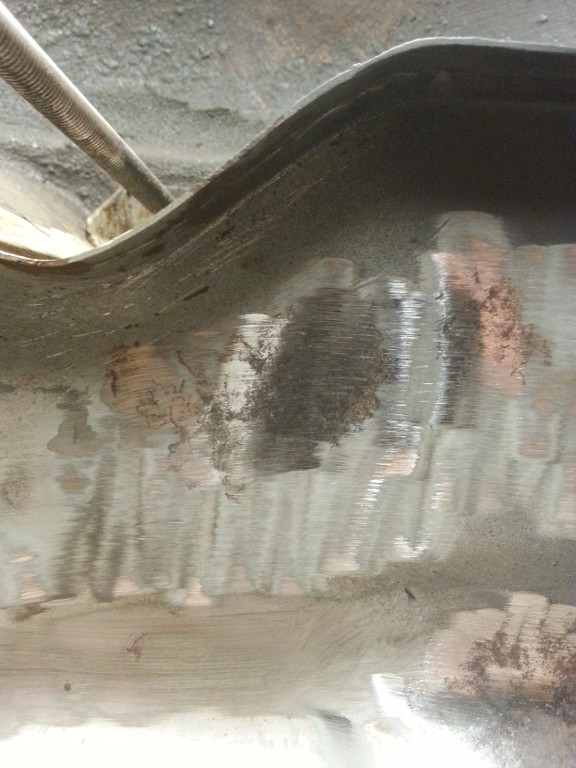
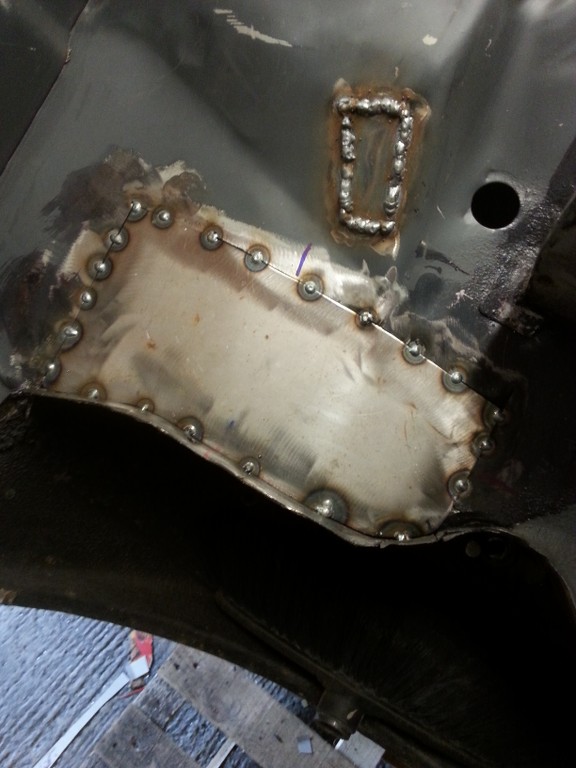
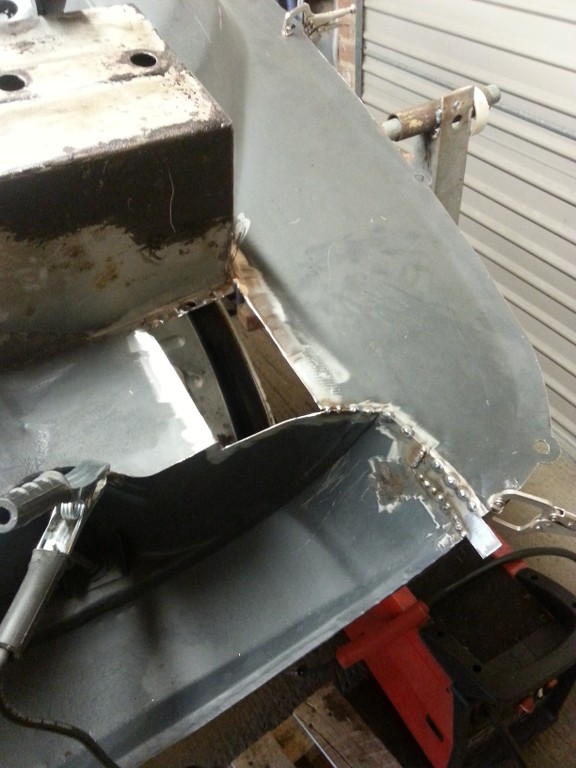
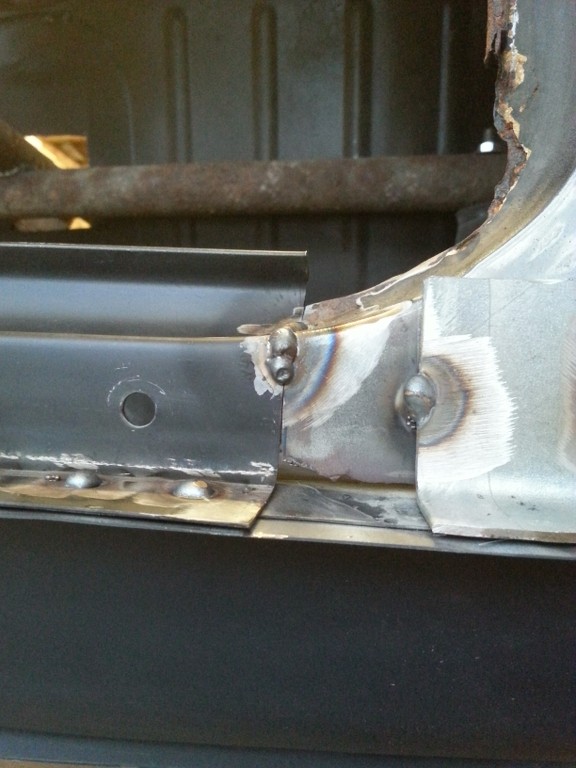
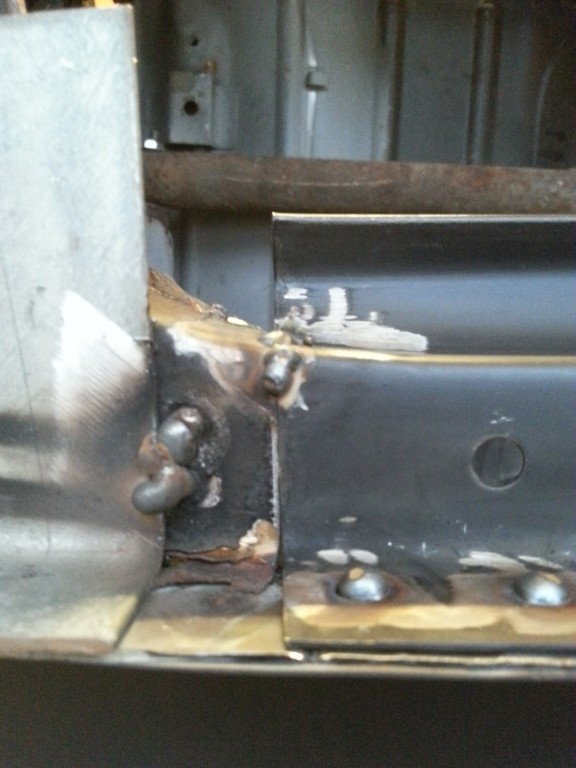
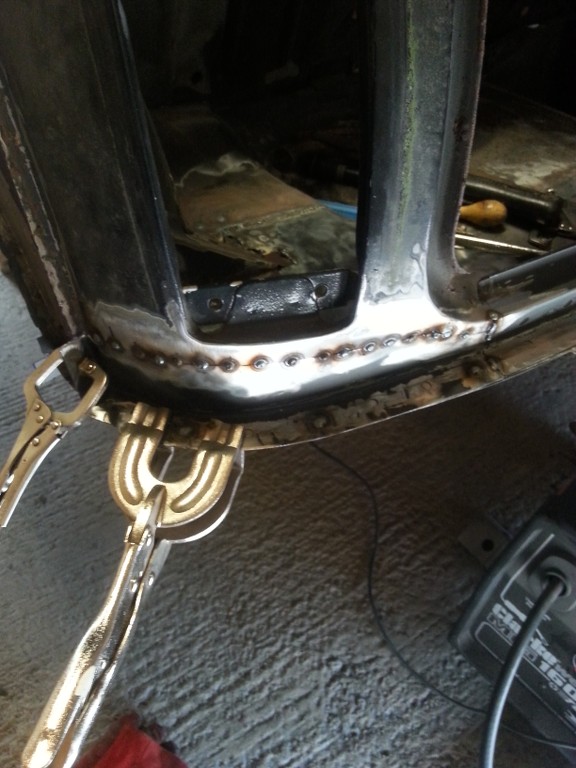
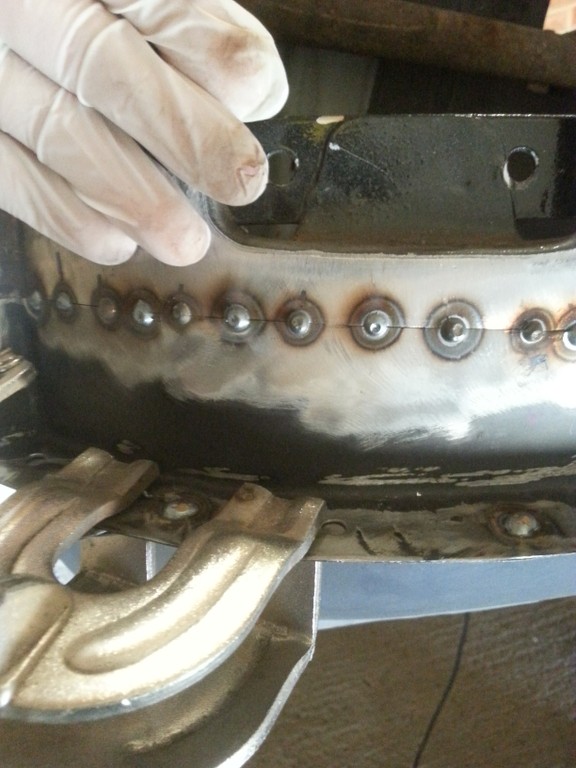
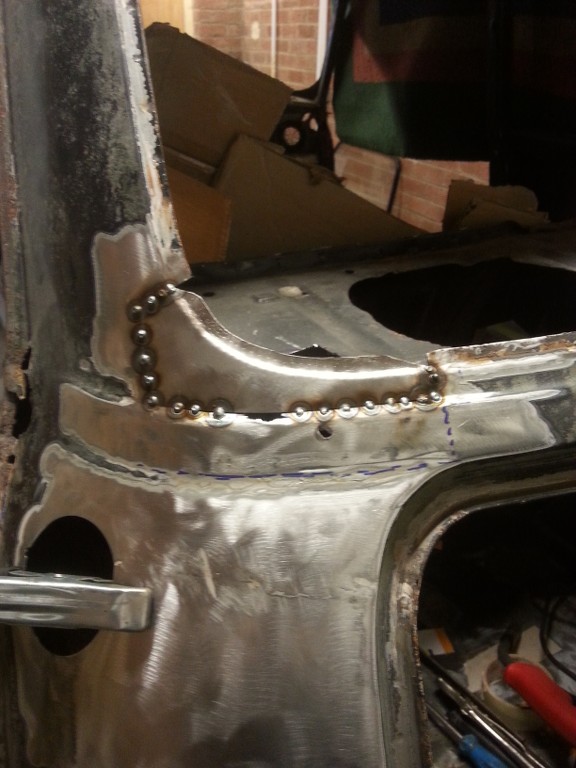
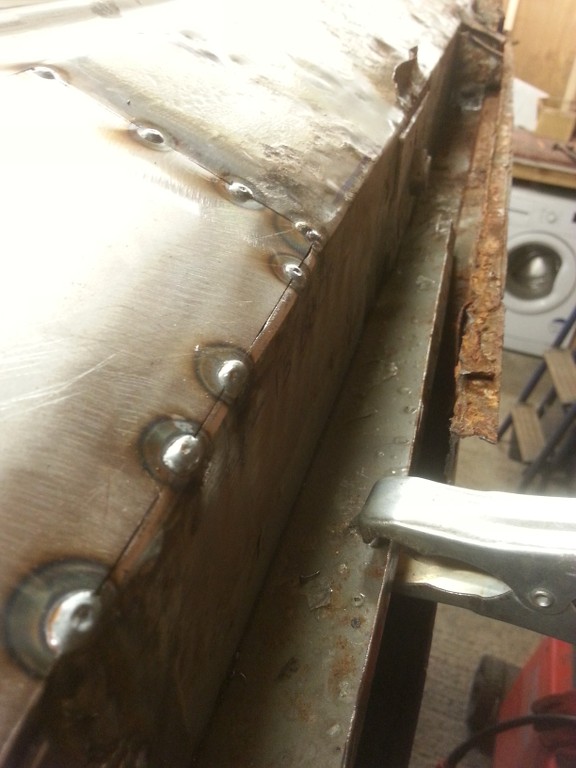
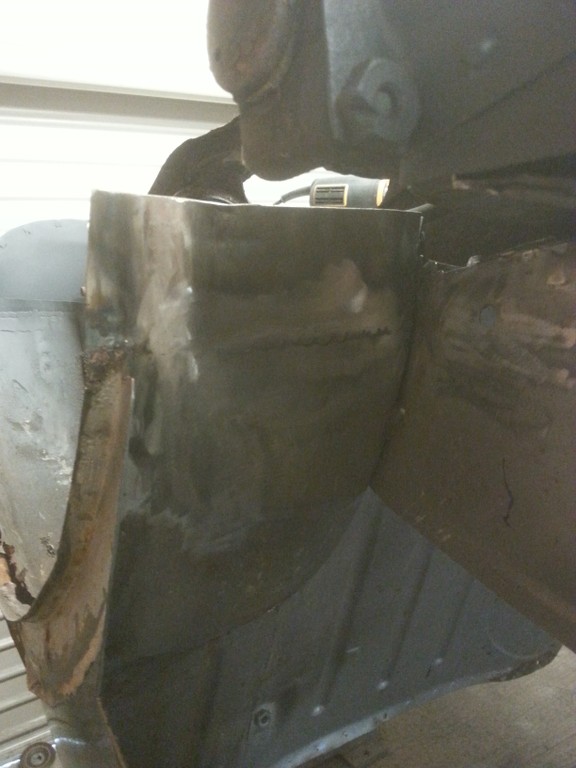
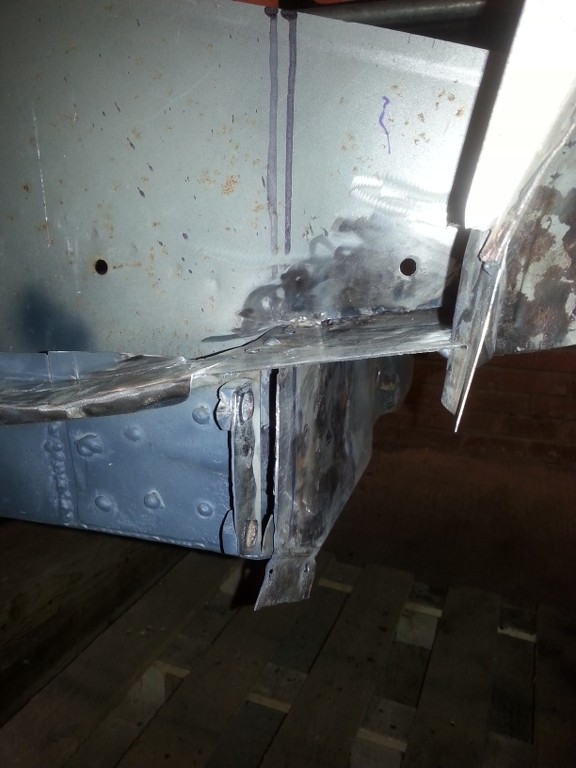
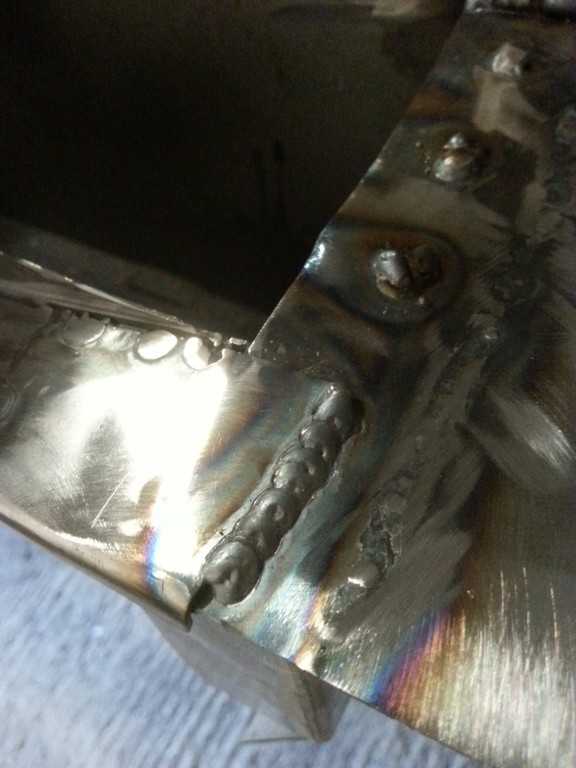
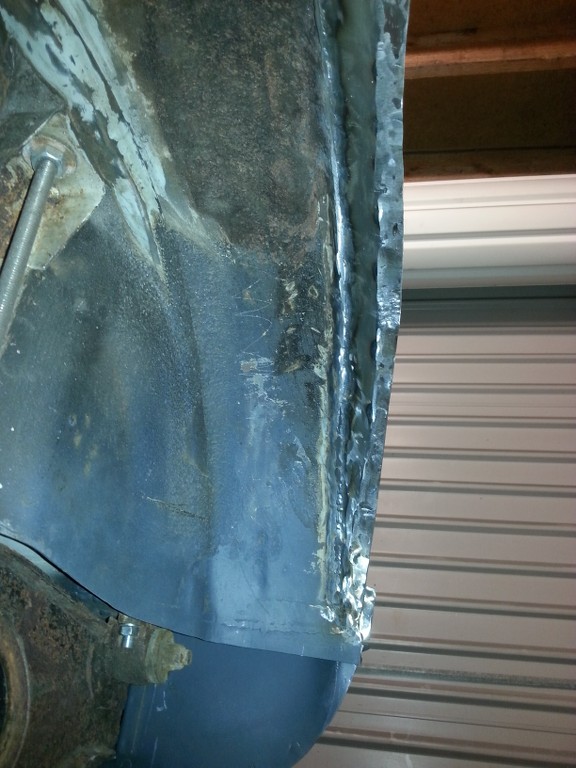
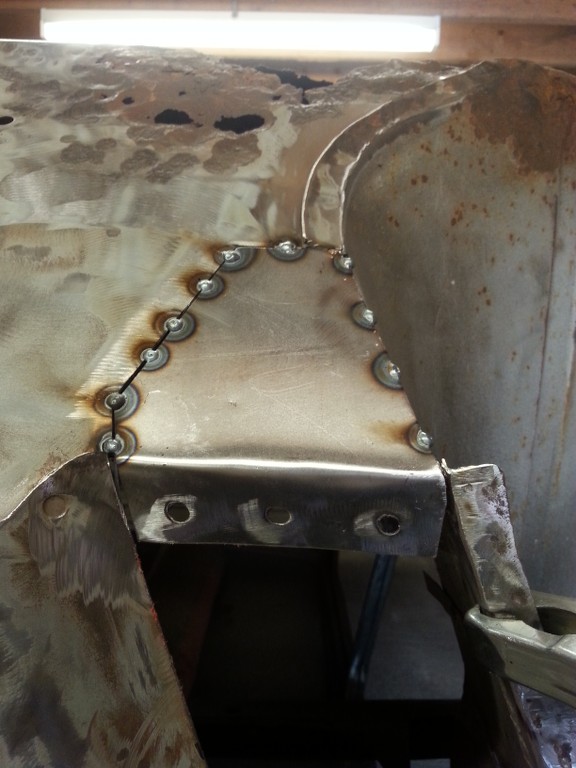
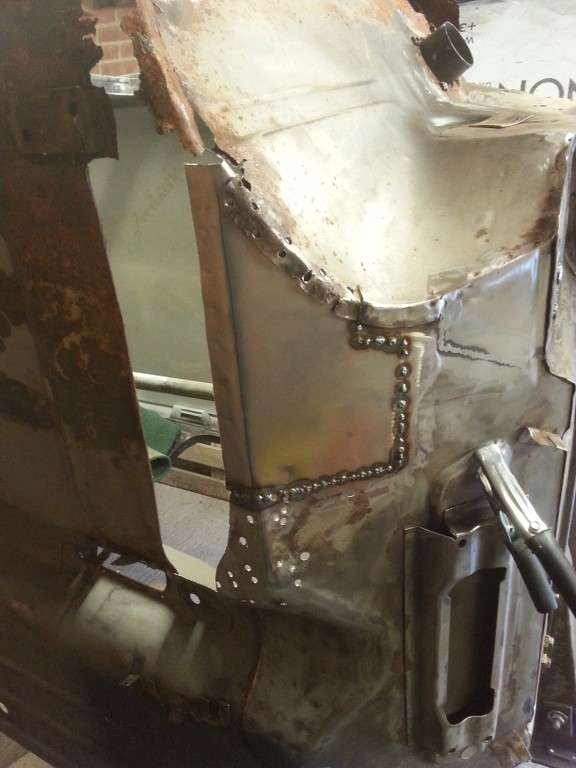
followed by those cheeky spot welds again, and checked for penetration

3r12.jpg

4vsf.jpg

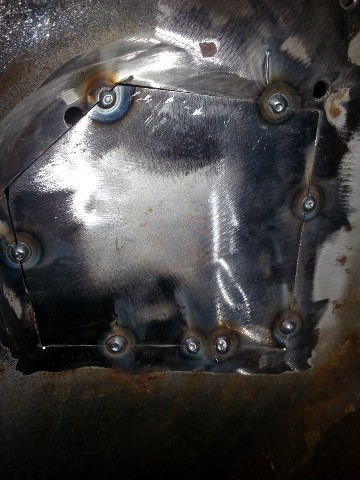
Next stage was to pulse weld between the tacks, making sure to leave time for the metal to cool between welding sessions, overkill perhaps, but im preparing my skills for a full butt weld in the boot !!!

isb5.jpg

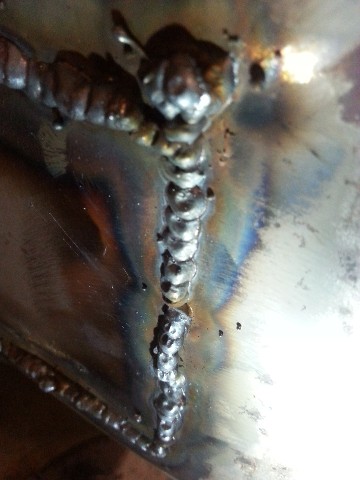
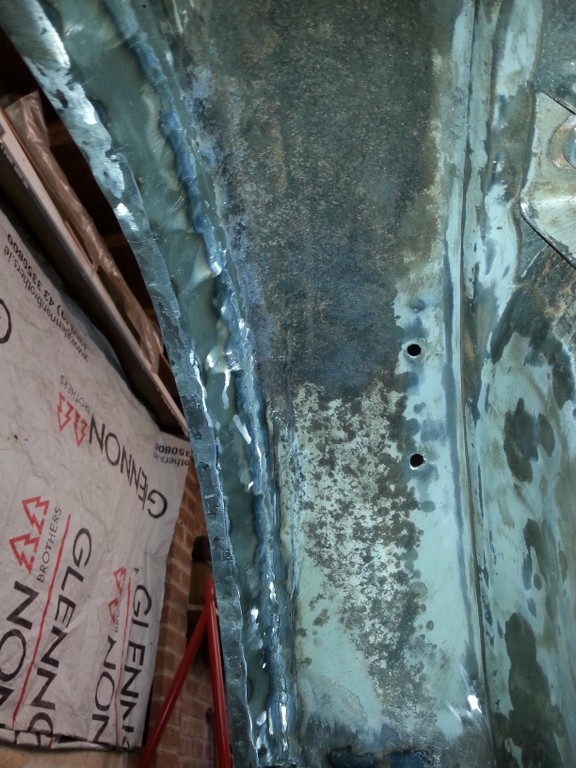
Inside penetration, could be better

m6wo.jpg

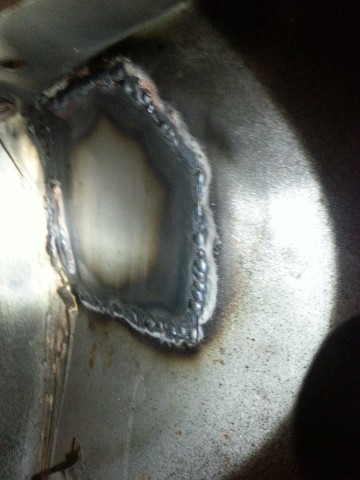
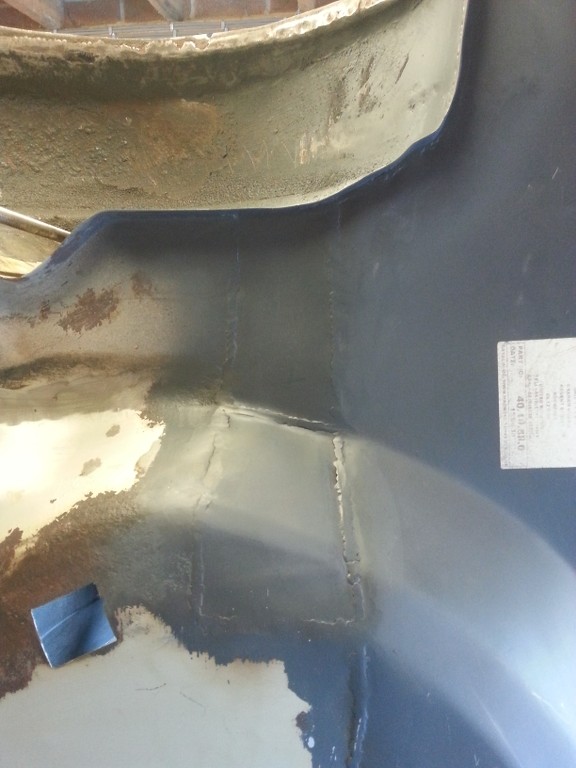
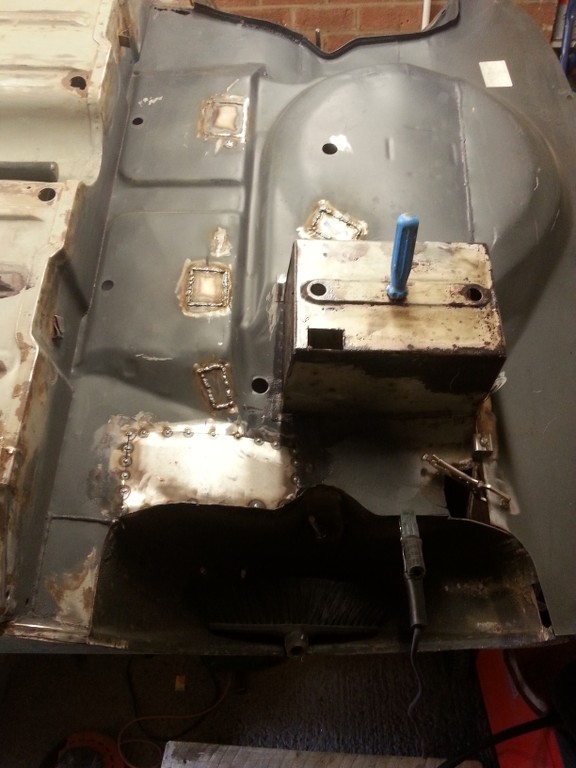
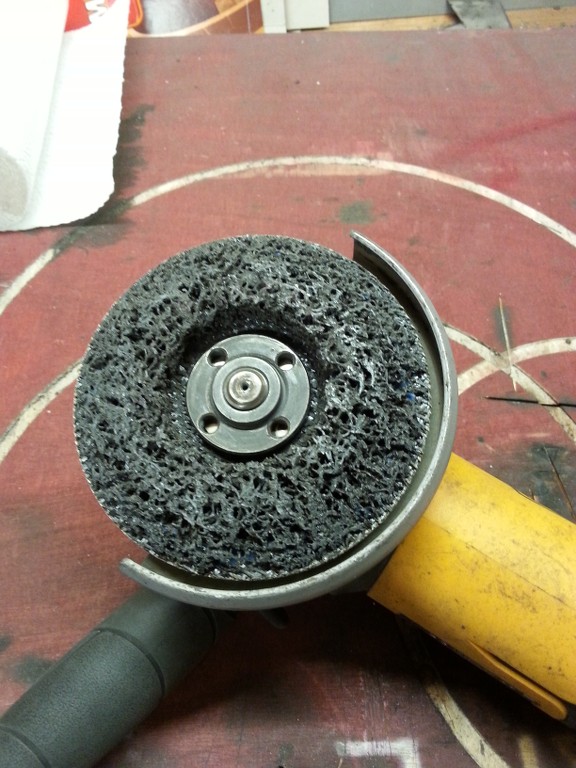
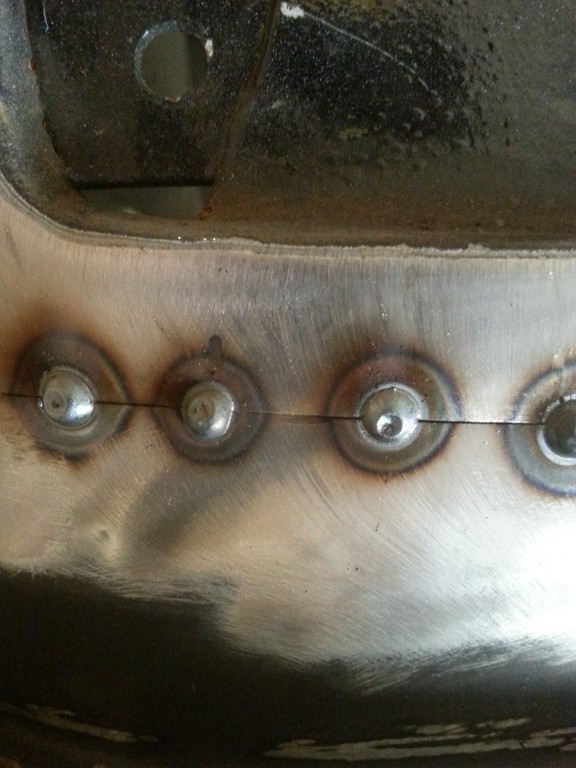
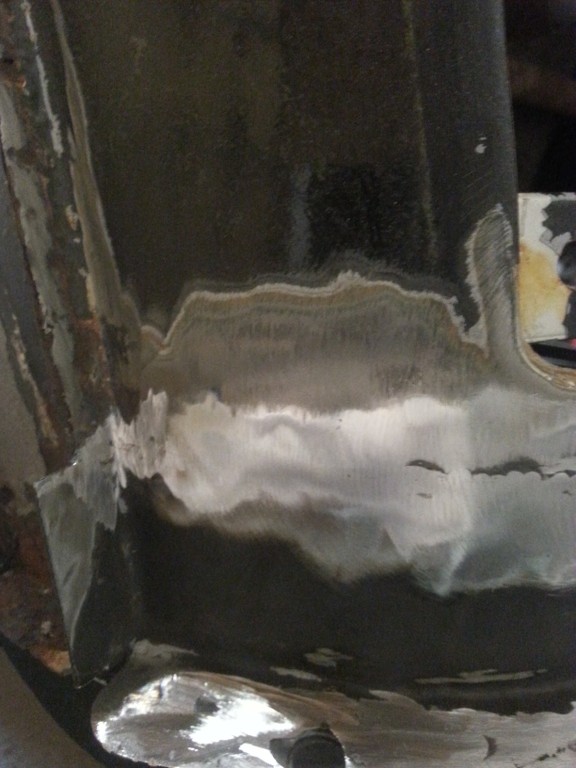
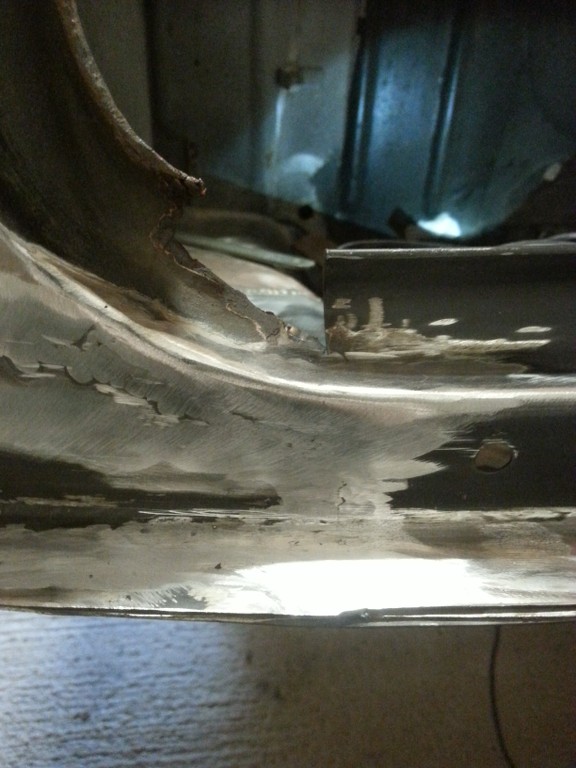
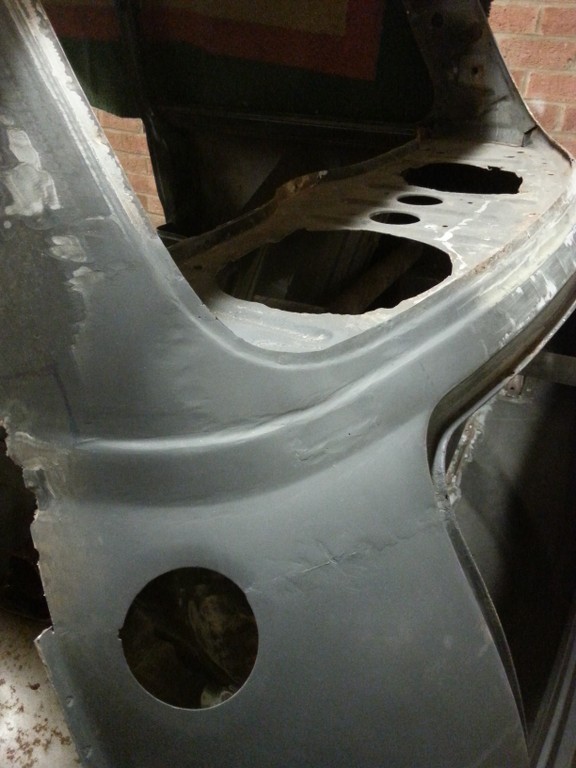
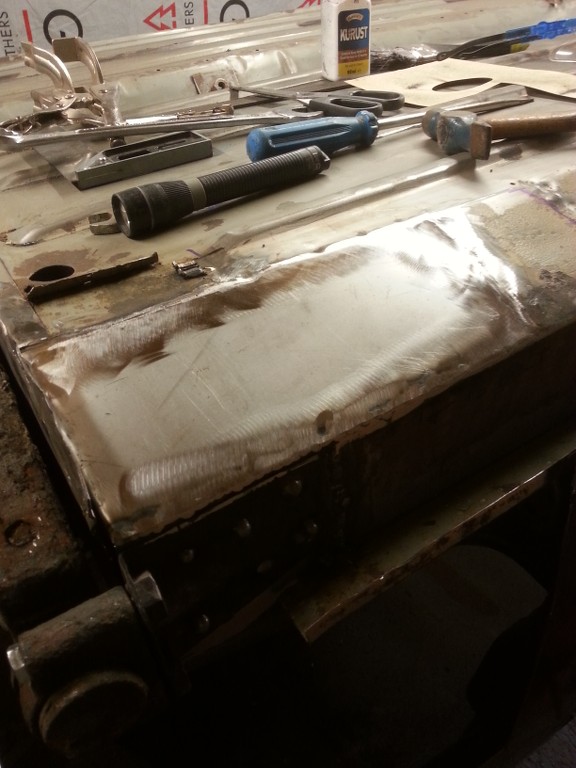
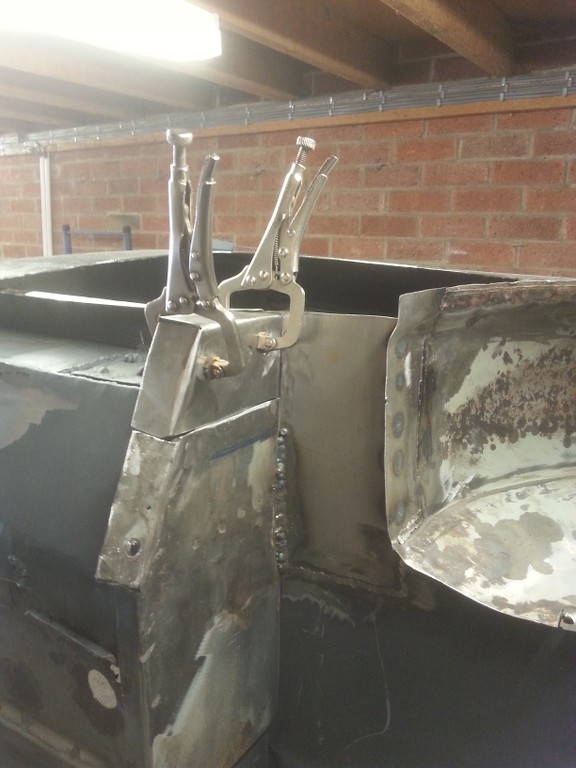
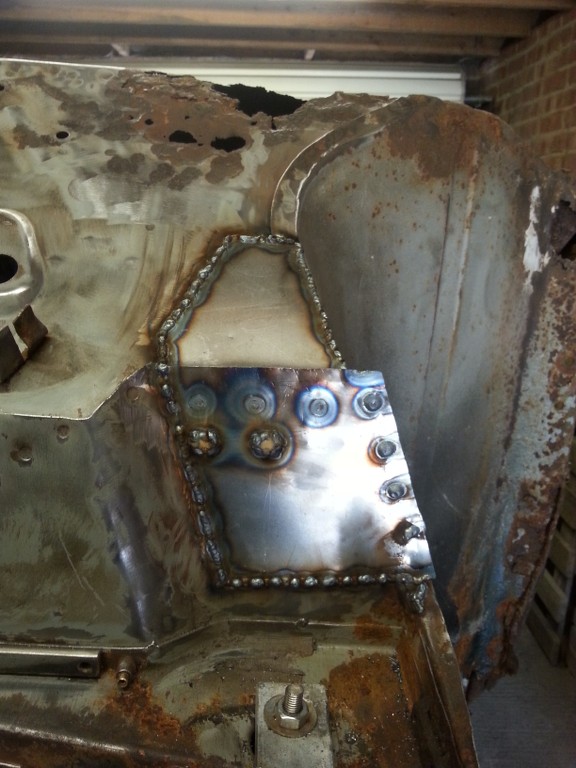
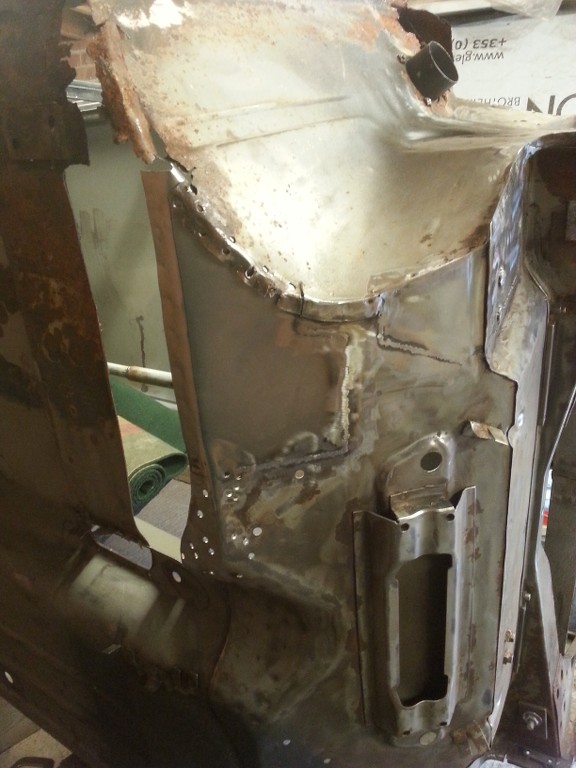
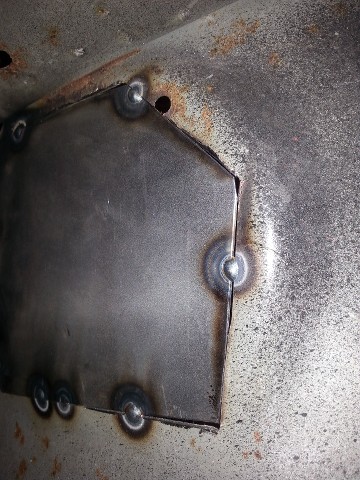
Then it was time to grind her back with my new favourite toy, the flap disc ala angle grinder.
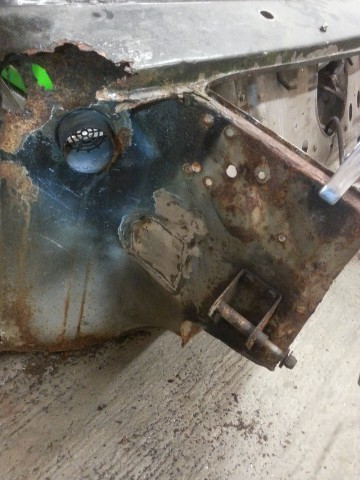
1fsj.jpg

some job.

And that's all folks, stay tuned for more learning curves.

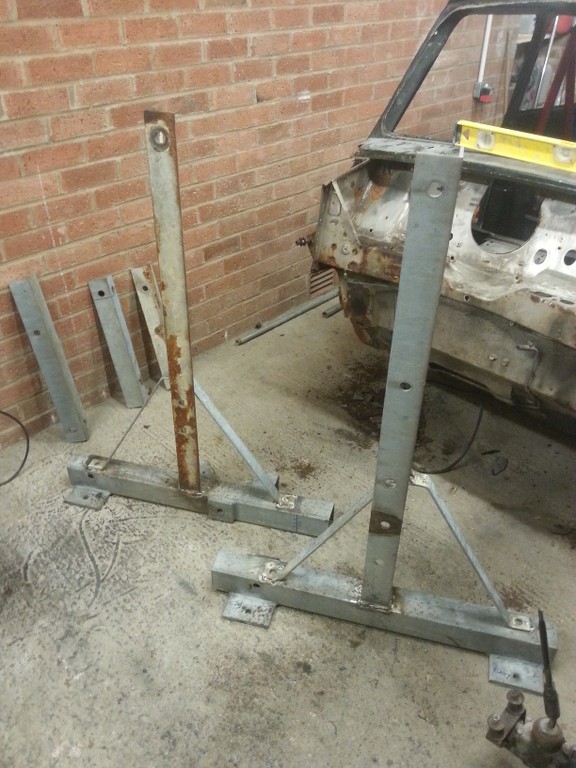
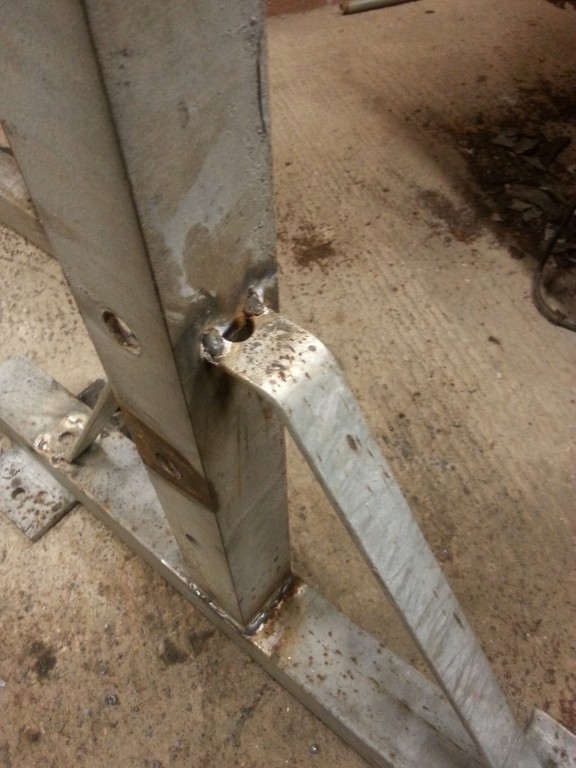
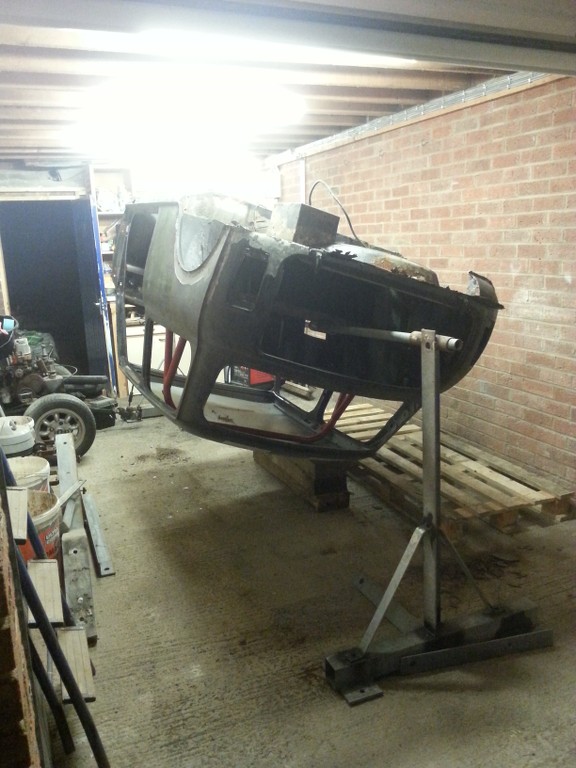
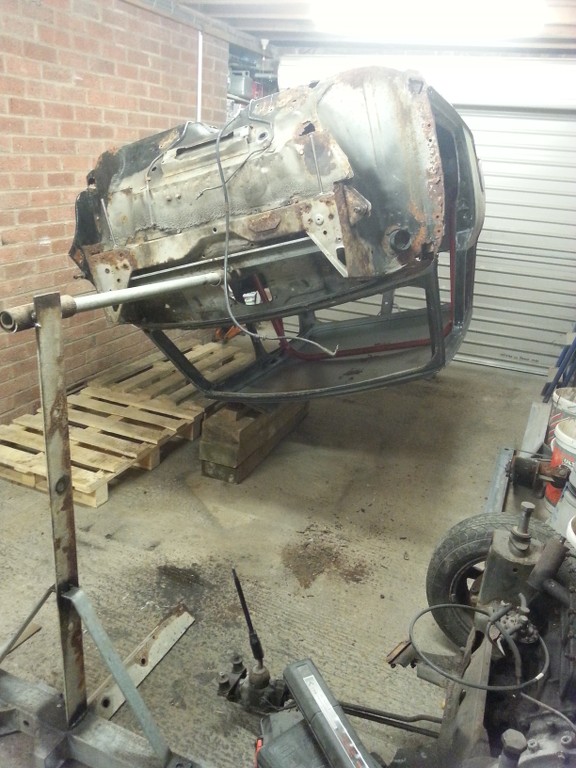
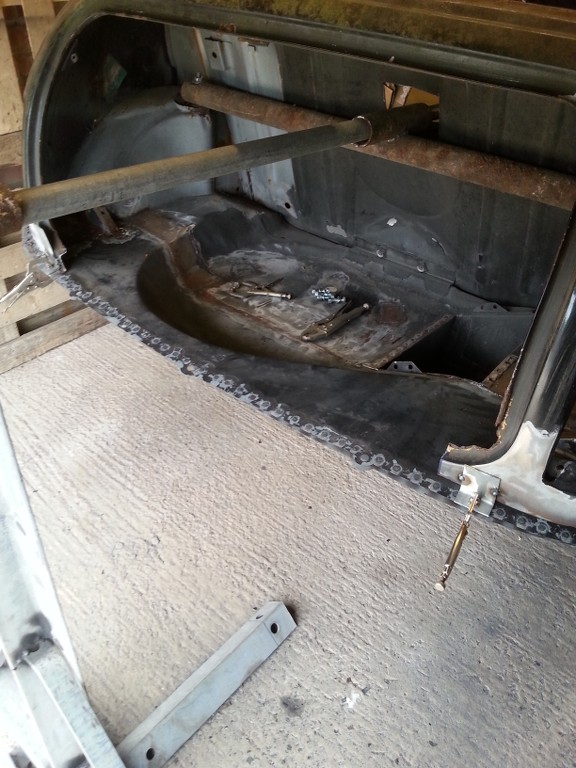
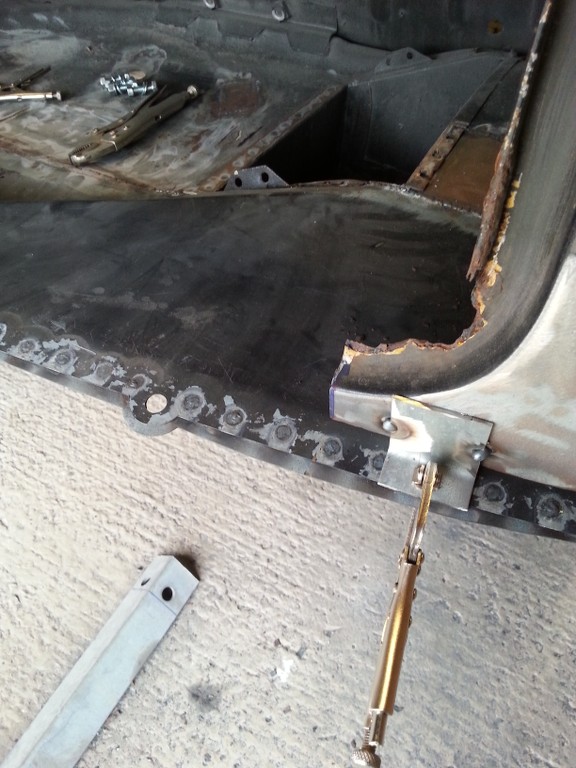
The next stage is to 'aquire' some box section and build a rotating spit. Anyone have a 4m or longer scaffold pole, the straight pole type with no clamps on the ends?

edit: having just looked at this post my pics are very small, I will do larger ones next time. click on the pic for a bigger view and to be taken to my imageshack account.

All the best, David


Edited by bluemini17, 22 November 2017 - 11:12 PM.


#2 bluemini17

bluemini17

    Mini Mad

  • Members
  • PipPipPipPip
  • 158 posts
  • Location: Bangor

Posted 18 July 2014 - 08:34 PM

(My next post from 18th April 2014)


Well folks, update no.2


During work I was standing staring at a wooden pole, as you do, and got some inspiration as to how I would build my rotating spit. After some head scratching and many drawings followed by calculations I came up with the required height vs rotation for my spit. Too low and the roof would hit the floor, too high and it would be awkward to work on.

After some metal was found I got cutting and welding, I had the welder set to max and even then I had to cut a V to get a good weld. This steel is thick!
Unable to find a length of pole for free I was forced to weld some bits together, good result in the end with the mini happily swinging about.

ch04.jpg

k1ln.jpg

mz77.jpg

29tl.jpg

i6lh.jpg

nz0t.jpg


Once she was up in the air I set about poking holes in the floor to find yet more RUST.
The next day I ended up at http://brooklandsmg.com/ and bought a boot repair panel

I cut all the rusty crud out with my angle grinder and made a few decisions as to how much good metal I should cut out. I ended up cutting away the flange that sits between the wheel arch and the boot floor.
I tacked the new panel in and then began welding an inch at a time allowing time to cool. Unfortunately the repair panel did not cover all of the gap. so I had to make some patches. They were tough going with all the angles and boot well to include. I got there in the end.

dx4c.jpg

ogy4.jpg

67f7.jpg

Once ground down I then made a new flange and blended it into the original, a seamless finish.

lgjq.jpg

Once complete, I nipped out and bought a tub of KURUST, it is brushed onto the area of which has surface rust and prevents the rust from rearing its head again.


I ground the surface rust away with a flap disc and then brushed on the KURUST. Once dried I then gave the whole boat floor a coat of ETCH primer. This stuff is used on bare metal and/ or rubbed down body work. The primer eats into the bear metal and provides a good key for the primer coat / seam sealer / stone chip.

yo67.jpg

lgjq.jpg

b0oz.jpg

5fyd.jpg

A word of caution to those who are working on minis, I took some of the seam sealer off which looked like this......

3se7.jpg

and this is what was underneath it !!!!

us48.jpg


I still have a few patches to do on the boot floor but thought it was best to paint up the bare metal to prevent flash rusting.
Stay tuned for more mini adventures……….. the heal board and hinge panel


#3 bluemini17

bluemini17

    Mini Mad

  • Members
  • PipPipPipPip
  • 158 posts
  • Location: Bangor

Posted 18 July 2014 - 08:37 PM

(Post from 19th April 2014)


neighbors were out so i took the opportunity to knock all the tar / bitumen stuff off the inside floor, i reckon a good 5kg saved in weight.

0ka2.jpg

67o0.jpg

once complete, i then used a twisted cup in my angle grinder to clean the under belly of the mini, once cleaned off i then rubbed it back to clean paint with some white spirit and a rag, More RUST was found, no surprises there..

8r30.jpg

up8i.jpg

i made up some patches for the boot floor, mainly where the drain holes were and also where the spare wheel was toughing the floor, tacked in and then pulse welded.

vfp9.jpg

1gds.jpg

more work on the mini tomorrow, hopefully get the boot repairs finished off and etch primed.


Edited by bluemini17, 22 December 2014 - 05:18 PM.


#4 bluemini17

bluemini17

    Mini Mad

  • Members
  • PipPipPipPip
  • 158 posts
  • Location: Bangor

Posted 18 July 2014 - 08:39 PM

(update from 23rd April)


another update from the bank holiday shenanigans.

mainly fafing about, i have been putting off the toe board, maybe i will grow a set and make a start on it soon.

made a start on the off side of the boot floor / arch. some minor rust on the arch but where the original sponges were between the sub and the boot floor had turned to rust, time cut, path and weld.

rrdx.jpg

t8kb.jpg

g0fv.jpg

then onto the offside of the boot, same again,,,,,

vlpm.jpg

a dab of KURUST

oftv.jpg

then a template, and then cut out from 0.8mm

efmf.jpg

v1gq.jpg

3s2g.jpg

patch tastic

4xql.jpg

need to spend some time grinding the welds down, i will wait for a rainy day.....

while i waited for the welds to cool in between runs i started stripping the subby

Nice n crusty, im going to need a new subby, i figured if im putting in the effort on the panels i might as well have something solid to bolts the wheels to

ovgi.jpg

1rqr.jpg

ut75.jpg

udkw.jpg

I then made a repair on the wheel tub,,,

9xqu.jpg

4gn7.jpg

and made a patch for the boot floor,

yxe4.jpg

I then made a new lip to stop mud splashing the boot floor,

w3jr.jpg

for a laugh i put the old boot floor on top, not much left, you can see why i needed a new floor...........

a8oqj.jpg

then i ground down some of my welds in the wheel tub,

2oho.jpg

1q93.jpg

i offered up the rusted sub frame and have taken multiple reference points for when i take out the toe board / front mounting points for the sub frame.

currently waiting on the delivery of a rear valance, rear closing panel and a few other boot related things.

back to work now so not much progress this week i would imagine


#5 bluemini17

bluemini17

    Mini Mad

  • Members
  • PipPipPipPip
  • 158 posts
  • Location: Bangor

Posted 18 July 2014 - 08:40 PM

(update from 27th April)


time for an update on Saturdays work, the rear valance.

I needed to the get the rear valance in before i begin work on rebuilding the rear hinge panel and the lip below the tail lights. the valance will bring some rigidity back to the rear end.

time for more pics...........

had a quick offering up of the valance, i bolted it to the boot lip with some bolts and also bolted in the rear closing panels that the subframe mounts into.

aft8l.jpg

tqi7.jpg

tjz3.jpg

06s8.jpg

the fit was terrible as you can see so i had to get creative. a few bends and folds later it got a good fit.

I then took the black paint off the valance panel with this paint remover pad in my angle grinder.

dk4g.jpg

c4tv.jpg

once rubbed down with spirits i then hit it with some etch primer

4c26.jpg

and then the final color of the car, my thoughts being that the paint would be hard to get into the valance and the back of the spare wheel well once fitted with the closing panels

2hn4.jpg

imn6.jpg

i then ground the paint off the edges where i would be welding and made some holes for the plug welds

8vq5.jpg

kxky.jpg

g2j7.jpg

g2j7.jpg

time to get plugging, 60 odd plugs later i was left with this,

8upf.jpg

8frt.jpg

gtw9.jpg

cwlz.jpg

jxr7.jpg

jxr7.jpg

this is how the rear looked when i first attacked it

cq7e.jpg

the pics below show my next challenge, the repair of the hinge panel and below the tail lights, a whole replacement panel can be bought but it is more expensive than what i paid for the car!! so repair i shall try

56nk.jpg

mijxf.jpg

b7fy.jpg

same story, back to work now so prob no more updates till next week


#6 bluemini17

bluemini17

    Mini Mad

  • Members
  • PipPipPipPip
  • 158 posts
  • Location: Bangor

Posted 18 July 2014 - 08:42 PM

(Update from 30th April)


time for a mid week update - the boot hinge panel

I ground the welds down on the valance from fitting on Saturday and gave it a quick lick of etch primer to keep the rust at bay. Im using U-pol etch primer, some job.

FYI i found this random shop in Ballynahinch that sells all sorts of car repair items, 2k paint, welding tips etc, fairly handy for me as i work in this area at least once a week.

mx6n.jpg

Once the welds were ground i then bolted the hinge repair panel to the existing boot hinge holes. this was to get it dead center on the car.


5ex2.jpg

after a few nuts and bolts later i then made up some flanges and welded them below the tail lights. this would keep the shape of the rear in place while i removed the rot.

ak1d.jpg

with this done i then cut the back out, no going back now!

5r2d.jpg

rjqa.jpg

and what was left of the hing panel

na8m.jpg

4yxp.jpg

i then trimmed and tweaked the panel until it was a good fit, followed by many a plug weld. if you follow the curve you will see it lines up perfectly. once i grind the welds down it will be perfect....... hopefully

icgs.jpg

k2q8.jpg

0hrl.jpg

5kk5.jpg

Next stage is to cut out the temporary flanges and remove the corners below the tail lights. stay tuned......

cl8l.jpg

on a side note, i sold my fiber glass flip front. the guy gave me some cash and also agreed to drop round a floor panel later this week. here is a pic of it in my pug. a MINI-pug, dont think it will catch on....

c7t6p.jpg


#7 bluemini17

bluemini17

    Mini Mad

  • Members
  • PipPipPipPip
  • 158 posts
  • Location: Bangor

Posted 18 July 2014 - 08:44 PM

(Update from 4th May 2014)


yet another update, my sanity is starting to slip now, what toxins are released when welding and grinding?  :twisted:

following on from my previous update i ground down my welds in and around the boot hinge repair, not a bad result.

yots.jpg

rowp0.jpg

 I then started on the corner repairs below the rear light clusters. i removed my temporary brackets and cut out the infamous rot.

1yck.jpg

t4fe.jpg

not much left in the way of metal !

I then clamped in the new panel and scribed around the opening with my trusty tool

wzs4.jpg

nu1q.jpg

cckq.jpg

ett2.jpg

I then tacked it to an inch of its life, while taking time in between tacks to cool the metal

l854.jpg

637c.jpg

yrr9.jpg

I then ground the welds flush and gave it a coat of etch primer. It prob looks rough to the naked eye but bear in mind this is just bare metal rubbed with 80 grit sandpaper and a light wiff of primer. it took 5 hours to do both corner repairs, give or take the odd tea break and making snacks. time and patience paid off  :P

ho0e.jpg

rqdb.jpg

gdtp.jpg

next stage will be to fabricate a repair piece where the boot seal rubber mounts to and also do a few patches along the top of the boot lip.

on a plus note i was at peak performance today and saw some nice minis and tyre/ wheel options

4tjc.jpg

lhxn.jpg

w7lj.jpg

5y11.jpg

27e9l.jpg

rp0z3.jpg


#8 bluemini17

bluemini17

    Mini Mad

  • Members
  • PipPipPipPip
  • 158 posts
  • Location: Bangor

Posted 18 July 2014 - 08:48 PM

cheers guys, one day i dream of a world where water + oxygen + metal does not equal rust  :lol:

time for a much needed update, im not going to write much because im too lazy tonight. First off, the bottom left corner of the rear windscreen.....

dz14.jpg

I cut out the rot, made a new panel from scratch, tacked in, pulse welded and then ground down to a rough shape, some clever filling will hopefully get me a good end result - total time - 2 half days  :o

pzh9.jpg

4fw3.jpg

03w4y.jpg

19pm.jpg

0wpgv.jpg

q9sg.jpg

rui4g.jpg

while sanding the paint off i also found a panel join, ends up that my mini had a whole lower n/s rear welded in, that weld was hidden perfectly under filler! Im trying my best to make my panels fit without the need for filler but unfortunately the complex curves were hard to replicate and im afraid a dash of the filler will be needed  :oops:

oze6.jpg

moving on......

the n/s toe board where the sub frame mounts at the front....... same story here, small amount of visible rust = massive area of hidden rust!

xabn.jpg

hk08.jpg

vuf7u.jpg

b353.jpg

9wyb.jpg

bkdd.jpg

m025.jpg

f91td.jpg

hqrt4.jpg


this is a pic of the mounting nuts for the rear sub, note the raised curve in the middle of the two nuts, i assume to add extra support
f7sv.jpg


the reverse of the above pic, the curve has allowed water to sit between the bracket and the inner sill, not good
7l88.jpg

g4ll.jpg

mgcc.jpg

cj71.jpg

5ohb.jpg

rhs7.jpg

19uz1.jpg

with the floor, mounting bracket and inner sill repaired i then moved onto the wheel arch/ tub. i made a patch and bodged er' in

ljh6.jpg

1grw.jpg

0c8j.jpg

p0qa.jpg

soon followed by a new closing panel on the heal board

chj7i.jpg

7zyg.jpg

m5ui.jpg

i then made a new inner sill support, that strange 'bent dog leg shape' that is on the inner sill and ties the mounting bolts to the inner and outer sill (can be seen just above the grey primer'ed bracket in the below pic)

gz5pe.jpg

After a swig of tea i then plugged ahead and did the closing section of the heal board, i did buy a repair panel but it was pure rubbish. on a side note.... any one want to buy a nearly new toe board closing panel repair  :?  

0x7a.jpg

7bcm.jpg

g7ug.jpg

you will note that i did not close the ends fully over, this is because the outer sill sits under this 'flap'

and a shot of my welds on the 'dog leg bit'

lvyi.jpg


#9 bluemini17

bluemini17

    Mini Mad

  • Members
  • PipPipPipPip
  • 158 posts
  • Location: Bangor

Posted 18 July 2014 - 08:49 PM

on another side note i saw this cool camper van made out of old tin items, oil drums etc

t5sz.jpg

ofihn.jpg

but i was put off by the price.....

q1nm.jpg

maybe a side project for when i get board of rust!  :o


I then moved my beady eyes to the rear n/s quarter panel, i new from day one that this had to come off, it was a hadrian repair panel and had been fitted very poorly by the previous owner. the inside of the panel had no paint on it and had rusted almost through. off it came with a few cuts of the grinder

urz3.jpg

vk55.jpg

and more rust...

1fsgd.jpg

here is a pic of the original repair seam weld....not to bad with the naked eye

2zgu.jpg

and the reverse

bypc.jpg

not good.

this brings me to date so stayed tuned for more manic cutting.


Edited by bluemini17, 22 December 2014 - 05:29 PM.


#10 bluemini17

bluemini17

    Mini Mad

  • Members
  • PipPipPipPip
  • 158 posts
  • Location: Bangor

Posted 18 July 2014 - 08:50 PM

(Update from 22nd May 2014)


time for a much needed update. Im spending more time welding and less time messing around with my camera so sadly there is only 41 pics for this update  :lol:

I went from this.....

f046.jpg

97nep.jpg

to this in 2 hours. not to shabby, even managed to get the curves incorporated into the seat

93gq.jpg.

I then turned my attention to the big hole where my n/s window once lived.

94t4.jpg

I ground all the crud off and sorted out any surface rust.

I then trimmed the shell to make a perfect fit for the new panel.

with that done i then tack welded the panel home.

I was sh@*&ing myself due to the price of the panel

1s85.jpg

jtos.jpg

boqp.jpg

i fitted the glass to make sure all was good and then i began work on fabricating a new inner wheel arch, i required the outer lip and then about 2inches inside the arch.

I made a template, cut the steel, bent it and then formed the curve. tacked in then seam welded.

end result was top notch  :D

ui1ev.jpg

7xhj.jpg

d9dg.jpg

5qfk.jpg

once this was done and ground smooth i then had to sort out the rusty hole above the petrol cap. Cut out and ready for new metal

7aov.jpg

New metal in. I managed to get the coach lines folded into the correct place, a bit of work still needed during paint prep but end result is better than expected considering the crazy amount of curves!

11hk.jpg

n6ln.jpg

moving swiftly on i poured some petrol onto my floors and waited a day for the bitumin stuff to soften. i then cleaned half the floor to reveal what rust was lurking.

o2cug.jpg

cj7q.jpg

3c1y.jpg

cz3s4.jpg

that will be a new floor pan then........   :o

i turned the shell upside down, cut out the floor pan, marked the new one and then welded it in. ground the welds down and a lick of etch primer.

obuby.jpg

akfg.jpg

hmm6o.jpg

cfno.jpg

Thats all for now folks. Just need to wait on my new panels arriving before i can do any more major stuff. I will just have to do the tiny patch welds around the drain holes for now  :twisted:


#11 bluemini17

bluemini17

    Mini Mad

  • Members
  • PipPipPipPip
  • 158 posts
  • Location: Bangor

Posted 18 July 2014 - 08:52 PM

(Update from 26th May 2014)


while i wait on my new panels i made a start to the rust removal around the front.

this is what i have going on, both sides of the car  :twisted:

gt1gw.jpg

ocfj.jpg

so, normal style of approach, cut out the old and bung in the new.....

ln70g.jpg

you will notice i havnt finished the lip along the top, i am waiting on a new dash rail so i can follow the curve, i dont have a rail at the min, it rusted away!


Next area of rust is where the accelerator pedal bolts to, its duff, so out it came but not before i took reference points for the bolts that secure the pedal.

9zpzs.jpg

o1nn.jpg

e3g9.jpg

e1og.jpg

lxml.jpg

27t0e.jpg

Time to turn her onto the other edge and make a start on the driver side floor.

vr7p9.jpg

Boom, more rust, i should of taken out stocks and shares in this orange stuff  :lol:

1yep.jpg

7arp.jpg

same again, cut out the crap, bung in the good stuff ( the small holes are where i drilled out the spot welds, I will use these holes to weld in the new floor pan).

i4fj2.jpg

51lw.jpg

0gsi.jpg

pxuk.jpg

j96ii.jpg

awy2l.jpg

I havnt welded in the flange at the top as this will be replaced with the new flitch panel when it arrives.

As always, the pace is moving slowly but surely. Everyday that goes by i feel my welding improves or i learn a new trick.


#12 bluemini17

bluemini17

    Mini Mad

  • Members
  • PipPipPipPip
  • 158 posts
  • Location: Bangor

Posted 18 July 2014 - 08:56 PM

More updates coming soon........ the whole of June's work.


#13 exuptoy

exuptoy

    Super Mini Mad

  • TMF+ Member
  • PipPipPipPipPipPip
  • 674 posts

Posted 18 July 2014 - 10:13 PM

Awesome work and your welding is looking good.

#14 Covert

Covert

    Super Mini Mad

  • Members
  • PipPipPipPipPipPip
  • 526 posts
  • Location: Northampton

Posted 19 July 2014 - 07:19 AM

Well done matey, considering you havent welded before you are doing really well, im so glad you took that rear quarter off, hidden treasures lurk within .....

#15 Steve8274

Steve8274

    Super Mini Mad

  • Members
  • PipPipPipPipPipPip
  • 580 posts
  • Location: Wigan (north west)

Posted 19 July 2014 - 09:49 AM

Impressive for a novice welder. I still working up confidence to start on mine.


0 user(s) are reading this topic

0 members, 0 guests, 0 anonymous users