No pretence at vast Mini experience on either of these topics, but 30+ years Mini Van ownership and 30+ years self-employed in mechanical engineering, racing, restoration etc business on both 2 and 4 wheels ought to lend some credibility to the approach.
I was struck how little (zero !) VAN information I could find before I got stuck into this job and swore I would publish a few pictures once I'd cracked some nuts.
I'm in France so suppliers and ingredients will be different but the principle will be the same. Some of the sizes are fortuitous, you can use what you’ve got to hand obviously – if you’re capable of making this stuff you’re capable of filling in the gaps in the explanation.
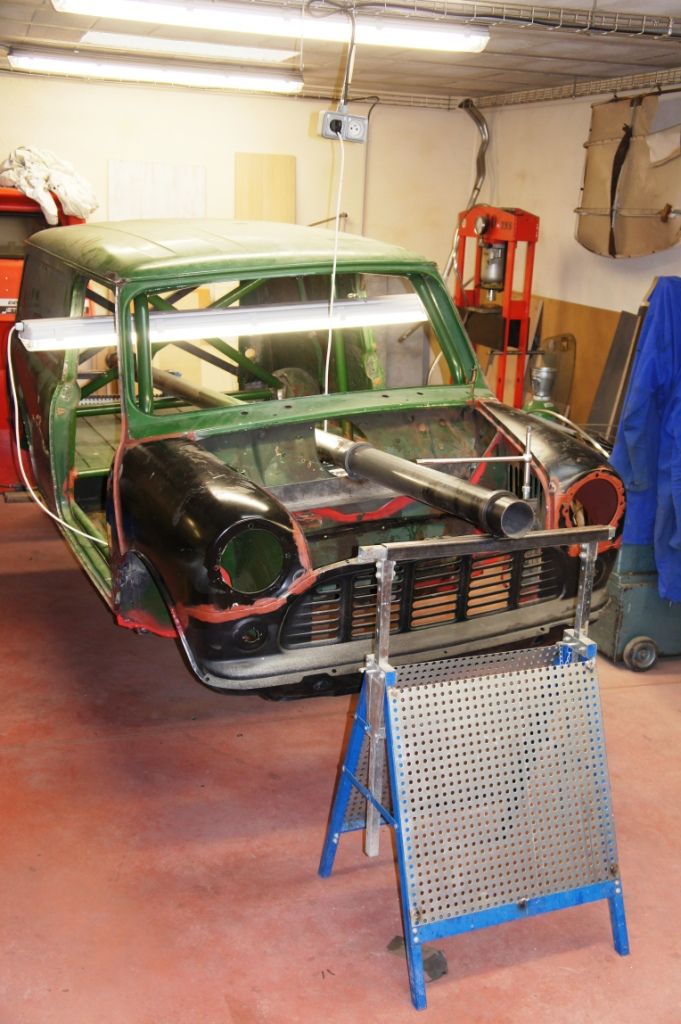
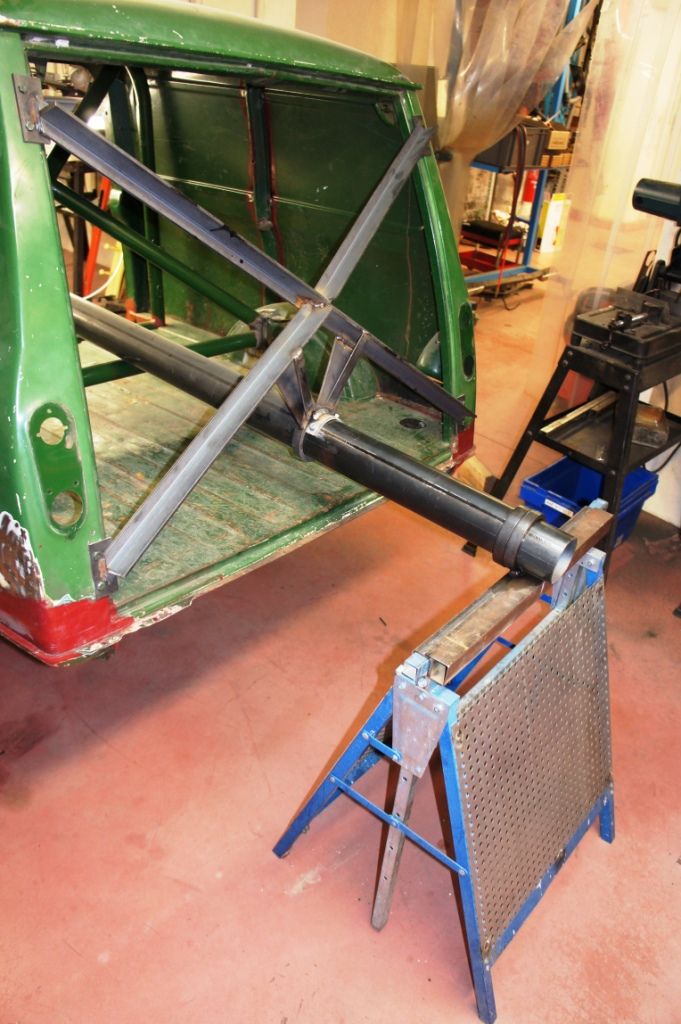
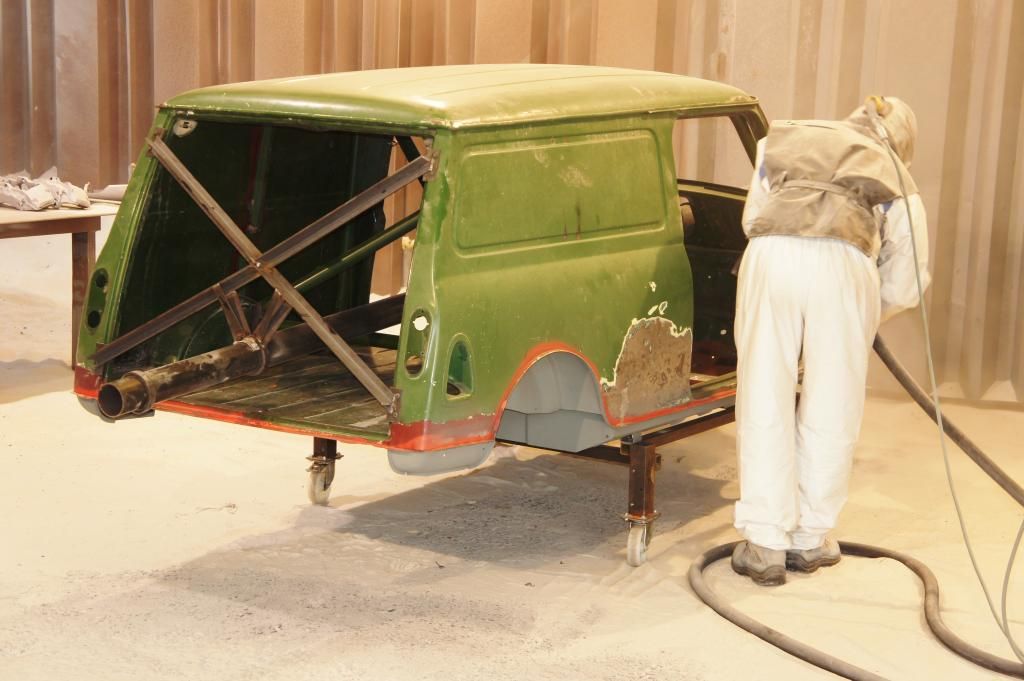
The big hole in the van bulkhead makes it an easy decision to go for a big-tube type spit, which is much nicer to make than one that has independent front-and-rear sections since there are no cantilevers or over-hangs to cope with.
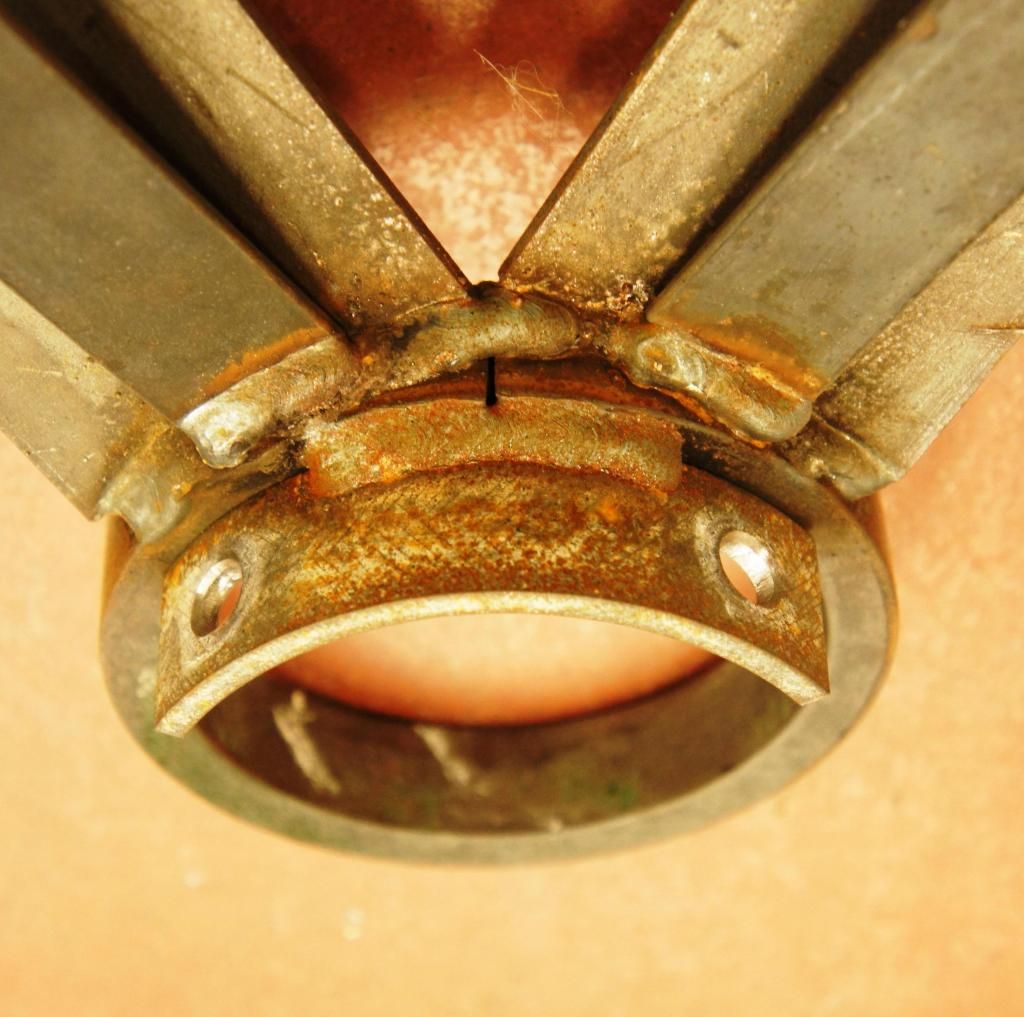
The key to making this as elegant and easy as possible is to locate suitable steel rings that "fit" your bit of pipe, since these form the anchorages and the pivots for all the rest.
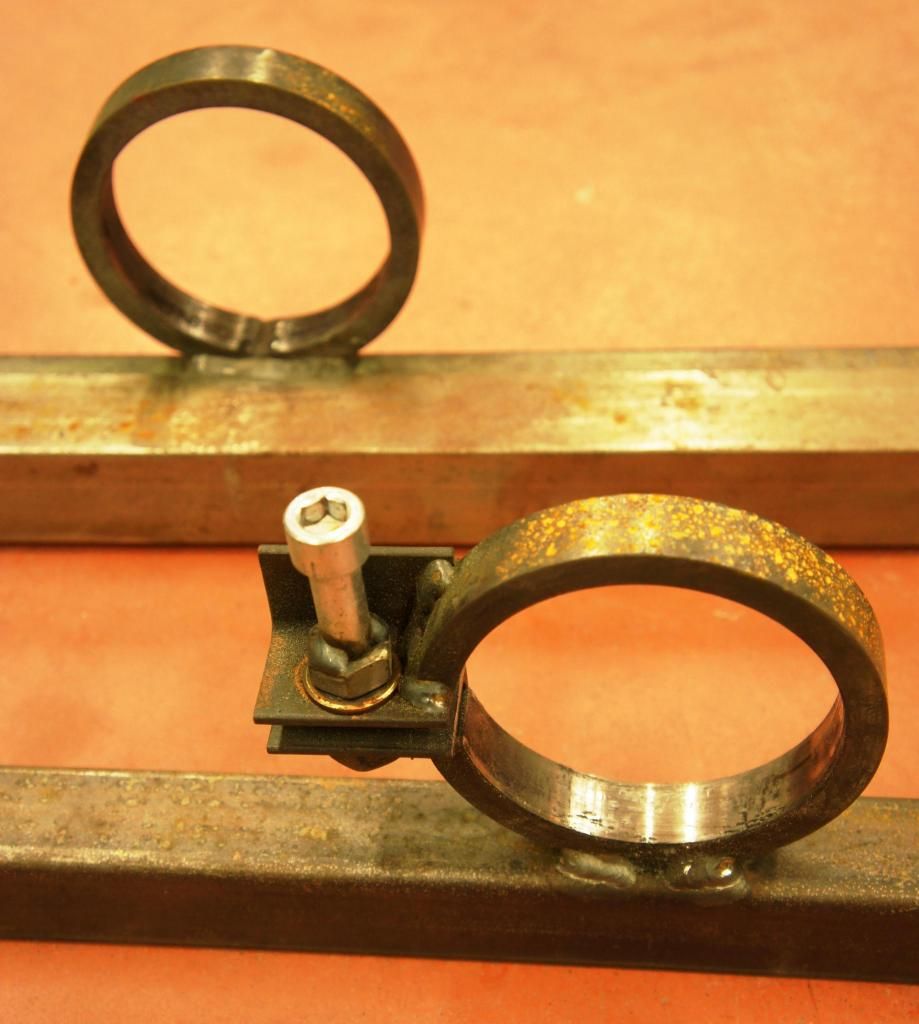
I found that a local steel supplier had, amongst the decorative wrought-ironwork stuff, perfectly rolled steel eyes that were destined for gates/panels/grills etc - these were about 90mm bore and rolled from a 20mmx10mm section, and at about £5 a piece it wasn't worth making them.
These fitted perfectly around the 89mm steel pipe x 2.8mm wall (probably actually an Imperial size - 3.50" ?) that I'd been eying up as a suitable spit ; they were loose enough to act as pivot rings, and close enough to be modified to give good 360° clamping force ; I used 5 in all I think.
It is worth insisting on the value of getting these ingredients right - the steel pipe is stronger than it needs to be, but the big diameter gives both a massive clamping surface for static use, and a comfortably large "bearing" in the dynamic situation. These parts are what makes the rest so simple to build, and so elegant in use.
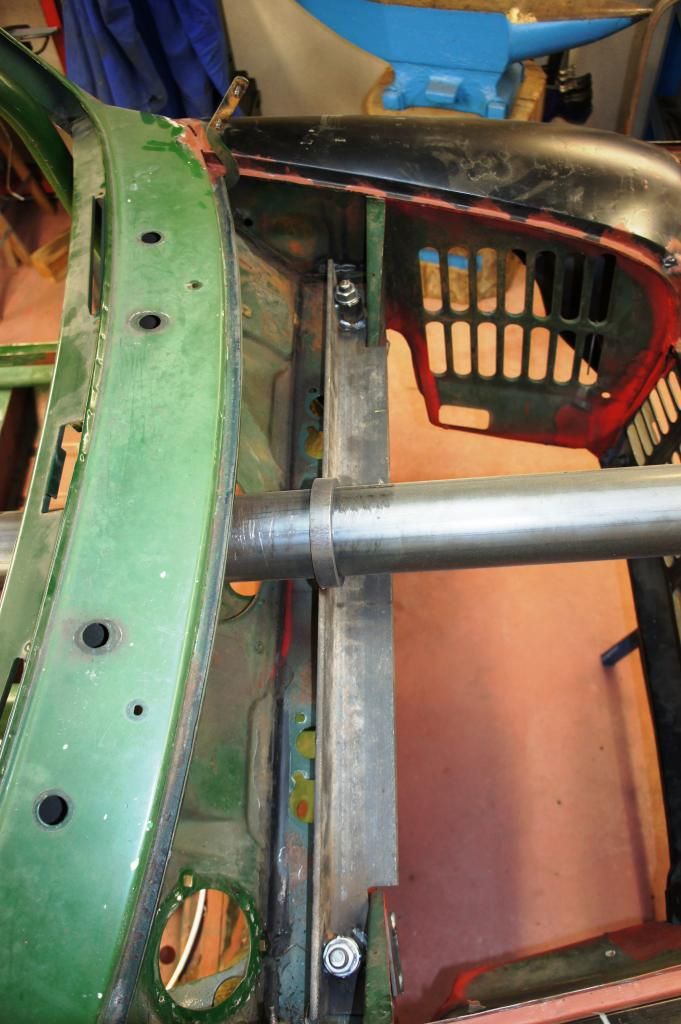
Front anchorage :
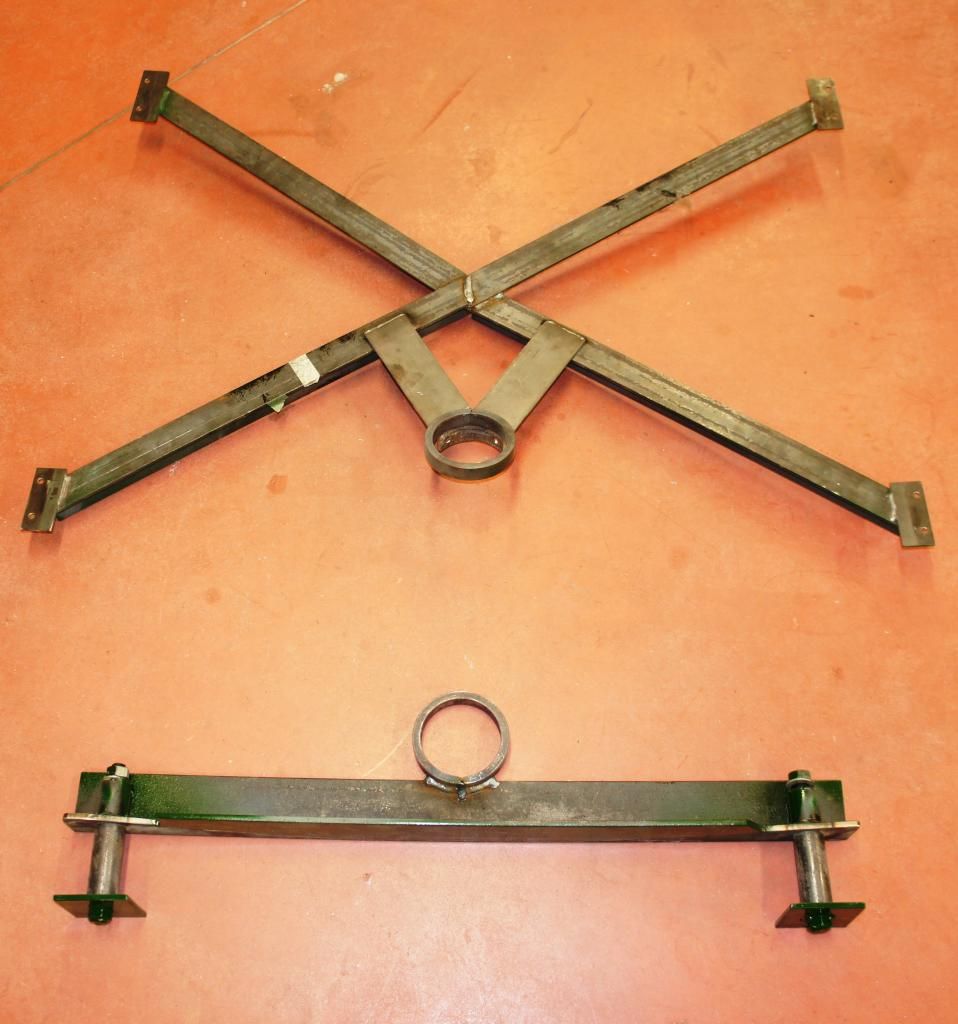
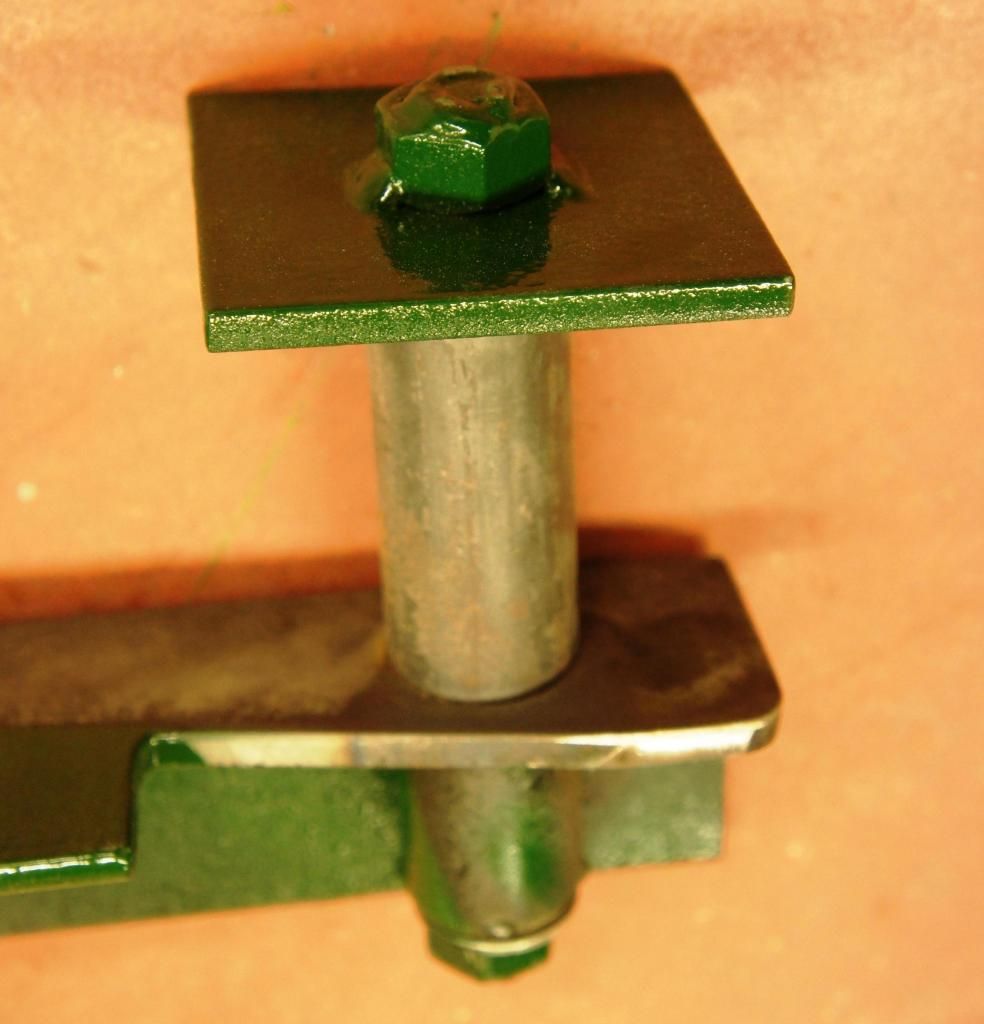
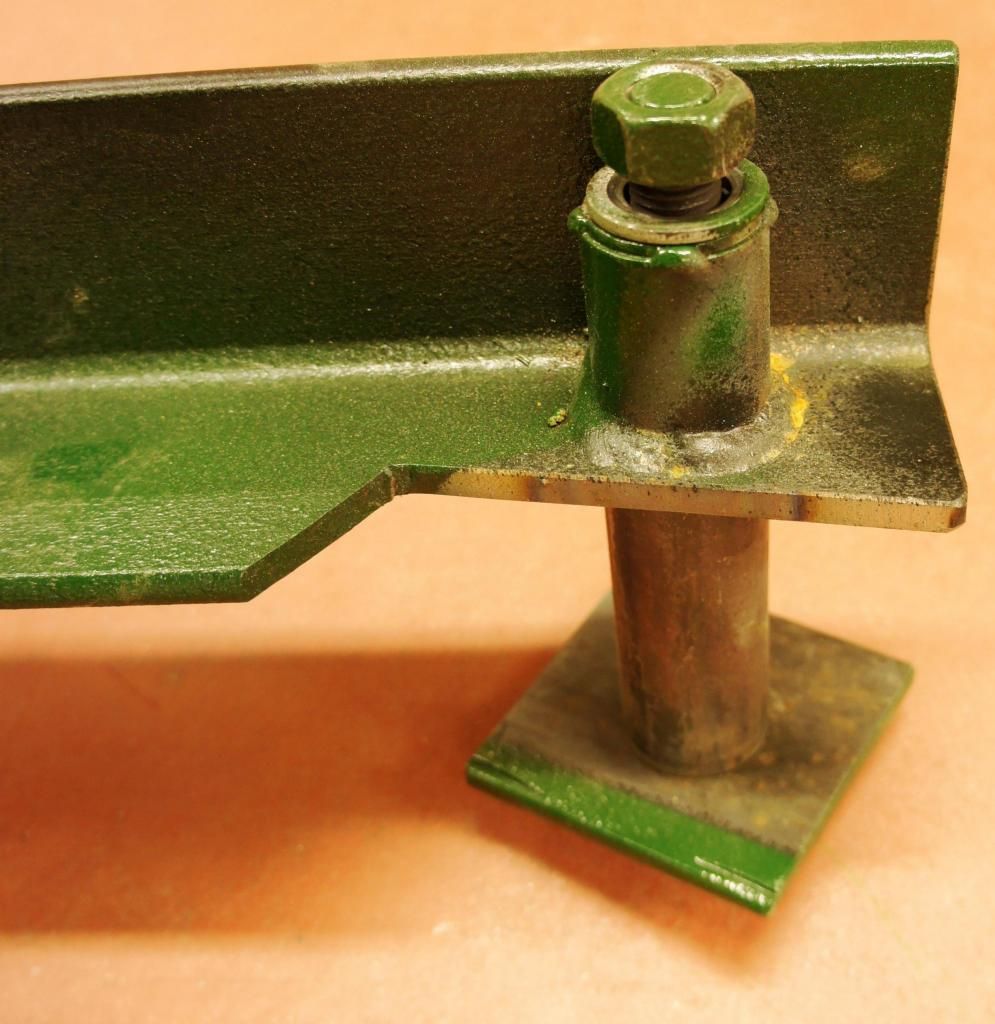
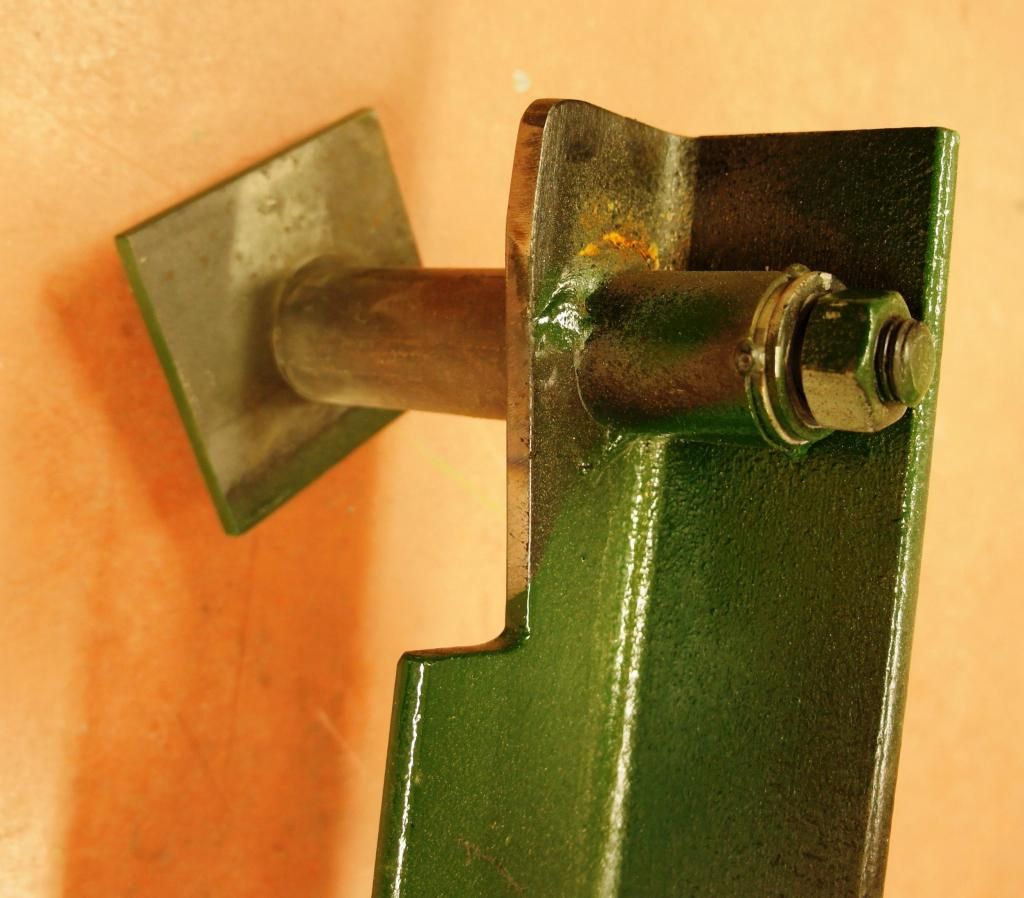
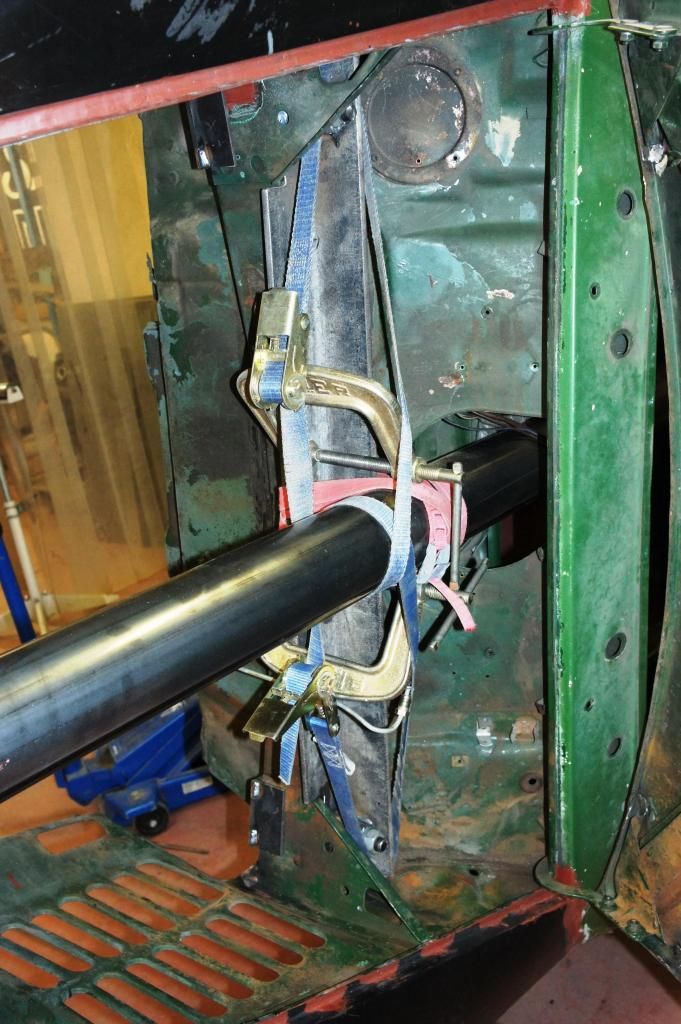
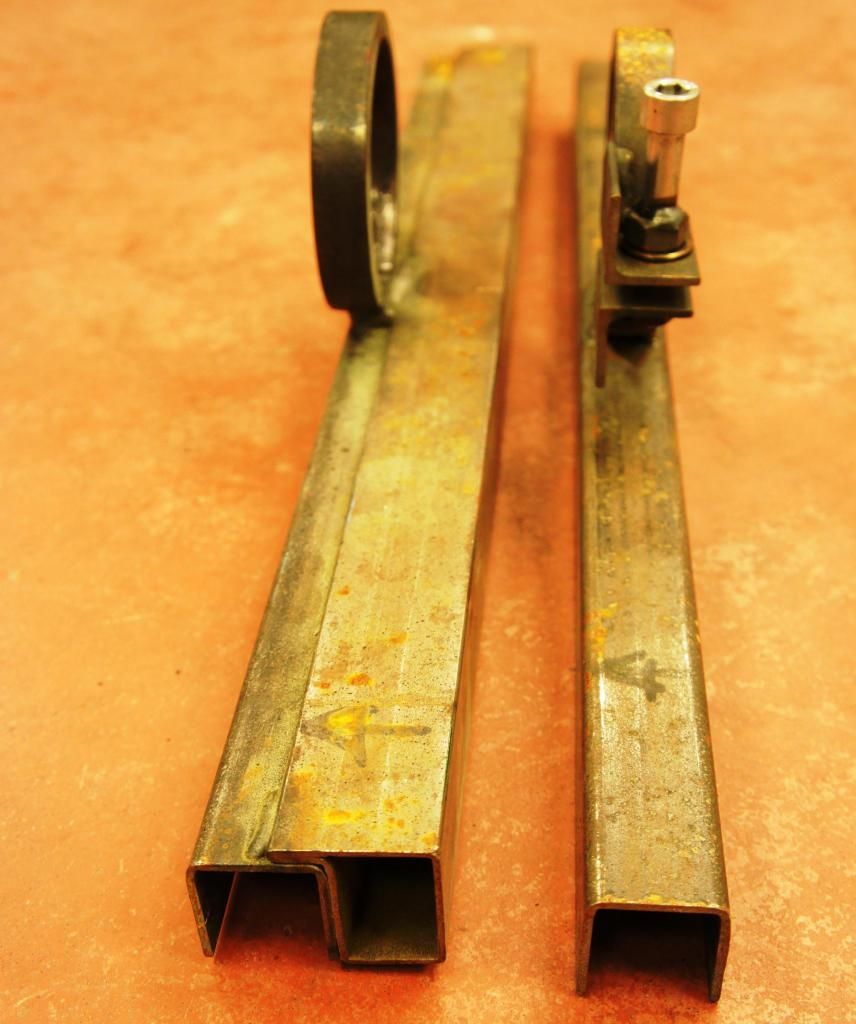
A traverse across between the big front-subframe bolts was made from a bit of 70x70x8 angle, trimmed to clear the gussets where necessary, to which were welded two length of 33mm steel pipe, 84mm –the thickness of the box-section - poking downwards through the main box-section, 40mm standing proud above the angle.
The 16mm studding goes though these stubs, and two square 80x80x6 washers sit underneath the box section with welded M16 nuts on them.
Thus when tightening the nuts you are clamping to crush the stubs and not the box-section, which is protected by the protruding 84mm pipe-length.
Rear anchorage :
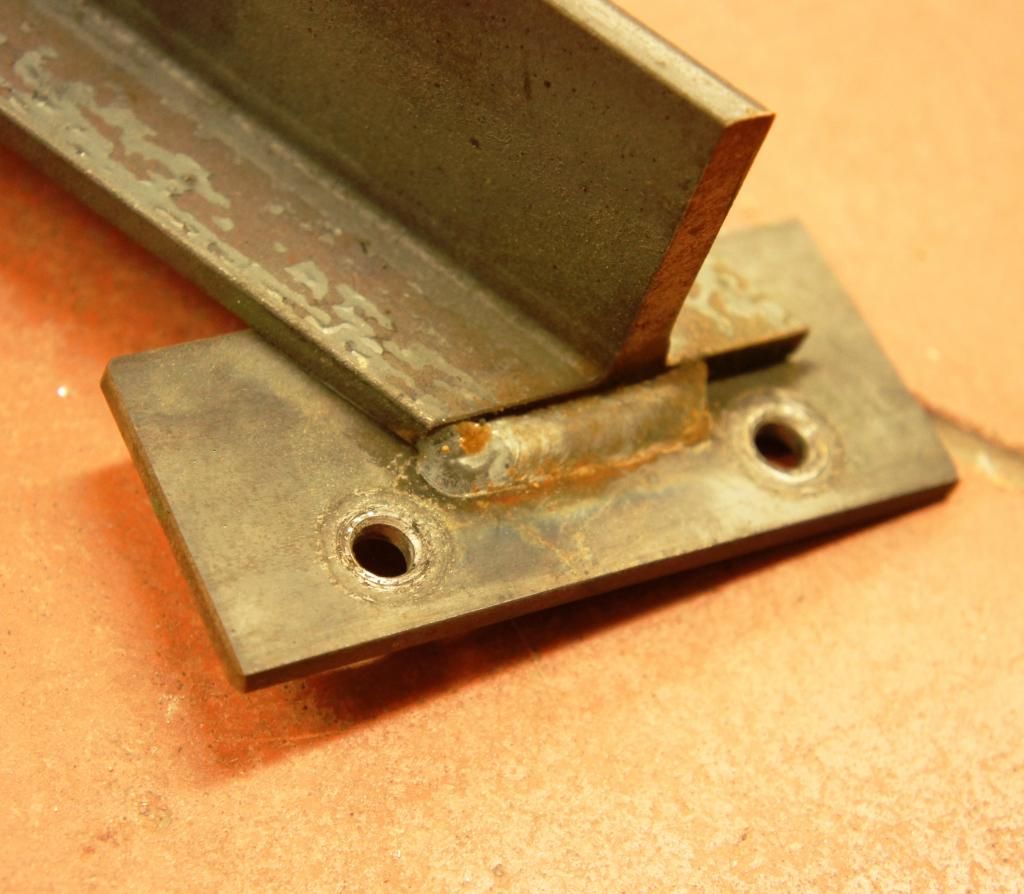
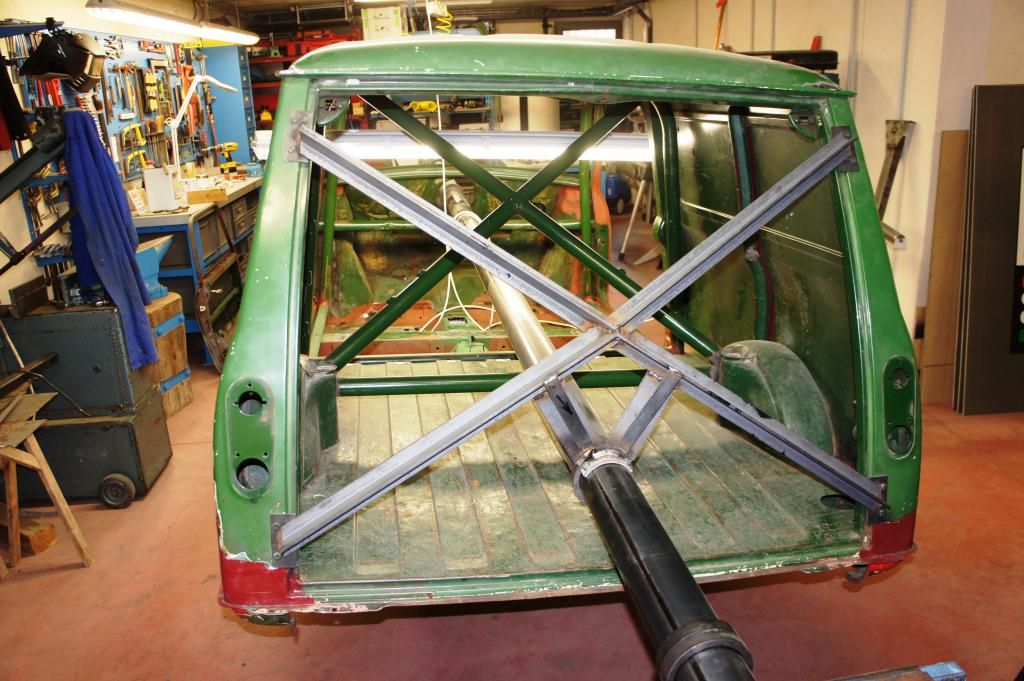
Four 2-bolt plates were knocked up out of 5mm steel to pick up on the van rear-door anchorage points, and bolted into place.
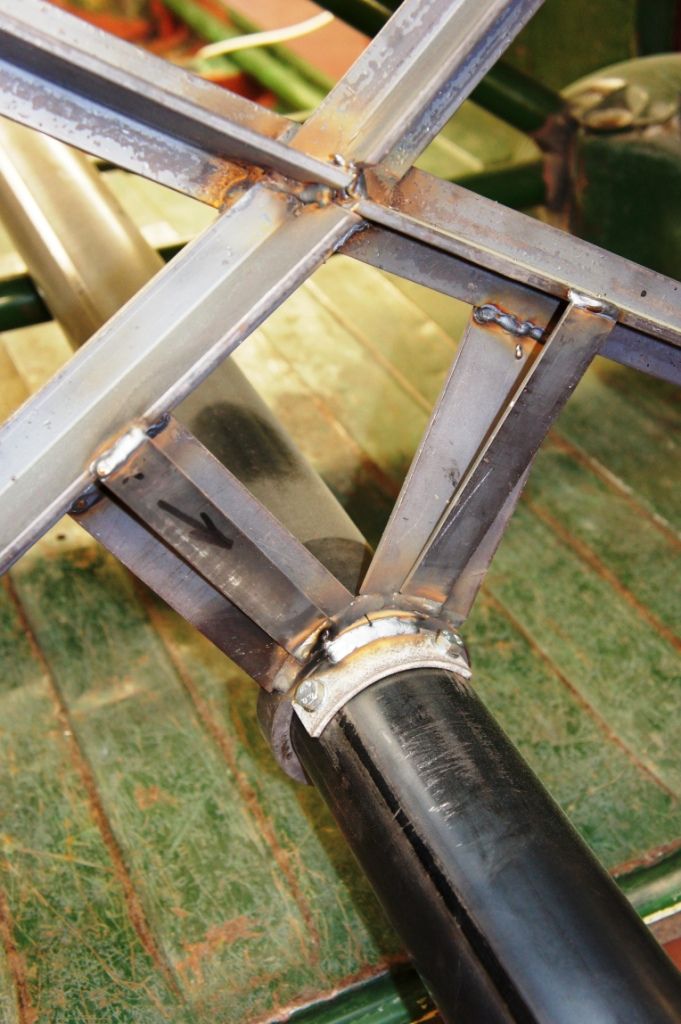
Then suitable lengths of 45 x 45 x 5 T were used (angle would do) to form a star-fish or spider to join all 4 together as shown, welded with everything still bolted to the shell – obviously.
At this point you’re ready to stick the spit through the car. Remember that none of the rings have been used yet or welded into position.
The height of your anchorage at the back is what determines the C of G, since the front is more or less dictated by the dashboard hole. My shell was bare when I did this, but even with the rear sub-frame in place I was later able to roll the whole lot and still clamp it in any position I desired.
After quite a lot of trial and error, the spit centre at the rear ended up about 95mm above the level of the lower rear door hinge bolts.
NB : at this point my Van already had the Roll-Cage inside, so the balance may be slightly different on yours ………
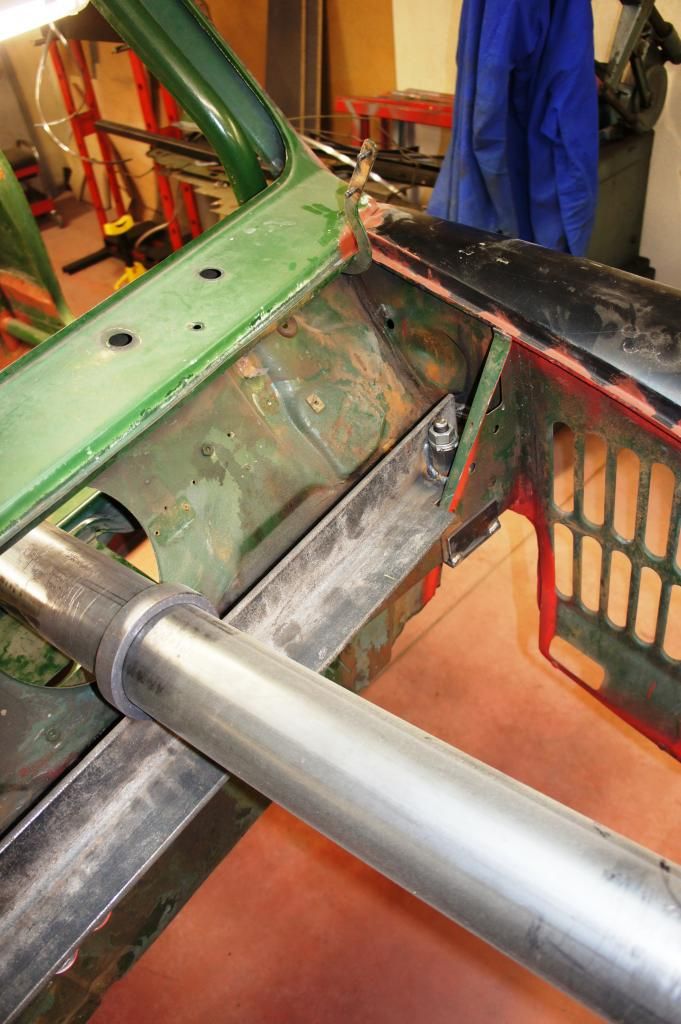
Once you’ve aligned the spit in this position, you can tack-weld the front ring onto your 70 x 70 traverse, then slide a second ring up from the back and brace it up to the main spider with some suitable sections (mine here are 60 x 5, plus a couple of 25 x 3 gussets).
Test your balance on a couple of trestles, and then pull out the spit and remove the anchorages to MIG weld the whole lot up definitively.
Essentially the hard work is now finished.
The spit :
My spit was a couple of feet longer than the car at either end.
Having refitted the shell brackets and refitted the spit, I added two M8 threaded inserts into the tube (so they remained flush) and added a saddle to the back of the rear ring so that – with a pair of M8 bolts – the shell was now fastened to the spit.
The trestles :
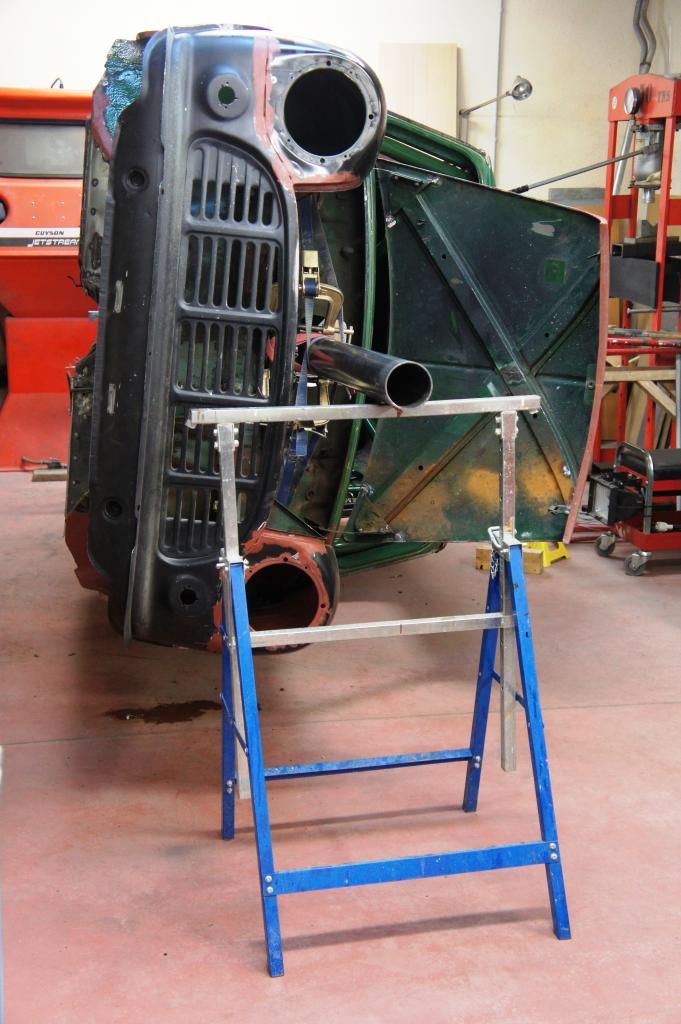
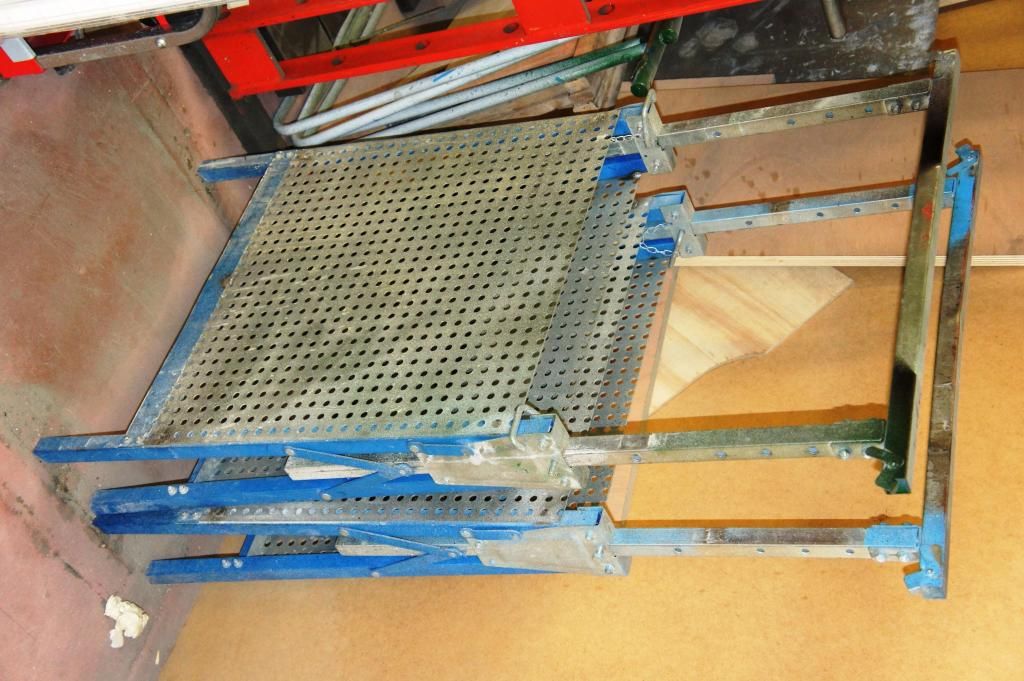
I used two cheap Chinese adjustable steel trestles, the kind of crap you find for £25 a pop everywhere – if you chuck out ALL the bolts when you buy them and use decent stuff, they are actually very durable.
I added four perforated 15/10 steel panels (+ MIG) to give them a bit more inherent stability, and just made two U channels to sit over the square top-tubes that would spread the weight of the car – to one I added an extra bit of square tube for strength and next time I would do both.
The pivots in the middle of these U channels are the bearing elements inside which your shell is going to rotate.
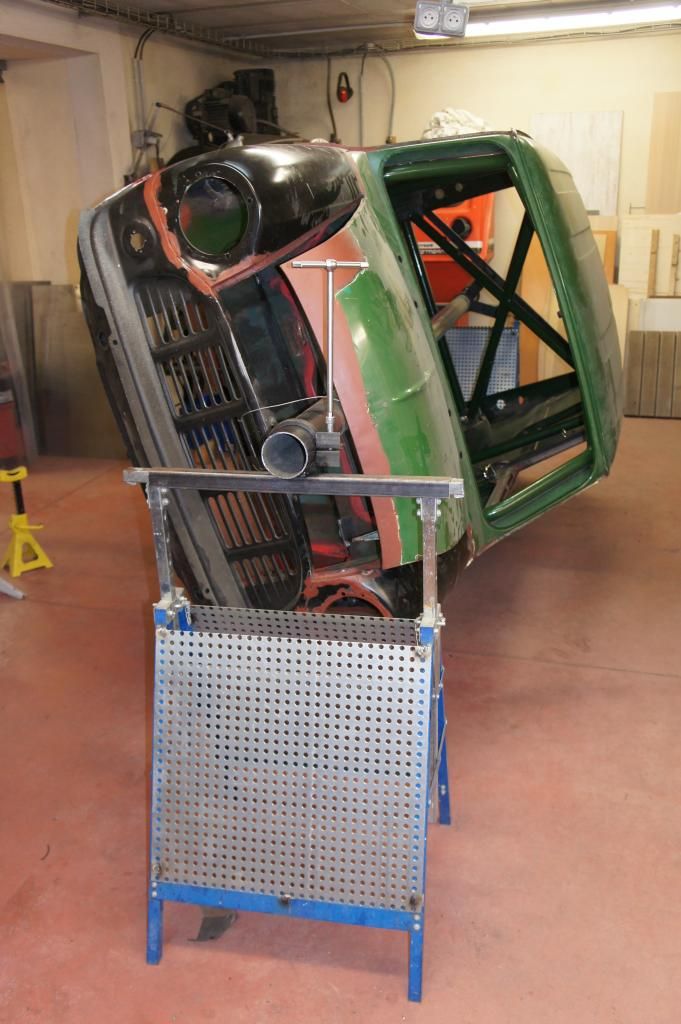
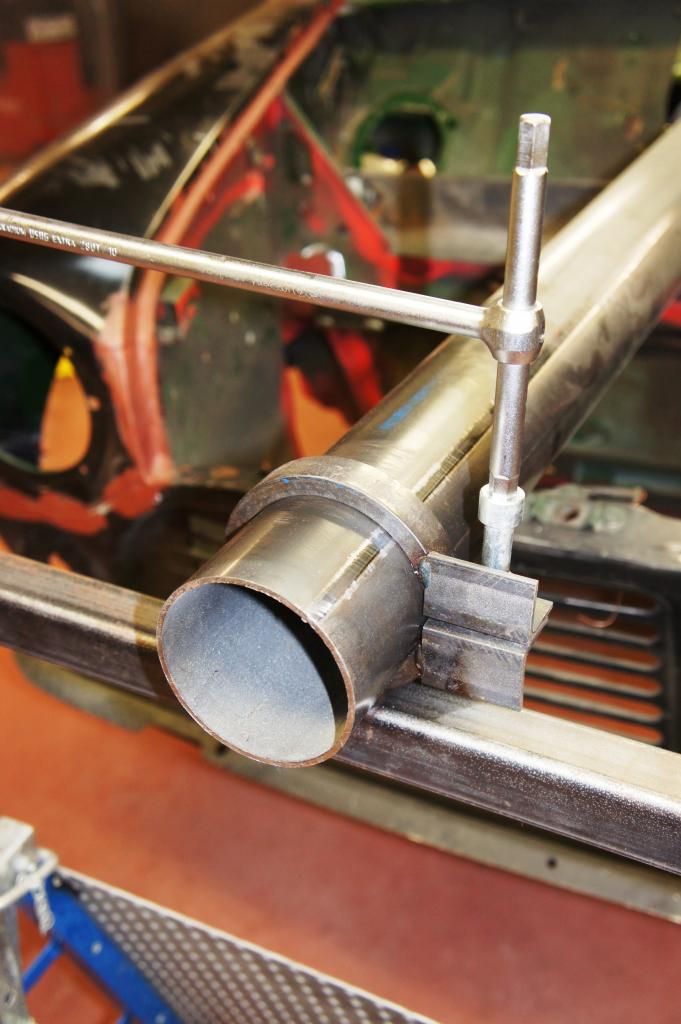
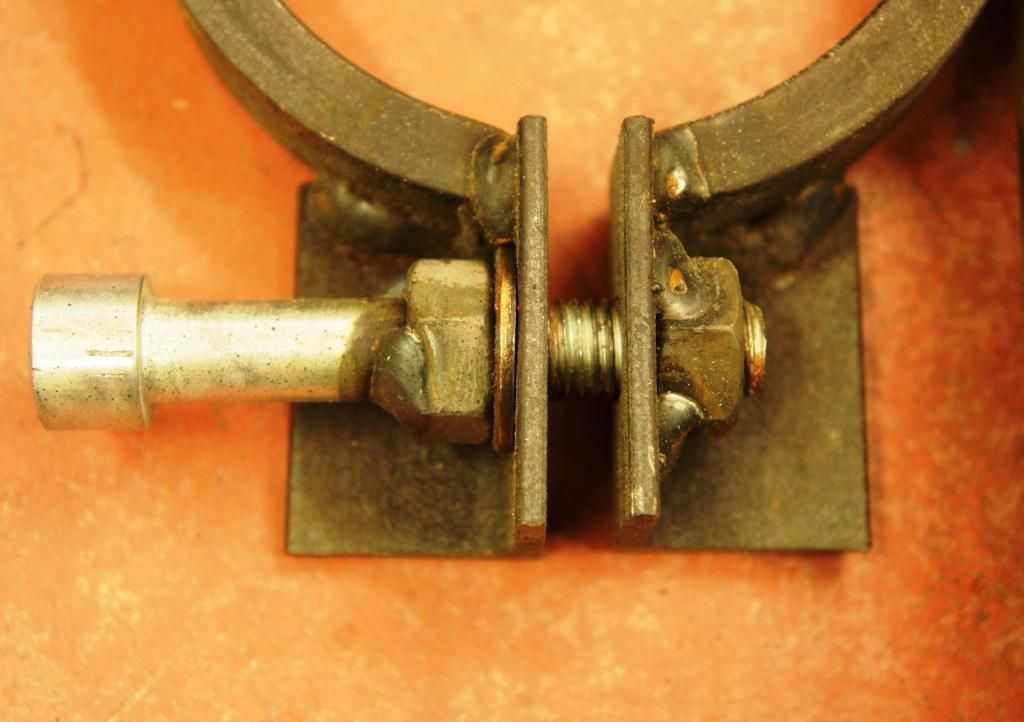
By splitting the top ring and adding an M10 clamping bolt you get an easy way of locking the shell in any position, the lower (rear) ring is just a bearing and can be welded onto the U.
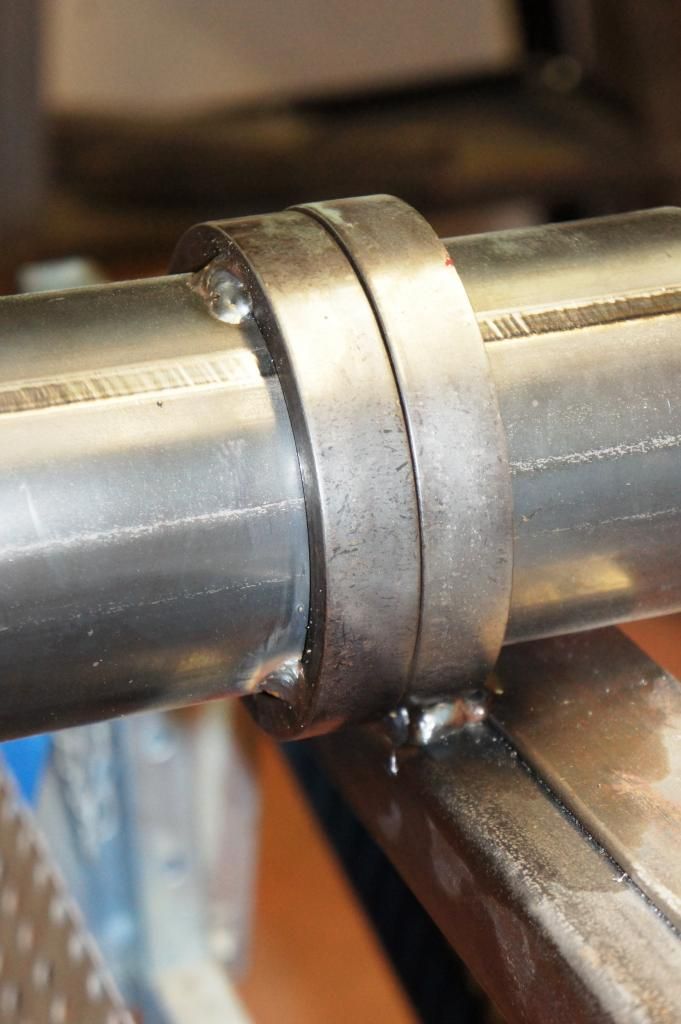
You will find that the spit ends up higher at the front, and the car tends to slide back down the spit, so I welded the 5th ring upstream of the bottom bearing ring, above the rear trestle, directly onto the spit, and this became the “thrust bearing”.
The result :
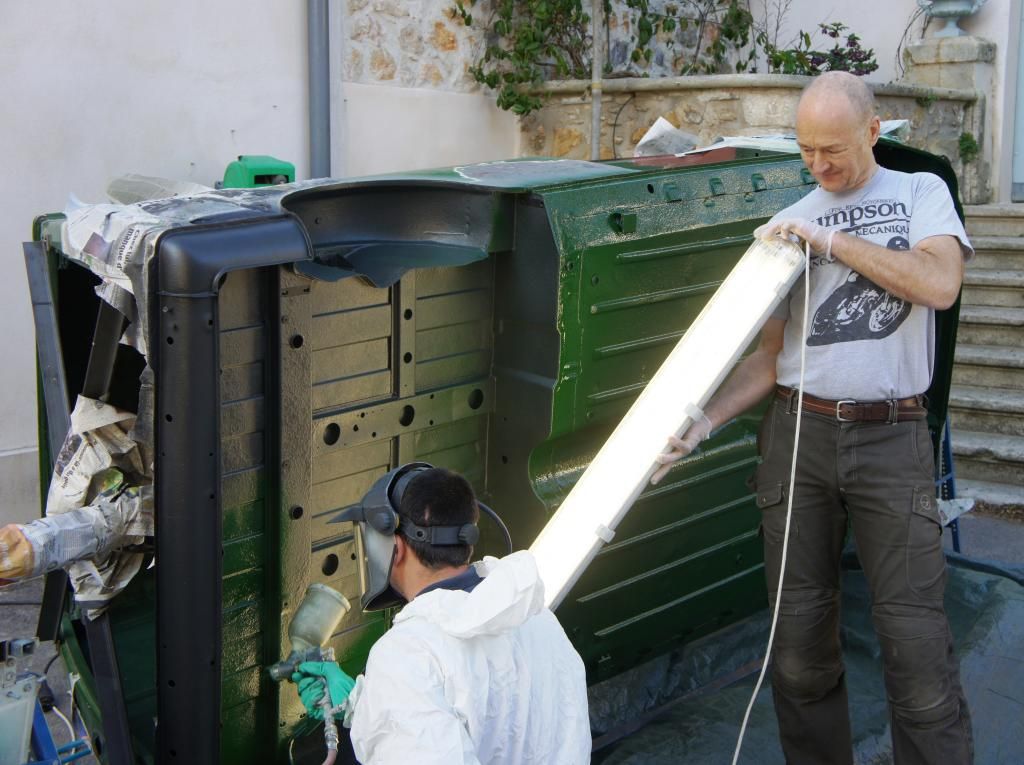
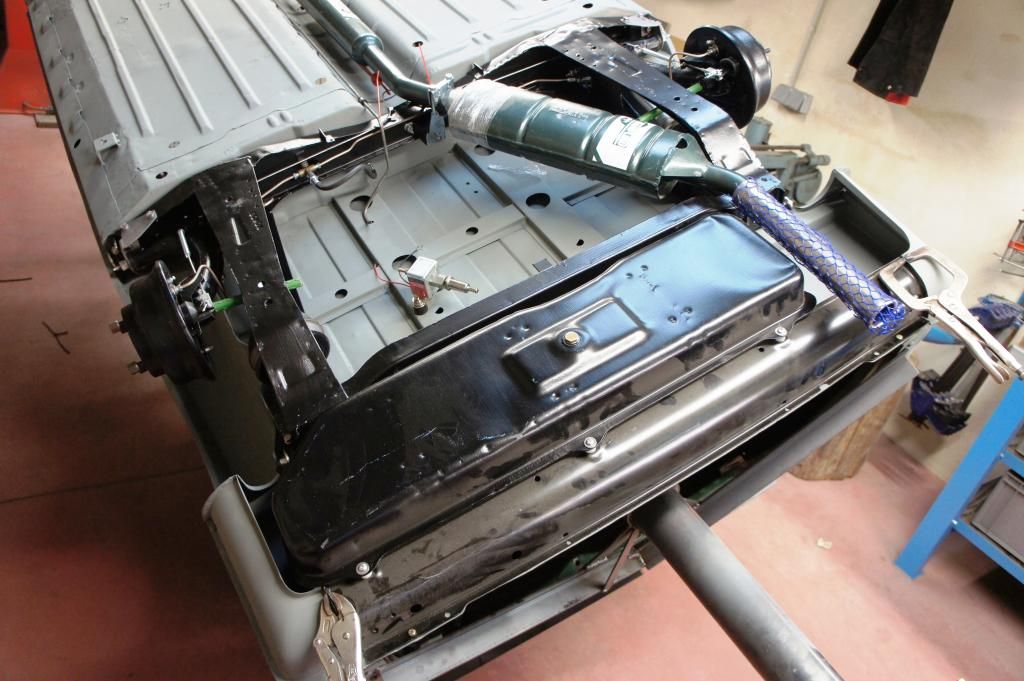
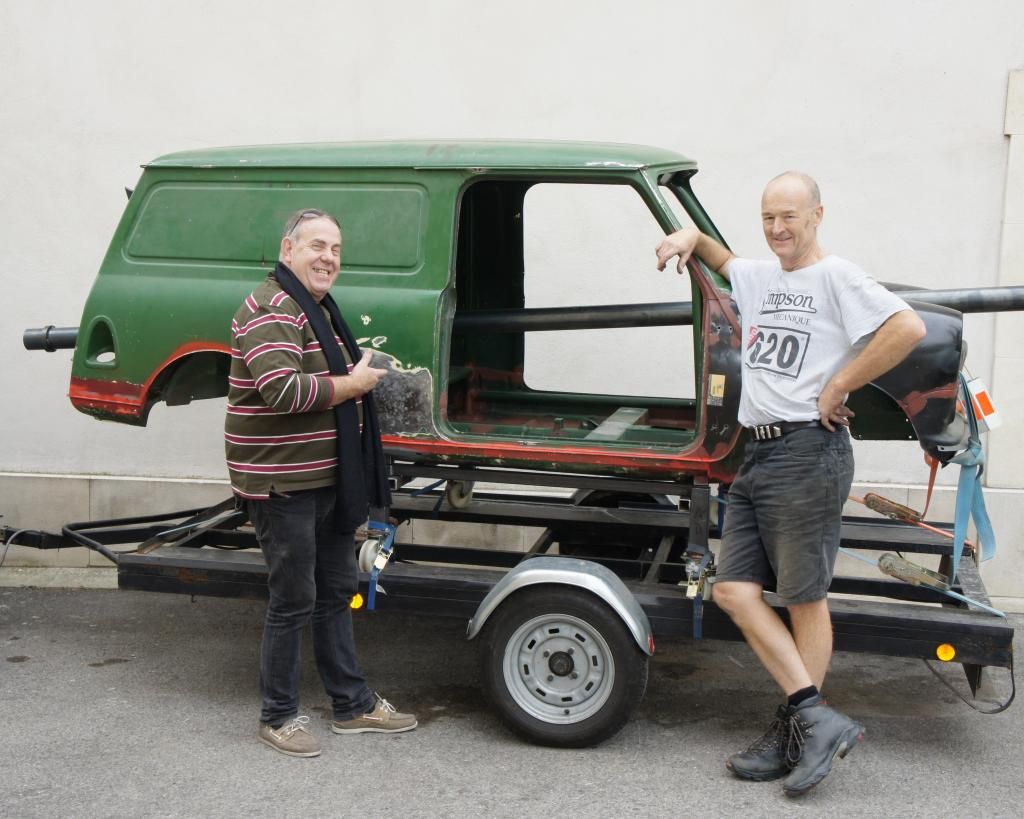
Using this method and these sections you end up with an assembly which is bullet-proof, rigid, is easy to remove and to store, and will hold the car (including rear sub-frame) in any position you choose – including whilst you are working inside the shell – and can be quickly set up if you have any work done off-site, like here for some grit-blasting.
The car was so well balanced and free that it could be rotated, then stopped at any position, with just one finger.
There are almost no modifications made to the tube itself – just one ring welded near one end, plus two threaded inserts – so it can be stored in very little space or re-used in other projects or for other rotisseries.
It will also make a fantastic bazooka for our impending civil wars here.
If you're interested in the Roll-Cage I shall be posting that separately.


