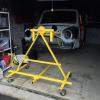
Great idea for practise, you could make a sculpture out your subframe.

95 Sprite Rebuild & 16V Conversion
#31

Posted 17 January 2015 - 06:41 PM
#32

Posted 18 January 2015 - 01:45 PM
I made myself a leaning tower of weld practice when I started ![]()
#33

Posted 19 January 2015 - 11:57 AM
Haha I don't think I have to artistic flair to be creating any sculptures, I'll be creating something to sell to the scarp metal merchant I imagine :)
#34

Posted 24 January 2015 - 06:19 PM
Not had chance to do any real welding practice, I have got it up and running but quickly managed to destroy a tip and the spares I bought turned out to be the wrong ones, so that's on hold now until next weekend, so I had a bash at some panel removal, first one done, one front wing is no more....
 Mini-65.JPG 64.74K
28 downloads
There were surprisingly few spot welds holding it on to the inner wing!
I might get time to remove the other side and the front panel tomorrow, then it's decision time; the inner wings are not in a great state, at the very least it'll need the front section replacing with a repair panel along with the flitch panel on both sides, so I'm thinking I may be as well just bite the bullet and replace the whole shooting match with the heritage panel that comes complete with the A panel.
I also cleaned up one of the botched parts of the front subframe to see what was going on there, I've posted this in another thread I started to garner opinion on whether I should live with this or ditch the thing, but here's what it looks like....
 Mini-63.JPG 52.23K
58 downloads
  Mini-64.JPG 46.1K
40 downloads
Anyway, that's a decision for another day.
#35

Posted 25 January 2015 - 03:26 PM
Finished the front end removal today, decision made about the inner wings, complete replacements to be done so I made my life easy and cut the front of the wings off rather than take the front panel off the wings.
 mini-68.jpg 78.43K
18 downloads
 mini-69.jpg 65.78K
16 downloads
So that is about as far as I can go now until I'm happy with my welding skills and I have bought the first set of replacement panels and some steel (panels and some tubing for bracing the shell before I crack on with the floor.
Interesting use of masking tape I found on the inside of the seam between A panel and wing on the drivers side! not sure that was ever going to help prevent ingress of water!
 mini-76.jpg 69.74K
45 downloads
At least I now have a nice pile of scrap for welding practice.....
I decided before I packed up to uncover the previous repairs that had been made to the bulkhead, here they are from the outside...
 mini-74.jpg 120.37K
59 downloads
 mini-73.jpg 83.8K
36 downloads
From the inside you can see it really is just a patch panel on top of whatever issue it was put in place to resolve and that it is in a bit of a sorry state....
 mini-70.jpg 76.68K
61 downloads
So it looks like I'll be putting in a new section in the middle of the bulkhead there, I will probably go much larger than the repair patch that is already there as it looks a bit dented and there's clearly some pitting from rust further out from the patch. The corner section will be partly resolved by the new inner wing so I should only have to patch up a small section to put that right, from the inside this really isn't good!
 mini-67.jpg 40.67K
45 downloads
Another panel that's clearly going to need some work is the toe board, it's been botched a bit at both sides along the bottom edge, not sure I want to be replacing the whole thing so I'm hoping I can get away with doing some proper repairs to the bottom edge when I come to replacing the front floor pans.
#36

Posted 27 January 2015 - 03:57 PM
Yet again amazing progress mate, be sure to put some pics up of your welding practise. Be interested to see as I just started myself last July.
#37

Posted 05 February 2015 - 11:02 PM
Hoping to get some practice in this weekend so I can get cracking again!
#38

Posted 06 February 2015 - 09:24 AM
Hope it goes ok, I found it difficult to start even after doing a college course but that's not to say you will, any probs just PM me.
John
#39

Posted 08 February 2015 - 10:22 AM
OK I had a little dabble yesterday; firstly I just ran a couple of runs on my old rear subframe where I had cleaned it up to find out what happens when I pull the trigger ![]() after a couple runs of splattery mess (top left of the picture) I managed to do a couple of runs without too much splatter or mess as you can see....
after a couple runs of splattery mess (top left of the picture) I managed to do a couple of runs without too much splatter or mess as you can see....
 FullSizeRender.jpg 49.97K
36 downloads
So I hacked off a small piece of steel from my previously removed inner wing, removed the paint and cleaned it up and had some further attempts, I also cut a slit in it to try welding it back together but it was really too wide so only my very last attempt having closed it up a bit and clamped it together did I have any success, albeit only about 1cm of success!
You can see the slit I cut just to the left of centre and my 1cm of success is towards the bottom, I simply burned the thing wider when the gap was too wide to start with.....
 IMG_2808.JPG 57.29K
50 downloads
As you can see from that photo I did blow a few holes and make some mistakes but I do seem to have had a little success too, I seemed to have no real problem with spot welds it was just the runs where I didn't get it right every time, but after a bit of tweaking of the settings on the welder things went a little more smoothly; simply upping the wire speed to 7 from the manuals suggested 5 - 6 seemed to help a lot.
And here's a picture of the reverse so you can see how I have really done....
 IMG_2809.JPG 50.88K
33 downloads
So I am now pretty confident that I can learn this welding malarky and just need a little practice, I shall go and source some sheet steel so I don't need to mess around cleaning up old stuff for practicing; while it seemed like a sensible and economical idea it's a bit of a faff and I can probably get some off cuts for next to nothing anyway and have enough left over to do the small patch repairs I will need to make where I'm not replacing whole panels.
#40

Posted 08 February 2015 - 11:21 AM
Hi,
Just picked up on your thread today. Some common items. The Tower bolts on my Spi seemed to come undone far too easily. I was expecting a fight. The spot welds in the top gutter between front wing and inner wing were apalling. Only 6 a side and most of them didnt have to be drilled out, only light leverage was required - shocking.
Wherever metal joins metal on a Mini, there will be rust........keep it up.
Adam
#41

Posted 08 February 2015 - 03:09 PM
Cheers, I'll have to have a read through your project to see what I can learn!
#42

Posted 08 February 2015 - 09:53 PM
It's all about the welder settings and prepping the surface for welding.
#43

Posted 22 February 2015 - 05:42 PM
Well it's been a little long since my last update but I have been making progress, not quite as quickly as I would like and also uncovering more rot to be replaced!
I started by removing the right inner wing, or what I had left of it, I got most of it off except the very bottom corner, the bottom edge was 3 or 4 sheets of steel and filler where is't been patched and patched again. The whole thing to be honest was a bit of a nightmare as there were plates welded on with the seam welded along runs of spot welds where the original wing met the bulkhead so I've ended up with a bit of a mess to repair along the edge of the bulkhead, I guess that will be a good test of my welding.
 Mini-77.jpg 50.26K
40 downloads
So I left it at that for the time being and moved on to stripping the bulkhead, I've managed to get the top part including the cross member stripped, rot cut out and have just in the last hour given it a quick coat of Electrox to keep the rust at bay, next step will be the repairs where I have had to cut out rot or where there's a bit of damage from wing removal and then onto the repair of the lower part of the bulkhead.
Anyway, here's a bit of a timeline in pictures....
Cleaned and ready to strip, a thick layer of bitumen type paint was messy to remove and for the first time I can see the original red!
 Mini-80.jpg 86.86K
32 downloads
Oncovered rot along the top of the bulkhead on the left side, this also revealed a complete lack of an edge along the top dash rail where previous repairs had been done, looks like a new dash rail is in order.
 Mini-81.jpg 58.22K
30 downloads
The Right side isn't so bad but there is a bit of dash rail rotten away there too.
 Mini-83.jpg 56.04K
24 downloads
Right hand cross member is quite badly pitted but not enough to replace it, I do need to cut out the section with the engine stabiliser bracket is mounted as that has rotted inside so I'll be putting a new bracket on when I've patched it up.
 Mini-82.jpg 75.42K
27 downloads
Stripped!
 Mini-84.jpg 82.62K
39 downloads
Uprights removed, glad I decided to do this, a right rusty mess underneath on both sides.
 Mini-86.jpg 82.72K
35 downloads
Everything removed that I want to remove and back to bare metal.
 Mini-87.jpg 76.09K
41 downloads
And finally a layer of Electrox (still drying)
 Mini-88.jpg 55.9K
60 downloads
Will be a couple of weeks now before any further progress is made as I am away for a long weekend in Stockholm next week, so I'll leave you a picture of whats left of my wire cup, guess I'll be ordering some more of these ![]()
 Mini-89.jpg 71.45K
28 downloads
#44

Posted 22 February 2015 - 07:55 PM
You keep surprising me with your fantastic progress mate
#45

Posted 22 February 2015 - 09:52 PM
Thanks, it doesn't always feel like great progress but I'm sure it'll feel much more like progress once I start actually adding instead of taking away!
1 user(s) are reading this topic
0 members, 1 guests, 0 anonymous users


