came out much better than I expected, saves me a few quid too 


95 Sprite Rebuild & 16V Conversion
Started by
alchall
, Nov 11 2014 05:27 PM
691 replies to this topic
#16

alchall
-
- Just Joined
-

- 604 posts
Super Mini Mad
- Location: Chorley
Posted 13 December 2014 - 10:33 AM
#17
alchall
-
- Just Joined
-
- 604 posts
Super Mini Mad
- Location: Chorley
Posted 09 January 2015 - 02:29 PM
Well I'm back in the UK, although my brain has't caught up quite yet, and ready to get cracking again.
When I got home I found this christmas pressie from my neighbour for "practice"
 image1.JPG 66.39K
16 downloads
image1.JPG 66.39K
16 downloads
This proved to be a quick build which progressed as follows...
image2.JPG 68.38K
7 downloads
image3.JPG 58.07K
3 downloads
image4.JPG 56.78K
5 downloads
image5.JPG 55.21K
9 downloads
image6.JPG 54.39K
18 downloads
Not quite a match for what I expect for the real thing but it all went together and ran first time 
Not sure why the uploader has put the photo's the wrong way up, when I view them normally they appear to be correct :-/
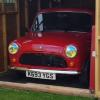
Anyway, I will post again when I make some more actual progress, oh and I spotted this little fella parked up at a house on the steepest Street in the world - Baldwin Street in Dunedin.....
NZ mini-35.jpg 107.79K
42 downloads
#18
alchall
-
- Just Joined
-
- 604 posts
Super Mini Mad
- Location: Chorley
Posted 12 January 2015 - 12:35 PM
Time for a proper update, good progress this weekend, almost finished the stripdown....
First job, out with the engine, this was actually pretty painless, it came out very smoothly and was just a little fiddly getting to the engine mount bolts...
mini-47.jpg 80.29K
17 downloads
mini-48.jpg 88.63K
13 downloads
mini-49.jpg 84.1K
10 downloads
mini-50.jpg 100.49K
10 downloads
mini-51.jpg 82.39K
27 downloads
I'm just waiting for a mounting bracket to arrive for my engine stand so it's sat on the floor for the time being, but probably won't be touching it for a while until progress is made with the shell...
mini-52.jpg 101.39K
7 downloads
mini-53.jpg 88.88K
11 downloads
Next job was to drop the front subframe out.
I removed the drive shafts complete with hubs and discs; I was going to remove the discs from the hubs but the castle nuts were on far too tightly and the force required to remove them was rocking the car on the axle stands so I decided to leave that for another day, after then removing the shocks (which had entirely different mountings to the suspension arms on each side  ) I was then ready to drop it out. In the process of doing all this I found a real mixture of imperial and metric nots and bolts, even a metric nut on an imperial bolt on one occasion!
I've also found that the tie rods are slightly bent, one more so than the other, thankfully inexpensive items to replace, may go for adjustable jobbies. Oh and it had poly bushes on the tie rods which looked reasonably new but were permanently squished out of shape so I don't think I'll be rushing to use poly bushes on the re-build!
To begin with I was concerned about dropping the thing and breaking my foot, so I used my jack and a couple of lumps of wood to steady it and lower it carefully, this worked a treat, I just placed the wood between the jack and the rear of the subframe and gently raised the jack so it was firm but didn't raise the car off the axel stands, once I'd removed all the bolts I was then able to just lower it slowly and it only fell to the floor for the last couple of inches; result!
The tower bolts were surprisingly easy to loosen with my reasonably short breaker bar.
mini-54.jpg 97.91K
22 downloads
mini-55.jpg 58.08K
12 downloads
It looks to be in reasonable condition but it does appear to have some plates welded on over the holes to the rear, not sure if this is a good or bad thing so will be posting a query elsewhere, here's a pic...
mini-57.jpg 68.46K
23 downloads
And a close up...
mini-56.jpg 78.29K
27 downloads
I also got round to removing the rear brakes, bit of a bodge has gone on here sometime in the past; no retaining screws on drums so with the wheels removed I was able to simply slide them off!  also some of the bolts were rather rounded off where somebody has been less than careful with a spanner in the past!
Anyway, that was it so here she stands now almost down to just the shell!
mini-59.jpg 81.33K
10 downloads
mini-60.jpg 82.93K
14 downloads
Attached Files
-
mini-58.jpg 76.4K
15 downloads
#19
F1L8EY
-

- Members
-
- 600 posts
Super Mini Mad
- Location: Cornwall
Posted 12 January 2015 - 12:43 PM
Spoiler alert on the Crimbo toy... i haven't made mine yet... ;) following this good luck
#20
Hendred
-

- Members
-
- 484 posts
Speeding Along Now
- Location: Cleobury Mortimer Nr Ludlow, Shropshire Name: John
Posted 12 January 2015 - 09:41 PM
Really coming along, not been that long either, I remember you just talking about starting.
Great job mate
#21
alchall
-
- Just Joined
-
- 604 posts
Super Mini Mad
- Location: Chorley
Posted 13 January 2015 - 08:15 AM
Spoiler alert on the Crimbo toy... i haven't made mine yet... ;) following this good luck
Cheers :)
#22
alchall
-
- Just Joined
-
- 604 posts
Super Mini Mad
- Location: Chorley
Posted 13 January 2015 - 08:16 AM
Really coming along, not been that long either, I remember you just talking about starting.
Great job mate
Thanks!, I'm pretty pleased with progress so far, lets see how quickly or otherwise things progress when the real work starts!
#23
alchall
-
- Just Joined
-
- 604 posts
Super Mini Mad
- Location: Chorley
Posted 13 January 2015 - 04:52 PM
So I had a couple of hours free today and decided to spend them wisely; rear subframe is now out!
No photo's I'm afraid just yet but it's looking a bit sorry for itself, and what a hassle getting it off! one mounting bolt sheared straight off and another next the the wheel arch in the boot had been welded on so I had to drill the thing out!
Will give it a clean up and see what is really lurking beneath rust and dirt but I suspect this one is not going to be salvageable, only the hubs and radius arms look to be useable.
#24
Hendred
-
- Members
-
- 484 posts
Speeding Along Now
- Location: Cleobury Mortimer Nr Ludlow, Shropshire Name: John
Posted 14 January 2015 - 02:18 PM
Not difficult to find a replacement rear subframe, just note the subframes differ slightly with the exhaust bracket on the later subframes
#25
almarsh132
-
- Members
-
- 389 posts
Speeding Along Now
- Local Club: Medway Mini's
Posted 14 January 2015 - 03:18 PM
Another red sprite rescue project! I will be following this!
#26
alchall
-
- Just Joined
-
- 604 posts
Super Mini Mad
- Location: Chorley
Posted 14 January 2015 - 05:15 PM
Looks like we're taking different routes, will be interesting to see how they both turn out.....
#27
almarsh132
-
- Members
-
- 389 posts
Speeding Along Now
- Local Club: Medway Mini's
Posted 14 January 2015 - 06:18 PM
I would say race to the finish! But mine had been neglected for two years before last weekend! Haha
#28
alchall
-
- Just Joined
-
- 604 posts
Super Mini Mad
- Location: Chorley
Posted 16 January 2015 - 08:58 AM
Look what arrived in the post...
IMG_2775 copy.jpg 86.88K
36 downloads
A fantastic early birthday present from my wonderful girlfriend!
Time to learn some welding starts very soon....
#29
Hendred
-
- Members
-
- 484 posts
Speeding Along Now
- Location: Cleobury Mortimer Nr Ludlow, Shropshire Name: John
Posted 16 January 2015 - 11:00 PM
What a treat, that welder should be perfect. I have the 150 TE (Blue one) and it's awesome.
I learnt to weld in a few weeks with alot help from this forum and did 3 days at college (crash course, welding for beginners).
You'll enjoy welding, plenty of practise on scrap metal first is the key!
Any probs or general questions don't hesitate to PM me.
Edited by Hendred, 16 January 2015 - 11:01 PM.
#30
alchall
-
- Just Joined
-
- 604 posts
Super Mini Mad
- Location: Chorley
Posted 17 January 2015 - 05:17 PM
Cheers, I shall probably commence my practicing next weekend!
I dismantled the rear subframe today, most of the bolts sheered off, one was rounded so I had to grind it off and in many places it's completely rotten as I feared and only the radius arms are worth keeping so it is going to the tip (maybe I'll use it for welding practice first!).


0 user(s) are reading this topic
0 members, 0 guests, 0 anonymous users


