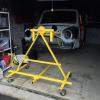
fantastic work on this! I'm still working through the strip down of my pickup, and was thinking to sort the full floor and load tray first, but having seen the way you've approached yours, I think it might start a the same place. great work :)

95 Sprite Rebuild & 16V Conversion
#286

Posted 31 August 2017 - 12:16 PM
#287

Posted 31 August 2017 - 03:24 PM
fantastic work on this! I'm still working through the strip down of my pickup, and was thinking to sort the full floor and load tray first, but having seen the way you've approached yours, I think it might start a the same place. great work :)
Thanks! updates been a bit slow recently but I'm going to post some more soon, I've also been busy updating all my posts to replace the pictures as Photobucket managed to loose them all (and that was before the big change they made).
I think if I were to do this again I might actually start from the back and work forward but with a pickup it might make little difference.
One thing I would definitely recommend when it comes to the front end is ensure you trial fit your doors before committing to welding hinge panels (assuming you need to change or repair them), I've had a massive job trying to get them to fit now and am having to use 3mm of spacers on the bottom hinge on the driver side to get it to fit straight which means I'm then going to have to do some re-work of the A panel to get the gap to be even top to bottom (going to replace that one rather than patch it as I did for the passenger side which wasn't as bad).
#288

Posted 31 August 2017 - 09:10 PM
fantastic work on this! I'm still working through the strip down of my pickup, and was thinking to sort the full floor and load tray first, but having seen the way you've approached yours, I think it might start a the same place. great work :)
Thanks! updates been a bit slow recently but I'm going to post some more soon, I've also been busy updating all my posts to replace the pictures as Photobucket managed to loose them all (and that was before the big change they made).
I think if I were to do this again I might actually start from the back and work forward but with a pickup it might make little difference.
One thing I would definitely recommend when it comes to the front end is ensure you trial fit your doors before committing to welding hinge panels (assuming you need to change or repair them), I've had a massive job trying to get them to fit now and am having to use 3mm of spacers on the bottom hinge on the driver side to get it to fit straight which means I'm then going to have to do some re-work of the A panel to get the gap to be even top to bottom (going to replace that one rather than patch it as I did for the passenger side which wasn't as bad).
Much appreciated - thank you. Pretty much the whole thing needs replaced, so just a case of starting somewhere. Will keep my thread updated on progress too :)
#289

Posted 01 September 2017 - 08:09 AM
fantastic work on this! I'm still working through the strip down of my pickup, and was thinking to sort the full floor and load tray first, but having seen the way you've approached yours, I think it might start a the same place. great work :)
Thanks! updates been a bit slow recently but I'm going to post some more soon, I've also been busy updating all my posts to replace the pictures as Photobucket managed to loose them all (and that was before the big change they made).
I think if I were to do this again I might actually start from the back and work forward but with a pickup it might make little difference.
One thing I would definitely recommend when it comes to the front end is ensure you trial fit your doors before committing to welding hinge panels (assuming you need to change or repair them), I've had a massive job trying to get them to fit now and am having to use 3mm of spacers on the bottom hinge on the driver side to get it to fit straight which means I'm then going to have to do some re-work of the A panel to get the gap to be even top to bottom (going to replace that one rather than patch it as I did for the passenger side which wasn't as bad).
Much appreciated - thank you. Pretty much the whole thing needs replaced, so just a case of starting somewhere. Will keep my thread updated on progress too :)
Looks like an interesting project you have there, will be nice to see it put back to something nearer original....
#290

Posted 01 September 2017 - 03:15 PM
Just to say I love the nightfire red, haven't heard of it before, looks almost as if it has a cerise tinge to it? Mine is a rather orangey red, (photo looks much redder than in real life) don't remember the name, but when she gets a respray it will be to a redder red, maybe like yours? Love the shiny exhaust system, I always forget to take befores too.
Just noticed this is a fairly old thread, guess you've finished by now, wondering where the final image is?
#291

Posted 02 September 2017 - 08:44 AM
Just to say I love the nightfire red, haven't heard of it before, looks almost as if it has a cerise tinge to it? Mine is a rather orangey red, (photo looks much redder than in real life) don't remember the name, but when she gets a respray it will be to a redder red, maybe like yours? Love the shiny exhaust system, I always forget to take befores too.
Just noticed this is a fairly old thread, guess you've finished by now, wondering where the final image is?
It's kind of a dark metallic red, but it's not the original colour which was flame red which I'm going to revert to.
Exhaust did come out well, undecided whether I'll use it or sell it yet though.
The last year or so has been slow progress for various reasons so not finished I'm afraid, I'm busy trying to get the doors and boot to all fit properly having repaired the frames and re-skinned them, going to re-do the A panels as they're not quite right (the fully built up inner wing and a panels were a bad move, would definitely not recommend going that route!). I now need to put some effort into finding a good bodyshop reasonably locally to I can get it tidied up and painted then get on to the oily bits!
#292

Posted 02 September 2017 - 10:15 AM
Having finally updated all my photo's since Photobucket lost them and those that they didn't loose aren't going to be available in external links anyway here's a bit of a progress update....
Boot lid has been skinned, turned out quite nicely....


Pretty pleased with that, especially since I've never attempted skinning anything before, very little distortion and hardly going to need any filler to finish off, I plug welded at the hinge points, behind the number plate to the frame and also in the top corners and these also finished off quite nicely.
However, I've got some work to do to make it fit flush at the bottom corners, not sure if I need to apply some pressure to the lid to make it fit or if I'm going to have to re-work / re-fit the rear panel repair....


I've also started skinning the doors, skins are on but I've not welded them yet as I want to get them to fit the car better first, drivers side has been a real pain, the hinge panel is out of line top to bottom (result of the trouble I had with the fully built up inner wing a panels) so I have to use 3 shims at the bottom and one at the top to get it straight and I couldn't get it to pull in tight at the back which I've realised was because when I repaired the B post I didn't quite get the shape right so I've undone the welds there, pinged it out a bit further and it's starting to look better.
How it was...


How it is now (rear wing to be fettled a bit more and then re-welded in place....


It's not far off now, once I've finished the rear wing it will be much better, and I'm going to re-fit the A panel too and I think I can probably fiddle with the hinge panel a bit that should help line it all up a bit better.
Passenger side has been much less of a problem (I actually thought it would have been the other way around), it actually fits a bit tighter front to back and again I'm going to re-fit the A panel but needed only 1 shim top and 2 bottom on the hinges to align it, I can't quite get it pulled in tight to the car at the back though even with the catch on the B post set as far back as possible so some work left to do.


And both sides have the usual odd gap in the corner that seems to be common so I'll so some welding work to close that up a little before I'm done...

#293

Posted 02 September 2017 - 11:18 AM
#294

Posted 03 September 2017 - 11:06 AM
Managed to fix the boot lid problem, application of force did the trick....

I just had to keep at this moving the clamps up and down as I went with the boot seal removed and eventually it pulled straight, I also did knock the bottom corners of the frame out a little with a hammer and between these two actions it now looks pretty good....


Also made some progress with the drivers door and rear wing, it's pretty much there now, I can pull the top edge in a touch when I weld the skin to the frame and it'll be nice and square to the edge of the wing, I'll need to tidy the wing up with a bit of filler as there's a few little dents now but I'm reasonably pleased with the way this is coming on now (it's certainly used up a lot of time and effort!)...

http://www.alchall.c...ni/mini-737.jpg

#295

Posted 03 September 2017 - 06:58 PM
Nice work on those doors
They can be a real pain to get right but in my opinion well worth the effort. There is nothing worse than a poorly fitting door I think.
Have you considered using welding rod to weld to the edges of the skin where the gaps are wider to close them up?
#296

Posted 04 September 2017 - 05:35 AM
Some nice work on those doors, there that boot lid looks ace, its a long time since I have seen someone skin a boot instead of just buying a new one. Paint cant be to far away now...
#297

Posted 04 September 2017 - 08:20 AM
Nice work on those doors
They can be a real pain to get right but in my opinion well worth the effort. There is nothing worse than a poorly fitting door I think.
Have you considered using welding rod to weld to the edges of the skin where the gaps are wider to close them up?
Thanks Ben, I agree with your sentiment, I've spent hours trying to get the doors to look as good as possible, it's frustrating but should be worth it in the end. I was at the mini festival at Oulton Park a couple of weeks back and spent ages examining everybody's doors to work out how good you can actually get them ![]()
I'll definitely use welding rod to close up the gap in the top rear corner which seems to be a pretty common problem, and will see how even the rest of the gaps are and make a decision from there.
Some nice work on those doors, there that boot lid looks ace, its a long time since I have seen someone skin a boot instead of just buying a new one. Paint cant be to far away now...
Thanks, and yes not too far off now, I've started a bit of research to find local body shops that specialise in classics, I've found a few, will probably post a request on here at some point too to see if anybody has any experience of any of these places.
#298

Posted 04 September 2017 - 06:42 PM
Shame you are not nearer
#299

Posted 04 September 2017 - 06:46 PM
It even gave me the urge to start on mine yesterday!
Keep up the good work & keep the pictures coming.
#300

Posted 04 September 2017 - 07:36 PM
Shame you are not nearer
Yeah, as much as isn't like a trip to IoW it's probably a bit far to take the mini form
Lancashire 😀
If I were nearer I wouldn't hesitate to send it your way though!
0 user(s) are reading this topic
0 members, 0 guests, 0 anonymous users


