Jump to content


Photo
- - - - -

95 Sprite Rebuild & 16V Conversion


  • Please log in to reply
691 replies to this topic

#556 72hump

72hump

    Mini Mad

  • Members
  • PipPipPipPip
  • 200 posts
  • Location: Nairn
  • Local Club: IMOG

Posted 25 May 2019 - 09:11 PM

How you getting on with your project, anywhere near getting her painted?

 
Slowed down again recently, I'm out of country a lot with work so not getting as much time as I'd like, although in reality I am not far off. I need the new bonnet back to be sure front end is all good and I've now got a new problem at the back - I decided to do a test fit of the rear subframe as it's not been on for a long time since I originally had it on the car, and one of the captive nuts has actually broken away from the heal board, only way I can think of easily fixing that is to take the rear wing off so I can get access to it, that panel is one that I'm not 100% happy with how I fitted it so replacing it again wouldn't be the end of the world, just more time and cost.....

Snap, my work also, if you throw a kitchen extension into the mix as well, I just don't have the time to give to my project, although I did get a few hours this week to fit the new trigger wheel I got from SC at Mini fair, and the Jenvey fuel rail. Regarding the captive nuts, can't you get in from the rear bins, by cutting a hole big enough hole to get the MIG in to weld them in place.

#557 alchall

alchall

    Super Mini Mad

  • Just Joined
  • PipPipPipPipPipPip
  • 604 posts
  • Location: Chorley

Posted 10 June 2019 - 02:09 PM


How you getting on with your project, anywhere near getting her painted?

 
Slowed down again recently, I'm out of country a lot with work so not getting as much time as I'd like, although in reality I am not far off. I need the new bonnet back to be sure front end is all good and I've now got a new problem at the back - I decided to do a test fit of the rear subframe as it's not been on for a long time since I originally had it on the car, and one of the captive nuts has actually broken away from the heal board, only way I can think of easily fixing that is to take the rear wing off so I can get access to it, that panel is one that I'm not 100% happy with how I fitted it so replacing it again wouldn't be the end of the world, just more time and cost.....

Snap, my work also, if you throw a kitchen extension into the mix as well, I just don't have the time to give to my project, although I did get a few hours this week to fit the new trigger wheel I got from SC at Mini fair, and the Jenvey fuel rail. Regarding the captive nuts, can't you get in from the rear bins, by cutting a hole big enough hole to get the MIG in to weld them in place.


Sorry for the delay, been off on holiday for last couple of weeks!


Trouble with the captive nuts is they're buried away behind the closing panels so you can't easily get at them through the bin as it's all a bit too tight, it's another reason to replace that panel that I'm not 100% happy with anyway so not the end of the world....


#558 alchall

alchall

    Super Mini Mad

  • Just Joined
  • PipPipPipPipPipPip
  • 604 posts
  • Location: Chorley

Posted 05 August 2019 - 03:34 PM

Not much progress, still waiting for the bonnet but here's what I have got up to....


I test fitted the seam covers, the rears were fine, but the fronts were not as they stuck out at the bottom and wouldn't follow the profile of the A panels.


So I cut some small slots in to bend them, and also had to shave a bit of the inside edge so they would pull up tight to the panels evenly front and rear...


mini-1011.jpg


mini-1013.jpg


mini-1015.jpg


mini-1017.jpg


Having clamped them into place I popped a small weld on each slot to hold it, took them off the car, popped a piece of copper inside and then welded them and dressed them, all looking fine now, will need a touch of filler to tidy up in the end....


mini-1014.jpg


mini-1009.jpg


On the passenger side I also had to do the same at the very top as it wasn't correctly profiled, same job, same outcome.


I have also re-done the bracket I fabricated to hold the relays to the side of the servo mount as I felt it was too flimsy, I used thicker gauge steel and have mounted the single lonely original relay that doesn't attach to the new ones slightly differently too, this should be more solid...


mini-1004.jpg


I've been deliberating for some time over DNS classics door hinges, the minispares replicas are ok but very stiff and a bit rough around the edges. I had also intended on getting a set of minivation articulated bonnet hinges but since they've now finished I decided to use the money to get some nice DSN ones, since it makes sense to fit this with the new bonnet to ensure everything fits together I bit the bullet and bought the door hinges too. Now these are much better, really nicely made, smooth as you like but with no slop at all and I no longer need as many shims, in fact on the drivers side I've used no shims at all and the door fits much better....


mini-1008.jpg


I also finished off the fitment of the rubber boots for the speaker cables and power cables for the central locking, was a bit tricky but is a nice neat solution, you can see this on the picture above fitted.


And talking of speakers, I've been pondering placement of my tweeters, and I think my best option is mounted to the door, so I've done one side and I think it should work well, it will stick out a little and I'll need to knock up some kind of sleeve to fit between it and the door panel so it's neat but that's a job for another day, here's where it goes.....


mini-1012.jpg


mini-1016.jpg


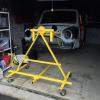
That's all, bonnet I'm promised will be with me in the next week, but I'm off on holiday next week so am anticipating being able to get cracking again when I return.


#559 72hump

72hump

    Mini Mad

  • Members
  • PipPipPipPip
  • 200 posts
  • Location: Nairn
  • Local Club: IMOG

Posted 05 August 2019 - 11:05 PM

Out of curiosity, what make of rubber boots did you use on your doors?


Cheers Paul


#560 alchall

alchall

    Super Mini Mad

  • Just Joined
  • PipPipPipPipPipPip
  • 604 posts
  • Location: Chorley

Posted 06 August 2019 - 05:48 PM

Out of curiosity, what make of rubber boots did you use on your doors?


Cheers Paul

Good question, I got them ages ago on eBay, I'll see if I can dig out the paperwork....


#561 alchall

alchall

    Super Mini Mad

  • Just Joined
  • PipPipPipPipPipPip
  • 604 posts
  • Location: Chorley

Posted 06 August 2019 - 05:51 PM

Out of curiosity, what make of rubber boots did you use on your doors?


Cheers Paul

So I thought I'd have a quick look in my purchase history on line and incredibly they're still available, even though I bought them in July 2017!


https://www.ebay.co....872.m2749.l2649


#562 72hump

72hump

    Mini Mad

  • Members
  • PipPipPipPip
  • 200 posts
  • Location: Nairn
  • Local Club: IMOG

Posted 07 August 2019 - 01:15 AM


Out of curiosity, what make of rubber boots did you use on your doors?


Cheers Paul

So I thought I'd have a quick look in my purchase history on line and incredibly they're still available, even though I bought them in July 2017!


https://www.ebay.co....872.m2749.l2649


Cheers for the ebay link, now bought. car is looking good. I had the same problem with the seam covers, they where a right pain to fit at the front.


Edited by 72hump, 07 August 2019 - 01:17 AM.


#563 alchall

alchall

    Super Mini Mad

  • Just Joined
  • PipPipPipPipPipPip
  • 604 posts
  • Location: Chorley

Posted 07 August 2019 - 06:41 AM


Out of curiosity, what make of rubber boots did you use on your doors?


Cheers Paul

So I thought I'd have a quick look in my purchase history on line and incredibly they're still available, even though I bought them in July 2017!


https://www.ebay.co....872.m2749.l2649


Cheers for the ebay link, now bought. car is looking good. I had the same problem with the seam covers, they where a right pain to fit at the front.


I had read that the seam covers needed this work so wasn't concerned about it, bit of a fiddly job but has turned out ok I think.


I can't remember the exact size but you need to drill fairly big holes for those boots to fit so placement is important, I've kept the holes as small as possible so it's also quite tight and a bit fiddly to get them on, especially as there's double thickness steel in those area's.


#564 72hump

72hump

    Mini Mad

  • Members
  • PipPipPipPip
  • 200 posts
  • Location: Nairn
  • Local Club: IMOG

Posted 09 August 2019 - 12:44 AM


Out of curiosity, what make of rubber boots did you use on your doors?


Cheers Paul

So I thought I'd have a quick look in my purchase history on line and incredibly they're still available, even though I bought them in July 2017!


https://www.ebay.co....872.m2749.l2649


Cheers for the ebay link, now bought. car is looking good. I had the same problem with the seam covers, they where a right pain to fit at the front.


I had read that the seam covers needed this work so wasn't concerned about it, bit of a fiddly job but has turned out ok I think.


I can't remember the exact size but you need to drill fairly big holes for those boots to fit so placement is important, I've kept the holes as small as possible so it's also quite tight and a bit fiddly to get them on, especially as there's double thickness steel in those area's.


On the Ebay page it mentioned 20mm holes, will take a look once I get back from work. I will have to be careful fitting these now, as my shell is already painted


#565 alchall

alchall

    Super Mini Mad

  • Just Joined
  • PipPipPipPipPipPip
  • 604 posts
  • Location: Chorley

Posted 27 October 2019 - 08:37 AM

So the bonnet saga continues!


The replacement carbon fibre bonnet arrived and while it was a much better fit than previous I still could not get it to fit properly and was fouling the front panel and therefore not fully closing, another brief conversation with the guys at Carbon Weezel and we agreed to not give it a third go and they've been very reasonable and agreed to take it back.


So back to plan A and a look at plan C!


Plan A was modify the steel bonnet, so I decided to bite the bullet and take the grinder to the bonnet I've had sat in storage for months, I cut the middle out of the webbing on the inside of the bonnet and a hole where the bulge should go. The bonnet fit perfectly and closed with a corner of the rocker cover poking out.


I created a bulge from a sheet of steel that would cover the engine with a little clearance so it would be reasonably subtle, and when mocked up it looked neat enough, shame I didn't take a photo at this stage because from here it went wrong. No matter how careful I was, how much cold front I used and how patient I seemed to be in welding in the bulge I simply could not prevent the bonnet warping, perhaps if I had done what was going to be the last step and adding back in some strengthening to the bonnet first it would be better but anyway it was a fail.....


mini-1027.jpg


mini-1025.jpg


mini-1026.jpg


It is worse in real life than the photo's suggest, you can see it in the head on shot but it's also changed the profile along the edge so it touches the wing half way along preventing the front corner meeting the front panel.


So, I turned to plan C, an Arc Angels fibre glass 16v bonnet....


Was relatively inexpensive, definitely in comparison with a carbon fibre bonnet and the waste of my good steel bonnet!


This turned up and looks good, I had to trim off some lumps and bumps along the inside front and rear edges but once that was done it fits OK, not as perfect as the steel before I warped it but actually it is quite smart and a little more subtle than the carbon fibre.


Actually the small hump could be done away with and the bulge would allow it to fit over the engine but I'm not tempted to tackle taking that off and wasting more money!


mini-1024.jpg


mini-1021.jpg


mini-1022.jpg


So I think for now I'm going to settle for this, I need to sort out the fittings so it stays closed when it needs to be and fit the bonnet stay to keep it open when I need it to be, time to move on and get this shell finished so I can finally get it to a paint shop....


#566 72hump

72hump

    Mini Mad

  • Members
  • PipPipPipPip
  • 200 posts
  • Location: Nairn
  • Local Club: IMOG

Posted 27 October 2019 - 10:19 PM

So the bonnet saga continues!
 
The replacement carbon fibre bonnet arrived and while it was a much better fit than previous I still could not get it to fit properly and was fouling the front panel and therefore not fully closing, another brief conversation with the guys at Carbon Weezel and we agreed to not give it a third go and they've been very reasonable and agreed to take it back.
 
So back to plan A and a look at plan C!
 
Plan A was modify the steel bonnet, so I decided to bite the bullet and take the grinder to the bonnet I've had sat in storage for months, I cut the middle out of the webbing on the inside of the bonnet and a hole where the bulge should go. The bonnet fit perfectly and closed with a corner of the rocker cover poking out.
 
I created a bulge from a sheet of steel that would cover the engine with a little clearance so it would be reasonably subtle, and when mocked up it looked neat enough, shame I didn't take a photo at this stage because from here it went wrong. No matter how careful I was, how much cold front I used and how patient I seemed to be in welding in the bulge I simply could not prevent the bonnet warping, perhaps if I had done what was going to be the last step and adding back in some strengthening to the bonnet first it would be better but anyway it was a fail.....
 
mini-1027.jpg
 
mini-1025.jpg
 
mini-1026.jpg
 
It is worse in real life than the photo's suggest, you can see it in the head on shot but it's also changed the profile along the edge so it touches the wing half way along preventing the front corner meeting the front panel.
 
So, I turned to plan C, an Arc Angels fibre glass 16v bonnet....
 
Was relatively inexpensive, definitely in comparison with a carbon fibre bonnet and the waste of my good steel bonnet!
 
This turned up and looks good, I had to trim off some lumps and bumps along the inside front and rear edges but once that was done it fits OK, not as perfect as the steel before I warped it but actually it is quite smart and a little more subtle than the carbon fibre.
 
Actually the small hump could be done away with and the bulge would allow it to fit over the engine but I'm not tempted to tackle taking that off and wasting more money!
 
mini-1024.jpg
 
mini-1021.jpg
 
mini-1022.jpg
 
So I think for now I'm going to settle for this, I need to sort out the fittings so it stays closed when it needs to be and fit the bonnet stay to keep it open when I need it to be, time to move on and get this shell finished so I can finally get it to a paint shop....


Shame about your steel bonnet, but the GRP one looks fine. When you hoping to get her sprayed?

Paul.

#567 alchall

alchall

    Super Mini Mad

  • Just Joined
  • PipPipPipPipPipPip
  • 604 posts
  • Location: Chorley

Posted 29 October 2019 - 12:38 PM


Shame about your steel bonnet, but the GRP one looks fine. When you hoping to get her sprayed?

Paul.


Yeah the GRP bonnet is fine really, if I'd had more success as you did with the steel one then that probably would have been better but I've spent enough time and money on it now!


Hoping to get it into a paint shop next year so I can get building in the summer, but that will probably depend as much on finding time at a good body shop that I can trust as it does on my own time to get finished and ready!


#568 frankm

frankm

    Learner Driver

  • Just Joined
  • PipPip
  • 21 posts
  • Location: Zwolle

Posted 30 October 2019 - 12:46 PM

Just been trough this, awesome build
Shame that the steel bonnet didn’t work out. I like the look of the steel one more.
Subscribed and hope to see more great updates, keep up the good work

#569 jsyjamie

jsyjamie

    Stage One Kit Fitted

  • Noobies
  • PipPipPip
  • 76 posts
  • Location: Jersey

Posted 30 October 2019 - 01:11 PM

To echo what lots of people have said, amazing build thread and attention to detail!


Whenever I fell like cutting corners I'm going to say to myself "what would alchall do?".


What size is your garage out of interest? I have serious envy!


#570 no66

no66

    Mini Mad

  • Members
  • PipPipPipPip
  • 149 posts
  • Location: Saetre, Norway
  • Local Club: NMCC (Norsk Mini Cooper Club)

Posted 31 October 2019 - 11:46 AM

Nice restore amd rebuild. 


2 user(s) are reading this topic

0 members, 1 guests, 0 anonymous users


    Bing (1)