No the subbie can stay in. However you may find by removing the subbie you will find other areas of rust lurking so will be worth doing this.
More Rust - Rear Quarter
Started by
finch661
, Nov 25 2014 12:23 PM
38 replies to this topic
#16

sonikk4
-

- Admin
-

- 15,894 posts
Twisted Paint Polisher!!!
- Name: Neil
- Location: Oxfordshire
Posted 30 November 2014 - 10:12 PM
#17
finch661
-
- Members
-
- 2,337 posts
Up Into Fourth
- Location: Kirkwall
- Local Club: none
Posted 05 December 2014 - 08:56 AM
Cheers Sonikk. started to drill out the easier spotwelds in the front and found some more rot/bodges. it looks like the weekl arch was rotten, so the arch was tubbed, but the old arch wasnt removed. a few bracing pieces were added but again over the rot. rest of the boot floor and rear valance look and seem solid.
in terms of removing the wheel arch, i was thinking of cutting out most the arch with the grinder, and then drill out the remaining spotweld pieces?
#18
sonikk4
-
- Admin
-
- 15,894 posts
Twisted Paint Polisher!!!
- Name: Neil
- Location: Oxfordshire
Posted 05 December 2014 - 10:55 AM
Cheers Sonikk. started to drill out the easier spotwelds in the front and found some more rot/bodges. it looks like the weekl arch was rotten, so the arch was tubbed, but the old arch wasnt removed. a few bracing pieces were added but again over the rot. rest of the boot floor and rear valance look and seem solid.
in terms of removing the wheel arch, i was thinking of cutting out most the arch with the grinder, and then drill out the remaining spotweld pieces?
Yep you can do that if you want, the only reason why I did what I did was to be able to refit the old arch with the new repair section.
#19
finch661
-
- Members
-
- 2,337 posts
Up Into Fourth
- Location: Kirkwall
- Local Club: none
Posted 07 December 2014 - 05:15 PM
had a shot tonight at removing the arch (its rotten!!! made up of rust, underseal and fibre glass!). couple of questions about how to remove it.
- how/where does the arch attach to the floor
- how do you remove the arch to rear support bracket (theres not a lot of room) - the one that attaches to the rear seat boot side
- i found that the subframe support (that attaches to the arch nearest the boot lid) is also rusty - how is this attached to the boot floor?
sorry for the questions, but didnt get too far tonight with this 
#20
sonikk4
-
- Admin
-
- 15,894 posts
Twisted Paint Polisher!!!
- Name: Neil
- Location: Oxfordshire
Posted 07 December 2014 - 05:28 PM
had a shot tonight at removing the arch (its rotten!!! made up of rust, underseal and fibre glass!). couple of questions about how to remove it.
- how/where does the arch attach to the floor
- how do you remove the arch to rear support bracket (theres not a lot of room) - the one that attaches to the rear seat boot side
- i found that the subframe support (that attaches to the arch nearest the boot lid) is also rusty - how is this attached to the boot floor?
sorry for the questions, but didnt get too far tonight with this
Those pictures i posted of the removed arch should give you the heads up as to where all of the spot welds need to be drilled out. I used a wide hacksaw blade that was sharpened to split the welds after they were drilled out.
The internal bumpstop bracket is a pain to get to but doable you just need to be patient. I drilled out all of the spot welds on the external side of the inner arch.
The rear subframe reinforcement bracket is spot welded to the boot floor and also to the arch although there is a small bead of seam weld there as well.
#21
finch661
-
- Members
-
- 2,337 posts
Up Into Fourth
- Location: Kirkwall
- Local Club: none
Posted 07 December 2014 - 07:23 PM
had a shot tonight at removing the arch (its rotten!!! made up of rust, underseal and fibre glass!). couple of questions about how to remove it.
- how/where does the arch attach to the floor
- how do you remove the arch to rear support bracket (theres not a lot of room) - the one that attaches to the rear seat boot side
- i found that the subframe support (that attaches to the arch nearest the boot lid) is also rusty - how is this attached to the boot floor?
sorry for the questions, but didnt get too far tonight with this
Those pictures i posted of the removed arch should give you the heads up as to where all of the spot welds need to be drilled out. I used a wide hacksaw blade that was sharpened to split the welds after they were drilled out.
The internal bumpstop bracket is a pain to get to but doable you just need to be patient. I drilled out all of the spot welds on the external side of the inner arch.
The rear subframe reinforcement bracket is spot welded to the boot floor and also to the arch although there is a small bead of seam weld there as well.
thanks sonikk, i was having one of those frustrating mini sessions! So there is a lip round the boot floor the arch is spotwelded to? a good section of mine is rusted away i think, Just trying to get an idea of how everything attaches!
after removing a good part of the arch, i discovered that the arch must have been rotten, so the previous owner had fillered/fibre glassed the arch and then tubbed it.
Edited by finch661, 07 December 2014 - 07:26 PM.
#22
sonikk4
-
- Admin
-
- 15,894 posts
Twisted Paint Polisher!!!
- Name: Neil
- Location: Oxfordshire
Posted 07 December 2014 - 07:45 PM
I have a description to the various bits

#23
finch661
-
- Members
-
- 2,337 posts
Up Into Fourth
- Location: Kirkwall
- Local Club: none
Posted 07 December 2014 - 08:53 PM
haha i love it! thats exactly what i am after! is the one furthest left the closing panel?
#24
sonikk4
-
- Admin
-
- 15,894 posts
Twisted Paint Polisher!!!
- Name: Neil
- Location: Oxfordshire
Posted 07 December 2014 - 09:13 PM
haha i love it! thats exactly what i am after! is the one furthest left the closing panel?
Yes it is , that did not come out to well

The companion bin is sandwiched between the seat pan and the l/h side of the closeout as its viewed in the picture..
Where the arch is attached to the top part of the rear bulkhead

#25
finch661
-
- Members
-
- 2,337 posts
Up Into Fourth
- Location: Kirkwall
- Local Club: none
Posted 08 December 2014 - 08:02 AM
Magic! think it will take me a while to get to that stage. its scary how the rot an spread, glad i am doing this properly, and not just covering it up with filler/fibre glass!
#26
finch661
-
- Members
-
- 2,337 posts
Up Into Fourth
- Location: Kirkwall
- Local Club: none
Posted 10 December 2014 - 10:29 AM
braved the cold last night and started drilling out the arch spotwelds, fecking freezing in my garage! best present though from my wife - padded boiler suit  I was actually sweating in it! Anyway, finally got the last of the arch off (after breaking numerous drill bits and a spot weld cutter), and its not looking good
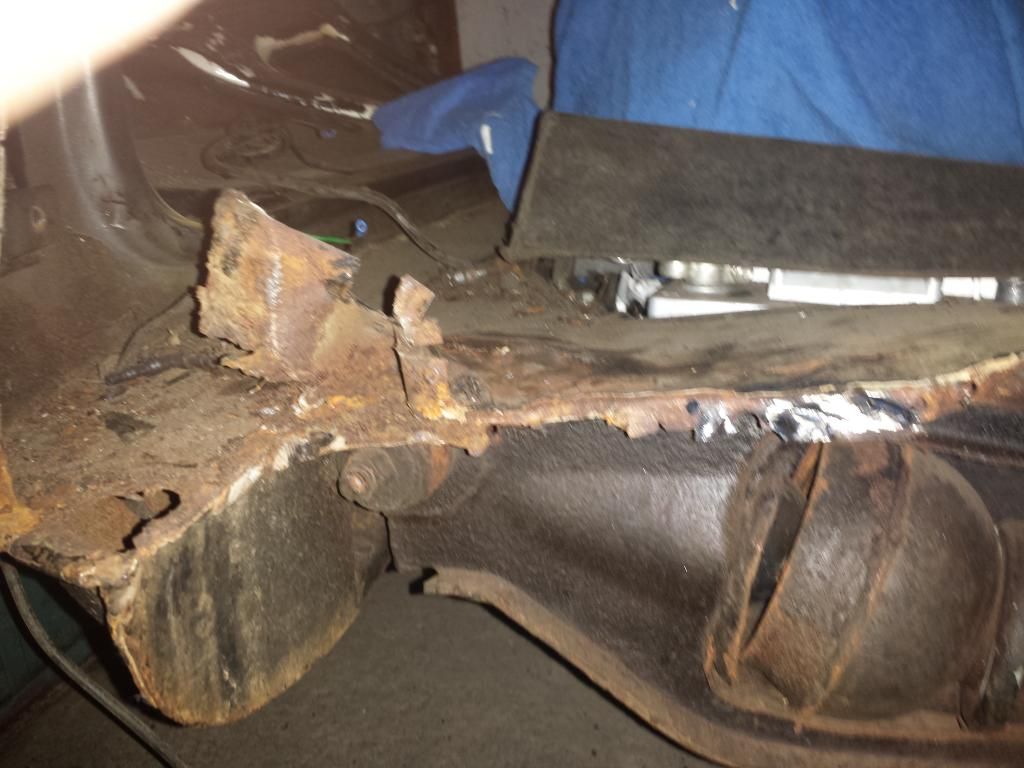
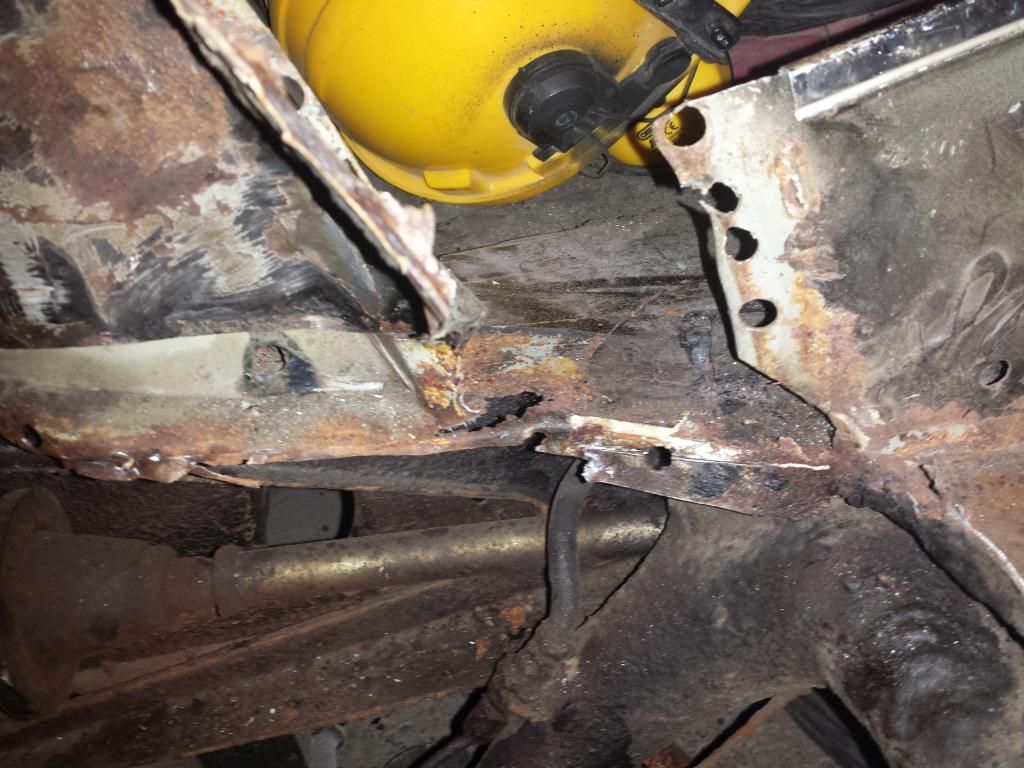
Looks like the rot has spread everywhere I am now feeling out of my depth in repairing this.
I am planning on taking the subbie out tonight, and see how bad the boot floor is.
I see that you can buy a boot repair section for the wheel arch, so plan to chop out the rot and replace with this?
In terms of the rot on the rear seat (pic above), is there a repair panel or will i have to fabricate something?
The bump stop reinforcement thingy was rotten as well
Edited by finch661, 10 December 2014 - 10:30 AM.
#27
Ben_O
-

- Paint Doctor
-
- 9,781 posts
Mill Road Garage
- Location: Isle of Wight
Posted 10 December 2014 - 01:46 PM
That doesn't look to bad to be honest mate.
You can get the side repair panels of the boot floor as well as the rear subframe mount reinforcer s etc so it should be straightforward.
http://www.somerford...roducts_id=1192
http://www.somerford...roducts_id=1201
http://www.somerford...roducts_id=1228
Ben
#28
sonikk4
-
- Admin
-
- 15,894 posts
Twisted Paint Polisher!!!
- Name: Neil
- Location: Oxfordshire
Posted 10 December 2014 - 02:02 PM
You can also get the panels from M Machine where you can get discount
11.41.00.27 Side Repair, Boot Floor, LH 18.00 21.60
11.41.00.28 Side Repair, Boot Floor, RH 18.00 21.60
11.41.00.17 Rear Seat Corner Repair, LH 7.50 9.00
11.41.00.18 Rear Seat Corner Repair, RH 7.50 9.00
11.41.04.04 Stiffener, Wheel Arch, RH 7.00 8.40
http://www.minispare...|Back to search
The arch close out i would recommend the one piece from Heritage but bought through minispares
http://www.minispare...|Back to search
#29
finch661
-
- Members
-
- 2,337 posts
Up Into Fourth
- Location: Kirkwall
- Local Club: none
Posted 11 December 2014 - 09:50 AM
cheers sonikk and Ben, its one of those things, where there is so much brown metal that i cant see the wood for the trees!
are the m-machine panels good?
I will have a look at getting the repair panels, and start cutting and welding. Is it safe to move the car with all this metal removed? I need to tun my car around if i am removing the subframe?
Edited by finch661, 11 December 2014 - 10:04 AM.
#30
sonikk4
-
- Admin
-
- 15,894 posts
Twisted Paint Polisher!!!
- Name: Neil
- Location: Oxfordshire
Posted 11 December 2014 - 02:22 PM
If you are going to move the car then I would add some bracing just to make sure there is no movement. Most of the repair panels from M Machine are very good especially their own pressed panels.
I use their products a lot but beware some are Magnum, things like flitch repair panels for example. On the day of ordering ask which are bought in and which is their own products. Doreen the lady who answers the phone us very helpful plus you need to tell them you are a TMF+ member to get the discount.
I have bought panels from Somerford but these tend to be Heritage so do cost more. The boot repair panels though maybe Magnum but again a phone call will clarify this.


0 user(s) are reading this topic
0 members, 0 guests, 0 anonymous users


