Jump to content


Photo
- - - - -

Getting 92' Jumbo Back On The Road!


  • Please log in to reply
11 replies to this topic

#1 AaronRimmington

AaronRimmington

    Stage One Kit Fitted

  • Noobies
  • PipPipPip
  • 62 posts

Posted 29 November 2014 - 04:45 AM

Im going to start this topic off by firstly saying hello TMF!


I have been hovering around the forum for the past 3 years and have owned my own mini for the length of that time, however due to personal comitments i have never had the time to really start. I Havent had the best space to work until now. Currently I have full use of a garage for the forseeable future. So far my poor Jumbo has been moved 4 times in the past 3 years for storage until I can finally get some decent work done. She was stored on a drive, in a field on another two drives and now shes not moving from the garage until MOT.


I hope you enjoy my build thread and please be advised this is my first project and the aim isnt to make her pristine, its to get her back on the road in a condition I am happy with! This is all of course done on what money I have and can earn and in any spare time I can get away from studies and family commitments. I will be working over the weekends mainly.


So, a little back story...Dont worry guys, you dont have to read this bit! I just wanted to add it.


 well I have been interested in mini's for a long time now and always wanted to own one, so me being the usual impulsive self; I went on a treasure hunt. After many long hours scrolling through endless ebay pages and gumtree adds I thought I was about to give up and was pretty dissapointed I had provisionally bought a few mini's only to have my time wasted by sellers who when agreed upon a deal couldnt wait a couple of days for me to collect. So at this point I have had my time wasted and Im just not getting lucky. Anyway my dad was more optimistic and said to me dont worry, with anyluck you will pick one up at the carboot. Low and BEHOLD I got a phonecall at the carboot that next day. So off I go up to Wigan, and there she is looking brilliant in her 50 shades of red, with the lovely peeling roof decals and paint bubbles rust n'all. The seller came out to unlock the car and let me have a look, after failing to unlock the door "putting the key in the normal way round" I decided to help her out, and then give her back the keys to start her up. It was rather adorable but i felt really sorry for the car i was potentially going to buy so after watching her try turn it over with the choke in and pumping the gas. So i asked if i could take over. I popped the hood and found the RAD empty, filled it up, checked it over and it started up first crack! A few minutes later and a short test drive I had a massive grin on my face. After negotiating a little on the price, I wasnt going to insult her, so i asked her to knock £50 off for the blowing exhaust and the obvious rust problems. So there it was, when i was least expecting it I had finally picked one up for £750 with a new MOT. ( Dont ask about how it got through the MOT because i have no idea ) The following weekend I drove back up to collect my first "full" mini, drove her straight to the fuel station and then to the post office to get some Tax. Drove it all the way home no issues purred away nicely. perhaps that was the blowing exhaust...  I really hope you guys didnt read all that, I did warn you.


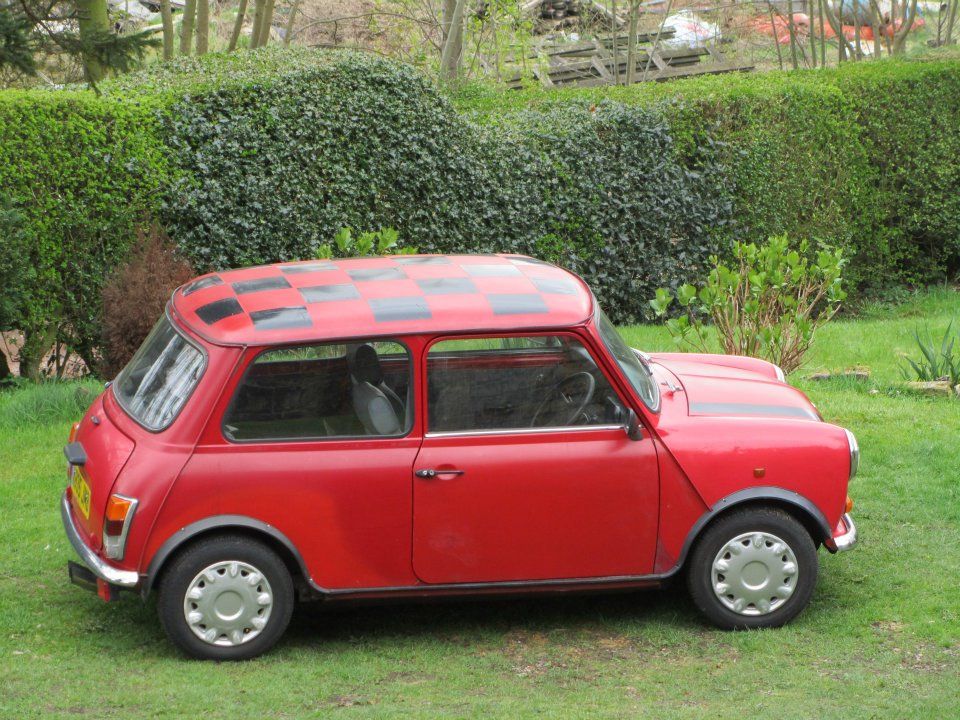
How she looked when first bought.


mymini_zps90e378ee.jpg


What I aim to achieve:


I want the mini to be structurally and mechanically sound with a respray in 2k.

Custom Seats Installed and custom Interior * You will see my plans unfold *

Change Bonnet and boot catches to being Internal release.

Change Ignition to being electronic eventually


There are many other little idea's and things but its too many to list. I want to get the car back on the road and driveable before doing everything.


Lets get started.


Whats been done - before move to garage


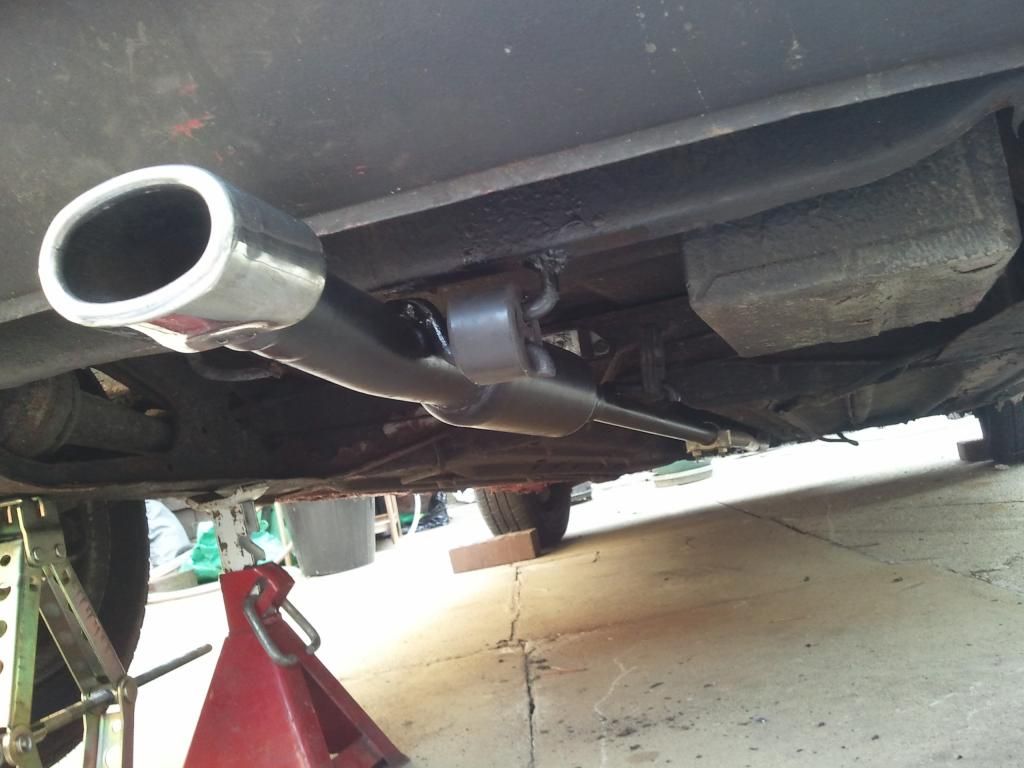
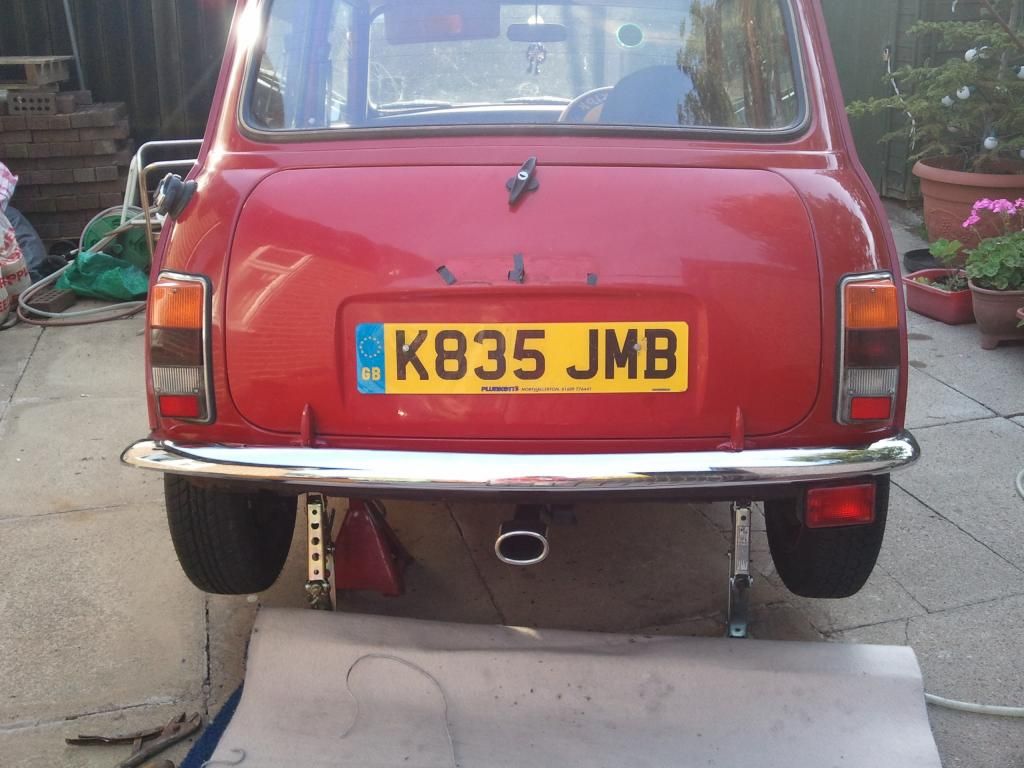
So far all I have had time for is strip the interior, including the bitchumen sound deadening. Remove all decals and battered wheel arches. removed excess electrics someone had badly put into the loom. Removed front dash vents. Stripped retro speakers and Cd player that didnt work. Removed old exhaust and bought new bosal straight pipe to correct diameter of original for £5 from an exhaust place. Found an small cherry bomb in the back of my grandads garage, and found an old exhaust chrome end tip and some old exhaust hangers from the scrap pile at my local motorsave which i could have for free, however I decided I should atleast throw the lads some beer money. So I made a straight through exhaust with cherry bomb and chrome tip to replace the blowing pipe and the twin DTM back box.  * Add picks Also poked into any rot I could find to see extent of rust. New panels bought: rear valance, Inner and outer sills and some sheet metal. Drivers side: removed rotten inner sill and welded in new panel. Made new top corner floor panel from sheet metal to match original and welded in. Thats everything that was done over the last two years. I have also collected various parts and spares as i have seen them appear.


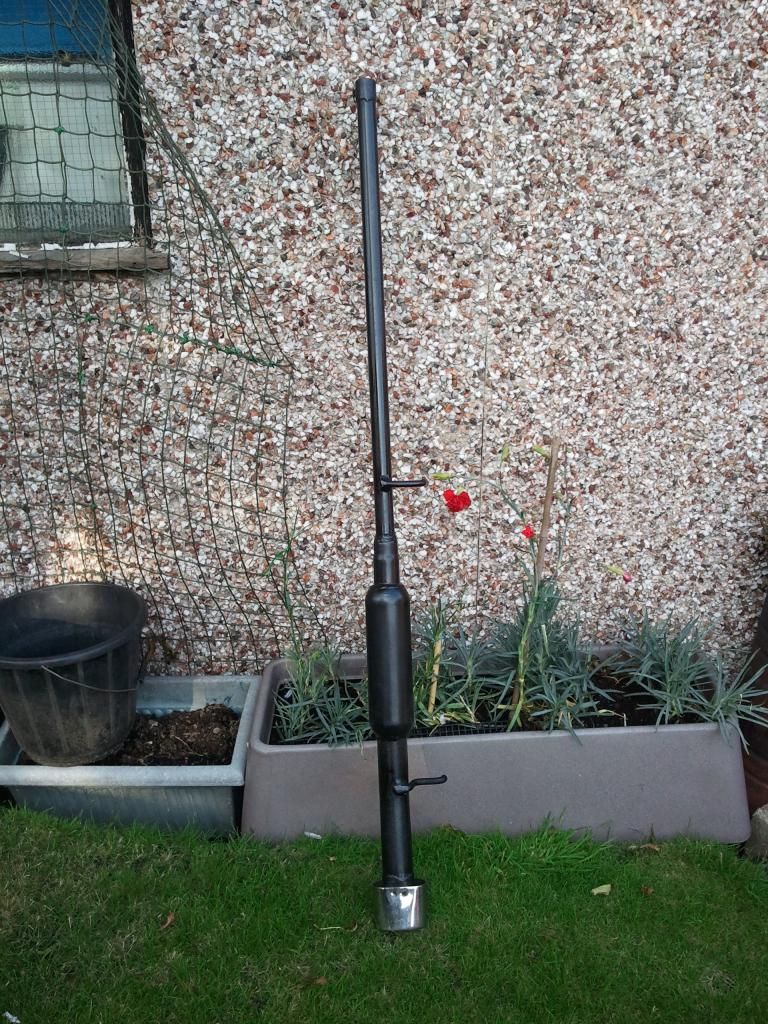
Exhaust made for £10 will revisit this to add a small middle box to creat viable back pressure and quiet it down to a reasonable level.


2012-09-22163704_zpsd9ec2252.jpg


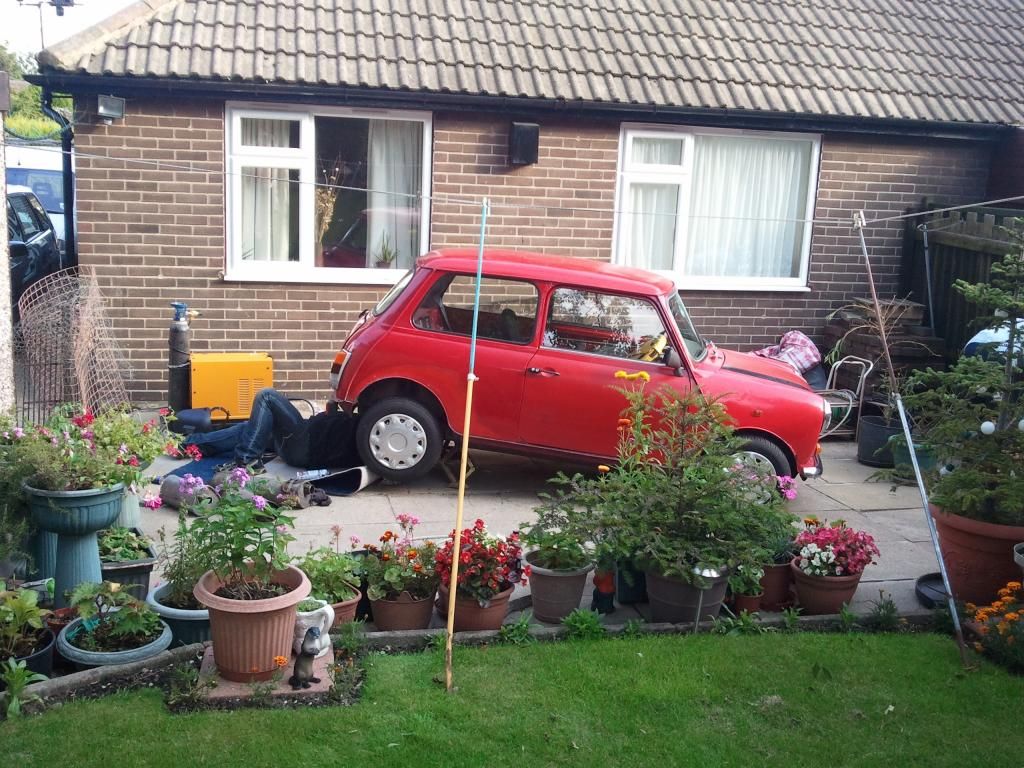
Finally got some work done, this was making exhaust and finally trying out the new welder.


2012-09-22163806_zpsfbd85cac.jpg


How the exhaust looked from underneath


2012-09-22165230_zps70059a1f.jpg


From behind


2012-09-22165315_zps551a9f18.jpg


The move & starting - 22/11/14


Moving her wasnt too difficult however after a few failed attempts and with the help of the other half and my dad we finally got her into the garage.  *add picks later


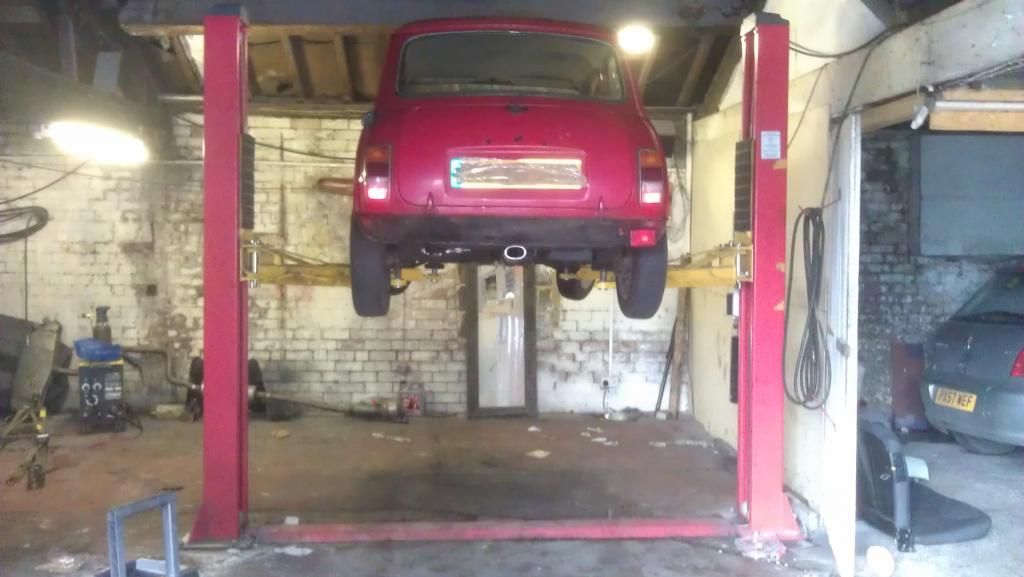
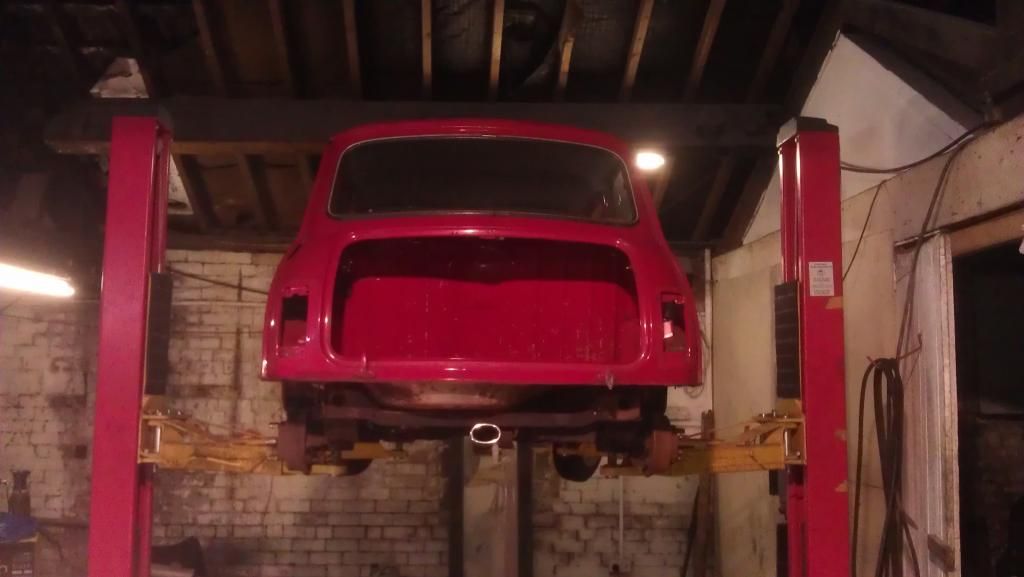
Put her up on the Lift and had a good look to what needed doing.


Stripped boot out, removed petrol tank, washer bottle, all lights and boot lid and pushed loom back through parcel shelf to keep out of the way.


Removed Rear valance and Rear wheels.


29/11/14 Finally made my build thread! Will add picks when I get around too it!


Rear subframe out and rear subframe mounts cut out to weld new ones in, it was abit of a pain as I was ill over this weekend so unfortunately I didnt get the ammount of work in I really would have liked.


02/12/14 WORKED OUT HOW TO PUT IN PICS! Sorry if its all just Rot but what do you expect ;)


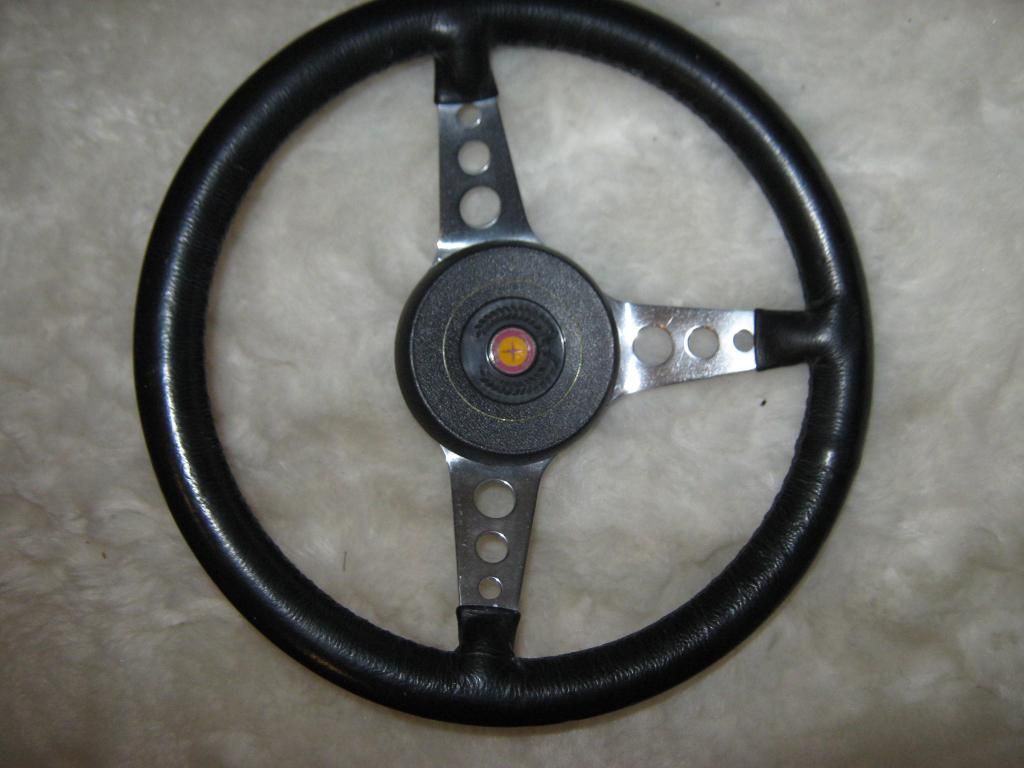
IMG_0523_zps996bd32a.jpg


Got given this by an old friend who bought it at a silent auction for £1 back in 1992 and was left in his celler until he heard I had a mini! Quick polish up and some leather cleaner and it came up a treat.


Edited by AaronRimmington, 02 December 2014 - 03:08 AM.


#2 AaronRimmington

AaronRimmington

    Stage One Kit Fitted

  • Noobies
  • PipPipPip
  • 62 posts

Posted 02 December 2014 - 03:25 AM

02/12/14 Still working out how best to do this topic.. Please bare with me.


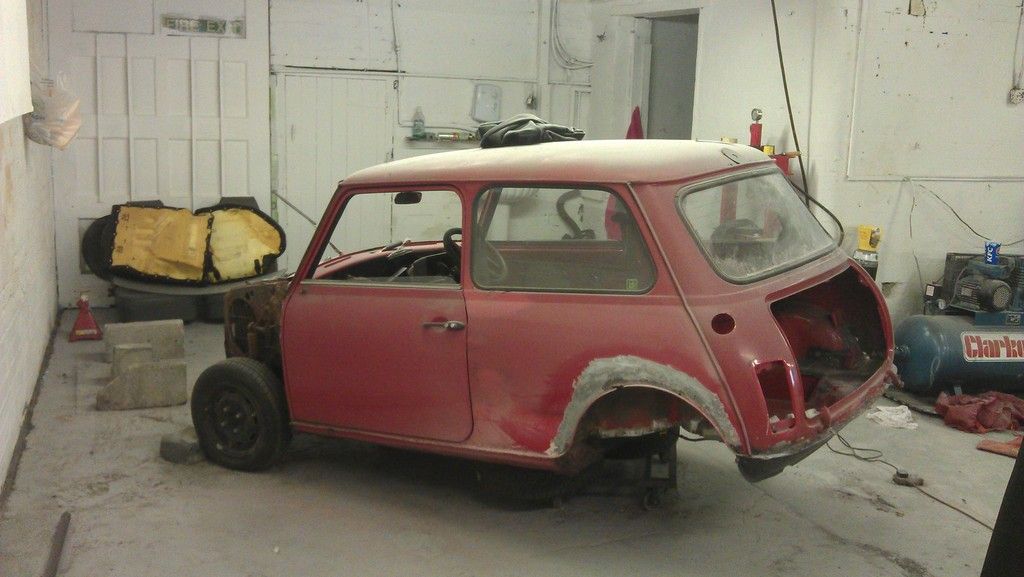
I hope the pictures arent boring you by now! Anyway Here we are once the car has been moved to the garage and put up on the ramps to see what we are dealing with. 


IMAG0663_zps7d466c43.jpg


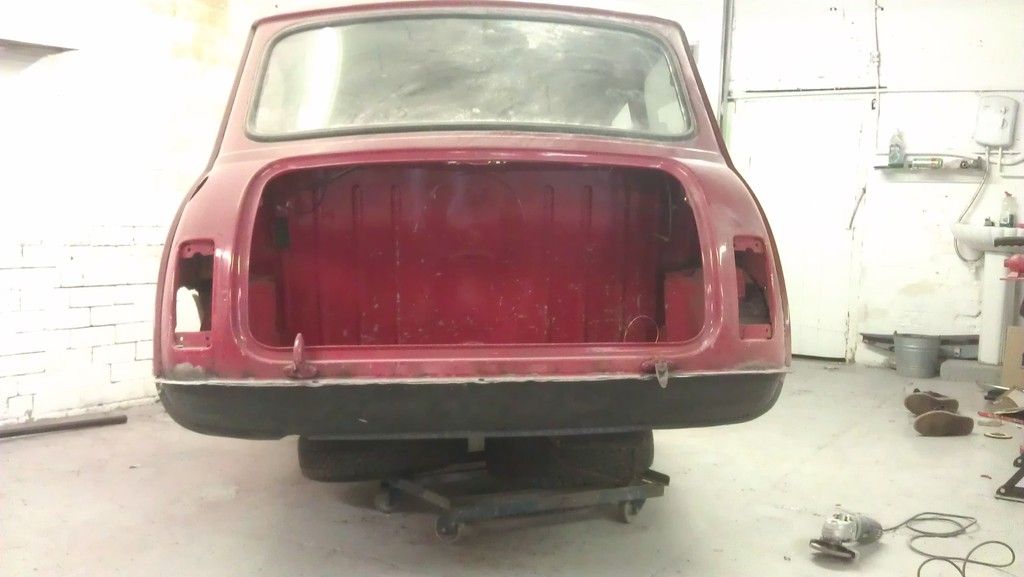
First few hours of work, stripped back end and removed rear valance using an old technique with a metal chisel. Then removed lip with flat head screw driver and a set of tin snips.


IMAG0665_zpsbea6eb46.jpg


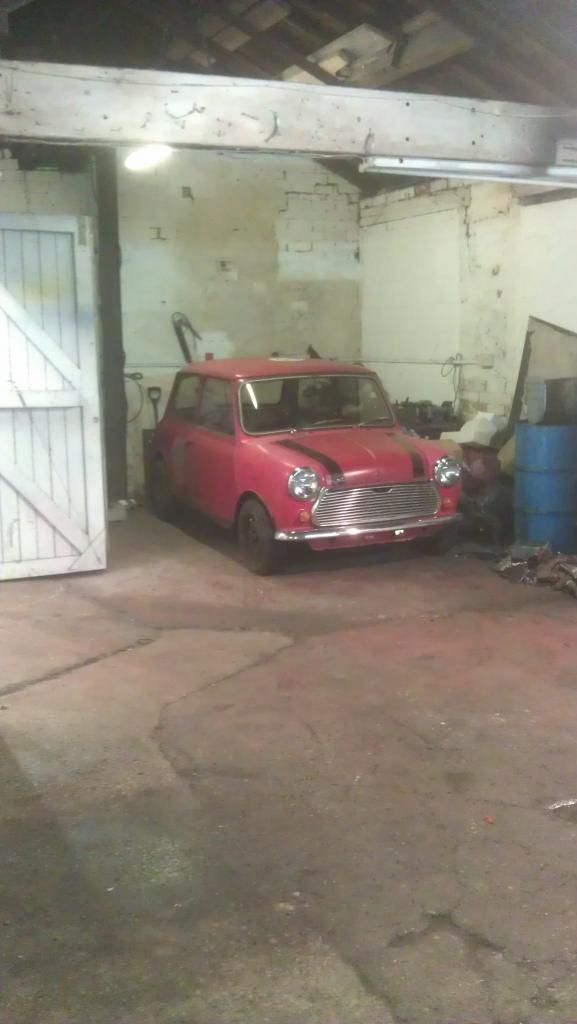
How she sits in the garage and a pic of the rotten front end, there is a reason its 50 shades of red!


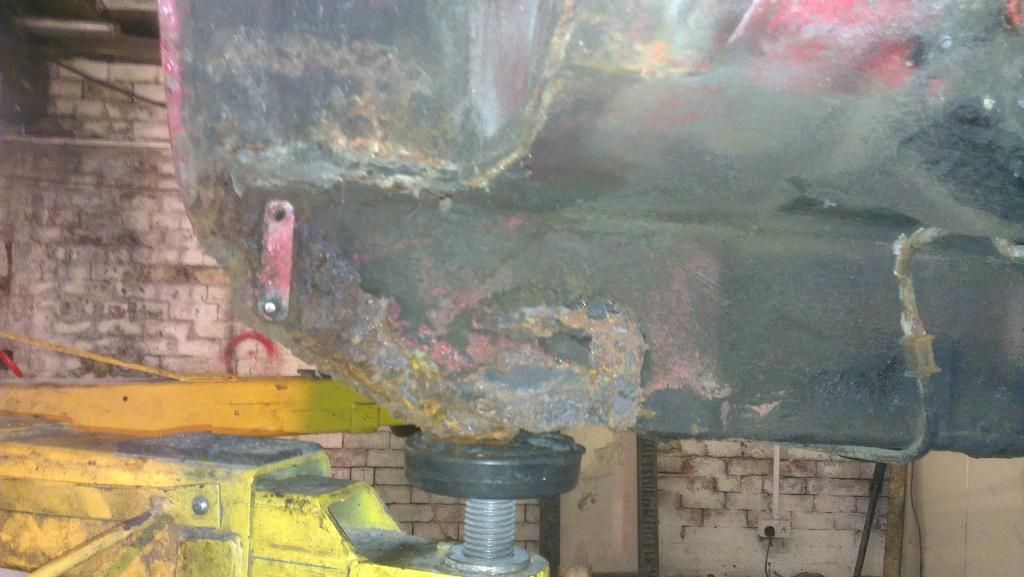
IMAG0668_zps92974831.jpg


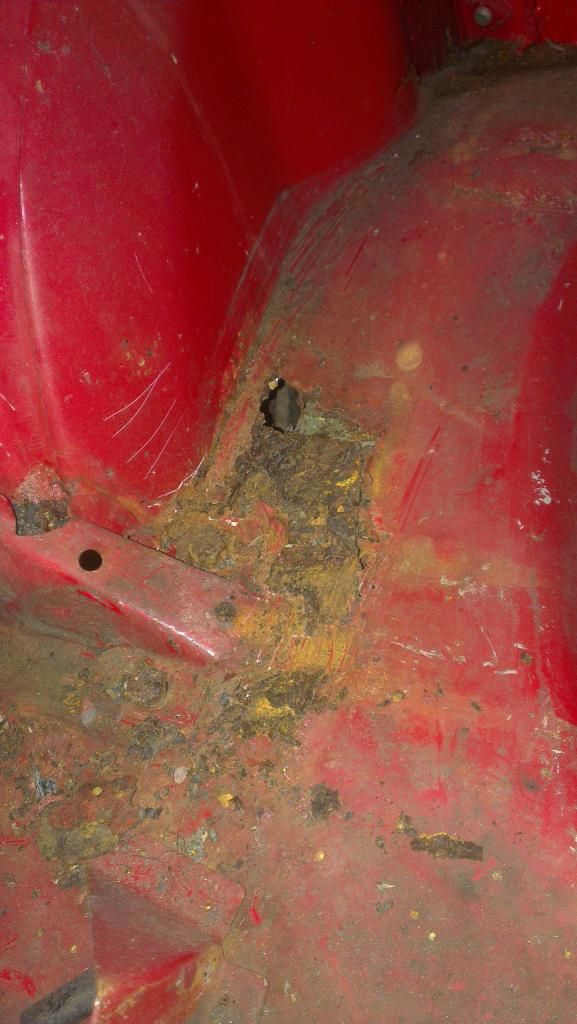
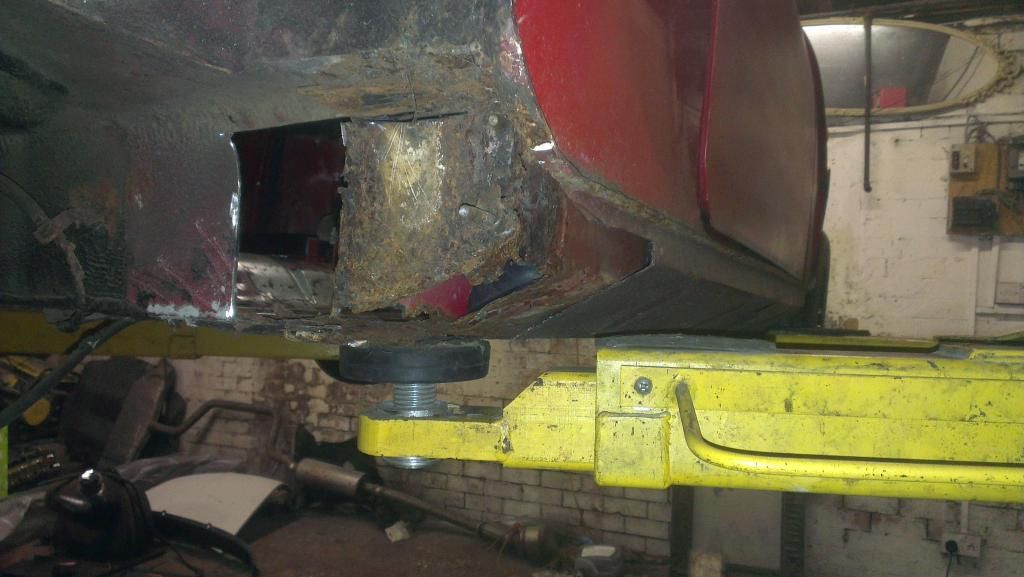
Passenger side rear subframe mount rotten to bits


IMAG1882_zpsf276bb83.jpg


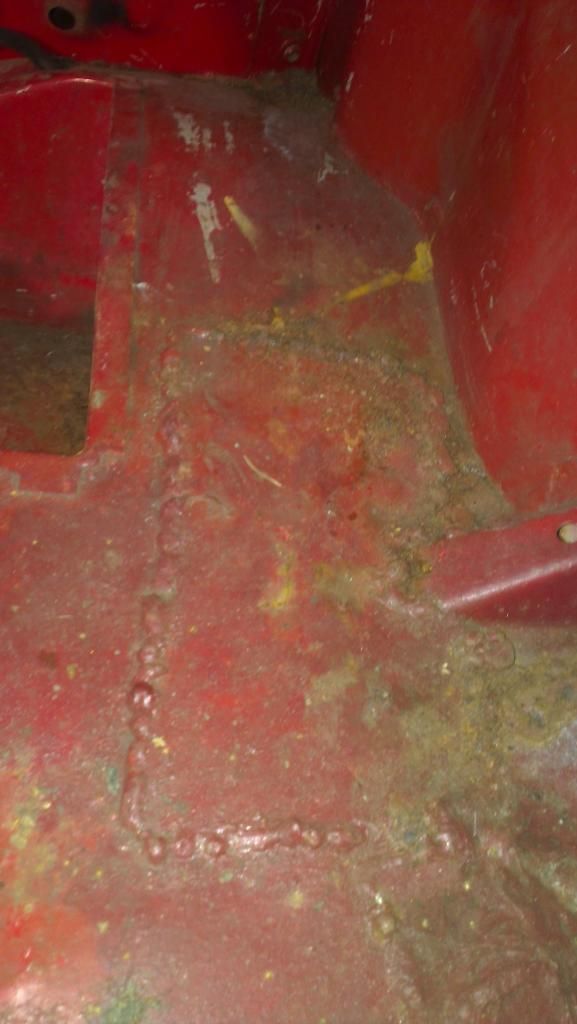
Drivers side had been patched over 2 x previously and had welded onto the subframe bolts. Made it a pig to get the subframe out but nothing a cutting disc and some gentle hammering wont solve.


IMAG1884_zps6faea034.jpg


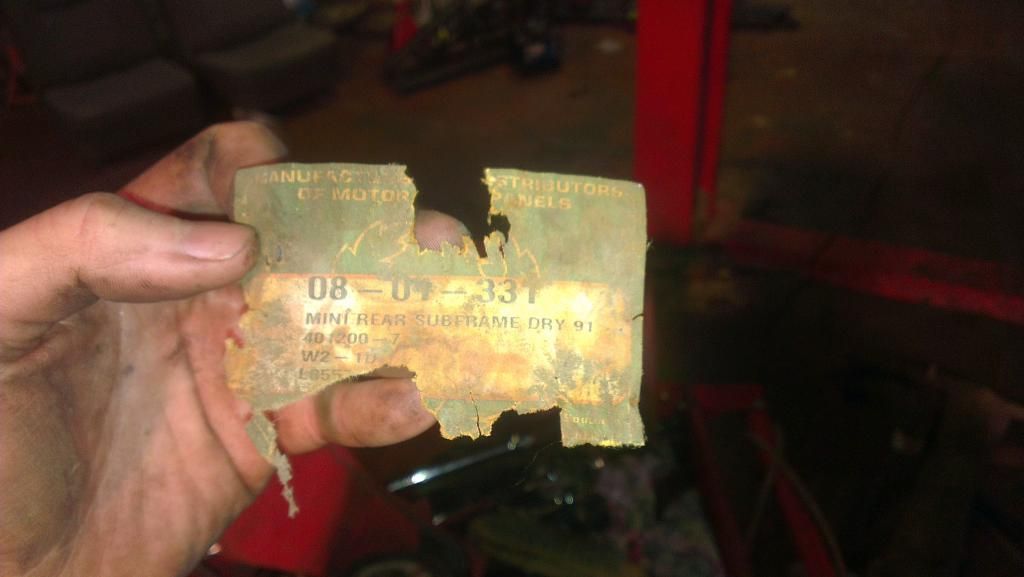
After I dropped the subframe I took a wire brush too it only to find this come off it, Cant believe its been on since 91!


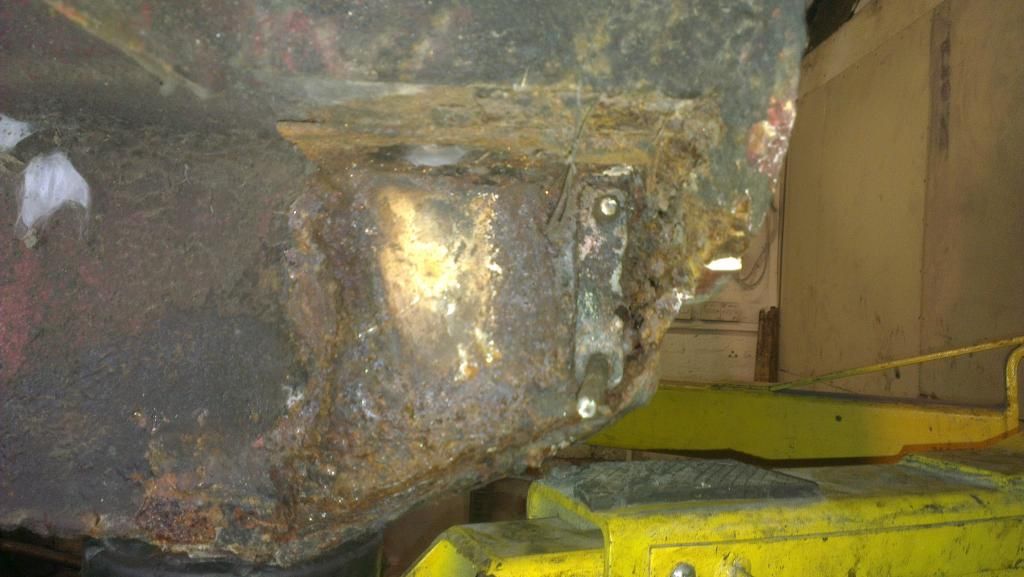
IMAG1887_zps2c0a2739.jpg


Subframe mounts Passenger and drivers side, both destroyed and need replacing.


IMAG1889_zps67815122.jpg

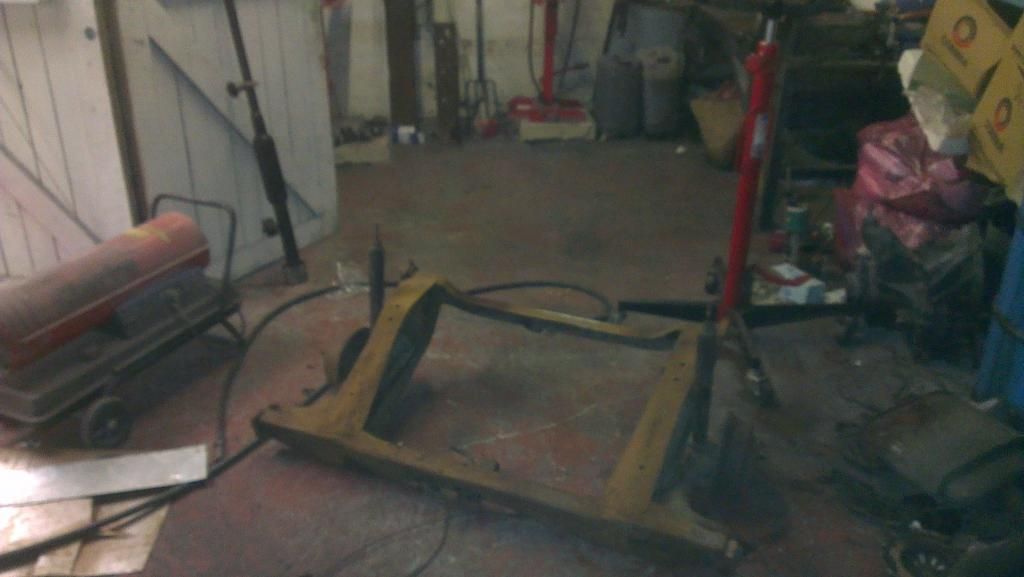
IMAG1894_zps7f10a805.jpg


Subframe out, after inspection looks to be in quite solid shape, aim to get this cleaned up and painted by the end of next weekend!


IMAG1896_zpsb1f61ca3.jpg


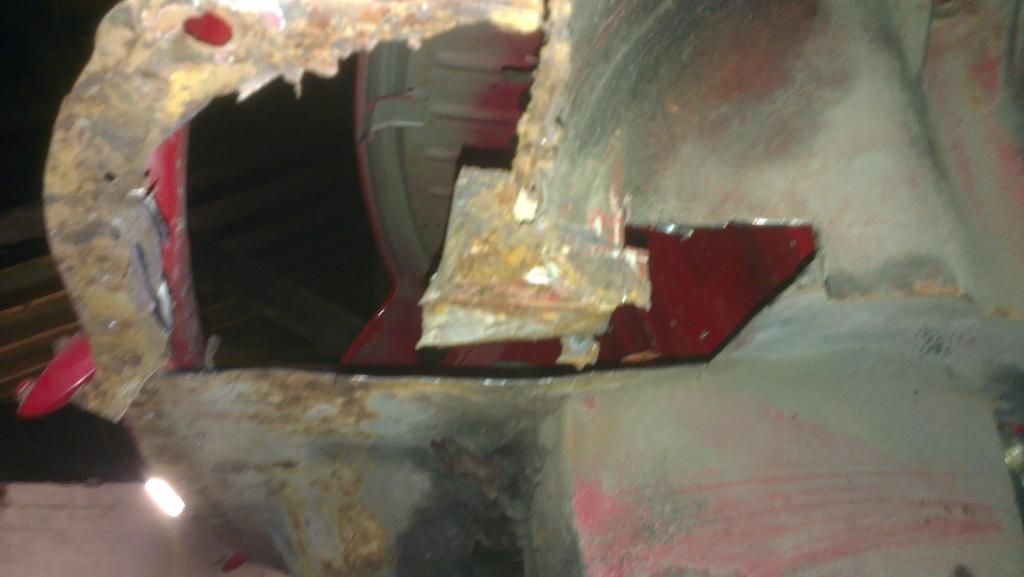
Finally got cutting some rust away, left internal structure to see how its built. If I cant source replacement Panel will fabricate own. the captive nuts will be annoying.. if thats the correct terminology?


IMAG1897_zps676763d3.jpg


Sorry for bad photo, this is the underside of the drivers side subframe mount from boot floor. ran out of cutters, next week will clean up bottom of support bracket and fabricate new panel.


IMAG1899_zpsb403a5d3.jpg


This is all I had time for this weekend as became Ill and had back issues and a fever. Also ran out of cutters. Fortunately mother bought me 30 new cutting discs and some of those wire grinding sander things? So im stocked up for next week.


Need to collect paint, subframe mounting panels (if possible).


I also have a few parts kicking around that I want to show you guys but they are all boxed away.

Full seat set to custom fit into the mini,

Internal Interior to bring modern comforts - Stay tuned!

Alloys.

Center speedo which came as a freebie on a random front end someone donated to me.

Wheel arches and the usual stuff kicking around.


Feel free to comment etc, I hope your enjoying it so far and stay tuned as welding will begin as of this weekend! Will be updating weekly if all goes to plan.


#3 leadly

leadly

    One Carb Or Two?

  • Members
  • PipPipPipPipPipPipPip
  • 779 posts
  • Location: Derby
  • Local Club: [] D.C.M.O.C []

Posted 02 December 2014 - 03:48 AM

Dosn't look to bad at all from the photo's. A good read so far, helped waste some time on my night shift as well!

Best of luck, will keep reading!

#4 AaronRimmington

AaronRimmington

    Stage One Kit Fitted

  • Noobies
  • PipPipPip
  • 62 posts

Posted 08 December 2014 - 11:34 PM

Update time, 08/12/14


So I have had a little more time on the mini, and I have so far bought some new tools to play, which involves the usual Cutters, grinding and flap discs and some primer. Trying to get more stocked up anyway here comes some photo's of where I am currently.


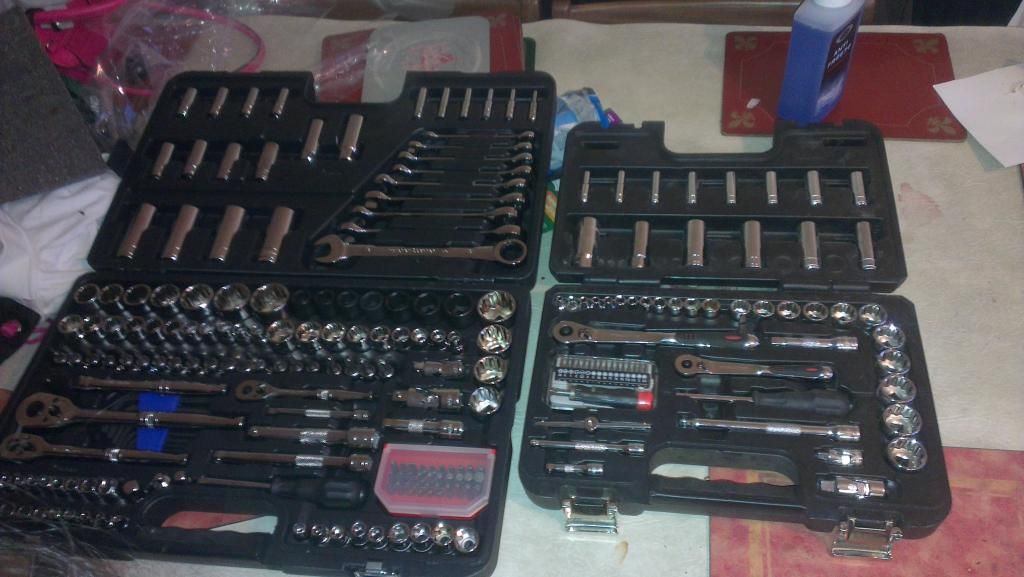
New tools, thanks halfords sale!

IMAG1905_zps23efb93b.jpg


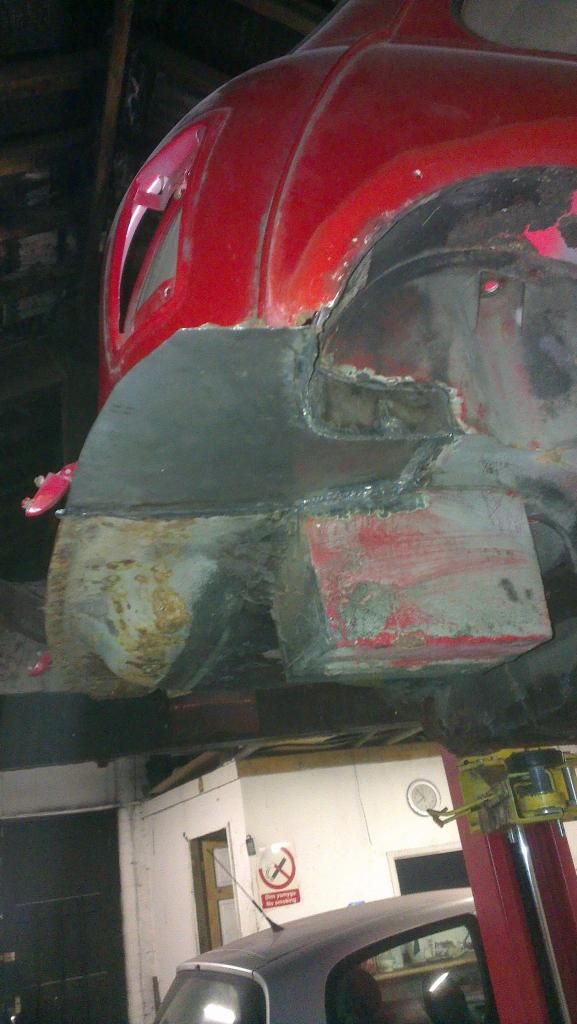
Missed a few Photo's getting to this point but I made my first plates and dad welded them. drivers side rear arch.


IMAG1906_zpsf43a5147.jpg


Arch continued,


IMAG1909_zpsd7de1957.jpg


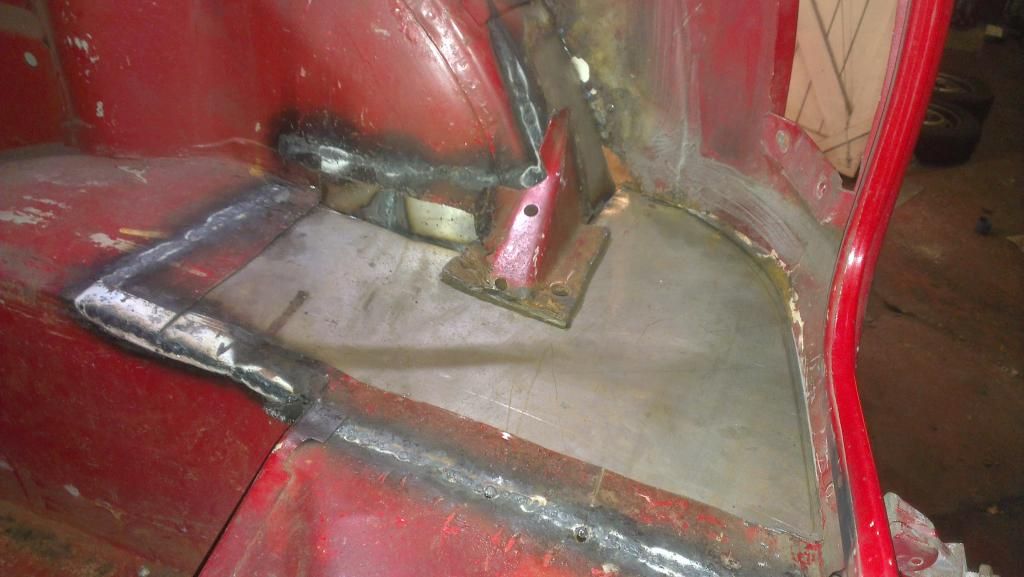
Drivers side boot corner to battery box, all cut out cleaned up and plate made to fit.


IMAG1917_zpsba90b6a9.jpg


welded in just need to clean up.


IMAG1920_zps43059946.jpg


Same patch from the inside, need to finnish welding to subframe mount and add reinforcing.


IMAG1922_zps570fbdba.jpg


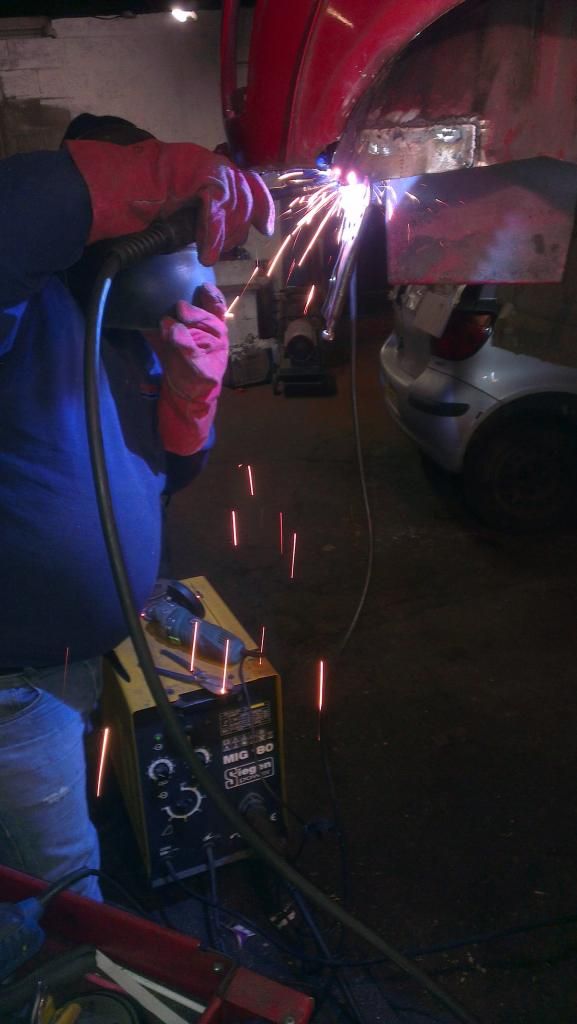
Overview of where we had to finnish up, Happy though, its the first of much welding since we got her! 


IMAG1923_zpsf81c112e.jpg


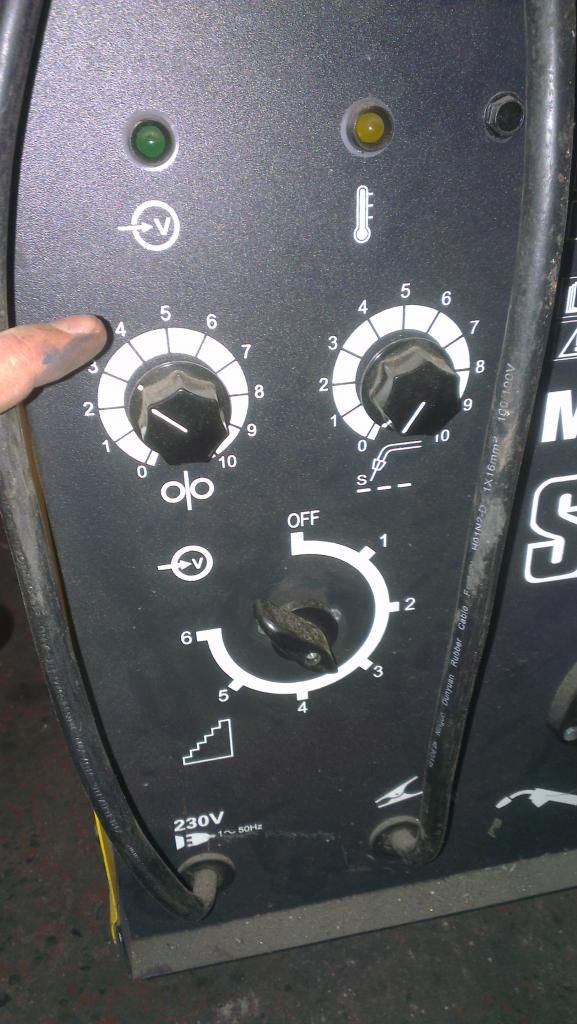
Current welder settings on the Mig.


IMAG1925_zpsf7e07feb.jpg


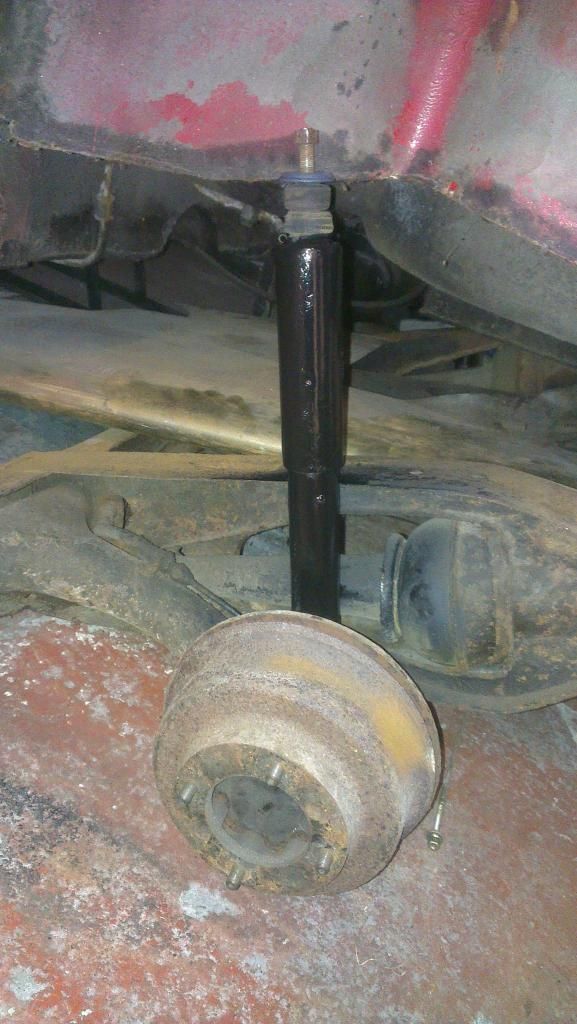
Also decided to clean up my shocks with a wire brush, sand and a few coats of primer and black. Not aiming for perfection, I just want to be back on the road and reasonable.


IMAG1926_zpsdc0b320d.jpg


Still to finish up the arch and clean up the welds before a good primer, Hopefully can get the rear arches finished this week.


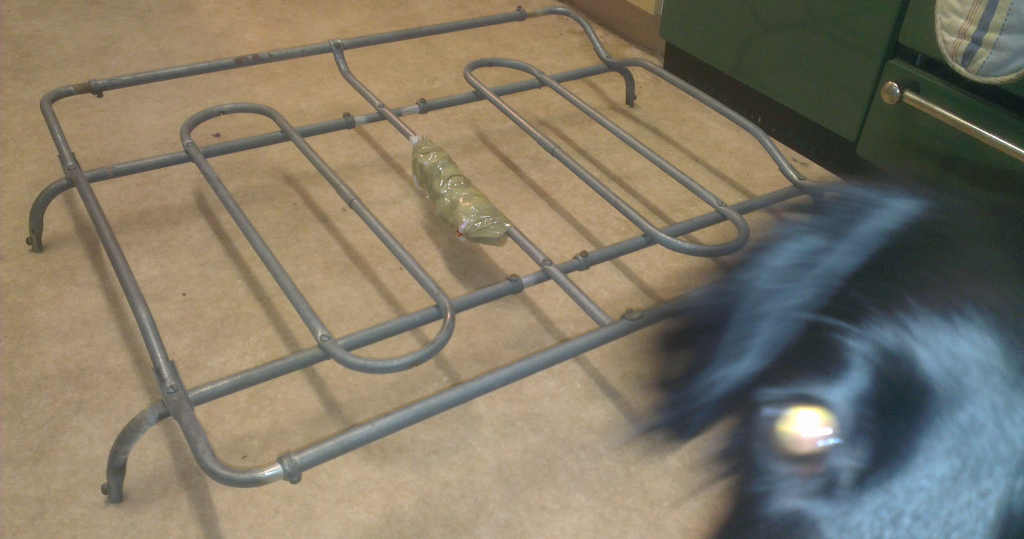
Also decided I would like a roof rack for my car.


More next week hopefully.


#5 Carlos W

Carlos W

    Mine is purple, but I have been told that's normal

  • TMF+ Member
  • PipPipPipPipPipPipPipPipPipPipPip
  • 10,110 posts
  • Location: Sittingbourne, Kent

Posted 08 December 2014 - 11:38 PM

Look at all that space.


So jealous


#6 AaronRimmington

AaronRimmington

    Stage One Kit Fitted

  • Noobies
  • PipPipPip
  • 62 posts

Posted 09 December 2014 - 05:19 PM

Thanks for the kind words Leadly, It looks worse than the photo's but step at a time.


Carlos. I was on a cramped drive that only fit my mini in before, its worth the extra cost. There's even a spray booth I can use too which is a bonus!


Edited by AaronRimmington, 09 December 2014 - 05:20 PM.

#7 AaronRimmington

AaronRimmington

    Stage One Kit Fitted

  • Noobies
  • PipPipPip
  • 62 posts

Posted 17 December 2014 - 09:37 PM

17/12/14


Sorry for no updates to work on the mini this weekend! Unfortunately Jumbo had to take a back seat whilst I worked on my dads van, without that we cant work on the mini so.. priorities :)
 

Although I do have something to show you guys!


IMAG1987_zpsced96d86.jpg


Goodies, or Goodie. Here it is... an early xmas gift to myself.  I believe its a 1960s circa Morris minor one? after a quick google search that was the only other i could find with a proper name. Thanks Josh!


Untitled_zps50a4d277.png


#8 AaronRimmington

AaronRimmington

    Stage One Kit Fitted

  • Noobies
  • PipPipPip
  • 62 posts

Posted 01 May 2015 - 11:33 PM

Update: Yeah its been too long!  ----- Pictures will be uploaded when I can. sorry guys :)


20/04/15 - Finally got around to doing something on the mini, even if it is only working on my roofrack.


I have been a little busy with things at home and converting my dads van into a campervan, also uni work and a few computer projects and some travelling ( ireland, belgium and holland ) so I have neglected the car and havent been able to get on. Anyway now alot of this is out of the way its time to get back into Jumbo.


Cause of having to look after younger siblings I havent had the chance to work on the car at the workshop so for now all i could do was potter around at home.


Roofrack - Stripped, cleaned, sanded, treated, primed and ready for paint.  I think white will be nice so ile let you see how that turns out.


There has also been some new purchases, I got a brand new air chisel for £5 at a boot sale - BEST £5 I HAVE SPENT YET!!!! seriously though, what a piece of kit.  New Hilo kit, machined alloy billet version. some paint for the subframes and usual odds and sodds.

New panels - 2 new a panels ( one has the shiny paint coating compared to the matt? also its alot better quality. 2 scuttle corner panels, and both rear subframe mount panels with captive nuts - the ones for the heel board? (if thats the correct term)

New seats (Leather this time), actually this is the 4th set of seats I have for the car.


01/05/15 - Finally back to working in the workshop.


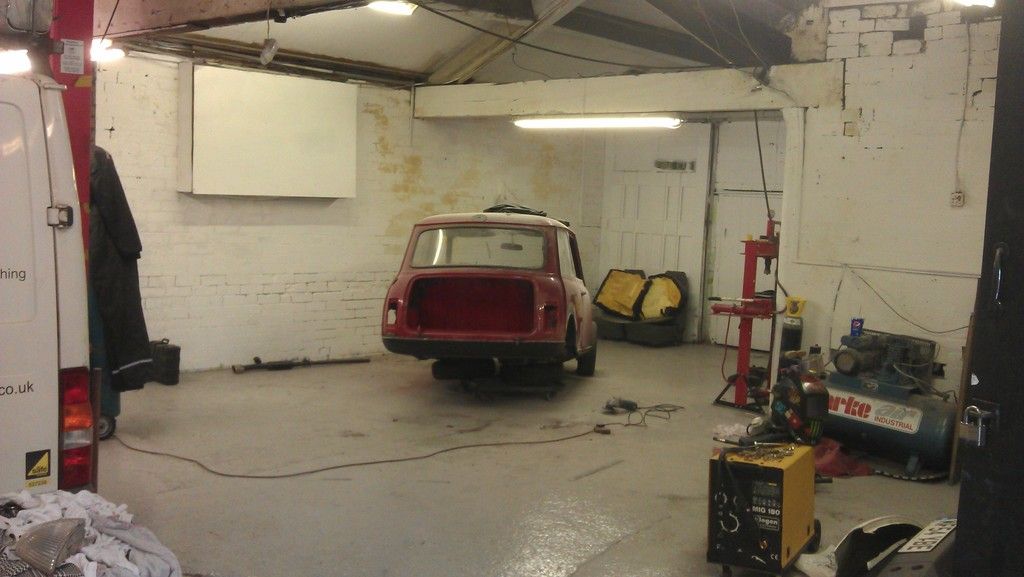
Usually the workshop is covered in all sorts of slime grease and oil and its pretty damp dark and dingey, however the lads have finally gotten around to cleaning it all out and whitewashing the walls and even painting the floor. They have even installed a new set of lights and the Mini has been moved into another, albeit larger corner of the shop.


With this new found lovely clean workshop and even larger ammount of space to work with its alot easier to work and cleaner * avoid rust*. so without further adue, whats been going on?


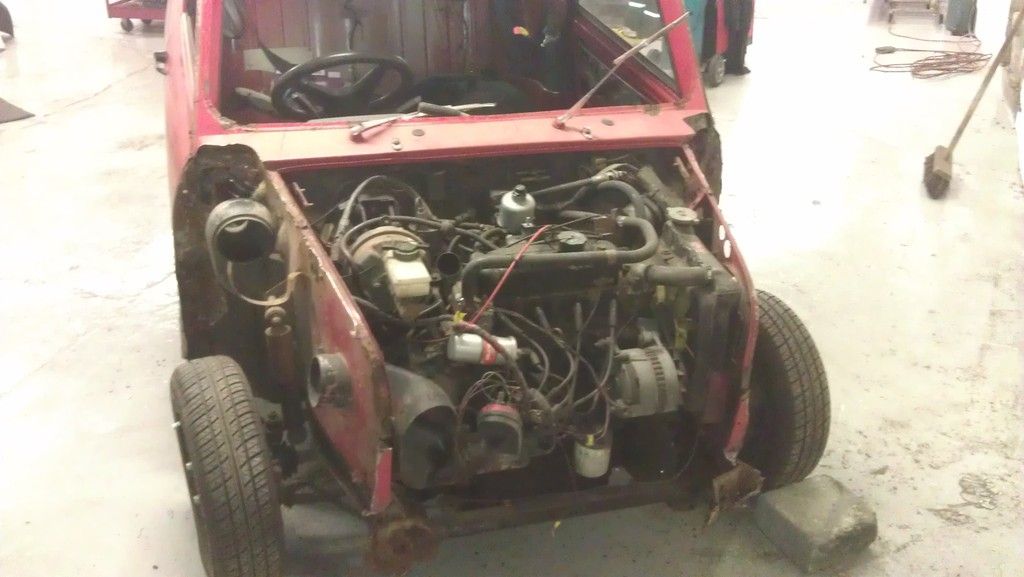
Front end is stripped and wiring labeled.

Upper dashboard out

Windscreen out


Wings & Front panel cut off.

fresh air vent hole things? and filtch panel? few holes cut - more exploration needed.


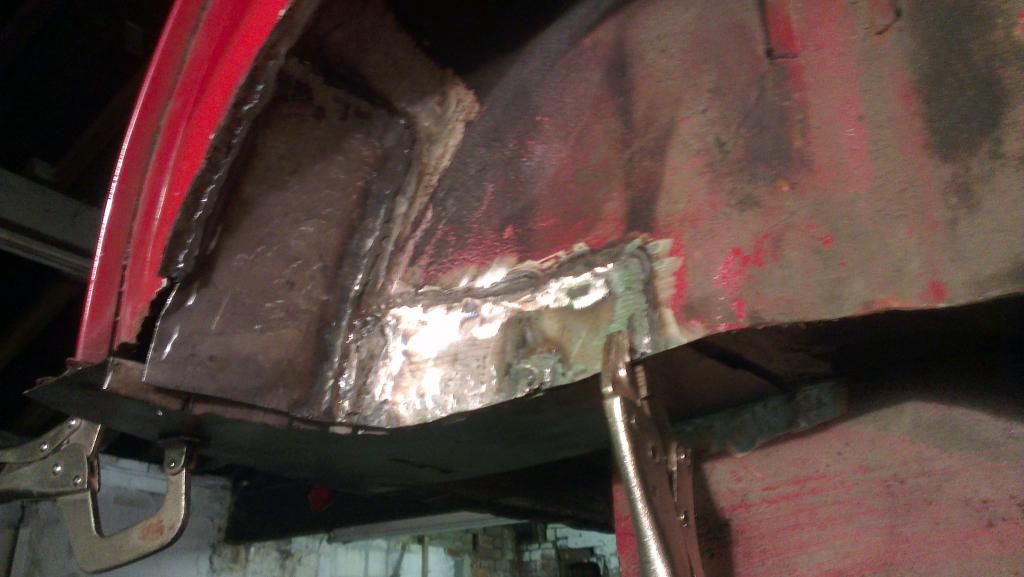
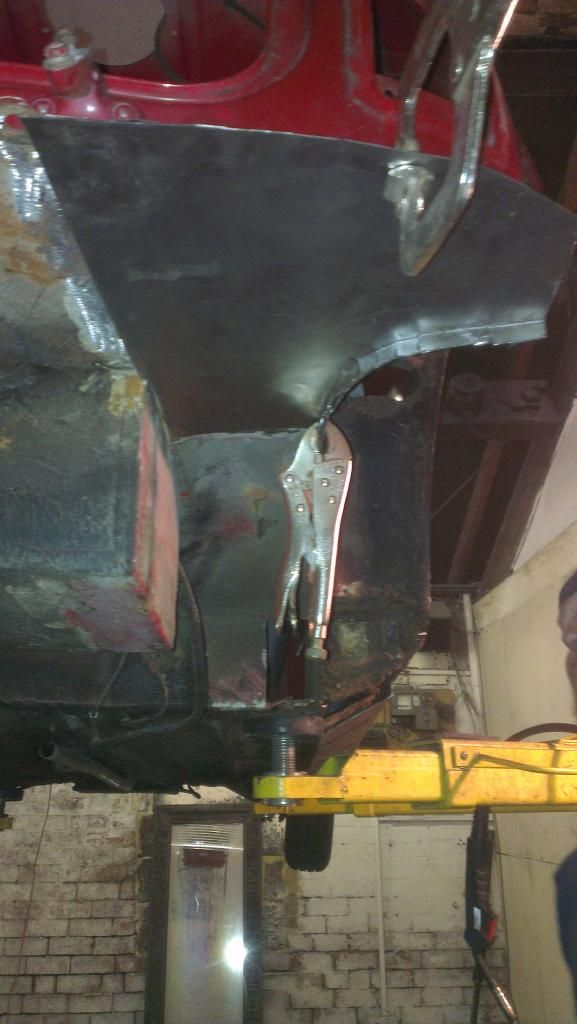
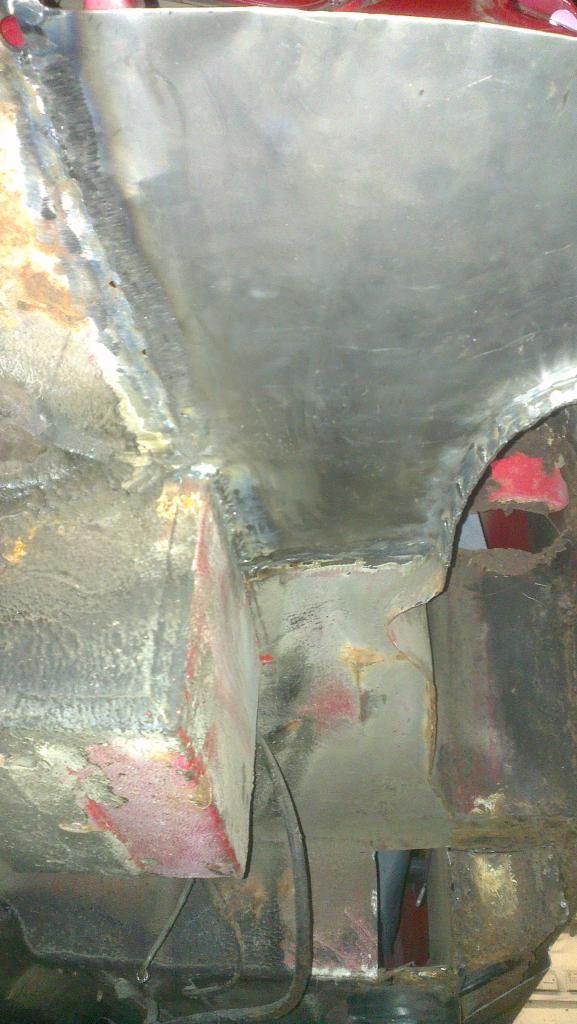
Rear subframe mounting points (wheel arch part) - N/S all rot cut out and area cleaned up. Panel fabricated and made to fit.


02/05/15


Rear subframe mounting points ( wheel arch part) - N/S new panel seam welded in, top and bottom.

Bottom of arches rot cut out and panel fabricated and seam welded in.

Arch panels fabricated from sheet steel. Starting point seam welded in.

Rear valence fitted and spot welded.


Filtch panels made to cover fresh air vent holes for NS&OS

Further cleaning done.


Hopefully tomorrow will work on the car too.


Aims - Tube arches, will save me time and money, ( the bottom of the arch is rotten and needs replacing but due to putting bigger wheels on the arch needs doing ) win win I suppose.

Remove rear bins - only temporary to gain easier access.

Finnish welding entire arches.

If enough time - Weld heel board and weld in the subframe mounting panels.


That should complete the welding for the back atleast.


Anyway, sorry for such a long time without an update, but the plan is updates everday for the next week or so if all goes to plan.


Thanks again. Will try and upload pics within the next day or so.


Aaron.


#9 AaronRimmington

AaronRimmington

    Stage One Kit Fitted

  • Noobies
  • PipPipPip
  • 62 posts

Posted 05 May 2015 - 12:34 AM

Update 2.0


03/05/15.


Got around to cleaning up around my arches on both NS&OS quarters, discovered old bump repair filled with filler.

also found extent of rot on both sides.


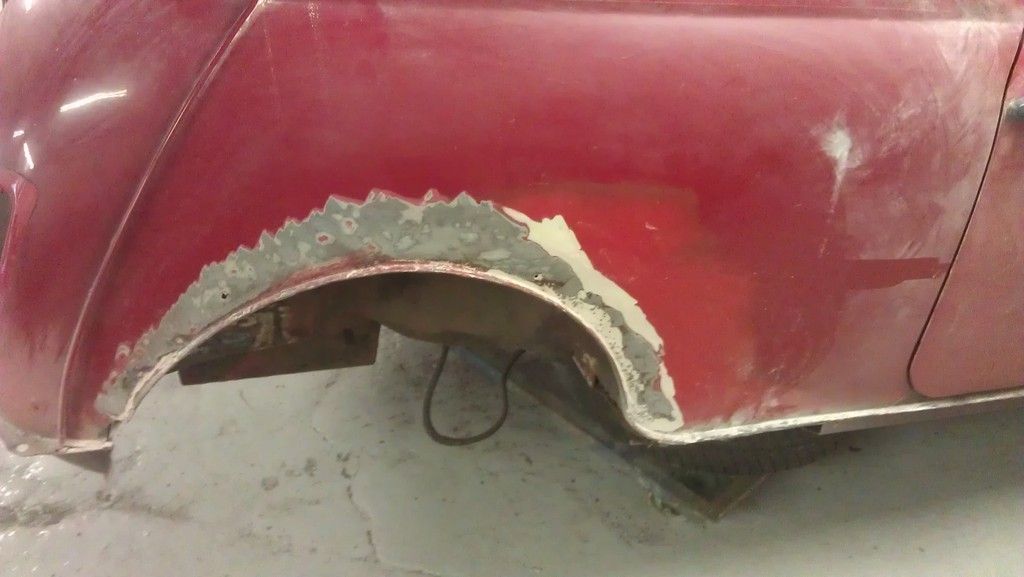
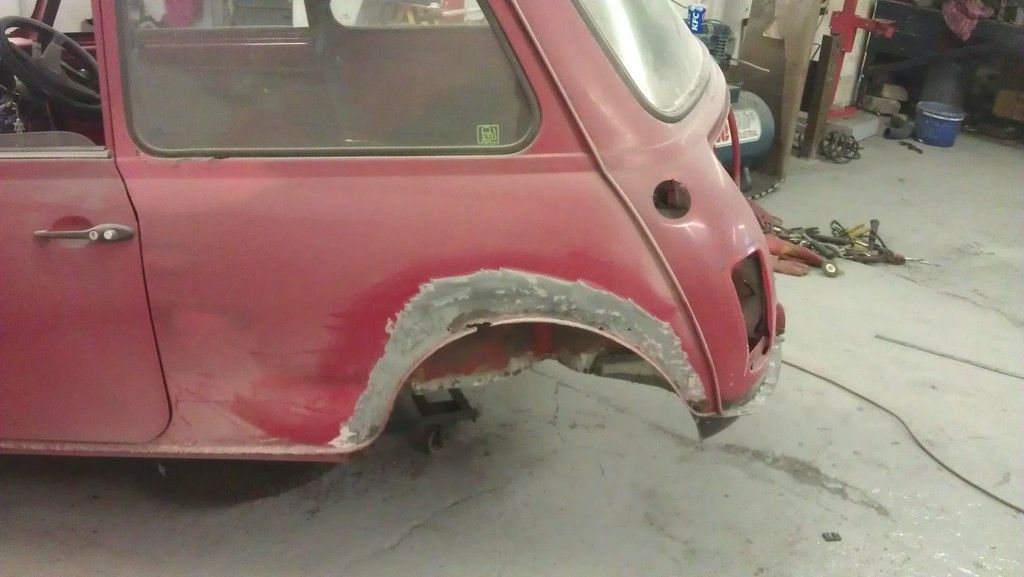
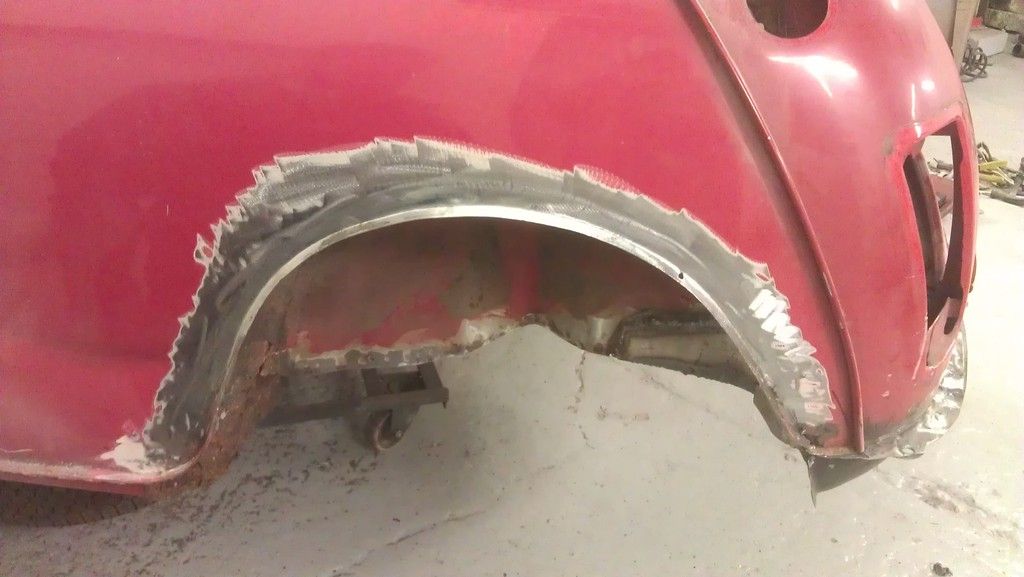
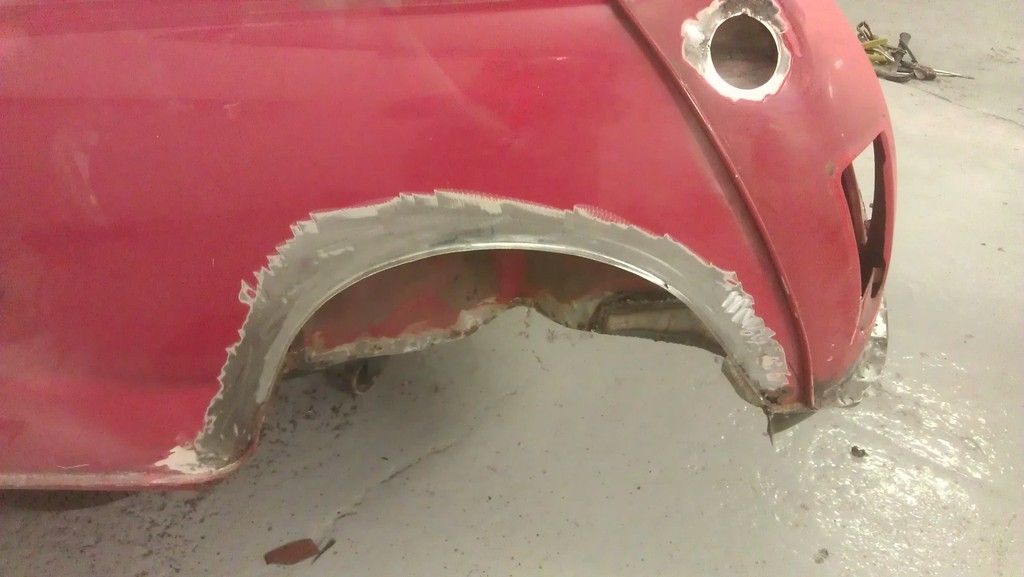
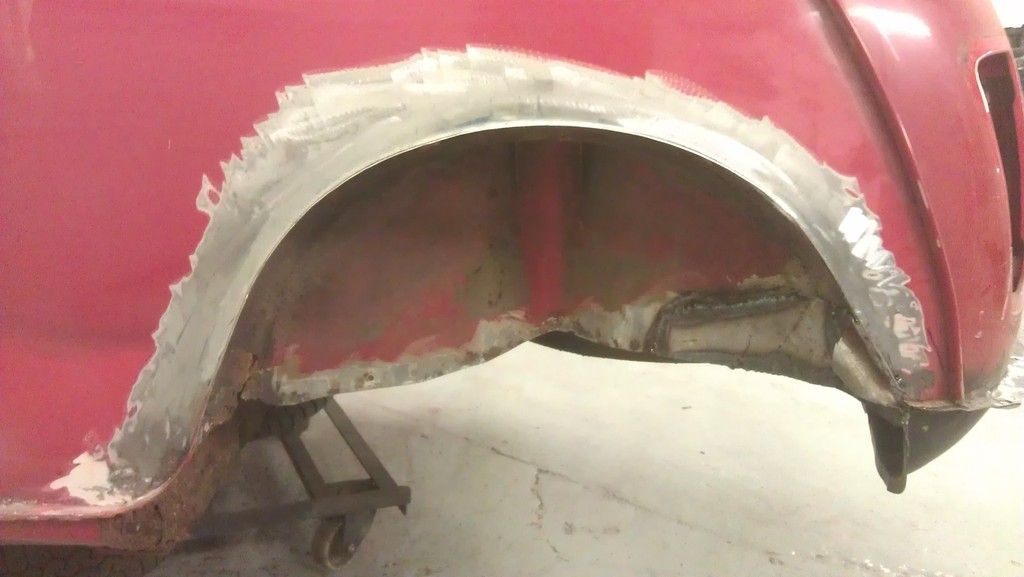
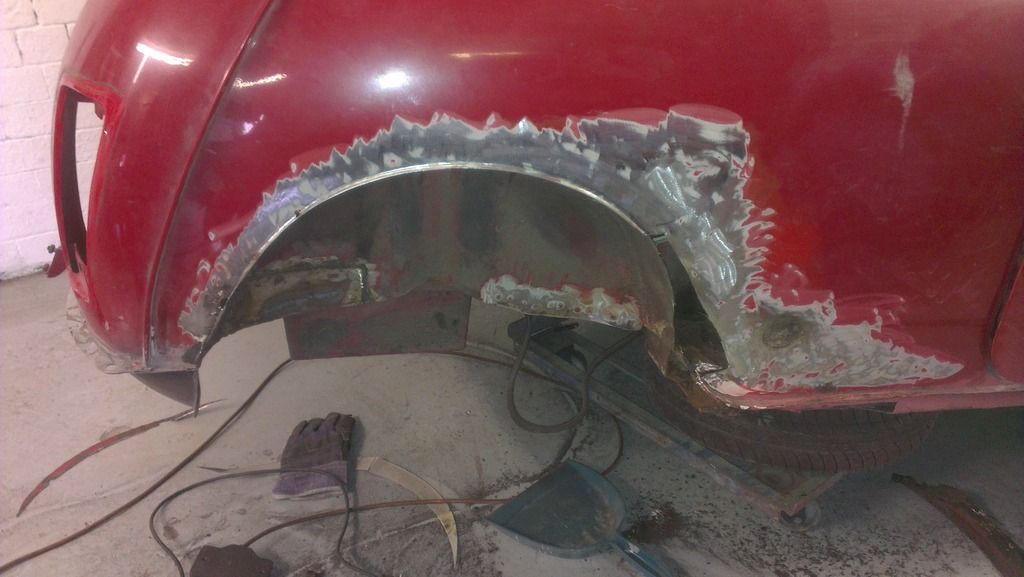
Now as I am going to be fitting 13x7 wheels on this car and the fact that the arches are rotten I have decided instead of spending extra money on a new panel I will just extend the wheel arch clearing all the rot and saving me some money. This will also futureproof the car If I ever decide to put even bigger wheels on if i do an engine swap for example.


got around to creating template for the arches, cut out the Nearside one ( worst one )

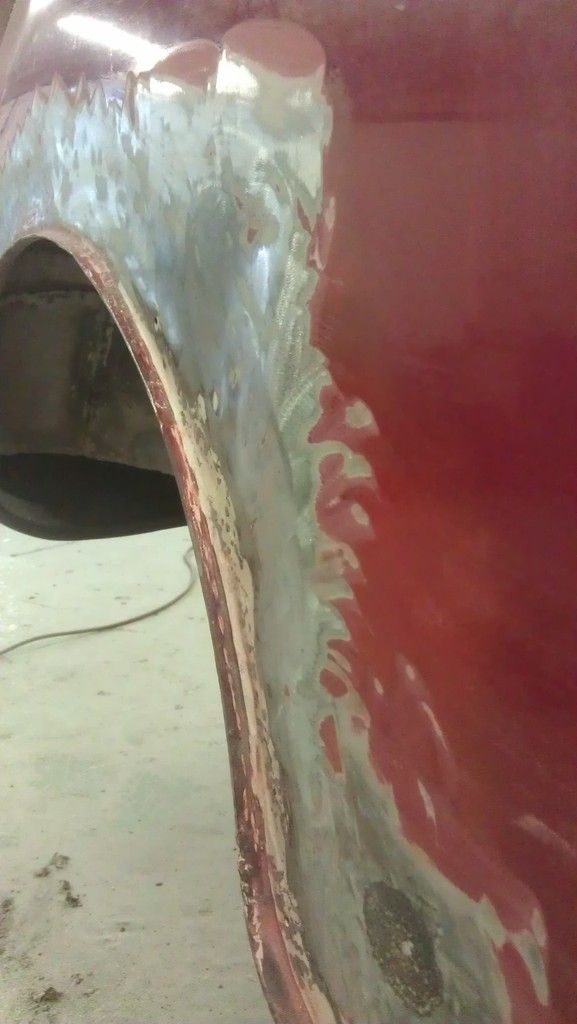
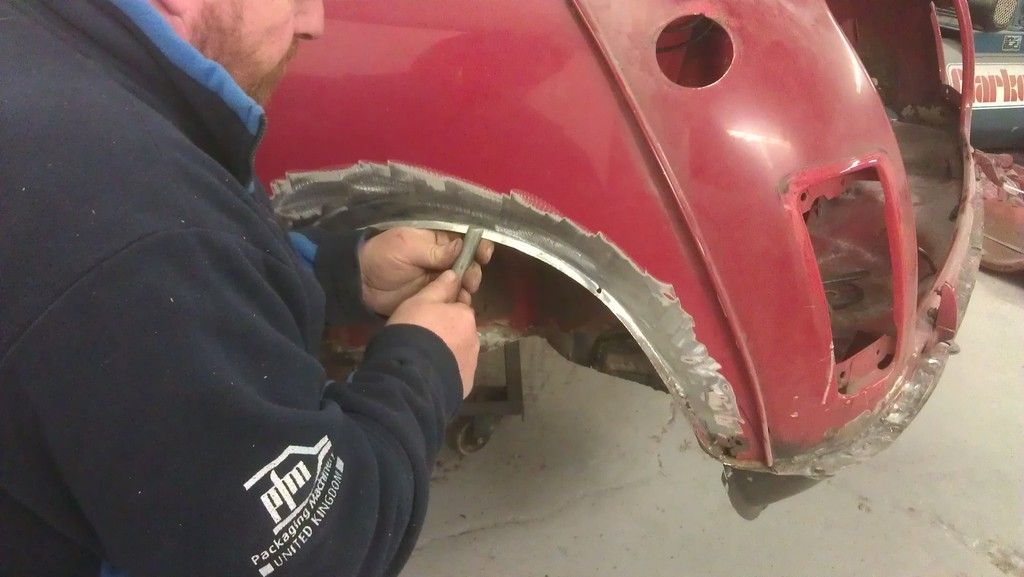
Then smoothed it off and made a tool to make a lip, as in project binky same method used, bit of bar cut out a groove with a cutting disc to 10mm and then sanded down the edges.


Made around 8 - 10 passes along geting around 10 degree of angle per time until eventually getting them how i wanted without distorting panel.


Didnt get around to cutting out the otherside, but hopefully will be back on it tuesday.


Will get the pictures uploaded soon. Thanks Aaron.


#10 johnylässig

johnylässig

    Stage One Kit Fitted

  • Validating
  • PipPipPip
  • 64 posts
  • Location: Widnau

Posted 06 May 2015 - 08:48 AM

looks like a more or less solid shell, top work on that boot area! :D


#11 AaronRimmington

AaronRimmington

    Stage One Kit Fitted

  • Noobies
  • PipPipPip
  • 62 posts

Posted 08 May 2015 - 04:31 PM

Update .... Actually Its just some of the pictures I promised. :D


Went down to the Unit today to do some work and as it turns out I forgot my keys, on the way to collect the altenator went on the van, so today I have been grounded :( However, new altenator is on its way and will be fitted on monday, in the meantime a friend has given me a spare fully charged battery to use, and i will be keeping my battery charger handy so I can still get back to the unit over the weekend.


So pic's


Mini's new corner


IMAG0768_zpsnchut8h9.jpg

IMAG0769_zps0vdrejss.jpg


And now to the fun part...


IMAG0749_zpsrxgz2m1p.jpg


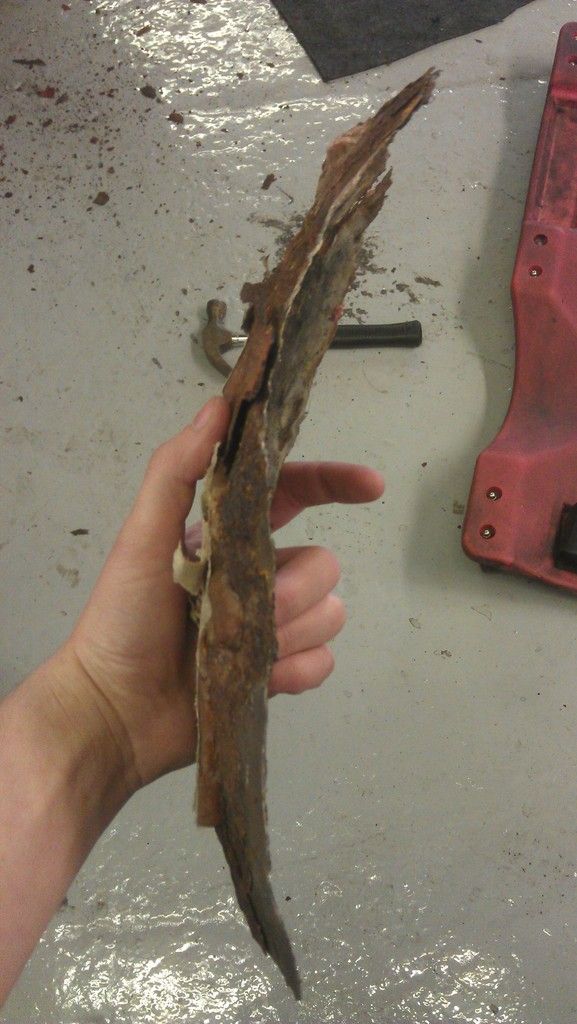
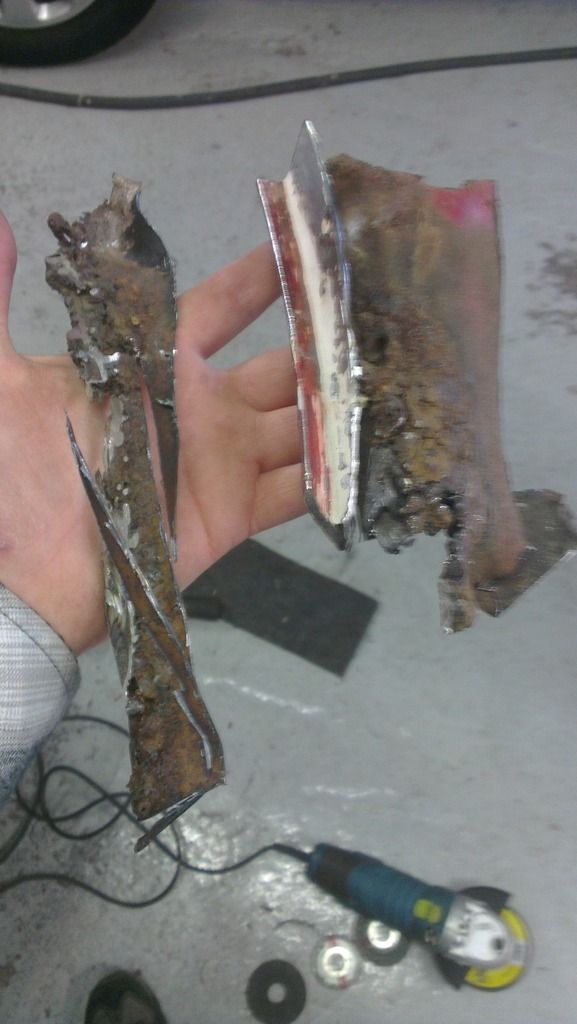
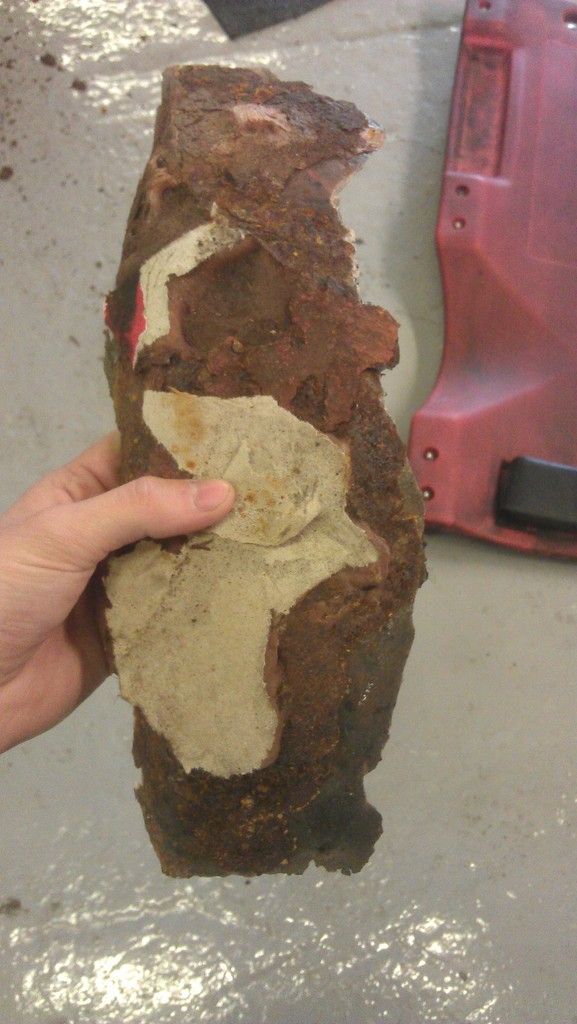
This was one of my rear inner arches, Component: Inner arch Composition: 15% rust 5% Carrier bag 5% Cardboard 65% Resin 10% assorted filth


IMAG0750_zpst7b8sub6.jpg


As above.


Then this happened


IMAG0754_zpspsbswxz4.jpg


around 2 minutes work with an air chisel!


IMAG0757_zpsnxwvbr88.jpg


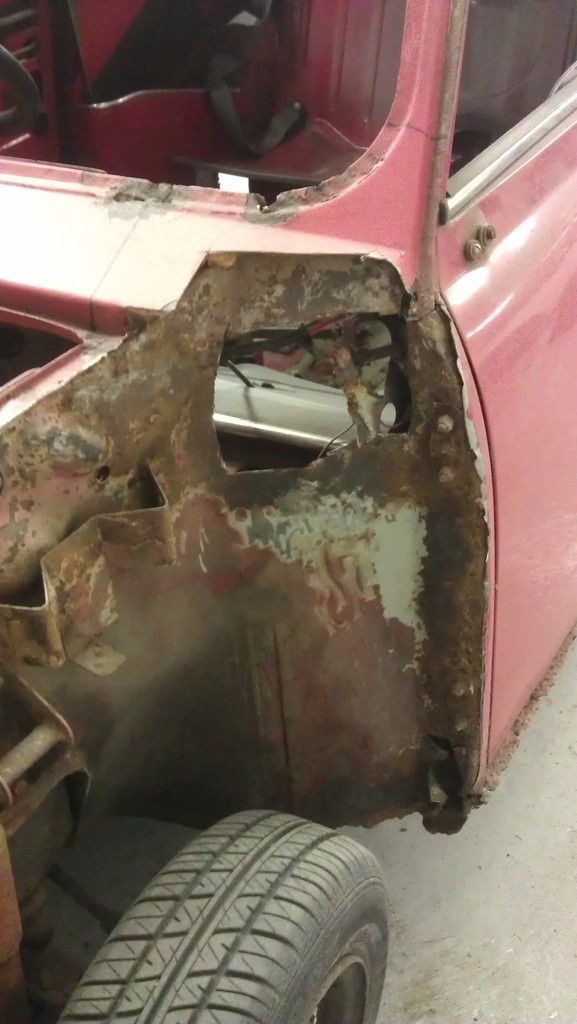
Flitch area, NS, didnt have a shot of the OS but its just as bad, will be plating these over anyway.


After the windscreen was removed found this to deal with


IMAG0758_zpsnin03clt.jpg


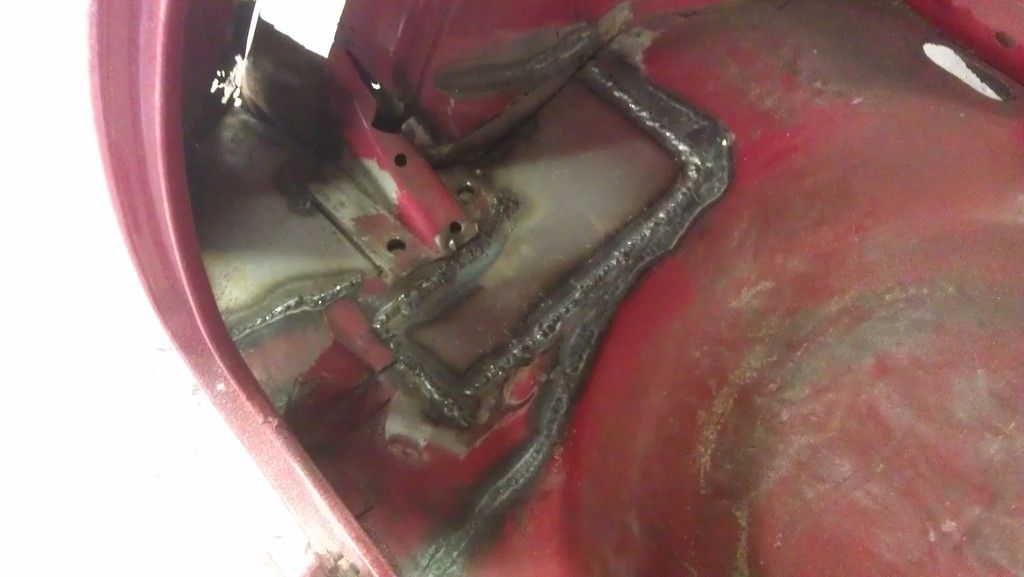
As a follow up from earlier work, here is the other side of the rear subframe repair will get a shot of the underneath at somepoint.


IMAG0763_zpssjvgykbr.jpg


As many will have noticed, the rear valance is on again!


IMAG0761_zpsb9dewmua.jpg


Spot welded and ground down, still cleanup work to do


IMAG0762_zps4xjqn4oe.jpg


IMAG0766_zpsxtvfb5df.jpg


Now I decided to tackle the rear arches, now the plan is to install bigger wheels but also as mentioned earlier this should save me a little bit of money and time, as i dont have to weld in a new panel.

First thing was to sand back both sides to see what im dealing with.

IMAG0767_zpsto4rkbku.jpg

IMAG0759_zpsmj2eccjn.jpg


Lovely, Filler, rot & Holes.


I also found this lovely dint,

Also has a little friend,


IMAG0772_zpsed94eeok.jpg


Then I wipped up a template, a cutting disc and out comes NS arch. didnt take too many photo's of this process but you should all know the score if you have been watching project binky!


skip a few pics and heres the start of the lip getting put back in.


IMAG0775_zps0fvhnry5.jpg


Only pic I could find of the tool, oh and my dad.


IMAG0774_zpsv5ahwoun.jpg


Getting there


IMAG0776_zps338qaw35.jpg


and a new arch


IMAG0777_zpsdlp3eysi.jpg


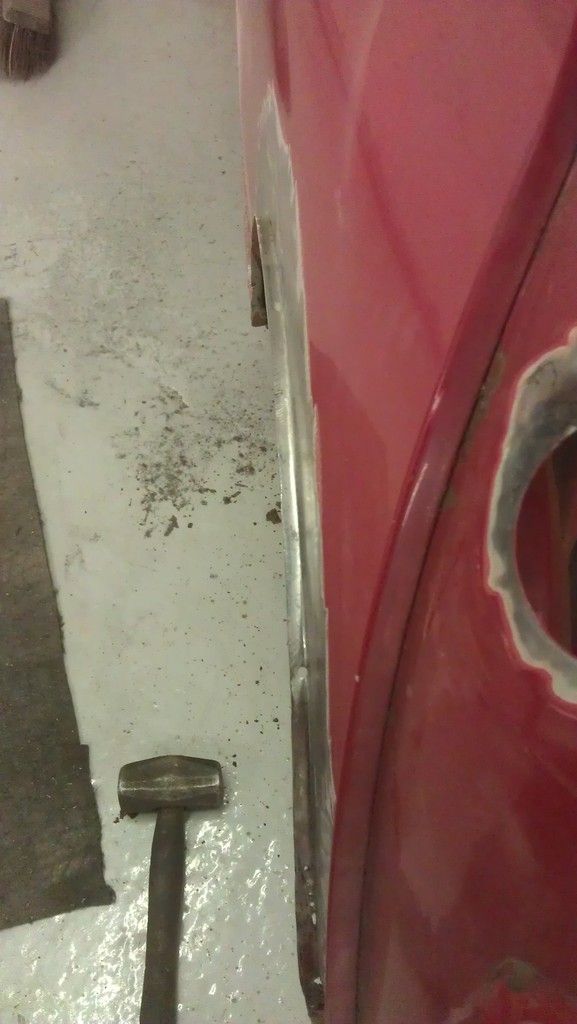
and lip


IMAG0778_zpsrqbas15i.jpg


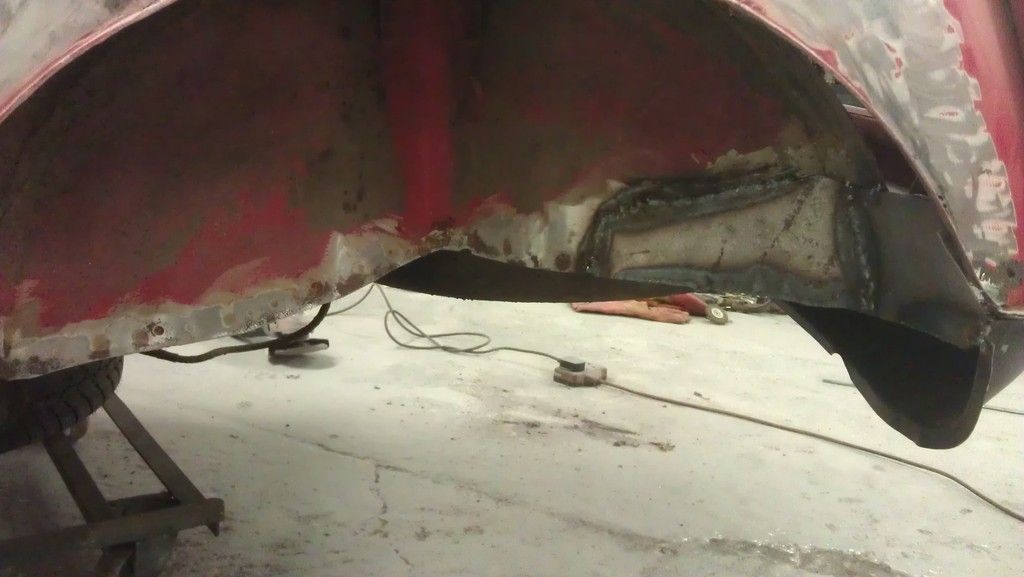
Also did a small ammount of tidying up on the inner arch.


IMAG0760_zpsseaaiupj.jpg


Expect an update in a few days, this should include - Finnish tubing OS arch, Finnish inner arches for both sides. Clean all current welds up. Possibly Stripping of the rear subframe and fitment to weld Heel board mounting panels back in place.


also pic of my Hilo's.


Sorry not much talking, hopefully the pic's are okay for you guys. All comments appreciated.


@Johnylassig - I wish it was more solid but then again Its a mini :) Thanks for the kind words.


#12 AaronRimmington

AaronRimmington

    Stage One Kit Fitted

  • Noobies
  • PipPipPip
  • 62 posts

Posted 15 May 2015 - 07:31 PM

Update 14/5/15


Only got a few hours in on the mini today, always busy it seems :(


Will be busy until July, so I best get cracking on. Ile do the car as and when I can, and I have even decided to aid progress I will be bringing parts home to restore. This way I can get on with some of my work and then take small breaks and work on restoring the car parts as and when. 


So here goes When to do the OS Arch as previously mentioned.


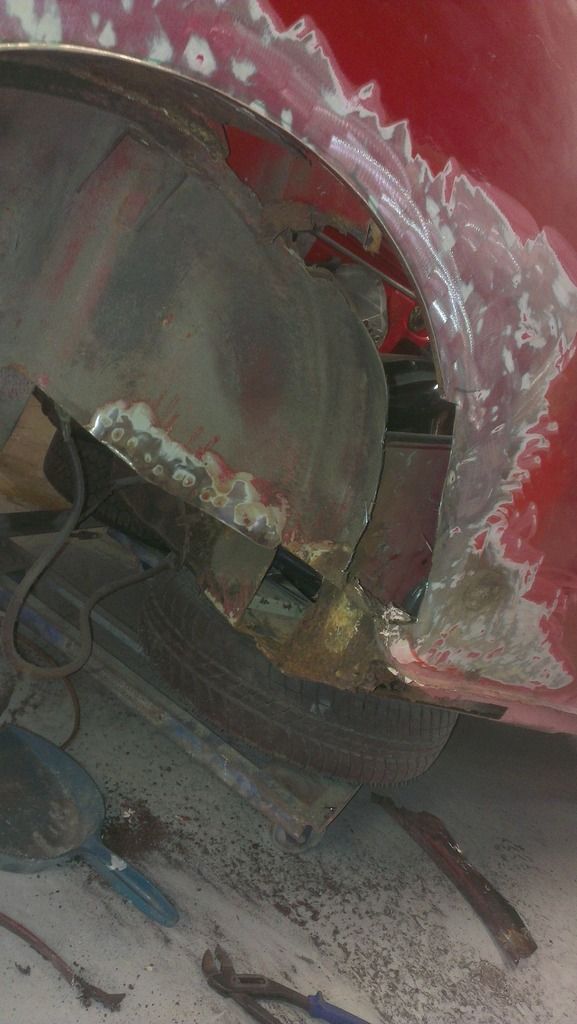
Cut out the rot and templated the new arch.


IMAG2156_zps3o3rfpq9.jpg


Arch cut out and lip bent,


IMAG2158_zpssn1i3b9y.jpg


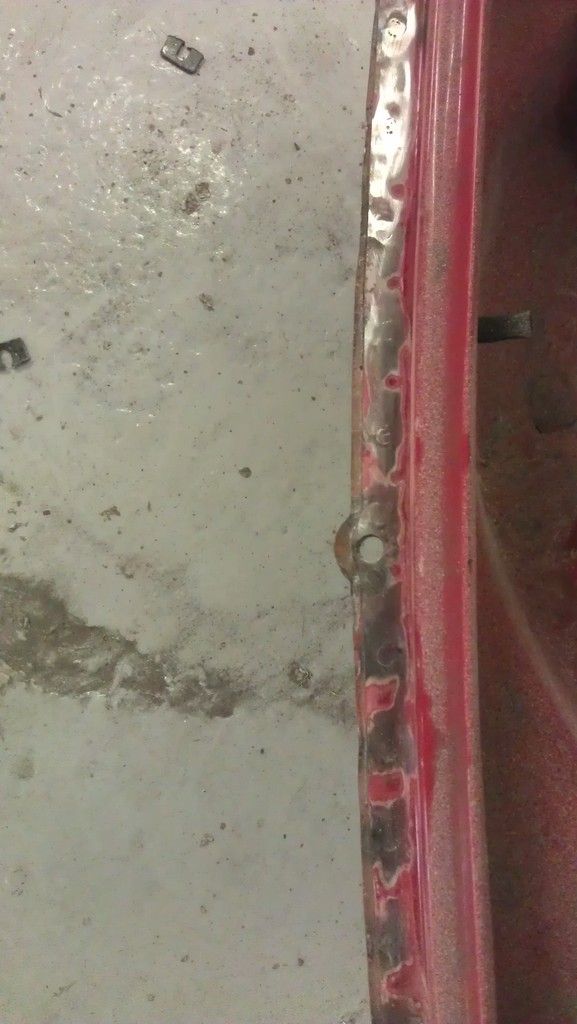
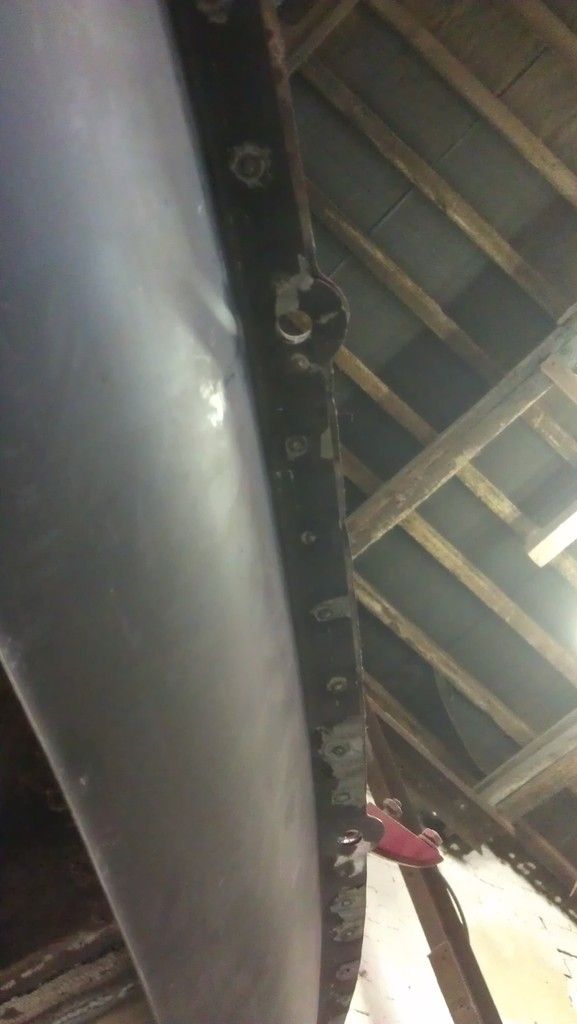
Note - Hole was due to excessive bad welding, as seen above.


Another view..


IMAG2157_zpsrzkbeum4.jpg


Will sort out both arches tomorrow, or atleast that is the plan.. so stay tuned on that.


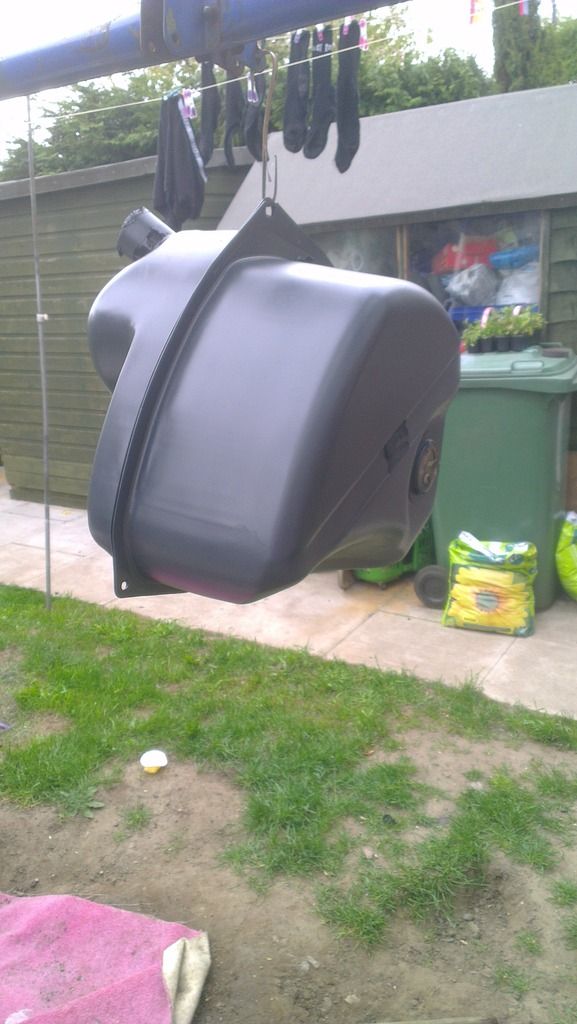
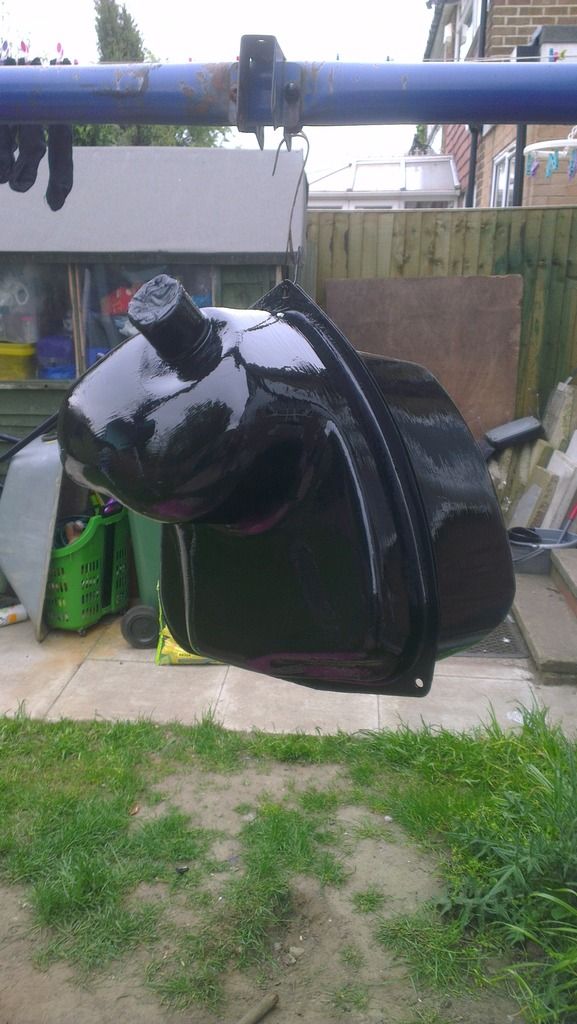
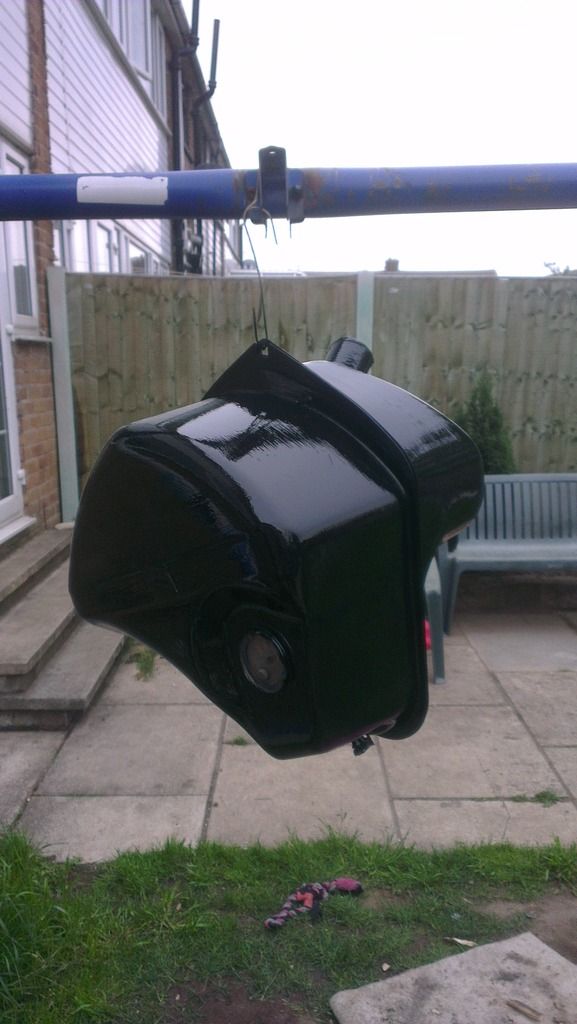
Also I got round to cleaning up the petrol tank, Rust removed and wire brushed, wiped down.


and its in primer..


IMAG2160_zpsfysdtsl1.jpg


please excuse the socks haha.


Its now painted black.


IMAG2161_zpshswxjpls.jpg


IMAG2162_zpsrx5kacmu.jpg


Not overly fussed about the finnish, I just want it to be protected. The back will be covered with a boot liner kit anyway so this wont be on show.


Thats about all I have atm folks!


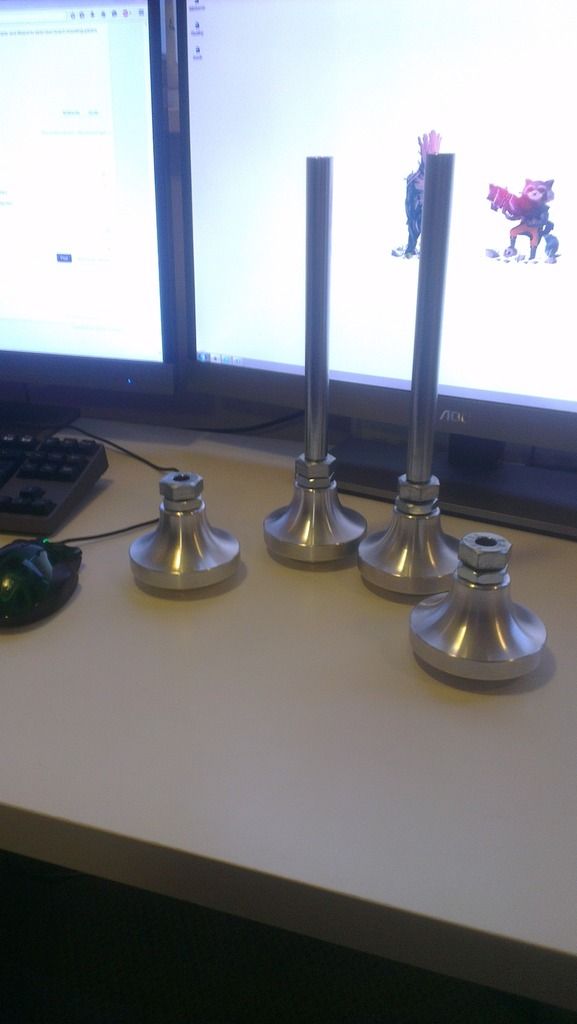
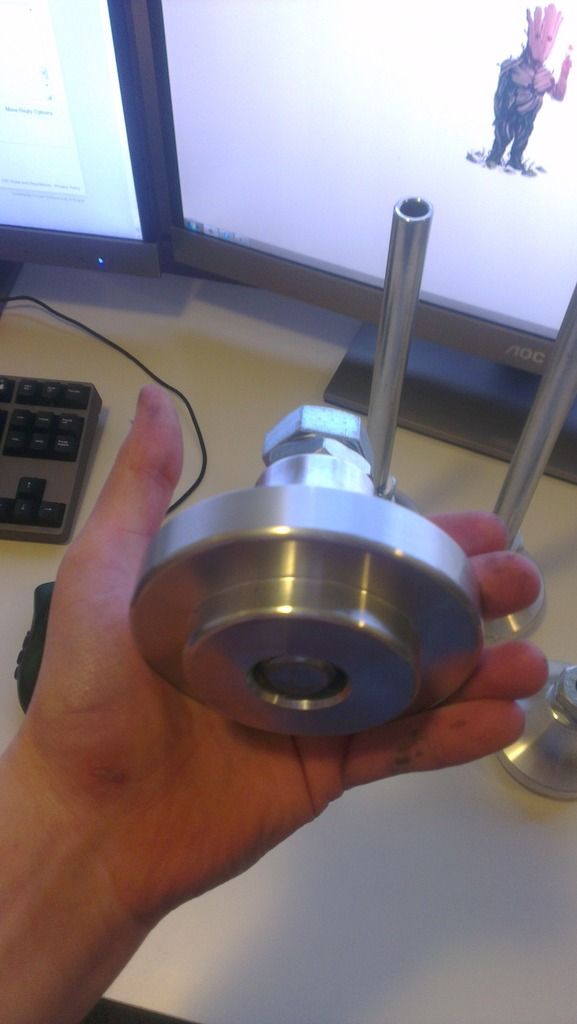
Oh, shiny as promised :D


IMAG2164_zpsdbugmwjm.jpg


IMAG2165_zpsgjlc50a9.jpg


Thats all for now, hopefully have an update for you all tomorrow.


Aaron.


0 user(s) are reading this topic

0 members, 0 guests, 0 anonymous users