Well this thread got busy, only went out for the afternoon and loads of reply's so thanks everybody!
Quick question, I am replacing full floor, boot floor and wheel tubs on my mk2. Would pre assembly of main floor to boot be easiest method. Also would you fit new doorsteps and outer a panels to shell before cutting out floor, is full floor easily picked up by two people.
I am just at planning stage with mine and not sure where to start. It's not my first resto but want the next one to be my best,
I also need to replace boot floor and tubs but am going to do them after the main floor panel rather than at the same time, I've already done the door steps and that went fine and give me a good solid grounding for fixing the bulk of the sills to.
you don't actually need to do that much bracing as you can 'fit the shell to the floor' if that makes sense? i was surprised how easy it was the first time i did one.
I'm thinking bracing the door openings then two braces across the car either at right angles or in a cross pattern.
I've done all this to my mk1, and I used separate panels, but I wanted to keep the correct floors.
I braced the car across the door openings and then welded a brace between the two door openings. I then did each half of the floor at a time, leaving the other half in for strength. I think I'd already done the door steps by then. I then did the heel board using a new rear subframe and lining it up from the original boot floor, then did the boot floor the same way, using the new heel board as the reference point. Rear arches were done before the boot floor, while it was all cut out.
I've no doubt it would be easier to use one whole assembly, but I wanted to keep the original floor and exhaust tunnel.
Im now doing the front end, so I need to figure out how to replace the inner wings and a-panels at the moment...
I was thinking of doing half floors, in fact originally I was thinking sills and just pans at the front but the rear on the drivers side needs replacing and the tunnel has rusted quite badly where the heat shield was fixed. Perhaps I should just buy a rear subframe now actually, going to need it at some stage anyway and that way I know I've got an absolute datum for the mounting points on the heal board.
I did the front end first, it's been quite a task and have had to replace pretty much everything but it's been a good learning curve.
Quick question, I am replacing full floor, boot floor and wheel tubs on my mk2. Would pre assembly of main floor to boot be easiest method. Also would you fit new doorsteps and outer a panels to shell before cutting out floor, is full floor easily picked up by two people.
I am just at planning stage with mine and not sure where to start. It's not my first resto but want the next one to be my best,
I think leaving the old boot floor and tubs in and do the floor first would be the way forward. No bracing needed at the back of the car then.
I'm definitely doing it this way, concerned about taking too much out at once, not so much for avoiding bracing but for getting everything in the right place!
I have a mk2 cooper to do next and are planning full m machine floor replacement on that, not sure if best to do door steps and outer a panel replacement first and have doors fitted to help with alignment in this area, I have bought a spot welder to hopefully keep as much looking factory as possible. Was planning on using 25mm box section for bracing.
I have also seen people fit boot floor and rear valance to floor assembly and replace the lot in one go but not sure I am brave enough to do this as not much car will be left after cutting.
That spot welder will also save you a heap of time and effort I would imagine!
I'm wondering about doing mine too. The floor isn't "that" bad in terms of rot. It's just where it's had repair patches, aftermarket seat brackets, all sorts of stuff welded in over the years. Just looks tatty but is solid. Big investment and big work, but I think it's going to be worth it.
It does seem a shame throwing away good steel, but mines a bit like yours, a mixture of previous patchwork and rot and it just seems to make sense to go with the full replacement, I could keep the passenger side rear floor pan from the edge of the inner sill and probably the cross member (although the ends have been patched up and I would re-do these patches to be tidier) but in the grand scheme of the overall cost of this project spending a bit more on the whole thing to save time and end up with a tidier job seems sensible.
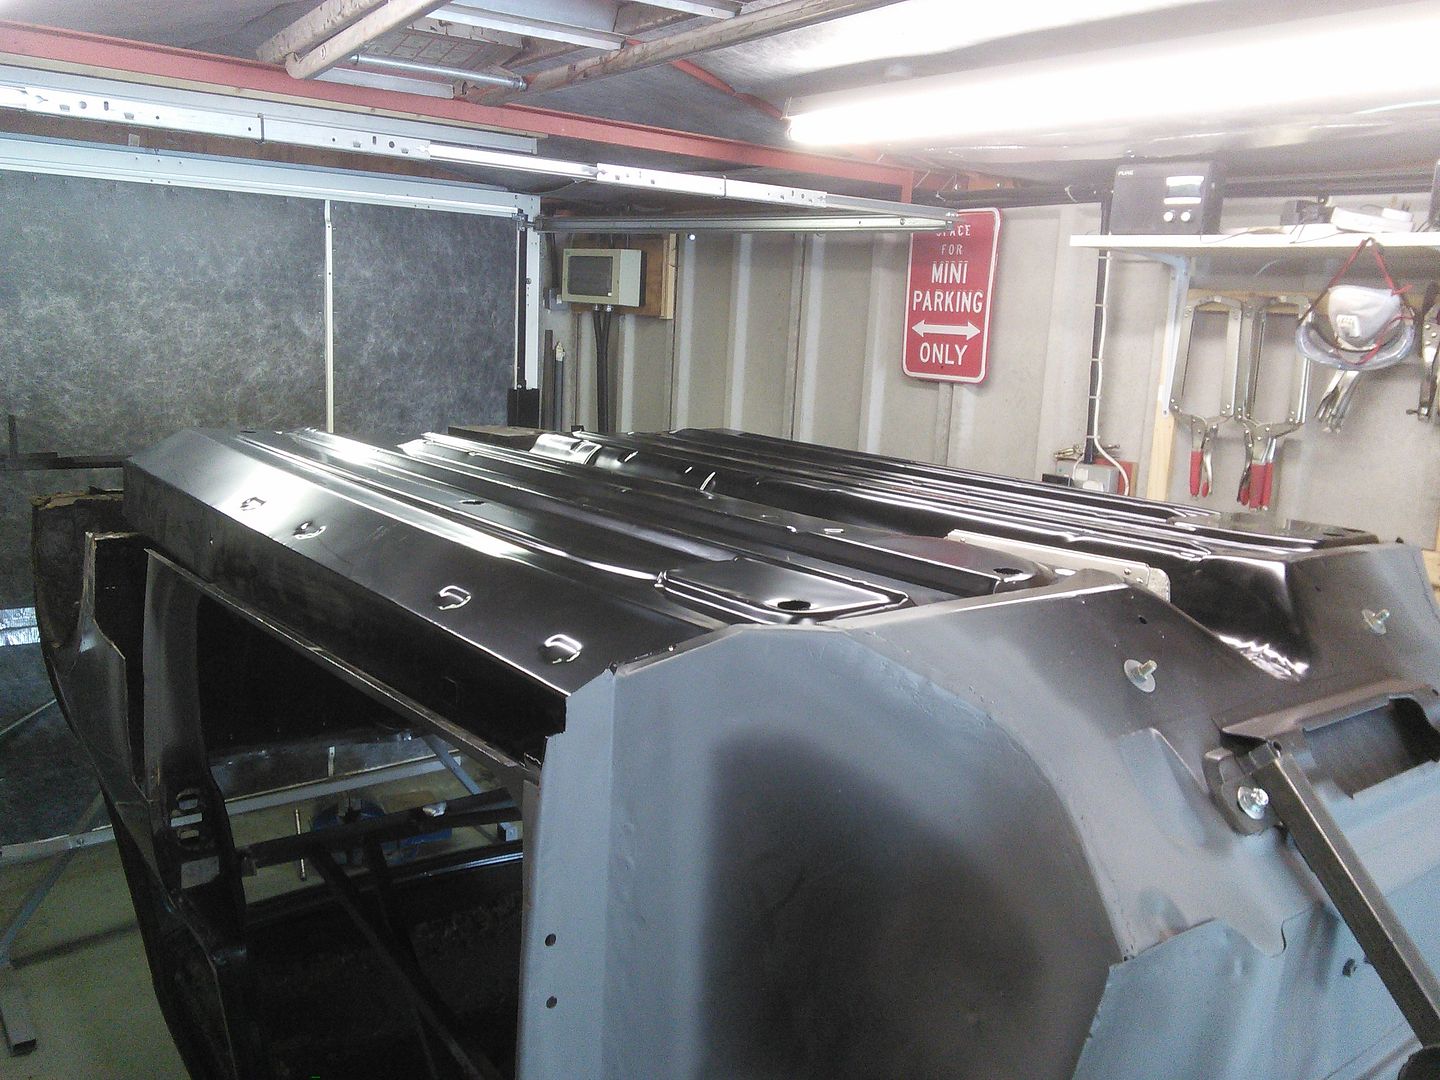
I did this one recently using a complete floor pan from Nippy Cars that they assemble from M-Machine panels.
After bracing the body, removing the old floor and being blasted any repairs need to the areas that join the floor were carried out then the body was slipped onto the new floor. This one was a bit extreme but you could use the same process if you were only replacing the main floor.


The alternative would be to use two half floor and a heel board like I have on my own car. It's considerably cheaper than a whole floor pan but does take more time.

If it's a rod change car and you don't mind the SPI floor pan then the bare Heritage floor pan is a bargain at £216 and also easy to fit with the body on a spit.
That whole front and rear assembly is certainly interesting, not heard of that before, looks like it should save even more time but I like the idea of doing main floor and boot floor separately (probably irrational given I'm leaning towards complete floor rather than the parts).
As said earlier in this post the tunnel is also badly rusted in the middle so I'd already decided against keeping the tunnel and going the two halves route, if mine was as good as your looks then I'd certainly be more inclined to go down the repairs route. The bare floor pan is good value, but when I add in the other parts that I need to replace too then the difference in price between all the parts and the fully assembled option aren't huge, so it's a matter of weighing up the cost vs time saved really for me.
Anyway, thanks everybody for the input, I shall sleep on this tonight and probably put in my order tomorrow one way or the other.....