Jump to content


Photo
- - - - -

Mayfair Retro 1275


  • Please log in to reply
38 replies to this topic

#1 andyt

andyt

    Speeding Along Now

  • Members
  • PipPipPipPipPip
  • 375 posts
  • Location: Melksham
  • Local Club: cooper register

Posted 31 October 2015 - 06:33 AM

Been on the forum for a few years and never had time for a project thread, well i'm going to try and catch up with my 7 year project.

1991 Mayfair 998.

Attached File  
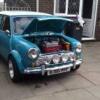
2008_0613MAR08-JUNE080217.JPG   80.87K   29 downloads


As it was when I bought it from a friend of my wife, didn't look to bad, no mot and a couple of holes in the boot, £275 Bargain I thought...... 


#2 minimissions

minimissions

    Up Into Fourth

  • Members
  • PipPipPipPipPipPipPipPipPip
  • 3,427 posts
  • Location: North West
  • Local Club: M.M.O.C

Posted 31 October 2015 - 07:47 AM

Looks like an ace car for £275 :)


#3 mr cooke

mr cooke

    Mini Mad

  • Members
  • PipPipPipPip
  • 278 posts
  • Location: sunny stoke
  • Local Club: Any

Posted 31 October 2015 - 10:03 AM

how much £275 , why can i never find a bargin


#4 andyt

andyt

    Speeding Along Now

  • Members
  • PipPipPipPipPip
  • 375 posts
  • Location: Melksham
  • Local Club: cooper register

Posted 31 October 2015 - 05:58 PM

I bought the car in 2007 and i think they were a bit cheaper then!


Andy.


#5 andyt

andyt

    Speeding Along Now

  • Members
  • PipPipPipPipPip
  • 375 posts
  • Location: Melksham
  • Local Club: cooper register

Posted 01 November 2015 - 10:03 PM

A couple more  pictures from when I purchased the car

2008_0613MAR08-JUNE080216.jpg


A taste of things to come, hidden rust and bodge jobs!


2008_0628JUNE080015.jpg


Yes that is fibre glassed up over the screen rubber!

Andy


Edited by andyt, 01 November 2015 - 10:05 PM.


#6 joshw

joshw

    Mini Mad

  • Members
  • PipPipPipPip
  • 152 posts
  • Location: Birmingham

Posted 01 November 2015 - 10:19 PM

Looks like a good project Andy and a bargain for £275 even for 7 years ago, wonder how much it would be worth now,
looking forward for more updates.
Josh

#7 andyt

andyt

    Speeding Along Now

  • Members
  • PipPipPipPipPip
  • 375 posts
  • Location: Melksham
  • Local Club: cooper register

Posted 02 November 2015 - 07:37 PM

Ok so I started on the back end by removing the rear valance which exposed a whole can of worms, boot floor, valance closers, various arch repairs and a strip under both rear lights and along the boot hinge panel.


2008_1205CHARMOUTHHOLSEPT080045.jpg


2008_0628JUNE080013.jpg


2008_0628JUNE080012.jpg


2008_0628JUNE080011.jpg


​I first cut all the rot out and set about welding in fresh metal, at first I was using an old sealey mig that I borrowed off my father in law which needed constant attention and was very frustrating! Eventually I bought a second hand Clarke en130 turbo which does both gas and gasless which proved to be very good as i'm working outside and means I can still weld when its windy.


The overall look i'm aiming for is 10" wheels, central speedo, low back bucket seats a few other retro bits and pieces all of which I've collected over the last 10 years or so. something like I used to have in the mid eighties when I was a lad! The last mini that my wife and I had before we had our children was very different to what I think is the perfect mini now but my wife loved driving it so it kept her sweet!


mini%20017.jpg


I'll see if I can fish out the next lot of resto pics.


Cheers Andy. 


#8 andyt

andyt

    Speeding Along Now

  • Members
  • PipPipPipPipPip
  • 375 posts
  • Location: Melksham
  • Local Club: cooper register

Posted 04 November 2015 - 10:12 PM

Next I set about removing the rear sub frame so I could start repairing the rot, the subframe was toast so it went in the bin along with various bits of the rear end.


2008_1205CHARMOUTHHOLSEPT080048.jpg


I started off by repairing the boot floor and the wheel arch.


2008_1205CHARMOUTHHOLSEPT080064.jpg


2008_1205CHARMOUTHHOLSEPT080066.jpg


#9 andyt

andyt

    Speeding Along Now

  • Members
  • PipPipPipPipPip
  • 375 posts
  • Location: Melksham
  • Local Club: cooper register

Posted 07 November 2015 - 09:41 PM

2008_1205CHARMOUTHHOLSEPT080095.jpg

New rear valance fitted along with new closing panels but I couldn't find the picture of this operation. I also fitted two repair panels to the rear section of the quarter panel.


2008_1205CHARMOUTHHOLSEPT080050.jpg


Young assistant condemns rear subframe!! 


#10 James_eaton_thewholething

James_eaton_thewholething

    One Carb Or Two?

  • Members
  • PipPipPipPipPipPipPip
  • 1,063 posts
  • Location: Manchester

Posted 07 November 2015 - 10:27 PM

Looking good. I need to get my self an assistant

#11 andyt

andyt

    Speeding Along Now

  • Members
  • PipPipPipPipPip
  • 375 posts
  • Location: Melksham
  • Local Club: cooper register

Posted 08 November 2015 - 03:24 PM

I know they come in handy for passing tools! though I showed her the picture today and she wasn't to impressed at nearly 10 years old, doesn't help anymore either.


Andy.


#12 andyt

andyt

    Speeding Along Now

  • Members
  • PipPipPipPipPip
  • 375 posts
  • Location: Melksham
  • Local Club: cooper register

Posted 09 November 2015 - 10:21 PM

Passenger side much the same, I can't believe how rusty the back end was I've had a few different minis and this is definatly the worse including 70's British Leyland built models. 


2008_1205CHARMOUTHHOLSEPT080096.jpg


​I also fitted a boot hinge repair panel and 2 panels that replace the rot below the rear lights on both sides, I can't find the pictures of fitting these but here is the back end finished.


20141101_151121.jpg


#13 andyt

andyt

    Speeding Along Now

  • Members
  • PipPipPipPipPip
  • 375 posts
  • Location: Melksham
  • Local Club: cooper register

Posted 15 November 2015 - 10:18 PM

Started work on the offside by removing the outer sill which was the original and then set about cutting out the rust in the inner sill and replacing with fresh metal.


IMAG0514.jpg


​Weather was warmer then!


IMAG0513.jpg


I bought the older style inner sill by mistake but it really doesn't matter as i'm not going for a concourse restoration. I had also built up a new rear subframe with reconditioned radius arms new brakes, dampers, rubber cones, hi low's and adjustable brackets and bushes.


Andy.


Edited by andyt, 15 November 2015 - 10:26 PM.


#14 andyt

andyt

    Speeding Along Now

  • Members
  • PipPipPipPipPip
  • 375 posts
  • Location: Melksham
  • Local Club: cooper register

Posted 04 December 2015 - 10:51 PM

Bit of an update, inner sill all patched up and zinc primed.


 20140512_210637.jpg


Next door step repair, I used a magnum panel which was a completely different profile but I managed to keep a fair bit of the original so I could cut the new panel and extend it so it matched the original step. I also had to extend the end which goes up the A post.


20140525_173852.jpg


20140525_133120.jpg


#15 andyt

andyt

    Speeding Along Now

  • Members
  • PipPipPipPipPip
  • 375 posts
  • Location: Melksham
  • Local Club: cooper register

Posted 02 August 2016 - 09:21 PM

%5BIMG%5Dhttp://i570.photobucket.com/albums/ss146/andyturnnidge/20151118_195254.jpg

Edited by andyt, 02 August 2016 - 09:24 PM.


1 user(s) are reading this topic

0 members, 1 guests, 0 anonymous users