Jump to content


Photo
- - - - -

My '93 Mini Sprite Project


  • Please log in to reply
47 replies to this topic

#1 wombatjock

wombatjock

    On The Road

  • Noobies
  • PipPip
  • 47 posts
  • Location: Edinburgh

Posted 06 April 2016 - 08:16 PM

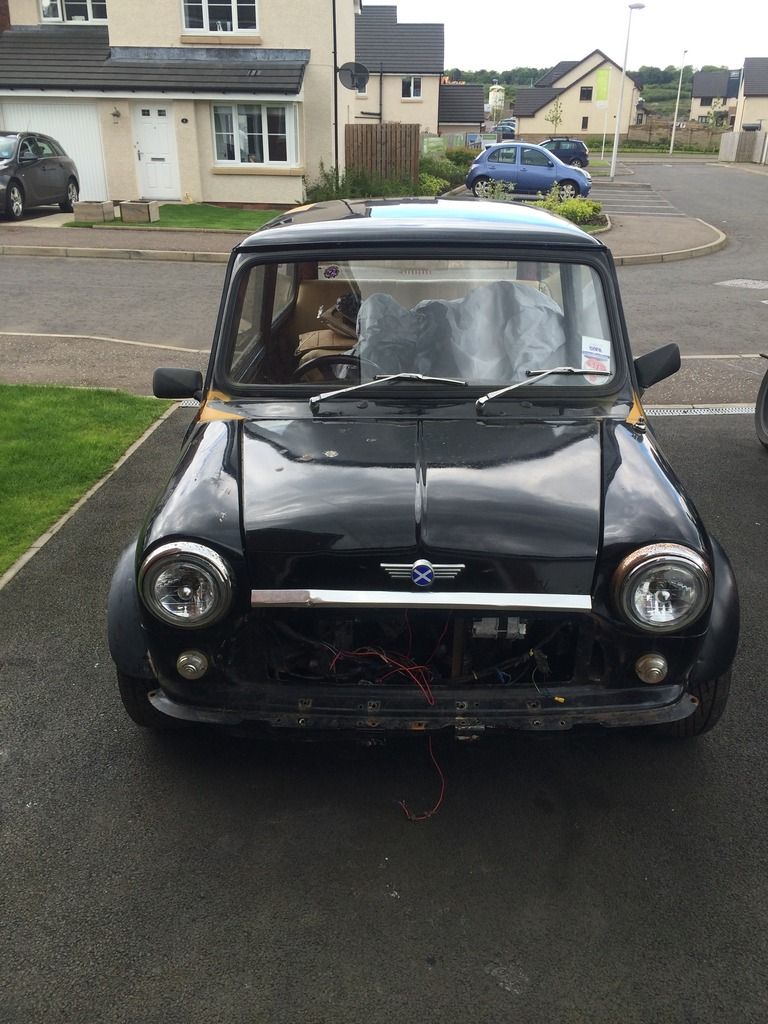
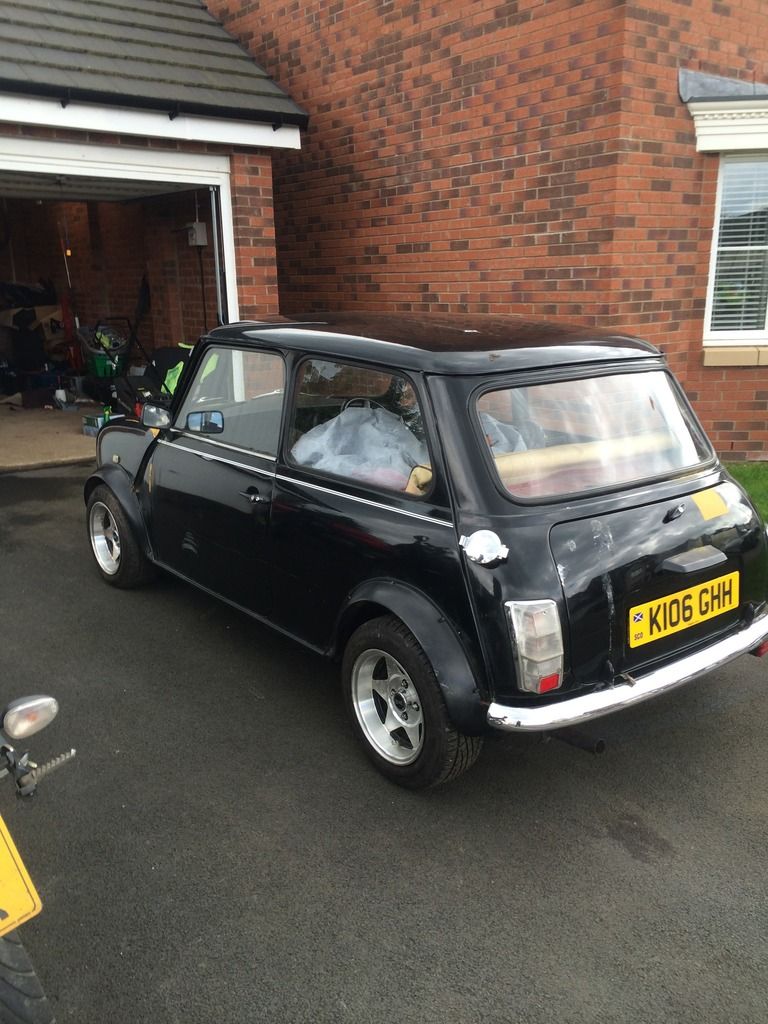
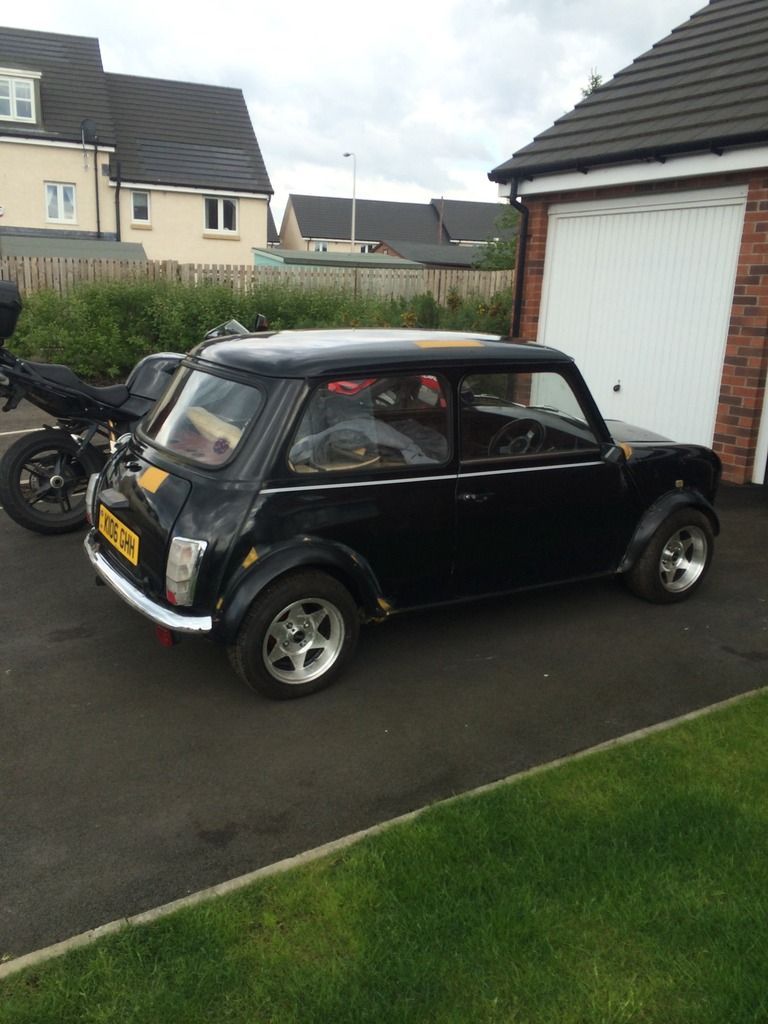
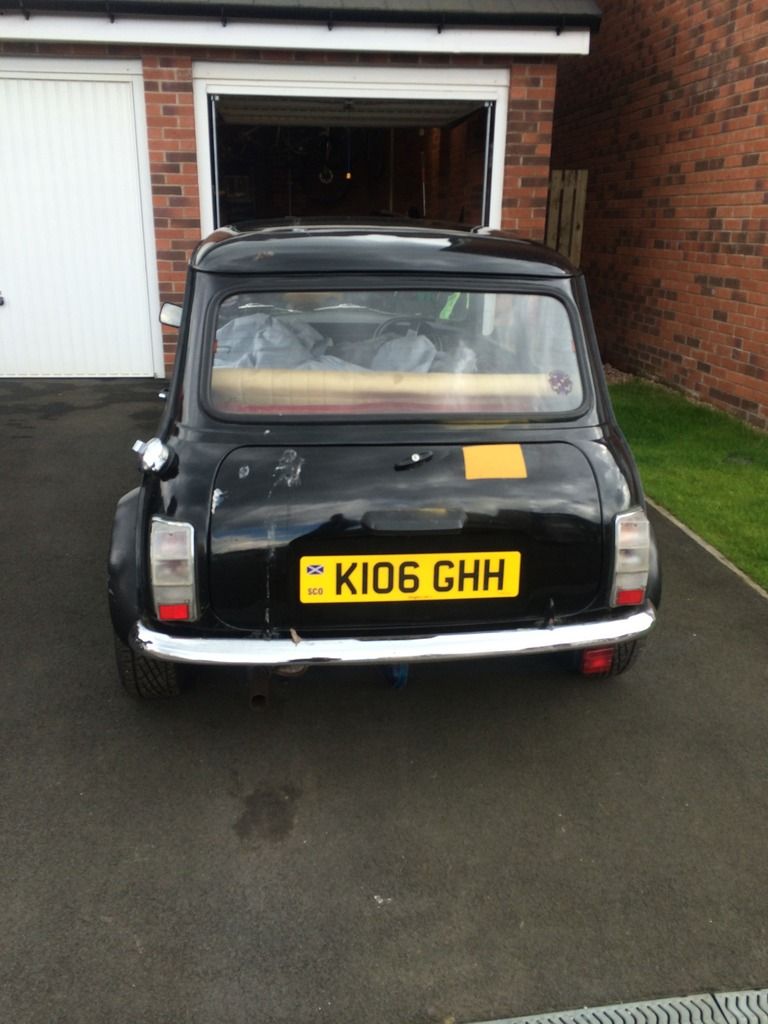
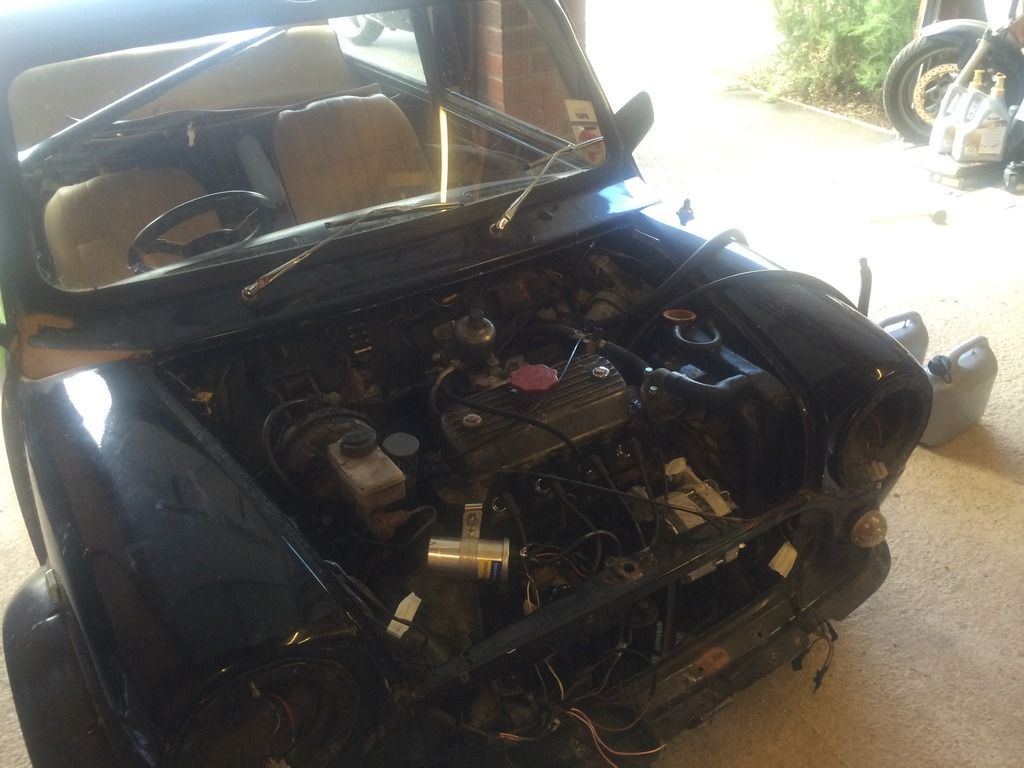
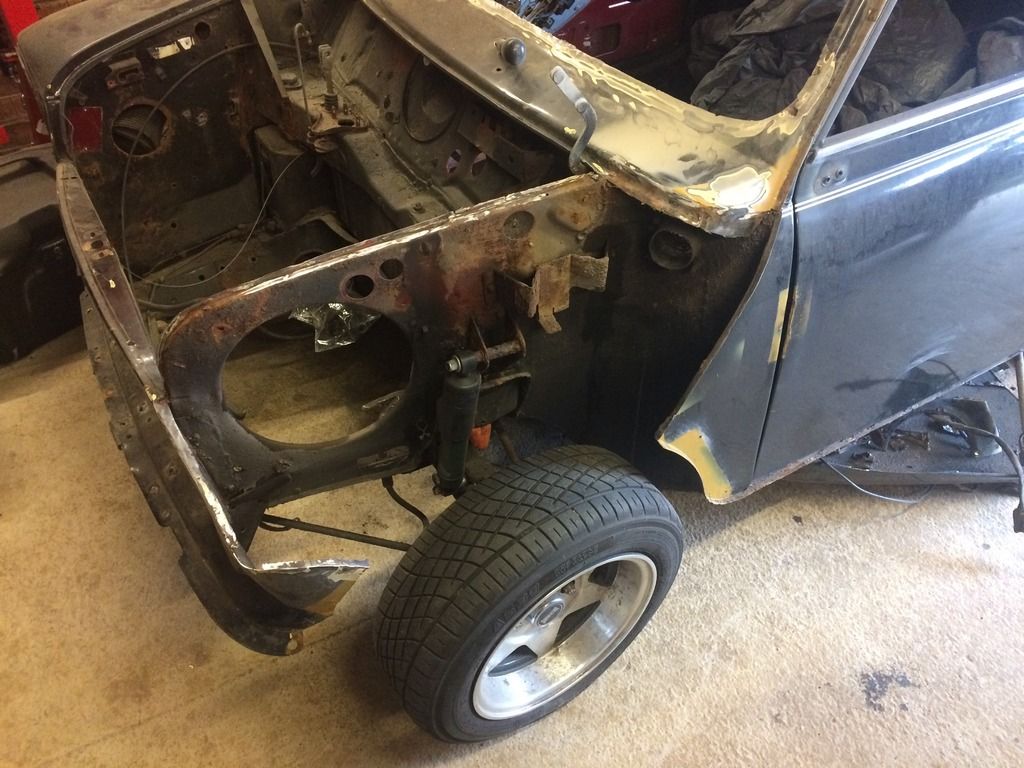
I bought a '93 Mini Sprite as a project a couple of years ago as my first restoration project. I wasn't sure what I wanted to do with it - just that I wanted another mini.


I had an 1976 1100 Clubman when I was 15, which was intended as my first car, but after a number of years with no progress on the restore, it ended up being scrapped. 


I got another 1100 Clubman, 1978 this time, when I was 20, which was my daily driver. It ended up being deseamed, and repainted. Typical young driver; it needed to run, be legal, and have enough cool factor. The important bits, like annual rust treatment, and proper replacement of corroded bits were ignored... As my commute got longer, I wanted something a bit quicker, and without a clear view of the road through the floor. I ended up giving it away to a mate.


Other than both being Clubmans (Clubmen?), they had something else in common. The price I paid for them. £50. We live in different times now! The Sprite cost me more than 16 times that! For a car in worse nick, relatively.


IMG_0788_zpsjjwwnlfm.jpg

IMG_0791_zpskgzfx3by.jpg

IMG_0789_zps0desculx.jpg

IMG_0790_zps1dliyhfm.jpg


#2 wombatjock

wombatjock

    On The Road

  • Noobies
  • PipPip
  • 47 posts
  • Location: Edinburgh

Posted 06 April 2016 - 08:31 PM

The car was bought unseen based on the description. I wanted something that wasn't too far gone, and that had most of the bits included. This seemed to fit the bill.


Looking under the bonnet, the engine and ancillaries were mostly there, and the missing parts were inside the cabin.


The wiring however, was mostly disconnected.


The first jobs on the car consisted of getting the engine compression tested, and then running.


That was a battle in itself.


Connecting the wiring was reasonably straightforward using patience, the Haynes manual, and Internet forums.


Still took me a while to get the engine turning. A previous owner fitted a rudimentary immobiliser by cutting into the starter wire on the steering column, which I eventually found and short circuited.


That got the engine turning, but not starting, which let me compression test it - all good.


Next thing was to work out that no fuel was making it to the carburettor - using a gravity fuel tank (I use for balancing motorbike carbs) solved that in the short term.


She LIVES!!!


IMG_0799_zpsakwxip0m.jpg


#3 wombatjock

wombatjock

    On The Road

  • Noobies
  • PipPip
  • 47 posts
  • Location: Edinburgh

Posted 06 April 2016 - 08:44 PM

In the time between buying, and getting the engine tested, the wife and I managed to create a child (she did most of the work in fairness) and progress was piecemeal on the car. He's just turned a year old, and I'm finding I have more time to play in the garage - hence starting this thread - a way to log my work as it progresses, as well as motivation to progress and post updates!


So, anyway, at random times over the past year or two, I have:


Removed the engine & gearbox, and broke them down into 3 bits - head, block and gearbox. These are now bagged up on a shelf, as I'm refusing to rebuild them until I have something to put them back into.


Removed the fuel tank.


Stripped out what remained of the interior (not much!).


Removed the windows (Stanley knife method on the seals)


Removed the wiring loom.


Basically stripped out everything apart from the running gear and steering column. 


I held off on the important work of tacking the body, as I had no welder, and didn't know how to use one. Both the welder, and the skills (basic to intermediate) to operate it have now been acquired!


IMG_1271_zpsfppqy4kq.jpg

IMG_1273_zpsigjzum2z.jpg

IMG_1278_zpsb9wv8idm.jpg


#4 wombatjock

wombatjock

    On The Road

  • Noobies
  • PipPip
  • 47 posts
  • Location: Edinburgh

Posted 06 April 2016 - 09:08 PM

Almost caught up to present time.


I've decided that I want to restore the car to (almost) original condition. 


I say almost, since I want to paint it British Racing Green (it was originally red), and I want Minilite alloys on it, rather than the steels with trims that the Sprite came with originally.


I've also spotted that the carburettor supplied with the car is an HS4, and the original spec is HIF38. I'll be trawling eBay to get the correct carb, but no rush...


Some observations on the condition of the car (should probably posted earlier, but I'm winging it):


  • The car is currently black, with patches of yellow primer. The paint job was not done professionally, and is, frankly, rubbish. Luckily it would never have stayed black regardless.
  • This is compounded by the way the engine bay, engine, and inside the cabin have been painted by slathering paint on with a roller or brush. The bits that are not being cut out and replaced are fine, but the bits that are staying with be a PITA to strip back.
  • There is a fair amount of corrosion around the N/S windscreen lower.
  • The floor is rotten in several places.
  • A previous owner took an angle grinder to the wings and front panel in order to make the wheel arches a bit bigger.
  • The rear arches are rotten.
  • The battery box is rotten.


#5 wombatjock

wombatjock

    On The Road

  • Noobies
  • PipPip
  • 47 posts
  • Location: Edinburgh

Posted 06 April 2016 - 09:21 PM

After stripping the interior, the corrosion at the N/S lower windscreen had clearly made it inside. 


I'm a big fan of low hanging fruit, so the upper dash rail was the first metal to be cut out. I have the new heritage dash rail, but held off on fitting the new one until I established that the parts I was welding onto were sound.


Left that for later - on to the exterior - next to go was the N/S wing.


Other than the charcoal cannister (missing - need one of those as well....) bracket being rotten, it didn't look too bad. I reckoned I was going to get away with cleaning up and painting the inner wing.....


IMG_1324_zpsjk9wdmob.jpg


#6 wombatjock

wombatjock

    On The Road

  • Noobies
  • PipPip
  • 47 posts
  • Location: Edinburgh

Posted 06 April 2016 - 09:25 PM

On closer inspection, there was a lot of corrosion on the flitch panel. Under the same section of windscreen that had clearly been leaking for some time. There's also a very suspect looking seam weld in there.


Maybe I'll get away with a flitch repair panel....


IMG_1335_zps5pfgly6g.jpg


IMG_1337_zpstbvxpqrk.jpg


#7 wombatjock

wombatjock

    On The Road

  • Noobies
  • PipPip
  • 47 posts
  • Location: Edinburgh

Posted 06 April 2016 - 09:31 PM

Oh great. The double skin behind the shock mount is rotten though. On top of that, there is a crack all the way down the inner wing in front of the bulkhead crossmember to inner wing strengthener (hard to see in the pics).


So. I can either do a flitch repair panel and an inner wing repair panel, or I can replace the whole inner wing.


I've decided on the whole inner wing.


At this point I also cut off the O/S wing and found similar corrosion under the shock mount. The O/S inner is in better shape at the front, but not sure about the flitch - haven't stripped the paint yet, but suspect that it might be a bit nasty. I'll probably end up replacing the O/S inner wing as well.


IMG_1357_zpsves8t2jn.jpg


IMG_1359_zpsdqfcqnt5.jpg


#8 wombatjock

wombatjock

    On The Road

  • Noobies
  • PipPip
  • 47 posts
  • Location: Edinburgh

Posted 06 April 2016 - 09:49 PM

I thought I would get the inner wing off in a day. Hah.


The first time I went to the garage to start, I found that the wife had lent both my drills out to a mate (I had given permission for one of them). Can't very well drill out spot welds without one.


Since I'd need the subframe out to get all the welds off the inner wing, I removed that instead, and cut off the scuttle panel.


The following day, with my drill restored, I started on the inner wing removal.


I'm learning as I go.


Started with standard spot weld drills, which annoyed me, so moved onto trying to grind off the top skin with an angle grinder. This went better, but very paranoid about damaging the underlying panels.


Later in the process I got a Sealey spot weld remover thingy (hex thing with a spring point and removable teeth attachments. Much better!


Going off on a tangent. I bought a flat pack rollover jig from mk2mania. I decided not to use it until the front end was done (at least the inner wings, scuttle and upper dash rail). It mounts on top of the bulkhead cross member, and I don't think the frame will be strong enough to mount on the jig without them.


As I may have mentioned, I'm learning as I go. I see that the bottom of the inner wing is spot welded from the side and from underneath. I'm going to have to elevate the shell a bit more to be able to get to the welds underneath - would be a doddle on the jig....


3 sessions later, It's almost off.....


IMG_1403_zpsmmimjvw3.jpg

IMG_1404_zps8ejqryjt.jpg

IMG_1405_zps9uvxsvvu.jpg

IMG_1406_zpsobntyxg1.jpg

IMG_1413_zpsvtg4vwun.jpg

IMG_1414_zpssj7vsea0.jpg


#9 wombatjock

wombatjock

    On The Road

  • Noobies
  • PipPip
  • 47 posts
  • Location: Edinburgh

Posted 06 April 2016 - 09:52 PM

It's not remotely ready for it (still the bottom of the wing to remove, and prep needed on the underlying panels), but I offered up the new wing just for fun...


Which leads me to my first question. There is a lip on the new wing, over the hinge panel. The old one was flush with the hinge panel.


Do I cut this off before fitting the A-panel, or should it stay on and the A-panel lie over it?


IMG_1419_zpsr6epwumm.jpg


#10 wombatjock

wombatjock

    On The Road

  • Noobies
  • PipPip
  • 47 posts
  • Location: Edinburgh

Posted 06 April 2016 - 09:57 PM

We're now up to date - so future posts should happen close to actual events!


Some additional info and pics.


The seam weld on the flitch was actually one of two dodgy repairs (the other being a small repair at the bottom in front of the sill.


Someone has just hammered and welded a piece of metal over the rot. No prep on the inside of the repair. Like something I would have done (well, commissioned - since I couldn't weld) 20 years ago to keep it on the road - suppose I shouldn't be too critical ;) Haven't found any newspaper backed filler yet, so not so bad!


IMG_1411_zpszodj4553.jpg


IMG_1410_zpstgeeltfs.jpg


#11 wombatjock

wombatjock

    On The Road

  • Noobies
  • PipPip
  • 47 posts
  • Location: Edinburgh

Posted 07 April 2016 - 05:44 PM

Hmmn. Managed to answer my own question on the lip on the inner wing.... I had read before about the a-panel being folded over something, but conveniently forgot.


So - another previous bodge job detected :)


#12 wombatjock

wombatjock

    On The Road

  • Noobies
  • PipPip
  • 47 posts
  • Location: Edinburgh

Posted 09 April 2016 - 01:00 PM

Got a couple of hours in this morning, which mostly consisted of a lot of tidying up. I really need to get (at least) another set of shelves, and maybe more tool storage. I hate it when I can't just put my hand on something I'm looking for. I couldn't find my right angled drill attachment, which I was going to use to get the spot welds drilled out of the bottom of the inner wing.


After getting tired of tidying, I decided to strip down the front hubs. The ball joints were removed easily enough, but I could only get one of the nuts out of one of the steering arms, the other three are still seized. Have soaked them in Plusgas and will have another go later.


#13 wombatjock

wombatjock

    On The Road

  • Noobies
  • PipPip
  • 47 posts
  • Location: Edinburgh

Posted 28 February 2017 - 09:55 PM

I ruptured my achilles tendon last summer. That, and a load of apathy has kept me from any serious work for a while. Got back to it tonight!


I cut out some rot, and welded in some new metal. First time I've taken the welder to the car seriously. Won't be the last!


I really need to get into the habit of taking more frequent photos....


Didn't take any photos of the cut out section, or cutting the new piece to size. Stitch welded in - some of them didn't penetrate as well as I would have liked. Will up the power on the welder and weld from the back as well.


IMG_2768_zpsxfhnfiw2.jpg


And the welds (mostly) ground off


IMG_2773_zps261zv0sl.jpg


#14 wombatjock

wombatjock

    On The Road

  • Noobies
  • PipPip
  • 47 posts
  • Location: Edinburgh

Posted 28 February 2017 - 09:57 PM

I also test fitted the dash rail. A lot of prep required before welding, and I need to be absolutely sure of the positioning.


IMG_2779_zpsbzmv8kqo.jpg


#15 wombatjock

wombatjock

    On The Road

  • Noobies
  • PipPip
  • 47 posts
  • Location: Edinburgh

Posted 12 August 2018 - 03:50 PM

After a long break, getting back to it again. Having kids sure takes up a lot of your time.


A while back I replaced the inner wing boxing plate. I had previously repaired it, but took too much metal off when grinding down the welds. Seemed easier to just replace it. You live and learn - hopefully not a mistake I'll make again!


Got the inner wing in position with some help from the front subframe, and clamping on a load of extra front end to check alignment.


20180812-1.jpg


20180812-2.jpg


20180812-3.jpg


20180812-1.jpg

Next will be to weld in the upper dash rail, once I stop faffing and worrying about the exact positioning.


20180812-4.jpg


(really wish I hadn't thrown away the scabby dashboard the car came with - would be really useful about now to help get the alignment spot on. Don't feel like splashing out £100+ for another one right now when I haven't decided which style I want.)


The the inner wing will come back off for some minor bulkhead welding to make sure they weld up nice.


1 user(s) are reading this topic

0 members, 1 guests, 0 anonymous users