Jump to content


Photo
- - - - -

Erics New Engine - Supercharged 1293Cc


  • Please log in to reply
129 replies to this topic

#1 Torgo

Torgo

    Stage One Kit Fitted

  • Noobies
  • PipPipPip
  • 80 posts
  • Location: dorset

Posted 15 May 2016 - 08:47 PM

Hi


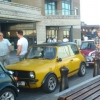
Meet Eric my 1978 Clubman, over the 10 years I've owned him he's been my daily driver and has had a range of mods & tweeks (including a re-build and paint since this picture).  


A few months ago I suffered a blown head gasket and it was whilst removing the head I realised that as Eric is no longer my only car this would be the ideal time to do a few other engine jobs........................... 


A bit of research, a few issues of mini world and a loss of all sanity later and my replacement head gasket has turned into a 1293cc Vmax supercharger build!


This is my first ever engine build so I thought I would keep a build thread, feel free to follow me through this build, ask questions offer advice and learn from my mistakes.


(My first mistake was to not just replace the head gasket!!!)

Attached Files


#2 Torgo

Torgo

    Stage One Kit Fitted

  • Noobies
  • PipPipPip
  • 80 posts
  • Location: dorset

Posted 15 May 2016 - 08:50 PM

Here's the engine coming out .....

Attached Files


Edited by Torgo, 15 May 2016 - 08:59 PM.


#3 Torgo

Torgo

    Stage One Kit Fitted

  • Noobies
  • PipPipPip
  • 80 posts
  • Location: dorset

Posted 15 May 2016 - 09:11 PM

The rest of the engine strip to date .........

Attached Files


#4 andrewmini67

andrewmini67

    Mini Mad

  • Noobies
  • PipPipPipPip
  • 144 posts
  • Location: Bristol
  • Local Club: West Country minis

Posted 15 May 2016 - 09:17 PM

Looking forward to this. Sort of build I would of liked to have done, before I got the Vauxhall converted mini.


#5 Torgo

Torgo

    Stage One Kit Fitted

  • Noobies
  • PipPipPip
  • 80 posts
  • Location: dorset

Posted 15 May 2016 - 09:20 PM

Had a Day trip up to Vmax last weekend to drop off my head, crank and block and after a chat with Stuart settled on the following:


- Block re-bore

- Re grind and balance crank

- New Omega 18cc dish pistons

- New Cam

- Turbo type clutch

- Supercharger head mods

- Supercharger

- Webber 40dcoe


#6 Torgo

Torgo

    Stage One Kit Fitted

  • Noobies
  • PipPipPip
  • 80 posts
  • Location: dorset

Posted 22 May 2016 - 08:35 PM

Not much to report today, engine bay looking empty now! Could do with a bit of a tidy up.....

I'm trying to decide if I should:

A- leave as is

B- Rattle can spray

C- other


also started a shopping list and list of jobs to do whilst the engine is out of the way (suggestions welcome).

Attached Files


Edited by Torgo, 22 May 2016 - 08:38 PM.


#7 andrewmini67

andrewmini67

    Mini Mad

  • Noobies
  • PipPipPipPip
  • 144 posts
  • Location: Bristol
  • Local Club: West Country minis

Posted 22 May 2016 - 09:02 PM

You must clean everything and repaint the engine bay, would be rude to put a nice new shiney, Weber fed, supercharged engine back in a dirty place.

Maybe a good idea to barcoat (paint isolator) the engine bay first prior to the primer and top coat in case you get a paint reaction. Central oil pick up point for the gearbox if you don't have one already and a nice new uprated radiator for peace of mind.......?

Are you still putting the engine together yourself?


#8 Torgo

Torgo

    Stage One Kit Fitted

  • Noobies
  • PipPipPip
  • 80 posts
  • Location: dorset

Posted 01 June 2016 - 03:17 PM

You must clean everything and repaint the engine bay, would be rude to put a nice new shiney, Weber fed, supercharged engine back in a dirty place.

Maybe a good idea to barcoat (paint isolator) the engine bay first prior to the primer and top coat in case you get a paint reaction. Central oil pick up point for the gearbox if you don't have one already and a nice new uprated radiator for peace of mind.......?

Are you still putting the engine together yourself?


Yes agreed it would be a shame to fit the new motor into the bay in the state its in. So it looks at though I'm going to have my first attempt at paint !! eeekkk!!!


I've done some further stripping out and started to de-grease and wire wool the rust off (see pics). You mention Barcoat but what about something for the rust?


The plan is still to build the engine myself and I'm hoping to collect the bulk of it from Vmax in the next week or so :) :) :)


#9 Torgo

Torgo

    Stage One Kit Fitted

  • Noobies
  • PipPipPip
  • 80 posts
  • Location: dorset

Posted 01 June 2016 - 03:25 PM

Started cleaning up engine bay, I'm not looking for a top class job, I just want to tidy things up a bit before the new engine goes in. What's the best primer that will take to bare metal and old paint and help treat rust?


Halfords etch primer??


Attached Files


#10 andrewmini67

andrewmini67

    Mini Mad

  • Noobies
  • PipPipPipPip
  • 144 posts
  • Location: Bristol
  • Local Club: West Country minis

Posted 01 June 2016 - 05:40 PM

Maybe a coat of the brush on rust treatment would be good. The barcoat is optional but as you have more paint than clean metal I would put a coat on 1st before the primer. You should have a nice neutral base then for the top coats. Try a local car body paint supplier and ask for some advice. Better than Halfords and usually not any more expensive.


#11 mk1leg

mk1leg

    Crazy About Mini's

  • Members
  • PipPipPipPipPipPipPipPipPipPip
  • 9,341 posts
  • Location: Jersey
  • Local Club: Mini Club Jersey, MCR

Posted 01 June 2016 - 07:00 PM

did you mark the No: on conrods from what bore they came from and what way they were installed


Edited by mk1leg, 01 June 2016 - 07:00 PM.


#12 Torgo

Torgo

    Stage One Kit Fitted

  • Noobies
  • PipPipPip
  • 80 posts
  • Location: dorset

Posted 05 June 2016 - 05:56 PM

did you mark the No: on conrods from what bore they came from and what way they were installed


EEEEKKKK! Good question! This may be the point at which I realise my 1st big mistake.....


I've kept the end caps and conrods as match pairs, but I did not mark them with which bore they came from.

As I am having the block bored out and new pistons fitted along with a re-grind of the crank I am hoping I will get away with it?


That is the sort of thing I usually do and as for the rest of the motor every single nut, washer, bolt is lovingly hand ladled. But is missed this one.  


I thought I had read on hear that I will be able to sus it out, is any thoughts?


#13 mk1leg

mk1leg

    Crazy About Mini's

  • Members
  • PipPipPipPipPipPipPipPipPipPip
  • 9,341 posts
  • Location: Jersey
  • Local Club: Mini Club Jersey, MCR

Posted 05 June 2016 - 06:53 PM


did you mark the No: on conrods from what bore they came from and what way they were installed


EEEEKKKK! Good question! This may be the point at which I realise my 1st big mistake.....


I've kept the end caps and conrods as match pairs, but I did not mark them with which bore they came from.

As I am having the block bored out and new pistons fitted along with a re-grind of the crank I am hoping I will get away with it?


That is the sort of thing I usually do and as for the rest of the motor every single nut, washer, bolt is lovingly hand ladled. But is missed this one.  


I thought I had read on hear that I will be able to sus it out, is any thoughts?


you will need to refer to the Bible see pic

Piston%20plaacement_zpsiiduy97y.png

Obviously N0:1  piston is timing chain end....and the front of piston should be at front of block...hope this helps


#14 Torgo

Torgo

    Stage One Kit Fitted

  • Noobies
  • PipPipPip
  • 80 posts
  • Location: dorset

Posted 05 June 2016 - 07:16 PM


did you mark the No: on conrods from what bore they came from and what way they were installed


EEEEKKKK! Good question! This may be the point at which I realise my 1st big mistake.....


I've kept the end caps and conrods as match pairs, but I did not mark them with which bore they came from.

As I am having the block bored out and new pistons fitted along with a re-grind of the crank I am hoping I will get away with it?


That is the sort of thing I usually do and as for the rest of the motor every single nut, washer, bolt is lovingly hand ladled. But is missed this one.  


I thought I had read on hear that I will be able to sus it out, is any thoughts?


you will need to refer to the Bible see pic

Piston%20plaacement_zpsiiduy97y.png

Obviously N0:1  piston is timing chain end....and the front of piston should be at front of block...hope this helps


Excellent, thank you mk1leg I can breath a sigh of relief :)


#15 Torgo

Torgo

    Stage One Kit Fitted

  • Noobies
  • PipPipPip
  • 80 posts
  • Location: dorset

Posted 05 June 2016 - 07:31 PM

Thanks for the advice andrewmini67, I sort of got carried away and ended up giving the spray can route a go.  

Today was spent rubbing back all rust I could find within the Engine bay and treating with Hammerite Krust, then once it had worked its magic and turned everything blue I applied a few layers of etch primer.  


As first attempts go so far so good, lets see how colour takes :) my next question is ....... 


Once I've painted is there a high temp lacquer suitable for engine bays? or do I spray and leave???? 


Looking forward to the Beaulieu mini day to get some inspiration, and hopefully meet some people with a Vmax enging to see how they find life with a Charger.

Attached Files


0 user(s) are reading this topic

0 members, 0 guests, 0 anonymous users