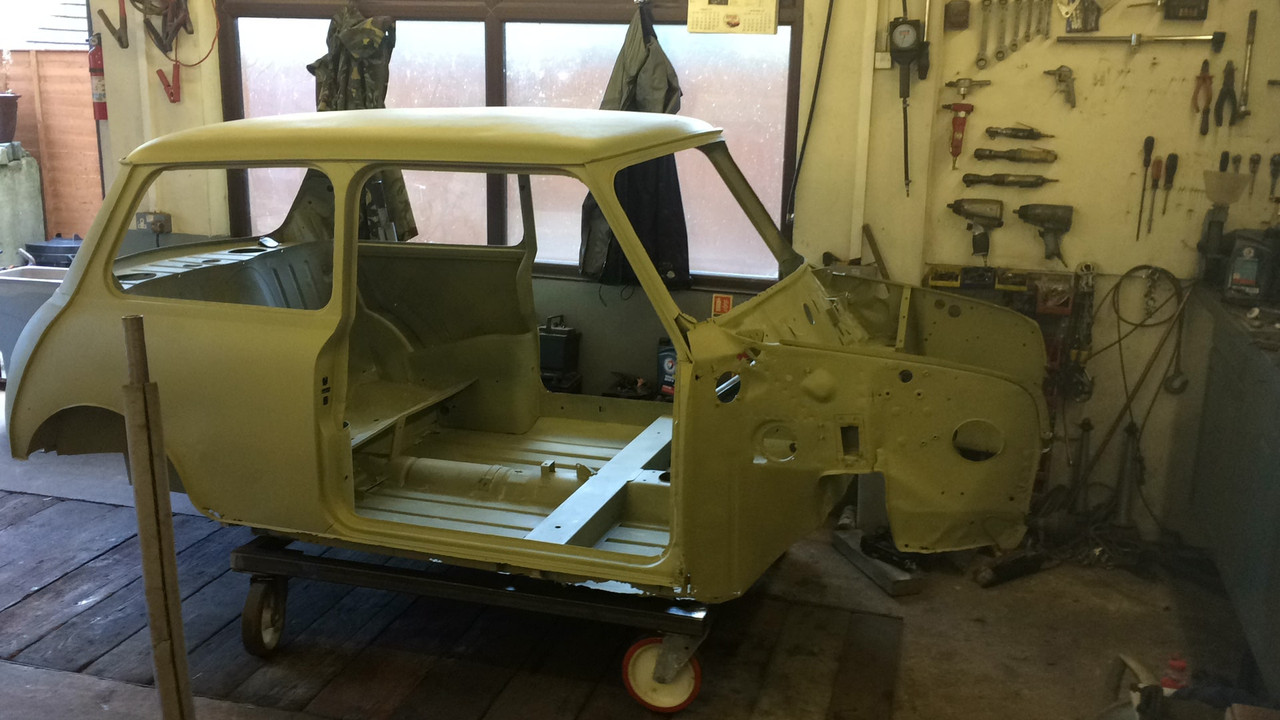
Jump to content


Photo
- - - - -

2000 Cooper Sport Full Rebuild


  • Please log in to reply
65 replies to this topic

#1 bartman

bartman

    Mini Mad

  • Members
  • PipPipPipPip
  • 265 posts
  • Location: Cornwall
  • Local Club: cornish mini club

Posted 18 May 2016 - 08:54 PM

hi guys


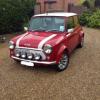
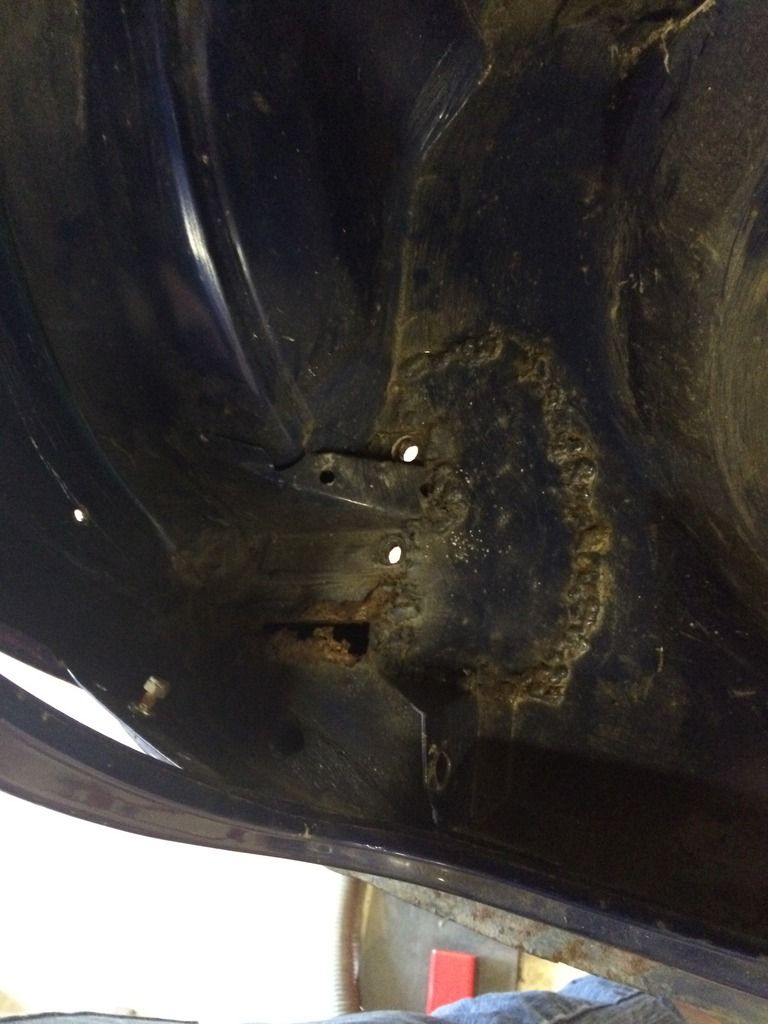
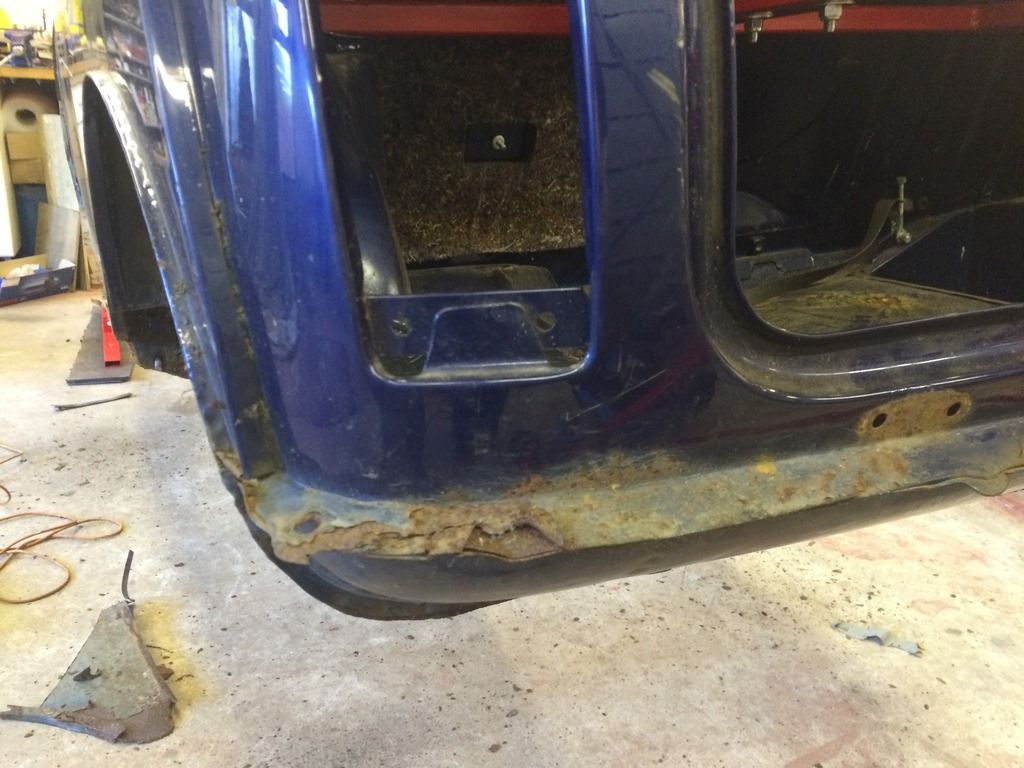
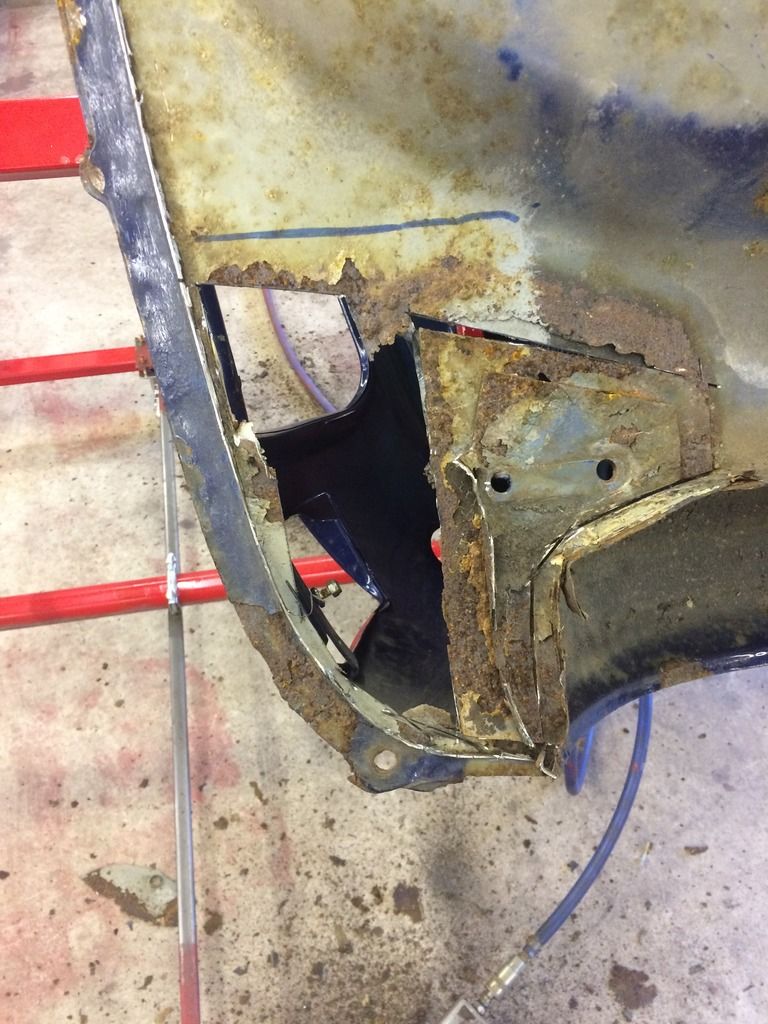
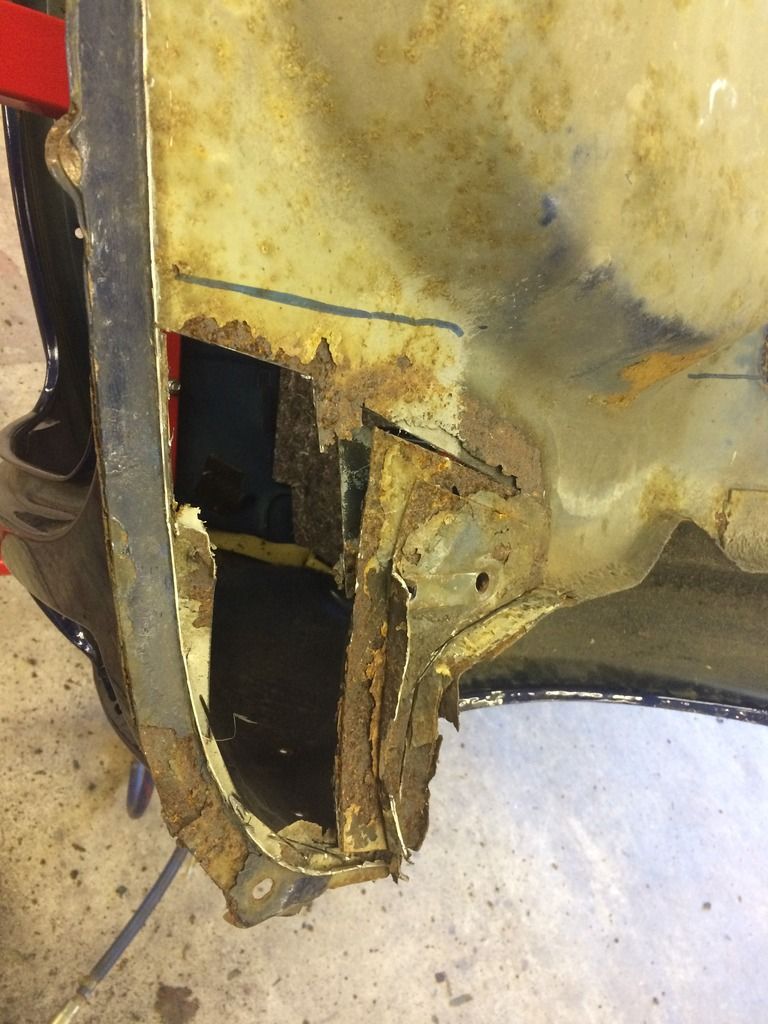
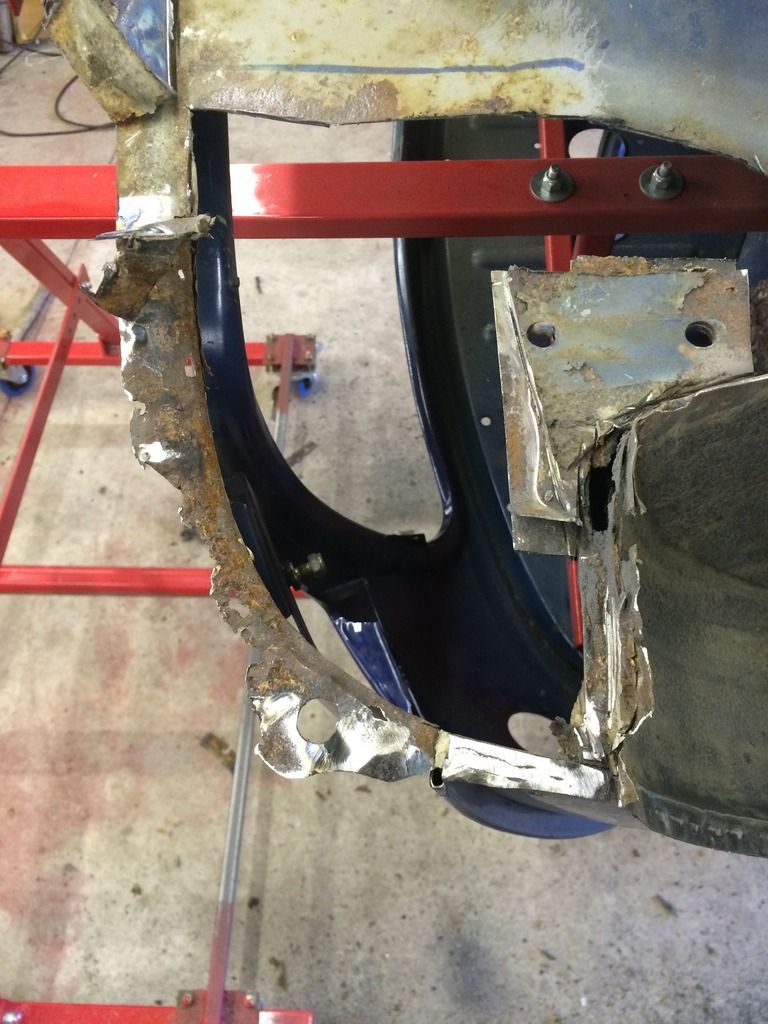
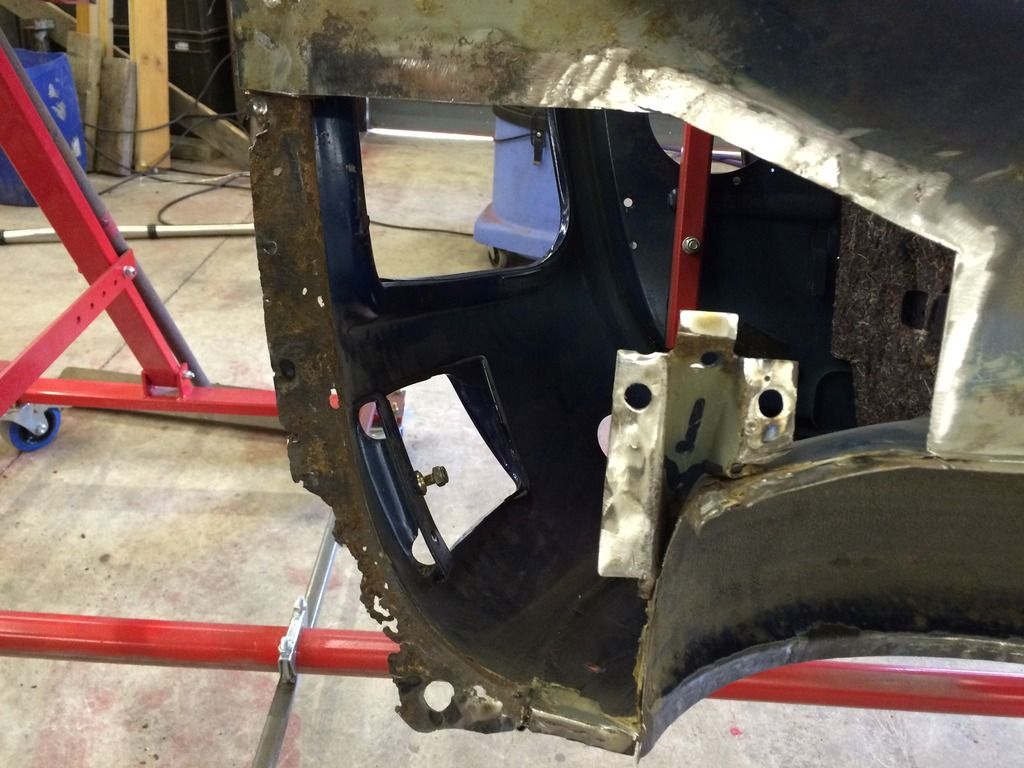
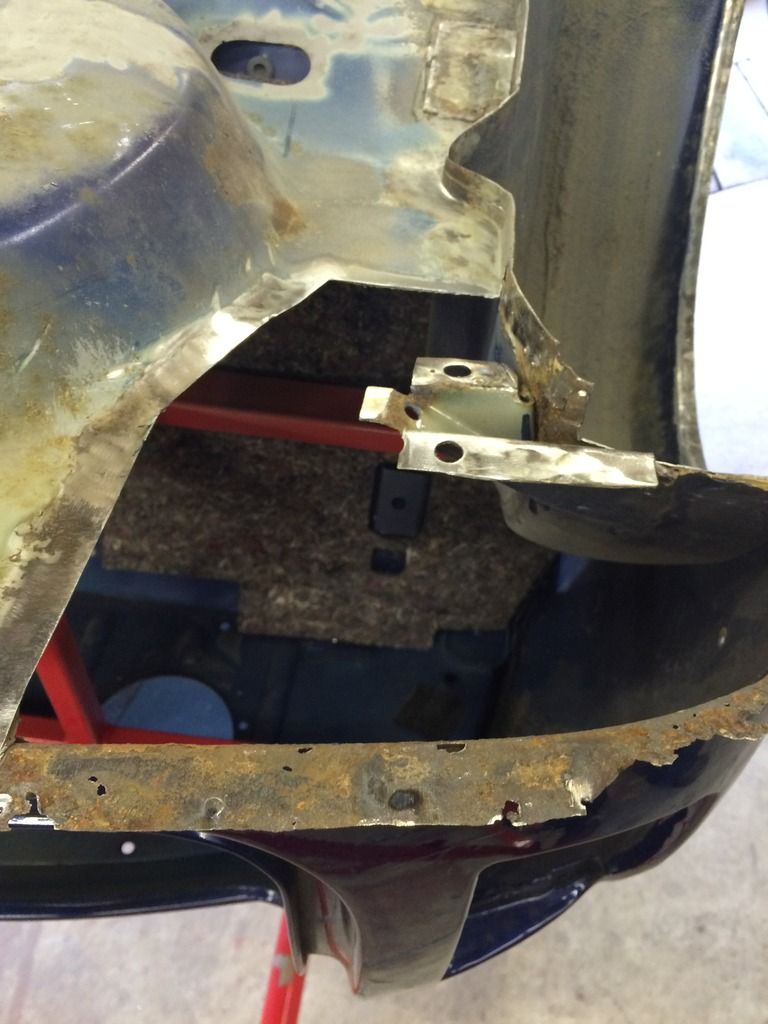
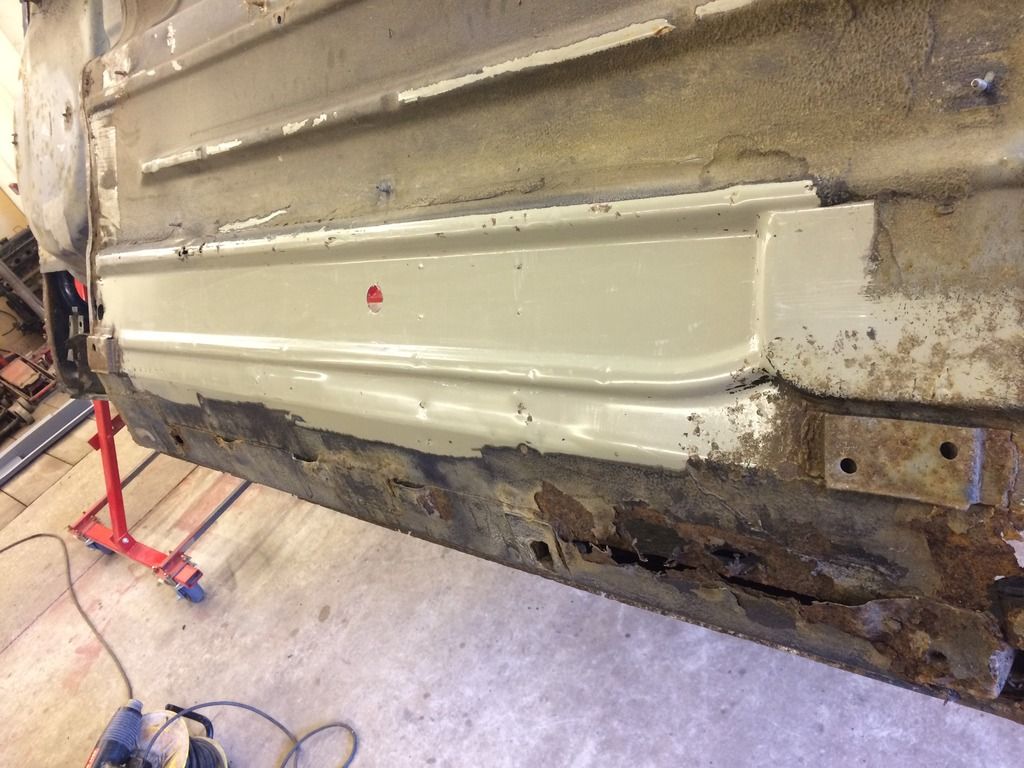
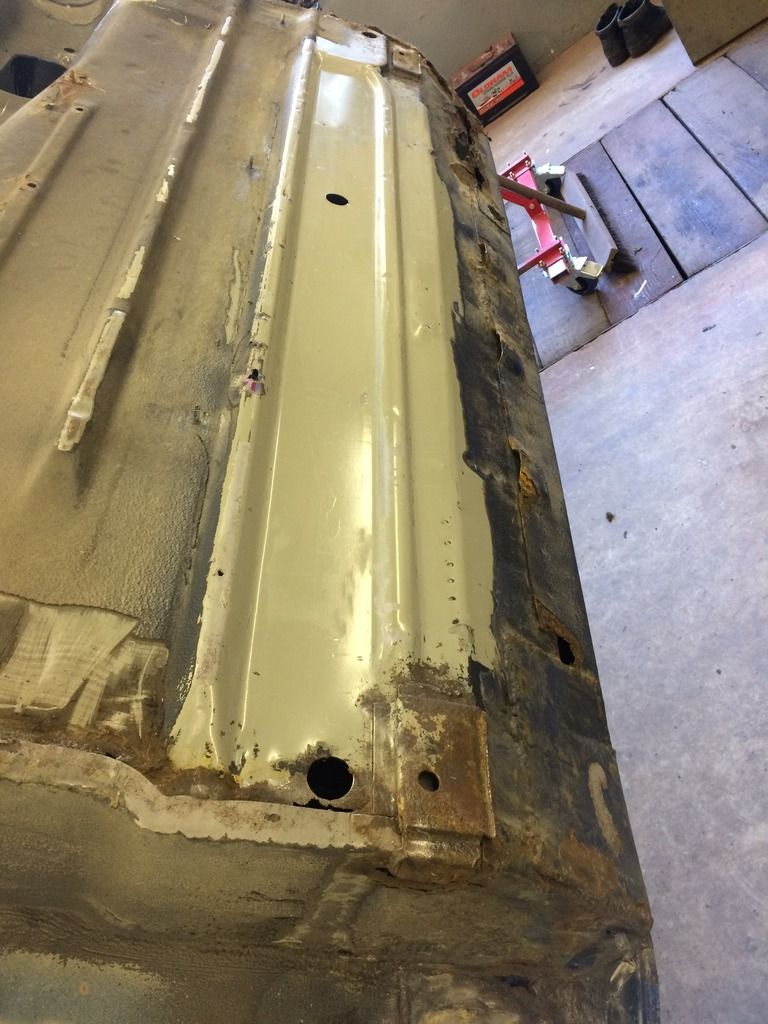
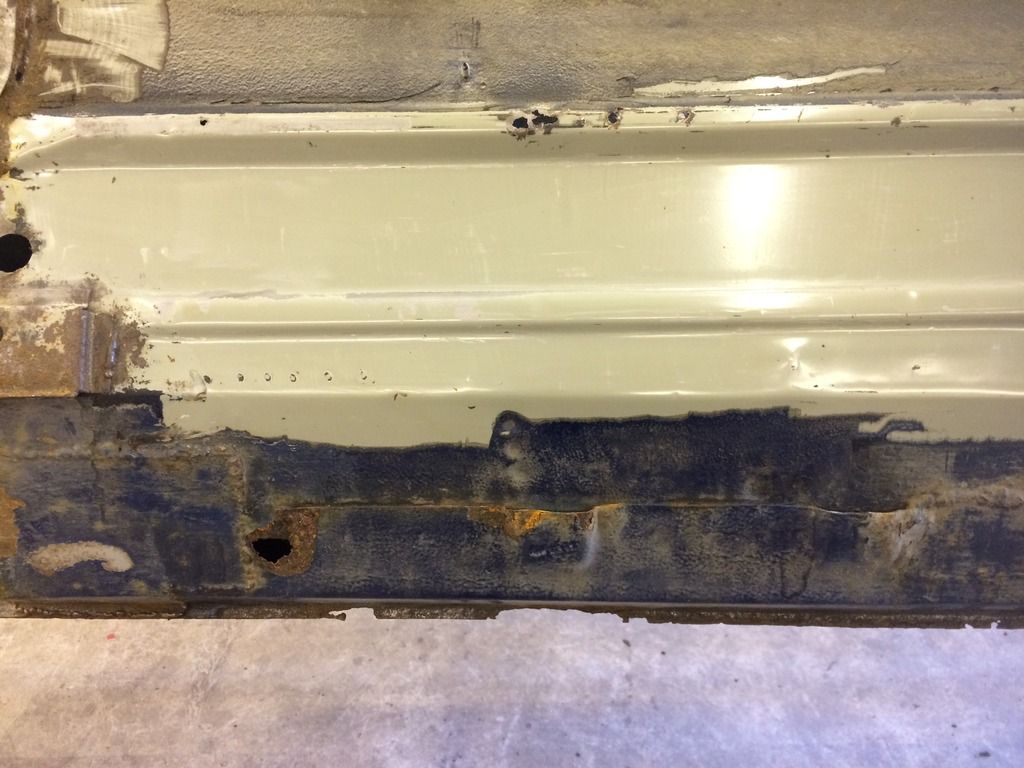
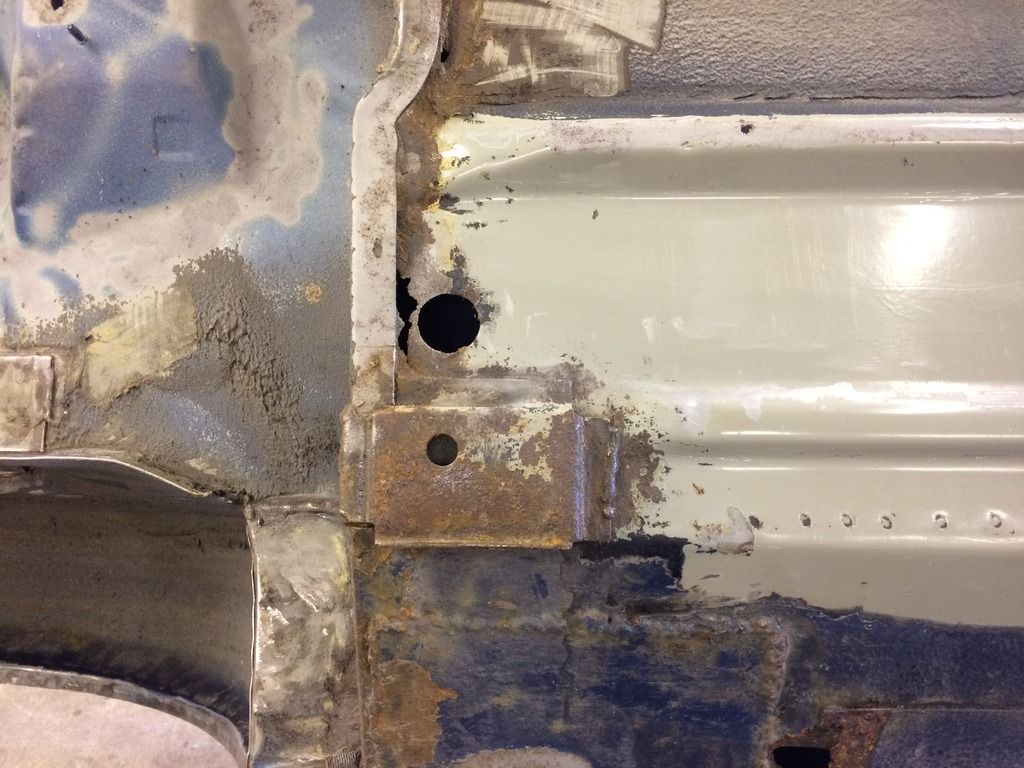
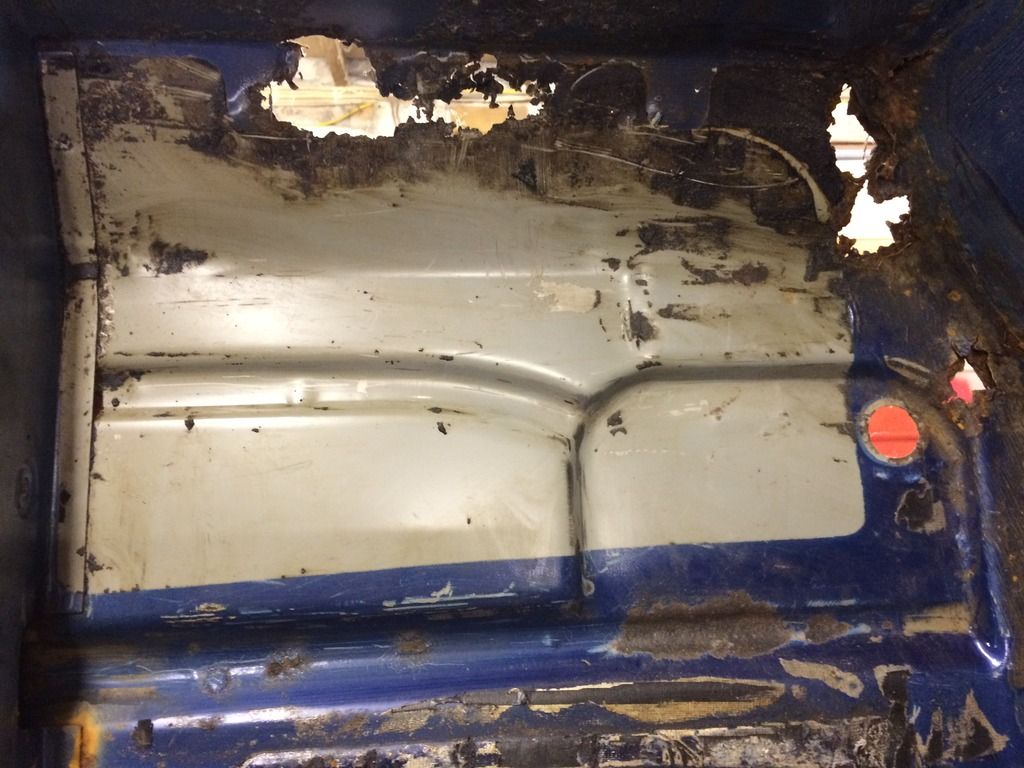
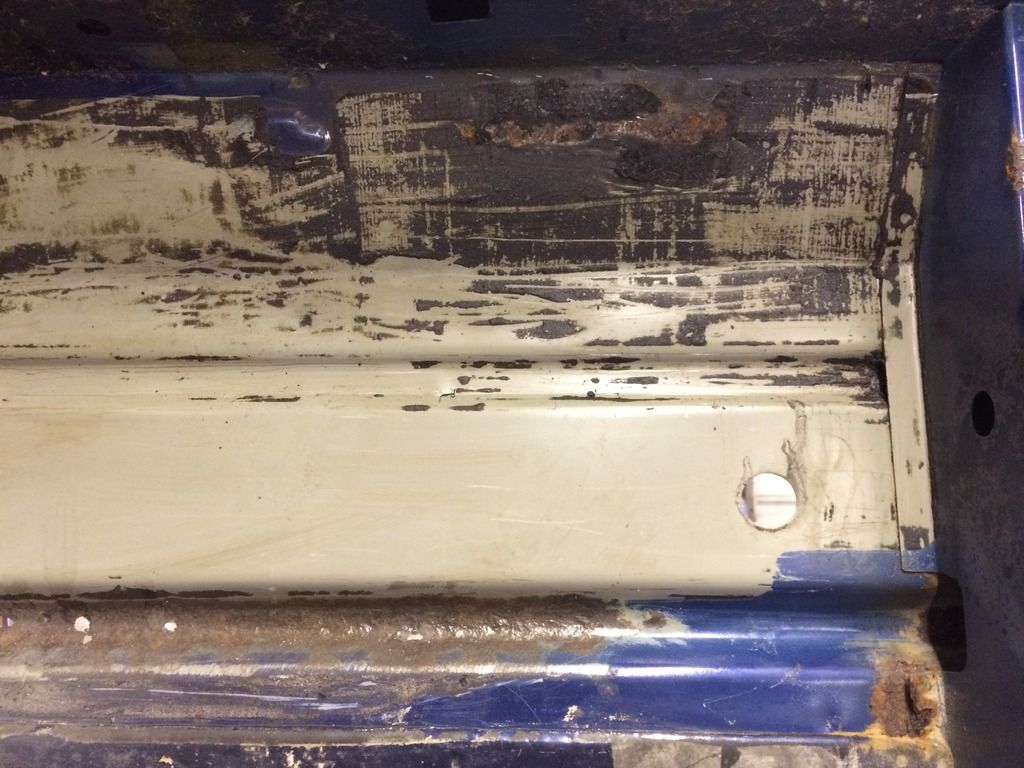
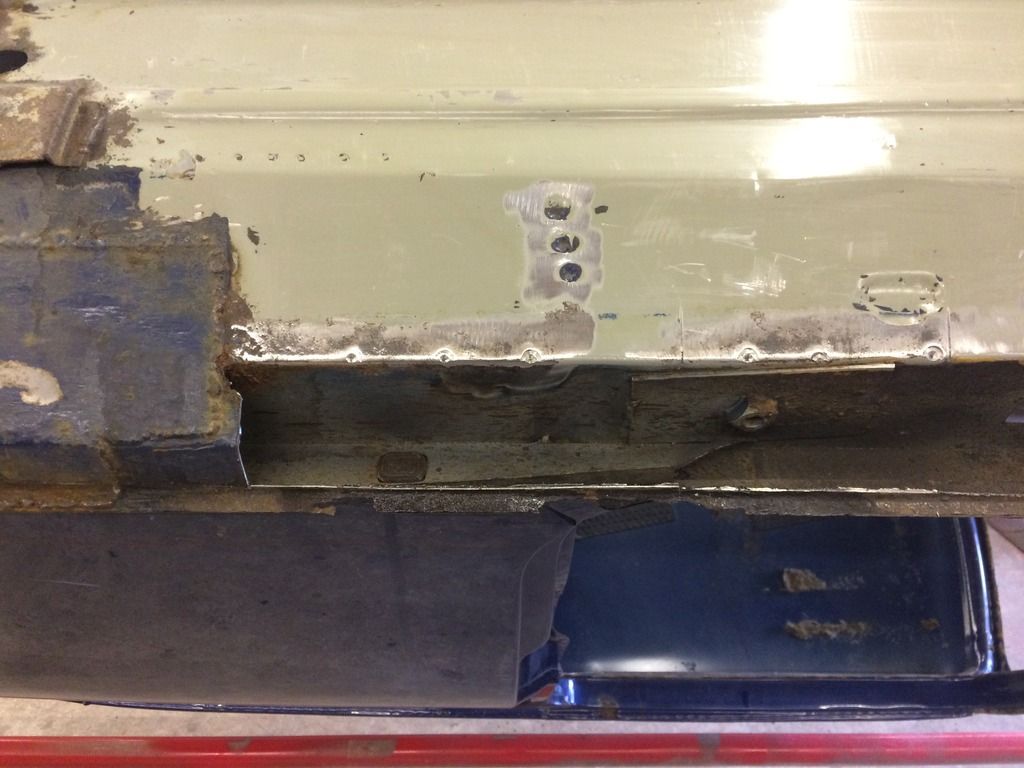
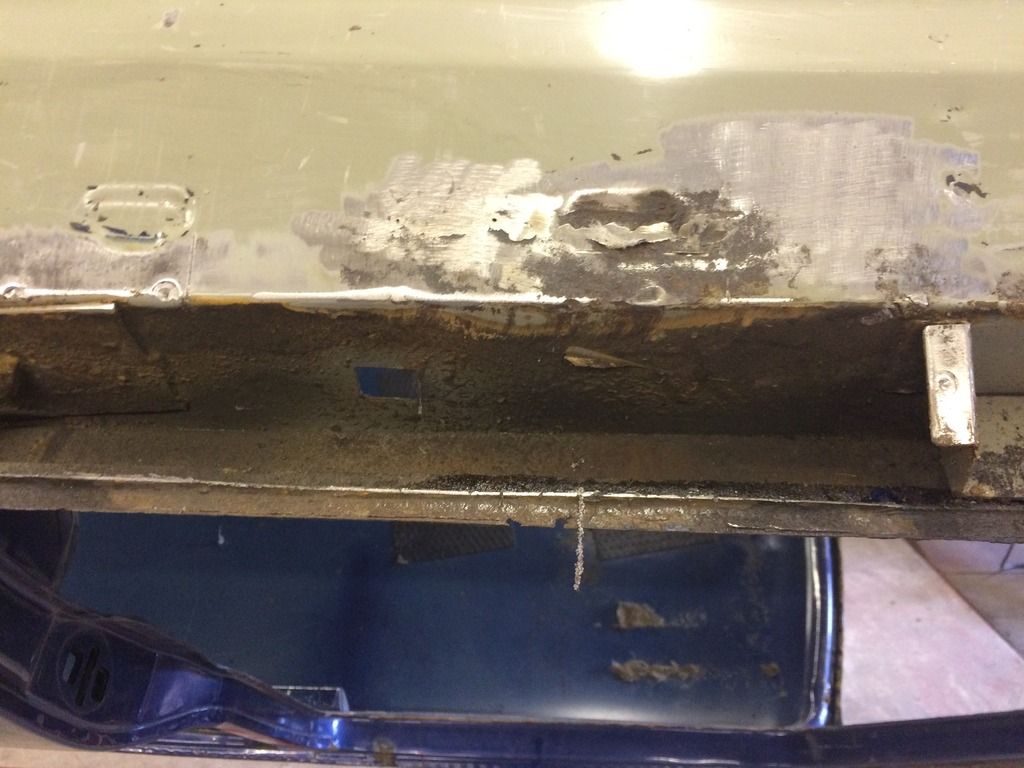
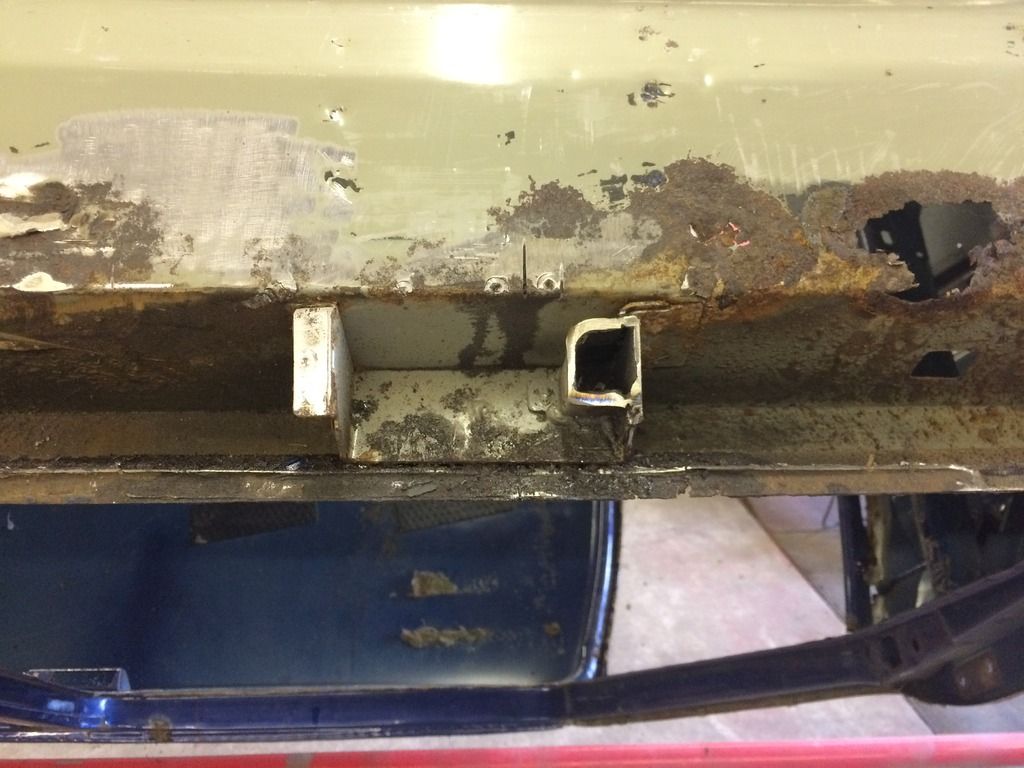
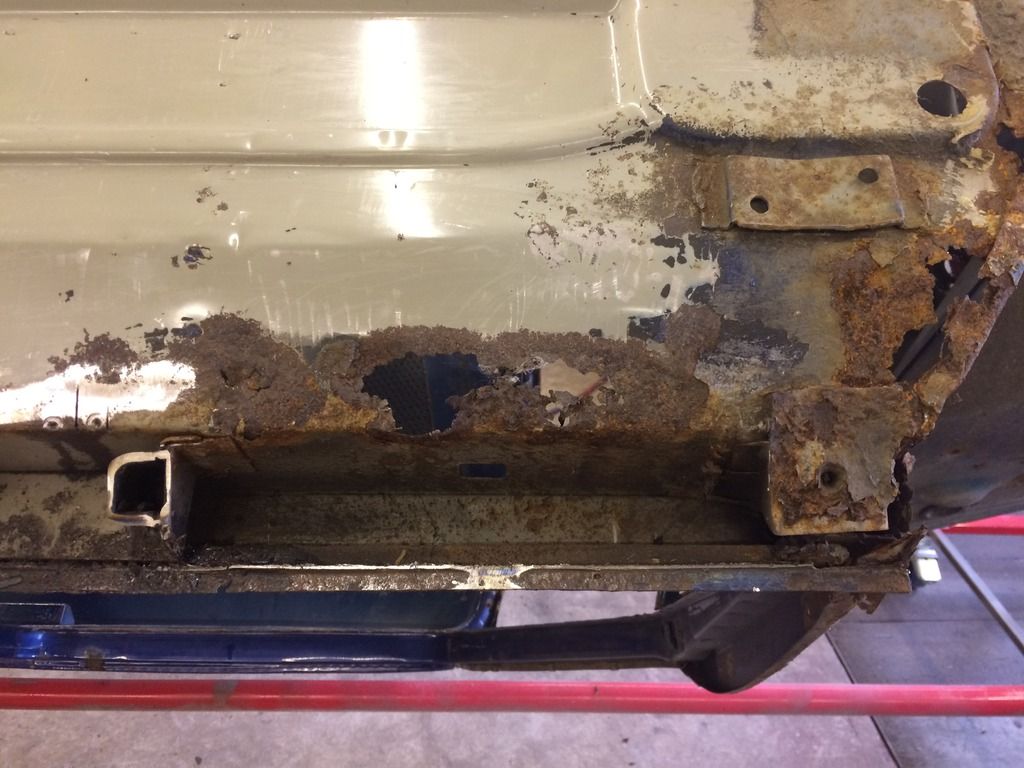
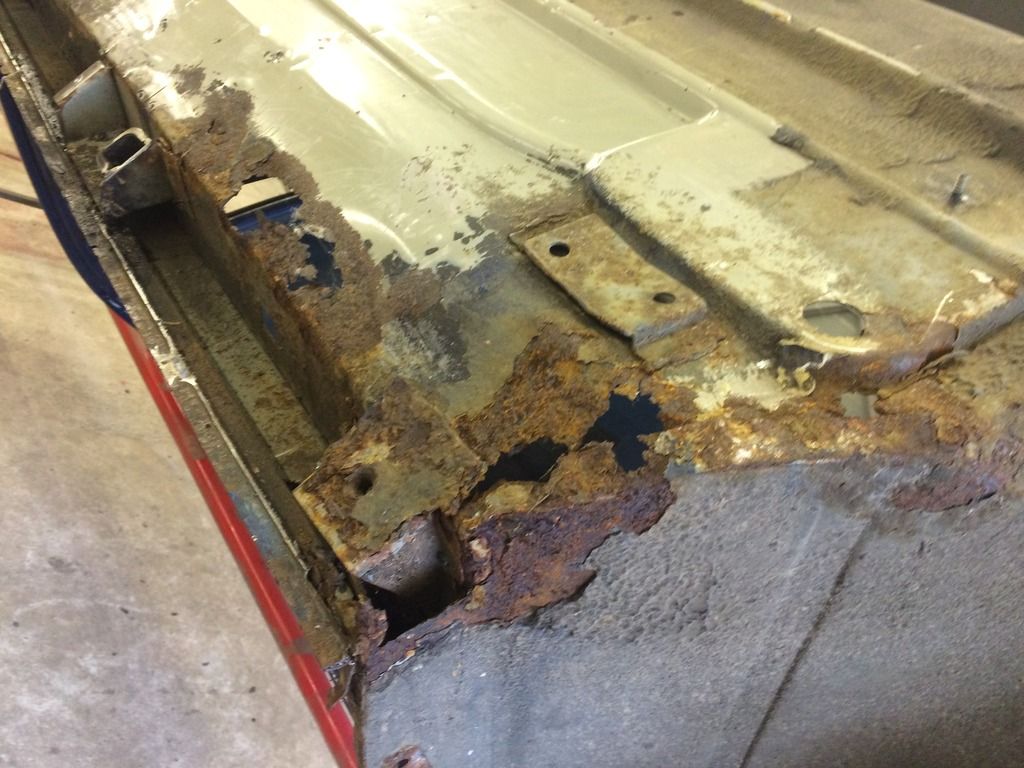
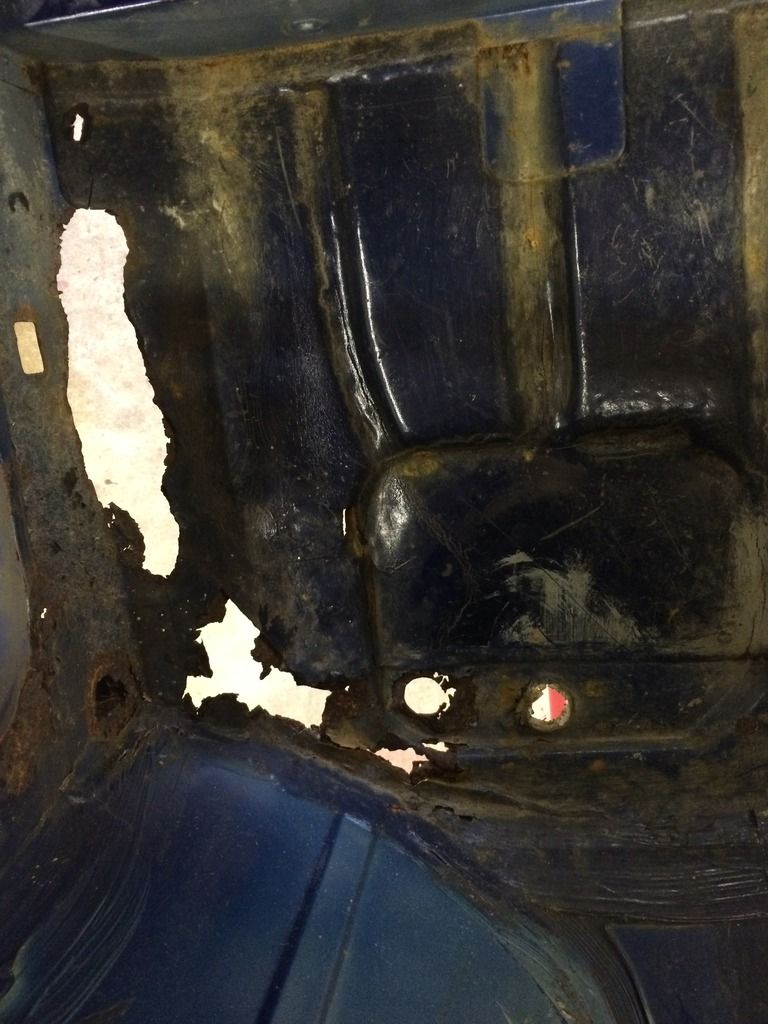
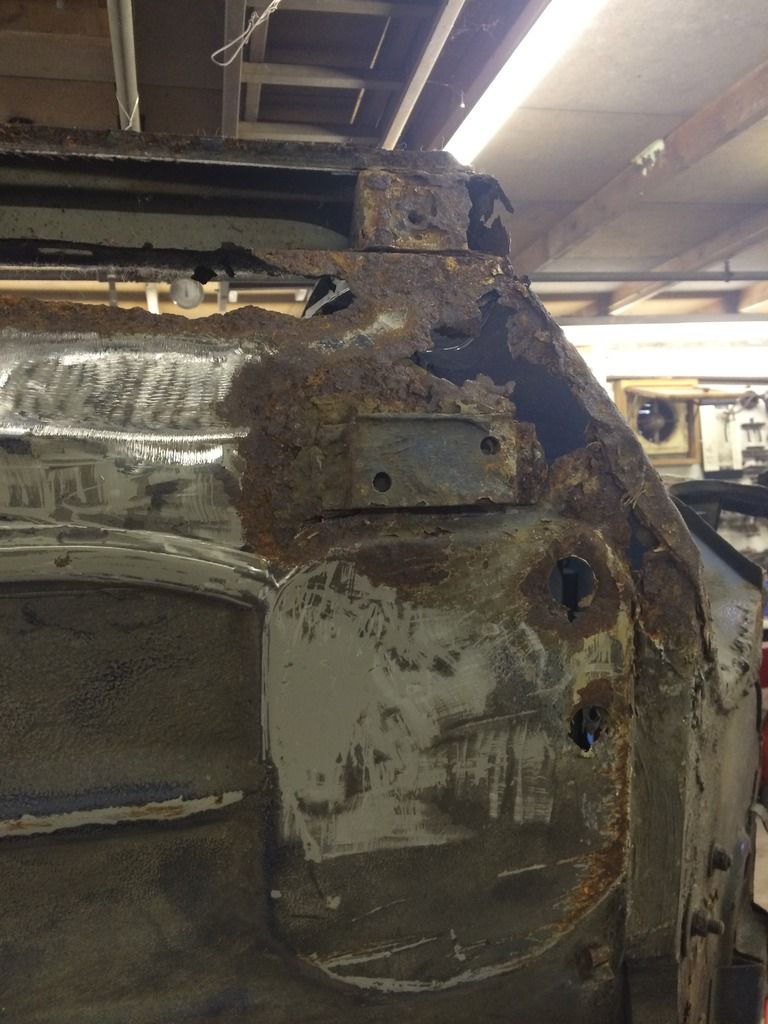
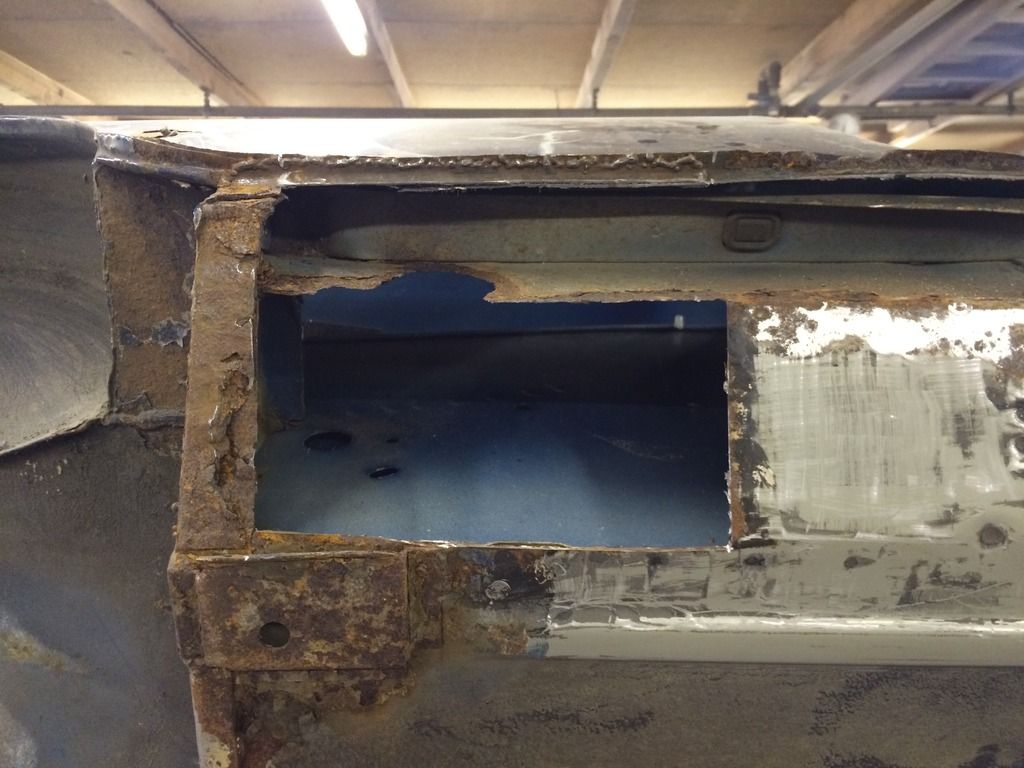
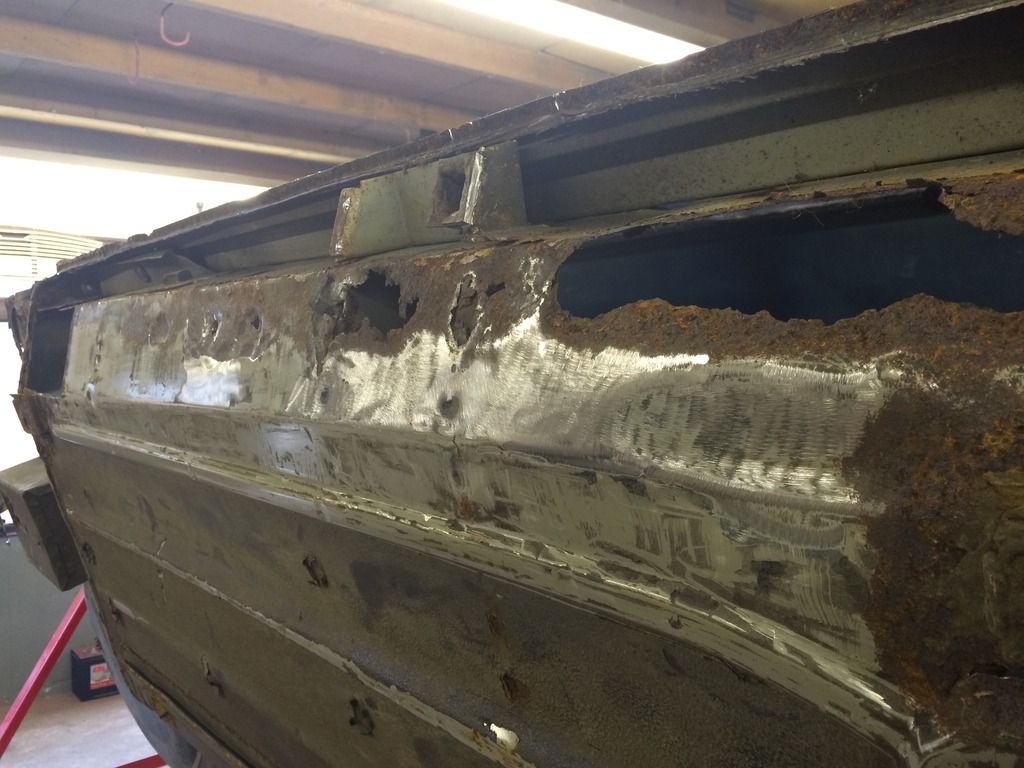
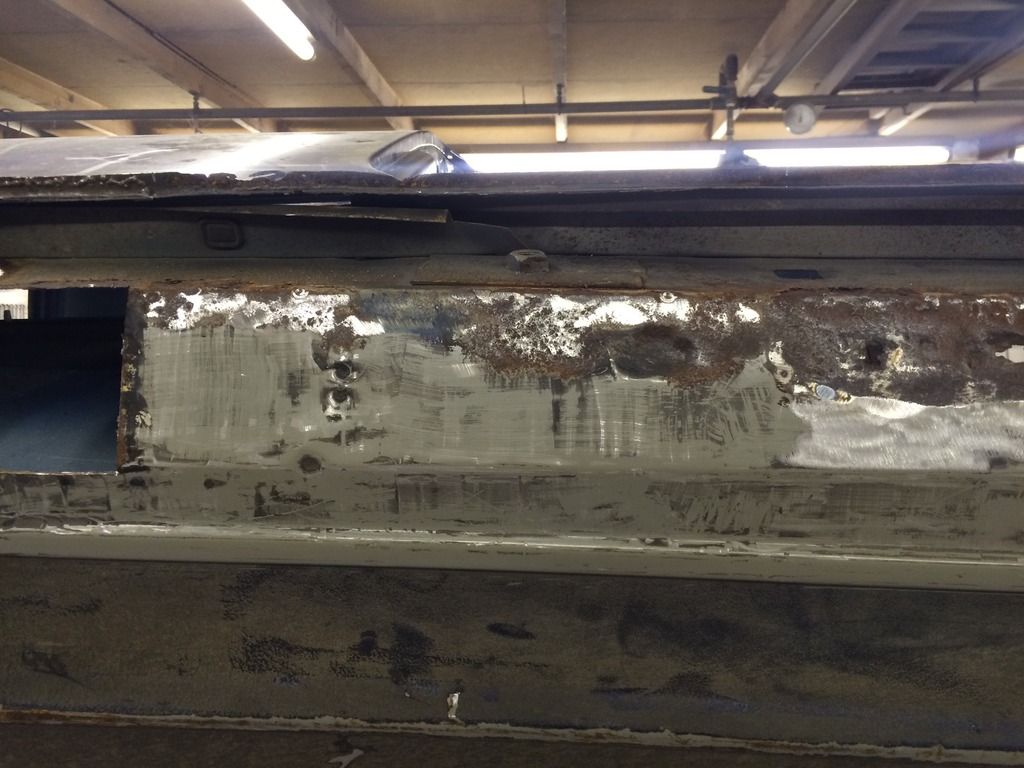
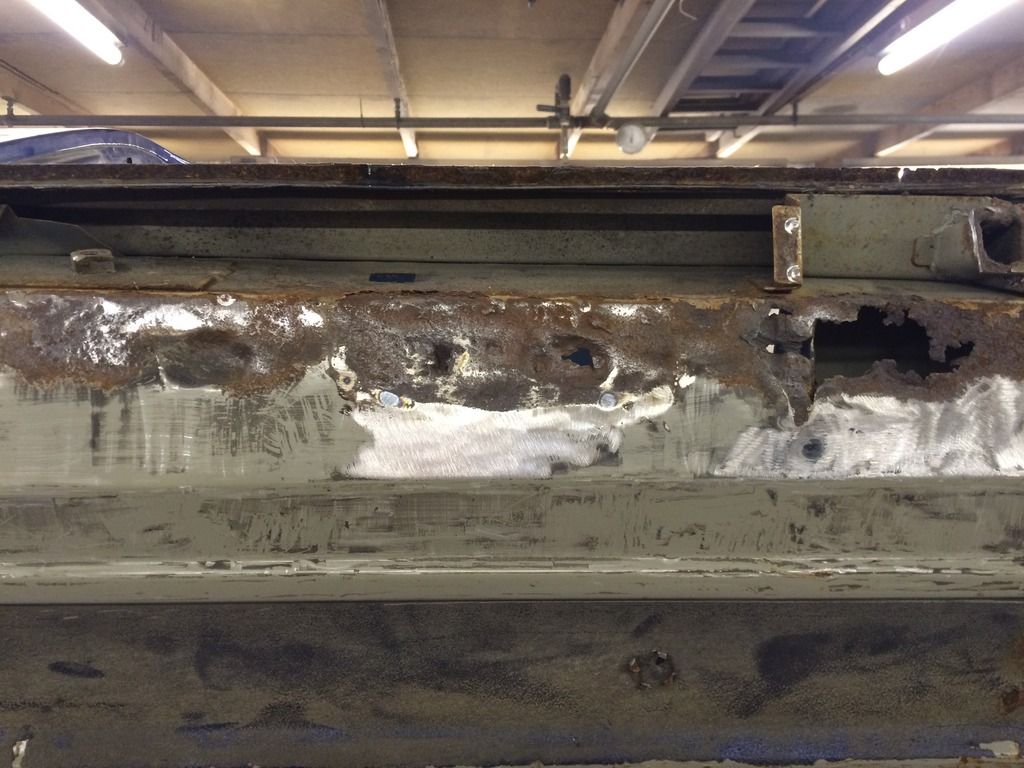
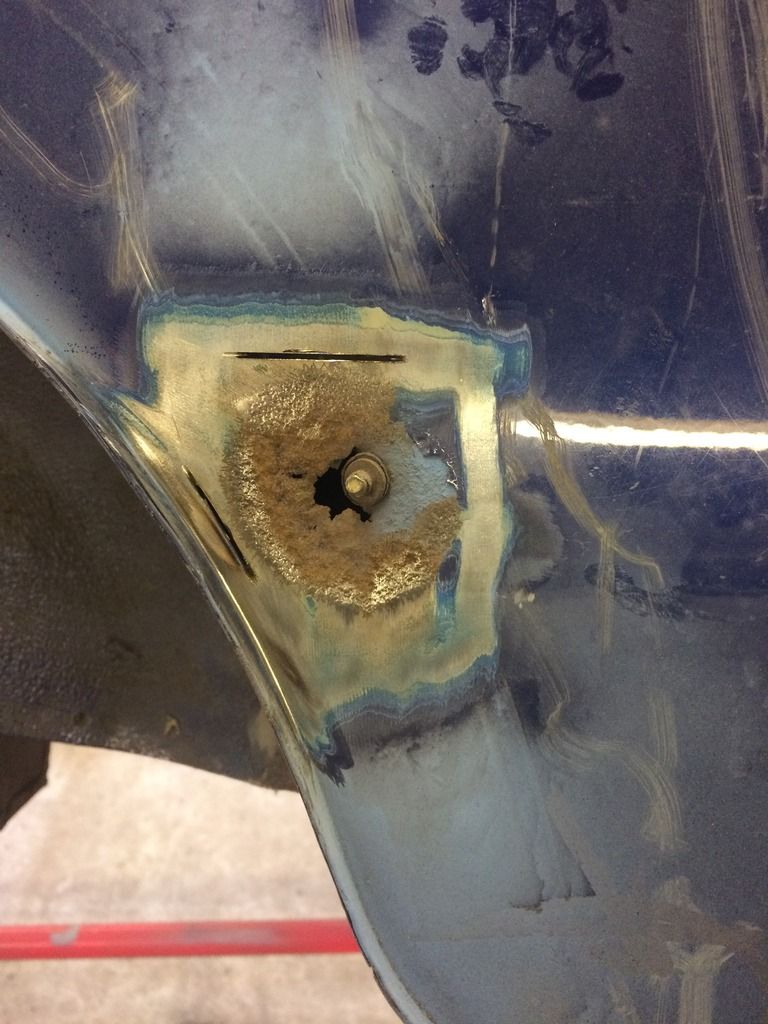
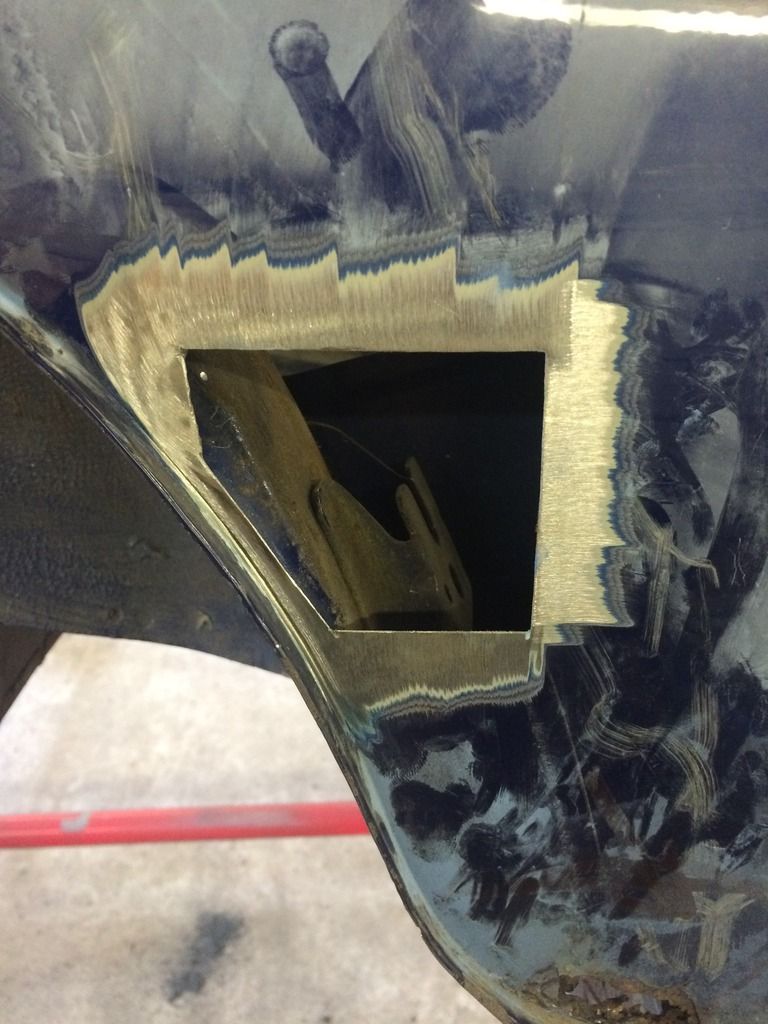
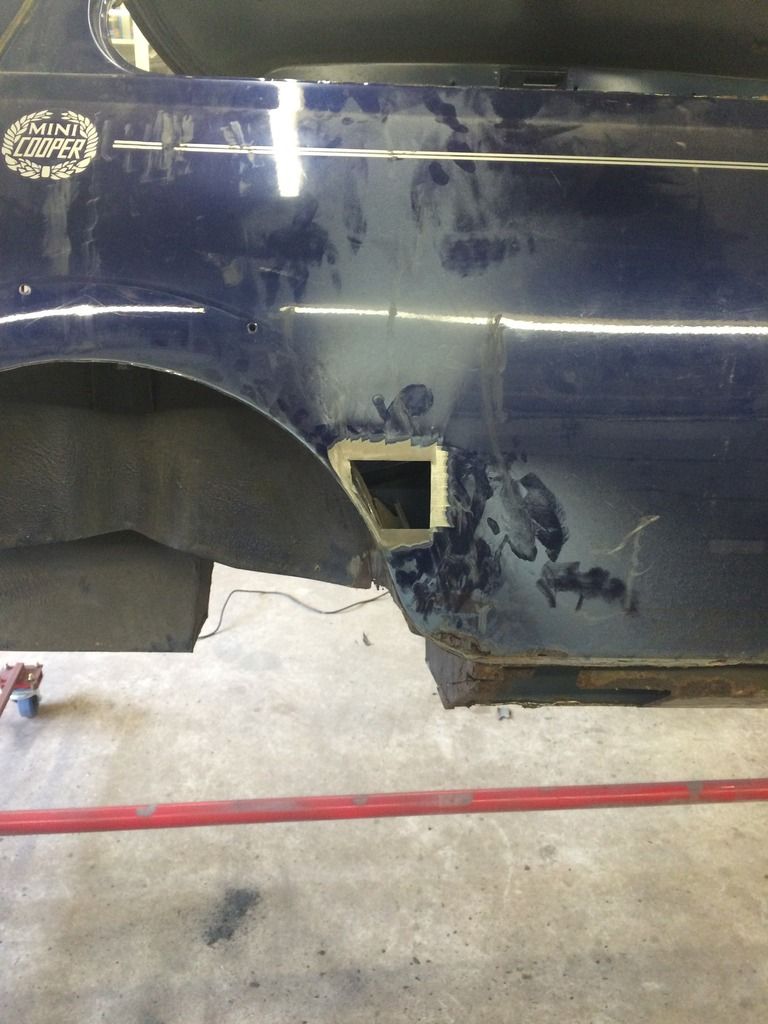
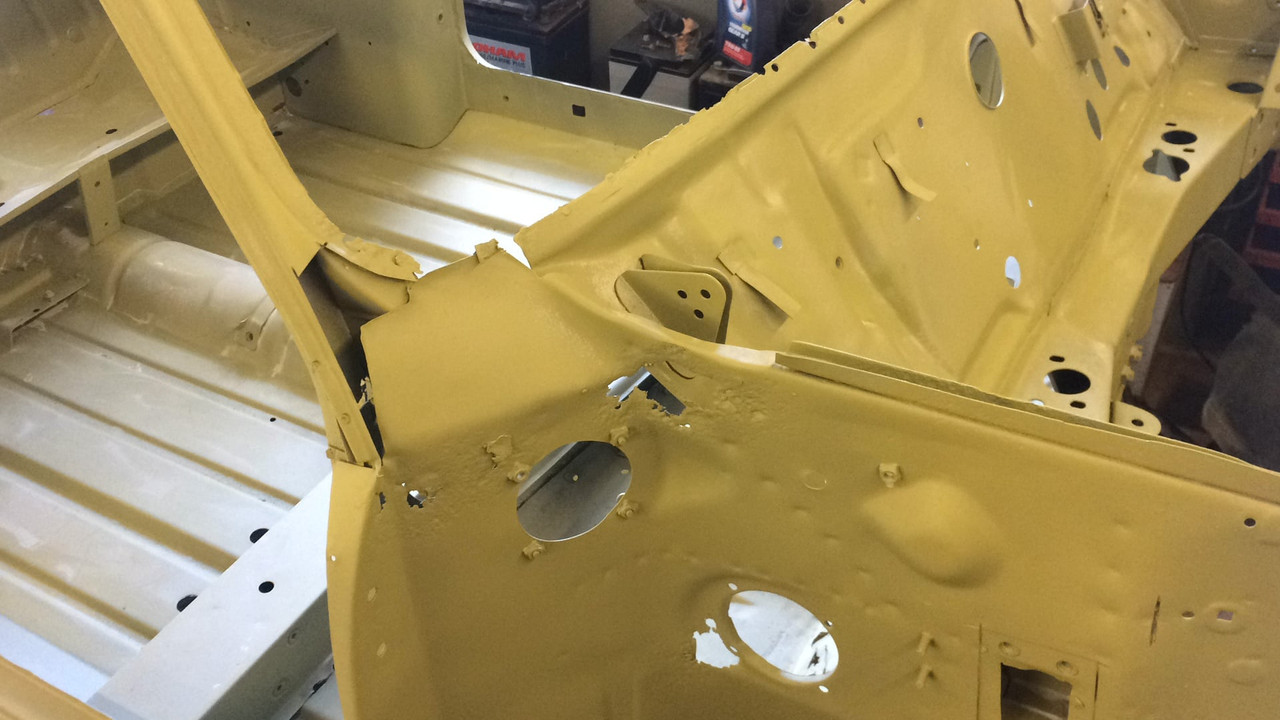
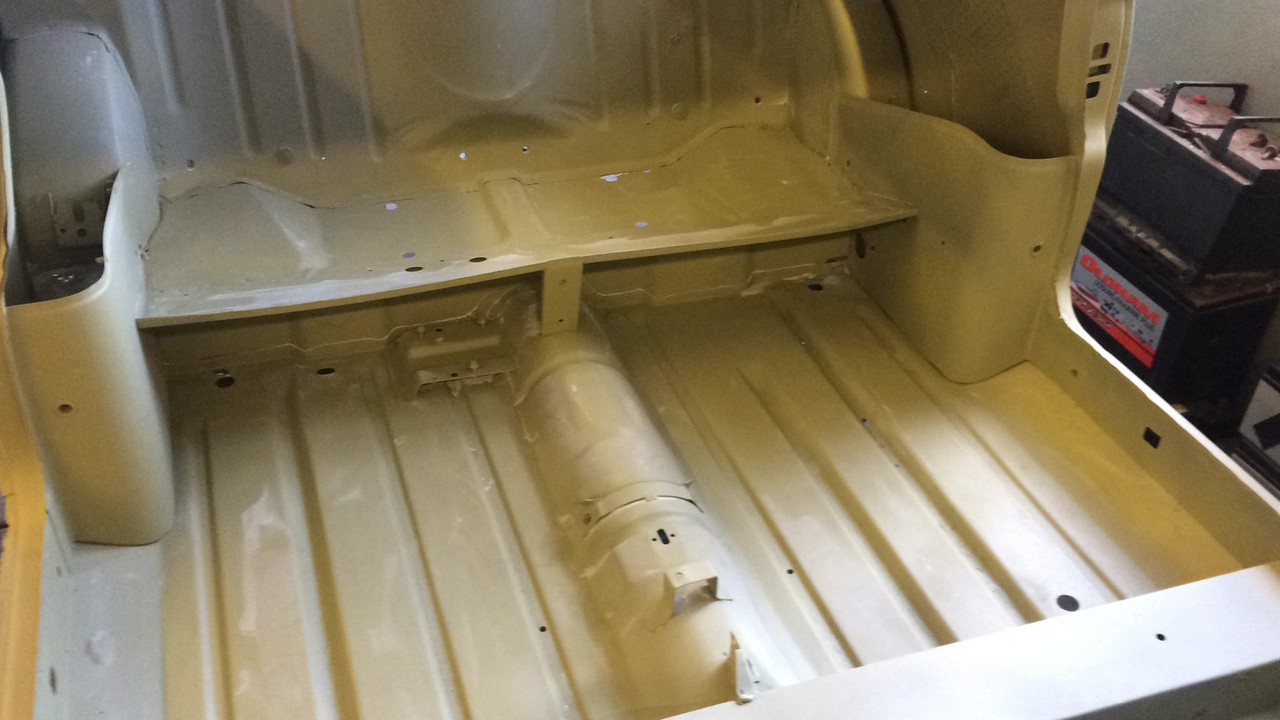
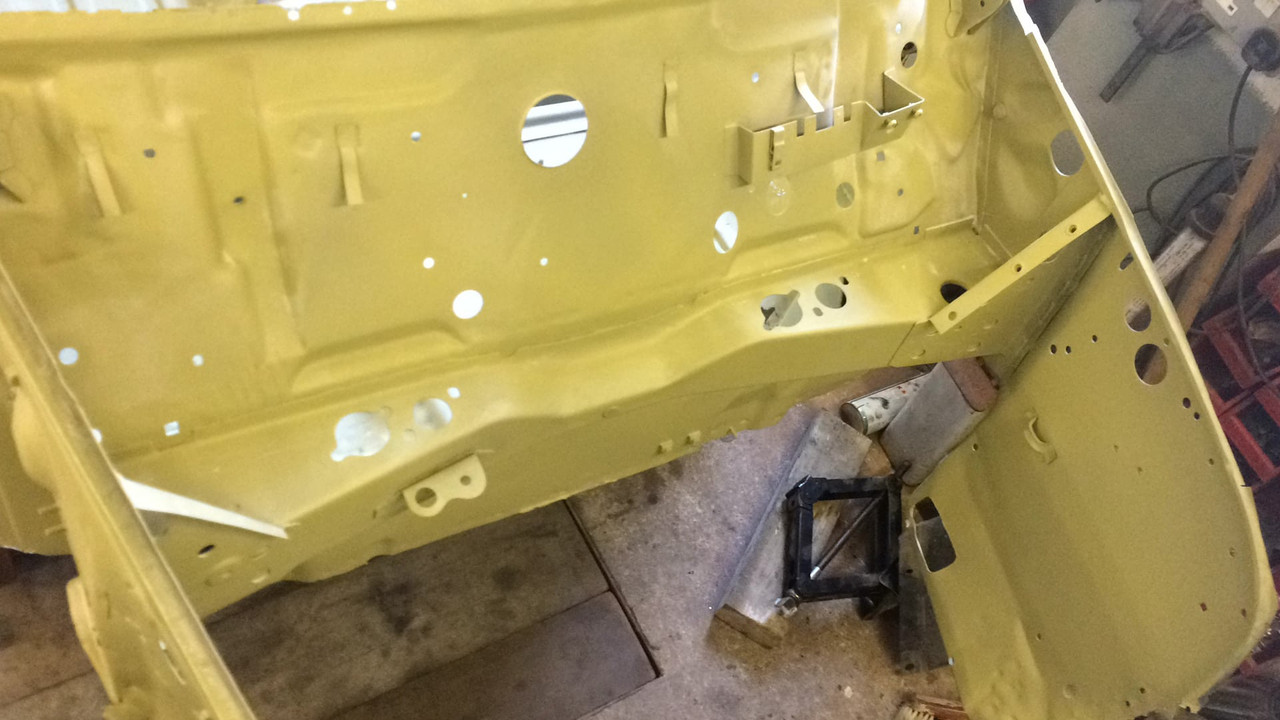
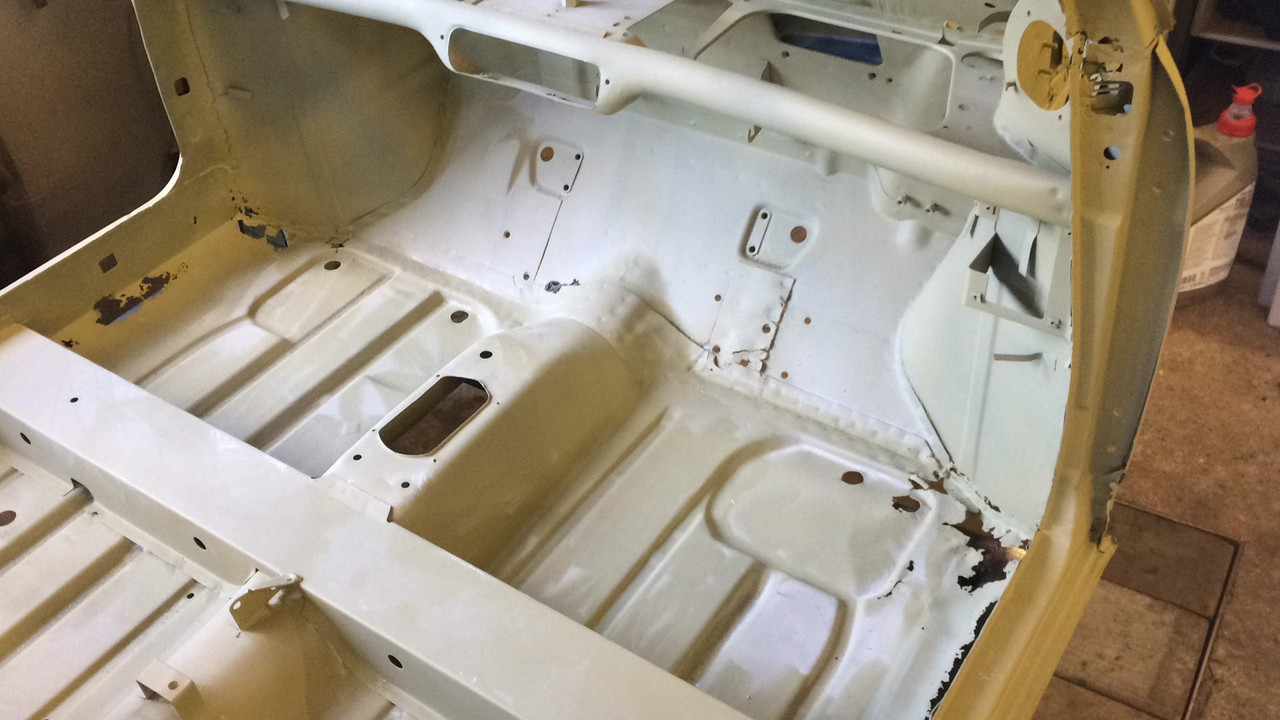
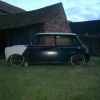
thought I would share my latest project. its a 2000 cooper sport in Tahiti blue. it has the High quality rover rust prevention so needs some attention.


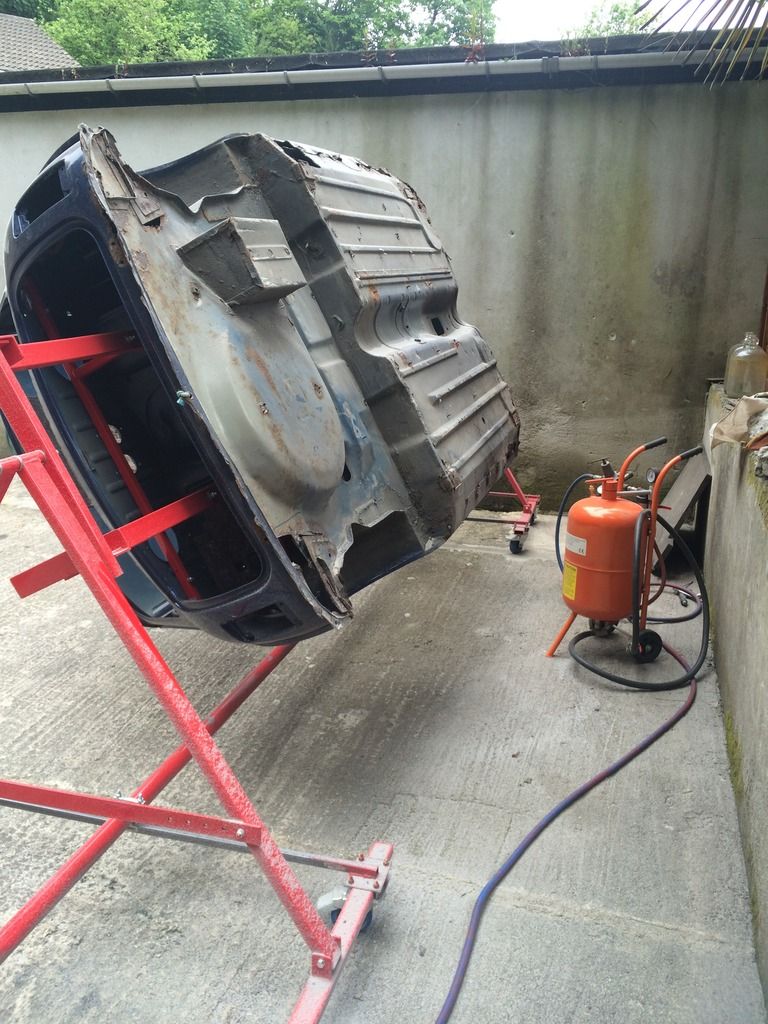
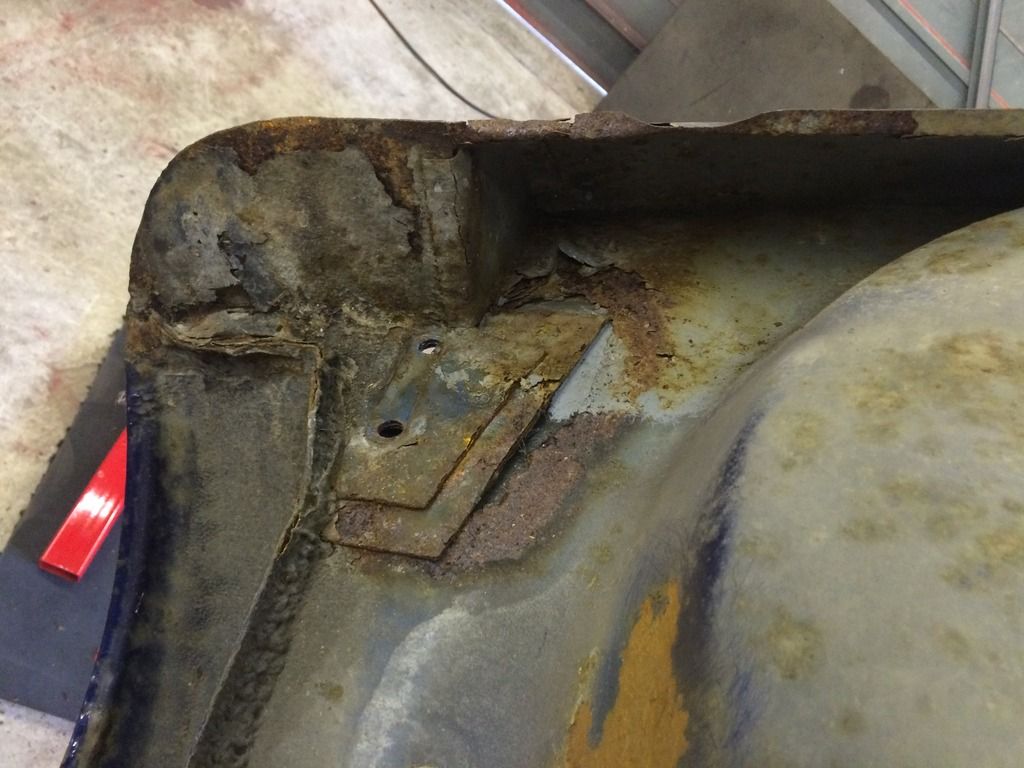
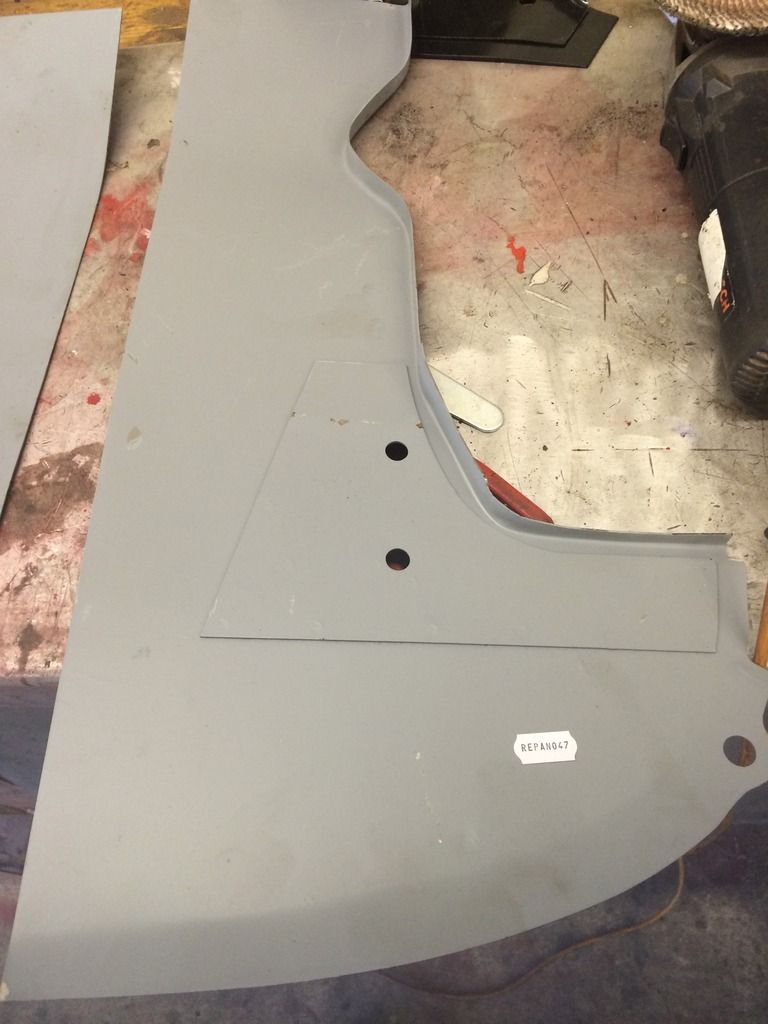
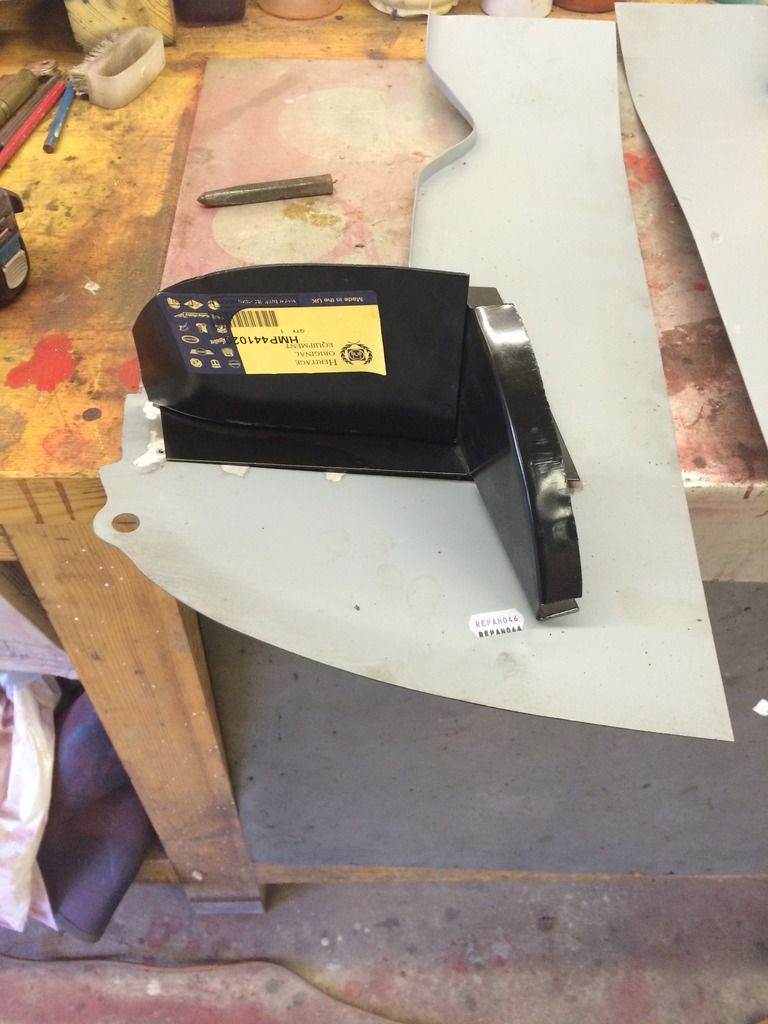
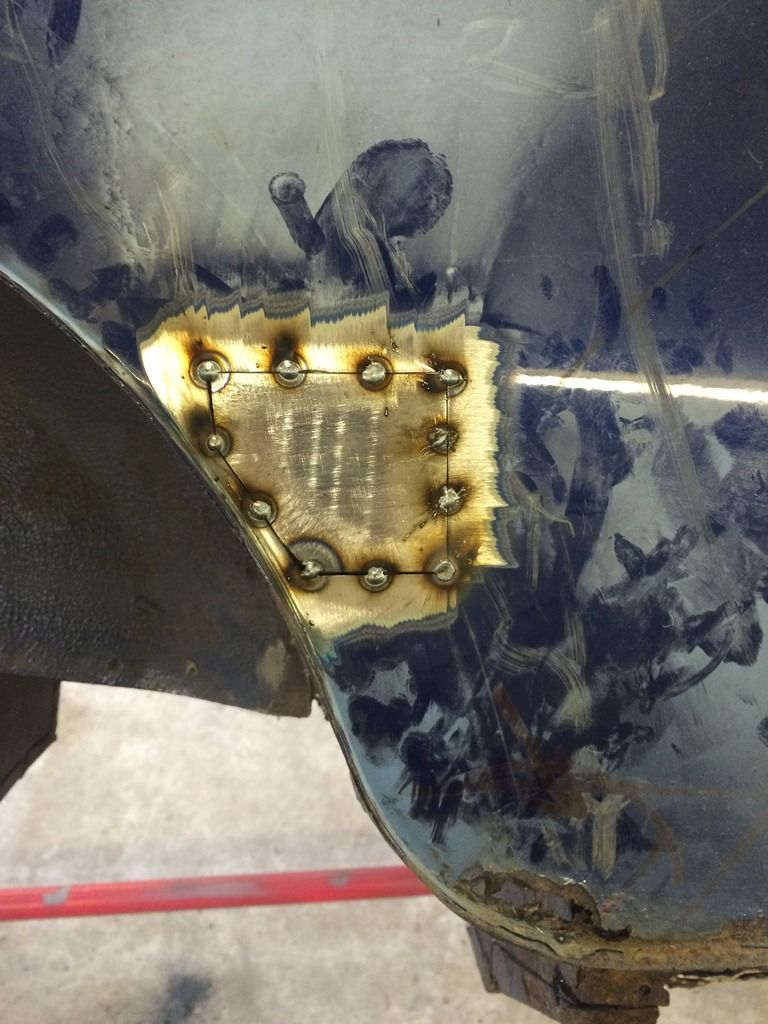
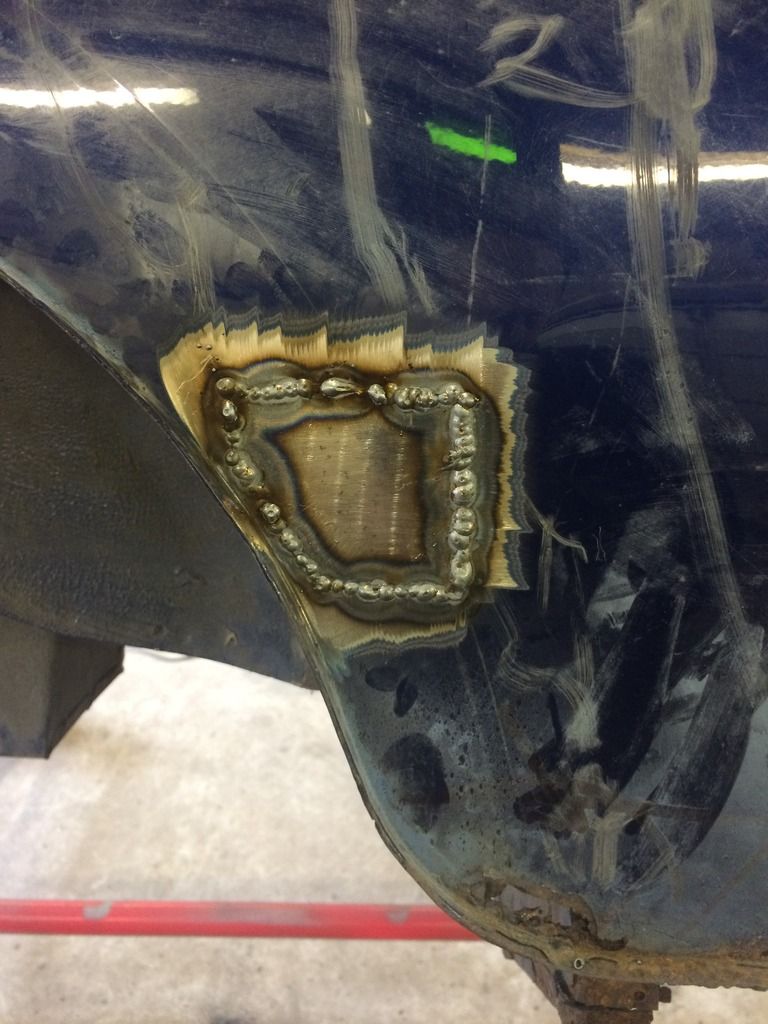
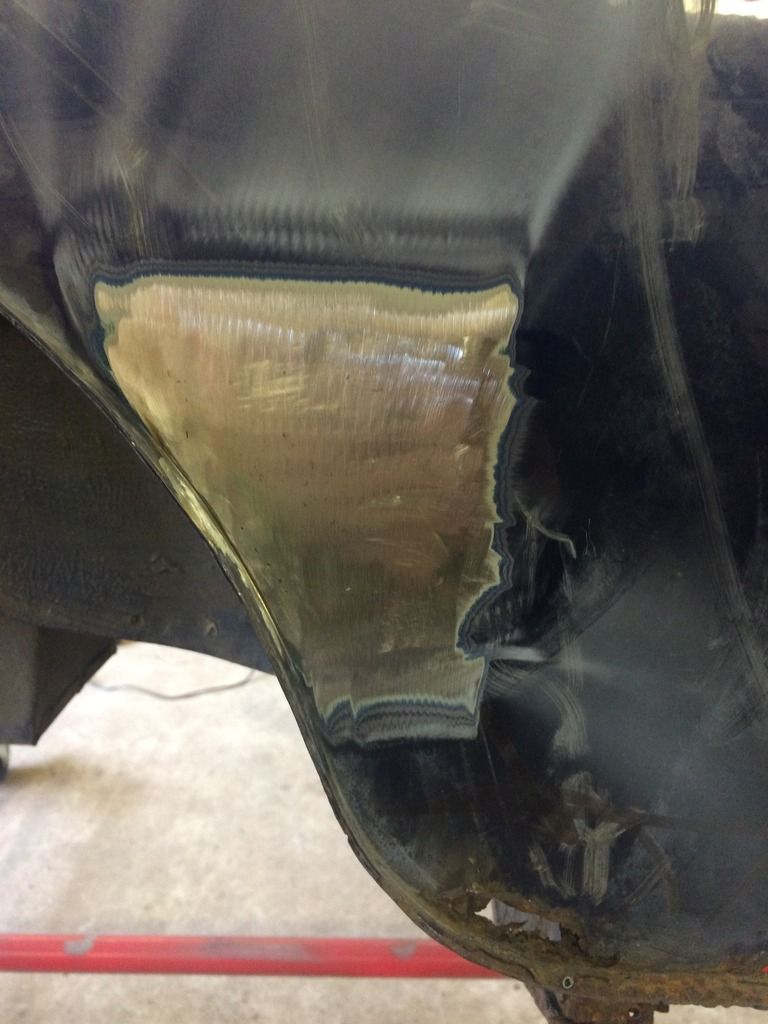
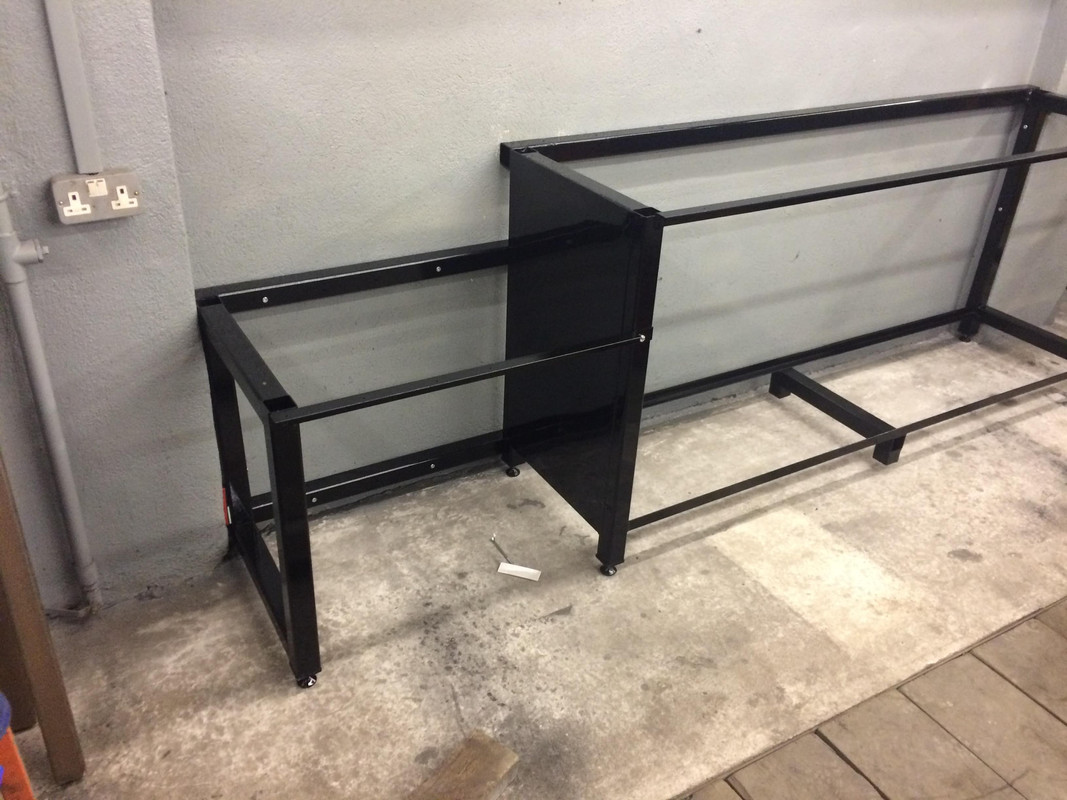
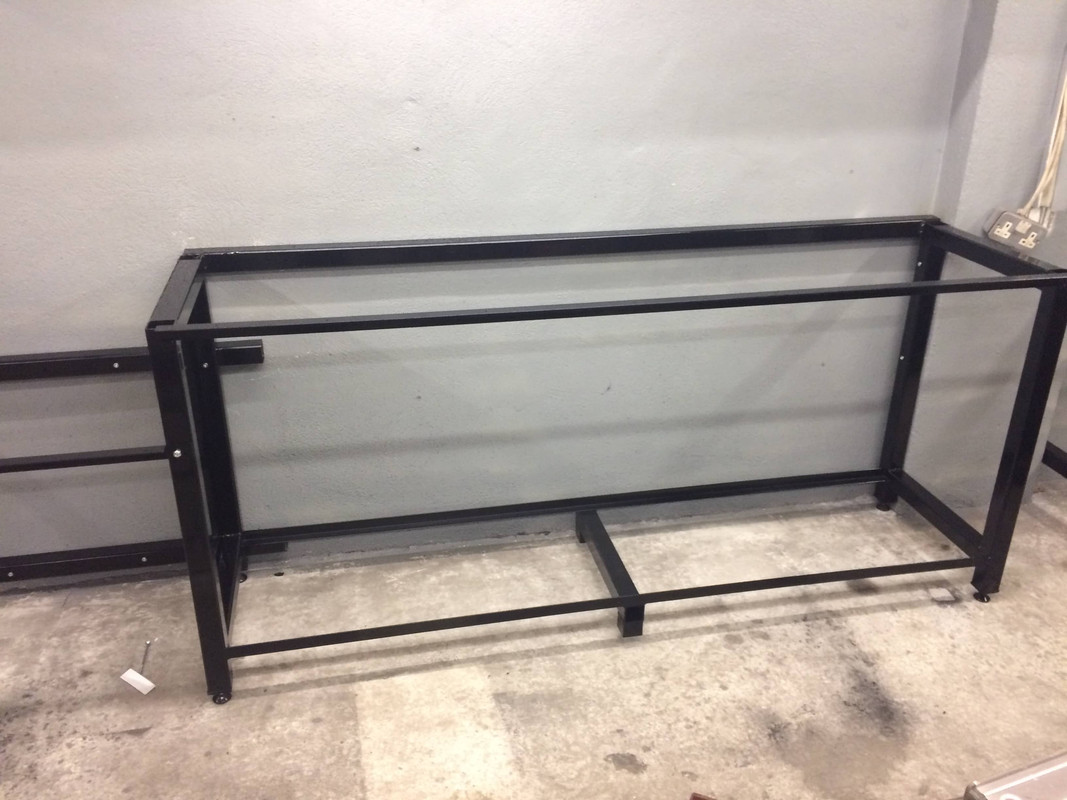
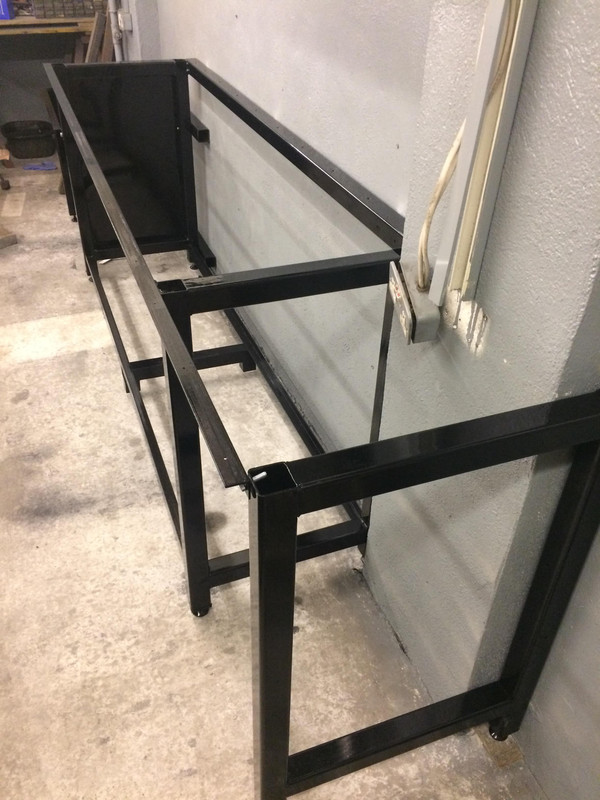
I bought a jig to mount it on so I can work on it easier with out sitting it on its roof. shell needs some sand blasting in places and a lot of panels. hoping to keep this thread up to date as I go and review some of the panels and suppliers I use along the way.


IMG_9066_zpsskkygh5u.jpg


IMG_9070_zps4qd8jxif.jpg


IMG_9067_zps4joocyxh.jpg


IMG_9090_zpsdsig5ifz.jpg


IMG_9081_zpsvn7hrtxb.jpg


IMG_9087_zpsqawooj8x.jpg


IMG_9082_zpsby2i9hum.jpg


IMG_9080_zpsogaooj8t.jpg


IMG_9092_zpsmuhwo4ai.jpg


IMG_9091_zpsawd97kqi.jpg


Edited by bartman, 06 August 2020 - 09:15 PM.


#2 Steve220

Steve220

    Up Into Fourth

  • Members
  • PipPipPipPipPipPipPipPipPip
  • 4,885 posts
  • Location: Shropshire
  • Local Club: RAF Mini Club

Posted 18 May 2016 - 08:56 PM

Your links are dead. Remove .html at the end of them all.

#3 Minimad100

Minimad100

    Speeding Along Now

  • Members
  • PipPipPipPipPip
  • 416 posts
  • Location: Norwich

Posted 18 May 2016 - 10:35 PM

I have a 1999, you've got your work cut out!!! Looks like you've got a decent work space and the jig will make it much easier! Looking forward to the progress!!!

#4 Zeemax Adventure

Zeemax Adventure

    Speeding Along Now

  • TMF+ Member
  • PipPipPipPipPip
  • 301 posts
  • Location: Llandudno

Posted 21 May 2016 - 02:35 PM

I also have a 2000 cooper sport but in solar red.  Good luck...mines almost ready for paint


#5 Steve220

Steve220

    Up Into Fourth

  • Members
  • PipPipPipPipPipPipPipPipPip
  • 4,885 posts
  • Location: Shropshire
  • Local Club: RAF Mini Club

Posted 21 May 2016 - 03:18 PM

I love your garage!


#6 bartman

bartman

    Mini Mad

  • Members
  • PipPipPipPip
  • 265 posts
  • Location: Cornwall
  • Local Club: cornish mini club

Posted 21 May 2016 - 08:50 PM

I love your garage!

thanks its a nice size to work in although I seem to buy to many mini's and im slowly running out of room O_O  O_O


#7 dave_39

dave_39

    Learner Driver

  • Noobies
  • PipPip
  • 19 posts

Posted 22 May 2016 - 07:29 PM

Takes me back. Building a Tahiti Blue 2000 cooper sport. It's been off the road for 3 years but in the final stretch now. Enjoy it. They are great looking cars when they are on top condition.

#8 mattmiglia

mattmiglia

    Super Mini Mad

  • Members
  • PipPipPipPipPipPip
  • 515 posts
  • Location: West Midlands

Posted 22 May 2016 - 08:08 PM

Nice project!

#9 bartman

bartman

    Mini Mad

  • Members
  • PipPipPipPip
  • 265 posts
  • Location: Cornwall
  • Local Club: cornish mini club

Posted 29 May 2016 - 04:42 PM

Small little update weather is too nice to be cutting and grinding.

ive modified my rollover jig so i can move it around easy and get it outside for blasting. these jigs are really good for the money and the make it so much easier to prepae the shell.

IMG_9181_zpswc1racdt.jpg


Made a start on the rear valance and boot floor. rear valance and closers are scrap as is the corners of the boot floor, it had a few bodged repairs before so i cut them out and dressed the rest ready for a new panel. think i am also going to fit a lower boot hinge repair panel as its pretty crusty

Before

IMG_9089_zpsgoh3qcjp.jpg

IMG_9075_zpsxhnspzbt.jpg

IMG_9091_zpsawd97kqi.jpg

During

IMG_9174_zpscsepmiwx.jpg

IMG_9176_zps7r5o44rm.jpg

IMG_9184_zps1djunoys.jpg

IMG_9187_zpsru2kdzpi.jpg

IMG_9189_zps5m9xatyd.jpg

The M-Machine boot repair panel im using comes with the subframe mounting reinforcing plate already attached, but so does the BMH closing panel so i removed the one from the boot panel.

IMG_9177_zpstpufrfzh.jpg

IMG_9178_zpswohza3ho.jpg

IMG_9179_zpsibhb5yop.jpg

#10 GraemeC

GraemeC

    Crazy About Mini's

  • TMF+ Member
  • PipPipPipPipPipPipPipPipPipPip
  • 7,313 posts
  • Location: Carnforth

Posted 30 May 2016 - 03:38 PM

If I remember rightly, you should have all three layers (floor, reinforcement, closing panel).  

Is the closing panel not slightly smaller than the reinforcement panel?  You can normally see them step down in size when fitted.


Edit - you can see all three in your first 'before' picture


Edited by GraemeC, 30 May 2016 - 03:39 PM.


#11 bartman

bartman

    Mini Mad

  • Members
  • PipPipPipPip
  • 265 posts
  • Location: Cornwall
  • Local Club: cornish mini club

Posted 30 May 2016 - 09:25 PM

If I remember rightly, you should have all three layers (floor, reinforcement, closing panel).  
Is the closing panel not slightly smaller than the reinforcement panel?  You can normally see them step down in size when fitted.
 
Edit - you can see all three in your first 'before' picture


yeah there should be 3 layers:

1.) boot floor
2.) reinforcing plate
3.) closing panel

the boot floor repair panel came with the reinforcing plate and the closing panel also came with the reinforcing plate so I have removed one of them.

#12 bartman

bartman

    Mini Mad

  • Members
  • PipPipPipPip
  • 265 posts
  • Location: Cornwall
  • Local Club: cornish mini club

Posted 05 June 2016 - 08:32 PM

I have been checking the inner and outer seals over the last few days. the outer were a past it and had a couple of patch repairs on them so I cut them off to inspect the inner seal to see what panels I will need to repair them.


IMG_9202_zpsnhczor7x.jpg

IMG_9203_zpsqrm1xemo.jpg

IMG_9205_zpsouwhfsx0.jpg

IMG_9204_zpsancou67l.jpg

IMG_9210_zpszh97s05m.jpg

IMG_9208_zpskpmdi3nn.jpg

IMG_9212_zpsy6bq41co.jpg

IMG_9215_zpsa0z10t11.jpg

IMG_9216_zpsbkb4ihrq.jpg

IMG_9217_zpsbhgfdkde.jpg

IMG_9218_zps9o654mez.jpg


this side I will use a front floor pan. and cut out all the corrosion and tidy the rest up. then a new outer seal.


drivers side is a bit worse.


IMG_9222_zpssvceuhjv.jpg

IMG_9223_zpsfoso0iln.jpg

IMG_9225_zpsjaya3hqq.jpg

IMG_9224_zps74qmmoew.jpg

IMG_9226_zps85gbffft.jpg

IMG_9227_zpszro8eauc.jpg


this side I will use a full inner seal and replace the front floor section, then a new outer seal to finish.


I also had a small hole on drivers rear quarter panel where one of the sports pack arch mounting bolts had rusted through so I cut the corrosion out and made a repair panel to fit. then I redrilled the hole for the arch.


IMG_9235_zps5jgnokc8.jpg

IMG_9236_zpss1jfbaiw.jpg

IMG_9237_zps9hg4shgu.jpg

IMG_9239_zpsb3glqwzn.jpg

IMG_9238_zps70yvfild.jpg

IMG_9240_zpsapdl7am3.jpg

IMG_9241_zps16oygfkn.jpg


#13 F1L8EY

F1L8EY

    Super Mini Mad

  • Members
  • PipPipPipPipPipPip
  • 600 posts
  • Location: Cornwall

Posted 28 November 2016 - 09:37 PM

Another one!! Nice work as always Ross 


#14 bartman

bartman

    Mini Mad

  • Members
  • PipPipPipPip
  • 265 posts
  • Location: Cornwall
  • Local Club: cornish mini club

Posted 28 November 2016 - 10:59 PM

Small update got the shell back from the blasters about a month ago, no nasty surprises.time to get cutting and welding.
 
IMG-9654.jpg

IMG-9653.jpg
 
IMG-9655.jpg
 
IMG-9656.jpg
 
IMG-9657.jpg
 
IMG-9659.jpg
 
 
Been distracted from the mini, decided to give my garage a good tidy and update it a bit, built myself a new bench, not finished yet but its getting there. Gave everything a paint aswell.
 
IMG-0325.jpg

IMG-0326.jpg

IMG-0327.jpg

IMG-0517.jpg

IMG-0520.jpg

Edited by bartman, 06 August 2020 - 09:36 PM.


#15 cityspeed

cityspeed

    Mini Mad

  • Noobies
  • PipPipPipPip
  • 193 posts
  • Location: Essex

Posted 28 November 2016 - 11:18 PM

Nice bench! Looks hench!


0 user(s) are reading this topic

0 members, 0 guests, 0 anonymous users