Jump to content


Photo
- - - - -

1989 White Mayfair - Amateur Turbo Build


  • Please log in to reply
96 replies to this topic

#31 MaxDempsey

MaxDempsey

    Mini Mad

  • Noobies
  • PipPipPipPip
  • 136 posts
  • Location: Essex

Posted 22 January 2017 - 07:34 PM

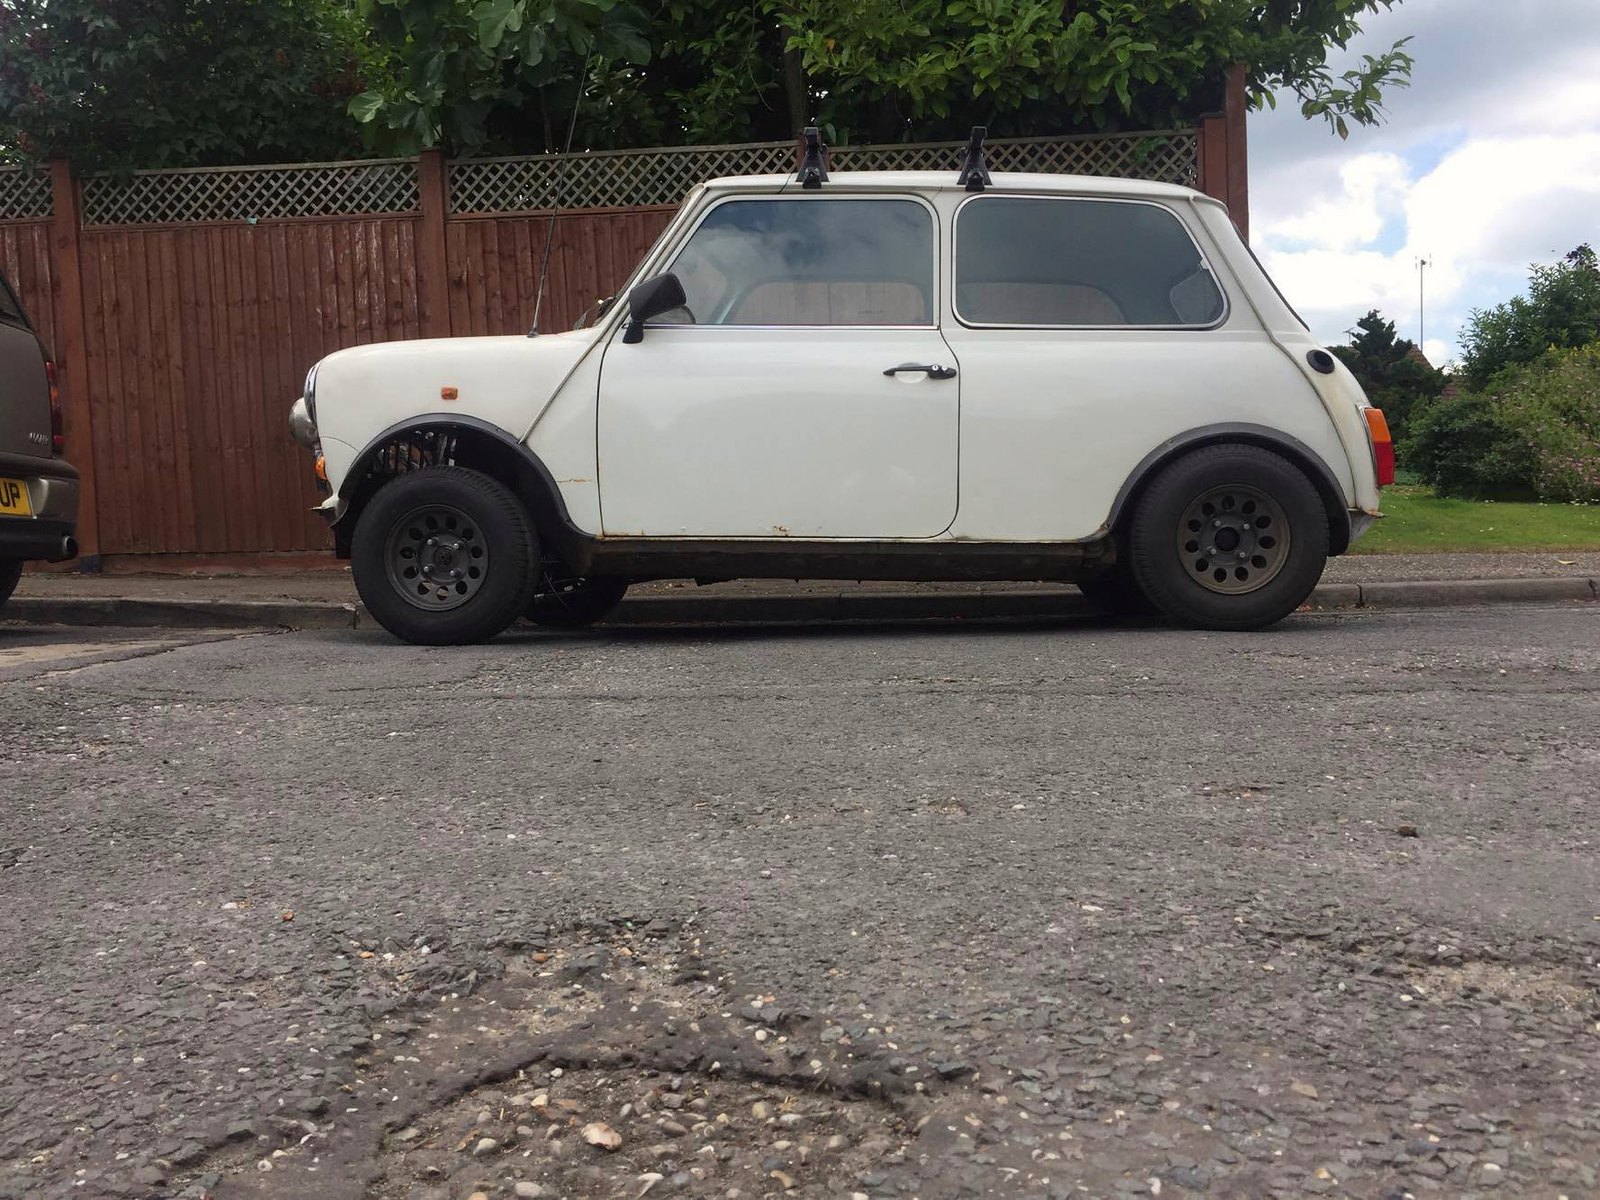
Small update on the little progress I have made. Haven't done loads due to it being too cold to spend ages out in the garage but also because I'm having to look up how to do every step as I'm a noob  :lol: I said it wouldn't be done fast.


36074203032_7d85eec405_b.jpgMini by Max Dempsey, on Flickr


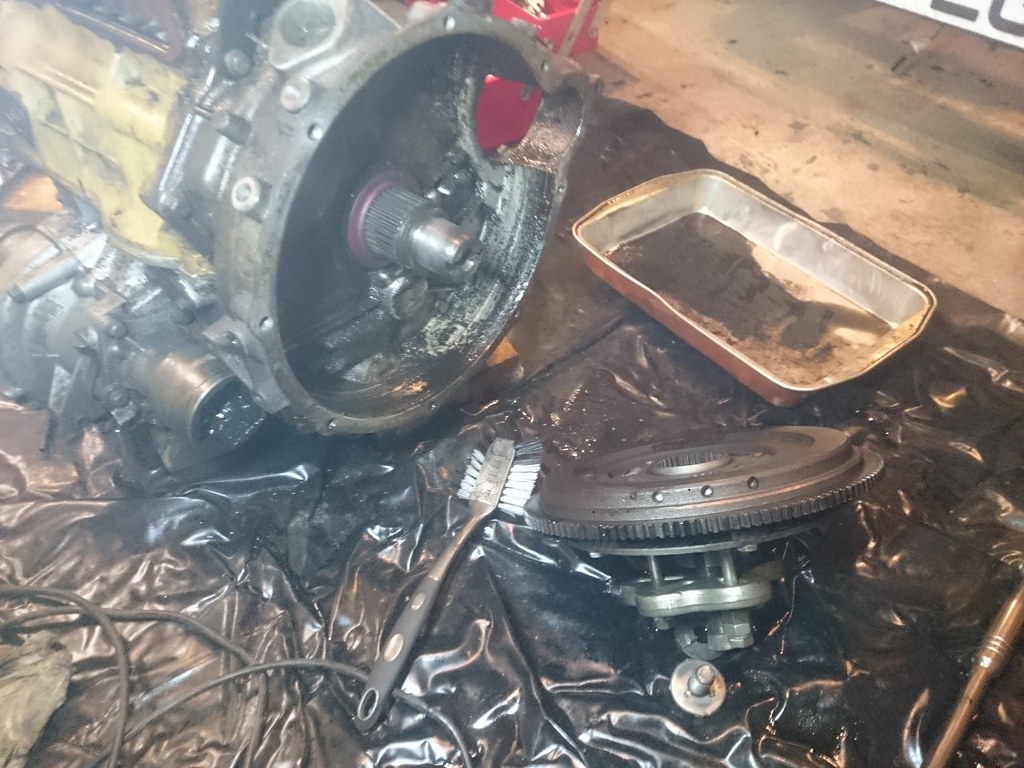
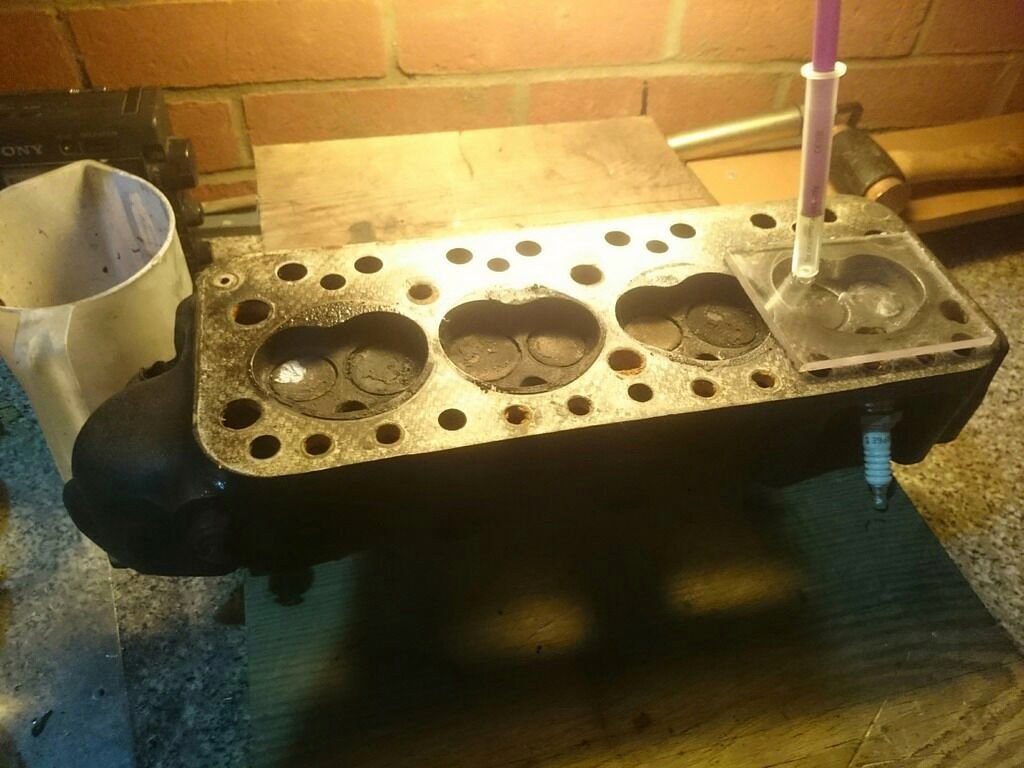
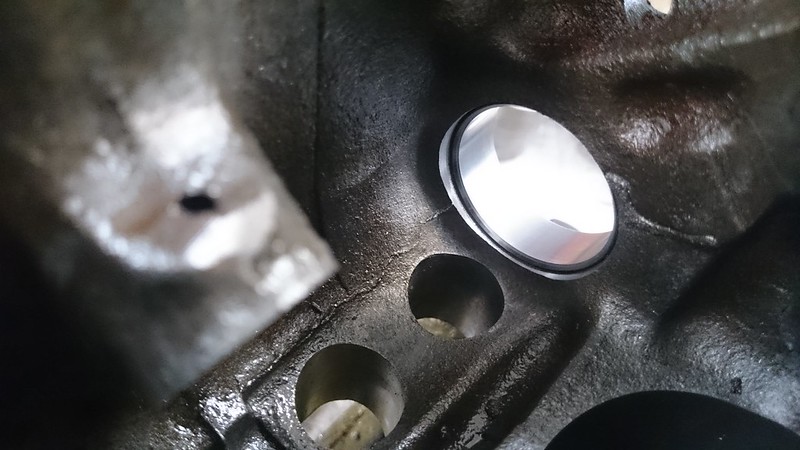
That explains where all my oil was going. I gave the block a quick wash off and started stripping it.


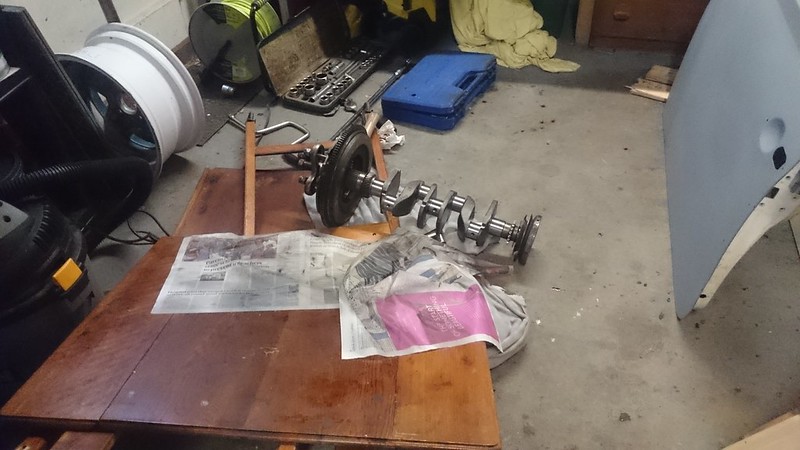
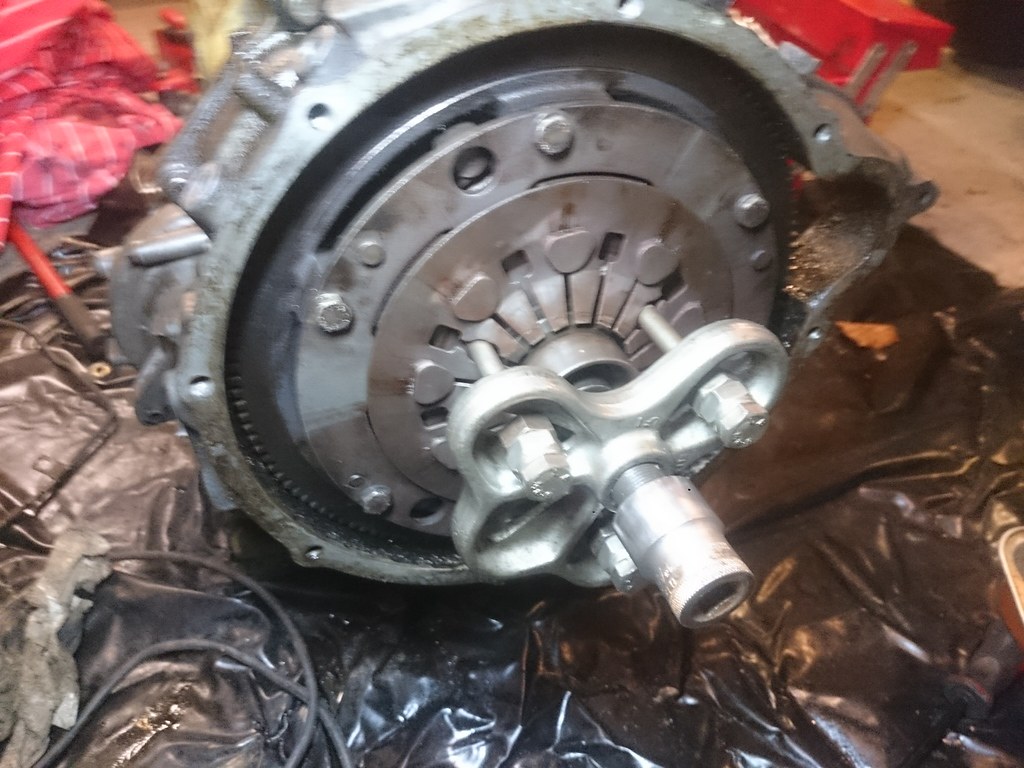
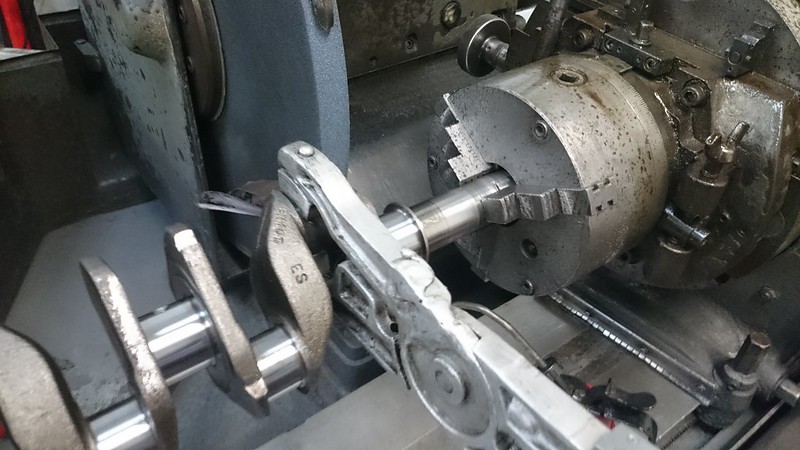
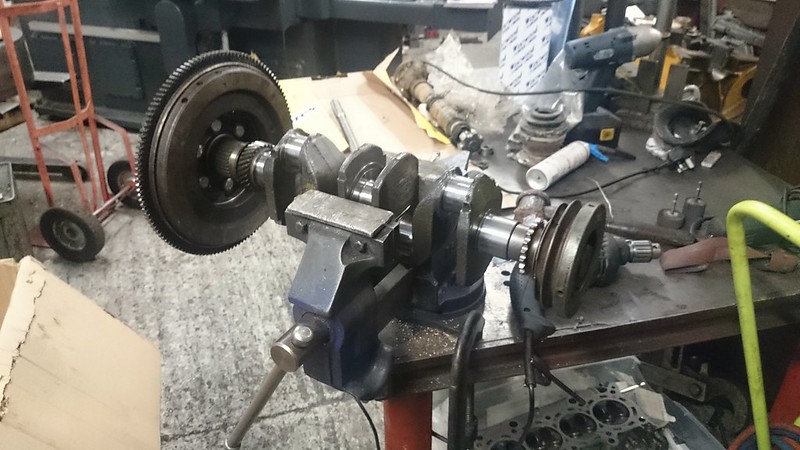
I feel fairly lucky in the fact that my flywheel came off with fairly little struggling after reading so much about people leaving them for days loaded up and fighting them for ages. I borrowed a puller, tightened it as much as I could with a three foot bar while also trying to hold the engine down. Left it for a couple of minutes and then hit the puller with a smallish hammer and it flew off with a bang.


36106946611_f7607c221a_b.jpgMini by Max Dempsey, on Flickr


35848353350_f9bce229d0_b.jpgMini by Max Dempsey, on Flickr


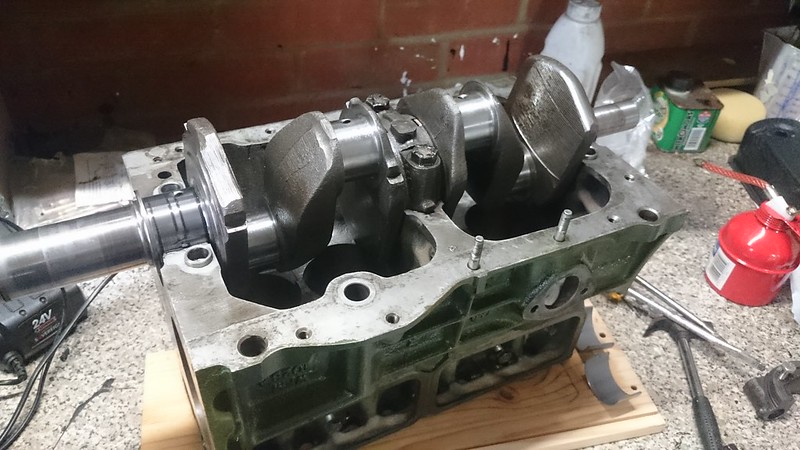
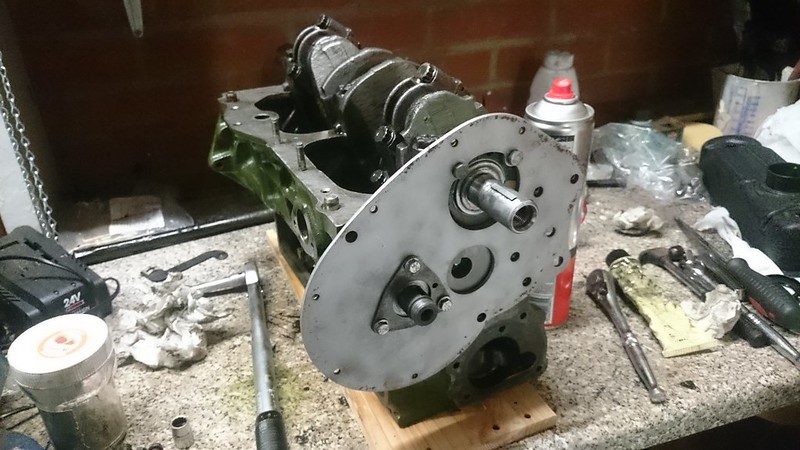
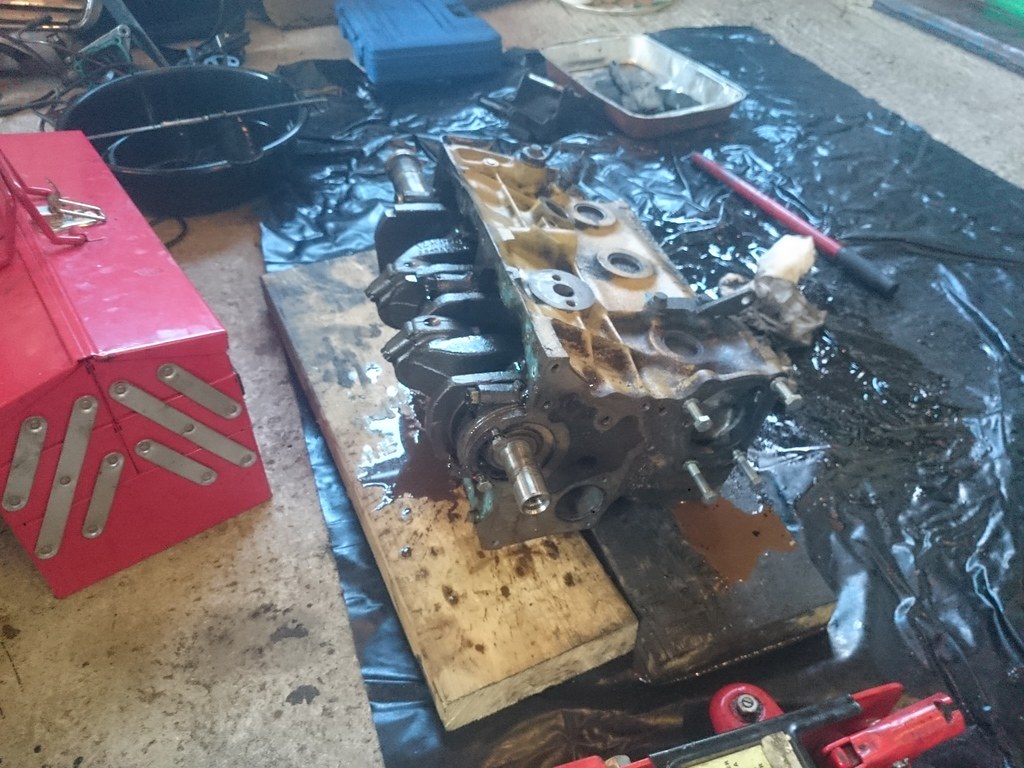
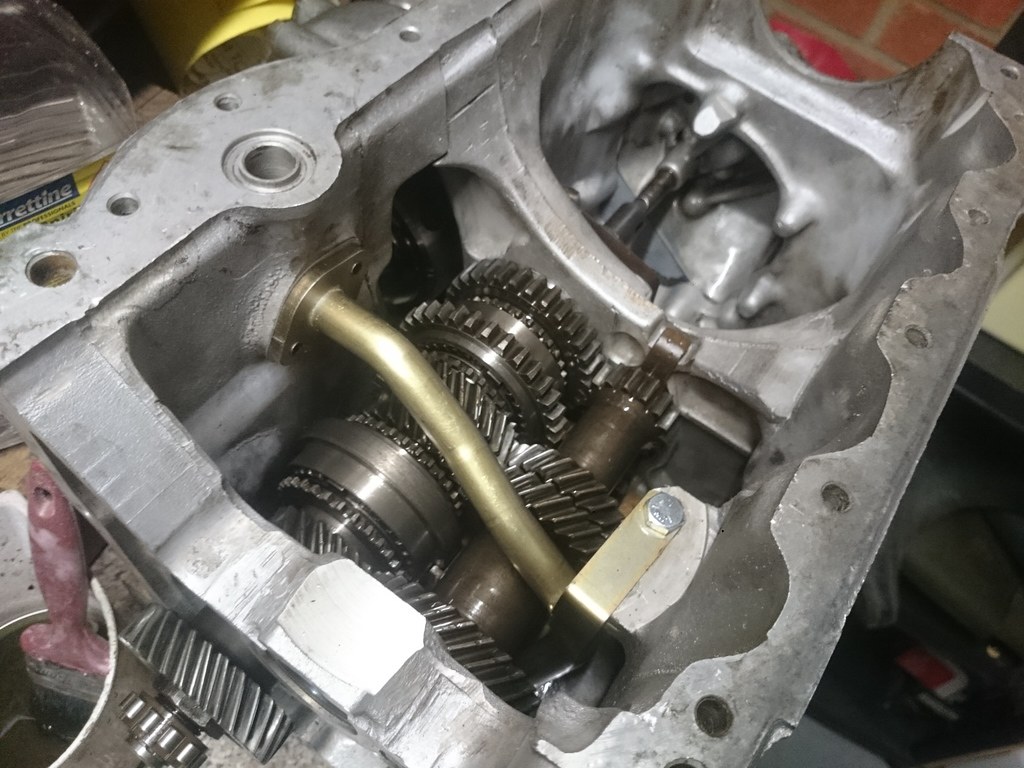
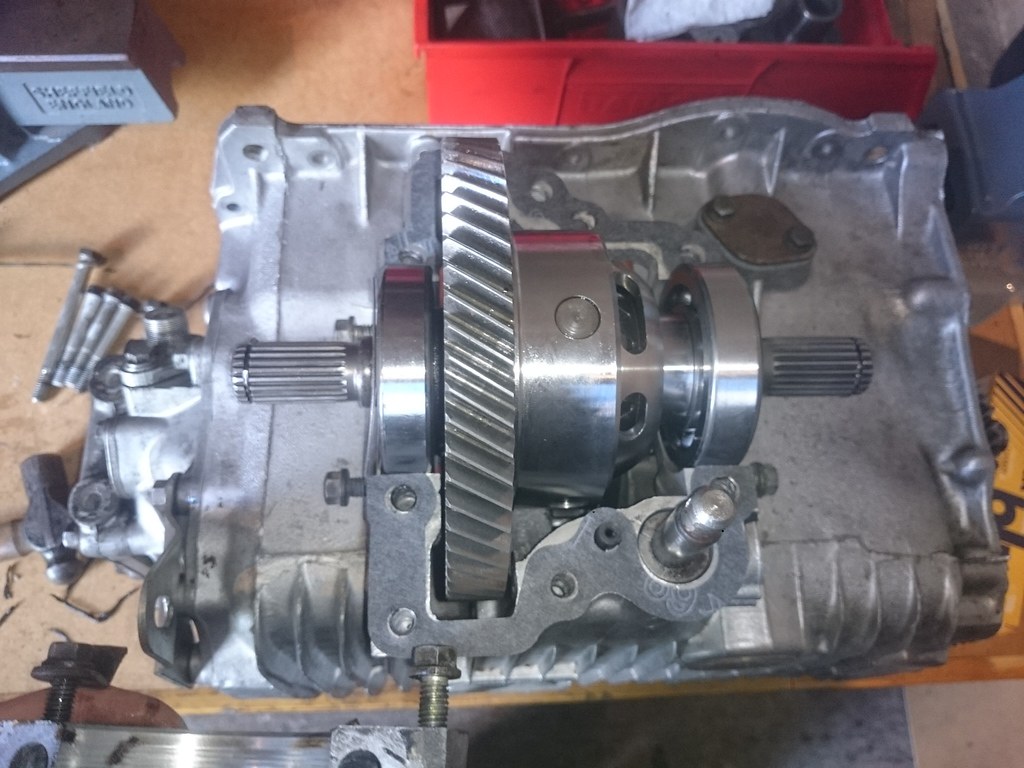
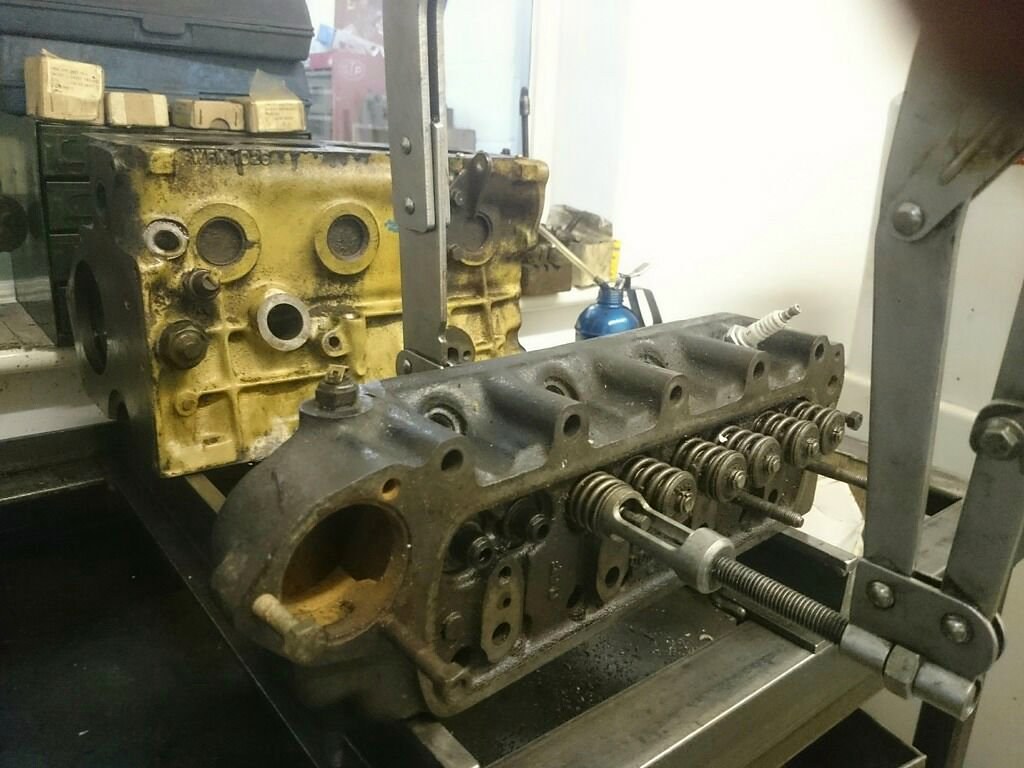
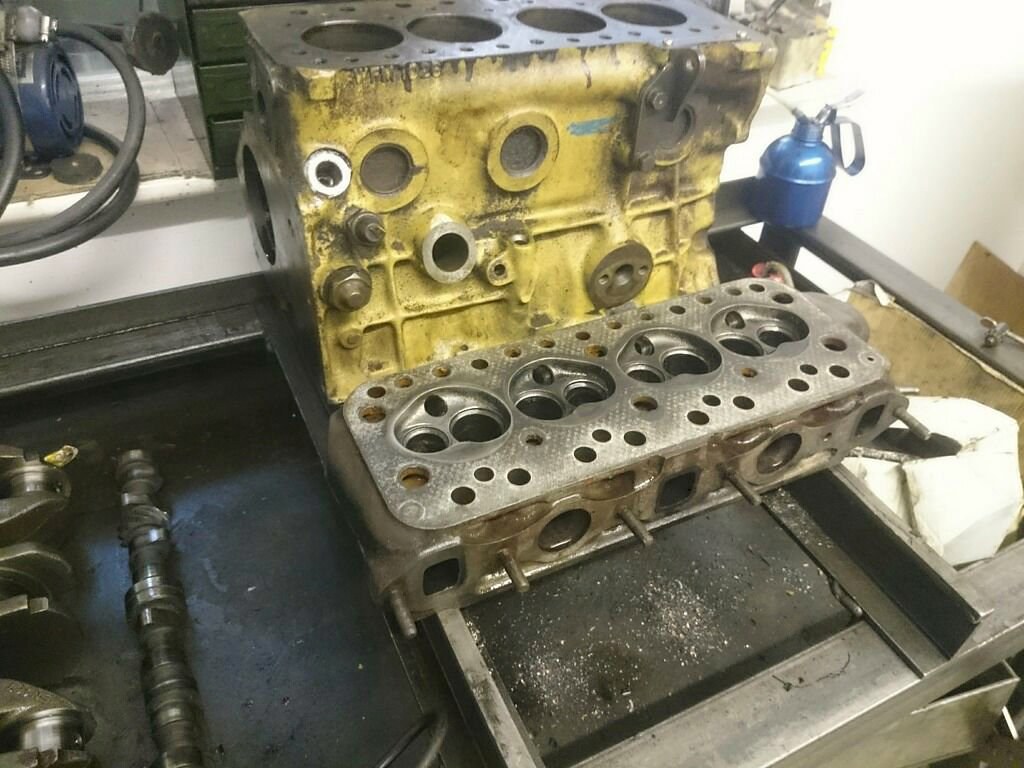
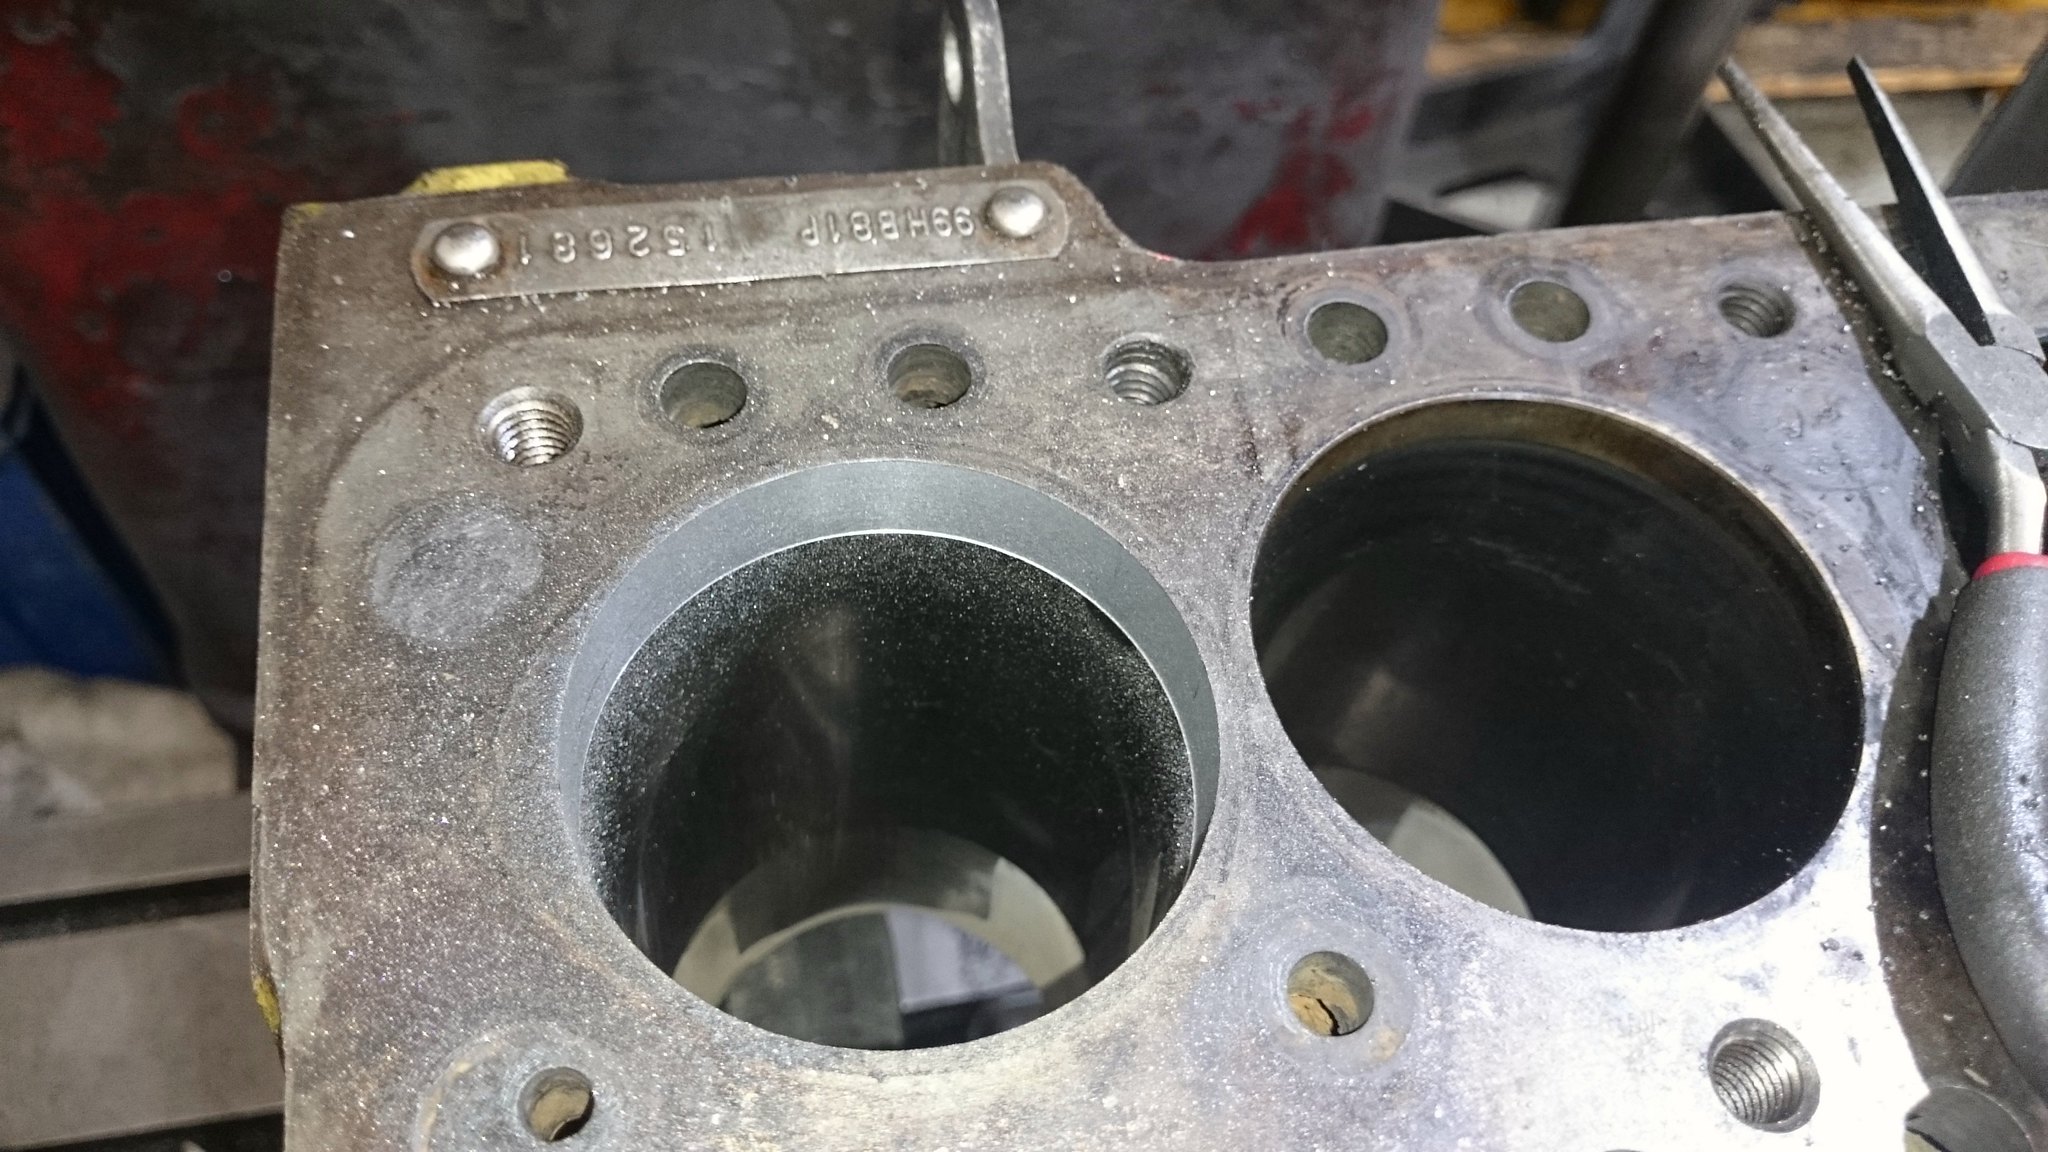
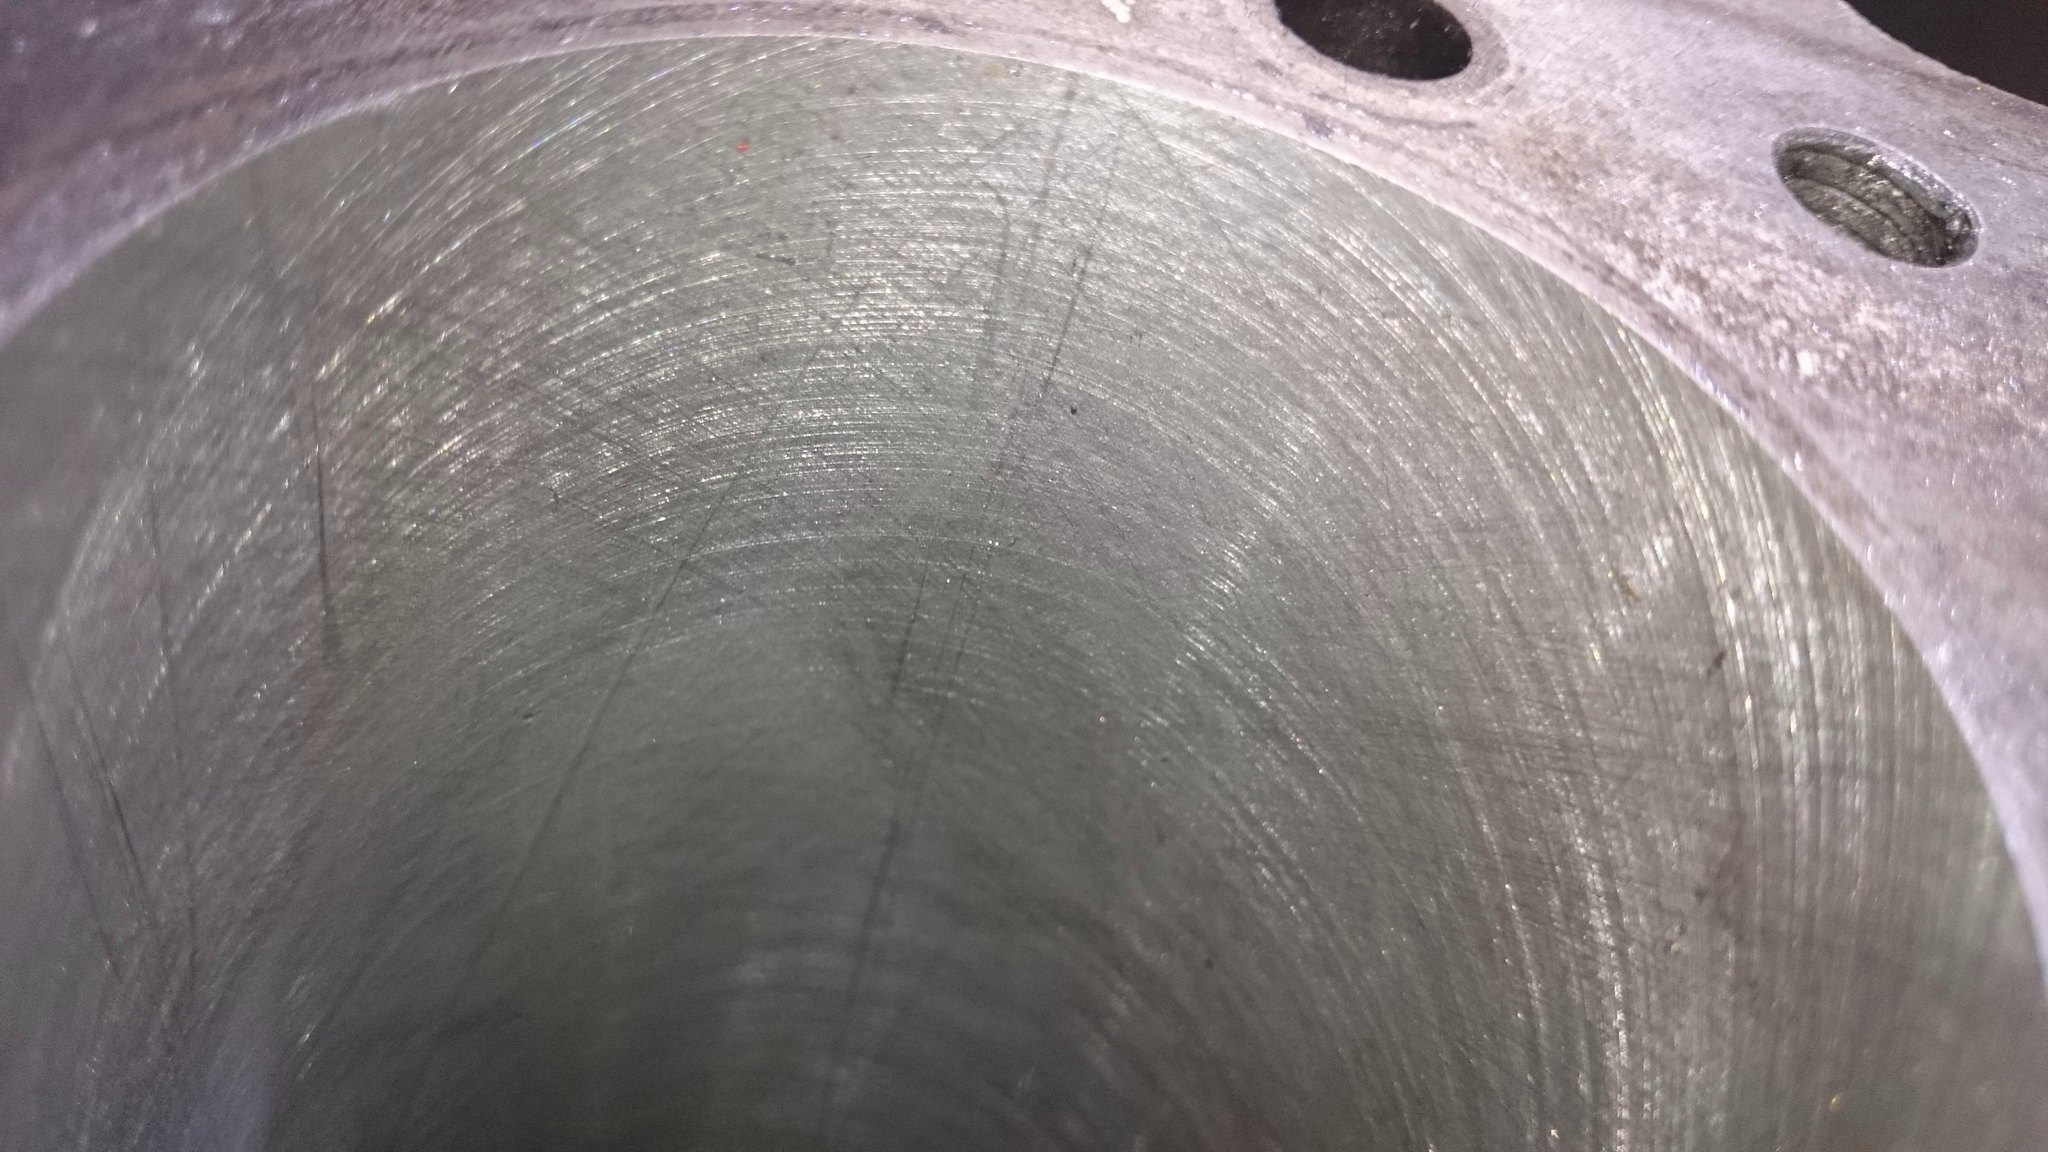
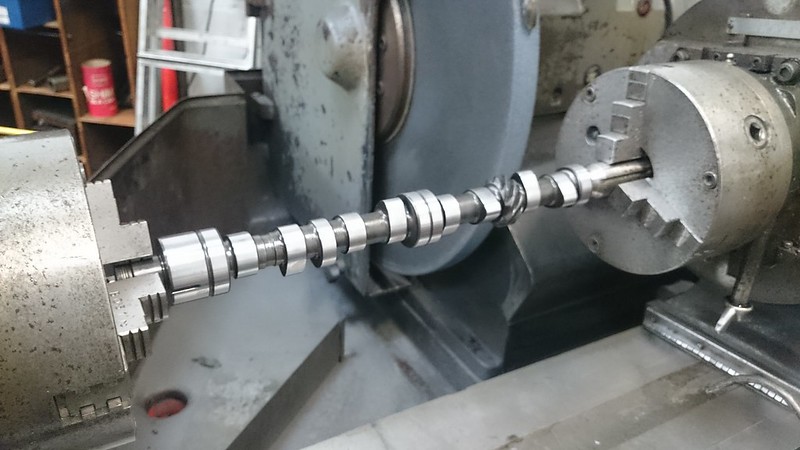
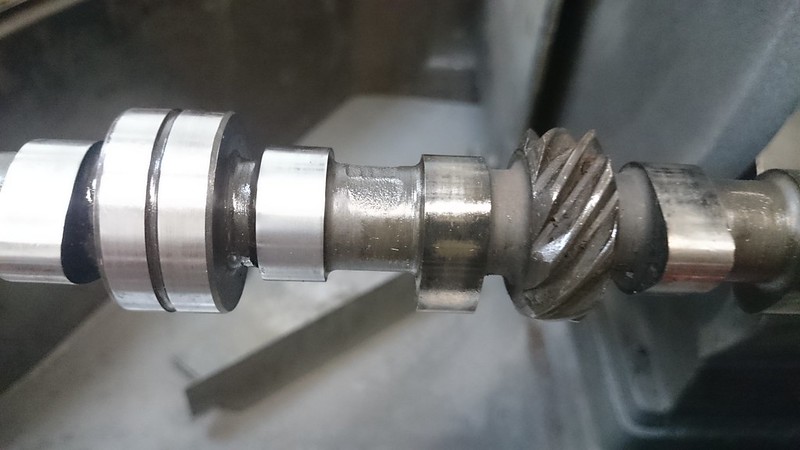
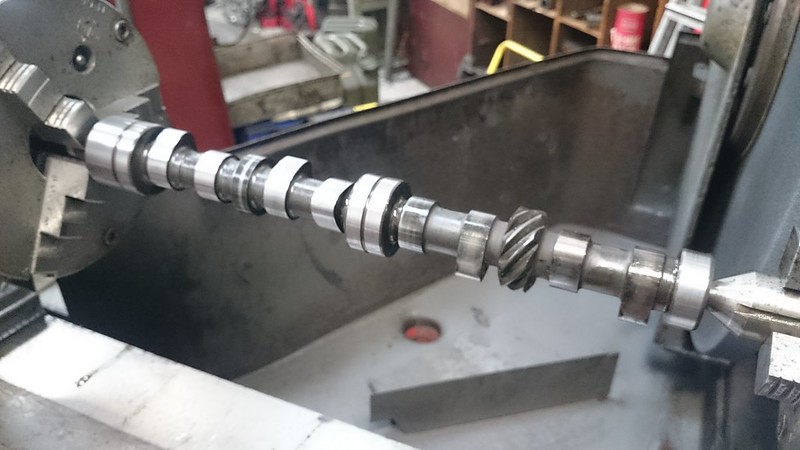
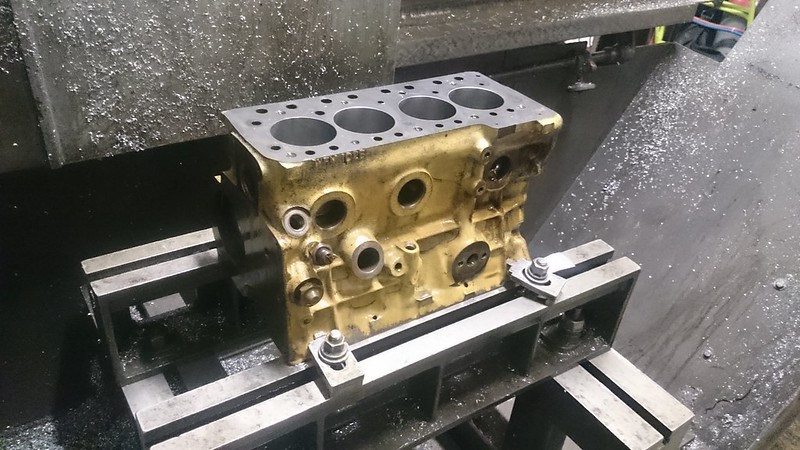
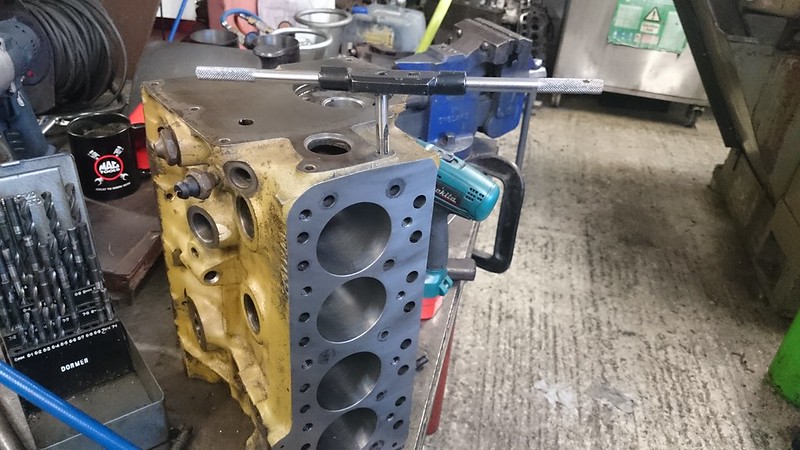
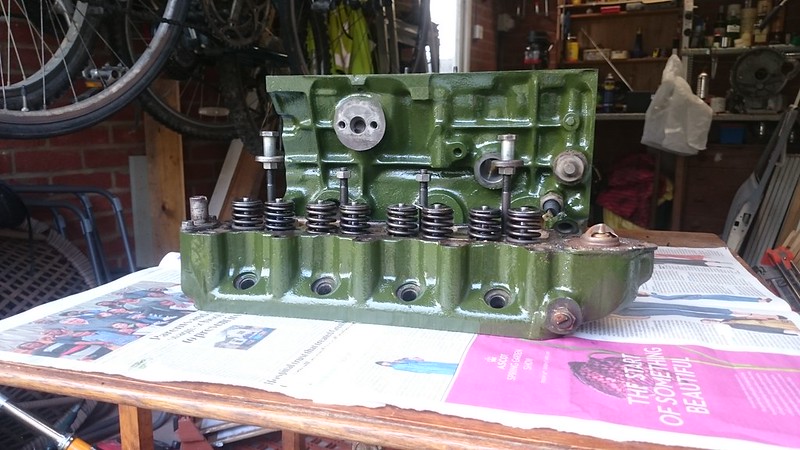
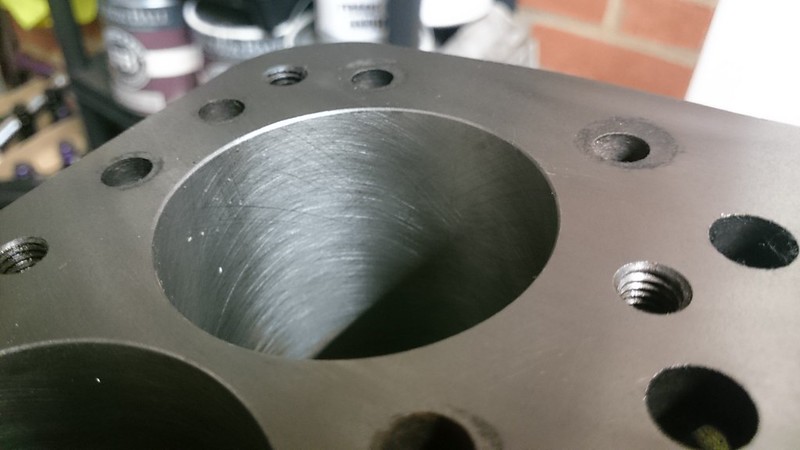
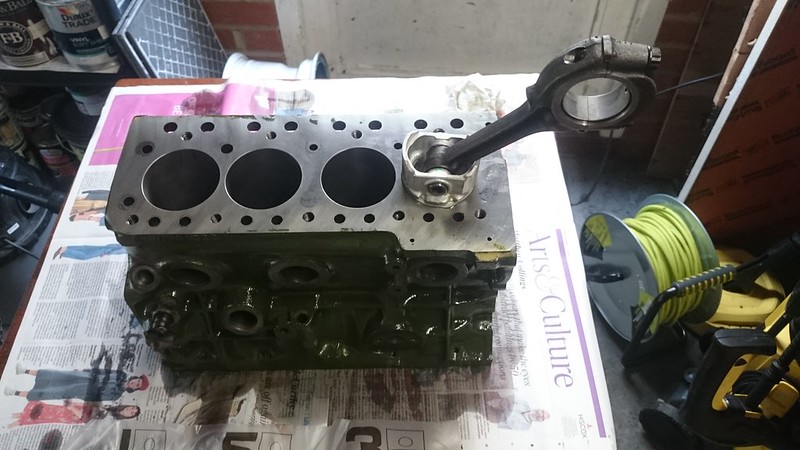
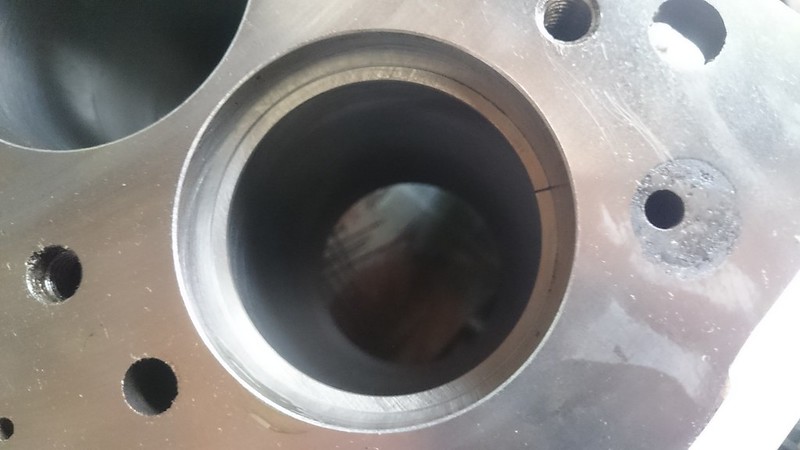
So far I have got to the point where I have the block and box split and the block stripped completely of everything other than crank, conrods and pistons.


35407210964_a066017b8e_b.jpgMini by Max Dempsey, on Flickr


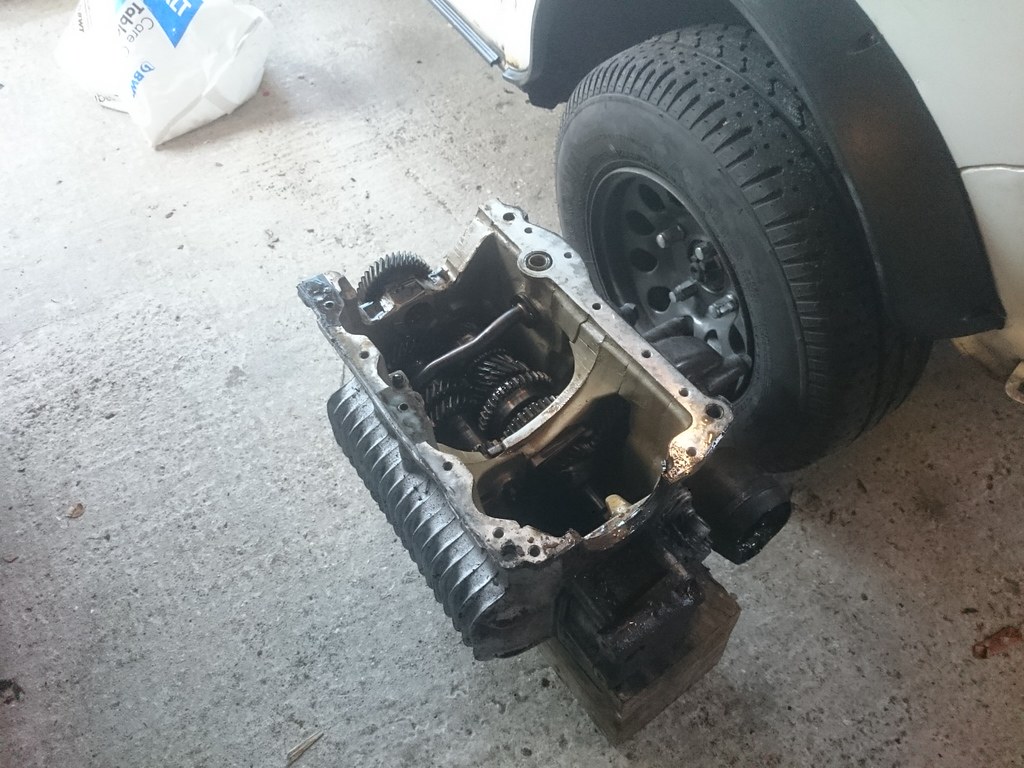
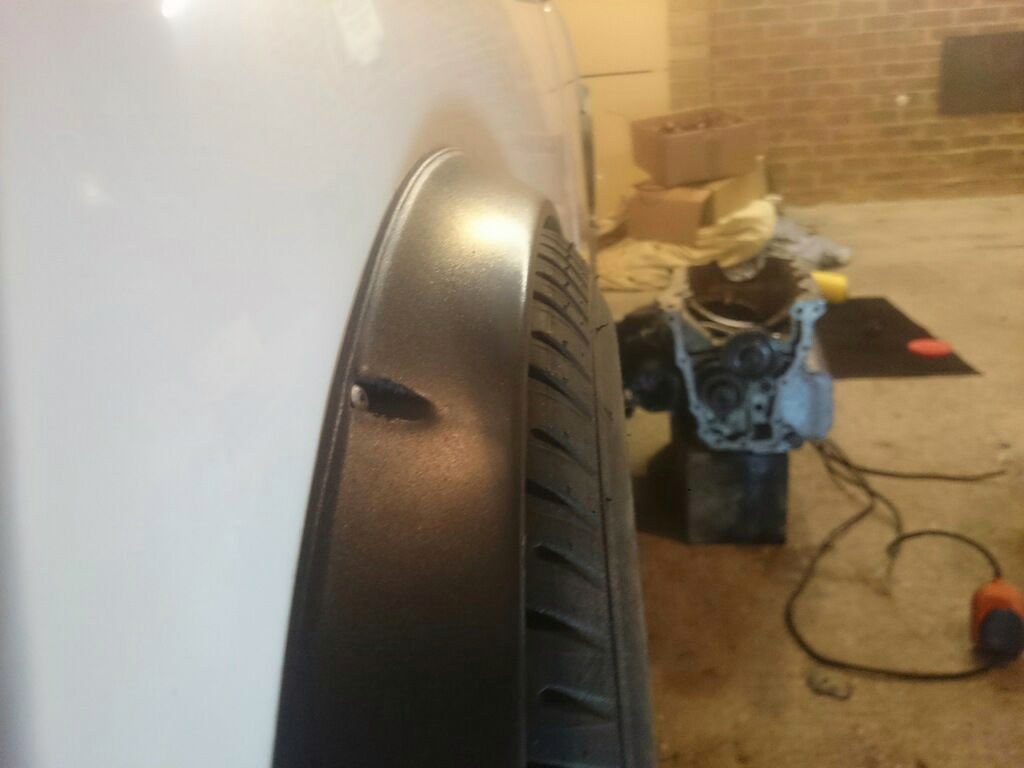
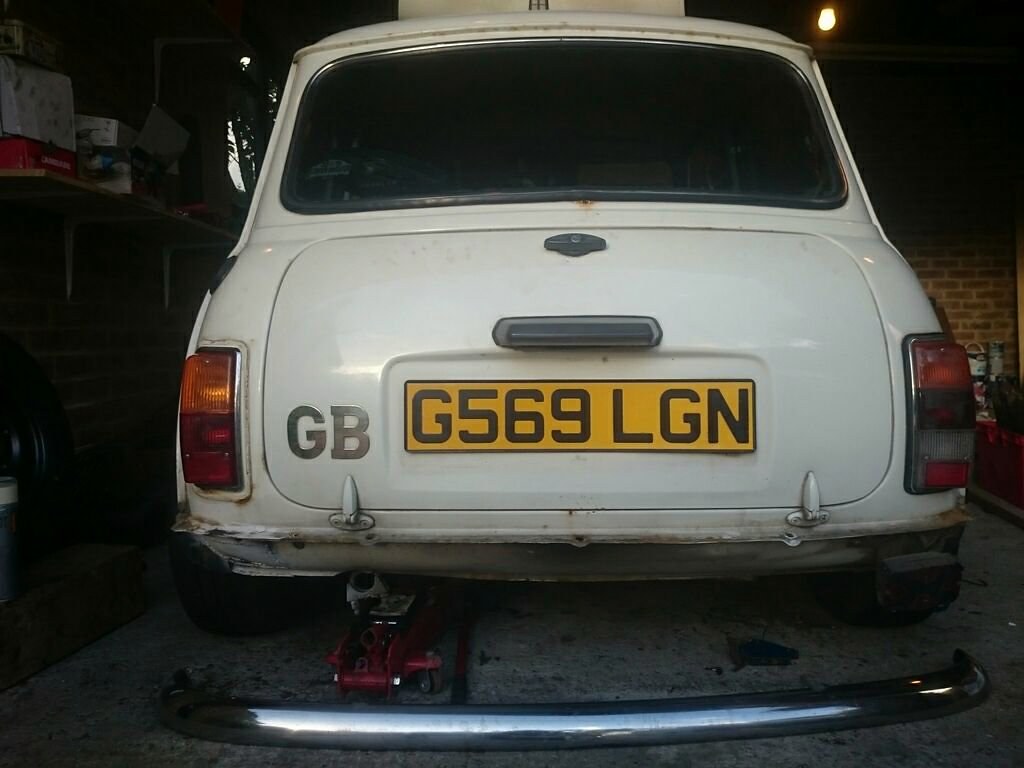
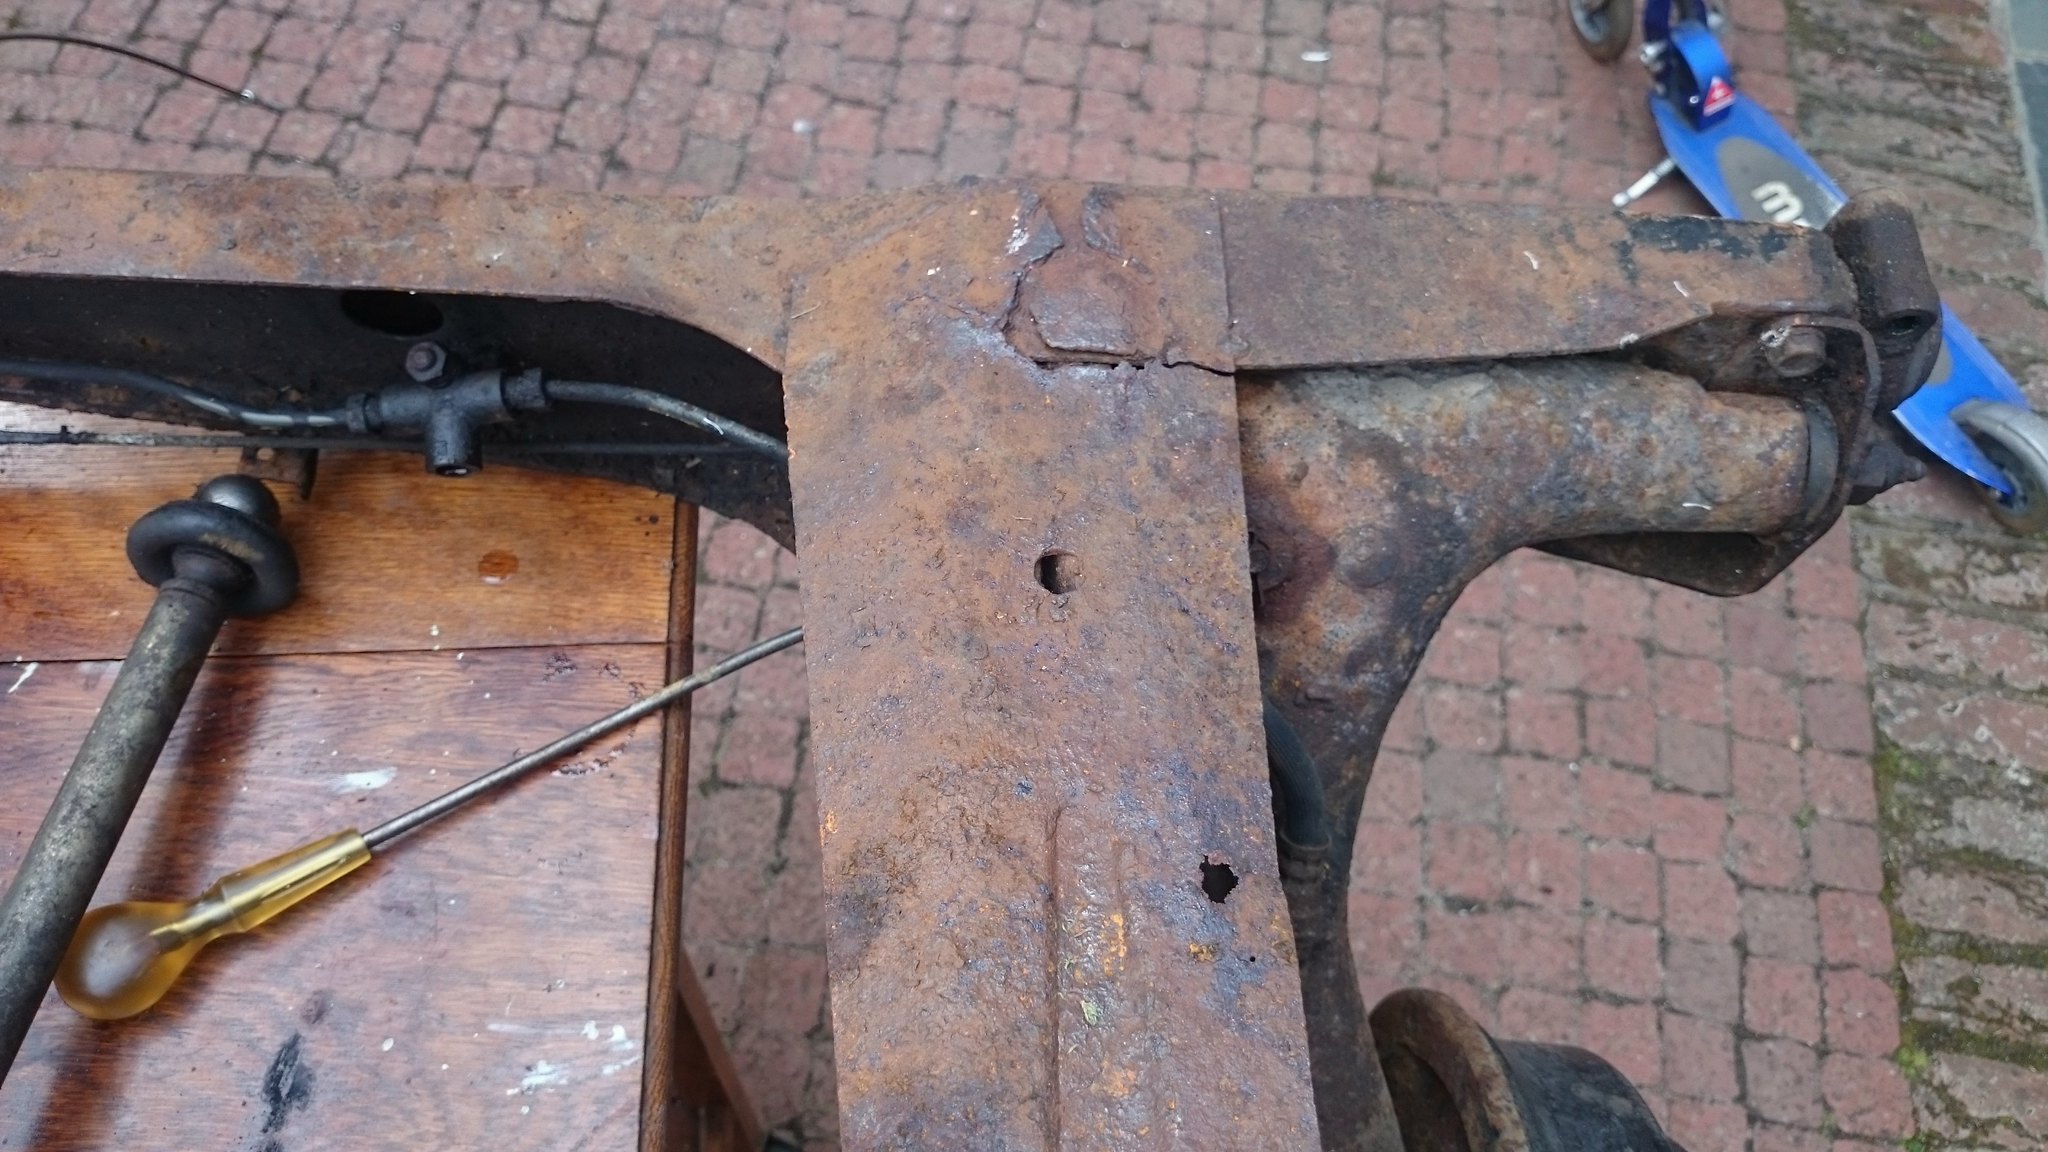
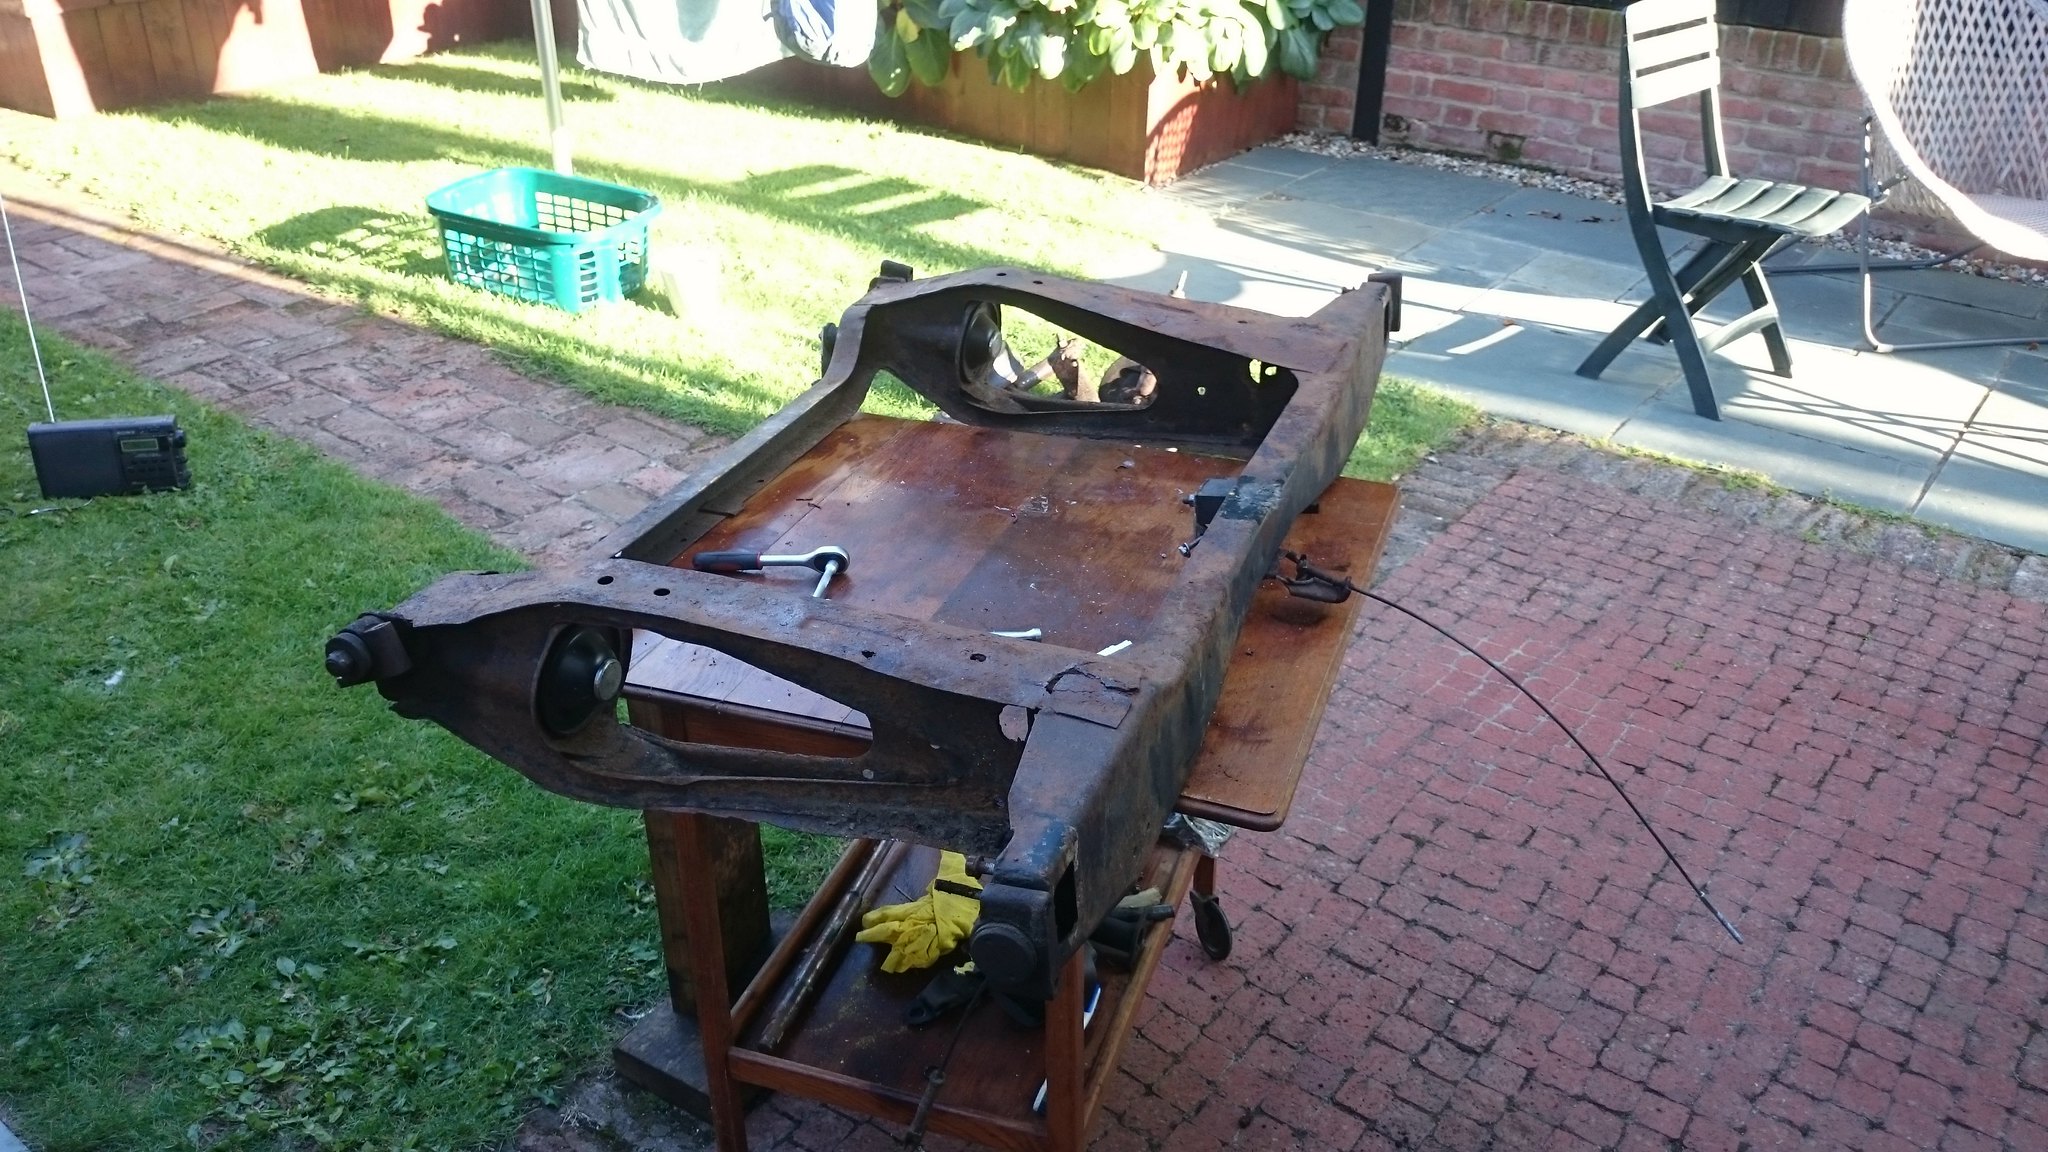
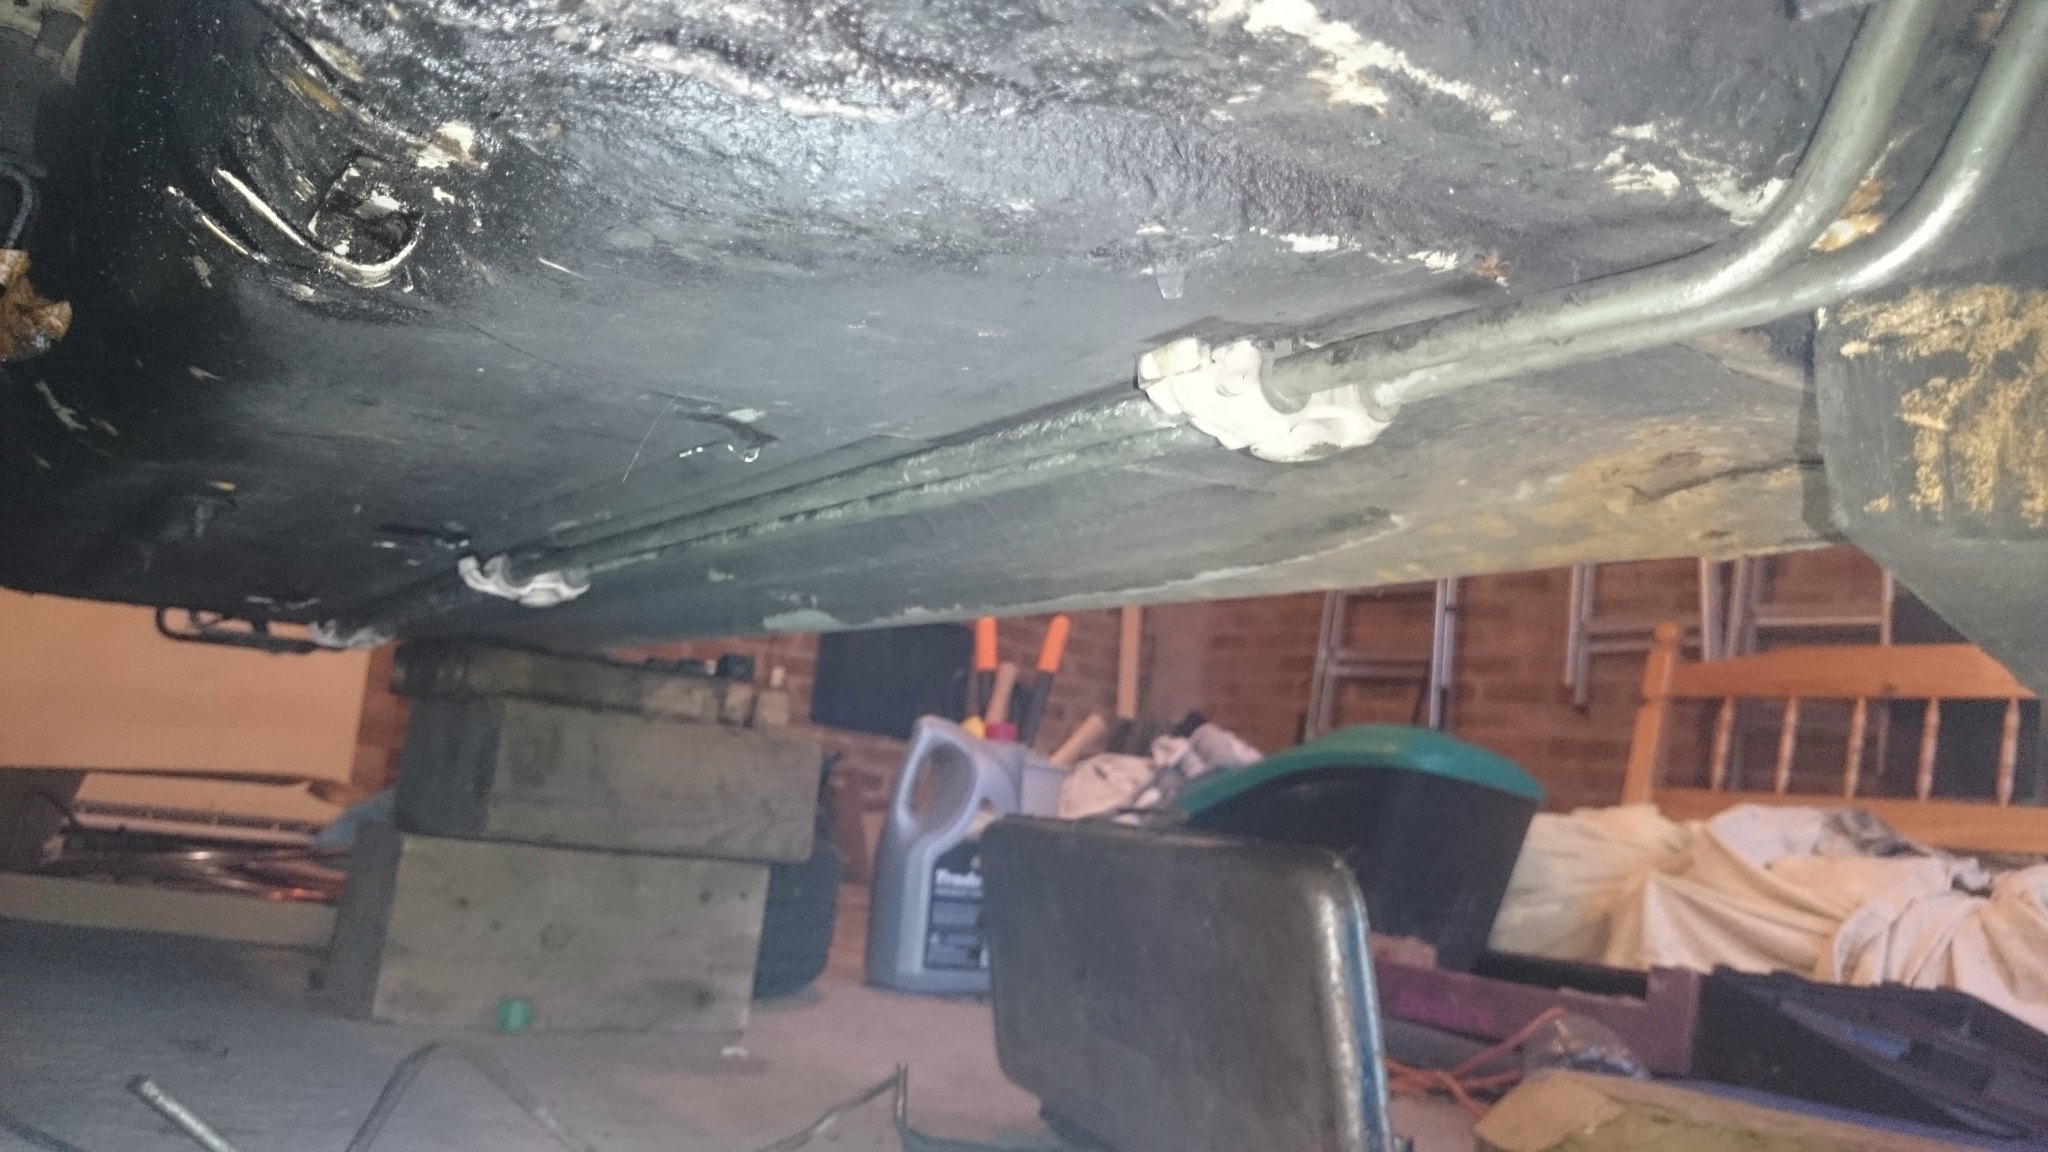
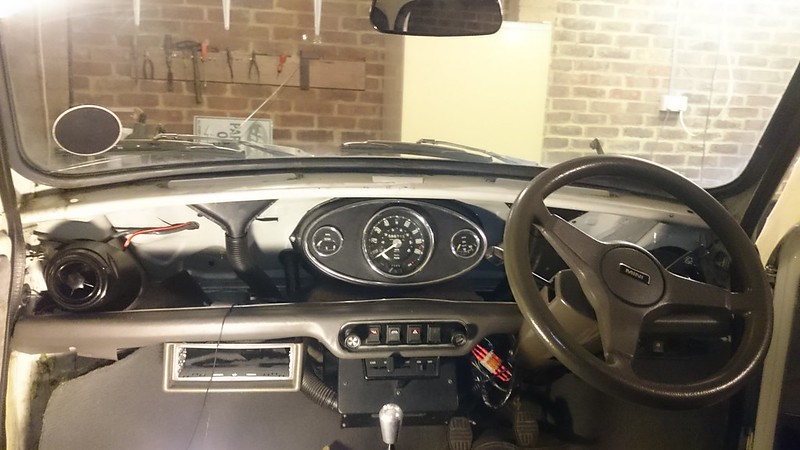
My wheel gap was always pretty big but this picture of the box shows how shocking it is with out an engine >_<


35848377920_a9e241e29d_b.jpgMini by Max Dempsey, on Flickr


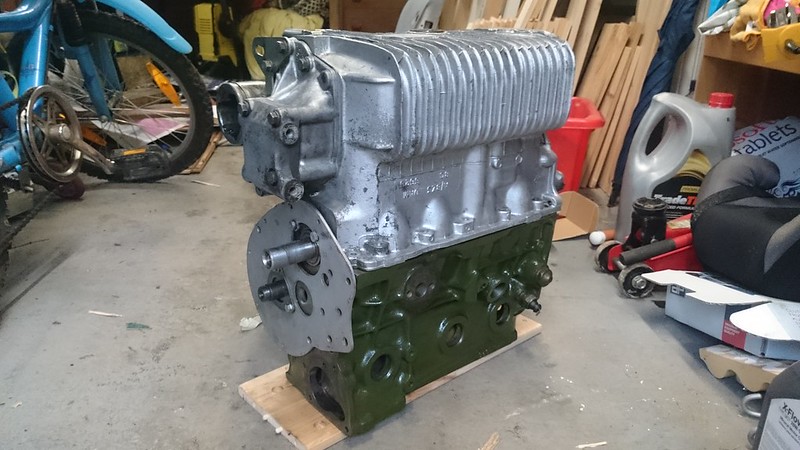
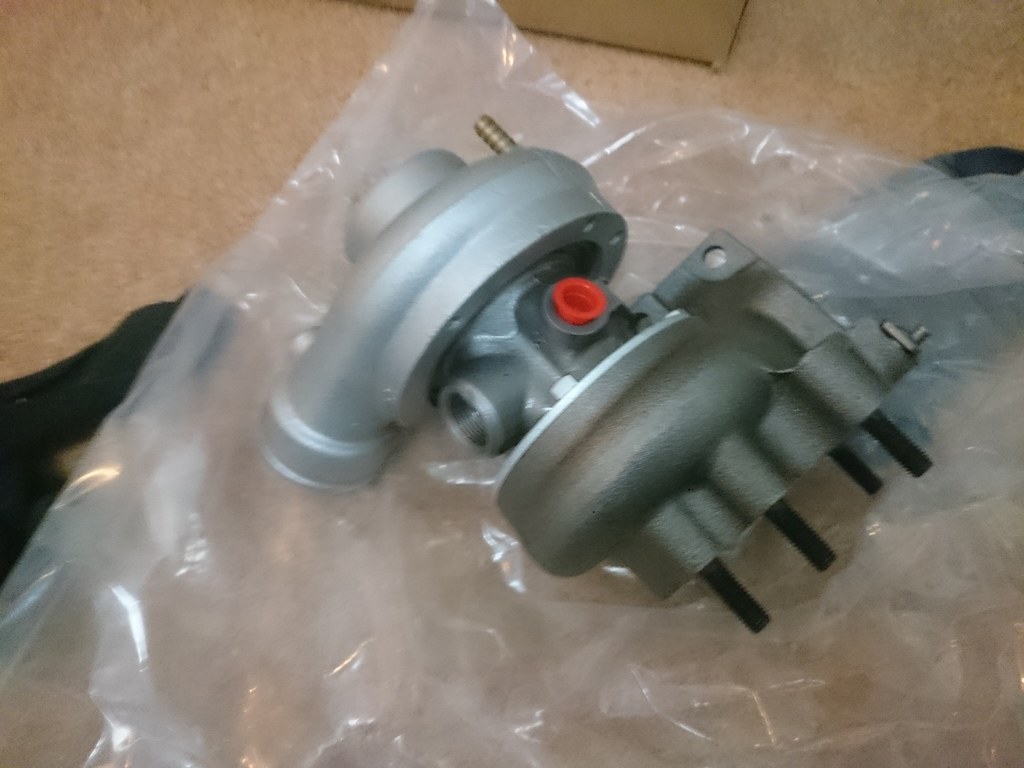
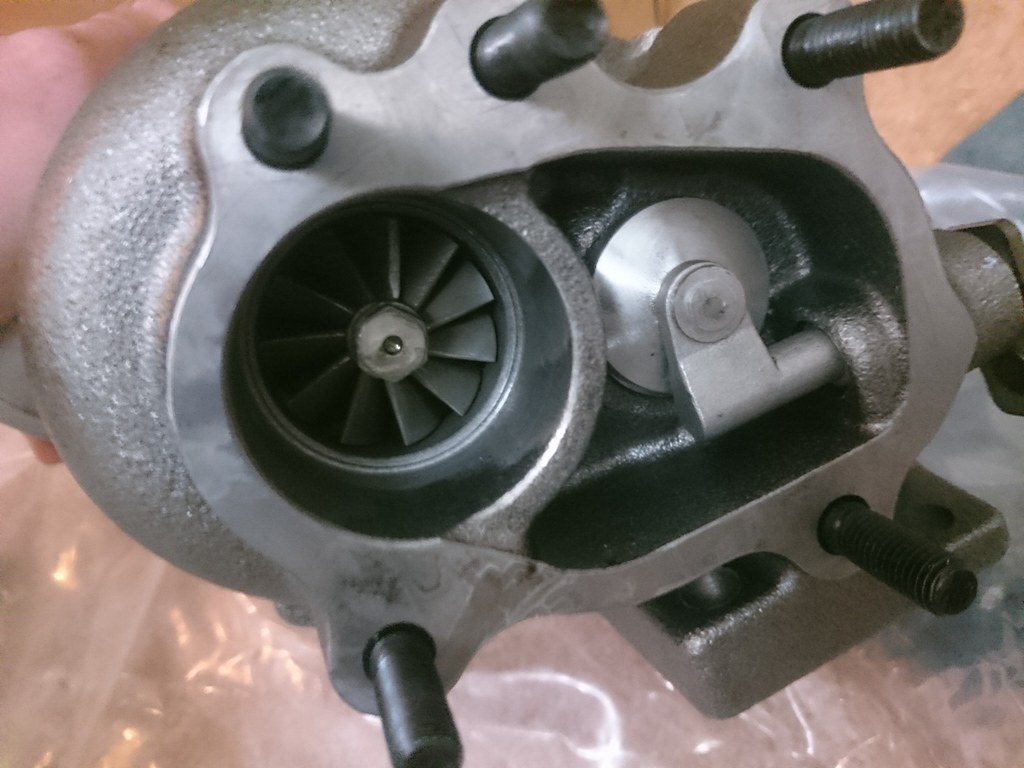
I also got my turbo rebuilt which has taken most of money but has come back like new with a new compressor housing.


35435592883_bd481e769e_b.jpgMini by Max Dempsey, on Flickr


36074214442_77a2ba1499_b.jpgMini by Max Dempsey, on Flickr


Hopefully I'll get the block fully stripped and then I can start looking at and measuring everything to see what needs doing and deciding how far to go.


Edited by MaxDempsey, 28 August 2017 - 09:06 PM.


#32 MaxDempsey

MaxDempsey

    Mini Mad

  • Noobies
  • PipPipPipPip
  • 136 posts
  • Location: Essex

Posted 11 June 2017 - 06:53 PM

Small update on the little progress I have made on the turbo, found a rust patch in the boot underneath the fuel tank so I have been spending my time attempting to weld that up, won't show any photos of that as the welding is far from pretty  :lol:


In college we were learning about gearbox's and I suggested that we rebuilt mine to help us learn and my tutor agreed to it which was a result as he has rebuilt loads of Mini gearbox's over the years. The mainshaft bearings cage had broken which would explain the rattle I had with the clutch not depressed. The gearbox had all new bearings and baulk rings and I cleaned the case in my works wash tank and it came up well for just a quick go in it.


35435753153_e2495af189_b.jpgMini by Max Dempsey, on Flickr


I also fitted a minispares cross pin diff which was also built at college during our differential unit  :proud:


36074328212_02768cc8e1_b.jpgMini by Max Dempsey, on Flickr


I picked up a 12g295 fairly cheap on ebay but was unsure whether it had been skimmed or not, I got home and used a syringe and piece or perspex the measure the combustion chambers and it seems to be not skimmed which I really pleased with.


36043596924_042df56299_b.jpg2017-08-28_10-09-46 by Max Dempsey, on Flickr


I then stripped the head as the exhaust valve seats are knackered and I want to fit unleaded inserts anyway.


36481399800_272f534df2_b.jpg2017-08-28_10-10-06 by Max Dempsey, on Flickr


Finally I put the block in the wash tank and it came up fairly nicely but its getting a coat of paint anyway before it is refitted.

The block is fairly worn so is being bored out to +30 and I have bought a set of flat top pistons which should take  the CR to around where I want it. The crank is also getting a regrind to +10 on the mains and big ends as it too is worn.


36481407430_0927f2fd51_b.jpg2017-08-28_10-10-19 by Max Dempsey, on Flickr


Apart from that I have just been cleaning up parts and doing some work to the car such as fitting rear hilos. I wound them right down and I wish I could run it this low but I don't think the arches would last very long  :lol:


36481440240_78c4cfb7c1_b.jpg2017-08-28_10-12-17 by Max Dempsey, on Flickr


I also have fitted one mk2 style light (bought one really cheap but not the other yet). Only a trail fit for the moment as I don't have the seal but I prefer the look of them to standard. I need to get it in soon though so I can fit my MPI fuel tank and start routing fuel lines and pump wiring. Pretty happy with how the rear is sitting now.


36706755222_0a5478a408_b.jpg2017-08-28_10-12-50 by Max Dempsey, on Flickr


Hopefully have another update soonish with some more achieved.


Edited by MaxDempsey, 28 August 2017 - 09:13 PM.


#33 Will16

Will16

    Wants a custom member title

  • Members
  • PipPipPipPipPipPipPip
  • 1,090 posts
  • Location: Abingdon, Oxfordshire

Posted 11 June 2017 - 09:48 PM

Glad to see your getting stuck into this man, nice work so far  :thumbsup: 


p.s. keep it that low  ;D


#34 Vinay-RS

Vinay-RS

    Put's foolish ideas in peoples heads

  • Members
  • PipPipPipPipPipPipPipPipPip
  • 2,093 posts
  • Location: Cape Town

Posted 12 June 2017 - 08:52 AM

Looks sweet with the lowered ride height. Love the mkII taillights. Definitely more retro than mkIII lights. 


#35 MaxDempsey

MaxDempsey

    Mini Mad

  • Noobies
  • PipPipPipPip
  • 136 posts
  • Location: Essex

Posted 28 August 2017 - 09:30 PM

Just spent ages sorting out all of my old photobucket photos, can't imagine what people with bigger threads are going to do as my was enough of a pain. Thought it was time for another update, still feel like I'm going backwards at the moment but the car is almost ready to start going back together.

Pushed it out the garage to have a sort out and it now looks like a gasser  :lol:


36738171291_3b37af798b_h.jpg2017-08-28_10-18-07 by Max Dempsey, on Flickr


I then bought some fuel lines at MITP from an Mpi to fit, i was originally going to use a rubber line going underneath the rear subby but when I got down there I decided that since the engine was gonna be a while until it was done I might as well remove the subframe and route the lines like factory. Removing the subframe went well apart from one captive nut in the heel board breaking loose. I then cut a small hole in the passenger pocket to retrieve it. Don't think it would have ever come undone. 


36877914345_38debba3eb_k.jpg2017-08-28_10-16-50 by Max Dempsey, on Flickr


36738151241_a4b0fe9a62_z.jpg2017-08-28_10-17-00 by Max Dempsey, on Flickr


I then set to work wire wheeling the frame to clean it up and give it a lick of paint. Problem was the metal kept disapearing until I was left with this.


36481500350_5ff2c4c4cf_k.jpg2017-08-28_10-15-50 by Max Dempsey, on Flickr


Found a bloke at MITP who refurbs gen frames so I'm gonna get myself one of them or refurb my own.  >_<


So now it is all stripped, annoyingly it is like new on the inside and everywhere else apart from two points.


36877908845_ee05873173_k.jpg2017-08-28_10-16-27 by Max Dempsey, on Flickr


I also went to the machine shop and bored my block out to +40. I was taught on one cylinder then bored and honed the rest myself which I'm really pleased with. The engine may take some time to be ready since i'm only doing it on days off but I'd rather learn to do it myself.


36706830622_b69344e428_k.jpg2017-08-28_10-15-01 by Max Dempsey, on Flickr


36706846452_4be92962bd_k.jpg2017-08-28_10-15-15 by Max Dempsey, on Flickr


Finally I dropped the rear of the front subframe and sort of dropped (lowered a bit  :lol: ) the steering rack and ran the injection fuel lines. Looks really neat with the Mpi lines so thanks to Will16 for that suggestion. 


36706857282_7355e3dc76_k.jpg2017-08-28_10-15-32 by Max Dempsey, on Flickr


Seeing the cars at MITP really made me want to get this done but as you can tell its slow going as I'm short on money, time and skill  :D


Edited by MaxDempsey, 28 August 2017 - 09:43 PM.


#36 leadly

leadly

    One Carb Or Two?

  • Members
  • PipPipPipPipPipPipPip
  • 779 posts
  • Location: Derby
  • Local Club: [] D.C.M.O.C []

Posted 29 August 2017 - 07:07 PM

Your making some good progress now pal. Keep it up!!


#37 MaxDempsey

MaxDempsey

    Mini Mad

  • Noobies
  • PipPipPipPip
  • 136 posts
  • Location: Essex

Posted 27 March 2018 - 04:55 PM

Didnt realise how long it has been since I last updated this, progress has been slow since my old daily, £50 fabia, took lots of my time to keep on the road for work. Now bought a new daily, a 2006 Seat Ibiza FR PD130 which is a huge upgrade but cost a lot more than £50 so I was too broke to do much. :lol:


From the last update I have bought a new (to me) genuine subframe and fit that to the car, everything from the old frame was removed, painted black and put back. Not the prettiest but much better than it was and now the car is finally on four wheels again.


40160655675_b0acf52f6c_c.jpgDSC_0164 by Max Dempsey, on Flickr


26182771327_c24fbe93f2_c.jpgDSC_0167 by Max Dempsey, on Flickr


27182329838_de51a73416_c.jpg2018-03-27_05-41-21 by Max Dempsey, on Flickr


More low planned.


Engine wise I've been down the engine builders today and I have ground the crank 0.010" on the mains and big ends and polished it.


40345120254_1d1f7641ab_c.jpgDSC_0515 by Max Dempsey, on Flickr


I have also polished the MG Metro camshaft.


40345131574_a190a48895_c.jpgDSC_0523 by Max Dempsey, on Flickr


Polished lobe next to original condition when I bought it.


40160655935_ddac3ee8f0_c.jpgDSC_0521 by Max Dempsey, on Flickr


26182773357_5b85eefb7f_c.jpgDSC_0518 by Max Dempsey, on Flickr


Next I installed the new cam bearings which became a bit of a headache as the cam has 0.002" of bow in it.


40160670655_c0613fbf4a_c.jpgDSC_0529 by Max Dempsey, on Flickr


26182780647_1f9fac2d9a_c.jpgDSC_0530 by Max Dempsey, on Flickr


My next job is to send off the crankshaft and the clutch stuff to get balanced as I don't want to do all the work for a vibrating engine. The plan is to run the engine in NA with the standard head and manifolds with a distributor partly the give the engine an easy break in period but mainly because I can't afford the mapable ignition yet  >_< Hopefully it will then become more of a rolling project because I am sick of having it off the road.


Finally I did a centre speedo conversion which imediatly made my car 20000 miles older but looks much better imo and with that grim standard steering wheel gone it'll look 100 times better.


41011730622_9ebbec189a_c.jpgDSC_0478 by Max Dempsey, on Flickr


I went to Brooklands last weekend for the first time and I thought it was a great show, good to meet some new people and catch up with others. It  really made me want to have the car done for this years shows so hopefully a few more updates more frequently in the future but I wouldn't hold your breath  :lol: .


Edited by MaxDempsey, 27 March 2018 - 05:00 PM.


#38 johnR

johnR

    Up Into Fourth

  • Members
  • PipPipPipPipPipPipPipPipPip
  • 2,244 posts
  • Location: Dorset

Posted 27 March 2018 - 07:06 PM

Great to have the chance to do your own machining as you go - have you tried Imgur for photohosting - I can't see all of yours.

#39 MaxDempsey

MaxDempsey

    Mini Mad

  • Noobies
  • PipPipPipPip
  • 136 posts
  • Location: Essex

Posted 27 March 2018 - 09:26 PM

Great to have the chance to do your own machining as you go - have you tried Imgur for photohosting - I can't see all of yours.

Yeah it means it takes a little longer but definitely worth it. And ffs just transferred them all to flikr from pb >_< , ill look into it 


#40 MaxDempsey

MaxDempsey

    Mini Mad

  • Noobies
  • PipPipPipPip
  • 136 posts
  • Location: Essex

Posted 15 April 2018 - 12:11 PM

Another small update. Spent a few evenings down at the engine builders and finished the machining. First I gave the deck a clean up skim, took 3 thou off. Didn't worry about machining it to match piston and deck height due to me wanting to keep the CR low for the boost. The block itself was warped so I had to spend ages clocking it up and using pieces of paper to level it. The bloke at the builders wasn't too worried about it and says it's fairly common.


27598813618_a10a30931d_c.jpgDSC_0548 by Max Dempsey, on Flickr


Then I removed the oil gallery plugs to clean them out went around the block removing any broken studs and helicoiling damaged threads.


39661491830_4727be0740_c.jpgDSC_0560 by Max Dempsey, on Flickr


I then threw a coat of paint on the block and on my old standard head which I'm using while its running NA.


39661491660_28a3b4f006_c.jpgDSC_0568 by Max Dempsey, on Flickr


I've also just checked the ring gap which were all above the minimum without any work needed.


27598814708_800401c14f_c.jpgDSC_0562 by Max Dempsey, on Flickr


41427154992_046e844fb4_c.jpgDSC_0570 by Max Dempsey, on Flickr


40576995635_b71f871b45_c.jpgDSC_0572 by Max Dempsey, on Flickr


The crank has just been sent off for balancing so should hopefully be back next week ready to be built up.


26598883017_6bd14262fc_c.jpg2018-04-15_01-10-19 by Max Dempsey, on Flickr


#41 johnR

johnR

    Up Into Fourth

  • Members
  • PipPipPipPipPipPipPipPipPip
  • 2,244 posts
  • Location: Dorset

Posted 15 April 2018 - 08:43 PM

Coming on well now - once you've got all the parts back it'll soon come together.


#42 MaxDempsey

MaxDempsey

    Mini Mad

  • Noobies
  • PipPipPipPip
  • 136 posts
  • Location: Essex

Posted 15 April 2018 - 09:04 PM

Coming on well now - once you've got all the parts back it'll soon come together.

Im hoping so as I'm still pushing to have it running and on the road NA by L2B  :ohno:


#43 MaxDempsey

MaxDempsey

    Mini Mad

  • Noobies
  • PipPipPipPip
  • 136 posts
  • Location: Essex

Posted 28 April 2018 - 05:53 PM

Finally feel like I've made some good progress on this today. Got the crankshaft back from balancing which was all that was stopping me from getting the engone together. First I had to remove the flywheel off its taper which didn't go well  O_O. Was working on an old flat pack table in the garage and giving the puller a fair bit of oomph and pushing my weight on the crank to keep it still. The table then flat packed itself and the crank started falling. I decided after the money and time I've spent on it it was a good idea to catch it. The timing chain end fell on my leg which was fine but the flywheel and ring gear managed to squash my thumb between themselves and the floor which ended up in a trip to a doctor who lives next door to get cleaned up. So that made friday night a write off for any work on the engine. Luckily since my thumb took the force the crank and flywheel assembly are okay  :proud:


Heres the carnage  :lol:


41761735191_0c2e24280d_c.jpgDSC_0757 by Max Dempsey, on Flickr


Anyway today I started assembling properly, first putting the crank in and measuring end float, about 3 thou.


41720197362_9ed72ceff6_c.jpgDSC_0759 by Max Dempsey, on Flickr


Next I fitted the pistons and rods without rings to check it still spun freely, mainly because I was so paranoid about any bow in the crank after my accident.

All was fine so i then finally fitted them with rings on.


41720197182_e9c7ae4760_c.jpgDSC_0764 by Max Dempsey, on Flickr


Next the oil pump which I primed with engine oil.


41720201962_4065ba5a0f_c.jpgDSC_0766 by Max Dempsey, on Flickr


Then the cam went in before fitting the engine plate and cam thrust plate.


27892470228_1501d66ef5_c.jpgDSC_0767 by Max Dempsey, on Flickr


Then I dropped the gearbox on top of it all.


40862344995_757a99f38d_c.jpgDSC_0770 by Max Dempsey, on Flickr


This is how it sits now. I quickly whacked in cam followers and called it a day, hope to get some more done tomorrow.


40862344845_9093ace3a9_c.jpgDSC_0772 by Max Dempsey, on Flickr


#44 hazpalmer14

hazpalmer14

    Super Mini Mad

  • Members
  • PipPipPipPipPipPip
  • 682 posts
  • Local Club: cumbria mini cruisers

Posted 29 April 2018 - 09:26 AM

If this is going turbo have you work out the compression ratio? As most people use dished pistons.

#45 MaxDempsey

MaxDempsey

    Mini Mad

  • Noobies
  • PipPipPipPip
  • 136 posts
  • Location: Essex

Posted 29 April 2018 - 09:31 AM

If this is going turbo have you work out the compression ratio? As most people use dished pistons.

I'm using a non skimmed 12g295 which has 28.6cc chambers which will take the compression low enough to safely run 10psi (will probably end up as more)


0 user(s) are reading this topic

0 members, 0 guests, 0 anonymous users