Jump to content


Photo

Cutting, Polishing And Protecting Cellulose Paint


  • Please log in to reply
18 replies to this topic

#1 JonnyAlpha

JonnyAlpha

    Up Into Fourth

  • Members
  • PipPipPipPipPipPipPipPipPip
  • 2,744 posts
  • Location: North Devon
  • Local Club: Exmoor Minis

Posted 18 August 2016 - 10:23 AM

OK so I finished painting the main bodywork of my mini about a month ago and now before I start to rebuild the car (putting on all the trim and fitting the glass etc) I would like to polish and protect the paint.

I understand that I need to carry out several stages:
1. Flatting and Cutting - To remove any imperfections and create a base for the polish.
2. Polishing - to shine. 
3. Sealing and Glazing - to protect.

Broken down as follows:
1. Wet and Dry - What size grit - 2000? - Is this an optional stage if the finish is OK?
2. Rubbing compound, something like Farecla G3 but which product paste or liquid?
3. Polish - any recommendations?
4. Wax - as above what type?
5. Glaze - is this include in the wax or is it separate?

I applied a couple of coats of Lechler Epoxy and then between 6 and 7 coats of Cellulose. Flatted down between the Epoxy and Colour Coats and then again after the first three coats of Celly, last coat of Celly was applied using about 70% Anti Bloom Thinners.


Can anyone recommend products and a process that I need to follow.

Many Thanks


#2 miniseven61

miniseven61

    Stage One Kit Fitted

  • Noobies
  • PipPipPip
  • 62 posts
  • Location: Hampshire

Posted 18 August 2016 - 06:06 PM

Sounds like a decent amount of paint to play with, flat with the 2000 wet and dry, wet with soap to prevent clogging, just have a bar of soap handy and rub the paper on the soap before flatting the paint, then T,cut with mutton cloth about a square foot at a time, it will take roughly 2 days to do a proper job, you will need a new pair of arms by the time you've finished if you have done it properly. Take care on the sharp edges not to rub through, if you do rub through re-coat before waxing. I use Turtle wax to polish mine, it doesn't seem to take any more paint off.  T,cut is ammonia based so you can't use it on 2k finish. If the 2000 w&d does not take of the imperfections you could go to 1200 w&d with a rubbing block then finish with 2000 w&d. Glad I'm not doing it!


#3 DeanP

DeanP

    Speeding Along Now

  • Members
  • PipPipPipPipPip
  • 499 posts
  • Location: Sutton Coldfield

Posted 18 August 2016 - 06:21 PM

I've used the Simoniz original Carnauba wax, the one that comes in a tin.


Hard work rubbing it in, but it seems to last for ages.


#4 Stu.

Stu.

    One Carb Or Two?

  • Members
  • PipPipPipPipPipPipPip
  • 912 posts
  • Location: My workshop.

Posted 18 August 2016 - 06:43 PM

Sounds ok but I'd start flatting with 1200. Using 2000 you'll be at it for ages. You can finish with 2000 before polishing though.


Lay masking tape over sharp edges and tight radius areas, otherwise youll easilly burn through the celly because when you spray the paint material it stretches out over these areas making the overall thickness thinner than other areas.


If you've not got one yet, buy a 6 stage variable speed power polisher. Hand polishing just isnt effective enough. You need to consider that the more its polished the more durable the paint will be. Its not like 2 pack which is really hard once cured, so you need to rely on a high polish for durability with cellulose.


Go slow and take your time. Dont worry if you go through to the primer in the odd area. A fairly cheap mini 0.8 gun with 40 / 60 paint will spot spray over the area and can easilly be blended into the surrounding paint by polishing. Cant do that with 2 pack can you :lol:


Edited by Stu., 18 August 2016 - 06:44 PM.


#5 miniseven61

miniseven61

    Stage One Kit Fitted

  • Noobies
  • PipPipPip
  • 62 posts
  • Location: Hampshire

Posted 19 August 2016 - 07:50 PM

Unless you are experienced with a power polisher I would do it by hand, it is easy to burn up the paint edges with a polisher, cellulose paint is much softer than 2k. If you wanted to make life a bit easier you could use Farecle' G7 for the initial cutting polish, it's expensive now, about £40 a tin, then T-cut, when polishing do it in forward and back motions, not circular motion.  We hand polished everything years ago before 2k came in. I would rather polish cellulose than 2k. It is time consuming but very rewarding when done, I wouldn't want to do it every day now though. 


#6 spraybeater

spraybeater

    Speeding Along Now

  • Members
  • PipPipPipPipPip
  • 468 posts
  • Location: west yorkshire
  • Local Club: Mcr

Posted 19 August 2016 - 08:55 PM

Unless you are experienced with a power polisher I would do it by hand, it is easy to burn up the paint edges with a polisher, cellulose paint is much softer than 2k. If you wanted to make life a bit easier you could use Farecle' G7 for the initial cutting polish, it's expensive now, about £40 a tin, then T-cut, when polishing do it in forward and back motions, not circular motion.  We hand polished everything years ago before 2k came in. I would rather polish cellulose than 2k. It is time consuming but very rewarding when done, I wouldn't want to do it every day now though. 

Yeah! can still remember cut and polishing black RollsRoyces when I was a 2/3rd year apprentice

very rewarding especially when the owner tipped you 2 shillings when he was pleased with the

job , happy days


#7 Stu.

Stu.

    One Carb Or Two?

  • Members
  • PipPipPipPipPipPipPip
  • 912 posts
  • Location: My workshop.

Posted 20 August 2016 - 09:16 AM

You can easilly protect edges & curves with masking tape to prevent burning through when power polishing. I did explain this. You can't get experience using a power polished without, well .... using one!

#8 JonnyAlpha

JonnyAlpha

    Up Into Fourth

  • Members
  • PipPipPipPipPipPipPipPipPip
  • 2,744 posts
  • Location: North Devon
  • Local Club: Exmoor Minis

Posted 20 August 2016 - 09:43 AM

Thanks for all the advice. I have bought some Farecla G3 and G10 and a Silverline variable speed polisher. Also bought a set of two FMT polishing pads and some Micro Fibre cloths. 

I'll post back the results (if the weather stays dry for a couple of days!!) 


Sounds ok but I'd start flatting with 1200. Using 2000 you'll be at it for ages. You can finish with 2000 before polishing though.


Lay masking tape over sharp edges and tight radius areas, otherwise youll easilly burn through the celly because when you spray the paint material it stretches out over these areas making the overall thickness thinner than other areas.


If you've not got one yet, buy a 6 stage variable speed power polisher. Hand polishing just isnt effective enough. You need to consider that the more its polished the more durable the paint will be. Its not like 2 pack which is really hard once cured, so you need to rely on a high polish for durability with cellulose.


Go slow and take your time. Dont worry if you go through to the primer in the odd area. A fairly cheap mini 0.8 gun with 40 / 60 paint will spot spray over the area and can easilly be blended into the surrounding paint by polishing. Cant do that with 2 pack can you :lol:


I think I have some 12 or 1500 - that;s what I was going to use for my flatting before polishing.

Couple of spots that may need a touch up (bugs landing on wet paint!!)


Unless you are experienced with a power polisher I would do it by hand, it is easy to burn up the paint edges with a polisher, cellulose paint is much softer than 2k. If you wanted to make life a bit easier you could use Farecle' G7 for the initial cutting polish, it's expensive now, about £40 a tin, then T-cut, when polishing do it in forward and back motions, not circular motion.  We hand polished everything years ago before 2k came in. I would rather polish cellulose than 2k. It is time consuming but very rewarding when done, I wouldn't want to do it every day now though. 


If doing it by hand what cloths would you recommend, Halfrauds sell a selection?


You can easilly protect edges & curves with masking tape to prevent burning through when power polishing. I did explain this. You can't get experience using a power polished without, well .... using one!


Yes noted that tip - I have some 1 inch tape ready for all the edges, I have also been watching a couple of instructional videos on Youtube:


#9 Ben_O

Ben_O

    Mill Road Garage

  • Paint Doctor
  • PipPipPipPipPipPipPipPipPipPip
  • 9,781 posts
  • Location: Isle of Wight

Posted 20 August 2016 - 10:35 AM

Little tip for the polishing machine, hold on tight when first using and be very careful near edges as it can catch and shread the sponge head or worse, rip the machine out of your hand.


Practice on flat open areas first, just use the weight of the machine with mild pressure and work slowly and evenly back and forth. Not too slow though or the paint can get a bit hot.


Keep the sponge head damp with water at all times and just keep going until the polish is fully worked in.


Good luck


Ben


#10 JonnyAlpha

JonnyAlpha

    Up Into Fourth

  • Members
  • PipPipPipPipPipPipPipPipPip
  • 2,744 posts
  • Location: North Devon
  • Local Club: Exmoor Minis

Posted 20 August 2016 - 02:27 PM

Little tip for the polishing machine, hold on tight when first using and be very careful near edges as it can catch and shread the sponge head or worse, rip the machine out of your hand.


Practice on flat open areas first, just use the weight of the machine with mild pressure and work slowly and evenly back and forth. Not too slow though or the paint can get a bit hot.


Keep the sponge head damp with water at all times and just keep going until the polish is fully worked in.


Good luck


Ben


Thanks Ben - I didnt think the G3 needed water? Just looked at the Farecla site and found this  - so it does :-)


Edited by JonnyAlpha, 20 August 2016 - 02:29 PM.


#11 Ben_O

Ben_O

    Mill Road Garage

  • Paint Doctor
  • PipPipPipPipPipPipPipPipPipPip
  • 9,781 posts
  • Location: Isle of Wight

Posted 20 August 2016 - 02:57 PM

Any cutting compound used with a mop needs water. Not so much for the polish but for the sponge to stop it scorching the paint.


What you don't want to do is soak it or use too much compound at any time or you will get millions of tiny flecks of polish fly everywhere and get in everywhere. 


If i am machine polishing a car that is assembled, i cover all trims and glass with masking paper as the compound is a pain to get off of plastic trims etc.


Ben


#12 JonnyAlpha

JonnyAlpha

    Up Into Fourth

  • Members
  • PipPipPipPipPipPipPipPipPip
  • 2,744 posts
  • Location: North Devon
  • Local Club: Exmoor Minis

Posted 24 August 2016 - 08:52 AM

Sounds like a decent amount of paint to play with, flat with the 2000 wet and dry, wet with soap to prevent clogging, just have a bar of soap handy and rub the paper on the soap before flatting the paint, then T,cut with mutton cloth about a square foot at a time, it will take roughly 2 days to do a proper job, you will need a new pair of arms by the time you've finished if you have done it properly. Take care on the sharp edges not to rub through, if you do rub through re-coat before waxing. I use Turtle wax to polish mine, it doesn't seem to take any more paint off.  T,cut is ammonia based so you can't use it on 2k finish. If the 2000 w&d does not take of the imperfections you could go to 1200 w&d with a rubbing block then finish with 2000 w&d. Glad I'm not doing it!


Is there such thing as Wet and Dry Soap or is this just a standard domestic bar of soap? (any particular brand to avoid perfume contaminants etc?).

Someone suggested Fairy Liquid?


#13 JonnyAlpha

JonnyAlpha

    Up Into Fourth

  • Members
  • PipPipPipPipPipPipPipPipPip
  • 2,744 posts
  • Location: North Devon
  • Local Club: Exmoor Minis

Posted 24 August 2016 - 09:10 AM

OK so I now have a Silverline variable speed polisher.

A set of FMT polishing sponges with an M14 hook and loop backing plate.

Farecla G3 paste and G10 liguid.

Indasa 1200 and 2000 Wet n Dry.


Question about soap in the previous post.


I can borrow a Meguire Sanding Block but just in case I can't get hold of it I have found these or any other recommendations? 


#14 Ben_O

Ben_O

    Mill Road Garage

  • Paint Doctor
  • PipPipPipPipPipPipPipPipPipPip
  • 9,781 posts
  • Location: Isle of Wight

Posted 24 August 2016 - 03:14 PM

Car shampoo is fine.


NOT fairy liquid though


#15 JonnyAlpha

JonnyAlpha

    Up Into Fourth

  • Members
  • PipPipPipPipPipPipPipPipPip
  • 2,744 posts
  • Location: North Devon
  • Local Club: Exmoor Minis

Posted 27 August 2016 - 05:25 PM

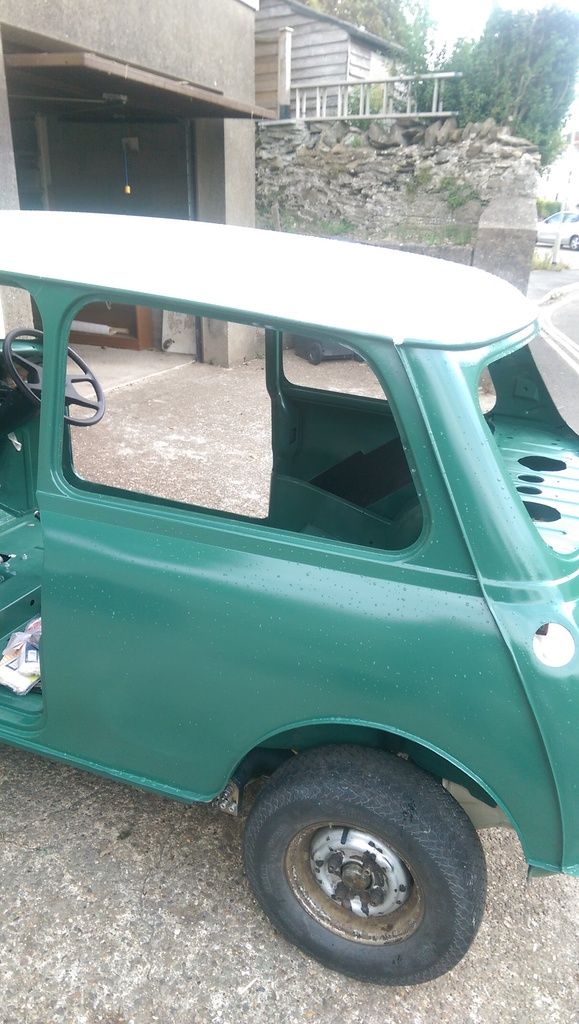
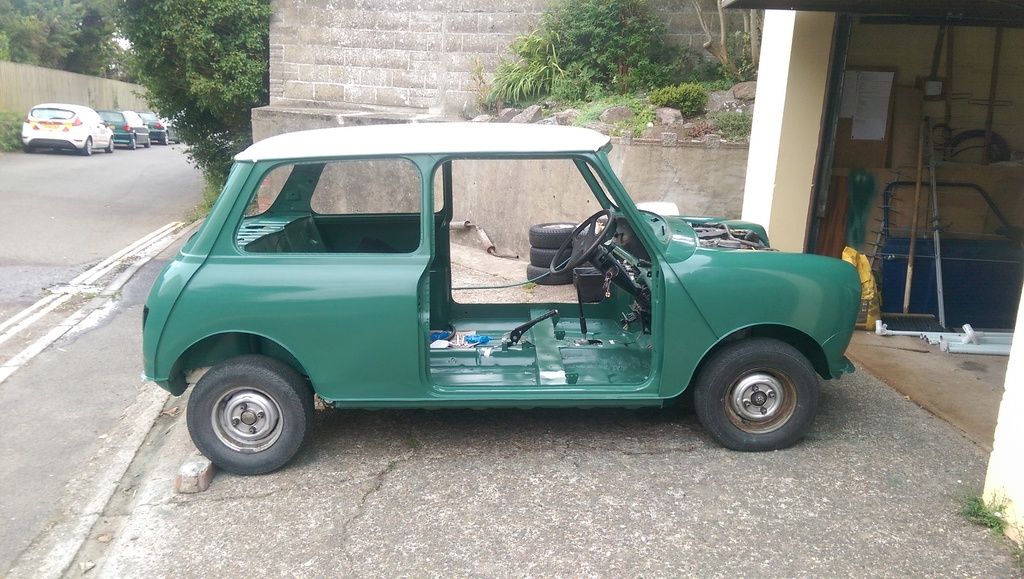
Gonna stick this bit in my project thread but thought I'd post up the results here also.


OK so today was the day. 
First of all washed the surfaces down with clean water:
 
IMAG5377_zpsqlc8oagp.jpg
 
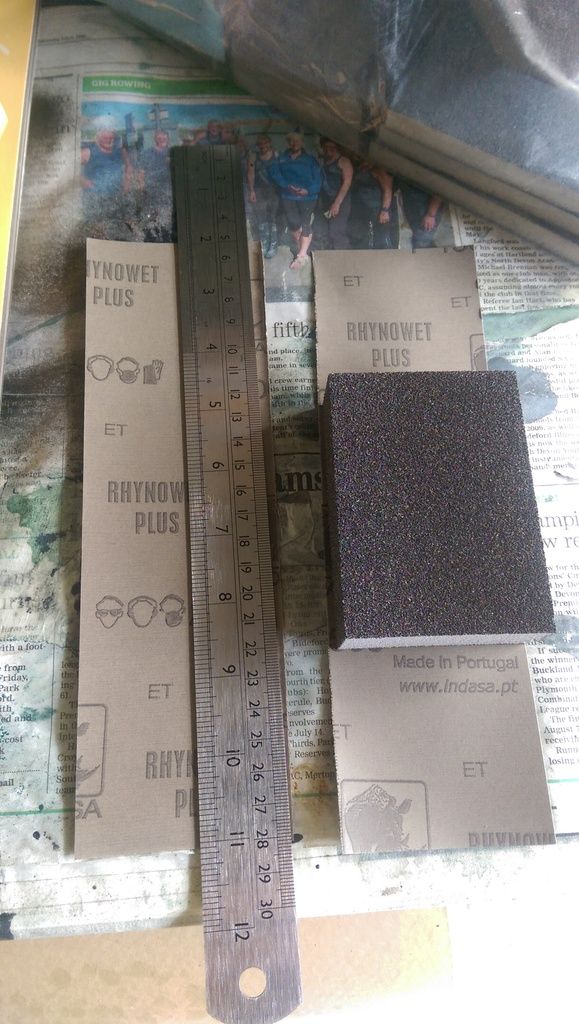
Then prepped the paper which when cut in half fitted the foam sanding block that I bought nicely:
 
IMAG5383_zpsglnyqq9a.jpg
 
 Then flatted with P1500 and then P2000 I used clean water and a drop of car shampoo (this stuff had wax in it as well but it was all I had).
 
IMAG5388_zpsnfvpkrkl.jpg 
 
The 1500 was OK and after a while I was getting the hang of it. I was using a spray bottle to keep the surface wet and the paper clean.
 
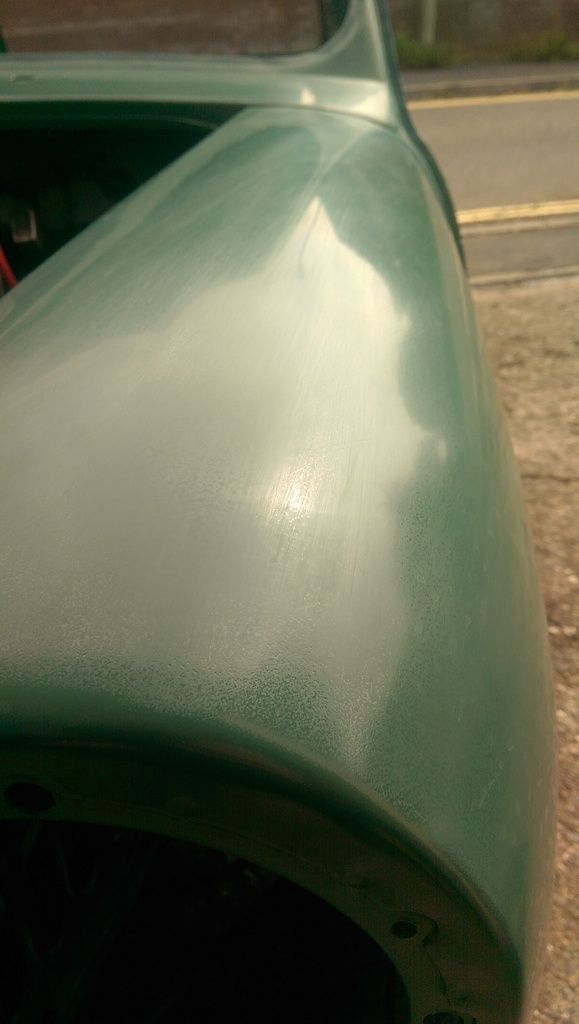
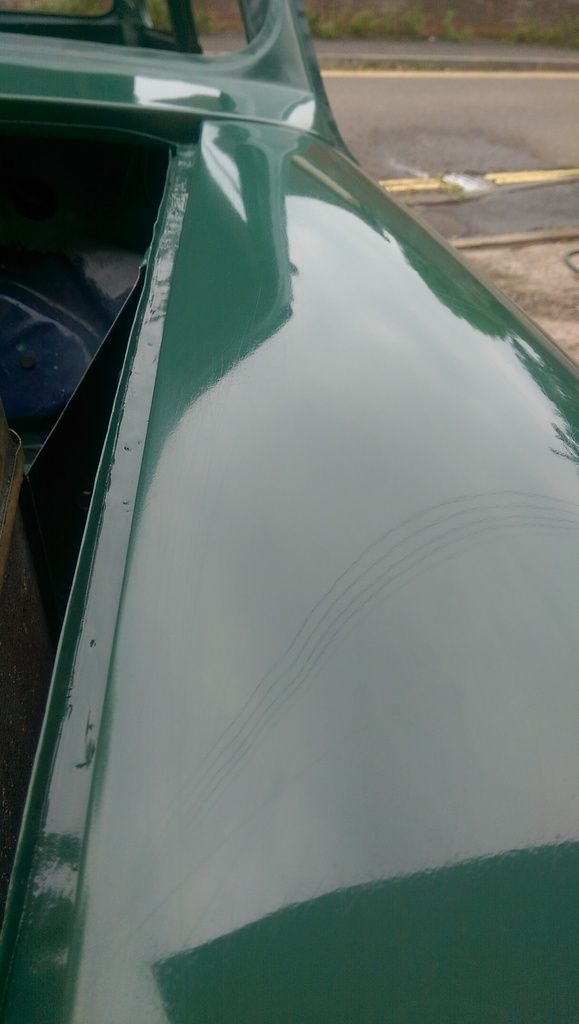
The 2000 was not so good, the paper kept clogging no matter how much I tried to keep it clean and as a result I probably did not do a thorough job with the P2000. 
 
This was after the 2000:
 
IMAG5391_zpss26rnkh6.jpg
 
Still a little peely, admittedly this area is worse at the edges to avoid going through the paint. 
 
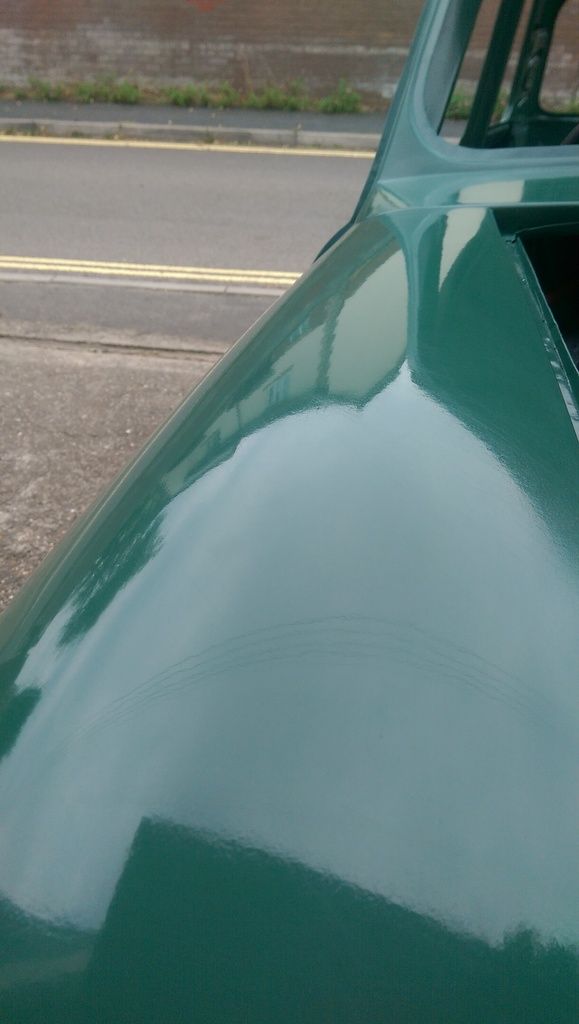
Also this appeared on the rear quarter, possibly due to the paper clogging, worryingly I thought it was through to the primer so left it alone. Not sure if I got a later pic but it seems to have come good after going over with the G3:
 
IMAG5392_zpsdo4ehiho.jpg
 
After cleaning everything up with clean water again I got out the Polisher. I primed the hard pad with G3 paste and then placed blob on the paint surface and rubbed it it with the Polish head.
 
I then sprayed the area with clean water (no soap) and on the slowest speed worked the surface from side to side or up and down (depending where I was polishing). 
 
I made sure I kept away from any edges and after a while I got the hang of it. After nearly finishing I tried out the next highest speed which actually seemed easier and probably could have gone at the next highest speed all over again but but I had been at it all day as it was.
 
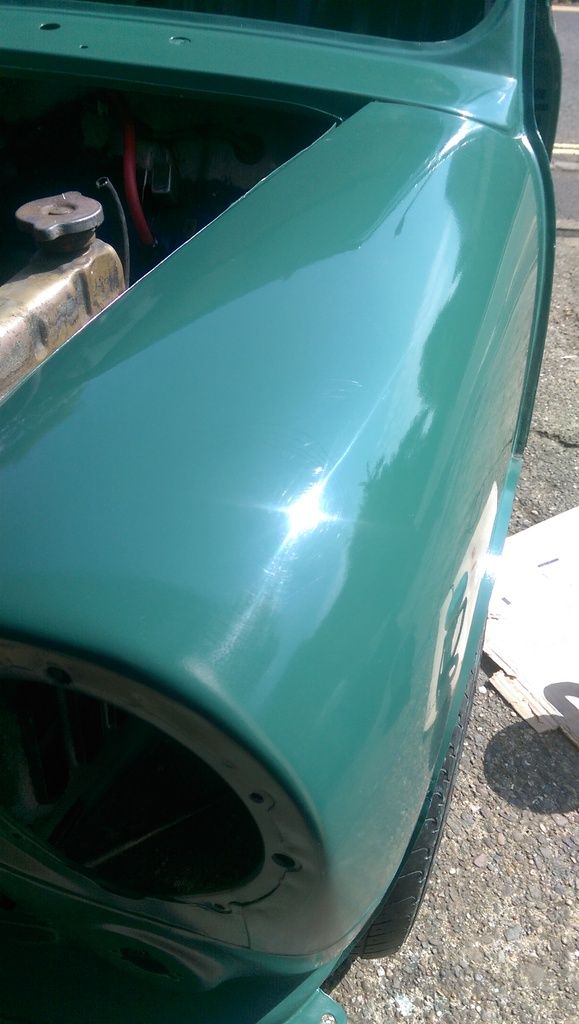
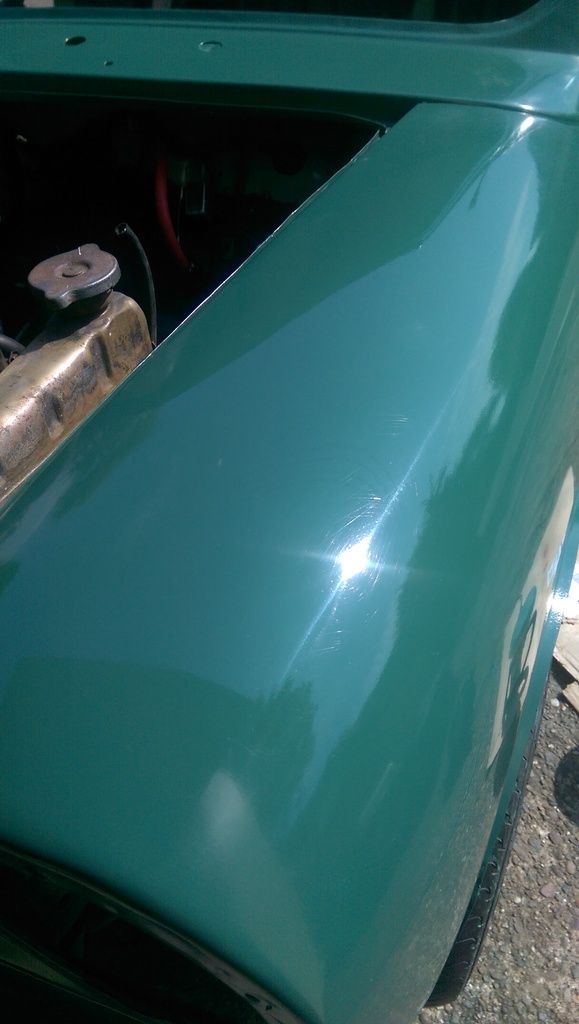
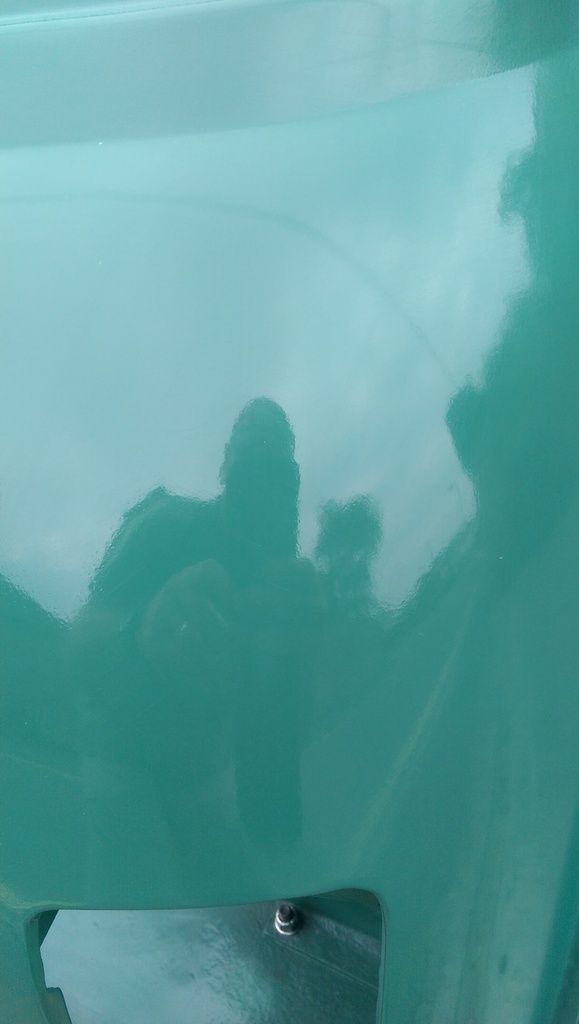
Here are some of the finished pics:
 
IMAG5393_zpsifziafwf.jpg
 
IMAG5394_zps0d3wwjg9.jpg
 
IMAG5401_zps6mljglkp.jpg  
 
IMAG5402_zpsht2ejvvx.jpg
 
IMAG5403_zpshtarbhgc.jpg
 
I went over the top of the wings again with P2000 this time very little at a time between cleaning it was still clogging though. But after G3ing again they came up even better:
 
IMAG5406_zpsmvgd0h0r.jpg
 
IMAG5408_zpsul3sgdpt.jpg
 
IMAG5410_zpsqhrrermn.jpg
 
IMAG5413_zpsv8s7aonh.jpg
 
Still scratchy in places i.e. you can see either the P1500 of the scratches from clogged 2000? (and a little peely) but for a DIY first ever job I am pretty happy with it.
 
Maybe I'll try the G3 again on a higher speed before I use the G10 and softer sponge?


0 user(s) are reading this topic

0 members, 0 guests, 0 anonymous users