I did a molasses experiment (actually used an old tin of treacle) and it worked very well but took it's time. A better method is to use citric acid, you can get bags of it on eBay pretty cheap and the results I've seen are pretty dramatic, especially if you use warm water.
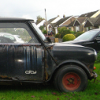

Boris - Retrieved From The Garden After 21 Years.
Started by
phildward
, Oct 30 2016 02:42 PM
44 replies to this topic
#31

panky
-

- Members
-

- 1,777 posts
Camshaft & Stage Two Head
- Location: Cheshire
Posted 23 November 2016 - 09:44 AM
#32
phildward
-
- Noobies
-
- 93 posts
Stage One Kit Fitted
- Location: BOROUGHBRIDGE
Posted 24 November 2016 - 06:24 PM
I agree malasses takes its time. Still waiting :)
#33
phildward
-
- Noobies
-
- 93 posts
Stage One Kit Fitted
- Location: BOROUGHBRIDGE
Posted 25 November 2016 - 09:18 PM
What is it about an old mini, the more work you do the less of a car you have? The fuel tank is potentially written off http://www.theminiforum.co.uk/forums/topic/322398-neglected-fuel-tank/ and all I have left is a shiny filler cap and a foam gasket. Actually the foam gasket was in a bad way so decided to try to restore it:

OK they are only a couple of £ but if I can retrieve the gasket then I have a chance with the carpets. The carpets have dissolved steel components encrusted in them  .
.
Warp lots of copper wire around and dunk in the electrolytic bath for a couple of days:

Appears to have worked OK, had to reposition the wires to fully soften the rust:

Now how do I get a carpet in there????
#34
phildward
-
- Noobies
-
- 93 posts
Stage One Kit Fitted
- Location: BOROUGHBRIDGE
Posted 20 February 2017 - 10:14 AM
To be honest mate I think personally your putting way to much effort into that Heater! At the end of the day it's a utility item that's rarely seen under the dash. By all means make it clean and tidy but I personally wouldn't bother with filler etc as you more than likely going to kick it as soon as you use the clutch and ruin the paint. Just my opinion there.
Keep it up :)
L
Still on with the heater

Seriously there has been other progress but I’ve not yet manged to start the car. I’ll do a full update once I have the engine running.
.
#35
MacGyver
-

- TMF+ Member
-
- 1,027 posts
One Carb Or Two?
- Location: Fribourg
Posted 20 February 2017 - 12:22 PM
Lovely work!
For the heater, you can always stick some foam on the end of your shoes so you don't scratch it?... 😀
For the heater, you can always stick some foam on the end of your shoes so you don't scratch it?... 😀
#36
slidehammer
-

- Members
-
- 1,081 posts
One Carb Or Two?
- Location: Surrey
- Local Club: LSMOC
Posted 20 February 2017 - 08:45 PM
Great project, but my advice would be to work on the body, get it sound (get rid of the rust) the mechanical stuff is easy. It is the body work that stalls projects like this, start getting some sound metal in. Good luck.
#37
phildward
-
- Noobies
-
- 93 posts
Stage One Kit Fitted
- Location: BOROUGHBRIDGE
Posted 21 February 2017 - 08:17 AM
Thanks MacGyver, however the days of kicking the heater are a long way away. It’s probably going to spend some time in storage once tested.
I see your point slidehammer but isn’t the problem as broad as its long? If I stripped the car to get at the shell I would have a pile of parts to work through once the shell is repaired and painted? I’m taking parts off cleaning, repairing and testing them, in some cases replacing them, then packing them with fixings. As I have no previous experience and only intend to do this once, it appeared the safest option to me.
The only chance a complete novice would have reassembling the car I thought?
#38
phildward
-
- Noobies
-
- 93 posts
Stage One Kit Fitted
- Location: BOROUGHBRIDGE
Posted 26 February 2017 - 12:01 PM
So noisy it hurts!

Im removing all additional nonstandard wiring and checking for mouse damage before turning the ignition key for the first time in a long time. The alarm system wiring has been chewed all over by mice but as yet the car harness appears untouched :).
Boris originally had a Selmar basic car alarm that operated from a switch concealed in the boot. It saved the car from theft on three occasions and the last time the door locks were chiselled out but the alarm saw off the would be thief. We saw him running away. This Gemini alarm is a 1989 3002 that was supplied by Rover to my then employer, who manufactured Rover harnesses, for testing for inclusion in Rover cars. Tests over I acquired the alarm, fitted it to a Golf for a short while and then transferred it to the mini. This alarm has never been activated by a break in.
Edited by phildward, 26 February 2017 - 12:03 PM.
#39
Alice Dooper
-

- Members
-
- 391 posts
Speeding Along Now
- Location: Co. Antrim
- Local Club: Minis in Northern Ireland
Posted 26 February 2017 - 01:43 PM
You're a brave man taking on poor Boris.
Great thread and very interesting seeing the electrolytic bath in real use.
Keeping your fixings with the parts is a good way to go seeing that the shell is going to need a much time and work. Photo's are invaluable. Learnt that one the hard way before.
Great thread and very interesting seeing the electrolytic bath in real use.
Keeping your fixings with the parts is a good way to go seeing that the shell is going to need a much time and work. Photo's are invaluable. Learnt that one the hard way before.
#40
phildward
-
- Noobies
-
- 93 posts
Stage One Kit Fitted
- Location: BOROUGHBRIDGE
Posted 27 February 2017 - 01:10 PM
Well Alice Dooper I've owned him from new and the number of cold callers asking to buy the mini (dumped in the garden) was increasing. My excuse "I'm going to restore it" was no longer washing with those who had asked before so I thought I'd best get on with it.
Electrolytic rust conversion is great for medium sized components, I'm using citric acid for small components, molasses for large components and phosphoric acid for any residual rust or any flash rusting after conversion, I'm pleased with my early results:


Shame I can’t fix the shell this way. After coaxing the alarm back into life yesterday I went for one last test and accidentally earthed a 12v output; it’s ruined. L
Edited by phildward, 27 February 2017 - 01:46 PM.
#41
phildward
-
- Noobies
-
- 93 posts
Stage One Kit Fitted
- Location: BOROUGHBRIDGE
Posted 23 March 2017 - 01:35 PM
Boris runs very nicely:

Now I know I have a runner the strip down can really begin.
#42
jagman.2003
-

- Members
-
- 1,307 posts
One Carb Or Two?
- Location: In the shed.
- Local Club: Owner of my own club of Minis
Posted 31 March 2017 - 07:05 PM
Excellent job bringing Boris back. Keep up the good work.
#43
phildward
-
- Noobies
-
- 93 posts
Stage One Kit Fitted
- Location: BOROUGHBRIDGE
Posted 11 April 2017 - 12:49 PM
Thanks jagman 2003, not been much progress to report for a few weeks now. Big change is that Boris now has some new wheels and rubber so is much easier to move around the garage. Other than that I've been starting him and addressing leaks and any other issues that a bit of heat shows.
One thing's for certain, once I start welding I will be referring no your restoration thread. The job is not dissimilar, I just hope not to lose the pedals  .
.
#44
Homersimpson
-

- Members
-
- 803 posts
One Carb Or Two?
- Location: Redditch
Posted 11 April 2017 - 06:21 PM
Thanks MacGyver, however the days of kicking the heater are a long way away. It’s probably going to spend some time in storage once tested.
I see your point slidehammer but isn’t the problem as broad as its long? If I stripped the car to get at the shell I would have a pile of parts to work through once the shell is repaired and painted? I’m taking parts off cleaning, repairing and testing them, in some cases replacing them, then packing them with fixings. As I have no previous experience and only intend to do this once, it appeared the safest option to me.
The only chance a complete novice would have reassembling the car I thought?
I agree with Slidehammer, almost all unfinished projects have a big pile of new shiny bits, rebuilt engines and a rough bodyshell. Its almost always the welding, bodywork and paintwork that people struggle with themselves and can't afford to pay someone else to do. Most people can rebuild an engine or a subframe.
When you strip the car down get some plastic food bags and a permanent marker, put all of the bits in bags with a note to say what they are and anything specific about how they fit. Take plenty of photos of everything, pay particular attention to wiring routes, brake pipe routes etc as these get forgotten over time.
I've restored around 30 cars of different makes and this has always stood me in good stead.
#45
phildward
-
- Noobies
-
- 93 posts
Stage One Kit Fitted
- Location: BOROUGHBRIDGE
Posted 12 April 2017 - 08:39 AM
Thanks Homersimpson; I can see the risk but having owned this car from new and run the engine successfully there is no way I will not finish this project.
Yes everything will be photographed and I need more than bags for my shiny bits. Been collecting boxes:

Once the shell is painted I will want the car on the road within weeks, I would prefer days. All the bits have to be ready to go.


1 user(s) are reading this topic
0 members, 1 guests, 0 anonymous users


