Jump to content


Photo
- - - - -

Project Noo


  • Please log in to reply
32 replies to this topic

#1 Psycho-biker

Psycho-biker

    Stage One Kit Fitted

  • TMF+ Member
  • PipPipPip
  • 90 posts

Posted 06 November 2016 - 01:07 PM

Back in august I was on holiday, and my mate text me asking if I was interested in a mini...  :bah:


 few messages and pics sent over it was bought for £250 delivered to his yard with no v5 but chassis tags and plates.


A few weeks later appiled for the logbook and a couple more weeks go past and it arrives!


Result! its not nicked or a right off!


So then pictures, because thats what were all here for lets be honest!!


IMG_1334.jpg


IMG_1341.jpg


IMG_1344.jpg


IMG_1348.jpg


IMG_1343.jpg


IMG_1350.jpg


more to come soon...


I have plans in my head just deciding how far to go with it...


Edited by Psycho-biker, 06 November 2016 - 03:19 PM.


#2 Psycho-biker

Psycho-biker

    Stage One Kit Fitted

  • TMF+ Member
  • PipPipPip
  • 90 posts

Posted 06 November 2016 - 03:45 PM

In further detail to the above...


the engine is seized, the brakes where seized (until it was time to roll it off the trailer at my house parked 20ft from my van and it was do or die O_O ), the clutch is seized, there is no drivers or passenger door (the bloke selling it only bought it for the doors).


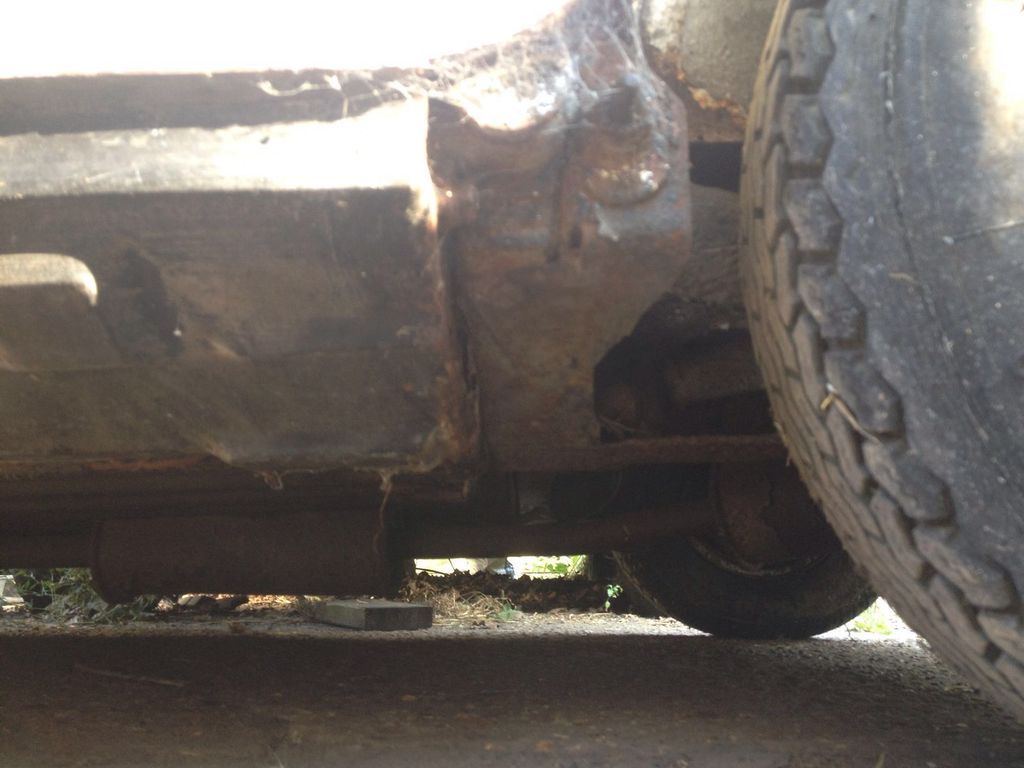
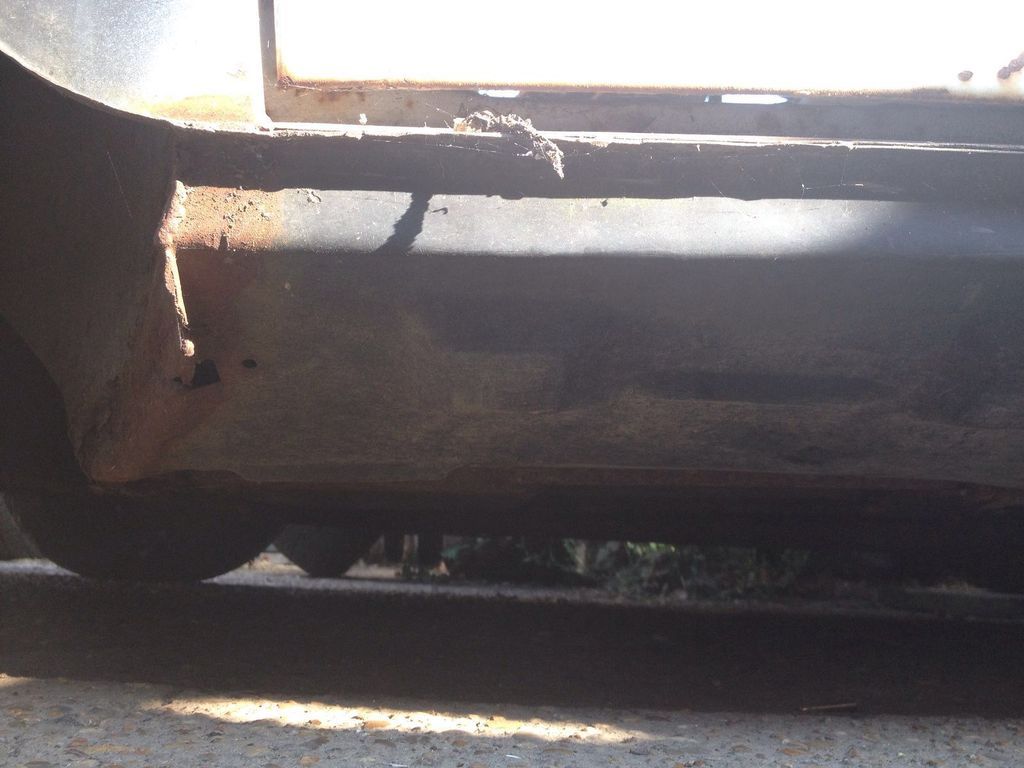
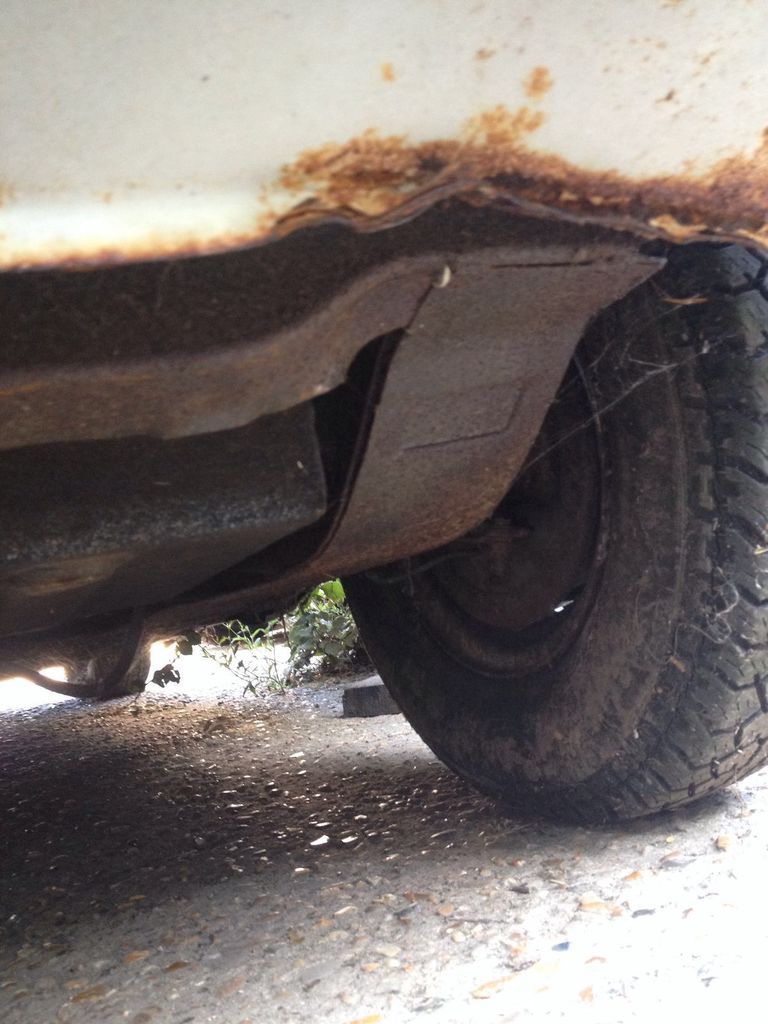
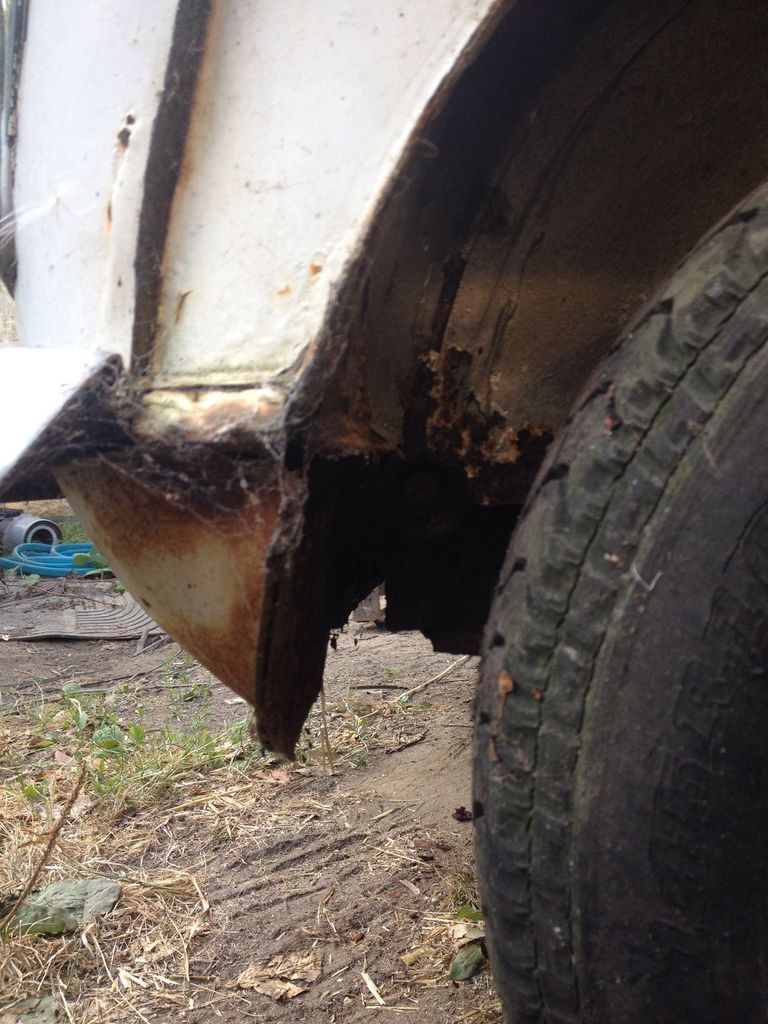
It has some rust obviously but someone had started to repair it a while ago, its had new inner sill and over sill and front floor pans, unfortunately they didn't paint or protect the work, the worst of it is where the water has crept in the door apertures and rusted the front floor pans and had puddled.

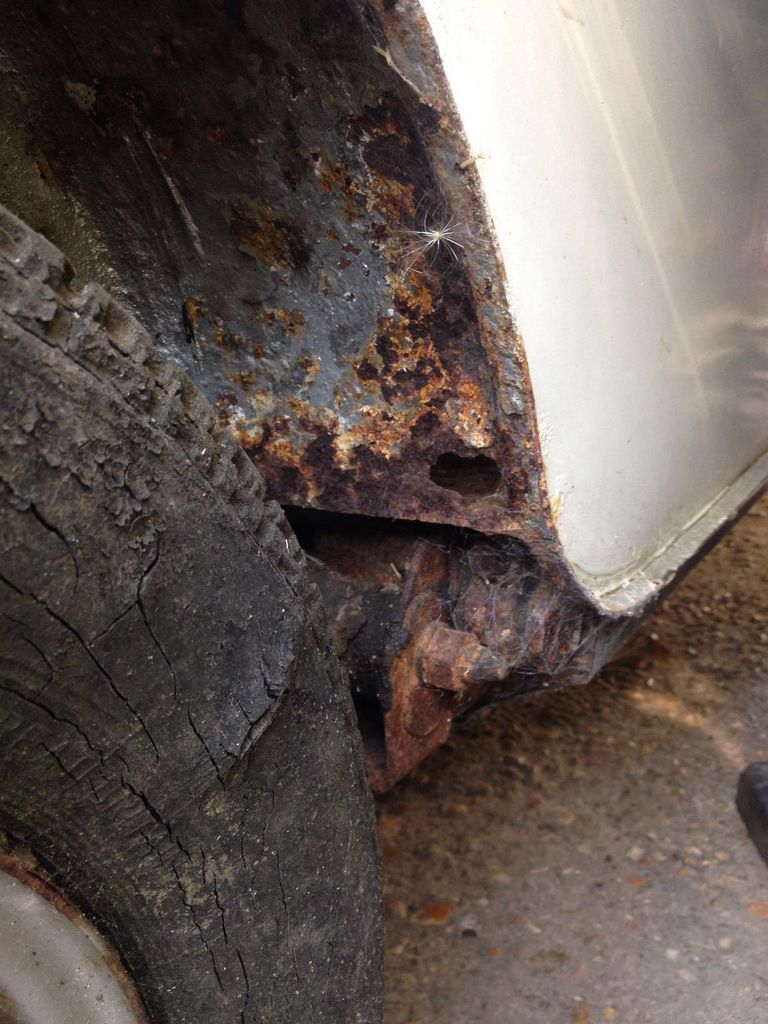
the rear arches, back of boot floor and possible(reads likely) heelboard.

subframes are lightly crusty but not scrap.

it came with quite an abundance of spares.


I have sourced a drivers door but no glass yet.

I have sourced an engine

for the above two I have to thank Giacomo for.


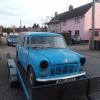
anyways some more pictures i hadnt uploaded...


IMG_1336.jpg


IMG_1340.jpg


IMG_1339.jpg


IMG_1346.jpg


IMG_1347.jpg


The overall plan is do as little body work to preserve the patina, get the necessary welding done for MOT, get the bargain 70's £30 roll cage in, engine and brake upgrade oh and doors on and get her on the road.

In short im going for a rat rod look. and it will be quick ish  :gimme:


Some pictures should be up in the week if it goes to plan.


#3 Van13

Van13

    Speeding Along Now

  • Members
  • PipPipPipPipPip
  • 314 posts
  • Location: England
  • Local Club: Unknown

Posted 06 November 2016 - 05:50 PM

Good buy for that money

#4 Psycho-biker

Psycho-biker

    Stage One Kit Fitted

  • TMF+ Member
  • PipPipPip
  • 90 posts

Posted 06 November 2016 - 06:43 PM

yeah i thought so.


Also didnt put in the above posts its a 1976.


tax exempt on march the 10th next year!! thats my target for MOT. we'll see!


#5 Will16

Will16

    Wants a custom member title

  • Members
  • PipPipPipPipPipPipPip
  • 1,090 posts
  • Location: Abingdon, Oxfordshire

Posted 06 November 2016 - 06:52 PM

Like this, cool that your keeping it ratty! Any pics of this 70's cage, I'm wanting a retro style one for mine?!


#6 sonikk4

sonikk4

    Twisted Paint Polisher!!!

  • Admin
  • PipPipPipPipPipPipPipPipPipPipPip
  • 15,897 posts
  • Name: Neil
  • Location: Oxfordshire

Posted 06 November 2016 - 07:07 PM

Something to get your teeth into. I can see the panel list being quite extensive. Bin those oversills sharpish.


#7 wingnut

wingnut

    Speeding Along Now

  • Members
  • PipPipPipPipPip
  • 463 posts
  • Location: bury st edmunds

Posted 06 November 2016 - 08:48 PM

Love it,keep it as ratty as possible

#8 Psycho-biker

Psycho-biker

    Stage One Kit Fitted

  • TMF+ Member
  • PipPipPip
  • 90 posts

Posted 07 November 2016 - 09:46 PM

Thanks for comments chaps!

I haven't got pics of the cage but will get some up I need time. I'm only going on what the bloke told me I got it off but it seems legit to me!

Yes over sills are coming off, handily there only tacked on!

And yes keeping it as the pictures as much as possible - I like sleeper!


Anyway tissues at the ready.... WHEEL PORN ALERT!!!


7D3F333D-1CCF-4D62-AF30-E6F6E86098B2.jpg


23A863D8-E9FF-4AD4-8404-0396CE621EB8.jpg


Hoping to get the front subframe and engine out over the next week or so the then start putting it back together.

#9 Psycho-biker

Psycho-biker

    Stage One Kit Fitted

  • TMF+ Member
  • PipPipPip
  • 90 posts

Posted 31 December 2016 - 03:20 PM

Well works been busy, then all the stuff that life throughs at me.....


well yesterday got a full day on it and a couple of hours this morning. the plan was to get the front subframe out with engine and suspension attached still, then to make a start on the floors/sills.


I will let the pictures do the talking


first up engine/subframe removal...


680B3EC3-FAFC-4409-9CAD-7A0EE55FE797.jpg


9802A79E-EC88-45C5-9848-A40F8567022F.jpg


1F2842C0-B1C9-479F-A2FF-CD887C4D359D.jpg


And Ta Da!

58246075-894E-4CF7-8F19-C169B8ECC552.jpg


Then a little repair to the drivers toeboard corner, dont look too closely, i had a school boy moment withthe welder when i thought it was pointing at 1 it was pointing at 5...


A5AA1987-DCEA-4BA6-9C8E-1E0EF2B14944.jpg


Then this morning whipped off the over sill of doom 

48905C2E-D3E6-42C5-8E9B-D3995C25B954.jpg


to reveal everything I expected but didnt want....

B3D80BD5-922B-41BA-AC04-9607FF8B0485.jpg


1CBEE82E-2CB2-42F2-9AEE-054E864AD289.jpg


326E067B-1F10-40A0-8116-7D7596C90FEA.jpg


ECBC5774-8B18-449E-8643-265985AB96D2.jpg


and completely extracted...  in the hope of slicing it down to a proper sill

BC7B46B0-CAF5-4519-96D1-BAF589318AC3.jpg


Then took a look at then inner sill patch piece and the crust under neath the over sill and decided to take it off


AAC5983F-6D6F-4060-AA2E-4578325E49BC.jpg


then it seemed the door way was a bit flimsey so out came the lengths of 25mm box... and shazam!

040F8CA3-2366-4151-B630-870ECEE47BB7.jpg


then this happened...

681375D9-9DE8-4DFA-9891-DFDDC054C052.jpg


AD735186-F874-4E29-9630-59916006551B.jpg


oh dear oh dear!!  more panels needed me thinks


#10 Ace Alex

Ace Alex

    Formally known as Pedal Pusher

  • Members
  • PipPipPipPipPip
  • 330 posts
  • Location: Somewhere

Posted 31 December 2016 - 06:23 PM

At quick glance, the colour of this interior combined with the white paintwork and twin stripes would indicate this is a 'Stripey' Limited Edition model. You might be aware of this already...nice project. There's a topic somewhere on this forum about them.

#11 Psycho-biker

Psycho-biker

    Stage One Kit Fitted

  • TMF+ Member
  • PipPipPip
  • 90 posts

Posted 31 December 2016 - 07:38 PM

At quick glance, the colour of this interior combined with the white paintwork and twin stripes would indicate this is a 'Stripey' Limited Edition model. You might be aware of this already...nice project. There's a topic somewhere on this forum about them.


Ah that confirms it then!  I had read somewhere about a SE 1000 in 76 to celebrate something and it had features that you described, ie interior with colour coded door seals and the coach line striping.

I will give it a look sometime, maybe tonight, theres not much else going on! 


#12 minimissions

minimissions

    Up Into Fourth

  • Members
  • PipPipPipPipPipPipPipPipPip
  • 3,427 posts
  • Location: North West
  • Local Club: M.M.O.C

Posted 02 January 2017 - 07:48 AM

What a great little mini to build and save! Whats your finished plans with it, an original build?


#13 Psycho-biker

Psycho-biker

    Stage One Kit Fitted

  • TMF+ Member
  • PipPipPip
  • 90 posts

Posted 02 January 2017 - 08:58 AM

What a great little mini to build and save! Whats your finished plans with it, an original build?

Thanks!

Plans are a lightly tinkered 1300 lump to begin with, body work to stay as close as it is now whilst mot-able, so it's have a little weldathon, go the brakes and suspension to refresh, got hilos and 7.5" discs going on. Also managers to pick up a single hoop roll cage from the seller thinks came from a '70's mini, which is going in. But in short a ratty racer, with room to expand on the engine in time :D

My other project is the Labour of love original nut and bolt, ground up rebuild. (Or other money pit)


Edited by Psycho-biker, 02 January 2017 - 08:02 PM.


#14 minimissions

minimissions

    Up Into Fourth

  • Members
  • PipPipPipPipPipPipPipPipPip
  • 3,427 posts
  • Location: North West
  • Local Club: M.M.O.C

Posted 03 January 2017 - 07:00 AM

Wicked I am liking the sound of this :) I look forward to seeing more updates


#15 Psycho-biker

Psycho-biker

    Stage One Kit Fitted

  • TMF+ Member
  • PipPipPip
  • 90 posts

Posted 25 March 2018 - 07:01 PM

After managing to drop to the bottom of page 16 in the projects section  O_O  I thought it would be a good time to update this.


I havn't got photos of everything i have done but you'll get the picture...


Early on ish it was decided to 2 half floors. I found a fello mini chap not far up the road having a clear out of panels and lined his palm with £80 for nearly all the panels I needed and some spare. most were magnum panels but to be honest alot better than what I have been told, both quality and pressings.


After fighting with weather and my free time trying to do this outside i lost my 5h1t with it and decided to swap the special out the outdoor shelter and do it in there instead. and progress has steamed on.


the decider on half floors...


ECBC5774-8B18-449E-8643-265985AB96D2.jpg


326E067B-1F10-40A0-8116-7D7596C90FEA.jpg


Then shortly after the drivers half floor was mostly fitted it occured that the boot floor wasnt any better nor heelboard and that the special came on the spit and this one found its new resting position.


IMG_3251.jpg


then fast forward to about mid january this year and this got re fitted once tieing up the heelboard to inner sill and strengthener


qNugVgPVTg2y1LOIFf7Fsw.jpg


then to 2 weeks ago....


passenger side floor trimming....

xoEZeHDmRDGzBnY4tFtXjg.jpg


X0gTh8tBSAGt0CabTwoPDg.jpg


Ta3OVP9bT6SCuquiOJWXyQ.jpg


New panel cut drilled and zinc primed clamped into place....


4t09TM0ERQe4SbeQsjxA.jpg


3N8pxvnfTMiN34HiUvNxFA.jpg


x4p2YxMTjiFXq3BS4B5lw.jpg


and a bit of a weldathon later on friday just gone...


gKQ9aVfSYe7o8qazlpXA.jpg


ors28JJRSxu6L6zGThkjiw.jpg


hmggioFaSAyQsBcxiFLA.jpg


7WiHtXXeRAOp9xoYwc6spQ.jpg


thats the shell up to now.


I have got a few patch repairs to do round the passenger floor and rear arch as seen in the last pics, then bit on the drivers top inner wing and blocking air vents, then round the front with a few stamp size patches before scuffing the lot up for some raptor  :D


0 user(s) are reading this topic

0 members, 0 guests, 0 anonymous users