Jump to content


Photo
- - - - -

A Pair Of 64 Mk1 850S


  • Please log in to reply
104 replies to this topic

#91 racingenglishcars

racingenglishcars

    Mini Mad

  • Members
  • PipPipPipPip
  • 293 posts
  • Location: Storkøbenhavn
  • Local Club: Donn's Backyard Garage

Posted 01 November 2017 - 04:14 PM

Last night now that all the inner protectors are finished, it was just a question of mounting the front wings.
All clamped in place and aligned, for which we took good time for perfect fit.
We had to close the bonnet and therefore had to mount the car on stands and remove the spit.


Then spot welding. first a test spot on the bonnet gap area because we had to use the large c-grips there and couldn't close the bonnet. Not quite right, drilled out and did again. 
by the way, the inner wings don't stay straight unless the wings are welded on. They had to be forced a bit to one side before welding.
After the top seam for which there is no image, down the side seams on both sides:
 
 
Then the front seams from the inside. The car was turned on it's side for this - in with the spit, out with the stands.
 
 
The welder is heavy!
 
Whooptie.
 
 
Insted of rolling the car to the other side, we just worked above our heads and did the left side.
 
 
Whooptie.
 
 
And though it can't be seen so well, both wings are mounted and the entire front is straight.


#92 racingenglishcars

racingenglishcars

    Mini Mad

  • Members
  • PipPipPipPip
  • 293 posts
  • Location: Storkøbenhavn
  • Local Club: Donn's Backyard Garage

Posted 05 November 2017 - 04:19 PM

Nice having a Sunday to work alone in the garage.
 
Saturday, since I am finished with the spot welder, I took it back to the garage club in Lyngby. I've only borrowed it for 9 months or so. But now there are all those small edges and corners that need finishing. Like these;
 
Front wings to front panel;
 
 
Windscreen surround to roof gutter:
 
Rear wing and inner wing to lower panel;
 
 
Rear wing corner to inner wing;
 
Back panel to roof gutter;
 
I'm sure I have lots more boring pictures of these small welds but suffice to say they all got welded up today.
 
Example;


#93 racingenglishcars

racingenglishcars

    Mini Mad

  • Members
  • PipPipPipPip
  • 293 posts
  • Location: Storkøbenhavn
  • Local Club: Donn's Backyard Garage

Posted 08 November 2017 - 09:40 AM

Another lovely Tuesday evening! Peter actually went home early citing headache from all the noise. We had two angle grinders running most of the time. Only one on the Mini, the other on a motorcycle sidecar.
 
However before all the noise, we thought it would be nice with a test fit of the Safety Devices rear bar with cross-brace.
 
Did anybody mention that theses are quite impossible to install in a completed car. And it doesn't have anything to do with the spit being in place. The four bottom feet of the are all too wide to fit past the B-post, in any possibility or any position-gyration. 
 
In the end it went in feet first. We used a rope to hold the forward feet together about 2 cm from rest point, and a cable-pull to pull the rear feet together nearly 4 cm. I suppose it would have been easier if there were no side bins but alas there are!
 
The front feet must pass between the side bins and door latch while the rear feet must pass further up on the B-post. This required violent compression of the rear bar's width. We also had to remove the windshield spacer which for some reason we have resisted. This implies that if it is done in a completed car, the windshield should be removed. This to allow the bar to go far enough forward that the front feet can go over the side bins.
 
 
Well, it's finally in place. It's a good thing we did it before paint as it would have scratched the heck out of the interior. We now have to put the mounting plates in, weld and epoxy paint before finally bolting the bar in place down INSIDE the side bins!. I guess in the end everything will be painted one colour. (Don't forget to tape the approval sticker before painting)
 
 
OK, so the angle grinder stuff.
 
 
These panels were covered with glue and insulation fibers.
 
 
Also the back seat. But they are all cleaned up now, awaiting sanding before epoxy primer.


#94 racingenglishcars

racingenglishcars

    Mini Mad

  • Members
  • PipPipPipPip
  • 293 posts
  • Location: Storkøbenhavn
  • Local Club: Donn's Backyard Garage

Posted 15 November 2017 - 02:41 PM

Another Tuesday and more group work on the blue 64 Mini.
Peter got some seats a while ago and we test fitted the general position. I think I have a plan for properly mounting them now. More on that when the time comes.
 
 
I made a template of the left side petrol tank opening, then using that Peter cut a hole in the right side.
 
 
The fit is quite good when the tank is properly in place.
 
 
Fixed mounting of the roll bar implied tweaking a bit. The top corners aren't exactly the same side to side
 
 
Half cm on left and 1.5 cm on right. And this was after compressing the legs trying to install it. 
No problem! Just a bit of cable pull. Mounted chain grips to the main bar on the left side to keep the cable in place;
 
 
and put a chain holder on the top right side.
 
 
I tweaked it a bit by pulling - hard, a bit more, and again a bit more.
 
 
In the end it was "much" better, that is to mean nearly the same distance on both sides. I had to take it out to bend the right side main bar a bit outward, just to relieve static stress. 
 
Actual positioning of the main hoop is primarily done by placement of the rear left foot. It is the one with the diagonal (triangulation), which generally can't be tweaked. 
 
 
Positioning of the main hoop (front) feet is done by tweaking the main hoop.
 
Despite what I wrote before, it will come out for painting.

Edited by racingenglishcars, 15 November 2017 - 02:42 PM.


#95 racingenglishcars

racingenglishcars

    Mini Mad

  • Members
  • PipPipPipPip
  • 293 posts
  • Location: Storkøbenhavn
  • Local Club: Donn's Backyard Garage

Posted 17 November 2017 - 09:50 AM

Well, last night I decided to do something about the seat mount. Tim who will drive the car daily is a bit taller than I am and quite a bit taller than his father Peter, who initiated this build. The seat needs to be adjustable!
I suppose I could have started off with the standard front seat mounts, which are a very cost effective solution, but we really wanted something that would mount the seat adjuster a bit further back and since I would have to modify it anyway, I decided to just make some myself.
 
 
They came out quite well but way too long time. I won't do that for my own car. So far only one bolt hole along the length.
 
As can be seen above, there is only one mounting bolt on the seat bottom. I had cut off the other two height adjusters which all would have mounted the seat much too high. I'm considering cutting down the back legs. 
 
Now there are only questions of: F / R adjustment. Height adjustment. Angle adjustment. I will have to get Tim here to test it. 
Both supporting the rear seat legs at the bottom, and latching the seat down in the back are also considerations.
 
As it is, it does slide;
 
 
and tilt, which gives a very limited access to the back seat area (for not much more than small things).


#96 racingenglishcars

racingenglishcars

    Mini Mad

  • Members
  • PipPipPipPip
  • 293 posts
  • Location: Storkøbenhavn
  • Local Club: Donn's Backyard Garage

Posted 22 November 2017 - 07:55 AM

A very rainy Tuesday and we didn't get much done on the Mini. Mostly the seat mounts. Aside from adjusting the seats for Tim, who didn't come to help, both in front height, rear height (for angle), we found that they were too close to the B-post. Again modifying the existing seat mounts by offsetting to the inside, 
 
 
and making two more for the other side.
 
 
The seat now appears to not conflict with the B-post and slides front and rear with no problem. It also still tilts.


#97 racingenglishcars

racingenglishcars

    Mini Mad

  • Members
  • PipPipPipPip
  • 293 posts
  • Location: Storkøbenhavn
  • Local Club: Donn's Backyard Garage

Posted 10 December 2017 - 05:48 PM

Few images from week ago Tuesday evening, though quite a bit of work done.
Final adjustment of the seat with Tim the final operator - and steering wheel in place. The picture is not the final fit!
Welded force-distribution-plates onto the back legs. Otherwise the seat legs will put dents in the floor.
 
 
Made hold-down straps for both the right side tank in Peter's Mini and also for my own 64 Mini left tank, just because I didn't have one.
 
Cleaned rear trumpets including removing the completely rusted-on rubber cones. Had to use a Wood saw, lubricated with WD40. It worked a charm to peel the rubber back. Then used a grinder to relieve the rust-fit onto the cone. Then just a bit of clean-up and they're fine. Also cleaned and readied for paint at least one rear suspension arm. The brakes are already new so it's only paint.
 
More cleaning on the fuzz glued all over the back seat and parcel shelf, and all ready for prepping for epoxy primer which will happen next Tuesday.

Edited by racingenglishcars, 10 December 2017 - 05:49 PM.


#98 racingenglishcars

racingenglishcars

    Mini Mad

  • Members
  • PipPipPipPip
  • 293 posts
  • Location: Storkøbenhavn
  • Local Club: Donn's Backyard Garage

Posted 10 December 2017 - 05:48 PM

Well, after all this cleanup it's starting to look good. 
Firstly, cleaning up the trumpets didn't do a lot of good since I asked Peter why he didn't just get some hi-los. So he pulled a set out of a box laying around. OK, enough for that!
 
After huge amounts of sanding and smoothing of the body, this Saturday was primer day. This is the first coat of epoxy, thinned well enough to go on with a "roller". I didn't think too much of the idea, but it worked a charm. A second coat, and a first coat where it isn't done yet, will happen after the holidays.


#99 racingenglishcars

racingenglishcars

    Mini Mad

  • Members
  • PipPipPipPip
  • 293 posts
  • Location: Storkøbenhavn
  • Local Club: Donn's Backyard Garage

Posted 10 December 2017 - 05:56 PM

Meanwhile, my little red 64 got a few rust repairs in the engine compartment. First the engine steady.


27051048349_d3c49c30d5_c.jpgIMG_20171203_184557l by frogeye61, on Flickr


23962540107_b5d5449706_c.jpgIMG_20171203_191943 by frogeye61, on Flickr


37940914735_dab9fa4ffb_c.jpgIMG_20171203_194341l by frogeye61, on Flickr


38827048191_1bbaa3abab_c.jpgIMG_20171203_195323 by frogeye61, on Flickr


Then a bit on front lower corner:


38842805072_f64e1edb58_c.jpgIMG_20171204_180709 by frogeye61, on Flickr


37986466475_f75219c494_c.jpgIMG_20171204_182936 by frogeye61, on Flickr


38157974534_9d17054e3a_c.jpgIMG_20171204_185520 by frogeye61, on Flickr


38157977094_78393d516c_c.jpgIMG_20171204_191620 by frogeye61, on Flickr


25001794788_1ab64d43db_c.jpgIMG_20171204_192125 by frogeye61, on Flickr


25001796598_f2613f581d_c.jpgIMG_20171205_212221 by frogeye61, on Flickr


24098695277_9ace18ef6d_c.jpgIMG_20171206_171253 by frogeye61, on Flickr


38963383301_f105d32580_c.jpgIMG_20171206_171918 by frogeye61, on Flickr


38247395444_3139ec5552_c.jpgIMG_20171206_171711 by frogeye61, on Flickr


#100 racingenglishcars

racingenglishcars

    Mini Mad

  • Members
  • PipPipPipPip
  • 293 posts
  • Location: Storkøbenhavn
  • Local Club: Donn's Backyard Garage

Posted 13 December 2017 - 03:47 PM

Yesterday Tim started with seam sealing the bottom... 
 
 
while Peter prepared the suspension components for epoxy black.
 
 
Once the suspension components were covered... 


there was some epoxy paint left over. 
 
Rather than it going to waste, Peter applied it to the bottom of the car, just not where the seam sealer is. The intention is that the bottom and engine compartment is black epoxy anyway, so one more coat should be fine.
 
 
We have slightly different road conditions here than the chaps in America with lots of salt in the winter. Since this isn't a trailer queen car, and intended to drive in the winter, it gets epoxy everywhere necessary and other rust prevention methods.


#101 racingenglishcars

racingenglishcars

    Mini Mad

  • Members
  • PipPipPipPip
  • 293 posts
  • Location: Storkøbenhavn
  • Local Club: Donn's Backyard Garage

Posted 16 January 2018 - 07:16 AM

[Sorry, It's been a while what with Christmas, family visits, new tenant, and all that stuff. 


Peter got the bottom completely sealed and epoxyed the third coat We hope this is sufficient.

39617436921_7f3f2b850e_z.jpgIMG_20180107_155208 by frogeye61, on Flickr


27840152629_b357fe64ff_z.jpgIMG_20180107_155157 by frogeye61, on Flickr


This also extends to all the seams around the car. There is very little body work to be smoothed, basically where some panels were joined or repaired, but with all this epoxy paint just about everything must be smoothed by hand before paint.

39587966592_4935b670bc_z.jpgIMG_20180107_154957 by frogeye61, on Flickr


39587961252_48910f8452_z.jpgIMG_20180107_155013 by frogeye61, on Flickr


39617426341_85188cbee5_z.jpgIMG_20180107_155005 by frogeye61, on Flickr


38909409724_22a25fb357_z.jpgIMG_20180107_155022 by frogeye61, on Flickr


This car is not a show car and will not be body colour all the way around. (Likely dark blue or purple) The bottom is pretty much completed the way it is. So now the suspension will be assembled and installed to facilitate rolling to the paint shop.

The rear subframe is powdercoated and assembled:

38721195865_1075814528_z.jpgIMG_20180102_211710 by frogeye61, on Flickr


We also have an old set of wheels

24749282767_e88f9675a8_z.jpgIMG_20180106_122828 by frogeye61, on Flickr


The front subframe will be assembled this evening, being the usual Tuesday evening work night.


#102 Vinay-RS

Vinay-RS

    Put's foolish ideas in peoples heads

  • Members
  • PipPipPipPipPipPipPipPipPip
  • 2,093 posts
  • Location: Cape Town

Posted 19 January 2018 - 03:08 PM

This car is coming along nicely. Those old D1s are a cool find.

#103 racingenglishcars

racingenglishcars

    Mini Mad

  • Members
  • PipPipPipPip
  • 293 posts
  • Location: Storkøbenhavn
  • Local Club: Donn's Backyard Garage

Posted 11 July 2018 - 01:29 PM

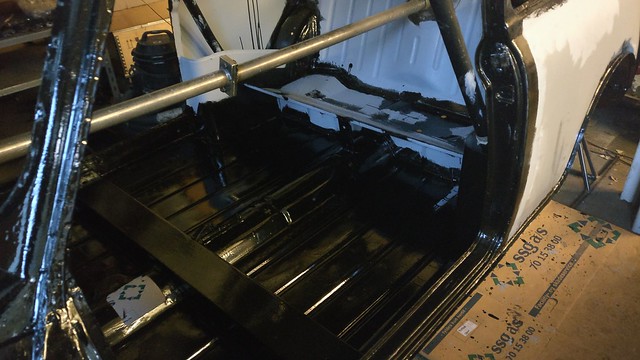
So, it's been a while. What with Christmas and a visit from my son who lives near Virginia/W.Virginia border, My trip to America for the Grand National Roadster Show in Pomona Ca, A trip to India for electronic hardware configuration on a test facility, a trip to Florida with the family, and I just forgot to post for a couple months.
 
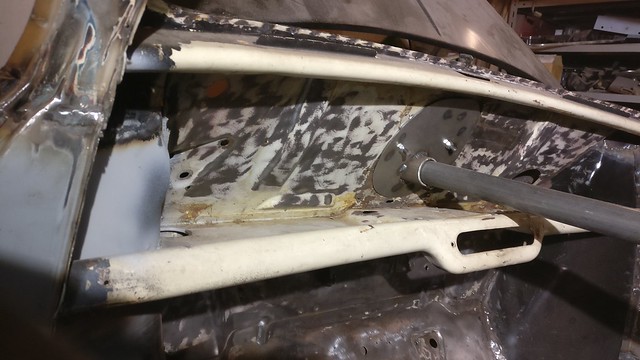
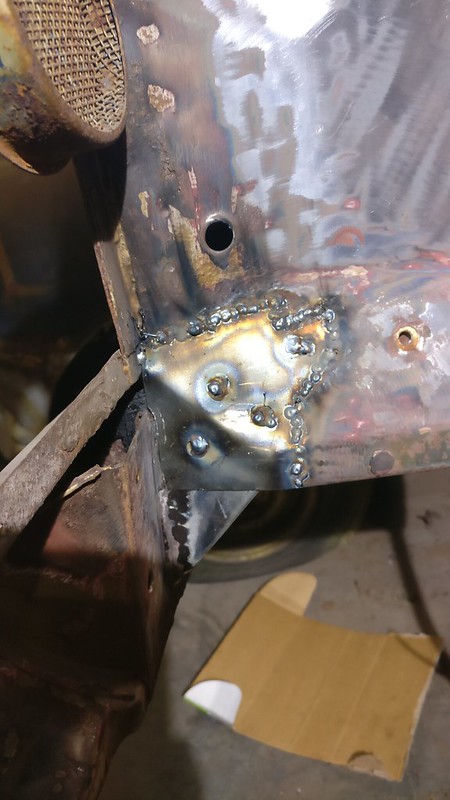
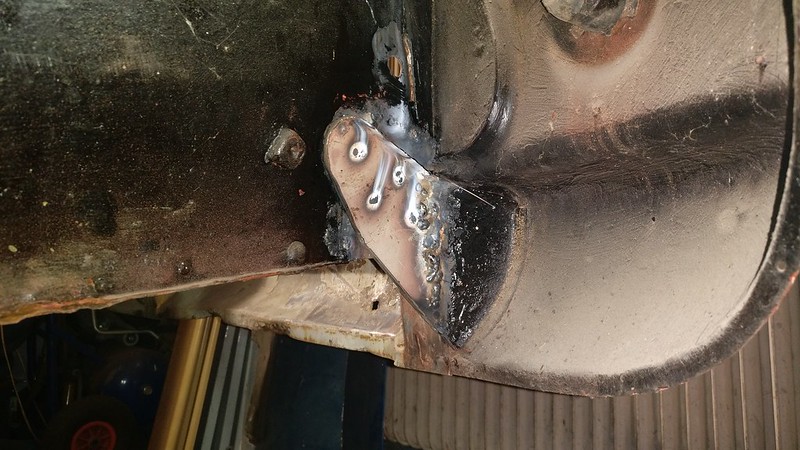
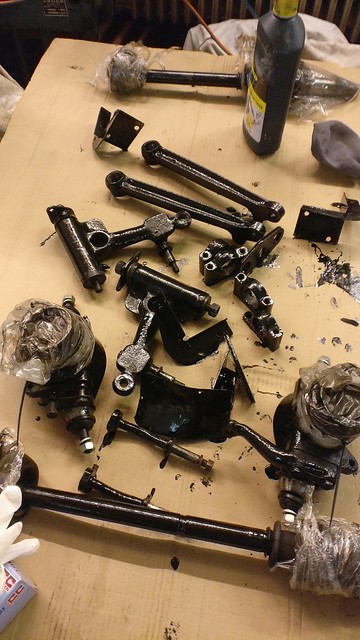
Between all that, Peter and I managed to get the rear suspension assembled with many new parts, bushings, Hi-Los, brake pipes, shoes etc. Notably with liberal amounts of copper grease, apparently to help prevent future rusting of the fasteners.
 
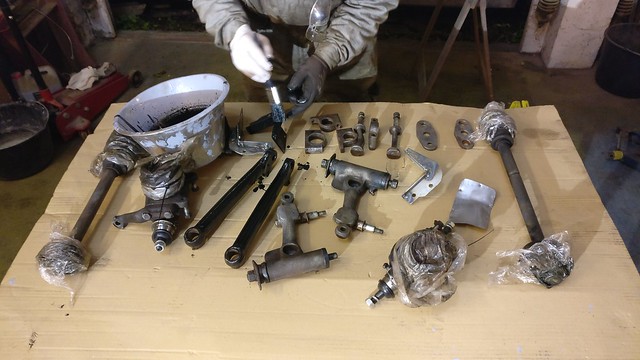
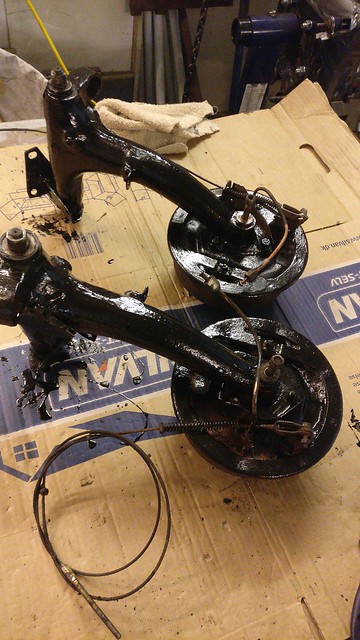
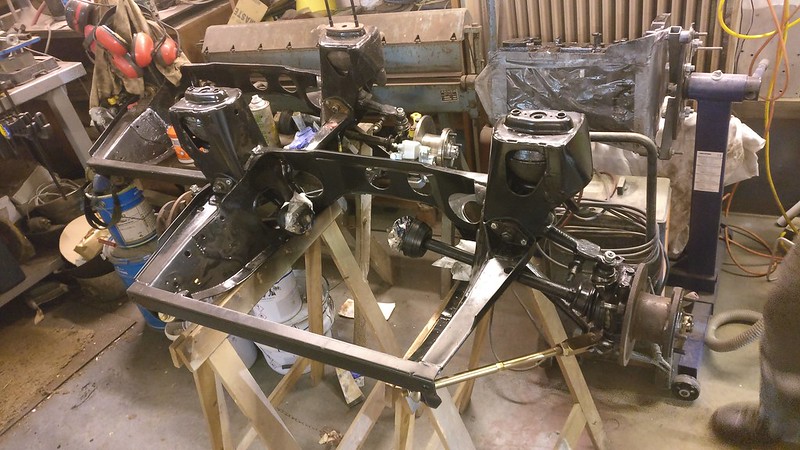
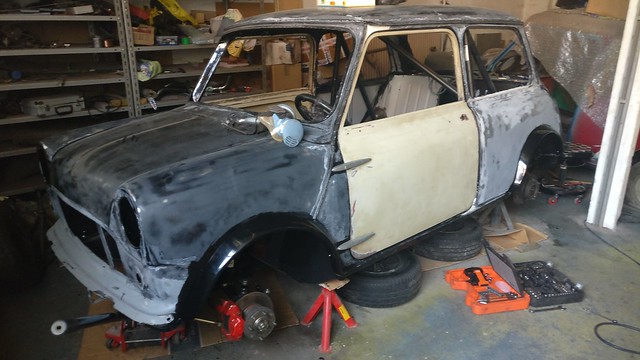
We then found time to assemble the front suspension.
 
 
The one in the back is for my own car painted with epoxy paint, while Peter's subframes are done with power-coat.
 
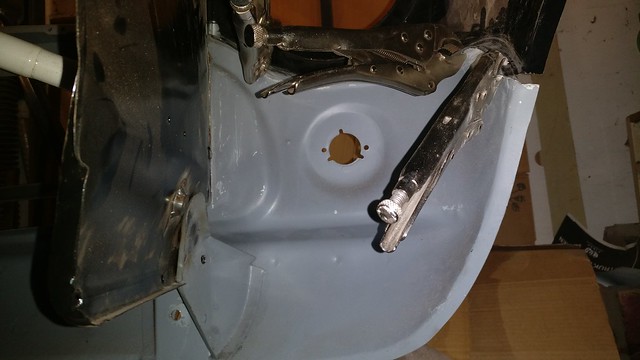
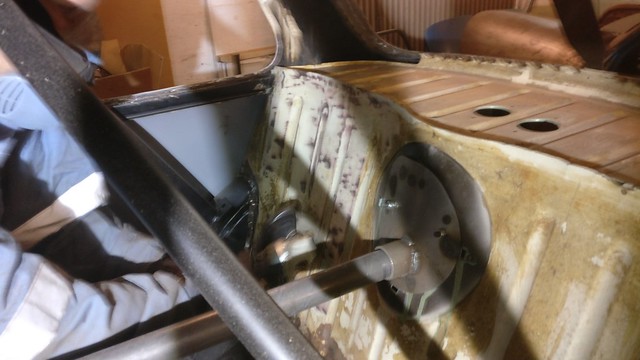
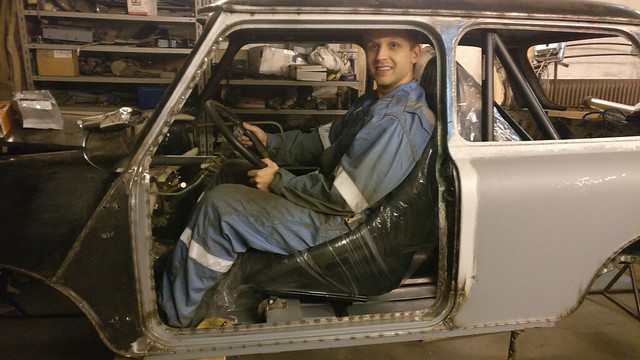
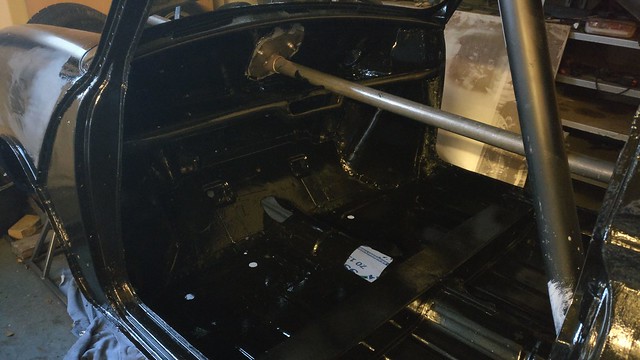
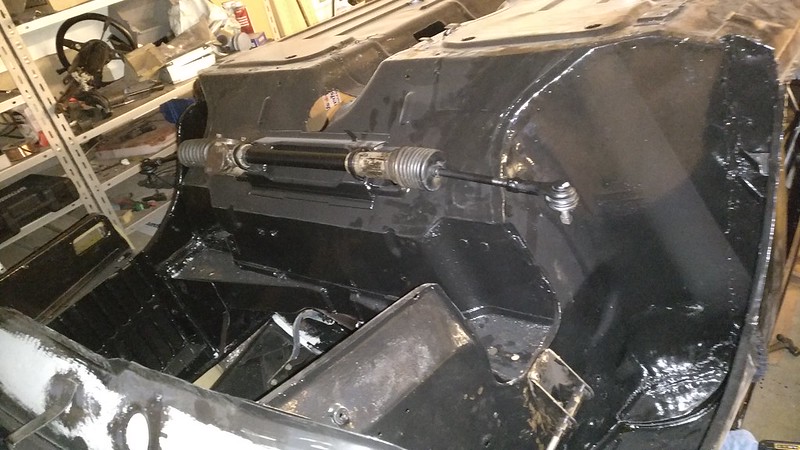
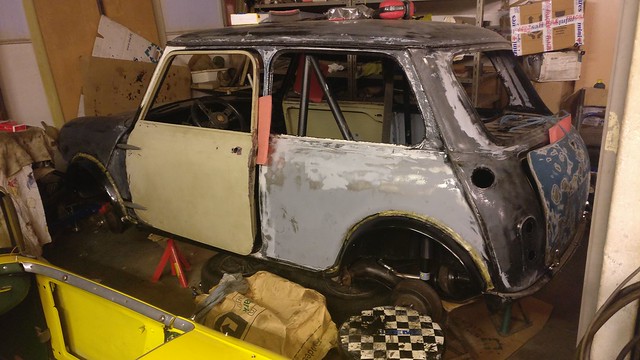
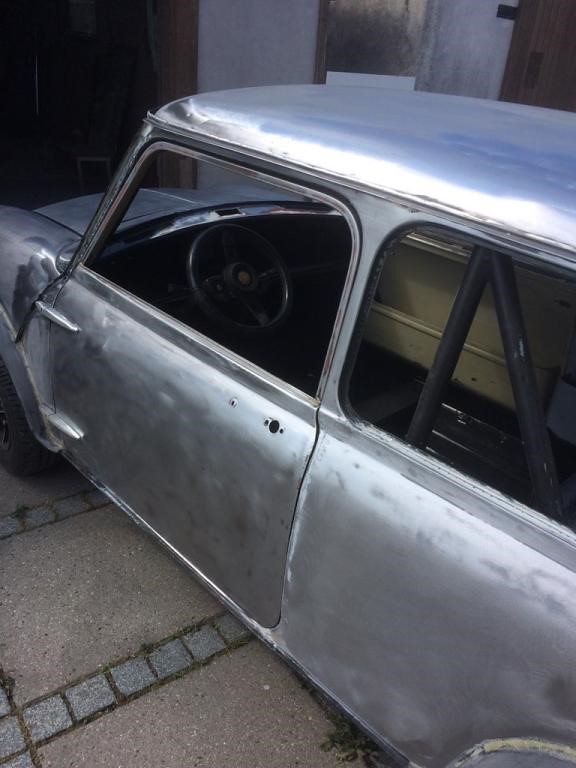
Peter had not been at our Tuesday work evening for several weeks. While he was away in Greece one time, I mounted the steering rack.
 
The next week I got another friend to help put the subframe in place then take the car down and set it on it's own four.
 
With steering mounted I didn't have the key, so by the next week Peter had emailed me the location of the key so I could actually turn the steering wheel. (sorry purists, no original steering shaft on this one)
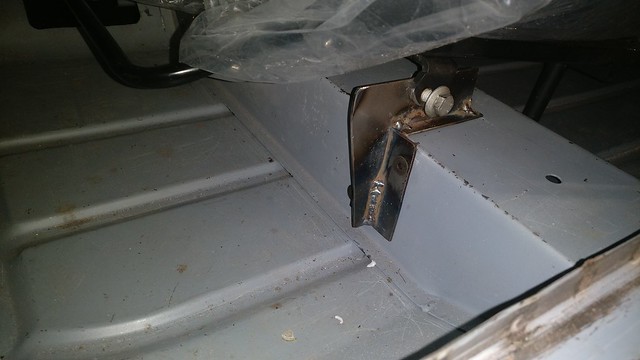
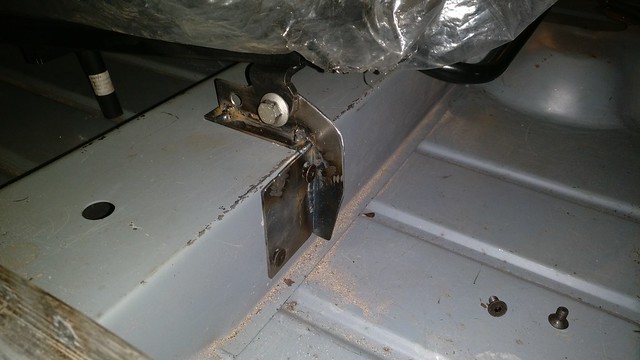
Peter has since been back and mounted the front subframe top bolts while he delivered the engine/gearbox for some work.


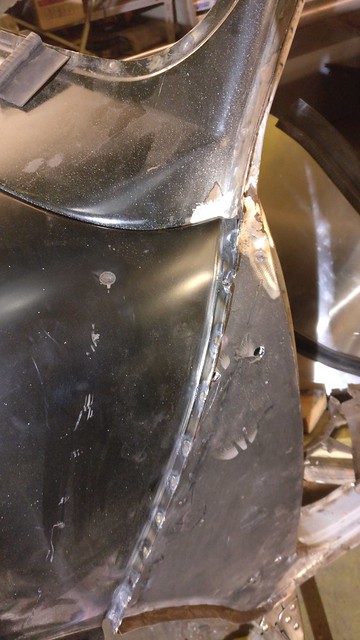
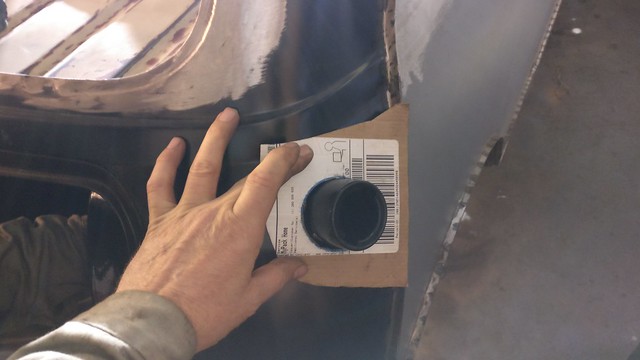
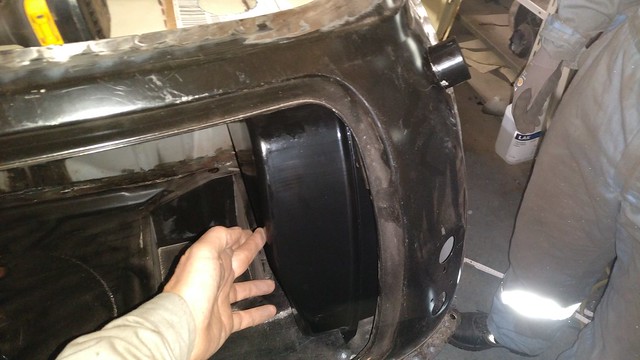
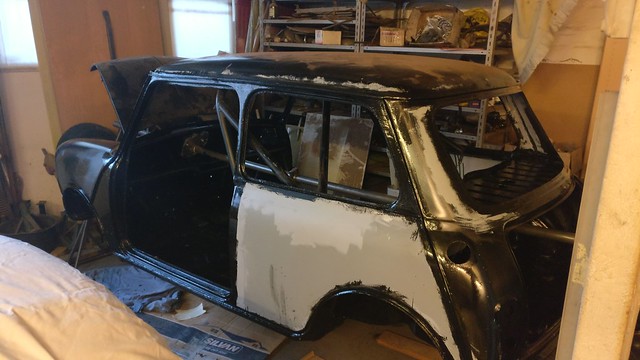
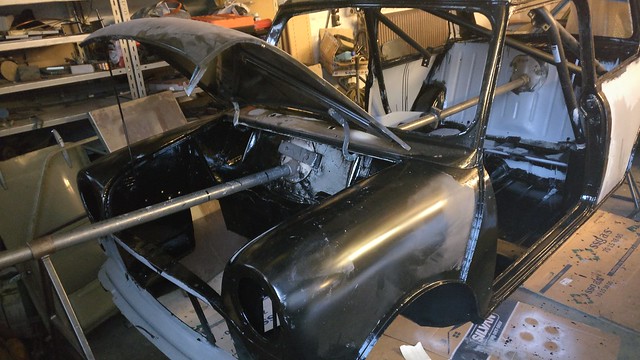
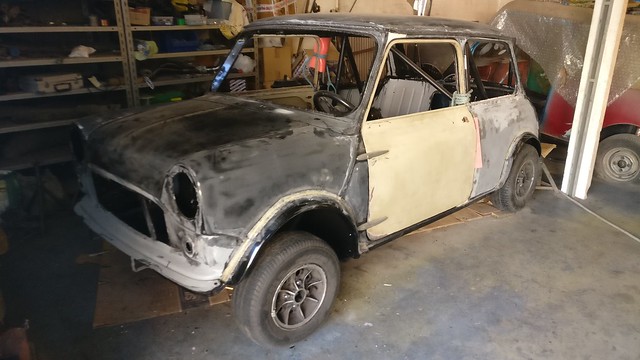
So since the Mini has wider wheels than standard, and there are laws about covering the tires, we had to add wing extensions. A cheap set, difficult to install
 
 
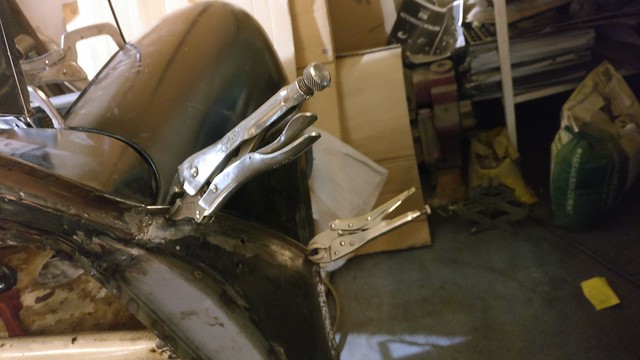
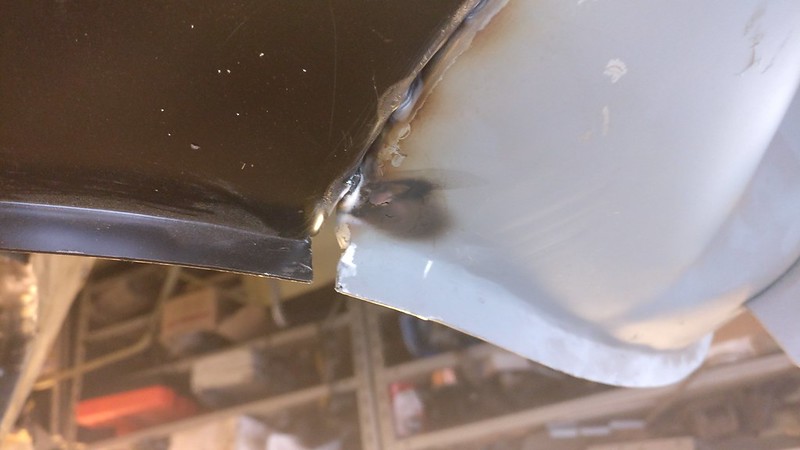
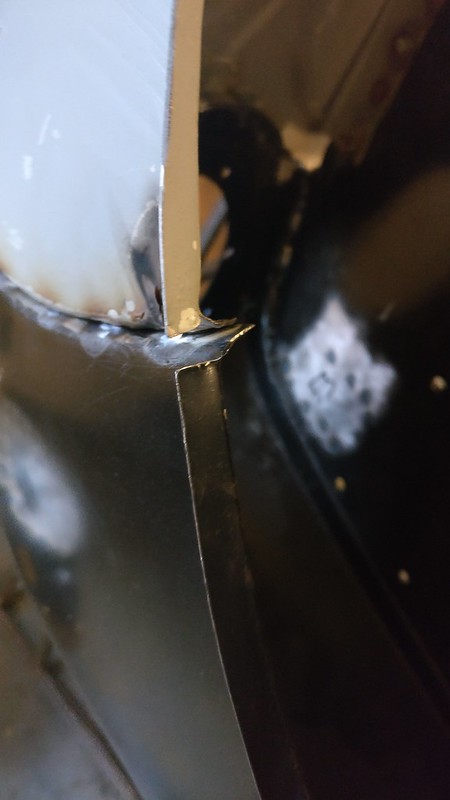
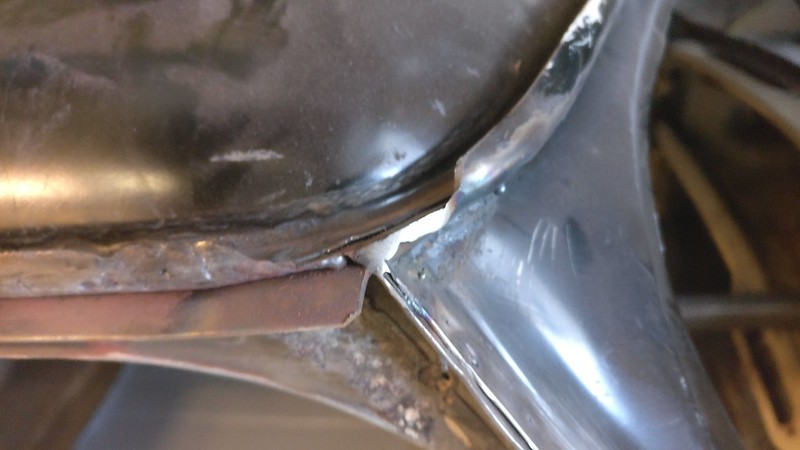
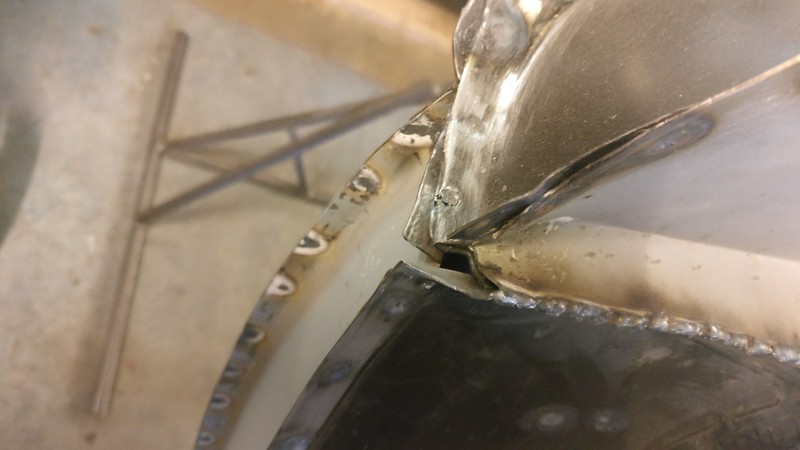
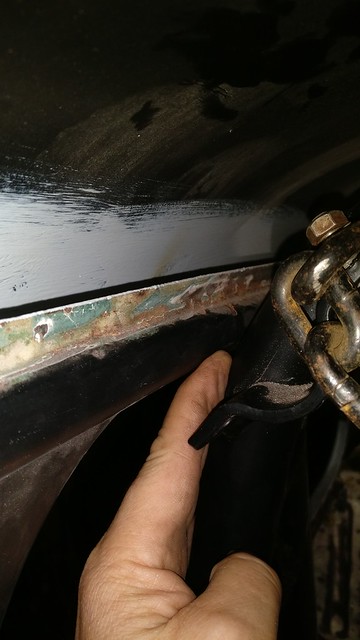
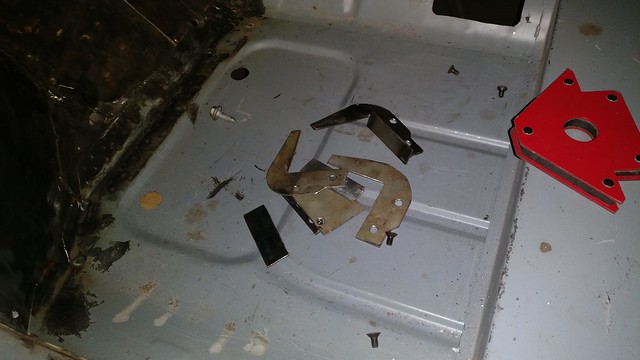
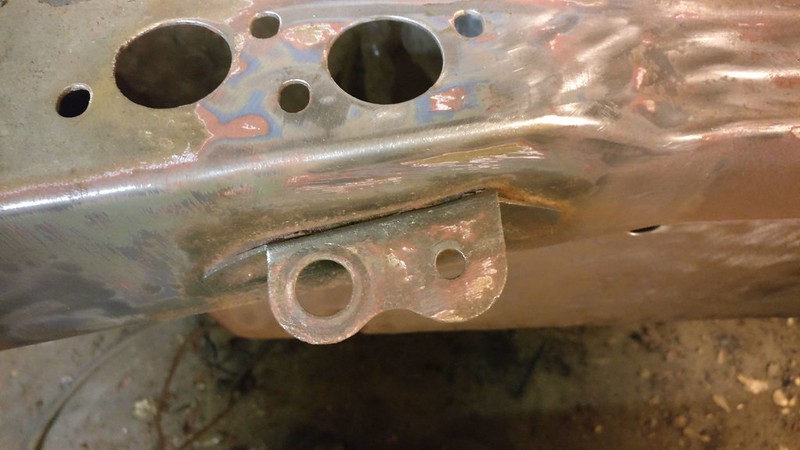
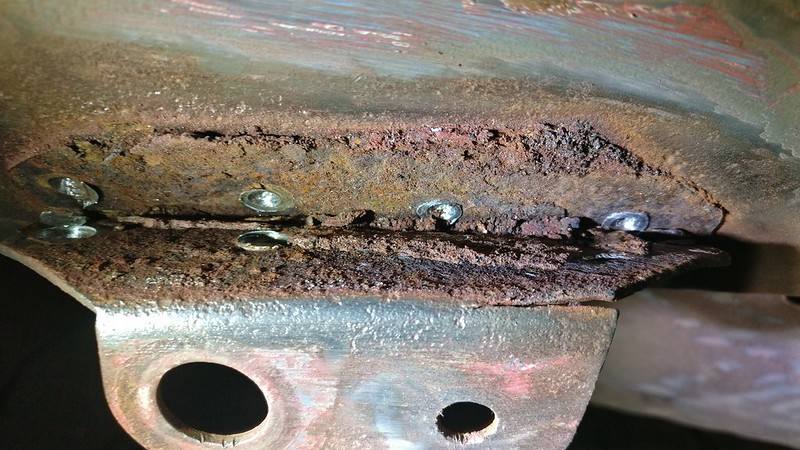
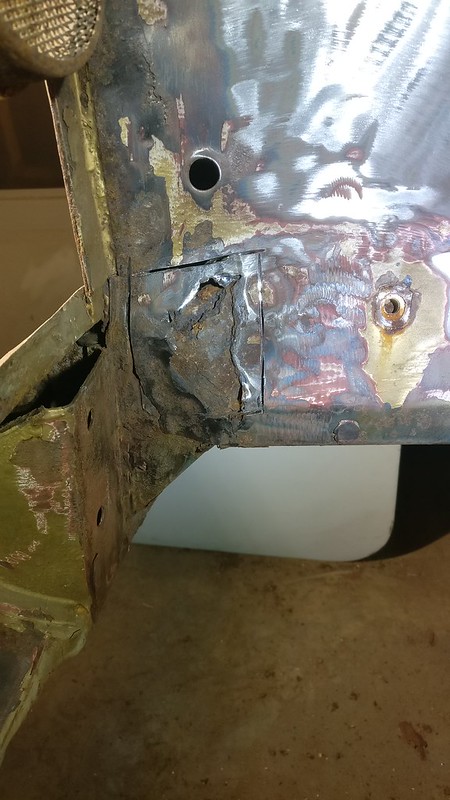
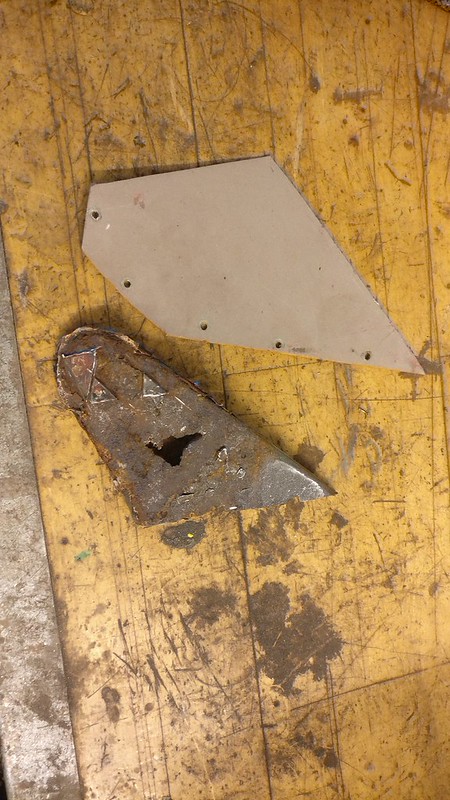
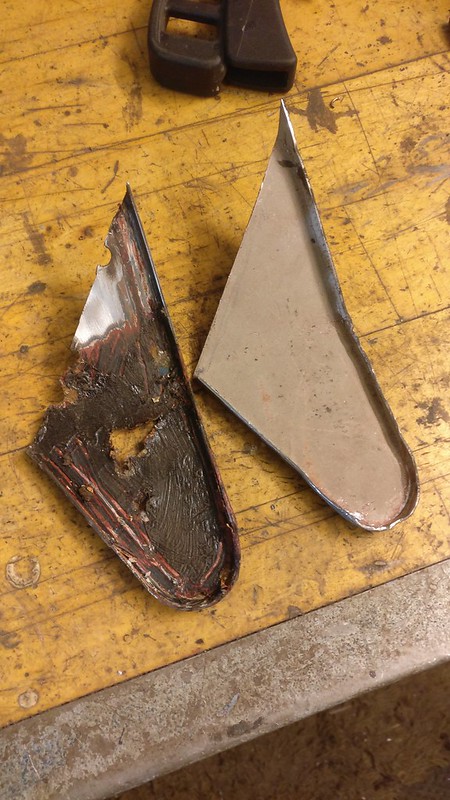
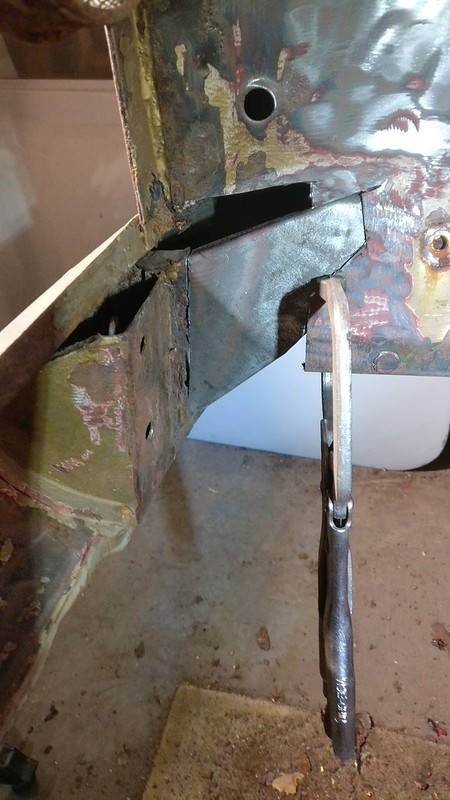
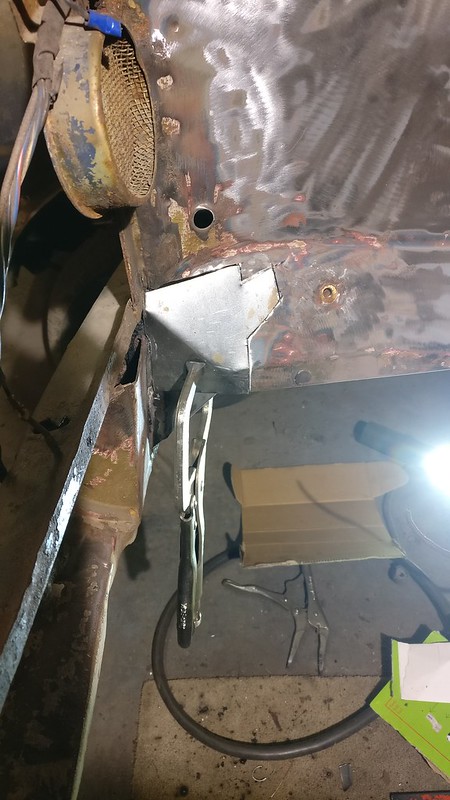
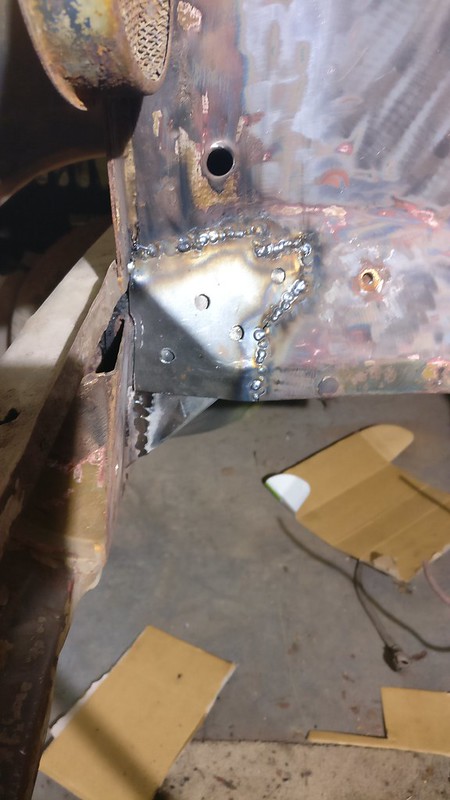
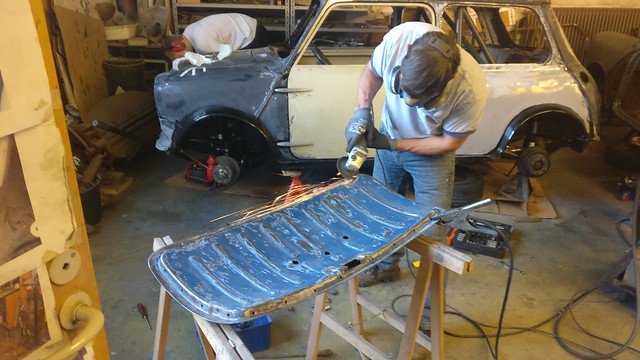
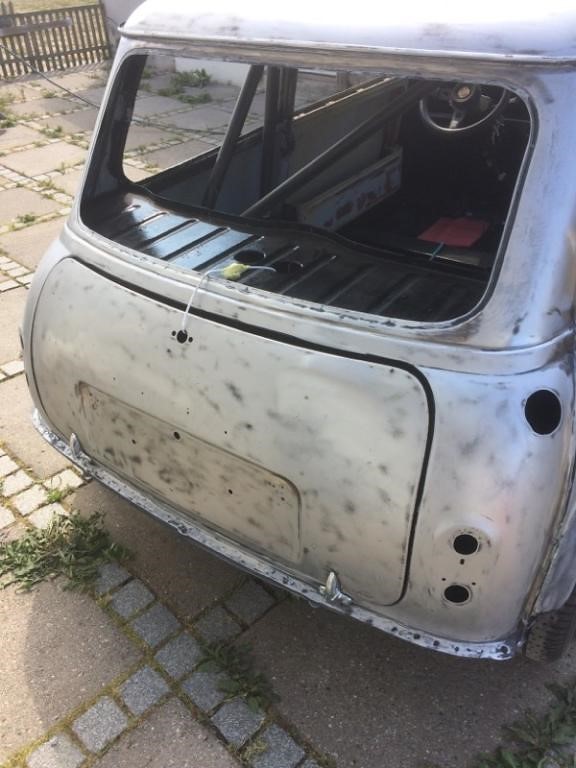
We made a few repairs to the non-new replacement parts, meaning doors and boot lid.
 
 
The wings were GRP bonded to the wings.
 
 
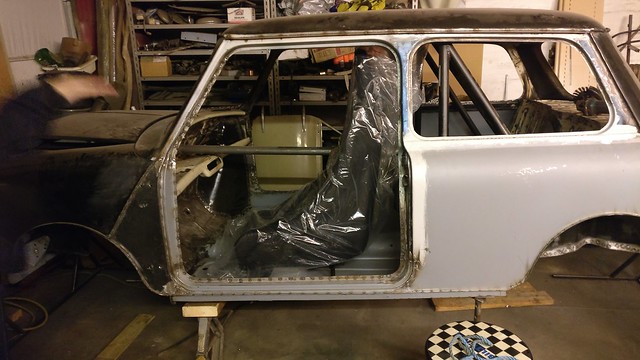
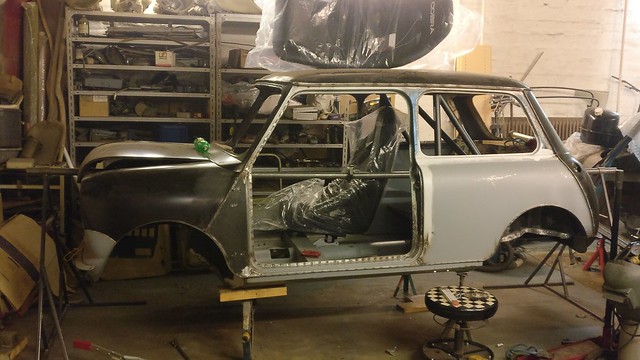
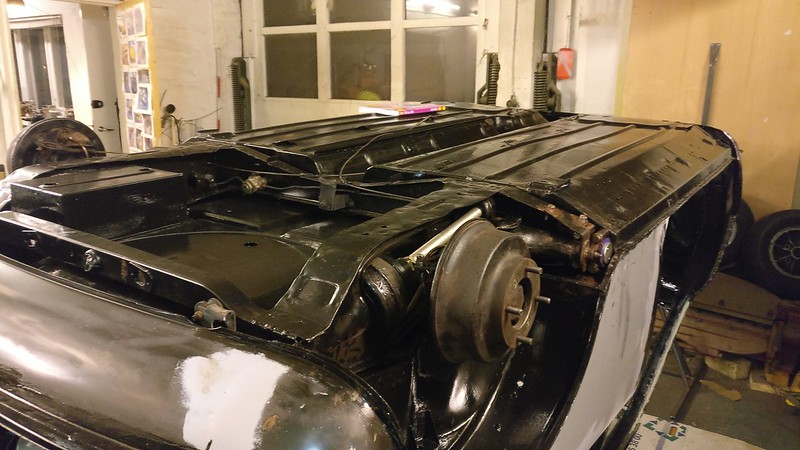
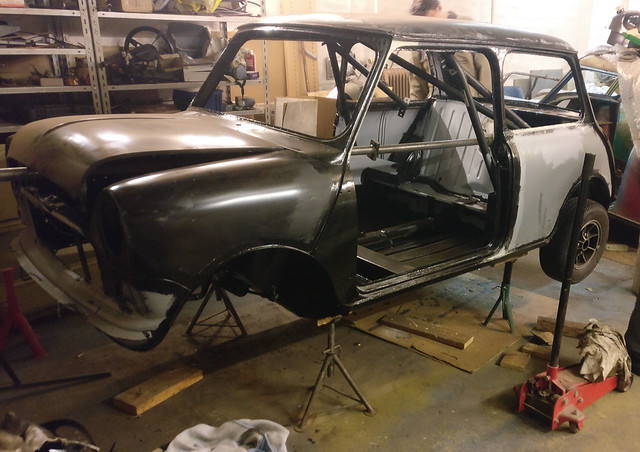
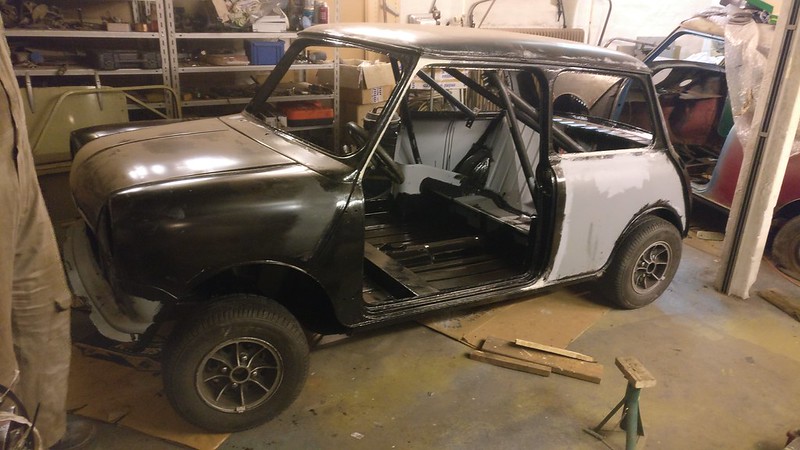
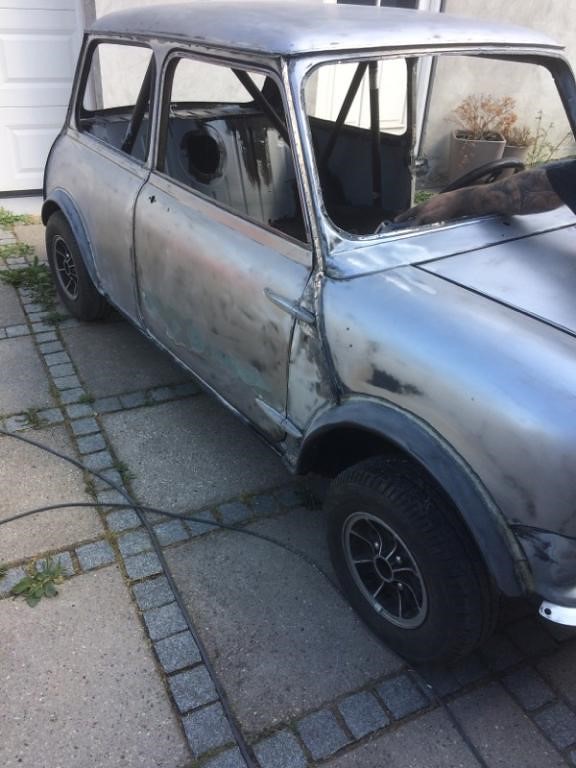
With a set of wheels, it's looking OK. This includes the set of long steering arm joints so the wheels point straight.
 
 
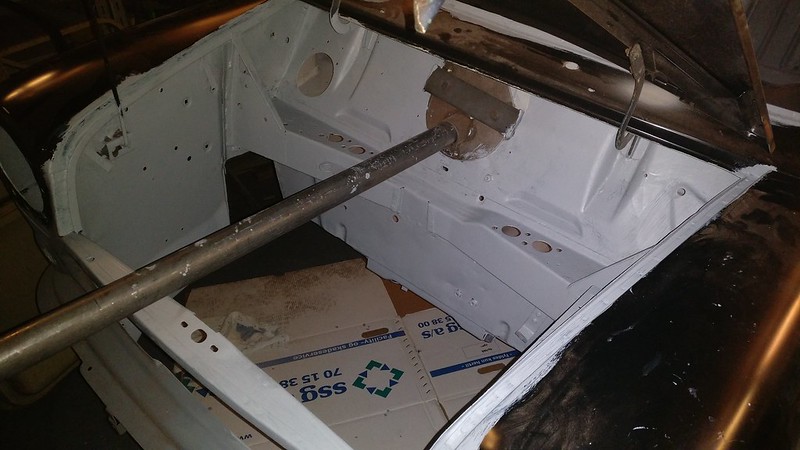
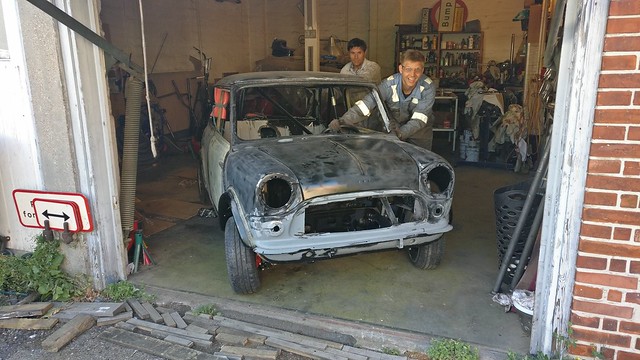
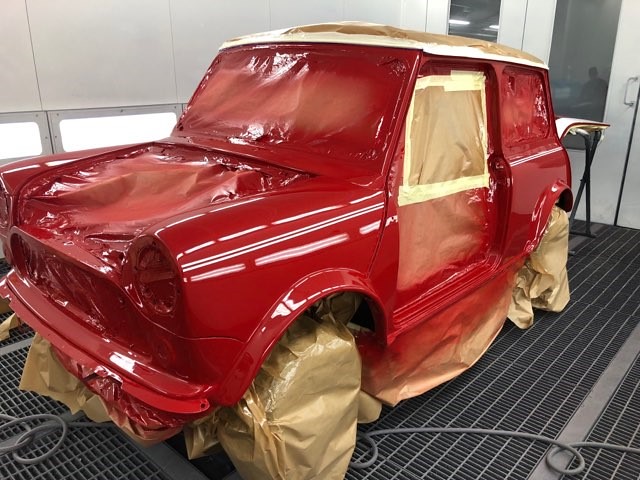
The car now rolls for the first time out of the garage in about 21 months.
 
 
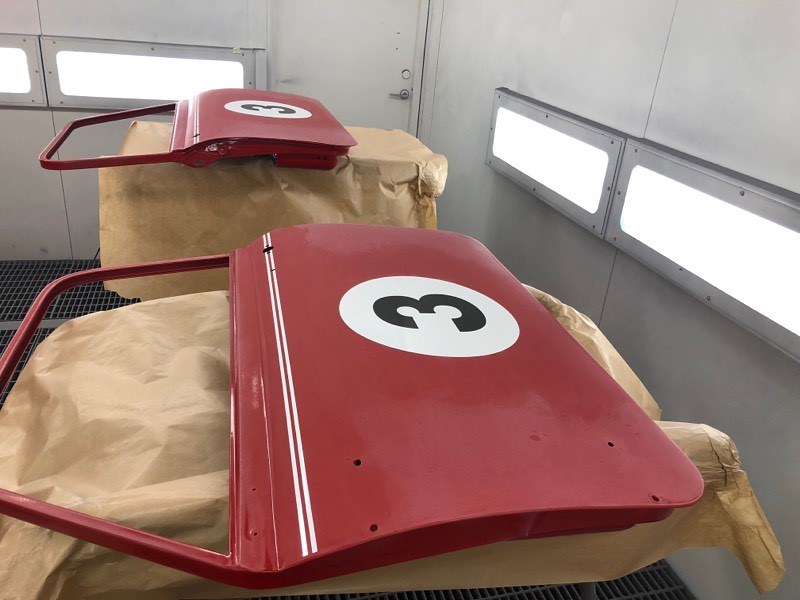
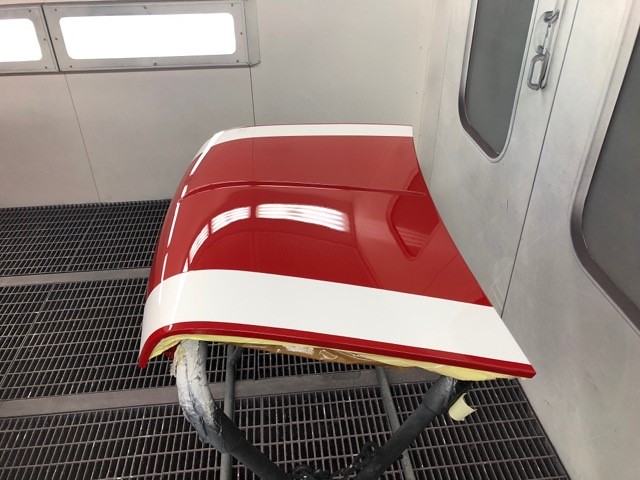
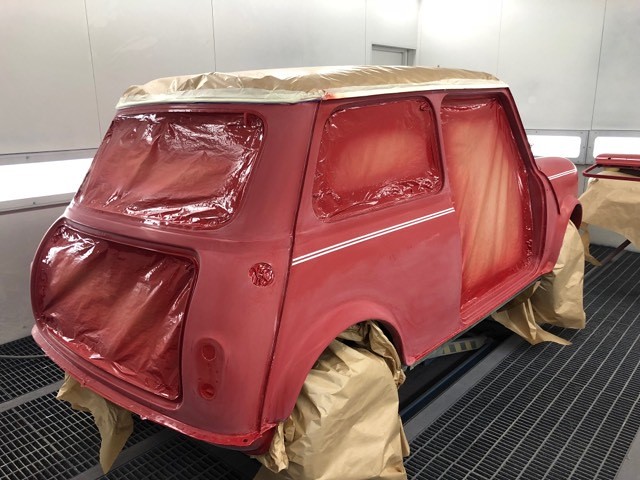
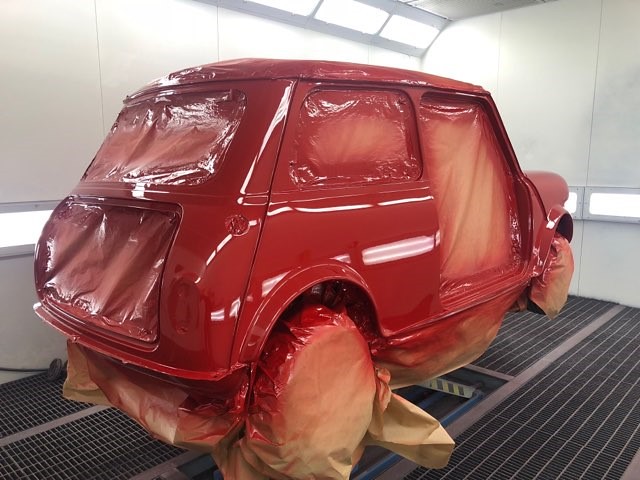
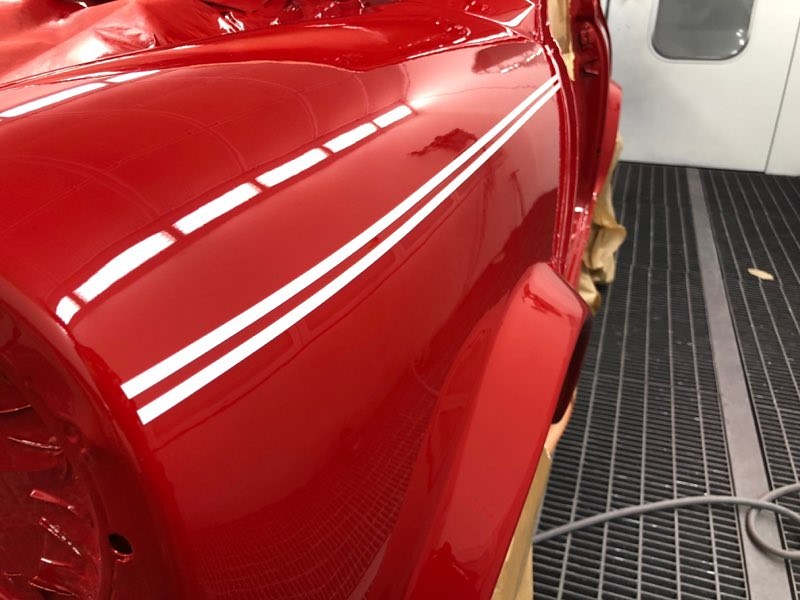
It is on it's way to the paint shop as I don't think I can do it justice in my little garage, and I don't want to get paint all over everything.
 
 
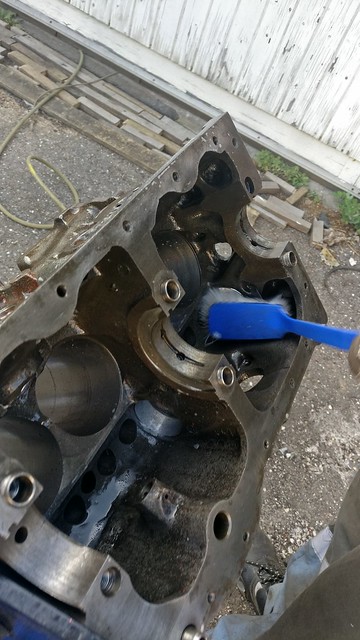
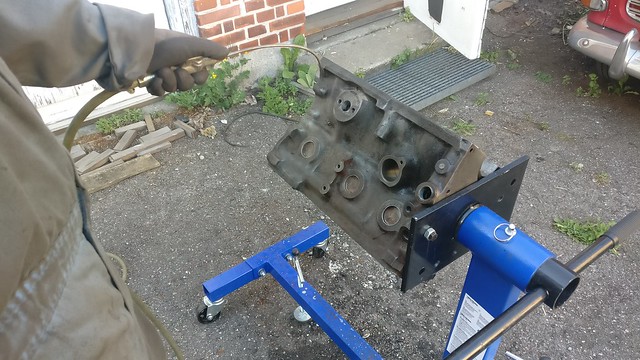
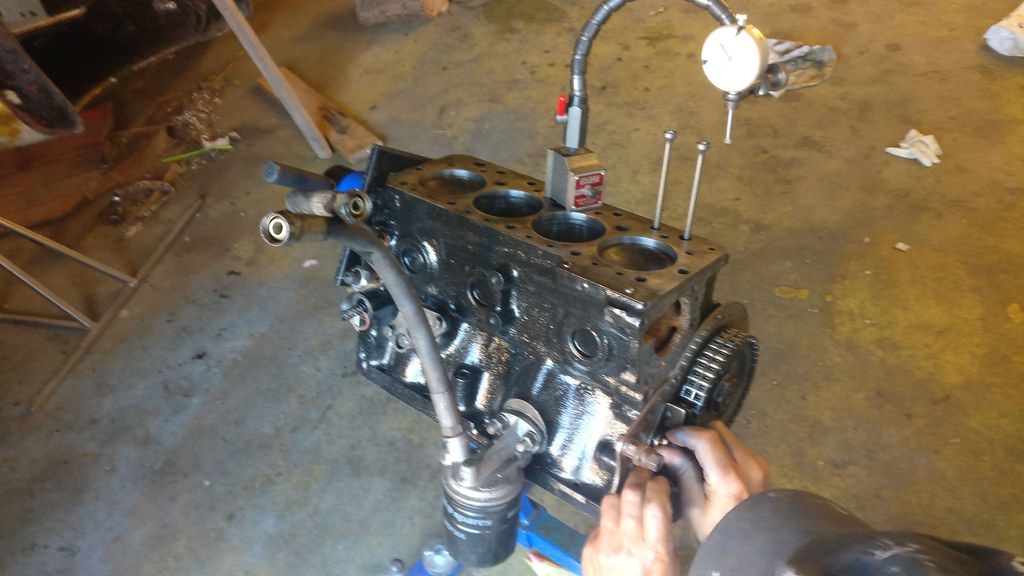
I had been fitting new cam bearings in the engine
 
 
for a MD266 cam.
 
 
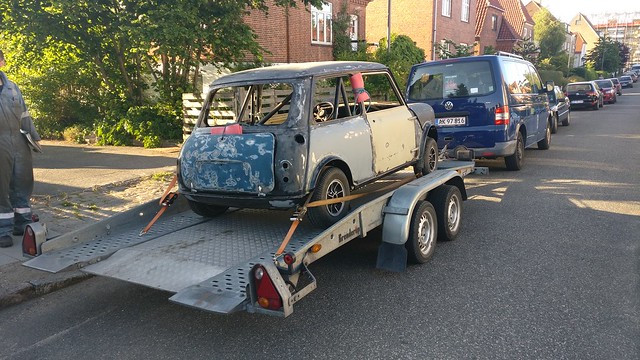
So on Constitution day here in Denmark, while Peter drove the car to the paint shop, Tim and I cleaned the engine thoroughly both inside and outside


Then I taped it up and painted it.
 
 
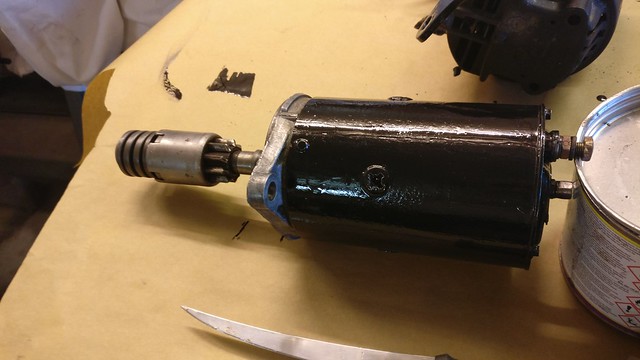
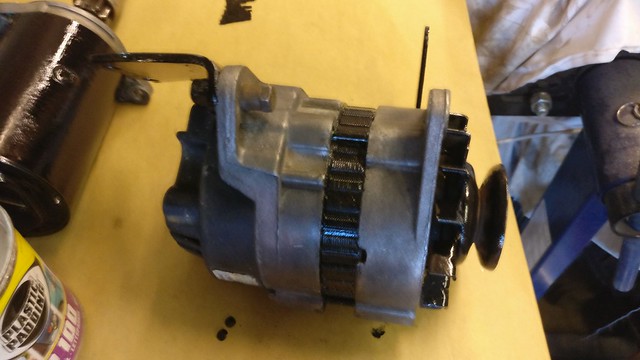
In the meantime, Tim cleaned up the starter and generator so I could paint them too.


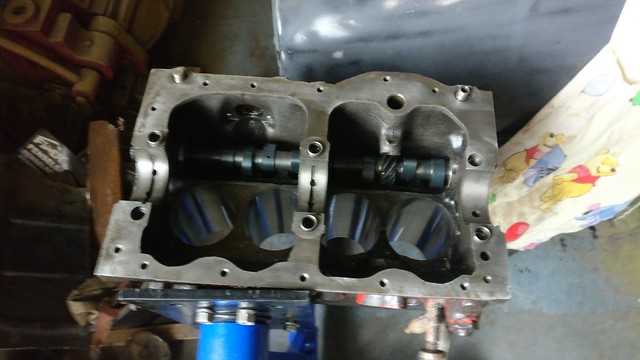
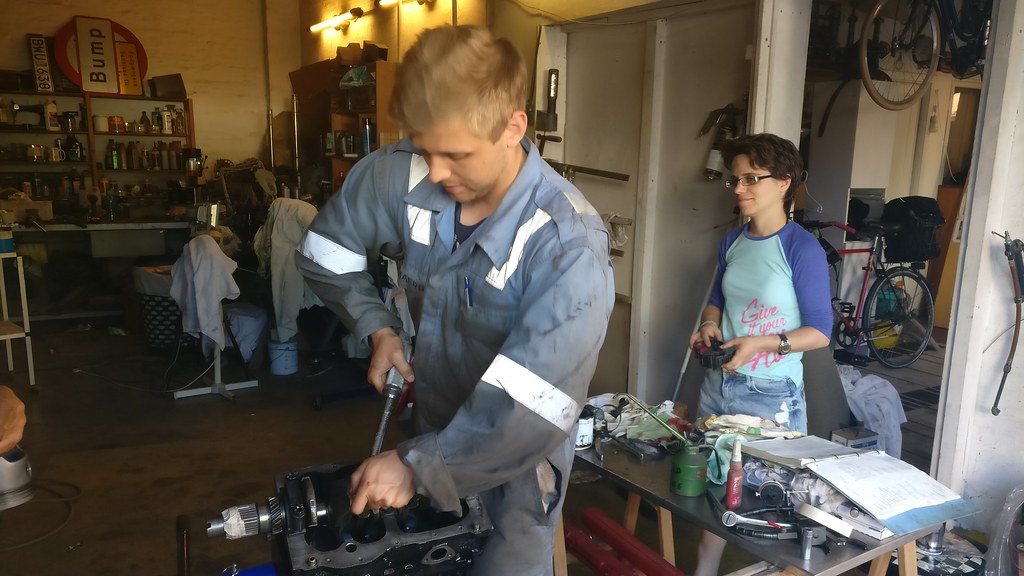
Here we finally got around to assembling the motor


It should all be ok, but everything is tested anyway. A couple marginal clearances cleaned up and the short block is done


Not too much this week. Finally got a correct transfer gear so put these two major components together. Also fiddled with the speedo drive and bearings.
 
 
Then cleaned up the third major component and installed it also.
 
 
It's not the final valve cover.


#104 minimissions

minimissions

    Up Into Fourth

  • Members
  • PipPipPipPipPipPipPipPipPip
  • 3,427 posts
  • Location: North West
  • Local Club: M.M.O.C

Posted 14 July 2018 - 07:07 AM

Some awesome work on this car. It makes me wish I kept my mk1 now. gutted....


#105 racingenglishcars

racingenglishcars

    Mini Mad

  • Members
  • PipPipPipPip
  • 293 posts
  • Location: Storkøbenhavn
  • Local Club: Donn's Backyard Garage

Posted 22 November 2018 - 12:39 PM

Finally, some recent pictures of this project:


45274632744_e84a1ba870_b.jpgTim01 by frogeye61, on Flickr 45998730201_945413a6ab_b.jpgTim02 by frogeye61, on Flickr 32127869808_4dd2793903_b.jpgTim03 by frogeye61, on Flickr 44182860600_f12e81b426_c.jpgTim06 by frogeye61, on Flickr 32127869488_6e8c2f4281_z.jpgTim07 by frogeye61, on Flickr 45274632404_012f989b71_z.jpgTim08 by frogeye61, on Flickr 32127869348_594aabb2ab_z.jpgTim09 by frogeye61, on Flickr 45274632504_99bdffd0b9_z.jpgTim05 by frogeye61, on Flickr 44182860790_4db7027942_c.jpgTim04 by frogeye61, on Flickr


1 user(s) are reading this topic

0 members, 1 guests, 0 anonymous users