Jump to content


Photo
- - - - -

A Pair Of 64 Mk1 850S


  • Please log in to reply
104 replies to this topic

#61 racingenglishcars

racingenglishcars

    Mini Mad

  • Members
  • PipPipPipPip
  • 293 posts
  • Location: Storkøbenhavn
  • Local Club: Donn's Backyard Garage

Posted 07 June 2017 - 10:46 AM

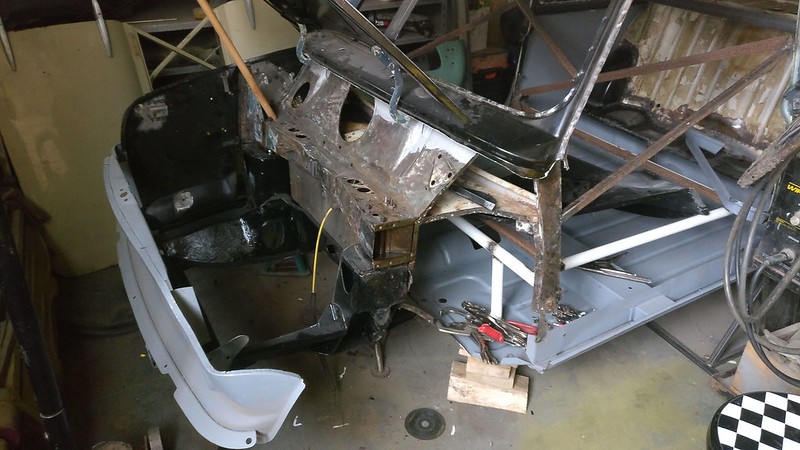
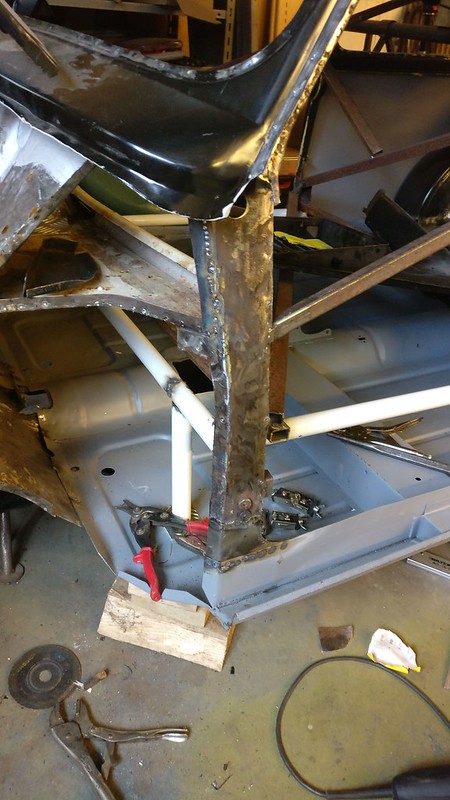
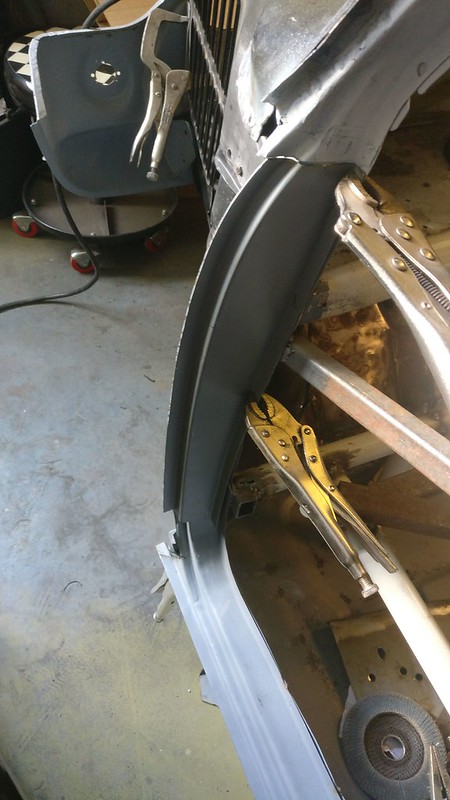
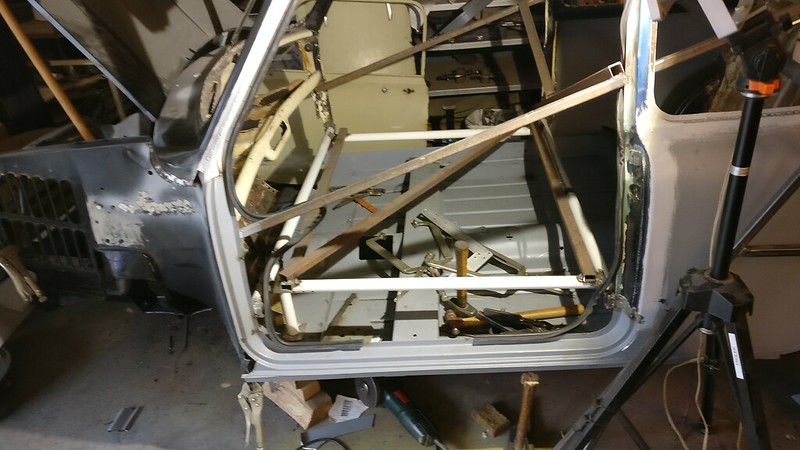
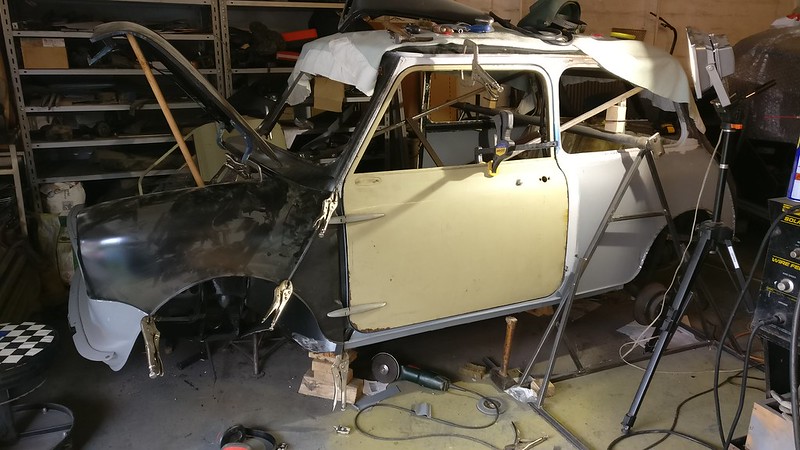
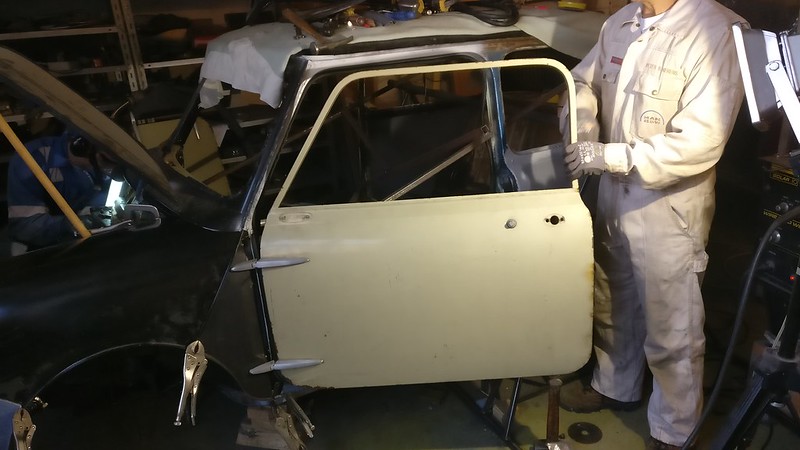
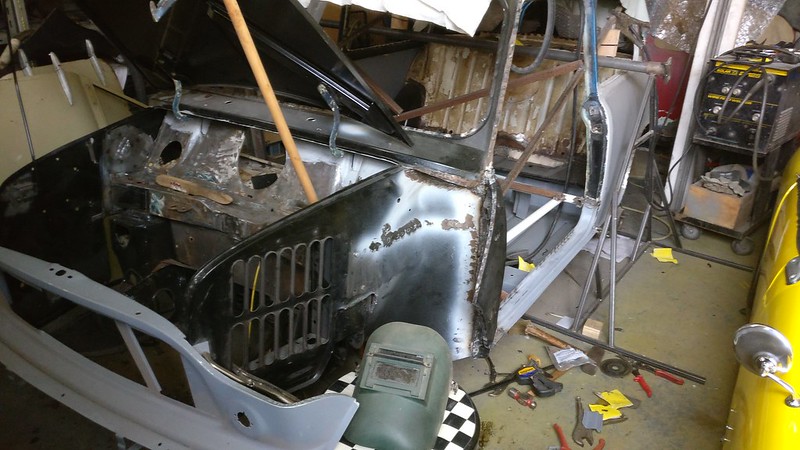
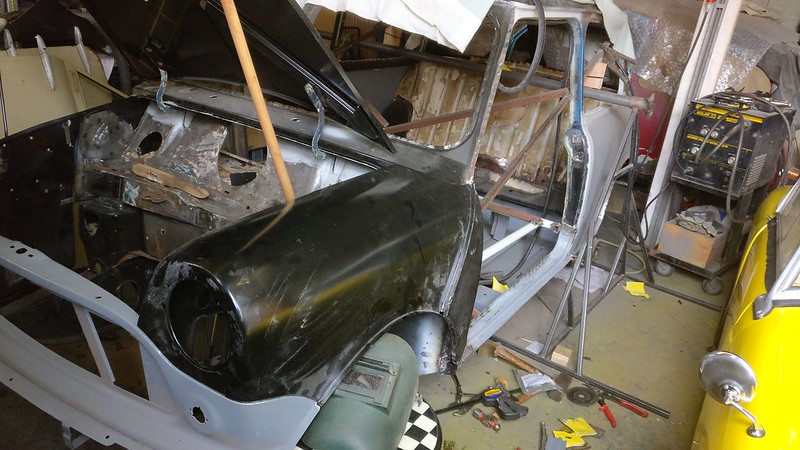
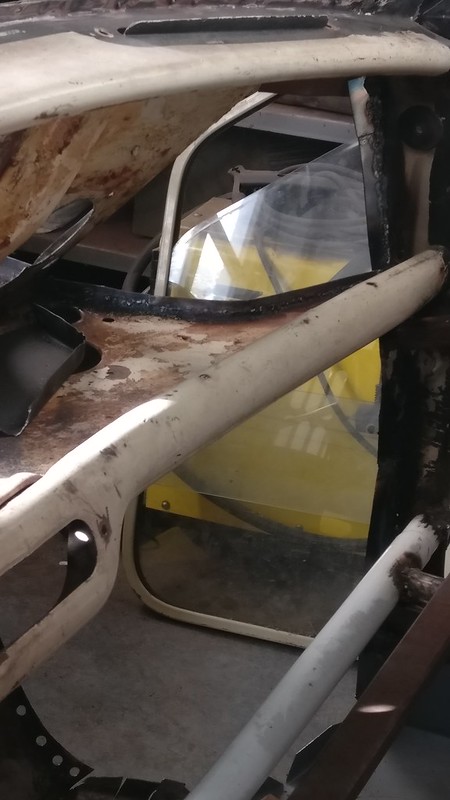
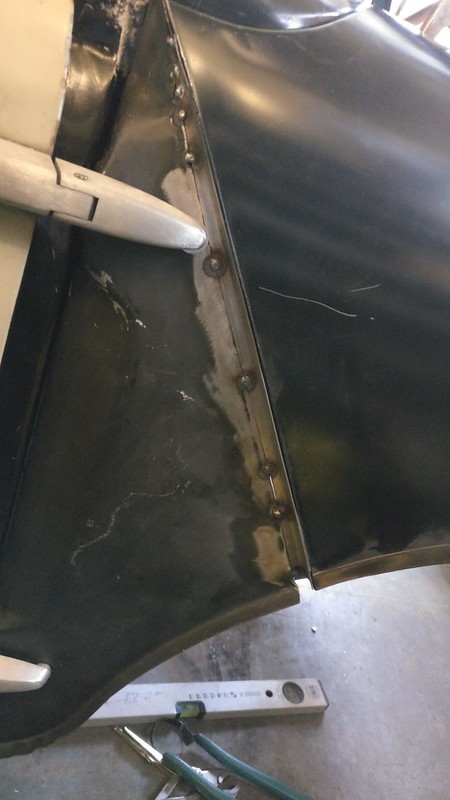
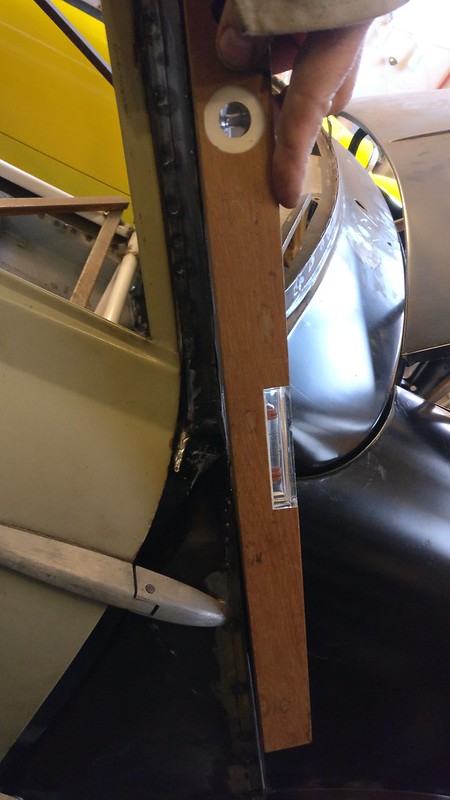
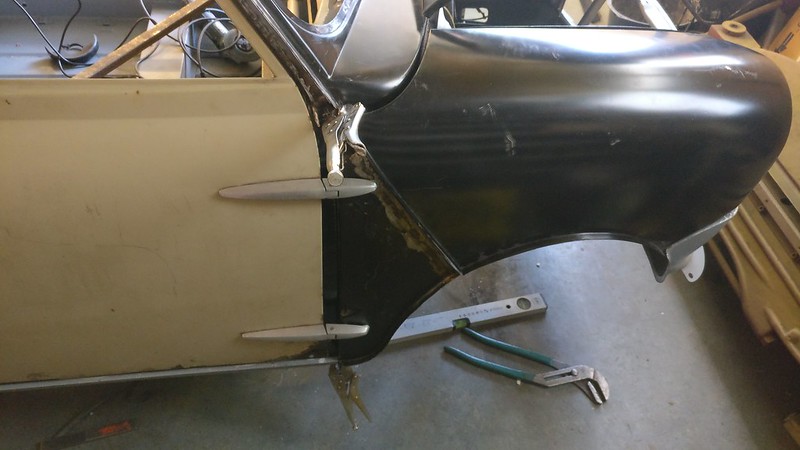
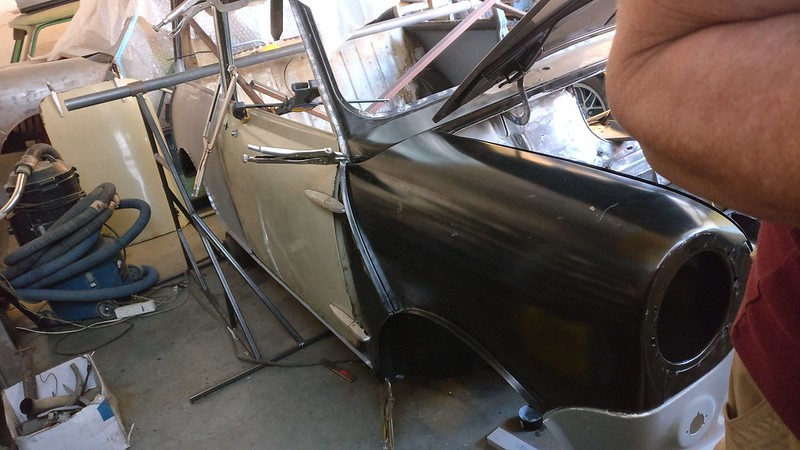
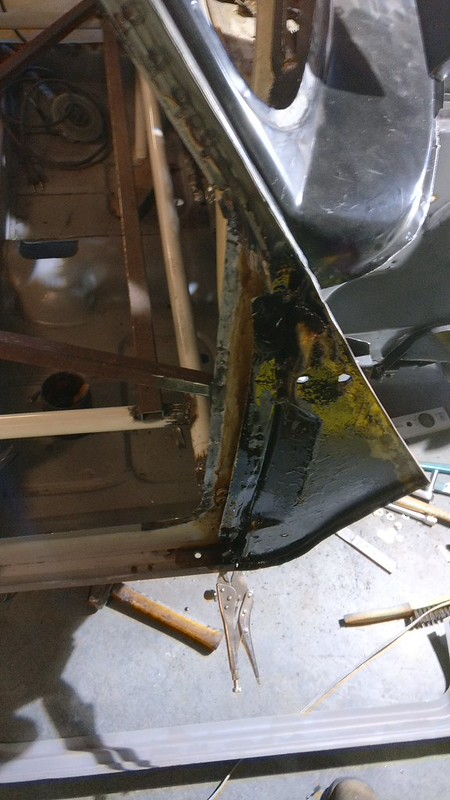
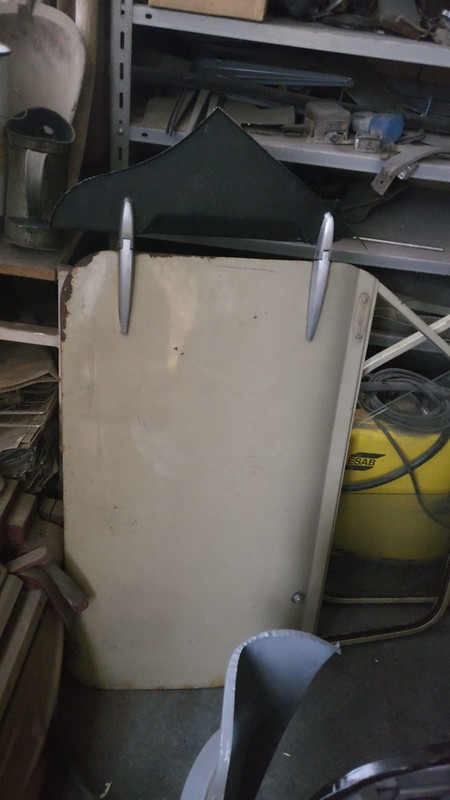
We have now fitted new hinges to the doors and mounted them to the A panels. After a bit (lot) of fettering, the door and A panel both fit onto the A post and inner fender with reasonable gaps around the door. This includes the sill top, front door opening panel, angled side seam, front fender etc. 
 
 
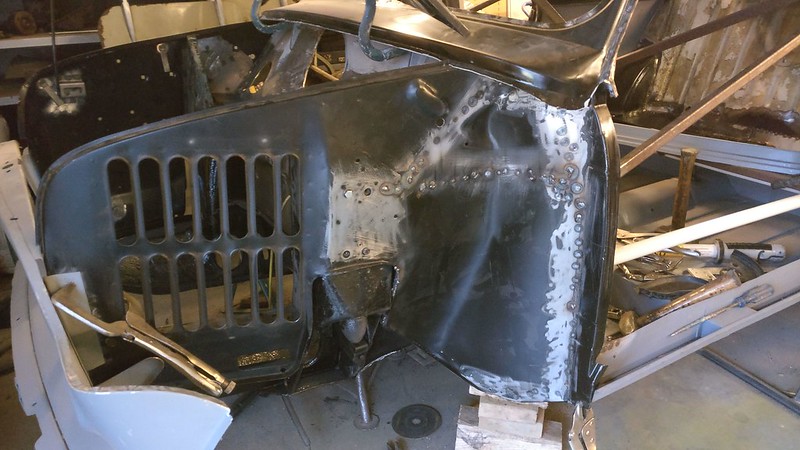
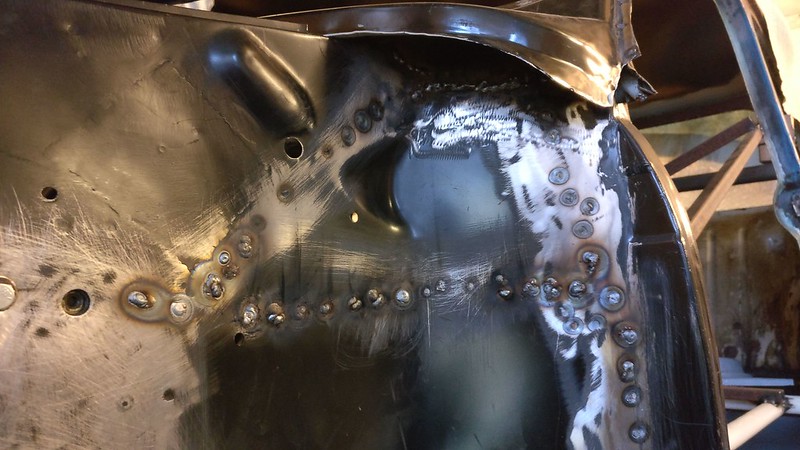
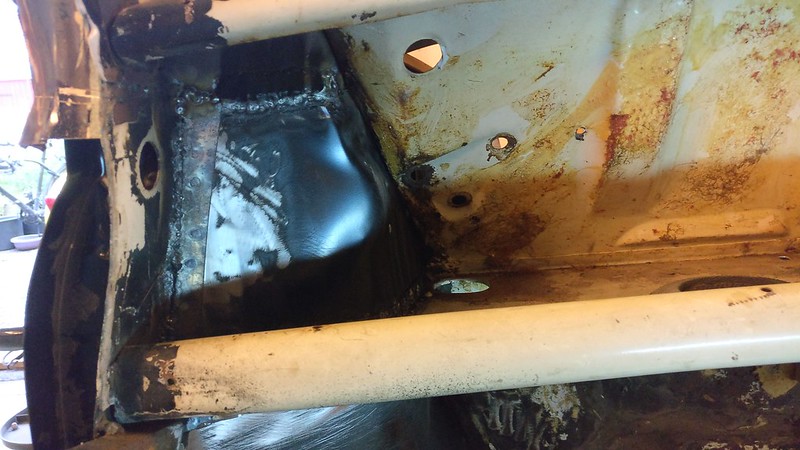
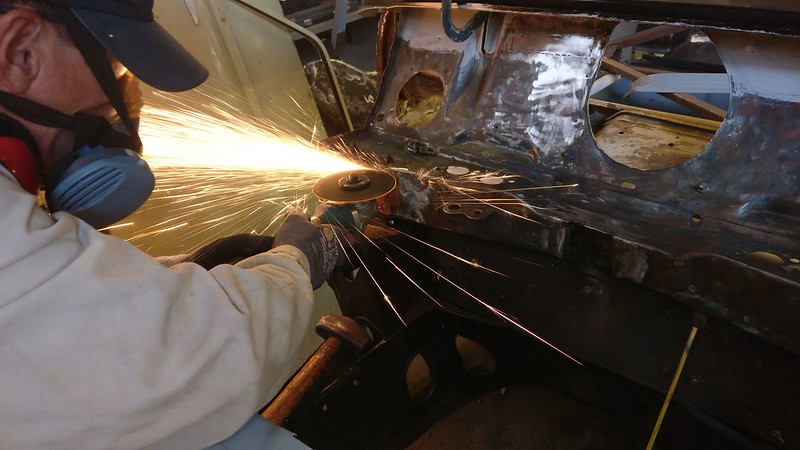
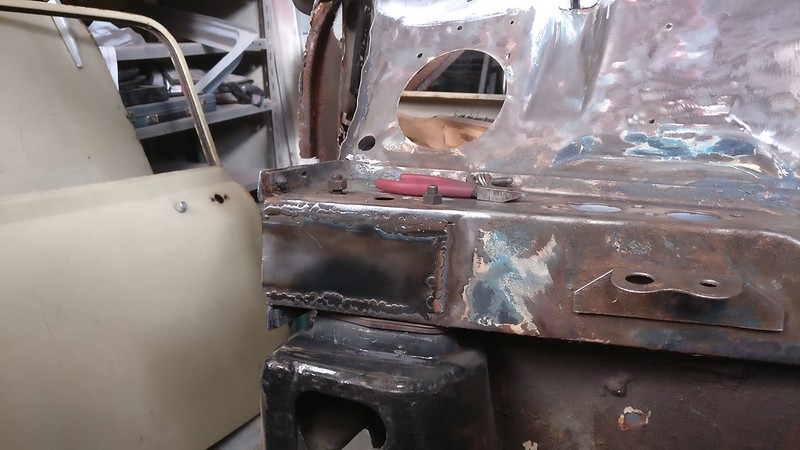
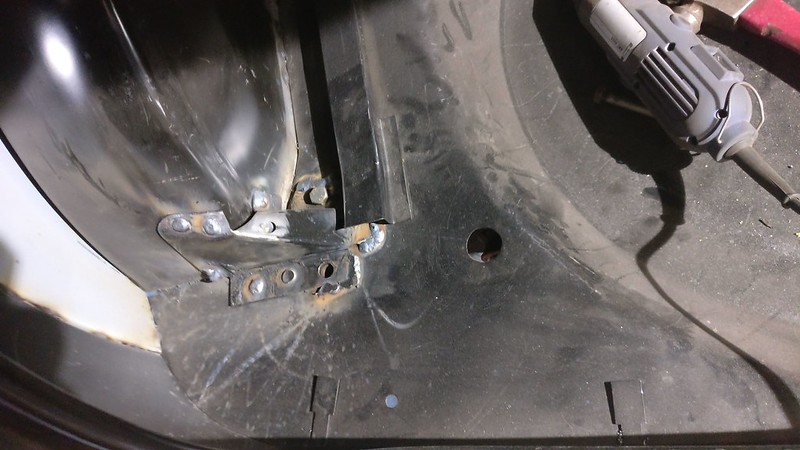
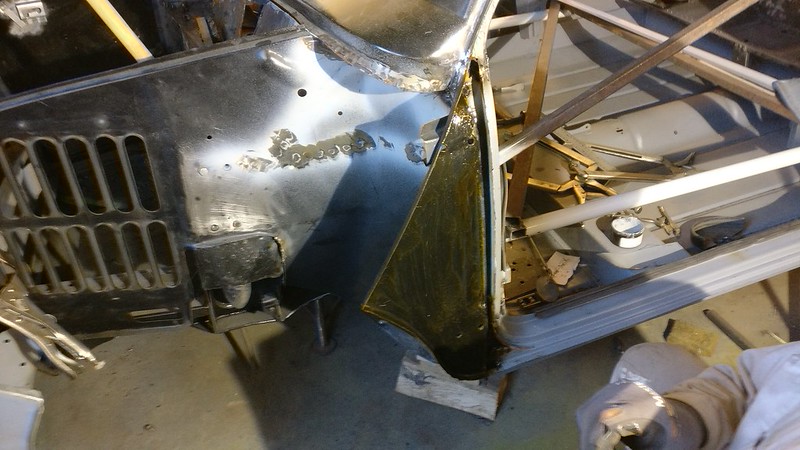
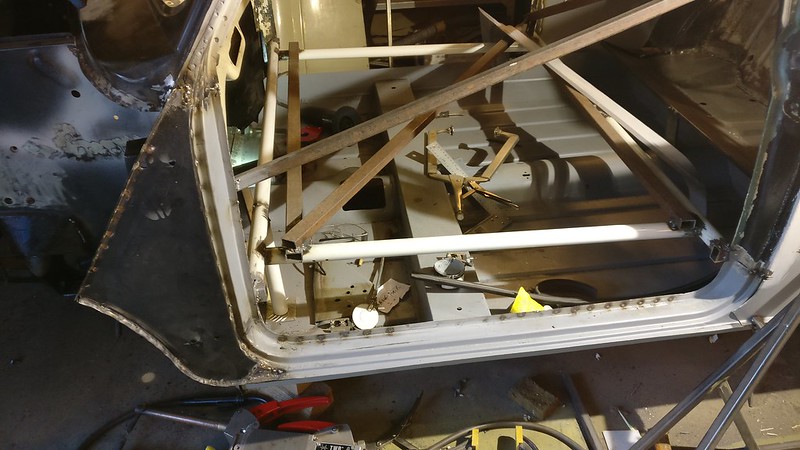
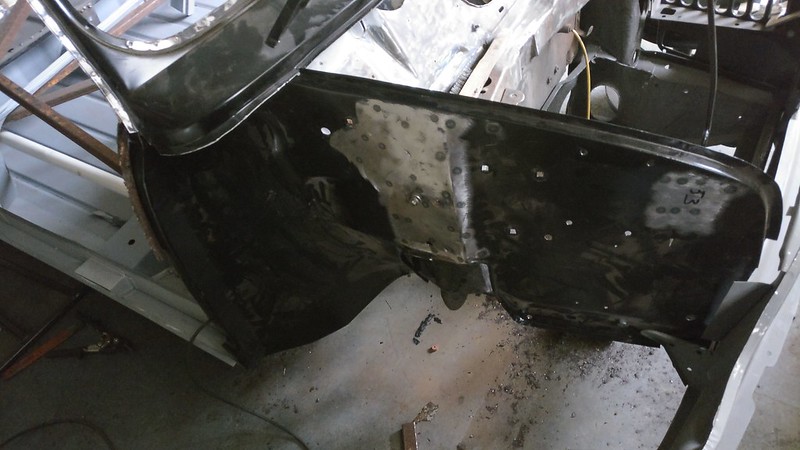
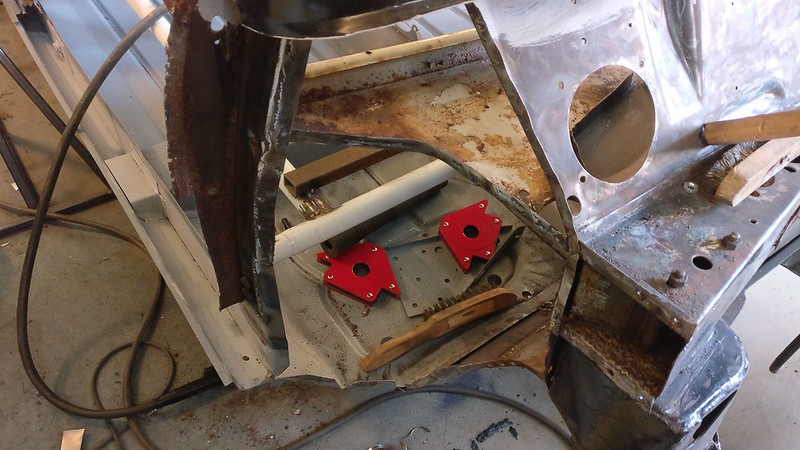
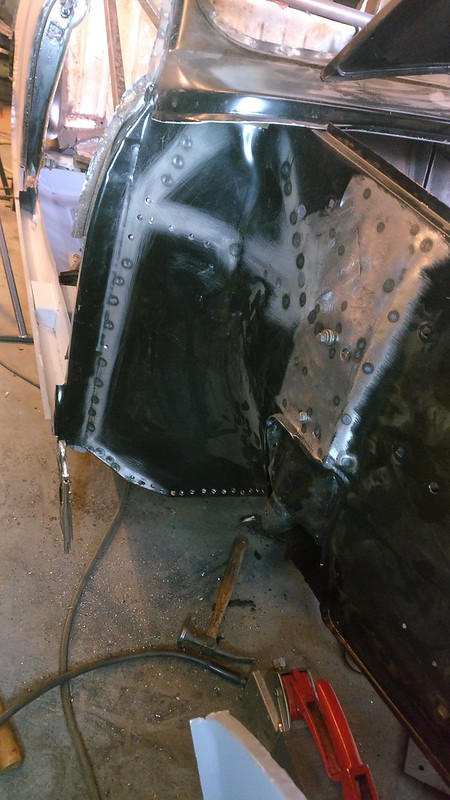
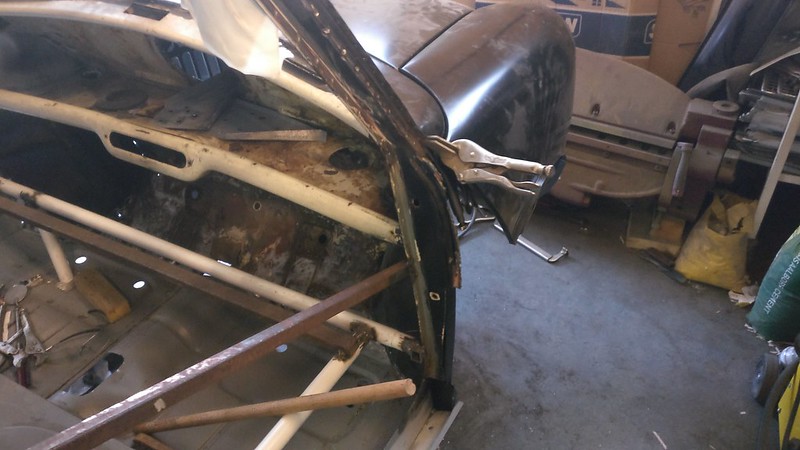
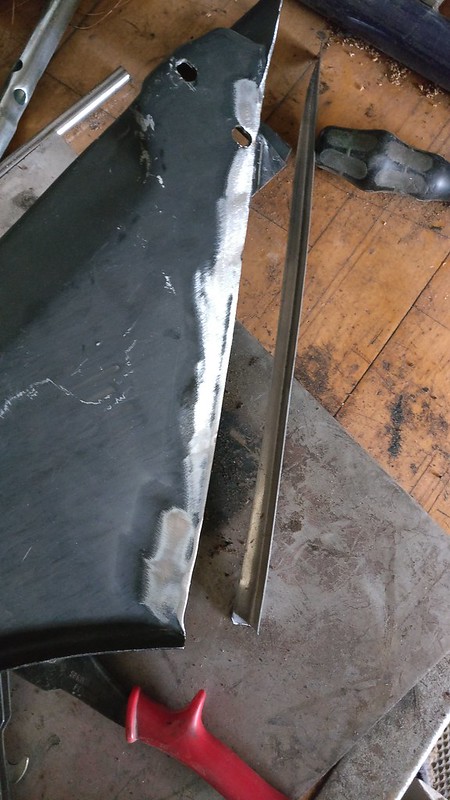
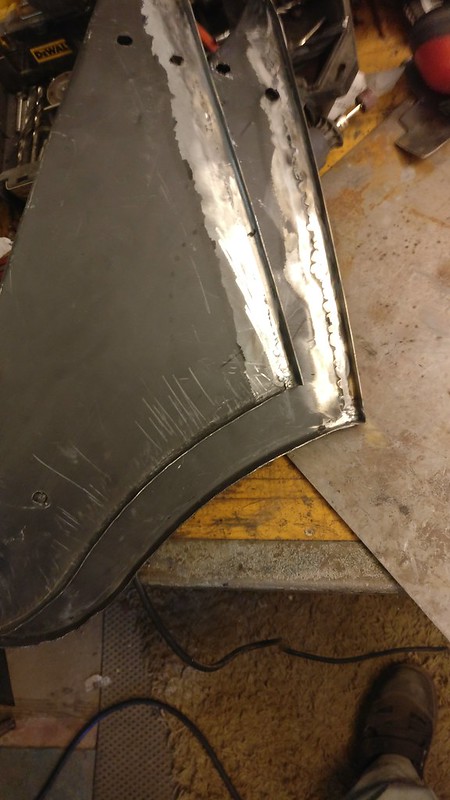
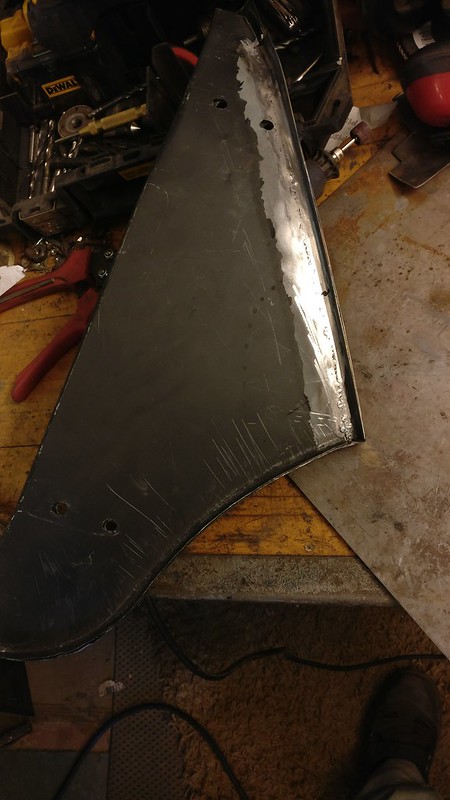
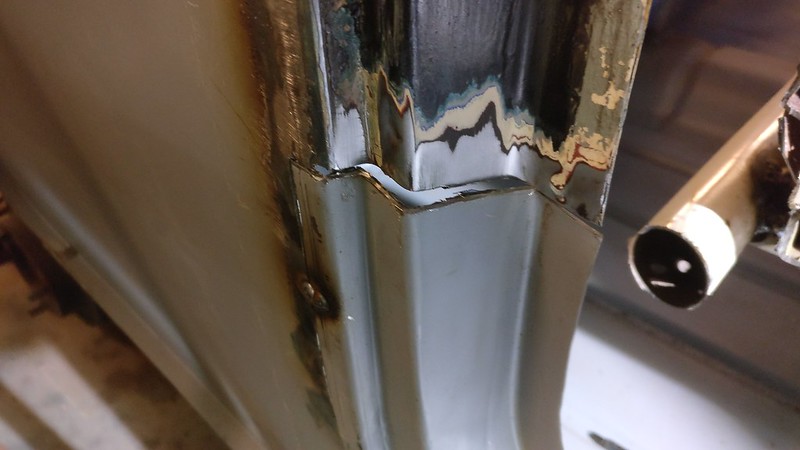
So then after marking, we pulled off the inner fender, cleaned and sanded, readying for the spot welder (and some plug welds), also rust protection inside the bulkhead crossmember. First job is that I need to finish the "Stiffener/Box Plate 11.36.03.03", which I'm not replacing, just repairing.


#62 racingenglishcars

racingenglishcars

    Mini Mad

  • Members
  • PipPipPipPip
  • 293 posts
  • Location: Storkøbenhavn
  • Local Club: Donn's Backyard Garage

Posted 14 June 2017 - 07:43 AM

I finally got the A-post inner plate repaired. Al the edges were cleaned up and readied for spot welding. "Completely correct" alignment of the inner fender achieved and tested with surrounding panels and door, then spot welded where I could reach. Where I couldn't reach we drilled for plug welds. The top corner of the inner fender was cut to fit the already-installed replacement top corner (It fits between the windscreen frame and firewall plate, and thus already installed.) and welded. As yet needs cleaning of the welds.

The scuttle under-plate is now ready to install.


35258934526_8016d64626_c.jpgIMG_20170612_195736s by frogeye61, on Flickr


34911838240_4cde89de7e_c.jpgIMG_20170613_211539s by frogeye61, on Flickr


35299193995_1bae5f3681_c.jpgIMG_20170613_211658s by frogeye61, on Flickr


35258934516_4a2e16a87b_c.jpgIMG_20170613_211722s by frogeye61, on Flickr


#63 racingenglishcars

racingenglishcars

    Mini Mad

  • Members
  • PipPipPipPip
  • 293 posts
  • Location: Storkøbenhavn
  • Local Club: Donn's Backyard Garage

Posted 21 June 2017 - 09:13 AM

Well, this Tuesday we took care of a number of smaller items.

Scuttle closing panel, though a bit hard to see in the photos. Used the spot welder on the front edge and full weld against the inner fender.


34600557844_cc2e388b52_c.jpgIMG_20170620_192136s by

frogeye61, on Flickr


34600559804_d0d904bda1_c.jpgIMG_20170621_073814s by frogeye61, on Flickr


Repaired the rust behind the right side fender brace


34600558304_c35d8d6a66_c.jpgIMG_20170620_194111s by frogeye61, on Flickr


I must say it still needs a bit of clean-up. It was after all Tim who did the welds and Peter who did the finishing.


34600560084_c629228b23_c.jpgIMG_20170621_073822s by frogeye61, on Flickr


The rear subframe braces aren't too bad, but need a bit of finishing.


35055214720_06dcc3ca48_c.jpgIMG_20170621_073915s by frogeye61, on Flickr


Under-door panel is trimmed to fit the surrounding panels. 


34600562604_ce949431cc_c.jpgIMG_20170621_073946s by frogeye61, on Flickr


And the A post rear face is to be positioned correctly with relation to the door.


35402568996_b5d6188cae_c.jpgIMG_20170621_073957s by frogeye61, on Flickr


Productive evening, though I would like things to go a bit faster.


#64 racingenglishcars

racingenglishcars

    Mini Mad

  • Members
  • PipPipPipPip
  • 293 posts
  • Location: Storkøbenhavn
  • Local Club: Donn's Backyard Garage

Posted 26 June 2017 - 12:05 PM

Saturday I decided I should fit the left door. The surrounding pieces needed to be placed correctly onto the shell but no space to mount with mole grips, so I had to use tack welds for much of it. The foot step and A-post pillar covering were carefully measured and tacked together. Placement of these two within the door opening was much more a guess and try affair. Turned out to be only two iterations for a proper fit though. 


35503640226_29f0a1c059_c.jpgIMG_20170624_161616 by frogeye61, on Flickr


All panels here are tacked or held with grips. Spacing is good. Door seal strip is installed most of the way around for proper distancing. Important here is that the bonnet, front wing, inner A-panel, door surround and door are within acceptable limits. Ready for epoxy primer inside the panels and welding in place.


34701249454_a964457063_c.jpgIMG_20170624_163516 by frogeye61, on Flickr


Last week I found a very interesting vehicle for sale locally. So Sunday I went out to inspect. TOTAL ROT, Seized engine etc... this coming from me! Even after doing major rust on the Mini, Frogeye, Jeep, Amazon, Alfa etc etc. I thought it was too much money (~£1400) even though it looks reasonable from the outside and has all glass and interior.


34733379963_c255d37865_c.jpgIMG_20170625_182811 by frogeye61, on Flickr


35412413841_a24fe3b465_c.jpgIMG_20170625_182802 by frogeye61, on Flickr


#65 racingenglishcars

racingenglishcars

    Mini Mad

  • Members
  • PipPipPipPip
  • 293 posts
  • Location: Storkøbenhavn
  • Local Club: Donn's Backyard Garage

Posted 28 June 2017 - 08:58 AM

Since the door fit nicely last weekend, Tuesday evening after very much re-checking I tack-welded the inner A-panel in place. We checked the door for motion and since everything was ok I went ahead and full welded the A-panel.
 
34775765183_1588dc152a_c.jpgIMG_20170627_183928 by frogeye61, on Flickr
 
There were a few pieces that needed some small patches but it seemed ok in the end. We then gave a thorough covering with waxoil.
 
35197965710_a63d23a14a_c.jpgIMG_20170627_203315 by frogeye61, on Flickr
 
I then mounted the outer A-panel with spot welds along the exposed edges and along the foot step and A post cover. (not completely finished in this photo)
 
35546059406_59a65c4672_c.jpgIMG_20170627_211939 by frogeye61, on Flickr


The front wing then fits perfectly with all surrounding panels.
 
34743743714_4295c45c97_c.jpgIMG_20170628_074555 by frogeye61, on Flickr


34743742694_668dfdd9a8_c.jpgIMG_20170628_074547 by frogeye61, on Flickr


The right side inner wing is now in the beginning stage of installation


34743742464_49af6daba5_c.jpgIMG_20170628_074501 by frogeye61, on Flickr


#66 Vinay-RS

Vinay-RS

    Put's foolish ideas in peoples heads

  • Members
  • PipPipPipPipPipPipPipPipPip
  • 2,093 posts
  • Location: Cape Town

Posted 28 June 2017 - 09:05 AM

You're making some good progress on this build. It's very cool to see. 


#67 racingenglishcars

racingenglishcars

    Mini Mad

  • Members
  • PipPipPipPip
  • 293 posts
  • Location: Storkøbenhavn
  • Local Club: Donn's Backyard Garage

Posted 29 June 2017 - 11:48 AM

Thanks, I'm quite enjoying it.


With regards to the red Mini, I have received some floor repair panels and side bins, but haven't had too much time to work with it. After I hand-ground a speedometer gear I haven't done much with the engine... except it fell on my shin one time and scraped a bunch of skin off.


But I have been working on the front suspension. Subframe is cleaned and painted, as are the upper and lower suspension parts. The tough part was separating the front trumpets from the upper arms and especially the rubber springs. I had soaked them in WD-40 and Caramba-70 for several weeks with no luck. Then a big bashing with a hammer and they came off. The rubbers, though original are quite nice but probably hard. That's good isn't it? I couldn't get the suspension back together because I don't have a spring compressor, and since these are English threads it would require the more expensive unit. Neither do I want to buy new rubber springs. Too expensive. So I have some Hi-Los and knuckle joints coming along with some hoses, speedometer cable and a thermostat housing for the 1275 cooper. This being necessary for fitting the Metro motor into the round-nose body. 


#68 racingenglishcars

racingenglishcars

    Mini Mad

  • Members
  • PipPipPipPip
  • 293 posts
  • Location: Storkøbenhavn
  • Local Club: Donn's Backyard Garage

Posted 03 July 2017 - 08:33 AM

Not too much work on the Mini this last weekend. You know, wife and house stuff.

I managed to repair the flanges which fit up to the right side front inner wing and the lowest extension of the inner part of the A-post. This last-mentioned part was butt welded to the good metal above and spot welded to the floor section.


34846994094_c681a36c0c_c.jpgIMG_20170702_175023 by frogeye61, on Flickr


The parcel shelf flange had been cut in half by one of the other guys when they removed the original inner wing. Don't do that! Cut clear of the parcel shelf!


34846993594_de57ca11c9_c.jpgIMG_20170703_074905 by frogeye61, on Flickr


#69 racingenglishcars

racingenglishcars

    Mini Mad

  • Members
  • PipPipPipPip
  • 293 posts
  • Location: Storkøbenhavn
  • Local Club: Donn's Backyard Garage

Posted 05 July 2017 - 02:00 PM

Tuesday evening as usual; re-positioned the right side inner wing and after much checking and alignment spot welded the sections I could and then plug welded the sections I couldn't reach with the spot welder.


Welded on the inner wing's replacement top flange and all internal welding
 
 
We tested temporary fitting of both wings, both before and after fitting the inner wings and front panel. A couple spots on the front panel to hold it in place and it might eventually look like these snaps.


Right side A-panel, door and foot step panel still need fitting.


#70 slidehammer

slidehammer

    One Carb Or Two?

  • Members
  • PipPipPipPipPipPipPip
  • 1,081 posts
  • Location: Surrey
  • Local Club: LSMOC

Posted 06 July 2017 - 02:05 PM

Great progress being made, soon be ready for prepping for paint. Keep the updates coming

#71 racingenglishcars

racingenglishcars

    Mini Mad

  • Members
  • PipPipPipPip
  • 293 posts
  • Location: Storkøbenhavn
  • Local Club: Donn's Backyard Garage

Posted 10 July 2017 - 02:14 PM

Sorry about progress on the Mini this weekend. Non existent. I finally got a chance to test drive the Frogeye.

Here are a few pics and a short film. My wife has a couple longer films but not up on the NAS yet.


https://flic.kr/s/aHsjY2n2jA


#72 racingenglishcars

racingenglishcars

    Mini Mad

  • Members
  • PipPipPipPip
  • 293 posts
  • Location: Storkøbenhavn
  • Local Club: Donn's Backyard Garage

Posted 12 July 2017 - 10:34 AM

Sorry, no useful pictures from Tuesday evening. 


We ran into a problem. While door is in correct position at the aft end, and the A-panel is mounted to hinges and therefore door, there comes a 10 mm gap to the front wing. The wing is clamped to the front panel, which is aligned to the bonnet and the wing is also aligned to the scuttle and the bonnet side. Measurements didn't enlighten us to the deviation. 


I will continue researching the problem, which is likely to be a combination of deviations through several pieces, or that the vehicle had been damaged prior to the initial bracing being installed. Either way, progressing further will require some less-than-fully acceptable mods. Who knows? Maybe the discrepancy comes from the non-genuine panels we are using.


#73 racingenglishcars

racingenglishcars

    Mini Mad

  • Members
  • PipPipPipPip
  • 293 posts
  • Location: Storkøbenhavn
  • Local Club: Donn's Backyard Garage

Posted 17 July 2017 - 01:31 PM

Well, I found a solution to the non-fitting components. I re-measured everything and found no fault with tim's measurements. Everything was ok. Possibly the only real problem is the scuttle flange could be a bit too long, therefore interfering with the front wing.
 
By keeping the door in the correct position with respect to the window frame and clearance to the rear wing, hinges as far forward as possible by slight filing on the mounting holes, A-panel as far forward as possible which also gave good clearance to the door and aligned with the windshield a-post, and with the front wing as far back as possible by slight forming of the contact point with the scuttle... I know that was long... 
 
I have added a small sliver (8mm) to the length of the A-panel.
 
35075832104_6a64ba7116_c.jpgIMG_20170712_082037 by frogeye61, on Flickr
 
It now fits like a charm. 
 
35075839764_ec6271e8c3_c.jpgIMG_20170712_203225 by frogeye61, on Flickr
 
This was absolutely not possible before. The seam was like a snake. It is now straight.
 
35106677843_189c024b87_c.jpgIMG_20170712_203140 by frogeye61, on Flickr
 
I have of course modified the outer A-panel to match. The bottom edge was deficient by about 5 mm so was beat into alignment. 
 
35106688653_2bf5bc3a7f_c.jpgIMG_20170713_200854 by frogeye61, on Flickr
 
the two edges fit like a charm. (yes there are two panels in the photo)
 
35746236832_b5b582dfaa_c.jpgIMG_20170713_200851 by frogeye61, on Flickr


#74 Van13

Van13

    Speeding Along Now

  • Members
  • PipPipPipPipPip
  • 314 posts
  • Location: England
  • Local Club: Unknown

Posted 17 July 2017 - 03:05 PM

Fantastic read so far well done

#75 racingenglishcars

racingenglishcars

    Mini Mad

  • Members
  • PipPipPipPip
  • 293 posts
  • Location: Storkøbenhavn
  • Local Club: Donn's Backyard Garage

Posted 19 July 2017 - 08:17 AM

We finally got the A-panel mounted, aligned and welded in place. The door fits fine and despite the appearance in this photo, it really does fit at the bottom.


35886893941_1f2a207fe1_c.jpgIMG_20170715_160303 by frogeye61, on Flickr


35630864400_0b2818203b_c.jpgIMG_20170715_160334 by frogeye61, on Flickr


The yellow appearance is a reflection of something behind me. The inner A-panel is covered in rust protection.


35849185752_e3ed3c154e_c.jpgIMG_20170718_201749 by frogeye61, on Flickr


35180712334_af7893f019_c.jpgIMG_20170718_201805 by frogeye61, on Flickr


Welds are ground reasonably smooth.


35209736573_721c7544a7_c.jpgIMG_20170718_201755 by frogeye61, on Flickr


The rusty metal at the bottom of the right rear door surround is removed in favour of a new door step.


35630878080_39314d18a4_c.jpgIMG_20170718_201818 by frogeye61, on Flickr


Problem is that the replacement door step is shaped wrongly.


35630880590_770da7f4eb_c.jpgIMG_20170718_205542 by frogeye61, on Flickr


Though no picture, I beat the corners into the correct shape and it looks superb. It fits the door very well with good door gap all along. Tonight I will weld this piece in place. 


0 user(s) are reading this topic

0 members, 0 guests, 0 anonymous users