Jump to content


Photo

"bad Boy" Pickup


  • Please log in to reply
174 replies to this topic

#61 g111mds

g111mds

    Speeding Along Now

  • Members
  • PipPipPipPipPip
  • 432 posts
  • Location: Edinburgh

Posted 27 September 2017 - 11:31 AM

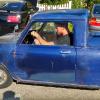
and so the panel buying begins...


just ordered a complete Heritage passenger side inner wing. I think the plan will be to fit that, a complete door pillar and apex panel in one, door step, together with a bottom edge repair going all the way down the side over the rear wheel arch to keep everything spaced correctly. Then, move up to the section between the door and the roof line, which I believe I can use a modified door step to complete, and then work down the rear door section with new inner and outer B posts.


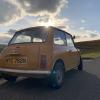
the two rear sides, except the lower few inches, seem to be pretty solid actually so I'm going to see if they're fixable. They do have a number of holes from the fixings for the fortech arches which will need to be plugged in some way.


#62 g111mds

g111mds

    Speeding Along Now

  • Members
  • PipPipPipPipPip
  • 432 posts
  • Location: Edinburgh

Posted 29 September 2017 - 02:55 PM

Home to what will be the first of many parcels from m-machine - a heritage passenger side inner wing. Oh, and nosey golden too!

Attached File  image.jpeg   55.99K   6 downloads

Attached File  image.jpeg   51.85K   4 downloads

Edited by g111mds, 29 September 2017 - 03:17 PM.


#63 g111mds

g111mds

    Speeding Along Now

  • Members
  • PipPipPipPipPip
  • 432 posts
  • Location: Edinburgh

Posted 30 September 2017 - 07:40 PM

Good bit of progress today. Engine and front subframe removed. Quite a bit of faffing about, especially to move the engine to where I wanted it in the garage.

Everything disconnected and body lifted slightly to make sure all was clear:

Attached File  image.jpeg   86.35K   2 downloads

Then with the aid of two handy helpers, we moved the shell over to the side:

Attached File  image.jpeg   62.15K   2 downloads

And engine and subframe moved over against the wall:

Attached File  image.jpeg   73.86K   3 downloads

Only the rear subframe and fuel tank left to remove.

Still thinking the best place to start is the front passenger corner, but then there is also benefit in doing the floor and load at first. Most likely front corners, the onto the rollover jig.

#64 DR3AM-W3AVUH

DR3AM-W3AVUH

    On The Road

  • Noobies
  • PipPip
  • 48 posts
  • Location: MA

Posted 30 September 2017 - 10:50 PM

Looking good mate!!! Glad you are finally getting on it.


#65 g111mds

g111mds

    Speeding Along Now

  • Members
  • PipPipPipPipPip
  • 432 posts
  • Location: Edinburgh

Posted 01 October 2017 - 07:13 AM

Thanks! Starting to make a little progress, although taking it apart is the easy bit (well, relatively so). :)

#66 g111mds

g111mds

    Speeding Along Now

  • Members
  • PipPipPipPipPip
  • 432 posts
  • Location: Edinburgh

Posted 14 October 2017 - 06:32 PM

Been holding off purchasing a MIG Welder and visor on the hope that machine mart would have a vat free deal. Home from holiday today to find a leaflet in the door, so a Clarke 135te plus decent visor ordered today. Need to sort a regulator and gas out, and then should be ready for some shell bracing following removal of the fuel tank and rear subframe.

#67 g111mds

g111mds

    Speeding Along Now

  • Members
  • PipPipPipPipPip
  • 432 posts
  • Location: Edinburgh

Posted 20 October 2017 - 07:01 PM

Welder and mask arrived today, so I did the decent thing and splashed out on the regulator, adaptor, wire, a trolley, and a couple of other things too. Hobbyweld set up, and bought some box section and right angle for the bracing. Now the fun really starts...

Attached Files


#68 g111mds

g111mds

    Speeding Along Now

  • Members
  • PipPipPipPipPip
  • 432 posts
  • Location: Edinburgh

Posted 22 October 2017 - 08:14 PM

After some wrestling with two rounded bolts, for what felt like ages, the rear subframe has finally been removed. Other than still needing to remove the steering rack, it's now a bare shell. The shell is now sitting on a pallet on two dollies.

Next up is to brace the shell ready to start the repairs. Not quite sure where to weld the brace bars as the complete door frame will be replaced. I'm thinking bulkhead to bulkhead, and then across the cab brace to brace. Sound about right?

Attached File  image.jpeg   60.14K   10 downloads

Attached File  image.jpeg   46.49K   7 downloads

#69 g111mds

g111mds

    Speeding Along Now

  • Members
  • PipPipPipPipPip
  • 432 posts
  • Location: Edinburgh

Posted 24 November 2017 - 07:49 PM

Goodness, this Pup is crusty!!

Attached File  image.jpeg   46.32K   5 downloads

Attached File  image.jpeg   55.07K   5 downloads

Shell now braced, and I've added some additional uprights from the door brace to windscreen pillars, and then braced between that too.

Attached File  image.jpeg   48.42K   8 downloads

Attached File  image.jpeg   47.03K   8 downloads

Inner wing removed, together with the triangular support on the passenger side. Two layers of metal in a lot of areas on the inner wing area.

I've ordered a crossmember end section, toe board repair section, and bulkhead repair section from m-machine. I've trimmed the door pillar right back too so that the inner wing can fit into place unobstructed. I'm going to also get the complete door pillar and a-panel in one to make sure everything is lined up before the inner wing goes on.

Everything is crusty, although some good metal in the bulkhead except at the outer edges.

Attached File  image.jpeg   46.13K   7 downloads

Attached File  image.jpeg   50.91K   4 downloads

Attached File  image.jpeg   47.44K   2 downloads

Attached File  image.png   377.35K   1 downloads

Attached File  image.png   409.8K   2 downloads

#70 Minigman

Minigman

    One Carb Or Two?

  • TMF+ Member
  • PipPipPipPipPipPipPip
  • 779 posts
  • Location: Barnstaple

Posted 24 November 2017 - 08:20 PM

Following with interest. Looking forward to seeing more. Keep up the good work

Edited by Minigman, 21 December 2017 - 09:10 AM.


#71 g111mds

g111mds

    Speeding Along Now

  • Members
  • PipPipPipPipPip
  • 432 posts
  • Location: Edinburgh

Posted 24 November 2017 - 08:35 PM

Following with interest. Looking forward to seeing more. Keep up the good work.


Thank you! Certainly plenty of work ahead, but determined to chip away at it and bring it back to its former glory.

#72 g111mds

g111mds

    Speeding Along Now

  • Members
  • PipPipPipPipPip
  • 432 posts
  • Location: Edinburgh

Posted 26 November 2017 - 08:10 PM

Couple more panels arrived yesterday. Super quick service from m-machine as ordered on Friday and arrived Saturday morning. Crossmember repair, toe board repair, and bulkhead repair. All for passenger side. Majority of the scuttle removed tonight and started to remove the spot welds on the crossmember. Slow progress.

Edited by g111mds, 26 November 2017 - 08:20 PM.


#73 FlyingScot

FlyingScot

    Up Into Fourth

  • TMF Team
  • PipPipPipPipPipPipPipPipPip
  • 2,660 posts
  • Location: Inverclyde Scotland
  • Local Club: Mini Cooper Register

Posted 26 November 2017 - 10:32 PM

Aye good work buddy. Doreen at m machine a star

FS

#74 g111mds

g111mds

    Speeding Along Now

  • Members
  • PipPipPipPipPip
  • 432 posts
  • Location: Edinburgh

Posted 26 November 2017 - 11:55 PM

Aye good work buddy. Doreen at m machine a star
FS


Thanks FS :). Yes, really pleased with their device. I'll need pretty much every panel by the time this is done!

#75 Van13

Van13

    Speeding Along Now

  • Members
  • PipPipPipPipPip
  • 314 posts
  • Location: England
  • Local Club: Unknown

Posted 27 November 2017 - 02:33 PM

Nice to see some progress on this will be watching,just a thought are your brace bars high enough to try doors on,probably are the old eyes aren’t what they used to be good luck


0 user(s) are reading this topic

0 members, 0 guests, 0 anonymous users